Are you ready for a snack that’s both tasty and low-carb? Cheesy Cauliflower Breadsticks are a perfect choice! With just a few simple ingredients, you can whip up a delicious treat that satisfies cravings without the carbs. Whether you’re on a diet or just looking for a fun cooking project, these breadsticks are quick and easy to make. Let’s dive into the recipe and impress your taste buds!
Ingredients
Main Ingredients
– 1 medium head of cauliflower, chopped into florets
– 1 cup shredded mozzarella cheese
– ¼ cup grated Parmesan cheese
– 2 large eggs
– 1 teaspoon garlic powder
– 1 teaspoon onion powder
– Salt and pepper to taste
– Optional: ¼ teaspoon red pepper flakes for heat
– Fresh parsley, chopped (for garnish)
Cauliflower is the star here. It gives the breadsticks their shape and low-carb goodness. I love using fresh cauliflower florets. They create a great texture when processed. Cheese adds flavor and cheesy goodness. I use mozzarella for its meltiness. Parmesan gives a rich, nutty kick.
Eggs act as a binder. They help hold everything together. Garlic and onion powders add depth and warmth. Salt and pepper bring out all the flavors. If you like heat, try adding red pepper flakes. Fresh parsley makes a lovely garnish. It adds color and freshness.
These ingredients combine for a tasty, cheesy treat. You can feel good about enjoying this snack. It’s both comforting and healthy!
Step-by-Step Instructions
Preparation of Cauliflower
1. Pulsing in the food processor: Start by chopping the cauliflower into small florets. Place these florets in your food processor. Pulse them until they look like small rice grains. This step is key to a good texture.
2. Cooking in the microwave: Transfer the pulsed cauliflower into a microwave-safe bowl. Microwave it on high for about 5 minutes. This softens the cauliflower, making it easier to mix later.
3. Squeezing out moisture: Once microwaved, let the cauliflower cool for a bit. Then, place it in a clean kitchen towel or cheesecloth. Squeeze out as much moisture as you can. This step is very important. Getting rid of excess moisture helps the breadsticks become crispy.
Mixing and Forming
1. Combining ingredients in a bowl: In a large mixing bowl, combine the drained cauliflower, 1 cup of shredded mozzarella, ¼ cup of grated Parmesan, 2 large eggs, 1 teaspoon of garlic powder, 1 teaspoon of onion powder, and salt and pepper to taste. If you want some heat, add ¼ teaspoon of red pepper flakes. Mix everything well until it is fully incorporated.
2. Spreading the mixture on the baking sheet: Use your hands or a spatula to spread the mixture evenly onto your prepared baking sheet. Aim for a rectangle or square shape about ½ inch thick. Make sure it is even to cook well.
Baking Process
1. Preheating the oven: Preheat your oven to 425°F (220°C). This high temperature helps the breadsticks become golden and crispy.
2. Bake time and temperature: Place the baking sheet in the oven and bake for about 20-25 minutes. Keep an eye on them. You want them to turn golden brown and feel firm to the touch.
3. Tips for checking doneness: To check if they are done, gently press the center. If it feels firm and not soft, they are ready. If they need more time, return them to the oven for a few more minutes. Remove them when they look perfect.
Tips & Tricks
Achieving the Perfect Texture
To get the best texture in your cheesy cauliflower breadsticks, moisture removal is key. After cooking the cauliflower, you must squeeze out all the water. This step helps the breadsticks become crispy, not soggy. Use a clean kitchen towel or cheesecloth for this.
When you mix the ingredients, handle the mixture gently. Use your hands or a spatula to combine everything. Make sure all the cheese and seasonings blend well with the cauliflower. This will help create a uniform texture.
Flavor Enhancements
To kick up the flavor, add herbs or spices. You can use dried oregano, basil, or Italian seasoning. These add great taste without extra calories. If you like some heat, sprinkle in red pepper flakes. Just a quarter teaspoon can add a nice kick to your breadsticks.
Feel free to experiment! Different herbs can change the flavor profile. Don’t be shy to mix and match.
Presentation Ideas
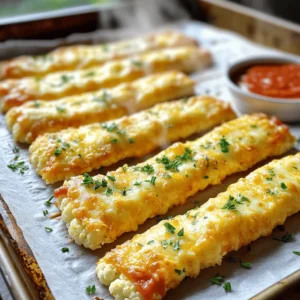
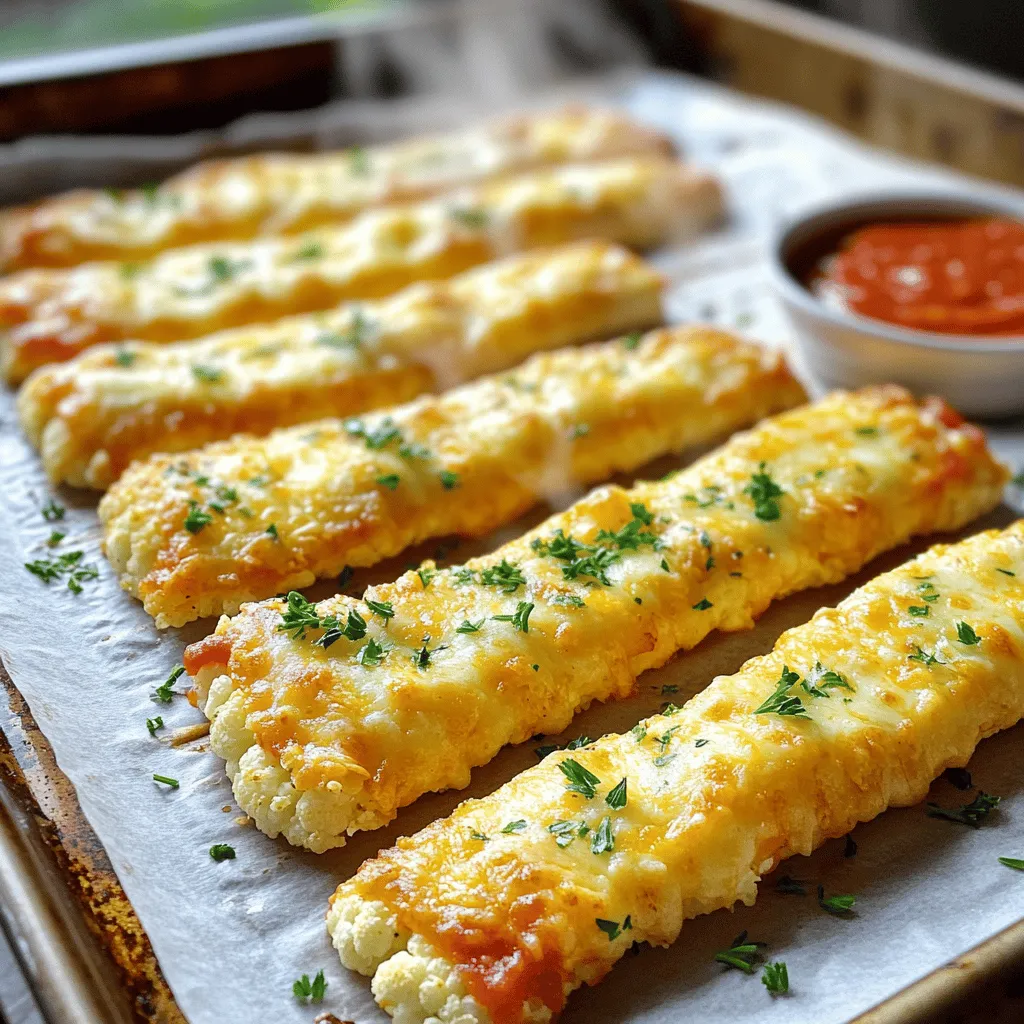
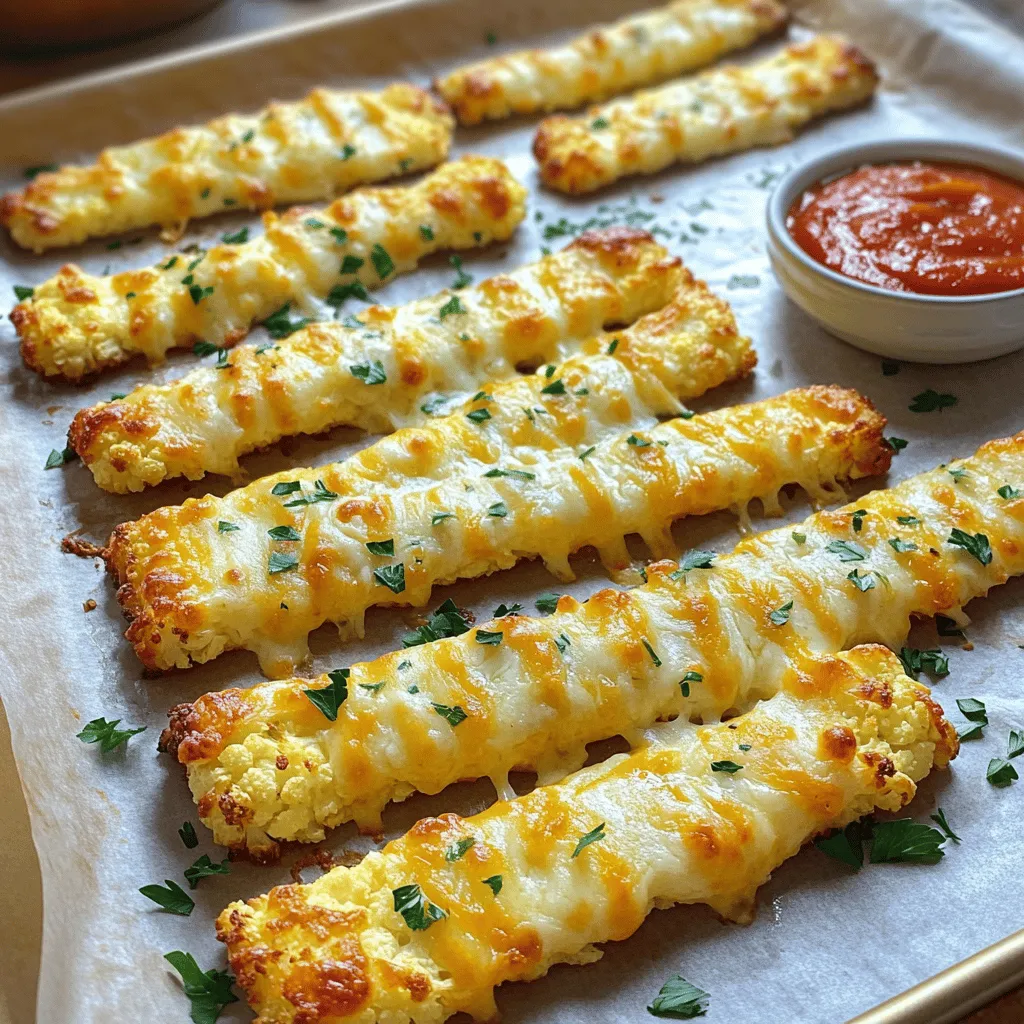
For serving, present your cheesy cauliflower breadsticks hot. A side of marinara sauce works great for dipping. You can also serve them with ranch or garlic sauce for extra flavor.
Garnishing is easy! Simply sprinkle some chopped fresh parsley over the top. It adds color and freshness. You can also add extra cheese on top right before serving for a cheesy finish. This makes the dish look even more appetizing!
Variations
Alternative Cheeses
You can change the cheese for different tastes. Cheddar adds a sharp kick. Gouda brings a smoky flavor. You can even mix cheeses for fun. This way, you make the breadsticks your own. Experiment with soft cheeses like ricotta for a creamier texture. Just remember, the cheese should melt well to hold everything together.
Additional Ingredients
Adding more veggies can boost nutrition. Try mixing in finely chopped spinach or bell peppers. You can also add herbs like basil or oregano for flavor. For a twist, add sun-dried tomatoes or olives. These options keep your breadsticks fresh and tasty. If you want a low-carb option, consider using almond flour in place of breadcrumbs. This adds texture without the carbs.
Dietary Restrictions
You can easily make these breadsticks gluten-free. Just ensure all your cheese and other ingredients are certified gluten-free. For a vegetarian option, these breadsticks fit perfectly. They use no meat, making them good for all diets. Just check your cheese choices to ensure they meet your needs. You can enjoy these tasty bites without worry.
Storage Info
Refrigeration Tips
To store your cheesy cauliflower breadsticks, let them cool first. Place them in an airtight container. This keeps them fresh and prevents them from drying out. You can also use parchment paper between layers if you stack them. This avoids sticking. Store them in the fridge for up to 3 days.
Freezing Instructions
To freeze the breadsticks, let them cool completely. Wrap each stick in plastic wrap. Then, place them in a freezer bag. This helps prevent freezer burn. You can freeze them for up to 3 months. To use them, thaw them overnight in the fridge. After that, reheat in the oven at 350°F (175°C) for about 10-15 minutes. This makes them hot and crispy again.
Shelf Life
In the fridge, these breadsticks last for about 3 days. If you freeze them, they can stay good for 3 months. Always check for any signs of spoilage before eating. Enjoy your tasty low-carb snack anytime!
FAQs
How do I make the breadsticks crispier?
To make your breadsticks crispier, focus on removing moisture. After microwaving the cauliflower, use a clean kitchen towel to squeeze out as much water as you can. Less moisture means a better crunch. Also, consider baking them longer. Keep an eye on them until they turn golden brown. For extra crispiness, spread the mixture thinner on the baking sheet.
Can I use frozen cauliflower instead of fresh?
Yes, you can use frozen cauliflower. Just make sure to thaw it fully before cooking. After thawing, drain any excess water. You’ll still want to pulse it in the food processor and squeeze out moisture as you would with fresh cauliflower. This helps keep your breadsticks firm.
What can I serve with Cheesy Cauliflower Breadsticks?
These breadsticks pair well with many dips. A classic choice is marinara sauce. You can also try ranch dressing or a garlic aioli for added flavor. For something fresh, serve them with a side of chopped veggies. They make a great snack during game night or as a side for your family dinner.
Creating Cheesy Cauliflower Breadsticks is simple and rewarding. We explored the main ingredients, including cauliflower, cheese, and seasonings, and discussed step-by-step preparation methods. I shared tips for texture, flavor enhancements, and presentation ideas that elevate your dish. Plus, we looked at variations to suit various diets. You can easily store leftovers and enjoy them later. With these insights, you can make delicious, healthy breadsticks that impress friends and family. Enjoy making them your own!