FREE DINNER EBOOK! Get your copy!
  • Cookie Policy
  • GDPR Policy
  • Disclaimer
  • Terms Of Use
  • Visit my other site: Fun Cookie Recipes
flavor nest kitchen
  • Home
  • Dinner
  • Desserts
  • Drinks
  • Appetizers
  • Contact
  • About
  • Privacy Policy
  • Home
  • Dinner
  • Desserts
  • Drinks
  • Appetizers
  • Contact
  • About
  • Privacy Policy
  • Cookie Policy
  • GDPR Policy
  • Disclaimer
  • Terms Of Use
Visit my other site: Fun Cookie Recipes

HOME / CATEGORIES /

Latest

To make Slow Cooker Creamy Spinach Tortellini, gather these simple ingredients: - 1 package (19 oz) cheese tortellini, frozen - 2 cups fresh spinach, chopped - 1 can (14 oz) diced tomatoes, undrained - 2 cups vegetable or chicken broth - 1 cup heavy cream - 1 cup grated Parmesan cheese - 2 cloves garlic, minced - 1 tablespoon Italian seasoning - Salt and pepper to taste - Fresh basil, for garnish (optional) These ingredients come together to create a rich and creamy dish. The cheese tortellini adds a nice bite, while the fresh spinach brings vibrant color and nutrients. The diced tomatoes add a touch of sweetness and acidity. You can choose vegetable broth for a vegetarian option or chicken broth for more flavor. I love using heavy cream for its richness, and Parmesan cheese gives a wonderful savory depth. Fresh garlic adds a punch, and Italian seasoning ties all the flavors together. Don't forget to adjust salt and pepper to fit your taste. Lastly, fresh basil makes a lovely garnish to finish off the dish. Start by gathering your ingredients. In your slow cooker, you will mix the diced tomatoes, broth, minced garlic, and Italian seasoning. Make sure to add a pinch of salt and pepper. Stir this mixture well. This forms the tasty base for your dish. Now, it’s time to add the frozen cheese tortellini. Pour them into the slow cooker. Gently stir to ensure the tortellini are fully submerged in the broth. This step is key for even cooking. Cover the slow cooker and set it to low heat. Cook for about 3 hours. After this time, check the tortellini for tenderness. They should be soft and ready to enjoy. After 3 hours, add the chopped spinach and heavy cream. Stir until the spinach wilts and mixes well. Next, sprinkle the grated Parmesan cheese on top. Mix again and let it cook for an extra 15 minutes. This allows the cheese to melt and blend the flavors. Taste your dish and adjust the seasoning if needed. Enjoy your creamy spinach tortellini! To make the best Slow Cooker Creamy Spinach Tortellini, timing is key. Cook it on low for about three hours. This helps the tortellini become tender without overcooking. If you prefer a firmer bite, check for doneness after two and a half hours. Adjusting the taste can make a big difference. You can add more garlic if you love its flavor. If you want a bit of heat, try adding red pepper flakes. For a richer taste, increase the Parmesan cheese. Pair this dish with a crisp salad. A simple green salad with a light vinaigrette works well. You can also serve it with garlic bread for extra comfort. For presentation, use a large bowl to serve. Sprinkle fresh basil on top for a pop of color. This will make the dish look even more inviting. If you need a gluten-free option, use gluten-free tortellini. Many brands offer great choices that taste delicious. To reduce calories, swap heavy cream for half-and-half. You can also use low-fat cheese instead of regular Parmesan. This keeps the dish tasty while being lighter. {{image_2}} You can easily change the tortellini type. Try using spinach or mushroom tortellini for a new taste. You can also use gluten-free tortellini if that's your choice. For greens, swap spinach with kale or Swiss chard. Both add a nice texture and flavor. Want to shake things up? Add spices like red pepper flakes for heat or smoked paprika for depth. Fresh herbs like thyme or oregano give a fresh twist. If you want more protein, consider adding cooked chicken, sausage, or chickpeas. These options can make your meal heartier. For a vegetarian version, keep it as is. To make it vegan, use plant-based cream and dairy-free cheese. You can also skip the cheese altogether for a lighter dish. If you're watching carbs, use cauliflower tortellini or reduce the amount of tortellini. These changes keep the dish tasty while fitting your diet. To store your Slow Cooker Creamy Spinach Tortellini, let it cool first. Use an airtight container to keep it fresh. Place the container in the fridge. This dish stays good for about 3 to 4 days. If you notice any odd smell or color, toss it out. When you're ready to enjoy your leftovers, you can reheat them easily. Use a microwave for quick warming. Heat in short bursts, stirring in between. You can also use a pot on low heat. Stir often to keep the texture nice. Make sure it reaches 165°F for safe eating. If you want to save some for later, freezing is a great option. Place the cooled dish in a freezer-safe container. Make sure to leave some space for expansion. It will last up to 2 months in the freezer. When you're ready to eat, defrost it overnight in the fridge. Reheat it gently, stirring to bring back the creaminess. It takes about 3 hours and 15 minutes to make this dish. The slow cooker works magic here. The tortellini cook in broth and soak up all the flavors. You will need 15 minutes for prep. Then, let it cook on low for about 3 hours. This time allows the flavors to blend perfectly. Yes, you can use fresh tortellini instead of frozen. Fresh tortellini cooks faster, so check them after 2 hours. Adjust the time based on the package instructions. Just make sure they are tender before adding spinach and cream. You can use half-and-half or coconut milk as a substitute. They add creaminess without the heaviness. If you want a lighter option, use low-fat milk. Just note that the dish may be less rich. Yes, this recipe is great for meal prep. You can store it in the fridge for up to 4 days. Just make sure it cools before storing. It reheats well, so you can enjoy it later. To boost flavor, add more garlic or fresh herbs like basil. You can also toss in some red pepper flakes for heat. A splash of lemon juice can add a nice zing. Don't shy away from experimenting! This blog post gave you a clear guide to making Slow Cooker Creamy Spinach Tortellini. You learned the key ingredients, step-by-step cooking instructions, and helpful tips. I also shared some variations and storing methods to suit your needs. Try this recipe for a cozy meal that’s easy and tasty. Enjoy each bite and feel free to make it your own. Happy cooking!

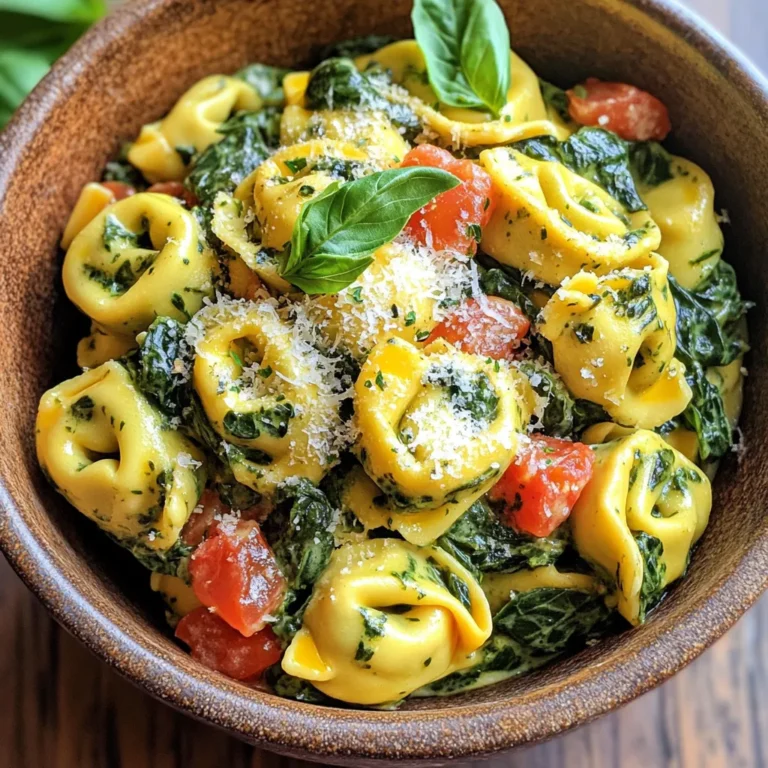
Slow Cooker Creamy Spinach Tortellini Delight

To make a delicious Mediterranean chickpea salad, you need the following ingredients: - 1 can (15 oz) chickpeas, drained and rinsed - 1 cup cherry tomatoes, halved - 1 cucumber, diced - 1/2 red onion, finely chopped - 1 red bell pepper, diced - 1/4 cup Kalamata olives, pitted and halved - 1/4 cup feta cheese, crumbled - 3 tablespoons olive oil - 2 tablespoons fresh lemon juice - 1 teaspoon dried oregano - Salt and pepper to taste - Fresh parsley, chopped (for garnish) You can swap in some ingredients if you want. Here are some easy changes: - Use canned white beans instead of chickpeas for a different flavor. - Try grape tomatoes if you can’t find cherry tomatoes. - Any crunchy bell pepper works if you don’t have red. - Use green olives if Kalamata olives are hard to find. - Feta cheese can be replaced with goat cheese or left out for vegan options. - Avocado is a great creamy addition if you want to switch things up. Choosing fresh, quality ingredients makes your salad taste better. Here are some tips: - Look for firm chickpeas without any soft spots. - Choose bright, firm tomatoes with no bruises. - Pick cucumbers that are smooth and dark green. - Select red onions that feel heavy and firm. - Check bell peppers for a shiny skin and no blemishes. - For olives, select ones stored in brine for the best flavor. - Fresh herbs, like parsley, should be vibrant and not wilted. By using these tips, you ensure your Mediterranean chickpea salad is fresh and full of flavor! {{ingredient_image_1}} To make this Mediterranean Chickpea Salad, you will gather fresh ingredients. You need to prepare the vegetables first. This will help the salad taste great. Make sure you have a large mixing bowl ready. 1. Start by draining and rinsing the chickpeas. This step removes extra salt and liquid. 2. In a large mixing bowl, add the chickpeas, halved cherry tomatoes, diced cucumber, finely chopped red onion, diced red bell pepper, and halved Kalamata olives. 3. Now, crumble the feta cheese over the top of the vegetables. This adds a nice creaminess. 4. In a small bowl, whisk together the olive oil, fresh lemon juice, dried oregano, salt, and pepper. Mix until everything is combined. 5. Pour this dressing over the salad mixture. Gently toss everything together. Make sure all the ingredients are coated well. 6. Let the salad rest for at least 15 minutes at room temperature. This allows the flavors to mix. 7. Just before serving, give the salad a final gentle toss. Taste and adjust the seasoning if needed. Garnish with chopped fresh parsley for color. - Gathering Ingredients: 5 minutes - Preparing Vegetables: 10 minutes - Mixing and Dressing: 5 minutes - Resting Time: 15 minutes - Total Time: 30 minutes By following these steps, you’ll create a colorful and tasty salad. Enjoy the fresh flavors! To enhance the flavor of your Mediterranean chickpea salad, use fresh herbs. Fresh parsley adds a bright touch. For a bolder taste, try adding fresh mint or basil. Make sure to use ripe cherry tomatoes for sweetness. They bring a juicy burst in every bite. The dressing is key; whisk it well to blend all the tastes. Letting the salad sit for 15 minutes allows the flavors to mix. This resting time makes a big difference. Taste before serving and adjust seasoning as needed. This salad pairs well with grilled meats or fish. It makes a great side dish for summer barbecues. Serve it with warm pita bread for a complete meal. You can also enjoy it on its own for a light lunch. For a fun twist, add it to a wrap with hummus. It’s also excellent over a bed of greens for extra crunch. A glass of chilled white wine complements the flavors nicely. One mistake is not rinsing the chickpeas. Rinsing removes excess salt and improves taste. Another error is skipping the resting time. If you serve it right away, the flavors won’t meld. Avoid overdoing the dressing; it can make the salad soggy. Instead, start with a little and add more as needed. Finally, don’t forget to taste before serving. Adjusting the seasoning can elevate your dish significantly. Pro Tips Chickpea Choice: Use dried chickpeas soaked overnight instead of canned for a firmer texture and enhanced flavor. Veggie Variations: Feel free to add other vegetables like bell peppers, radishes, or even avocado for added nutrition and flavor. Marinating Time: For the best flavor, let the salad marinate in the refrigerator for at least an hour before serving. Serving Suggestions: Serve this salad over a bed of greens or alongside grilled meats for a hearty meal. {{image_2}} You can customize your Mediterranean chickpea salad in many fun ways. Here are some ideas: - Vegetables: Add shredded carrots or diced zucchini for more crunch. - Herbs: Toss in fresh mint or basil for a unique twist. - Proteins: Chickpeas are great, but you can add grilled chicken or shrimp for extra protein. - Cheese: If you don’t like feta, try goat cheese or leave it out for a dairy-free option. This salad is naturally vegan and gluten-free. Chickpeas provide protein and fiber without any meat or gluten. If you skip the feta, it stays vegan. Use a gluten-free dressing if you prefer. Most store-bought dressings are vegan and gluten-free, but check labels for safety. Change your ingredients based on the season. In summer, add diced bell peppers and ripe tomatoes for freshness. In winter, use roasted vegetables like sweet potatoes or beets. Seasonal changes keep the salad exciting. You can also use canned vegetables when fresh ones are not available. This way, you enjoy the salad year-round! To store your Mediterranean chickpea salad, place it in an airtight container. Make sure to cover it tightly. This keeps the salad fresh and tasty. If you have a lot of salad, divide it into smaller portions. This way, you can grab just what you need. I recommend using glass or BPA-free plastic containers. Glass containers are great because they do not stain or hold smells. Plastic containers are lightweight and handy for packing. Look for ones with tight seals to keep air out. Your salad will last about 3 to 5 days in the fridge. It’s best to eat it cold, so no need to reheat. If you want to enjoy it warm, heat the chickpeas and then mix them in. This keeps the veggies crisp and fresh. You can boost this salad with many tasty items. Consider adding diced avocado or shredded carrots. Fresh herbs like mint or basil add bright flavor. You could also include grilled chicken or shrimp for protein. If you want a spicy kick, add red pepper flakes or diced jalapeños. Feel free to mix and match to suit your taste. The Mediterranean Chickpea Salad stays fresh for about three days in the fridge. Make sure to store it in a sealed container. The flavors will blend more over time, but the veggies may get a bit soft. It's best to eat it within this time for the best taste and texture. Yes, you can make this salad ahead of time. I often prepare it a day before serving. Just keep the salad in the fridge until you’re ready to eat. If you want the best crunch, add the feta cheese and olives just before serving. This way, they stay fresh and tasty. This salad is packed with nutrients. A serving provides protein, fiber, and healthy fats. Chickpeas offer a great source of plant-based protein. Fresh veggies add vitamins and minerals. Feta cheese brings calcium, while olive oil offers heart-healthy fats. Overall, it’s a balanced meal that supports a healthy diet. We covered key ingredients for Mediterranean Chickpea Salad, including smart swaps and quality tips. I shared step-by-step cooking instructions to ensure perfect timing. You learned how to enhance flavors and avoid common mistakes. We explored variations, storage advice, and answered your burning questions. Mastering this salad brings fresh tastes and health benefits to your table. Enjoy making it your own!

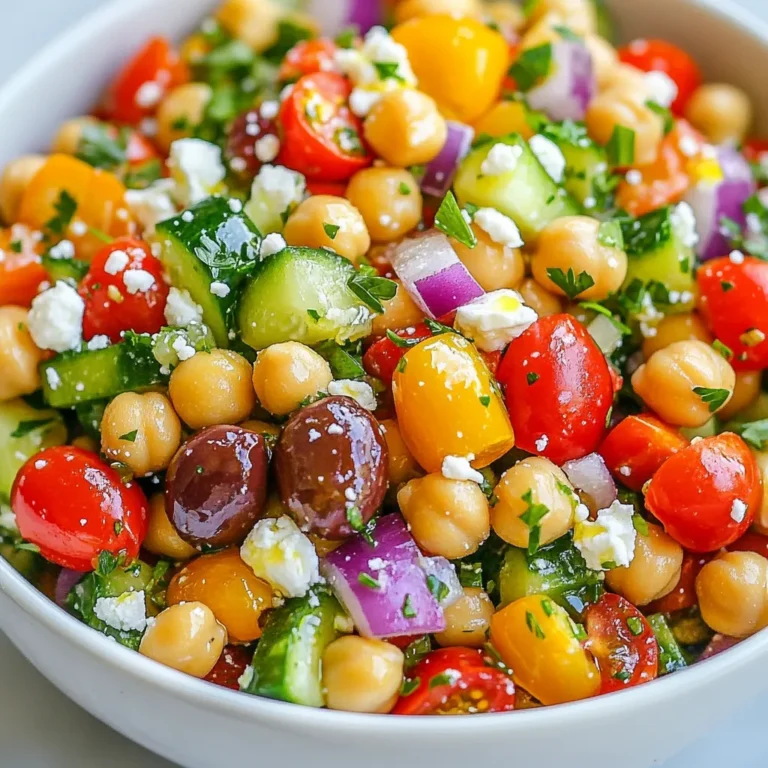
Mediterranean Chickpea Salad Flavorful and Fresh Meal

- Chicken and Pineapple - 1 lb boneless chicken breast, cut into 1-inch cubes - 1 medium ripe pineapple, peeled and cut into 1-inch cubes - Vegetables for Kebabs - 1 red bell pepper, cut into 1-inch pieces - 1 green bell pepper, cut into 1-inch pieces - 1 small red onion, cut into wedges - Marinade Components - 3 tablespoons olive oil - 2 tablespoons soy sauce - 1 tablespoon honey - 2 cloves garlic, minced - 1 teaspoon ground ginger - 1 teaspoon paprika - Salt and pepper to taste - Skewers (if wooden, soak in water for 30 minutes) Gather these items before you start. The chicken and pineapple are the stars here. The sweet pineapple pairs well with juicy chicken. The colorful peppers and onion add taste and a nice look. The marinade brings everything together. It adds flavor and moisture to the chicken. Use fresh ingredients for the best taste. Fresh garlic and ginger make a big difference. If you can, let the chicken sit in the marinade longer. This helps the flavors seep in. You can also mix and match veggies based on what you like. Enjoy the process and have fun creating your kebabs! {{ingredient_image_1}} Mixing Marinade Ingredients To start, grab a large bowl. In this bowl, mix three tablespoons of olive oil, two tablespoons of soy sauce, and one tablespoon of honey. Add two minced garlic cloves, one teaspoon of ground ginger, and one teaspoon of paprika. Lastly, season with salt and pepper. Whisk everything together until it forms a smooth marinade. Marinating the Chicken Next, take one pound of boneless chicken breast, cut into one-inch cubes. Add the chicken pieces to the marinade. Toss them well to ensure they are fully coated. Cover the bowl and place it in the fridge. Let the chicken marinate for at least 30 minutes, but two hours gives it more flavor. Threading Ingredients onto Skewers Now it's time to build your kebabs. If using wooden skewers, soak them in water for about 30 minutes. This keeps them from burning on the grill. Take the marinated chicken, pineapple cubes, and cut vegetables. Alternate threading the chicken, pineapple, red and green bell peppers, and red onion onto the skewers. This makes them colorful and fun. Tips for a Colorful Presentation For a bright look, use a mix of colors. Red and green bell peppers add zest. The yellow pineapple brings a sunny feel. Make sure to leave a little space between each piece. This helps them cook evenly. Preheating the Grill Before grilling, preheat your grill to medium-high heat. Aim for about 400°F or 200°C. Once hot, lightly oil the grates to prevent sticking. This step is crucial for perfect kebabs. Cooking Times and Techniques Place your skewers on the grill. Cook them for about 10-12 minutes. Turn them occasionally to get nice grill marks. You want the chicken to be fully cooked and the veggies tender. Use a meat thermometer if you're unsure. The chicken should reach 165°F for safety. Marinating Time Recommendations Marinating the chicken is key for great flavor. I recommend marinating for at least 30 minutes. If you have time, let it marinate for up to 2 hours. This gives the chicken time to soak in all the amazing flavors. Adjusting Seasonings for Personal Taste Feel free to adjust the seasonings to match your taste. If you love garlic, add more! Want it spicy? Toss in some red pepper flakes. Make it your own by mixing different flavors that you enjoy. Tips for Preventing Sticking To keep your kebabs from sticking, oil the grill grates well. I like to use a paper towel dipped in oil and a pair of tongs. This helps keep the kebabs intact while grilling. Achieving Perfect Grill Marks For those beautiful grill marks, place the kebabs on the grill and don’t move them for a few minutes. This lets them sear nicely. After a few minutes, you can turn them for even cooking. The key is patience! Pro Tips Marinating Time: For the best flavor, marinate the chicken for at least 2 hours or overnight in the refrigerator. Grill Temperature: Ensure your grill is preheated to medium-high heat for optimal cooking and to achieve nice grill marks. Vegetable Variety: Feel free to add other vegetables like zucchini or cherry tomatoes for extra color and flavor. Resting Time: Let the kebabs rest for a few minutes after grilling to allow the juices to redistribute for a juicier bite. {{image_2}} You can switch up the meat in this dish. Try using shrimp or pork. They both grill well and add new tastes. If you want a vegetarian option, use firm tofu or tempeh. These proteins soak up flavors nicely. You can also add mushrooms or zucchini for extra veggies. Feel free to mix and match. Want to add more flavor? Change the marinade! Try adding lime juice or cilantro for a fresh twist. If you like spice, add chili flakes or hot sauce to the mix. This will give your kebabs a nice kick. You can also experiment with different herbs. Thyme or rosemary work well with the chicken and pineapple. Each change makes the dish unique and exciting! After you enjoy your grilled pineapple chicken kebabs, you may have some left. Store leftovers in a shallow, airtight container. This helps keep them fresh. Make sure to cool them to room temperature first. Place the container in the fridge. They will stay good for about three days. If you want to keep them longer, freeze the kebabs. Wrap each skewer tightly in plastic wrap or foil. Then, place them in a freezer-safe bag. This way, they can last up to three months. Just remember to label the bag with the date. To reheat your kebabs, use the oven or grill. This keeps them tender and juicy. For the oven, preheat it to 350°F (175°C). Place the kebabs on a baking sheet. Heat for about 10-15 minutes. If you choose to reheat on the grill, use low heat. This method helps to avoid drying them out. Grill the kebabs for about 5-7 minutes, turning them often. Always check that they are heated through. Enjoy your tasty leftovers! To check if the chicken is cooked, use a meat thermometer. The inside should reach 165°F (74°C). If you don’t have a thermometer, cut a piece of chicken open. The meat should be white, not pink. Juices should run clear. Cook the kebabs for about 10-12 minutes, turning them often. This helps them cook evenly. Yes, you can add other vegetables. Some great options are zucchini, mushrooms, or cherry tomatoes. Feel free to mix and match based on your taste. Just make sure to cut the veggies to about the same size as the chicken and pineapple. This way, everything cooks evenly and looks colorful on the skewers. For sides, fresh green salad pairs well. You can also serve rice or quinoa. Grilled corn on the cob makes a tasty addition too. If you like, add a refreshing yogurt dip or a tangy coleslaw. These sides balance the sweet and savory flavors of the kebabs. Grilled pineapple chicken kebabs are fun to make and tasty to eat. You learned about the key ingredients, the marinade, and grilling tips to create great kebabs. I shared variations and storage tips to keep your leftovers fresh. With a few simple steps, you can craft savory kebabs that impress family and friends. Enjoy your cooking journey, and don’t hesitate to experiment with flavors!

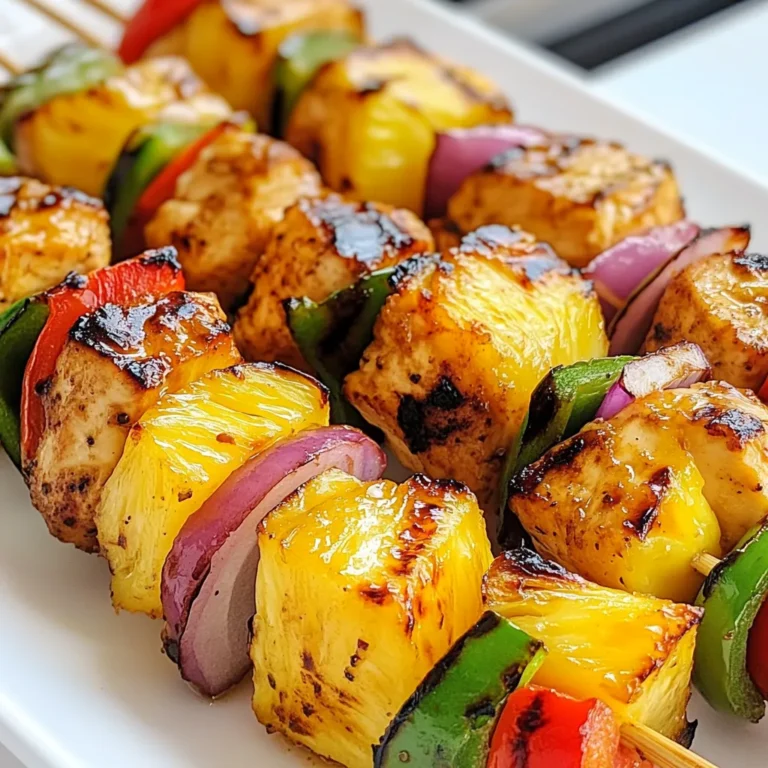
Grilled Pineapple Chicken Kebabs Tasty Summer Dish

To make the best spiced apple cider doughnuts, gather these simple ingredients: - 1 cup apple cider - 2 cups all-purpose flour - 1/2 cup granulated sugar - 1/2 teaspoon baking powder - 1/2 teaspoon baking soda - 1 teaspoon ground cinnamon - 1/4 teaspoon ground nutmeg - 1/4 teaspoon ground ginger - 1/4 teaspoon salt - 1/2 cup plain yogurt - 1/2 cup unsweetened applesauce - 2 large eggs - 1/4 cup melted butter - Extra sugar and cinnamon for coating Each ingredient plays a key role in flavor and texture. The apple cider gives a sweet, tangy taste that shines through. The combination of spices like cinnamon, nutmeg, and ginger warms up each bite. The yogurt and applesauce keep the doughnuts moist and tender. When you mix all these ingredients, you create a delightful treat perfect for fall. This simple list helps you shop quickly and get baking! To start, you need to reduce the cider. Pour 1 cup of apple cider into a small saucepan. Heat it over medium heat until it boils. Once it starts boiling, lower the heat and let it simmer. You want to reduce the cider to about 1/2 cup. This should take about 10 to 15 minutes. After that, remove it from the heat and let it cool. Next, mix the dry ingredients. Grab a large bowl and whisk together: - 2 cups all-purpose flour - 1/2 cup granulated sugar - 1/2 teaspoon baking powder - 1/2 teaspoon baking soda - 1 teaspoon ground cinnamon - 1/4 teaspoon ground nutmeg - 1/4 teaspoon ground ginger - 1/4 teaspoon salt In another bowl, blend the wet ingredients. Combine the cooled apple cider, 1/2 cup plain yogurt, 1/2 cup unsweetened applesauce, 2 large eggs, and 1/4 cup melted butter. Mix well until it is smooth. Now, it’s time to bake. Preheat your oven to 350°F (175°C). Grease a doughnut pan with non-stick spray. Pour the wet mixture into the dry ingredients. Stir gently until just combined. Some lumps are okay; do not overmix. Fill the doughnut pan about halfway with the batter. Bake the doughnuts for 12 to 15 minutes. Check them by inserting a toothpick in the center. If it comes out clean, they are done. Let the doughnuts cool in the pan for about 5 minutes. After that, transfer them to a wire rack to cool completely. To get the best doughnut, avoid overmixing. When you mix your wet and dry items, stir gently. Some lumps in the batter are okay. This keeps the doughnuts light and fluffy. Ensure even baking by filling each cavity of your doughnut pan halfway. This helps them rise evenly. Keep an eye on the baking time. A toothpick should come out clean when done. For a cozy flavor, add spices like allspice or cloves to your doughnuts. You can also increase the cinnamon for more warmth. Adding apple chunks gives a nice bite. Use fresh or even dried apples for extra texture. Just make sure to chop them small so they mix well. Serve your doughnuts warm for the best taste. They are perfect with a hot drink. Try pairing them with apple cider or coffee. The flavors blend well and make a great snack. You can also sprinkle some extra cinnamon sugar on top before serving. It adds a sweet touch to the warm doughnuts. Enjoy them fresh or store them in a container for later! {{image_2}} To make these doughnuts gluten-free, you can use a gluten-free flour blend. Look for one that includes xanthan gum. This helps mimic the texture of all-purpose flour. You can also try almond flour or coconut flour. Keep in mind that these flours may change the taste and texture. Adjust the liquid in your recipe to get a good batter. You can make these doughnuts vegan by replacing eggs and yogurt. Use flaxseed meal mixed with water as an egg substitute. Mix 1 tablespoon of flaxseed meal with 2.5 tablespoons of water for one egg. For yogurt, try unsweetened plant-based yogurt or applesauce. This keeps the doughnuts moist and fluffy while being vegan-friendly. Want to mix things up? You can add pumpkin spice for a taste of fall. Just substitute half the cinnamon with pumpkin spice. For chocolate lovers, try a chocolate glaze. Melt dark chocolate and mix with a bit of coconut oil. Dip the cooled doughnuts in this glaze for a rich treat. To keep your spiced apple cider doughnuts fresh, store them in an airtight container. This helps prevent them from drying out. You can also wrap them in plastic wrap. Avoid leaving them exposed to air. If you stack them, place parchment paper between layers to prevent sticking. To freeze your doughnuts, first cool them completely. Then, place them in a single layer on a baking sheet. Freeze until solid, about 1-2 hours. After they are frozen, transfer them to a freezer bag. Make sure to remove as much air as possible. For thawing, leave them at room temperature for about an hour. You can also warm them in the oven at 350°F for 5-10 minutes. At room temperature, these doughnuts last about 2-3 days. If stored in the fridge, they can stay fresh for up to a week. Just remember to keep them in an airtight container. This helps maintain their taste and texture. To reduce apple cider, start by pouring it into a small saucepan. Heat it over medium heat until it boils. Then, lower the heat to a simmer. Let it cook for 10 to 15 minutes. Keep an eye on it. You want it to reduce to about half a cup. This process helps to concentrate the flavor, making it richer and sweeter. Yes, you can make these doughnuts ahead of time. Bake them and let them cool. After cooling, you can store them in an airtight container. Keep them at room temperature for up to three days. If you need them longer, freeze them. Just thaw them at room temperature when ready to enjoy. If you need a substitute for applesauce, you have a few options. You can use mashed bananas or pumpkin puree for a different flavor. Another option is plain yogurt, which adds moisture. Each option will change the taste slightly, but they work well in the recipe. To make doughnut holes, use the same batter. Instead of a doughnut pan, use a mini muffin pan. Fill each cavity about halfway with batter. Bake them for about 8 to 10 minutes. Check for doneness with a toothpick. Once cool, roll them in the sugar and cinnamon mix for a tasty treat! This blog post shared a simple doughnut recipe using apple cider. You learned about essential ingredients, step-by-step instructions, and helpful tips. With variations for gluten-free and vegan diets, there’s something for everyone. Storage methods ensure your doughnuts stay fresh. Now, you can impress friends and family with tasty homemade doughnuts. Whether you stick to the classic recipe or try new flavors, enjoy every bite! Happy baking!

Spiced Apple Cider Doughnuts Irresistible Fall Treat

To make Air Fryer Garlic Parmesan Potatoes, gather these items: - 1.5 pounds baby potatoes, halved - 3 tablespoons olive oil - 4 cloves garlic, minced - ½ cup grated Parmesan cheese - 1 teaspoon dried oregano - ½ teaspoon smoked paprika - Salt and pepper to taste These ingredients give the dish its great taste and texture. The baby potatoes will turn crispy in the air fryer, while the garlic and cheese add rich flavors. You can include these optional items for extra flavor: - Fresh herbs like thyme or rosemary - Crushed red pepper flakes for heat - Lemon zest for brightness - Balsamic vinegar for a tangy twist These additions can enhance your dish and make it unique. Feel free to experiment with what you have on hand. For the best results, use baby potatoes or new potatoes. Their thin skin makes them perfect for frying. They cook evenly and become tender inside. If you want, you can also use Yukon Gold or red potatoes. Just cut them into smaller pieces to ensure they cook well. To start, preheat your air fryer to 400°F (200°C). This should take about 5 minutes. Preheating helps the potatoes cook evenly. I always do this step to ensure a crispy finish. Next, take 1.5 pounds of baby potatoes and cut them in half. In a large bowl, add the halved potatoes. Pour in 3 tablespoons of olive oil. Then, add 4 minced garlic cloves, 1 teaspoon of dried oregano, and ½ teaspoon of smoked paprika. Season with salt and pepper to taste. Toss all the ingredients together until the potatoes are well coated. This step is key for flavor and crispiness. Now, add ½ cup of grated Parmesan cheese to the bowl. Mix again until the cheese sticks to the potatoes. The cheese adds a delicious crunch and rich flavor. Place the potato mixture into the air fryer basket. Arrange them in a single layer. Avoid overcrowding the basket for the best results. You might need to cook in batches if your air fryer is small. Cook the potatoes for 15 to 20 minutes. Halfway through, toss the potatoes for even cooking. You want them golden brown and crispy. Once done, carefully remove them from the air fryer. Let them cool for a couple of minutes. Finally, garnish with fresh chopped parsley before serving. Enjoy your crispy and delicious garlic Parmesan potatoes! To get garlic Parmesan potatoes crispy, start with dry potatoes. Pat them with a towel after washing. The oil helps with crispiness, so don’t skip it. Use enough olive oil to coat each potato well. Toss them in a bowl until they shine. Keep space in the air fryer basket. If you crowd the potatoes, they won’t crisp up. Air needs to flow around them. Remember to shake the basket halfway through cooking. This helps them cook evenly and get crispy all over. One common mistake is not preheating the air fryer. Preheating helps the potatoes cook faster and more evenly. Another mistake is using too much cheese at once. If you add cheese early, it can burn. Add it halfway through cooking for a better melt. Overcrowding the basket is another issue. This can lead to soggy potatoes. Lastly, don’t skip the seasoning. Salt and pepper balance the flavors. Taste the mixture before cooking to ensure it is well seasoned. Garlic Parmesan potatoes pair well with many dishes. Serve them alongside grilled chicken or steak for a hearty meal. They also go great with fish, adding a nice crunch. For a lighter option, enjoy them with a fresh salad. A simple green salad or a Caesar salad works well. You can even use these potatoes in a breakfast bowl. Top them with eggs for a tasty brunch idea. The flavors blend nicely, making any meal special. {{image_2}} You can switch up the cheese for a new taste. Try using cheddar for a sharper flavor. Goat cheese adds creaminess and tang. You can even use a mix of cheeses for depth. Just keep in mind that some cheeses melt better than others. Herbs can change the whole dish. Try rosemary for a woodsy taste. Basil gives a fresh kick, while thyme adds a nice earthiness. For heat, a pinch of red pepper flakes works great. You can also play with different spices like garlic powder or onion powder. Want to make this dish heartier? Add cooked chicken or shrimp. They pair well with the garlic and cheese flavors. You can also toss in vegetables like bell peppers or zucchini. They will roast up nicely with the potatoes, adding color and nutrition. To keep your garlic Parmesan potatoes fresh, let them cool first. Place them in an airtight container. Store them in the fridge for up to three days. This keeps them safe and tasty for your next meal. Reheat your leftovers in the air fryer for the best results. Set it to 350°F (175°C). Heat for about 5-7 minutes. This method will help regain the crispy texture. You can also use a microwave, but the potatoes may not stay crispy. If you want to freeze these potatoes, do it before cooking. After tossing them with oil and seasonings, spread them out on a baking sheet. Freeze them for a few hours until they are solid. Then, transfer them to a freezer bag. They will stay good for up to three months. When ready to enjoy, cook them straight from the freezer in your air fryer. Yes, you can make these potatoes in the oven. Preheat your oven to 425°F (220°C). Toss the halved potatoes with olive oil, garlic, and spices as usual. Spread them on a baking sheet in a single layer. Bake for 25-30 minutes until they are golden and crispy. Keep an eye on them to avoid burning. Check the potatoes after 15 minutes in the air fryer. They should be golden brown and crispy. You can use a fork to poke one. If it goes in easily, they are done! If not, cook for a few more minutes. Toss them halfway through cooking for even crispiness. These potatoes are great as a side dish. Serve them with grilled chicken, steak, or fish. You can also enjoy them as a snack! Add a dip like ranch or garlic aioli for extra flavor. Top them with fresh herbs or a squeeze of lemon for brightness. Absolutely! Feel free to get creative with your spices. Try adding Italian seasoning or chili powder for heat. You can also mix in fresh herbs like rosemary or thyme. The key is to balance flavors, so taste as you go! In this article, we explored key ingredients, steps, and tips for making Garlic Parmesan Potatoes. You learned how to pick the best potatoes and which optional ingredients can boost flavors. We discussed how to ensure crispiness and avoid common mistakes. Lastly, we covered ways to store leftovers and variations to try. These potatoes are easy and delicious. I hope you're excited to create them at home. Enjoy experimenting with flavors and pairings! Happy cooking!

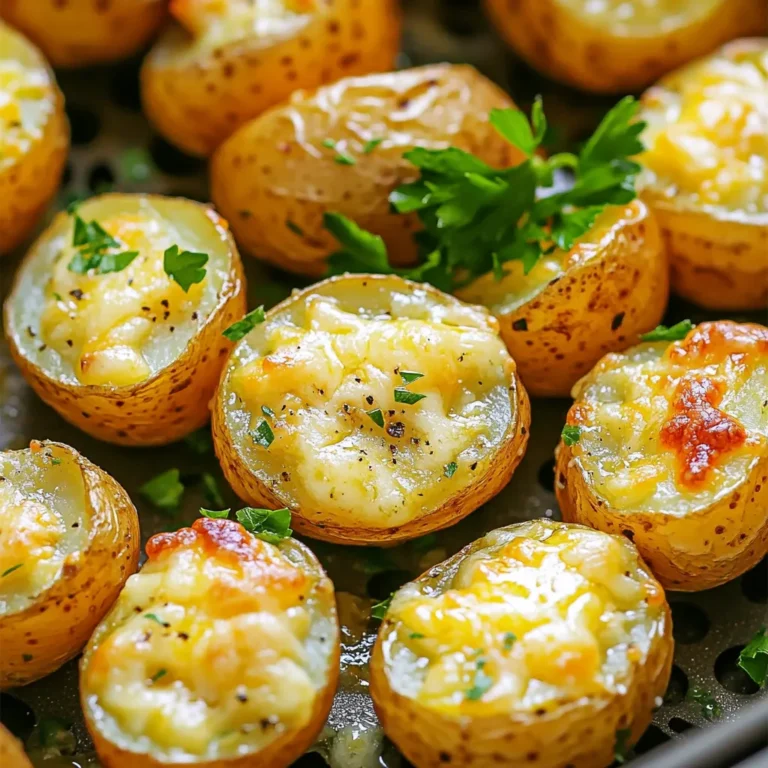
Air Fryer Garlic Parmesan Potatoes Crispy and Delicious

For this tasty soup, you will need: - 4 cups vegetable broth - 1 can (28 oz) crushed tomatoes - 2 cups fresh basil leaves, chopped - 1 medium onion, diced - 2 cloves garlic, minced - 1 teaspoon dried oregano - 1 teaspoon dried thyme - 1 cup carrot, diced - 1 cup zucchini, diced - 1 package (9 oz) fresh cheese tortellini - 1 cup heavy cream - Salt and pepper to taste - Grated parmesan cheese for serving You can swap some ingredients if needed: - Use chicken broth instead of vegetable broth for more flavor. - Canned diced tomatoes work well instead of crushed tomatoes. - If you lack fresh basil, dried basil is a good choice. Use less, about 1 tablespoon. - You can also replace cheese tortellini with any pasta you like. - For a lighter version, consider using half-and-half instead of heavy cream. Fresh ingredients make a big difference in flavor. Fresh basil gives a bright taste that dried herbs can't match. Fresh vegetables add crunch and nutrients. Using high-quality broth enhances the soup's base. When you pick fresh ingredients, your soup becomes richer and more satisfying. Always aim for the best quality you can find. This effort shows in your final dish! Start by getting your slow cooker ready. Pour in 4 cups of vegetable broth. Add one can of crushed tomatoes. Toss in a diced onion and two minced garlic cloves. Sprinkle in one teaspoon of dried oregano and one teaspoon of dried thyme. Then, add one cup of diced carrots and one cup of diced zucchini. Stir everything well to mix. This blend creates a rich base for the soup. Cover your slow cooker tightly. Set it to cook for 4 hours on high or 6 to 8 hours on low. Cooking it longer at a lower setting softens the flavors. When the cooking time is up, add one package of fresh cheese tortellini. Gently stir to combine. Pour in one cup of heavy cream and add two cups of chopped fresh basil. Stir again. Let it cook for another 20 to 30 minutes on high. This ensures the tortellini cooks through and absorbs the flavors. Once the tortellini is tender, taste the soup. Add salt and pepper to your liking. Serve the soup hot. I love to sprinkle grated parmesan cheese on top. For extra flavor, add a few more basil leaves. This soup pairs well with crusty bread or a light salad. Enjoy your delicious, warm bowl of soup! To make the soup burst with flavor, use fresh herbs. Fresh basil gives a great taste. You can also add a pinch of red pepper flakes for heat. If you want a sweeter flavor, add a little sugar. A splash of balsamic vinegar can add depth too. Stir these in right before serving. Cook the tortellini just until tender. If you cook it too long, it gets mushy. Add it to the slow cooker about 20-30 minutes before serving. This keeps it firm and chewy. Also, try using fresh tortellini instead of dry. Fresh tortellini cooks faster and tastes better in the soup. Always layer your ingredients. Start with the broth and tomatoes. Then, add the veggies and spices on top. This helps flavors mix well. Set your slow cooker to the right time. For a quick meal, use high heat for 4 hours. For a slow meal, set it low for 6-8 hours. And don’t lift the lid too often. Each time you do, heat escapes. {{image_2}} You can easily add protein to your soup. Try diced chicken or cooked sausage. Both options bring a savory taste. If using chicken, cook it before adding. Sauté it for a few minutes. If you prefer sausage, slice it and add it to the slow cooker. It will blend well with the flavors. Making this soup gluten-free is simple. Use gluten-free tortellini instead of regular ones. Many brands offer tasty gluten-free options. For a dairy-free version, swap heavy cream for coconut milk. This will keep the soup creamy without dairy. It’s a great way to enjoy the soup if you have dietary needs. Feel free to mix in other vegetables. Spinach or kale can add a fresh taste. You can also use bell peppers for a sweet crunch. Try adding beans for extra fiber and protein. Carrots and zucchini work well, but you can add your favorites. Just remember to chop the veggies into small pieces, so they cook evenly. After you enjoy your meal, let the soup cool. Pour it into a sealed container. Keep it in the fridge. It will last for 3 to 4 days. Make sure to label your container with the date. This helps you know when to use it. When you're ready to eat again, reheat your soup on the stove. Use a medium heat. Stir often to avoid burning. You can also use the microwave. Heat it in a safe bowl for 2 to 3 minutes. Make sure it is hot all the way through before serving. You can freeze this soup for later too. Use freezer-safe containers or bags. Leave some space at the top, as soup expands when frozen. It stays good for up to 3 months. When you want to eat it, thaw it overnight in the fridge. Then, reheat it on the stove or in the microwave. Enjoy your tasty soup anytime! Yes, you can use frozen tortellini. Just add them to the slow cooker in the last 20-30 minutes of cooking. Frozen tortellini cook well and add great flavor. They will soak up the yummy broth as they cook. If your soup is too thin, use a few simple tricks. You can mash some of the cooked vegetables in the soup. This adds body and texture. Another option is to mix 1 tablespoon of cornstarch with cold water. Stir it into the soup, then cook for a few more minutes. You can try adding parsley or rosemary for a fresh taste. Thyme and oregano already work well, but a bit of dill can also be nice. Experiment with your favorite herbs. Each herb can bring a new twist to your soup. This blog post showed how to make Slow Cooker Tomato Basil Tortellini Soup. We explored the key ingredients and fun substitutes. Fresh ingredients add to the dish's taste. I shared step-by-step instructions, cooking tips, and how to enhance flavor. Variations let you mix and match proteins and dietary needs. Lastly, proper storage ensures you can enjoy leftovers. Keep experimenting with this recipe to find your favorite version. Enjoy your cooking!

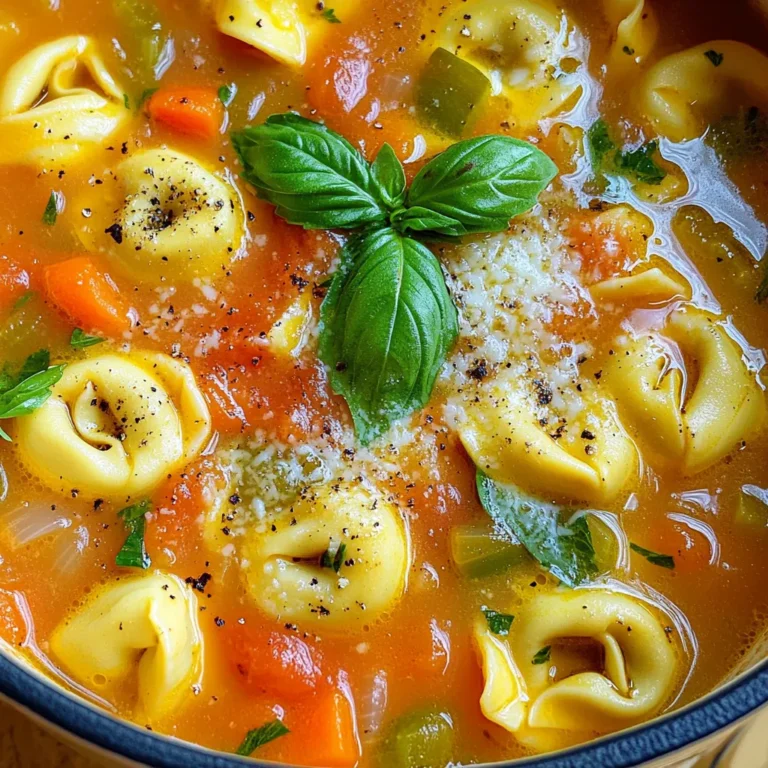
Savory Slow Cooker Tomato Basil Tortellini Soup Recipe

- 1 pound Italian chicken or turkey sausage - 1 medium butternut squash - 2 cups Brussels sprouts - 1 red onion - 2 tablespoons olive oil - 2 teaspoons smoked paprika - 1 teaspoon garlic powder - ½ teaspoon red pepper flakes - Salt and pepper - Fresh thyme leaves - Sheet pan - Mixing bowl - Knife and cutting board When I make Sheet Pan Sausage and Butternut Squash, I love the mix of flavors. The sausage adds a nice, savory taste. The butternut squash brings sweetness. Brussels sprouts and red onion add crunch and depth. This dish is colorful and fills the kitchen with a warm smell. For this recipe, you need just a few main items. First, the sausage is the star. You can use Italian chicken or turkey sausage. Both work well. Next is the butternut squash. Make sure it is ripe and firm. The Brussels sprouts should be fresh and trimmed. Finally, a red onion adds a sweet touch. You’ll also want some seasonings. Olive oil makes everything crisp and golden. Smoked paprika gives a nice, smoky flavor. Garlic powder adds depth, and red pepper flakes (if you like heat) spice things up. Don’t forget salt and pepper. Fresh thyme leaves are a lovely garnish. For tools, gather a sheet pan, mixing bowl, knife, and cutting board. These are all you need. This dish is easy to prepare and clean up is a breeze. - Preheat the oven to 425°F (220°C). - Peel and cube the butternut squash. Start by getting your oven nice and hot. Set it to 425°F (220°C). This heat helps everything roast well. Next, take your butternut squash. Use a sharp knife to peel off the skin. Cut it into small cubes. Aim for about 1-inch pieces. This size helps it cook evenly with the other veggies. - Mix vegetables and seasonings in a bowl. - Incorporate the sausage pieces. In a large mixing bowl, toss your cubed butternut squash with two cups of Brussels sprouts and the sliced red onion. Next, drizzle two tablespoons of olive oil over the mix. Add in two teaspoons of smoked paprika, one teaspoon of garlic powder, and a pinch of red pepper flakes if you like some heat. Don’t forget salt and pepper to taste! Toss everything together until the veggies are well coated. Now, gently add in the sausage pieces. Stir just enough to mix them in without breaking them apart. - Spread mixture on the sheet pan. - Roast in the oven and timing tips. Take a large sheet pan and spread the veggie and sausage mix evenly across it. Make sure it’s in a single layer. This helps everything roast nicely. Place the pan in the oven and set a timer for 25 to 30 minutes. Halfway through, give it a good stir. This action helps all the flavors blend and ensures even cooking. When done, the sausage should be cooked through, and the veggies will be tender and slightly caramelized. Let it cool for a moment before serving. Enjoy! To get the best out of your sheet pan meal, timing is key. Roast your dish at 425°F (220°C) for 25-30 minutes. Stir halfway through cooking to help everything cook evenly. This helps the sausage brown nicely and the veggies become tender. If you like extra crispy edges, leave it in for a few more minutes. Just keep an eye on it! For even roasting, spread the mixture in one layer on the pan. Avoid crowding the pan. If it’s too packed, the food will steam instead of roast, and you won’t get that nice caramelization. Make your dish pop with extra herbs and spices. Try adding rosemary or sage for a warm touch. You can also use thyme, which pairs well with butternut squash. If you want more heat, increase the red pepper flakes to taste. Feel free to customize the heat levels. If you prefer a milder dish, skip the red pepper flakes. You can also add a dash of hot sauce right before serving for that extra kick. This dish stands well on its own, but it pairs great with a fresh side salad. A simple arugula salad with lemon vinaigrette adds a nice crunch and bright flavor. You can also serve it with crusty bread to soak up the tasty juices. For beverages, I recommend a light white wine like Sauvignon Blanc. It complements the flavors well. If you prefer non-alcoholic options, a sparkling water with lemon is refreshing and tasty. {{image_2}} You can switch up the sausage type to fit your taste. Try pork, beef, or even vegan sausage. Each option gives a new flavor twist. If you want more protein, add chicken or shrimp. Chicken brings a nice mild flavor. Shrimp cooks fast and adds a seafood touch. Feel free to mix in seasonal vegetables. Carrots, sweet potatoes, or zucchini work well. They add great taste and color. You can also use root vegetables like parsnips or turnips. These give a hearty, earthy flavor that pairs nicely with the sausage. You can change the style of this dish easily. Add Italian herbs like oregano or basil for a tasty Italian twist. For a BBQ flair, drizzle your favorite BBQ sauce before roasting. Want something sweet? Try teriyaki sauce for a unique Asian flavor. Each twist makes this dish exciting and fun! To store leftovers, let the dish cool first. Place it in a clean, airtight container. This helps keep the flavors fresh. I recommend using glass or BPA-free plastic containers. They work best for storage. You can keep the leftovers in the fridge for up to three days. To reheat, use the oven or a microwave. The oven keeps the dish crispy. Heat at 350°F (175°C) for about 10-15 minutes. Stir halfway through for even warming. If using the microwave, heat in 1-minute bursts. Stir after each minute to avoid drying out. To freeze, pack the cooled dish in a freezer-safe container. You can also use freezer bags. Remove as much air as possible. Label with the date. This dish can last up to three months in the freezer. To thaw, place the container in the fridge overnight. Reheat it in the oven or microwave as mentioned before. Enjoy your meal anytime! To make this dish gluten-free, choose gluten-free sausage. Look for brands that use chicken or turkey without fillers. Ensure your spices, like smoked paprika and garlic powder, are also gluten-free. Most are safe, but always check labels. Serve with gluten-free sides like quinoa or a green salad for a complete meal. Yes, you can prepare this dish ahead of time. Chop the butternut squash, Brussels sprouts, and onion a day before. Store them in the fridge in an airtight container. You can also mix the spices and oil in a small bowl. When you're ready to cook, just combine everything and roast. This saves time and makes dinner easy! Great sides include: - A fresh green salad with a light vinaigrette - Creamy mashed potatoes for a comforting touch - Quinoa or rice to soak up the flavors - Roasted green beans for a crunchy contrast These sides pair well and add variety to your meal. Enjoy! This dish combines Italian sausage, butternut squash, and Brussels sprouts for a hearty meal. We explored the main ingredients, key seasonings, and essential equipment needed to create this recipe. I shared tips for perfect cooking and exciting variations to suit your taste. Overall, this meal is easy to make, flavorful, and versatile. You can adapt it based on what you have, making it ideal for any season. Enjoy the process and savor every bite!

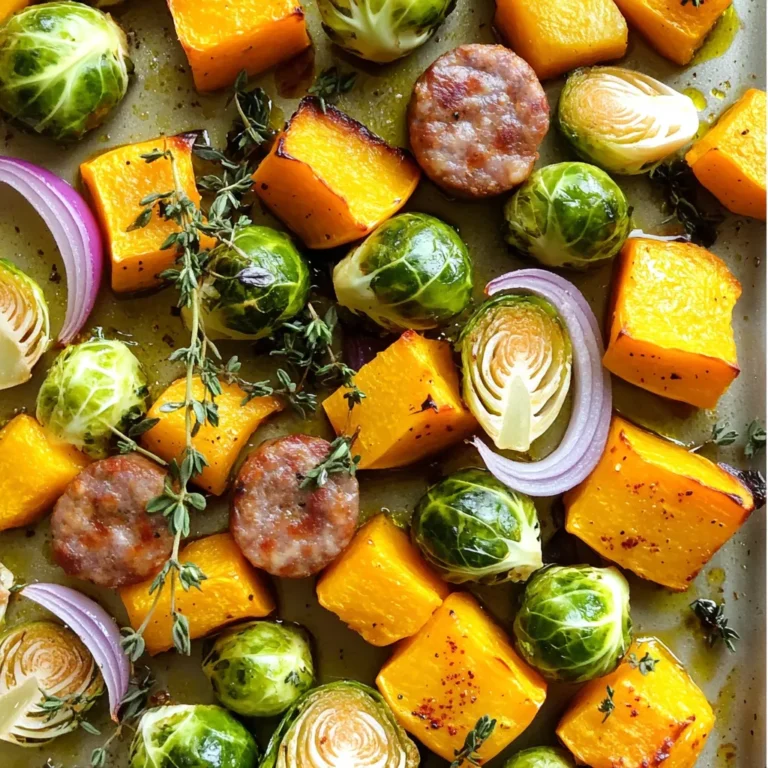
Sheet Pan Sausage & Butternut Squash Easy Meal

- 2 cups rolled oats - 1 cup all-purpose flour - 1/2 cup brown sugar, packed - 1/2 cup granulated sugar - 1 teaspoon baking powder - 1/2 teaspoon baking soda - 1/2 teaspoon cinnamon - 1/4 teaspoon salt - 1/2 cup unsalted butter, melted - 2 large apples, peeled, cored, and diced - 1 cup caramel sauce (store-bought or homemade) - 1/4 cup chopped walnuts (optional) For caramel apple oatmeal bars, you need simple ingredients. Rolled oats give a hearty base. All-purpose flour helps bind it together. Brown sugar adds a rich flavor, while granulated sugar brings sweetness. Baking powder and baking soda help the bars rise. A touch of cinnamon gives warmth, and salt balances the sweet notes. Unsalted butter adds richness and moisture. Fresh apples are key. They bring a juicy crunch. Caramel sauce makes everything sweeter and tasty. If you want, add chopped walnuts for a nutty bite. These bars are not just easy to make; they are also fun to enjoy! - Oats alternatives: Use quick oats for a softer texture. - Gluten-free options: Substitute with gluten-free flour and oats. - Alternatives for caramel sauce: Try maple syrup or a homemade fruit spread. Substitutions help you customize your bars. Quick oats can change the texture for a softer bite. If you need gluten-free bars, use certified gluten-free oats and flour. For caramel sauce, maple syrup offers a different sweet flavor. You can also try fruit spreads if you want a fruity twist. Adjusting ingredients can make this recipe fit your taste perfectly! 1. First, preheat your oven to 350°F (175°C). This ensures even baking. 2. Next, grease a 9x13 inch baking dish with butter or cooking spray. This helps the bars release easily later. 1. In a large bowl, combine 2 cups of rolled oats, 1 cup of all-purpose flour, 1/2 cup of brown sugar, 1/2 cup of granulated sugar, 1 teaspoon of baking powder, 1/2 teaspoon of baking soda, 1/2 teaspoon of cinnamon, and 1/4 teaspoon of salt. Mix well until all dry ingredients blend together. 2. Pour in 1/2 cup of melted butter. Stir until the mix looks like wet sand. Set aside 1 cup of this mix for the topping. 1. Press the remaining mixture into the bottom of the greased dish to create a solid crust. 2. In another bowl, toss 2 large diced apples with 1 cup of caramel sauce. Make sure each piece is coated. Spread the apples over the crust evenly. 3. Drizzle the rest of the caramel sauce over the apples. This adds flavor and keeps it moist. 4. Crumble the reserved oatmeal mixture on top of the apples and caramel. If you like, sprinkle 1/4 cup of chopped walnuts on top. 1. Place the baking dish in the preheated oven. Bake for 25-30 minutes. 2. Check for doneness by looking for a golden brown top and soft apples. The bars should not jiggle. Choosing the right apples is key. I love using Granny Smith apples. They are tart and hold their shape well. Honeycrisp apples also work great due to their sweetness and crunch. Adjusting sweetness can make a big difference. If you prefer your bars sweeter, add more brown sugar or caramel. You can also use less sugar if you like a less sweet treat. Serve these bars warm or at room temperature. Drizzle additional caramel sauce on top for extra flavor. You can also dust them with powdered sugar for a pretty touch. For a fun twist, add a scoop of vanilla ice cream on the side. This makes a great dessert! If your bars are too crumbly, try adding a bit more melted butter. This will help bind the ingredients better. Another option is to press the crust harder into the pan. If the apples are too firm, bake the bars a bit longer. Check them after 30 minutes. You want the apples to be soft but not mushy. {{image_2}} You can change the flavor of your Caramel Apple Oatmeal Bars easily. Adding spices like nutmeg or ginger gives a warm twist. Just a pinch can bring out rich flavors. You can also mix in dried fruits, like raisins or cranberries. They add sweetness and chewiness. This makes each bite a new surprise. If you want a vegan version, swap the butter for coconut oil. Use a plant-based caramel sauce to keep it vegan. For nut-free options, skip the walnuts. You can replace them with seeds like pumpkin or sunflower. This keeps the bars tasty and safe for those with allergies. Change up the fruit based on the season. In fall, use pears or even peaches in summer. You can also make holiday-themed bars. Add spices like cloves or nutmeg, and use festive sprinkles on top. These small changes keep the bars fun and fresh all year round. You can store Caramel Apple Oatmeal Bars at room temperature or in the fridge. For room temperature, place them in an airtight container. If you choose the fridge, the bars will stay fresh longer. Just make sure to seal them tight to keep moisture out. You can freeze these bars before or after baking. If you freeze them before baking, wrap the unbaked bars in plastic wrap and foil. This helps keep the taste fresh. To freeze after baking, cut the bars into squares, then wrap them well. For thawing, take them out and let them sit on the counter for a few hours. Fresh bars last for about a week at room temperature. In the fridge, they can last up to two weeks. Look out for signs of spoilage like a change in smell or texture. If they smell off or feel too dry, it’s best to toss them. Yes, you can make these bars ahead of time. This makes them great for meal prep. Just bake, cool, and store them in an airtight container. They will stay fresh for up to five days. You can also freeze them for longer storage. Wrap each bar tightly in plastic wrap before freezing. The bars are done when the top turns golden brown. You can also check the apples. They should be tender but not mushy. A toothpick inserted in the center should come out clean. Keep an eye on them during the last few minutes of baking. Quick oats can work, but they will change the texture. Rolled oats give a heartier bite. If you must use quick oats, reduce the baking time slightly. The bars may turn out softer, which some may prefer. If you want to skip the caramel sauce, try honey or maple syrup. These add sweetness but change the flavor slightly. You can also make a simple homemade caramel with sugar and butter. This way, you control the taste and texture. To reheat, place the bars in the microwave for about 15-20 seconds. You can also warm them in the oven at 350°F for about 10 minutes. This helps keep them soft and gooey. If you like, drizzle with more caramel sauce before serving. You learned how to make Caramel Apple Oatmeal Bars. We covered key ingredients and smart substitutions. You saw step-by-step instructions to prepare, mix, and bake. Tips helped you perfect texture and avoid common mistakes. Remember, you can get creative with flavors and storage options too. Enjoy making these delicious bars for any occasion. Happy baking!

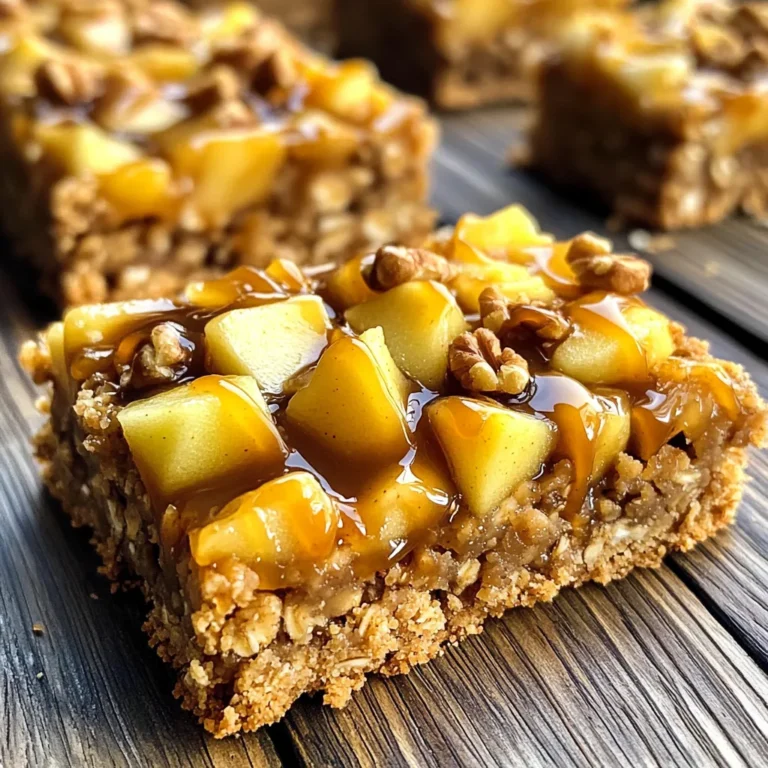
Caramel Apple Oatmeal Bars Irresistible Treat Delight

To make these delightful muffins, you will need the following ingredients: - 1 cup all-purpose flour - 1 teaspoon baking soda - 1 teaspoon baking powder - 1 teaspoon cinnamon - 1/2 teaspoon nutmeg - 1/2 teaspoon ginger - 1/4 teaspoon salt - 1 cup granulated sugar - 1/2 cup brown sugar, packed - 2 large eggs - 1 cup canned pumpkin puree - 1/2 cup vegetable oil - 1 teaspoon vanilla extract The creamy cheesecake filling requires: - 8 oz cream cheese, softened - 1/4 cup granulated sugar - 1 egg - 1 teaspoon vanilla extract - 1 tablespoon all-purpose flour You can still enjoy these muffins if you have dietary needs. Here are some substitutions: - For gluten-free muffins, use a 1:1 gluten-free flour blend. - For a vegan version, replace eggs with flax eggs (1 tablespoon flaxseed meal + 2.5 tablespoons water for each egg). - Use dairy-free cream cheese for the filling to keep it vegan. - Substitute vegetable oil with melted coconut oil for a different taste. These swaps allow everyone to enjoy the warm flavors of fall in a muffin! First, you need to preheat your oven to 350°F (175°C). This step is important for even baking. While the oven heats, take a muffin tin and line it with paper liners or grease it well. This will help your muffins come out easily when done. In a medium bowl, whisk together the dry ingredients. Combine 1 cup of all-purpose flour, 1 teaspoon of baking soda, 1 teaspoon of baking powder, 1 teaspoon of cinnamon, 1/2 teaspoon of nutmeg, 1/2 teaspoon of ginger, and 1/4 teaspoon of salt. Mix them well and set this bowl aside. Next, in a large bowl, mix the wet ingredients. Combine 1 cup of granulated sugar, 1/2 cup of brown sugar, and 2 large eggs. Add 1 cup of canned pumpkin puree, 1/2 cup of vegetable oil, and 1 teaspoon of vanilla extract. Stir until everything is well mixed. Gradually add the dry mixture to the wet mixture. Stir gently until just combined. Be careful not to overmix, as this can make your muffins tough. To make the cheesecake filling, use a separate bowl. Beat together 8 ounces of softened cream cheese, 1/4 cup of granulated sugar, 1 egg, 1 teaspoon of vanilla extract, and 1 tablespoon of flour. Mix until smooth and creamy. Now, it’s time to fill the muffin tins. Spoon a heaping tablespoon of pumpkin batter into each muffin cup. Then, add about a tablespoon of the cheesecake filling in the center. Finally, top it with another tablespoon of pumpkin batter. Use a toothpick to swirl gently for a marbled look. Place the muffin tin in your preheated oven. Bake for about 18-22 minutes. To check if they are done, insert a toothpick into the pumpkin part. The toothpick should come out clean. After baking, let the muffins cool in the pan for 5 minutes. Then transfer them to a wire rack to cool completely. Enjoy the warm muffins or let them cool to room temperature before serving. To get the best muffin texture, use room temperature ingredients. Cold eggs and cream cheese can make mixing harder. When mixing, combine wet and dry ingredients gently. Overmixing can lead to tough muffins. Aim for a few lumps in the batter. This will keep your muffins light and fluffy. A common mistake is packing the flour too tightly. Use a spoon to scoop flour into your measuring cup instead. Level it off without pressing down. Also, check your baking soda and baking powder. If they are old, they may not rise well. Fresh ingredients help your muffins rise to perfection. Spices bring warmth and depth to your muffins. I love using cinnamon, nutmeg, and ginger. They pair perfectly with pumpkin's rich flavor. You can add a pinch of allspice or cloves for a twist. For an extra kick, consider adding a splash of maple syrup. This will make your muffins even more delightful. {{image_2}} To make gluten-free pumpkin cheesecake muffins, swap regular flour for a gluten-free blend. Look for a mix that includes xanthan gum. This ingredient helps bind the muffins. Use the same amount of gluten-free flour as the recipe states. The muffins will still be moist and tasty! For vegan pumpkin cheesecake muffins, replace eggs with flax eggs. To make one flax egg, mix one tablespoon of ground flaxseed with three tablespoons of water. Let it sit for five minutes. Use a dairy-free cream cheese for the filling. Coconut cream or cashew cream also works well. These swaps keep your muffins vegan and delicious! If you want to change up the cheesecake filling, try using ricotta cheese or mascarpone. Both give a different texture and flavor. You can also add spices like lemon zest or cinnamon to the filling. This adds a fun twist to the classic taste. After baking, let your muffins cool completely. This step is key to keeping them fresh. Once cool, place the muffins in an airtight container. You can store them at room temperature for up to three days. If you want them to last longer, refrigerate them. They will stay fresh in the fridge for about a week. Freezing is a great way to save these delicious muffins. To freeze, wrap each muffin in plastic wrap. Then, place them in a freezer-safe bag or container. They can be frozen for up to three months. When you are ready to enjoy them, just take out what you need. Thaw the muffins in the fridge overnight or at room temperature for a couple of hours. Reheating your muffins brings back their fresh-baked taste. For the best results, microwave them for about 15-20 seconds. If you prefer, you can also reheat them in an oven. Set the oven to 350°F (175°C) and warm them for 5-10 minutes. This way, the muffins stay moist and tasty. Enjoy them warm for a cozy fall treat! Yes, you can make these muffins ahead of time. Bake them and let them cool completely. Once cooled, store them in an airtight container. They stay fresh for up to three days at room temperature. You can also freeze them for up to three months. Just remember to wrap them tightly in plastic wrap before freezing. If you want a change, you can use mascarpone cheese or Greek yogurt. Both options give a creamy texture. You could also use a dairy-free cream cheese for a vegan version. Just keep in mind that the flavor might differ slightly, but they'll still be tasty. To adjust sweetness, you can reduce the sugar amounts. Try cutting the granulated sugar by a quarter cup. You can also swap sugar for natural sweeteners like honey or maple syrup. If you want more sweetness, add a bit more sugar or sweetener. Taste the batter before baking to find your perfect balance. We covered everything about Pumpkin Cheesecake Muffins. You learned the right ingredients, including gluten-free and vegan options. I gave you step-by-step instructions and shared tips for perfect texture and flavor. We explored fun variations and how to store your muffins properly. In closing, these muffins are easy to make and so tasty. Try them out, and enjoy each bite!

Pumpkin Cheesecake Muffins Perfect for Fall Baking

- 4 boneless, skinless chicken cutlets - 3 cloves garlic, minced - 1 teaspoon onion powder - 1 teaspoon paprika - 1 teaspoon Italian seasoning - 1/2 teaspoon salt - 1/2 teaspoon black pepper - 1/4 cup breadcrumbs - 1/4 cup grated Parmesan cheese - 2 tablespoons olive oil - Fresh parsley, chopped (for garnish) You can enhance your chicken cutlets with a few extras. Try adding: - Lemon zest for a fresh kick. - Red pepper flakes for a spicy twist. - Fresh herbs like thyme or rosemary for depth. These will add layers of flavor to the dish. If you don’t have something on hand, here are some swaps: - Use chicken thighs instead of cutlets for a juicier bite. - Swap garlic with garlic powder if you’re in a pinch. - Use panko breadcrumbs for extra crunch. - Replace Parmesan cheese with any hard cheese you like. These substitutions keep the recipe flexible and fun! To start, gather your ingredients. In a bowl, mix together the minced garlic, onion powder, paprika, Italian seasoning, salt, black pepper, olive oil, breadcrumbs, and Parmesan cheese. Stir well until everything forms a smooth paste. This mixture will give your chicken cutlets a tasty garlic flavor. Make sure you blend all the spices evenly. Next, preheat your air fryer to 380°F (193°C). This step is key to ensuring even cooking. Preheating helps to lock in moisture and crisp up the outside of the chicken. While the air fryer heats up, you can focus on coating the chicken cutlets. Take each chicken cutlet and coat it with your garlic mixture. Use your hands or a spoon to spread the paste evenly on both sides. Make sure every part is covered for the best flavor. This coating will create a nice crust as the chicken cooks. Place the coated cutlets in the air fryer basket in a single layer. Do not overcrowd them; this ensures they cook evenly. Air fry the cutlets for 10 to 12 minutes. Flip them halfway through to get a golden brown color on both sides. Check that the chicken reaches an internal temperature of 165°F (75°C). When they are done, take the cutlets out and let them rest for a few minutes. Garnish with fresh parsley for a pop of color and flavor. To make sure your chicken cutlets cook just right, follow these tips. First, use a meat thermometer. Check that the inside reaches 165°F. This step keeps your chicken safe to eat. Also, avoid overcrowding the air fryer. Give each cutlet space to cook evenly. If needed, cook in batches. This helps get that perfect golden brown color. Rest the chicken for a few minutes after cooking. This lets the juices settle. Your chicken will be juicy and tender. Marinades are a great way to boost flavor. Start with the garlic mixture in the recipe. It has garlic, onion powder, and spices. You can add more. Try using lemon juice or soy sauce for a twist. Let the chicken sit in the marinade for at least 30 minutes. If you have more time, let it sit longer. This allows the flavors to soak in. You can even marinate overnight in the fridge for even better taste. To get the best results with your air fryer, follow these steps. Always preheat your air fryer before cooking. This helps the chicken cook evenly from the start. Use a light coat of oil on the chicken. Olive oil helps with browning and flavor. Remember to flip the cutlets halfway through. This ensures both sides get crispy. Lastly, keep an eye on cooking time. Every air fryer is a little different. Adjust as needed for perfect results. {{image_2}} You can switch up the flavors in your air fryer garlic chicken cutlets. Try adding lemon zest for a fresh taste. If you love heat, add cayenne pepper or chili flakes. For a smoky flavor, use smoked paprika instead of regular paprika. You can also mix in some herbs like thyme or rosemary for added depth. Each of these options gives a new twist to the dish. Chicken cutlets are great, but you can use other proteins too. Try turkey cutlets for a leaner option. If you prefer seafood, shrimp works well with the garlic mixture. For a meatless option, use firm tofu. Just make sure to adjust cooking times. Fish cooks faster, while turkey may need more time. Each protein absorbs the garlic and spice flavors beautifully. Serve your air fryer garlic chicken cutlets with a fresh salad. A simple green salad with lemon vinaigrette pairs well. You can also try roasted vegetables like broccoli or carrots. For a heartier meal, serve with rice or mashed potatoes. Add a side of garlic bread for a fun twist. Each side complements the flavors of the chicken cutlets perfectly. Store leftover chicken cutlets in an airtight container. Place them in the fridge. They stay fresh for up to three days. To keep them from drying out, cover them with plastic wrap. This helps lock in moisture. To reheat, use your air fryer. Set it to 350°F (175°C). Heat the cutlets for about 5 to 7 minutes. This method warms them evenly and keeps them crispy. You can also use a microwave, but they may get soggy. You can freeze these chicken cutlets for later. Place them in a freezer-safe bag. Remove as much air as possible. They last up to three months in the freezer. When ready to eat, thaw in the fridge overnight. Reheat in your air fryer for best results. Air fry chicken cutlets for 10-12 minutes at 380°F (193°C). Flip them halfway through. This helps to cook them evenly. Always check that the internal temperature reaches 165°F (75°C) before serving. Yes, you can cook frozen chicken cutlets in the air fryer. Adjust the cooking time to about 15-18 minutes. Flip them once during cooking. Ensure they are fully cooked before serving. To keep chicken cutlets juicy, marinate them before cooking. Use olive oil and spices for flavor. Coating them well with the garlic mixture also helps seal in moisture. Avoid overcooking to keep them tender. Garlic chicken cutlets can be healthy. They use lean chicken and fresh garlic. You control the oil and seasoning amounts. Pair them with veggies for a balanced meal. Enjoy them guilt-free! In this post, we covered the key ingredients, step-by-step instructions, and helpful tips for making garlic chicken cutlets in an air fryer. You learned how to flavor and store the dish, along with variations to try. Air frying can keep your meals tasty and healthy. Remember to enjoy experimenting with flavors and sides. Each meal is a chance to learn and grow. Dive into this cooking adventure and share your results!

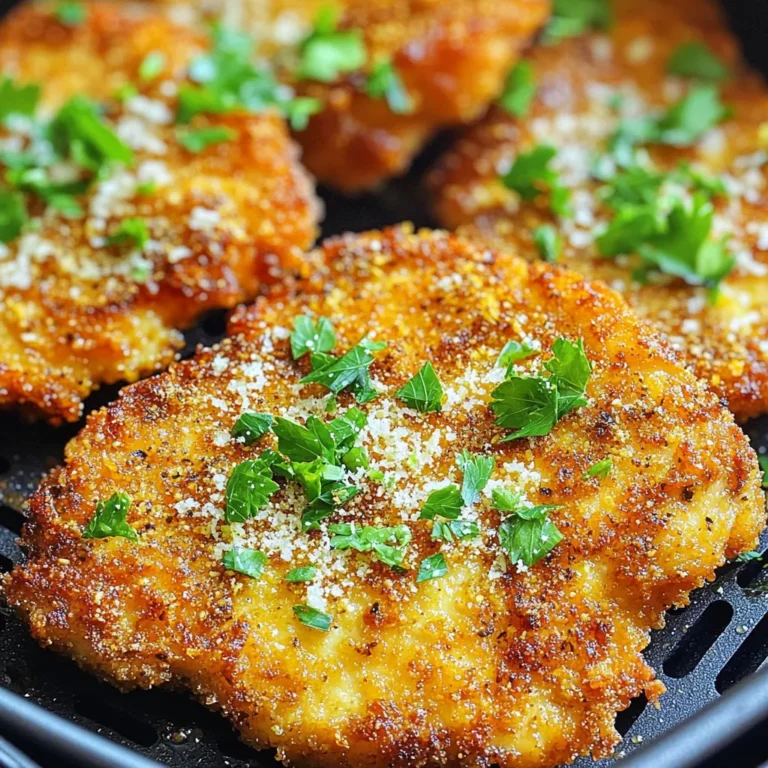
Air Fryer Garlic Chicken Cutlets Juicy and Flavorful

PREV 1 … 10 11 12 … 57 NEXT
flavor nest kitchen

explore

DessertsDinnerAppetizersDrinks

Our Policies

  • Cookie Policy
  • Copyright Policy
  • Disclaimer
  • GDPR Policy
  • Terms Of Use
Back to Top
  • About
  • Contact Us
  • Privacy Policy
© 2025 flavor nest kitchen