FREE DINNER EBOOK! Get your copy!
  • Cookie Policy
  • GDPR Policy
  • Disclaimer
  • Terms Of Use
  • Visit my other site: Fun Cookie Recipes
flavor nest kitchen
  • Home
  • Dinner
  • Desserts
  • Drinks
  • Appetizers
  • Contact
  • About
  • Privacy Policy
  • Home
  • Dinner
  • Desserts
  • Drinks
  • Appetizers
  • Contact
  • About
  • Privacy Policy
  • Cookie Policy
  • GDPR Policy
  • Disclaimer
  • Terms Of Use
Visit my other site: Fun Cookie Recipes

HOME / CATEGORIES /

Latest

To make Slow Cooker Creamy Tortellini Spinach Soup, gather these simple ingredients: - 3 cups vegetable broth - 1 medium onion, diced - 2 cloves garlic, minced - 1 carrot, diced - 2 cups fresh spinach, chopped - 1 package (12 oz) refrigerated cheese tortellini - 1 can (14.5 oz) diced tomatoes, with juices - 1 cup heavy cream or coconut milk - 1 teaspoon dried Italian herbs - Salt and pepper to taste - Grated Parmesan cheese, for serving (optional) - Fresh basil leaves, for garnish (optional) You can elevate the soup with these optional ingredients: - A pinch of red pepper flakes for heat - A squeeze of fresh lemon juice for brightness - A dash of Worcestershire sauce for depth - Sliced mushrooms for earthiness - Fresh herbs like thyme or parsley for added freshness If you can't find an ingredient, here are some substitutes: - Use chicken broth instead of vegetable broth for a richer taste. - For a dairy-free version, coconut milk works well in place of cream. - Swap out cheese tortellini for spinach or mushroom tortellini. - If you prefer, canned crushed tomatoes can replace diced tomatoes. - Use frozen spinach if fresh is not available; just thaw and drain it first. These ingredients come together to create a warm, creamy soup that warms the soul. Enjoy the cooking process and let the flavors meld beautifully in your slow cooker! First, gather all your ingredients. You need: - 3 cups vegetable broth - 1 medium onion, diced - 2 cloves garlic, minced - 1 carrot, diced - 2 cups fresh spinach, chopped - 1 package (12 oz) refrigerated cheese tortellini - 1 can (14.5 oz) diced tomatoes, with juices - 1 cup heavy cream or coconut milk - 1 teaspoon dried Italian herbs - Salt and pepper to taste - Grated Parmesan cheese, for serving (optional) - Fresh basil leaves, for garnish (optional) Next, take your slow cooker. Add the vegetable broth, onion, garlic, and carrot. Stir everything together. This mix will form the soup's base. Now, open the can of diced tomatoes. Pour it into the slow cooker with its juices. Sprinkle in the dried Italian herbs. Season with salt and pepper to taste. Cover the slow cooker. Set it to cook on low for four hours or on high for two hours. The goal is to make the vegetables tender. After the time is up, it's time for the tortellini. Add the package of tortellini to the slow cooker. Stir it in gently. Cook for another 30 minutes on high. The tortellini should be cooked through and tender. Now, it's time to add the spinach and cream. Stir in the chopped spinach and heavy cream or coconut milk. These ingredients make the soup creamy and rich. Let it cook for another ten minutes. The spinach should wilt nicely in the warm soup. Before you serve, taste the soup. Adjust the seasoning if needed, adding more salt and pepper. When serving, ladle the soup into bowls. For a nice touch, sprinkle grated Parmesan cheese on top. Add fresh basil leaves for a pop of color and flavor. Enjoy! To get the best texture for your soup, follow these steps: - Use fresh tortellini. They cook better and stay tender. - Stir gently when adding the tortellini. This keeps them intact. - Add spinach at the end to keep it vibrant and fresh. - If you prefer a thicker soup, let it cook longer. This allows it to reduce. Many people make mistakes when cooking soup. Here are some to watch out for: - Don't skip the sauté step. Cooking the onion and garlic first adds great flavor. - Avoid overcooking the tortellini. They can become mushy if left too long. - Resist the urge to add too much salt early. Taste as you go for best results. You can easily boost the soup's flavor with these tips: - Add a splash of lemon juice for brightness. - Mix in some red pepper flakes for heat. - Consider fresh herbs like thyme or parsley for extra depth. - For a richer taste, try adding a bit of white wine with the broth. These tips will help you make a delightful Slow Cooker Creamy Tortellini Spinach Soup that everyone will love! {{image_2}} You can easily make this soup vegetarian or vegan. To do this, just skip the heavy cream. Use coconut milk for a vegan twist. For extra flavor, try adding a splash of lemon juice. You can also swap the cheese tortellini for a brand that is dairy-free. This way, everyone can enjoy a delicious bowl! If you want to add protein, you have options. You can stir in cooked chicken or turkey for a hearty meal. For a meatless choice, try chickpeas or lentils. They add protein and fiber, making this soup even more filling. Just add them during the last 30 minutes of cooking. Spinach is great, but you can mix it up! Kale or Swiss chard work well in this soup. These greens give a different texture and taste. Add them in the last 10 minutes of cooking. This way, they stay bright and fresh. You can even toss in frozen peas for a sweet touch! To store your Slow Cooker Creamy Tortellini Spinach Soup, let it cool first. Use airtight containers for best results. You can keep it in the fridge for up to three days. Make sure you label the containers with the date. This will help you track how fresh it is! When you're ready to enjoy your leftovers, reheat the soup on the stove. Pour the soup into a pot and warm it over medium heat. Stir often to keep it from sticking. You can also use a microwave. Place the soup in a microwave-safe bowl and heat it in 30-second intervals. Stir in between until it’s hot. If you want to freeze the soup, use freezer-safe containers. Leave some space at the top, as the soup will expand when frozen. It will stay good for up to three months. To thaw, place it in the fridge overnight. Reheat it on the stove, adding a splash of broth if needed. This helps bring back its creamy texture. It takes about 30 minutes to cook tortellini in a slow cooker. After your soup is ready, add the tortellini. Cook them on high for 30 minutes. They should be tender and delicious. Yes, you can use frozen tortellini! Just add them in the last 30 minutes of cooking. They will cook well and taste great. Frozen tortellini are a quick option when you are short on time. This soup pairs well with crusty bread. A fresh salad can also be a nice side. For a heartier meal, serve it with grilled cheese sandwiches. You can make it fun by adding different toppings like grated cheese or fresh herbs. This blog post covered how to make Slow Cooker Creamy Tortellini Spinach Soup. We explored the key ingredients and optional flavors to boost taste. I shared step-by-step instructions and tips for perfect texture and flavor. We also discussed variations for different diets and how to store leftovers efficiently. As you cook, remember to adjust flavors and have fun. Enjoy your soup journey!

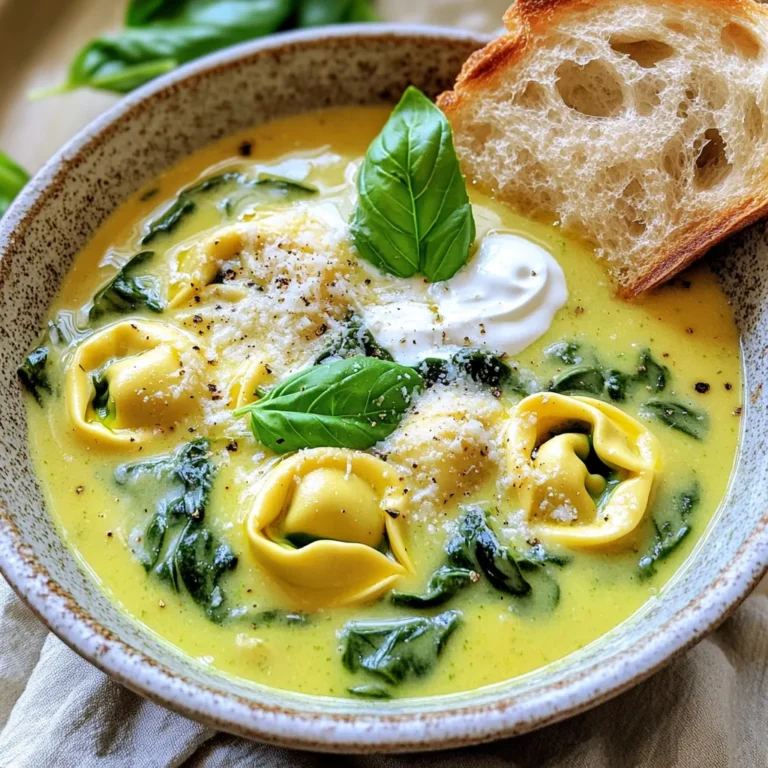
Slow Cooker Creamy Tortellini Spinach Soup Delight

- 1 pound Brussels sprouts, trimmed and halved - 2 tablespoons olive oil - 3 tablespoons honey - 2 tablespoons Sriracha sauce - 1 tablespoon soy sauce - 1 teaspoon garlic powder - Salt and pepper to taste - Sesame seeds - Fresh cilantro To make Air Fryer Honey Sriracha Brussels Sprouts, you need fresh Brussels sprouts. Choose sprouts that are firm and bright green. Trim the ends and cut them in half for even cooking. You will also need olive oil. This oil helps the sprouts crisp up nicely in the air fryer. Next, let’s create a tasty glaze. Mix honey for sweetness, Sriracha sauce for heat, soy sauce for umami, garlic powder for flavor, and salt and pepper to enhance everything. For garnish, consider using sesame seeds and fresh cilantro. They add a nice touch to the dish. Gather these ingredients, and you are ready to cook! Enjoy the process and the great flavors! Preheat your air fryer to 375°F (190°C). This step is key for even cooking. A hot fryer makes your Brussels sprouts crispier and more delicious. In a large bowl, combine these ingredients: - 2 tablespoons olive oil - 3 tablespoons honey - 2 tablespoons Sriracha sauce - 1 tablespoon soy sauce - 1 teaspoon garlic powder - Salt and pepper to taste Stir until everything blends well. This glaze gives the sprouts a sweet and spicy kick. Take 1 pound of Brussels sprouts, trimmed and halved. Add them to the glaze bowl. Toss them well. Make sure every sprout gets coated. This is where the magic begins! Arrange the coated sprouts in a single layer in the air fryer basket. Don't overcrowd them; this helps them cook evenly. Air fry for 12-15 minutes. Shake the basket halfway through. This ensures all sides get crispy and golden brown. Once done, carefully remove the sprouts. Transfer them to a serving dish. For a nice touch, garnish with sesame seeds and fresh cilantro. They look great and taste even better! To get that perfect crunch, set your air fryer to 375°F (190°C). Preheat it for about 5 minutes. This step ensures that your Brussels sprouts cook evenly and get that nice, crispy texture. Arrange them in a single layer in the basket. Crowding the sprouts will make them steam instead of crisping up. Want to take your sprouts to the next level? Try adding a pinch of smoked paprika or cayenne pepper for extra heat. You can also mix in some lemon zest for a fresh zing. If you enjoy a nutty flavor, toss in some crushed peanuts or walnuts. Each of these additions can enhance the flavor and make your dish even more exciting. If your Brussels sprouts turn out undercooked, try air frying them a few minutes longer. Check them halfway through and give the basket a good shake. If they seem overcooked, reduce the cooking time next time. Keep a close eye on them. Remember, every air fryer cooks a bit differently, so adjust as needed for your appliance. {{image_2}} You can turn these Brussels sprouts into a full meal by adding protein. Chicken works great here. Just cut it into small pieces and toss it with the sprouts in the glaze. You can also use tofu for a plant-based option. Press the tofu to remove excess water, then cut it into cubes. Toss it into the honey Sriracha mix for flavor. If you don’t have an air fryer, you can still enjoy these Brussels sprouts. Preheat your oven to 400°F (200°C). Spread the sprouts on a baking sheet in a single layer. Roast them for about 20-25 minutes. Shake the pan halfway through to get even cooking. You can also pan-fry the sprouts in a skillet with olive oil until they are crispy. Don't feel limited to just honey and Sriracha. You can try different sauces for a new twist. For a sweet taste, use maple syrup instead of honey. If you like it spicy, add more Sriracha or try chili garlic sauce. For a tangy kick, mix in some lime juice or rice vinegar. These changes can make the dish your own. After cooking, let the Brussels sprouts cool down. Place them in an airtight container. Store this container in your fridge. They stay fresh for about three days. If you want to keep them crispy, don't cover them tightly. This helps air circulate and keeps them from getting soggy. For long-term storage, freezing is a great option. First, let the Brussels sprouts cool completely. Next, spread them on a baking sheet. Freeze them for about two hours until they are solid. Then, transfer the sprouts into a freezer bag. Squeeze out the air and seal it. They can last up to three months in the freezer. The honey Sriracha glaze can also be frozen. Store it in a separate container. To reheat your Brussels sprouts, use your air fryer. Set it to 350°F (175°C). Heat the sprouts for about 5-7 minutes. This method helps them regain their crispiness. You can also use an oven. Preheat to 350°F and spread them on a baking sheet. Bake for 10-15 minutes. Avoid using the microwave, as it makes them soggy. Enjoy your crispy treats! Yes, you can use frozen Brussels sprouts. Here’s how to do it right: - Thawing: First, take them out of the freezer. Let them sit at room temperature for about 30 minutes. You can also microwave them for a few minutes to speed this up. - Cooking: After thawing, make sure to pat them dry with a paper towel. This keeps them from getting soggy. Then, follow the same steps in the recipe. You may need to air fry them a bit longer, about 15-18 minutes. It’s easy to make this dish vegan. Here are some substitutions: - Honey: Use agave syrup or maple syrup instead of honey. Both add sweetness without animal products. - Soy sauce: Most soy sauces are already vegan, but check for brands that are certified vegan. You can also use tamari for a gluten-free option. These Brussels sprouts pair well with many dishes. Here are some great options: - Grains: Serve with brown rice or quinoa for a hearty meal. - Proteins: Add grilled chicken, tofu, or chickpeas for extra protein. - Salads: A fresh green salad complements the spicy-sweet flavor nicely. Feel free to mix and match these ideas for a balanced meal! This blog post showed how to make tasty Air Fryer Honey Sriracha Brussels Sprouts. We covered the main and flavoring ingredients, step-by-step cooking, and helpful tips for the best results. These crispy sprouts can fit into various meals. Try adding protein or different sauces for a twist. With easy storage and reheating tips, you can enjoy leftovers too. Dive in and enjoy!

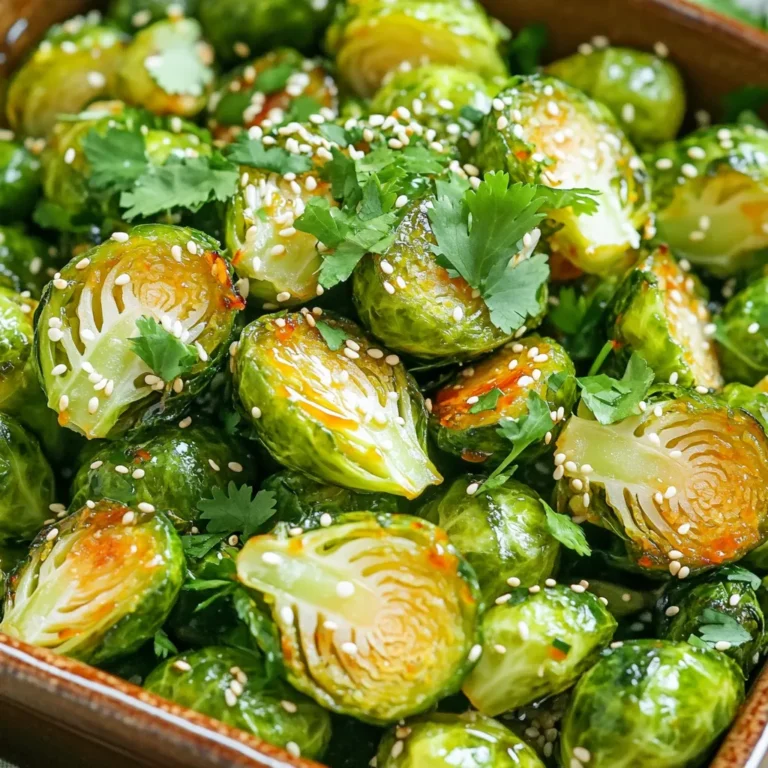
Air Fryer Honey Sriracha Brussels Sprouts Delight

- 8 oz spaghetti or your favorite pasta - 1 tablespoon olive oil - 3 cloves garlic, minced - 1 can (14 oz) artichoke hearts, drained and chopped - 4 cups fresh spinach - 1 cup heavy cream - 1 cup grated Parmesan cheese - 1 teaspoon Italian seasoning - Salt and pepper to taste - Red pepper flakes (optional, for a spicy kick) - Fresh basil leaves (for garnish) - Additional Parmesan cheese (optional) Gathering the right ingredients sets the stage for this creamy spinach artichoke pasta. I love using spaghetti, but any pasta works just as well. Olive oil adds richness, while minced garlic gives that warm, inviting aroma. Artichoke hearts bring a unique texture and flavor, and fresh spinach adds vibrant color and nutrition. Heavy cream makes the sauce luscious and rich, and Parmesan cheese contributes a salty and nutty taste. For seasoning, Italian seasoning enhances the dish with herbs, while salt and pepper balance the flavors. If you enjoy a bit of heat, red pepper flakes give a kick. You can finish with fresh basil and extra Parmesan for garnish, which brings a burst of freshness to every bite. This combination of ingredients creates a meal that is not only delicious but also satisfying. The balance of creamy, savory, and fresh flavors makes this pasta dish a winner at any table. {{ingredient_image_1}} 1. Start by bringing a large pot of salted water to a boil. This helps the pasta stay seasoned. 2. Add 8 oz of spaghetti or your favorite pasta. Cook it until al dente, which means it should be firm to the bite. 3. Before draining, reserve 1 cup of pasta water. This water is great for adjusting your sauce later. 1. In the same pot, heat 1 tablespoon of olive oil over medium heat. 2. Add 3 cloves of minced garlic. Sauté for about 1 minute until you smell the garlic's fragrant flavor. 3. Next, add 1 can of chopped artichoke hearts. Cook for 2-3 minutes to warm them through. 4. Gradually add 4 cups of fresh spinach. Stir until it wilts down, which takes about 3-4 minutes. 1. Pour in 1 cup of heavy cream. Bring it to a gentle simmer, watching it carefully. 2. Stir in 1 cup of grated Parmesan cheese. Mix until the cheese melts and creates a smooth sauce. 3. Season the sauce with 1 teaspoon of Italian seasoning, salt, and pepper to taste. If you want a spicy kick, add in some red pepper flakes. Now, your creamy spinach artichoke sauce is ready. Toss in the cooked pasta, adding reserved pasta water if needed to get the perfect sauce thickness. - How to achieve perfect pasta: Always use a large pot with plenty of water. Add salt to the boiling water. This helps flavor the pasta. Cook until it's al dente, firm but not hard. Check the package for timing. - Best techniques for sautéing: Heat olive oil in a pot over medium heat. Add minced garlic and sauté until it smells great. Don’t burn the garlic; it can taste bitter. Add chopped artichokes next and heat them through. - Signs of perfect spinach wilting: Spinach is ready when it shrinks down and turns bright green. This takes about 3-4 minutes. Stir often to ensure even cooking. - Adjusting sauce thickness: If your sauce is too thick, don’t worry! Gradually add some reserved pasta water. This water has starch that helps the sauce stick to the pasta. - Using reserved pasta water effectively: Always save at least one cup of pasta water before draining. Use it to adjust the sauce's thickness. It enhances flavor and makes everything creamy. - Suggestions for additional spices: Add red pepper flakes for heat. Mix in some extra Italian seasoning for more flavor. A pinch of nutmeg can also enhance the creaminess. - Incorporating protein options: Consider adding grilled chicken or shrimp for extra protein. For a vegetarian option, try chickpeas or tofu. This makes the dish heartier and more filling. Pro Tips Use Fresh Spinach: Opt for fresh spinach instead of frozen for a brighter flavor and better texture in your creamy sauce. Reserve Pasta Water: Always save some pasta cooking water; it helps thicken the sauce and adds flavor when mixing everything together. Customize Your Cheese: Feel free to mix different cheeses like mozzarella or feta for a unique flavor twist in your pasta dish. Spice It Up: If you enjoy heat, increase the red pepper flakes or add a dash of hot sauce for an extra kick in your creamy pasta. {{image_2}} You can make this dish even more exciting by swapping ingredients. Here are some fun ideas: - Alternative pasta choices: Try penne, fettuccine, or even whole wheat pasta. Each type brings a new texture. - Dairy-free cream options: Use coconut cream or cashew cream if you want a dairy-free dish. Both options add a nice creaminess. - Different cheese varieties: Mix in goat cheese or feta for a tangy twist. You can also try mozzarella for a milder flavor. Adding protein can turn this dish into a full meal. Here are some tasty options: - Grilled chicken: Add sliced grilled chicken for a hearty touch. It pairs well with the creamy sauce. - Shrimp additions: Toss in sautéed shrimp for a seafood twist. The shrimp soak up the flavors nicely. - Vegetarian protein options: Use chickpeas or lentils for a plant-based boost. They add protein and texture without meat. Want to change the flavor profile? Here are a few ideas to enhance the dish: - Lemon zest for brightness: Add a pinch of lemon zest to brighten the creamy sauce. It adds a fresh, zesty flavor. - Sun-dried tomatoes for extra flavor: Chopped sun-dried tomatoes give a sweet and tangy punch. They help balance the creaminess. - Adding nuts for crunch: Sprinkle toasted pine nuts or walnuts on top. They add a nice crunch and enhance the dish's flavor. To keep your creamy spinach artichoke pasta fresh, store it in an airtight container. This helps prevent moisture loss and keeps it tasty. Place it in the fridge within two hours of cooking. It lasts about three to four days. If you want to enjoy it later, make sure to cool it down before sealing. You can easily reheat this dish in the microwave or on the stovetop. For the microwave, place the pasta in a bowl and cover it with a damp paper towel. Heat it in short bursts, stirring often. On the stovetop, warm it in a pan over low heat. Add a splash of milk or extra cream to restore the creaminess. Stir well to combine everything. If you want to freeze your pasta, let it cool completely first. Transfer it into a freezer-safe container or bag. Remove as much air as possible to prevent freezer burn. It can stay frozen for up to three months. When ready to eat, thaw it in the fridge overnight. Reheat it gently on the stove, adding a bit of cream for a smooth texture. You can use coconut milk or cashew cream. Both are rich and creamy. They add a nice flavor. Almond milk is also an option. However, it is thinner. Adjust seasonings to balance the taste. Yes, you can! Use plant-based cream and nutritional yeast instead of cheese. Swap the pasta for whole grain or vegetable noodles. This keeps the dish tasty and healthy. To avoid soggy pasta, cook it al dente. This means the pasta is firm when bitten. Also, drain it right away and do not rinse. If you mix it with sauce quickly, it will stay firm. You can add bell peppers, mushrooms, or zucchini. These add color and crunch. Broccoli or peas also work well. Just sauté them with the garlic. The pasta stays fresh for about 3 to 5 days. Store it in an airtight container. Reheat it on the stovetop or microwave. Add a splash of water or cream to keep it moist. This article covered how to make a tasty pasta dish with artichokes and spinach. You learned about key ingredients, step-by-step cooking methods, and tips for great flavor. I also discussed variations and storage tips. Incorporating these ideas will help you enjoy a tasty meal. Try different swaps and proteins to keep things fun. Remember, cooking is about exploring flavors and enjoying your time in the kitchen. Happy cooking!

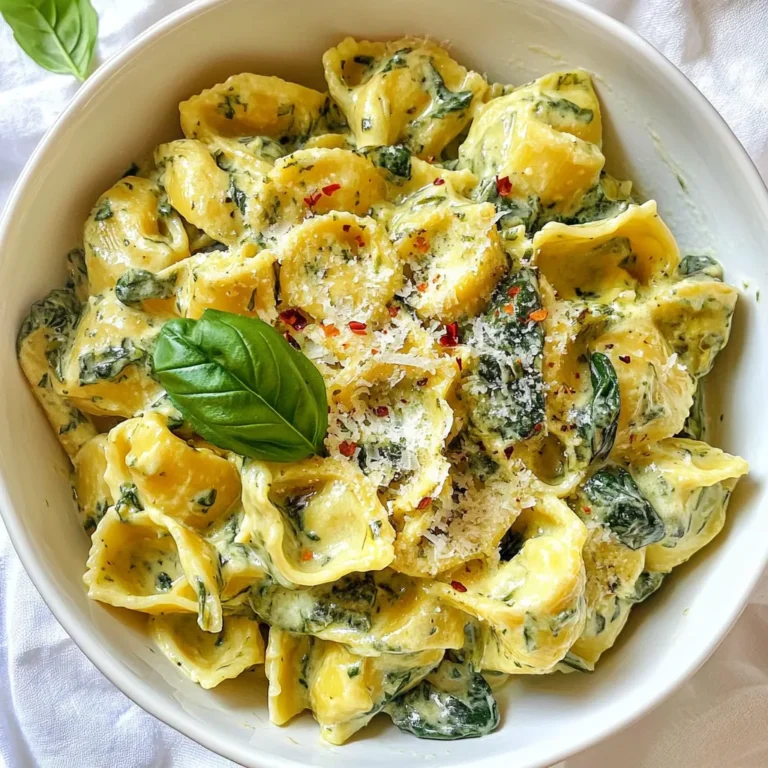
Creamy Spinach Artichoke Pasta Rich and Flavorful Dish

- 200g beef sirloin, thinly sliced - 2 servings instant ramen noodles - 4 cups beef broth - 2 tablespoons soy sauce - 1 tablespoon sriracha (adjust to taste) - 1 tablespoon sesame oil - 1 red bell pepper, thinly sliced - 1 cup shiitake mushrooms, sliced - 1 handful baby spinach - 2 green onions, chopped - Soft-boiled eggs (optional, for topping) - Sesame seeds for garnish To make spicy beef ramen bowls, start with key ingredients. The beef sirloin brings richness and flavor. Instant ramen noodles cook fast and absorb the broth well. Beef broth delivers a deep, savory base. Next, add flavor enhancers. Soy sauce gives umami, while sriracha adds heat. Sesame oil adds a nutty taste. These three elevate the dish to new heights. For freshness, include vegetables. Red bell pepper adds sweetness and color. Shiitake mushrooms offer an earthy flavor. Baby spinach gives a healthy touch and brightens the bowl. Finish with green onions for crunch. If you like, add soft-boiled eggs for creaminess and sesame seeds for a nice finish. Gather these ingredients to create a delicious and cozy meal that warms you up. {{ingredient_image_1}} Start by heating sesame oil in a large pot over medium heat. Add minced garlic and grated ginger. Sauté them for about one minute. You want the aroma to fill your kitchen. Next, add the thinly sliced beef sirloin. Cook it for two to three minutes until it turns brown. You don’t need to cook it fully; it will finish cooking later. Once the beef is browned, pour in the beef broth, soy sauce, and sriracha. Stir the mixture to combine all the flavors. Bring the pot to a low simmer. Now, add the sliced red bell pepper and shiitake mushrooms. Let them cook in the broth for about five minutes. This will make the broth rich and flavorful. After five minutes, stir in the baby spinach. It will wilt quickly in the hot broth, adding a nice touch. While the broth simmers, prepare the ramen noodles in a separate pot. Follow the package instructions. Once cooked, drain the noodles and set them aside. To assemble, divide the noodles into bowls. Ladle the spicy beef broth over the top. Finally, add toppings like soft-boiled eggs, chopped green onions, and a sprinkle of sesame seeds. This adds color and crunch to your meal. Enjoy your cozy bowl of spicy beef ramen! To make the broth just right, adjust the spice level to your taste. Start with one tablespoon of sriracha. You can add more if you like it spicier. Always taste as you go. For a rich broth, use high-quality beef broth. Cooking the beef and vegetables in the broth adds more flavor. Let the broth simmer gently. This step brings all the flavors together. To avoid mushy noodles, cook them separately. Follow the package instructions carefully. Drain them when they are just done. Rinse with cold water to stop the cooking. Time your cooking well. Add the noodles to the broth just before serving. This keeps them firm while soaking up flavor. Serve the ramen in deep bowls for a cozy look. Cut the soft-boiled eggs in half and place them on top. This makes it visually appealing. For garnishing, sprinkle sesame seeds and sliced green onions on each bowl. This adds color and freshness. A bright presentation makes your dish more inviting. Pro Tips Use High-Quality Beef: Opt for grass-fed or organic beef sirloin for a richer flavor and better texture in your ramen. Customize the Heat: Adjust the amount of sriracha based on your spice tolerance; you can add more for a fiery kick or less for a milder broth. Fresh Ingredients Matter: Using fresh vegetables like bell peppers and spinach enhances the overall flavor and nutrition of the dish. Perfect Soft-Boiled Eggs: Boil your eggs for exactly 6-7 minutes for a perfectly runny yolk that complements the ramen beautifully. {{image_2}} You can change the protein in your ramen bowl. If you prefer chicken, use thinly sliced chicken breast. It cooks quickly and absorbs flavors well. For a richer taste, try pork. Pork belly or tenderloin works great. For a vegetarian or vegan option, tofu is a fantastic choice. Use firm or extra-firm tofu. Cut it into cubes and pan-fry until golden. It adds a nice texture and soaks up the broth flavors. Toppings can make your ramen bowl exciting. You can add other vegetables like bok choy, carrots, or snap peas. They not only add color but also nutrition. Don’t forget about specialty garnishes! Try adding nori strips, pickled ginger, or chili oil. These can elevate the dish and offer new flavors. If you want to tone down the heat, there are easy ways. Start by reducing the amount of sriracha. You can also use a milder hot sauce, like chili garlic sauce. Another option is to add a dollop of sour cream or yogurt. It helps balance the heat while keeping the dish creamy. To keep your spicy beef ramen fresh, store leftovers in airtight containers. Place them in the fridge right after they cool. Use the ramen within three days for the best taste. If you want to freeze it, separate the noodles from the broth. The broth freezes well for up to three months. Noodles can get mushy if frozen, so it’s best to keep them out. When you're ready to enjoy your leftovers, reheat the broth on the stove. Use medium heat and stir often to prevent sticking. If you want to microwave, place broth in a bowl and cover it. Heat in short bursts, stirring in between. For noodles, you can quickly boil them for a minute. This keeps them from becoming too soft and helps maintain their texture. In the fridge, your spicy beef ramen will stay fresh for about three days. Keep an eye on it. If you see any changes in color or smell, it’s time to toss it. Signs of spoilage include a sour smell or a slimy texture. Always trust your senses when checking food. Yes, you can use homemade broth! Homemade broth is often richer in flavor. It allows you to control the ingredients. You can also avoid additives found in store-bought options. Making broth at home can be fun, too. Just simmer bones, meat, and veggies for hours. This creates a deep, savory taste that enhances your ramen. You can add many tasty ingredients! Consider these options: - Soft-boiled eggs for creaminess - Corn for sweetness - Bok choy for crunch - Bean sprouts for texture - Spicy kimchi for a kick - Seaweed for a unique flavor These extras can make your ramen even better! Yes, this recipe is great for meal prep! Here are some tips: - Cook the broth and beef in advance. - Store noodles separately to keep them firm. - Portion out toppings to add fresh before eating. - Keep everything in airtight containers in the fridge. This way, you can enjoy a spicy beef ramen bowl anytime! This blog post guided you through making a spicy beef ramen bowl. We covered the main ingredients like beef sirloin and instant ramen. You learned how to enhance flavor with soy sauce and sriracha. We also explored toppings like shiitake mushrooms and soft-boiled eggs. To make the best ramen, remember the tips on broth and noodle cooking. Experiment with different proteins and vegetables to find your favorite mix. This dish is both comforting and fun to make. Enjoy your deliciously customized ramen!

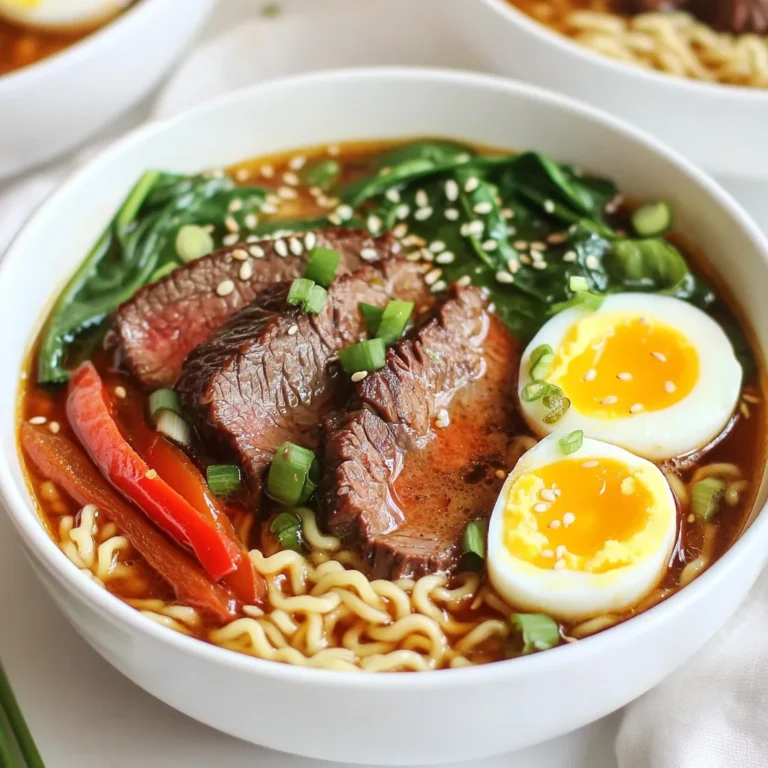
Spicy Beef Ramen Bowls Flavorful and Cozy Meal

- 1 cup all-purpose flour (heat-treated) - ½ cup unsalted butter, softened - ½ cup brown sugar, packed - ¼ cup granulated sugar - 2 teaspoons vanilla extract - 1 tablespoon milk (or dairy-free alternative) - ½ cup mini chocolate chips - ¼ teaspoon salt You must heat-treat the flour to keep it safe. Raw flour can hold germs. Heating it kills any harmful bacteria. This makes it safe to eat the dough. To heat-treat flour, preheat your oven to 350°F (175°C). Spread the flour on a baking sheet. Bake it for 5 to 7 minutes. Let the flour cool completely before using it. This step is key for safe and tasty cookie dough bites! Heat treating the flour First, we need to heat-treat the flour. Preheat your oven to 350°F (175°C). Spread 1 cup of all-purpose flour on a baking sheet. Bake it for 5-7 minutes. This step kills any harmful bacteria. Let the flour cool completely before using it. Mixing the butter and sugars Next, grab a large mixing bowl. Add ½ cup of softened unsalted butter, ½ cup of packed brown sugar, and ¼ cup of granulated sugar. Use a mixer to cream these ingredients together. Beat them until the mixture is light and fluffy, about 2-3 minutes. Adding flavorings Now it’s time to add some flavor! Mix in 2 teaspoons of vanilla extract and 1 tablespoon of milk. Continue to beat until everything is smooth and well blended. Incorporating dry ingredients Gradually add the heat-treated flour and ¼ teaspoon of salt to the butter mixture. Mix just until the dry ingredients are incorporated. Be careful not to overmix, or your bites may become tough. Folding in chocolate chips Then, gently fold in ½ cup of mini chocolate chips. Make sure they are evenly distributed throughout the dough. This step adds that sweet chocolatey goodness! Shaping and chilling the dough Use a tablespoon or small cookie scoop to portion out the dough. Roll each portion into a ball. Place them on a parchment-lined baking tray. To help them firm up, chill the tray in the refrigerator for about 30 minutes. Now you have delicious edible sugar cookie dough bites ready to enjoy! To get the best texture in your dough bites, do not overmix. Overmixing can make your bites tough. Mix just until you see no dry flour. This keeps the dough soft and chewy. Chilling the dough is also key. After shaping the bites, put them in the fridge for about 30 minutes. This helps them firm up. A cold dough holds its shape better when you eat it. You can make your dough bites even more fun with add-ins. Try nuts, like chopped walnuts or pecans. You can also try different chocolates, like dark or white chocolate chips. If you want to switch things up, think about flavor variations. Peanut butter or caramel can add a new twist. Just mix them in with the butter and sugars for a tasty change. {{image_2}} You can change the flavor of your cookie dough bites easily. While vanilla is classic, other extracts work great too. Try almond or coconut extract for a twist. A little goes a long way! You can also make seasonal flavors. For fall, add pumpkin spice to your dough. For winter, peppermint extract gives a fresh taste. These flavors add fun and excitement to every bite! If you need gluten-free options, substitute regular flour with a gluten-free blend. Ensure the blend has a fine texture for the best results. For those who need dairy-free treats, swap out the butter with coconut oil or a dairy-free butter blend. You can also use almond milk or oat milk in place of regular milk. These changes keep your treats tasty and safe for everyone. To keep your edible cookie dough bites fresh, place them in an airtight container. Make sure they are completely cool before you store them. This helps to lock in moisture and flavor. You can store them in the fridge for up to a week. If you want to save them for later, freezing is a great option. To freeze, arrange the cookie dough bites on a baking sheet. Make sure they do not touch. Freeze them for about an hour until firm, then transfer them to a freezer-safe bag or container. They will keep well in the freezer for about three months. In the fridge, these cookie dough bites last about one week. After that, they may start to lose taste and texture. If you notice any changes in smell or appearance, it's best to discard them. Signs of spoilage include any off smell or a dry texture. You want to enjoy these treats at their best, so always check before indulging! Yes, you can eat cookie dough. However, you need to make sure it is safe. The main concern is raw flour and eggs. In this recipe, we heat-treat the flour. This kills harmful bacteria. We also do not use eggs. This makes the dough safe to eat. Enjoy these bites without worry! You can substitute butter with several options. Here are some ideas: - Coconut oil - Vegetable shortening - Applesauce (for a lower fat option) - Nut butters (like almond or peanut butter) Each option gives a different taste and texture. Choose what you like best! To tell if the cookie dough is done, check its texture. It should be smooth and soft, but not too sticky. If you can roll it into a ball easily, it’s ready. Make sure to mix just until combined. Overmixing can make it tough. This blog post covered how to make edible cookie dough bites safely and deliciously. We discussed the key ingredients, especially the need for heat-treated flour. You learned step-by-step instructions and valuable tips for achieving the perfect texture. There are many flavor variations and customization options to explore. Lastly, we shared how to store and maintain the freshness of your treats. Now you're ready to enjoy safe, tasty cookie dough bites that you can make at home!

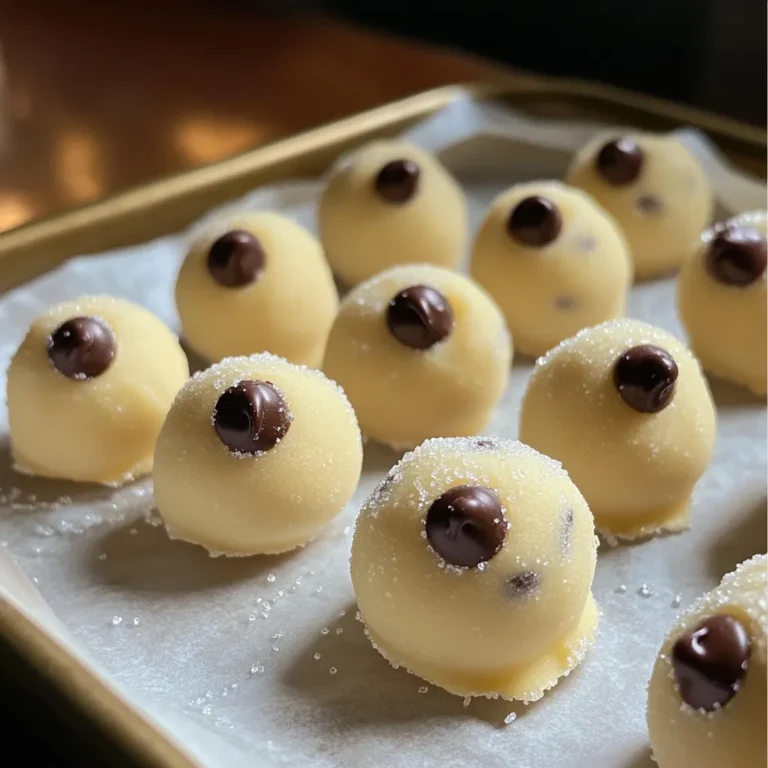
Edible Sugar Cookie Dough Bites Easy and Tasty Treat

To make a yummy Nutella mug cake, you need these simple ingredients: - All-purpose flour - Baking powder - Cocoa powder - Nutella - Milk - Sugar - Vegetable oil - Salt Here are the exact amounts to use: - 4 tablespoons all-purpose flour - 1/8 teaspoon baking powder - 2 tablespoons cocoa powder - 3 tablespoons Nutella - 3 tablespoons milk - 2 tablespoons sugar - 1 tablespoon vegetable oil - A pinch of salt These small amounts are perfect for one mug cake. You can make your mug cake even better with these toppings: - Whipped cream - Vanilla ice cream Adding these will make your cake taste extra sweet and special. First, grab a microwave-safe mug. In the mug, add: - 4 tablespoons all-purpose flour - 1/8 teaspoon baking powder - 2 tablespoons cocoa powder - 2 tablespoons sugar - A pinch of salt Mix these dry ingredients well. Make sure there are no lumps. This step is key for a smooth cake. Next, add the wet ingredients to your dry mix. Pour in: - 3 tablespoons milk - 1 tablespoon vegetable oil Stir until the batter is smooth. You want a nice, thick mixture. Now, gently fold in 3 tablespoons of Nutella. Leave some Nutella in the center for a gooey effect later. Put your mug in the microwave. Cook it on high for about 40-60 seconds. Start with 40 seconds. After 40 seconds, check the cake. It should look soft and a bit fudgy in the center. If it needs more time, cook it for another 10-20 seconds. Be careful not to overcook it. Let it cool for a minute before enjoying. To get the best texture, mix your dry ingredients well. This helps keep the cake fluffy. When you add wet ingredients, stir until the batter is smooth. Be careful not to overmix. Less mixing keeps air in the batter, making it light. Leave some Nutella in the center. This creates that gooey lava effect that everyone loves. One big mistake is not measuring your ingredients. Use the right amounts for the best taste. Don't skip the baking powder; it helps the cake rise. Also, keep an eye on the cooking time. Microwaves vary, so check the cake after 40 seconds. If you cook it too long, it can turn dry. Microwaving at a high setting works best. Start at 40 seconds, then check. If it needs more time, add 10-second bursts. This way, you can avoid overcooking. Remember, the center should be soft and fudgy when done. Each microwave is different, so adjust the time as needed. {{image_2}} You can easily change the taste of your Nutella mug cake. Try adding a splash of vanilla extract for warmth. A bit of espresso powder gives a nice coffee kick. You can mix in some peanut butter for a rich twist. If you love fruit, add mashed banana or chopped strawberries. Each choice makes your cake unique and fun. Toppings can make your mug cake even better. Whipped cream is a classic, adding lightness. A scoop of vanilla ice cream makes it extra special. You can sprinkle crushed nuts for crunch. Drizzle caramel or chocolate sauce for sweetness. Fresh berries on top will add color and freshness. Choose your favorite toppings to match your mood. You can make a gluten-free version of this mug cake too. Use gluten-free flour instead of regular flour. Almond flour or oat flour works well. Check that your cocoa powder is gluten-free as well. This way, everyone can enjoy the tasty treat. You won’t lose any flavor or fun! After enjoying your Nutella mug cake, you might have some left. First, let it cool completely. Then, cover the mug with plastic wrap or a small plate. This helps keep it fresh. Store it in the fridge for up to two days. Always check for spoilage before eating. When you want to enjoy your leftover mug cake, reheating is simple. Place the mug in the microwave. Heat it for about 20 to 30 seconds. Check if it's warm. If not, add a few more seconds. Be careful not to overheat it. This can make the cake dry. You can freeze the mug cake if you want to save it longer. First, let it cool down fully. Next, transfer it to an airtight container or wrap it well in plastic wrap. Freeze it for up to a month. When you're ready to eat it, let it thaw in the fridge overnight. Reheat it in the microwave as mentioned before. Enjoy your treat! No, this mug cake is best made fresh. The texture changes when stored. If you make it early, the cake may become dry or hard. I recommend making it just before you want to eat it. This way, you enjoy the warm, gooey center. You can adjust sweetness easily. If you like it less sweet, reduce the sugar to one tablespoon. For a sweeter taste, add more sugar. You can also try sweet toppings like whipped cream or ice cream. These add extra sweetness without changing the cake. If you don't have Nutella, try other spreads. Peanut butter or chocolate spread works well. You can even use cookie butter for a fun twist. Just make sure the spread is thick. This keeps that delicious lava center that makes the mug cake special. This Nutella mug cake is easy to make and fun to enjoy. We've covered the ingredients, step-by-step instructions, and tips for success. Don't forget to experiment with different flavors and toppings. With the right care, you can store leftovers and reheat them later. I hope you feel inspired to try this recipe. Enjoy your sweet treat and share it with friends!

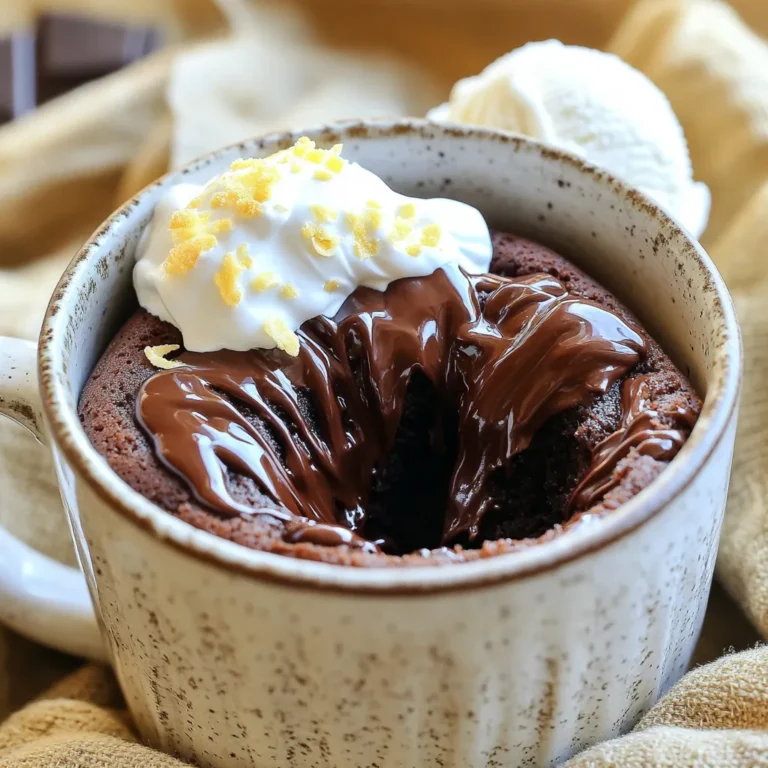
Ingredient Nutella Mug Cake Simple and Delicious Recipe

- 1 lb shrimp, peeled and deveined - 2 tablespoons honey - 2 tablespoons Sriracha sauce - 1 tablespoon soy sauce The main ingredients are simple yet bold. Shrimp is the star. It adds a nice, sweet flavor that pairs well with honey and Sriracha. Honey brings sweetness, while Sriracha adds heat. Soy sauce adds depth and saltiness. Together, they create a tasty base for the wraps. - 2 cloves garlic, minced - 1 tablespoon ginger, grated - 1 tablespoon lime juice - 1 teaspoon sesame oil - 1/2 teaspoon salt - 1/4 teaspoon black pepper Aromatics bring the dish to life. Garlic and ginger add a warm, spicy note. Lime juice adds brightness. Sesame oil gives a nutty flavor. Salt and black pepper round out the taste. These ingredients enhance the shrimp and make the wraps even better. - 1 head of iceberg lettuce, leaves separated - 1/4 cup diced cucumber - 1/4 cup grated carrots - 1/4 cup chopped cilantro - Slices of lime for garnish Fresh toppings add crunch and color. Iceberg lettuce makes a great wrap. It’s crisp and holds everything well. Cucumber adds coolness and crunch. Grated carrots bring sweetness and texture. Cilantro adds a fresh herb flavor. Lime slices give an extra zing. These toppings complete the dish and make it fun to eat. First, grab a bowl. In it, whisk together the honey, Sriracha, soy sauce, minced garlic, grated ginger, lime juice, sesame oil, salt, and black pepper. Make sure all the ingredients blend well. This mix creates a sweet and spicy sauce that packs a punch. Now, add the shrimp to the marinade. Use a spoon to coat each shrimp fully. Let them sit in the marinade for 15 to 20 minutes. This step allows the shrimp to soak up all that flavor. Next, heat a skillet over medium-high heat. Add the marinated shrimp to the skillet, but keep any leftover marinade for later. Cook the shrimp for 2 to 3 minutes on each side. They should turn pink and be cooked through. Once done, pour the reserved marinade into the skillet. Let it simmer for 1 to 2 minutes. This thickens the sauce, making it extra tasty. To put it all together, take a lettuce leaf. Fill it with a few cooked shrimp. Top with diced cucumber, grated carrots, and chopped cilantro. For a burst of flavor, squeeze fresh lime juice over the top. Serve these wraps warm for the best experience. Enjoy! To get juicy shrimp, timing and heat are key. Cook shrimp for about 2-3 minutes on each side. They should turn pink and curl slightly. Make sure your skillet is hot, but not too hot. A medium-high heat works best. Overcooking can make shrimp tough. Always check them closely to avoid this. Do you want more or less heat? You can easily adjust the Sriracha. Start with one tablespoon for a mild kick. If you love spice, try two tablespoons or more. You can also add a little honey to balance out the heat. Taste the marinade before you add the shrimp. This way, you can find your perfect spice level. Choosing the right lettuce makes your wraps fresh and fun. Iceberg lettuce is my favorite. Its leaves are crisp and hold well. Romaine is another good option if you want a bit more flavor. Butter lettuce is soft and tender, perfect for a delicate wrap. Just make sure the leaves are clean and dry. This ensures your wrap stays crunchy and tasty. {{image_2}} If you want to switch things up, try using chicken, tofu, or veggies. - Chicken: Use cooked chicken breast. Marinate the same way as shrimp. - Tofu: Choose firm tofu. Press it to remove water, then cube and marinate. - Veggies: Try bell peppers, mushrooms, or zucchini. Sauté them until tender. These swaps keep the dish fresh and fun! Adding more toppings can make your wraps even better. - Avocado: Creamy avocado adds a rich taste. - Jalapeños: For some heat, add sliced jalapeños. - Mango: Sweet mango gives a nice contrast to the spicy shrimp. Feel free to mix and match toppings to find your favorite combo! You can switch Sriracha for other sauces to change the flavor. - Chili Garlic Sauce: This gives a strong garlic flavor with heat. - Sweet Chili Sauce: This sauce offers a sweet and tangy taste. - Buffalo Sauce: For a kick, use buffalo sauce instead of Sriracha. These options let you create a new dish every time! To keep your shrimp fresh, store it properly. Place any leftover shrimp in an airtight container. Make sure it cools down to room temperature before sealing. Store the container in the fridge. Cooked shrimp can last up to three days in the fridge. Always check for any off smells before eating. When reheating shrimp, the goal is to keep it juicy. Use a skillet over medium heat. Add a splash of water or a bit of oil. This helps keep it moist. Heat for about three to four minutes, stirring gently. Avoid cooking too long, or the shrimp can become tough. If you want to save shrimp for later, freezing works well. Place the cooked shrimp in a single layer on a baking sheet. Freeze for about an hour. Once frozen, transfer the shrimp to a freezer bag. Remove as much air as possible to prevent freezer burn. To thaw, place the shrimp in the fridge overnight. For a quick thaw, run under cold water. Yes, you can prep these wraps in advance. To do this, marinate the shrimp a day before. Keep them in the fridge to soak up the flavors. You can also chop the veggies like cucumber and carrots ahead of time. Store them in airtight containers for freshness. When you're ready to eat, just cook the shrimp and assemble the wraps. This makes for a quick meal. If you need a swap for Sriracha, try these options: - Chili garlic sauce: This adds spice and a bit of garlic flavor. - Sambal oelek: A chunky chili paste that gives heat without sweetness. - Hot sauce: Any hot sauce can work, but check the heat level first. Each sauce has its own taste, so pick one that fits your liking. When buying shrimp, look for these tips: - Color: Fresh shrimp should have a clean, translucent look. Avoid any that look dull or have black spots. - Smell: Fresh shrimp should smell like the sea. If it smells strong or fishy, it’s not fresh. - Texture: The shrimp should feel firm and not sticky. If it feels mushy, skip it. Choosing the right shrimp makes your wraps taste even better. This post covered how to make delicious shrimp wraps using simple ingredients and steps. We explored the key ingredients like shrimp, honey, and Sriracha, along with fresh toppings for crunch. Cooking tips helped ensure tender shrimp and flavorful marinades. You can even adjust spice levels or swap proteins for variety. In the end, these wraps are a fun and tasty meal option. Enjoy making your own version!

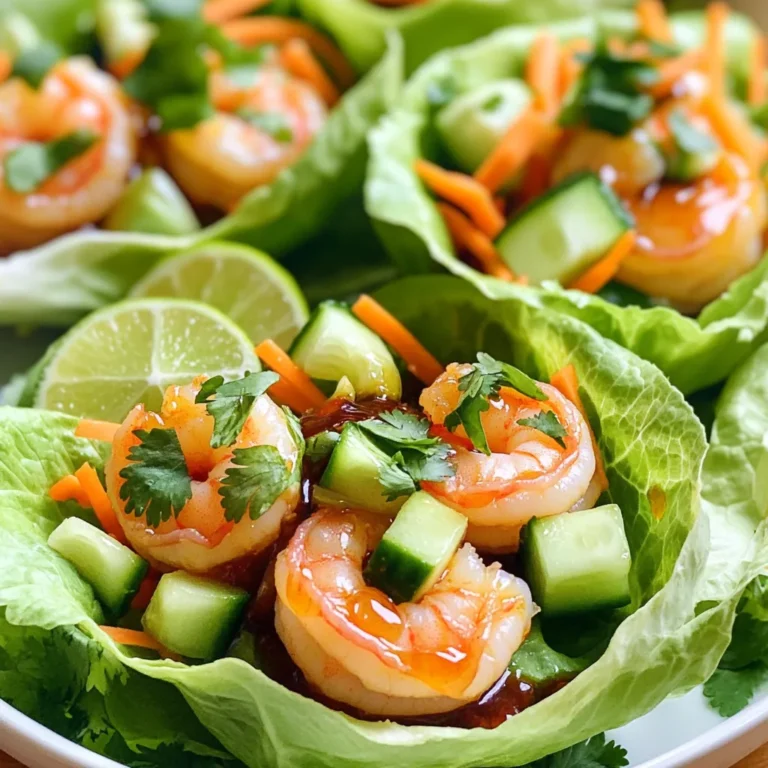
Spicy Honey Sriracha Shrimp Lettuce Wraps Delight

- 2 cups cooked pasta (fusilli or bowtie) - 1 cup cherry tomatoes, halved - 1 cup fresh mozzarella balls (bocconcini) - 1/2 cup fresh basil leaves, torn - 1/4 cup olive oil - 2 tablespoons balsamic vinegar - 1 clove garlic, minced - Salt and pepper to taste - Optional: 1/4 teaspoon red pepper flakes for a kick In this Caprese Pasta Salad, the ingredients blend to create a bright taste. You need cooked pasta, cherry tomatoes, mozzarella, and fresh basil. The pasta can be fusilli or bowtie—both work well. I love how the colors pop in this dish. The dressing is key. I whisk olive oil, balsamic vinegar, minced garlic, salt, and pepper together. If you want a little heat, add red pepper flakes. This dressing makes every bite burst with flavor. When you combine these fresh ingredients, you get a salad that is both eye-catching and delicious. It’s perfect for lunch or a picnic. Plus, it stays fresh in a mason jar. You can prepare it ahead of time and enjoy it later! To make the dressing, start with a small bowl. In it, whisk together 1/4 cup of olive oil and 2 tablespoons of balsamic vinegar. This mix adds flavor and richness to the salad. Next, add 1 clove of minced garlic, salt, and pepper to taste. If you like some spice, toss in 1/4 teaspoon of red pepper flakes. Whisk until it’s nicely blended. This dressing brings all the flavors together. In a large bowl, combine 2 cups of cooked pasta, 1 cup of halved cherry tomatoes, and 1 cup of fresh mozzarella balls. Don’t forget to add 1/2 cup of torn fresh basil leaves. These ingredients create a colorful and tasty mix. Now, pour the dressing over the salad mixture. Toss gently until everything is evenly coated. This step ensures every bite bursts with flavor. To layer your salad in the mason jar, start with a layer of the dressing at the bottom. This keeps the other ingredients fresh. Next, add the pasta mixture on top of the dressing. Pack it down slightly to create more layers. Now, add layers of cherry tomatoes and mozzarella balls. Finish with any remaining basil leaves. Seal the jar tightly and refrigerate for at least 30 minutes. This wait allows the flavors to meld beautifully. When you're ready to eat, just shake the jar to mix everything again and enjoy! To keep your Caprese pasta salad fresh, layer it right! Start with the dressing at the bottom. This keeps the other ingredients from getting soggy. Next, pack the pasta mixture on top. Add cherry tomatoes and mozzarella in layers. This helps everything stay neat and tasty. Taste is key! You can adjust the seasoning to your liking. Add more salt or pepper if you want. If you love herbs, try adding oregano or thyme. A sprinkle of fresh herbs boosts the flavor. When it's time to eat, shake the jar to mix the flavors. This makes every bite tasty. You can serve it with grilled chicken or a fresh green salad. It pairs well with crusty bread or a light soup too! {{image_2}} You can change the pasta shape to mix things up. Fusilli and bowtie pasta work well, but you can try penne or rotini too. Each shape offers a different texture and holds the sauce differently. For cheese, fresh mozzarella is a favorite. You might swap it for feta or goat cheese. Both add a unique tangy flavor that can elevate your dish. If you want more protein, grilled chicken or shrimp are great options. They add heartiness and make the salad a full meal. Just chop them into bite-sized pieces and toss them in. For a vegetarian twist, beans work wonderfully. Chickpeas or black beans add protein and a nice texture. They also blend well with the salad's flavors. Incorporating seasonal vegetables can make your salad fresh and exciting. In summer, add cucumbers or bell peppers for crunch. In fall, try roasted sweet potatoes or butternut squash for warmth. You can adapt this recipe for any occasion. For a holiday, add festive colors with red and yellow cherry tomatoes. For a picnic, keep it simple and light with just pasta and basil. Each season brings new flavors, so have fun exploring! To keep your Caprese Pasta Salad fresh, you should layer the ingredients correctly. Start with the dressing at the bottom. This keeps the pasta from getting soggy. Next, add the pasta mixture, then the tomatoes, mozzarella, and basil. Seal the jar tightly, and store it in the fridge. - Keep it cool: Always place the jars in the coldest part of your fridge. - Avoid air exposure: Make sure the lid fits snugly to keep air out. When stored correctly, your salad can last up to four days in the fridge. Always check for freshness before enjoying. - Signs it’s gone bad: Look for off-smells, slimy textures, or visible mold. If you see any of these, throw it away. Making this salad ahead of time is a smart move for busy days. You can prepare several jars at once. This makes lunch easy to grab. - Portioning: Fill each jar with enough for one meal. This way, you have a quick option ready to go. - Mixing it up: If you want a change, try adding different veggies or proteins. This keeps your meals exciting! Yes, you can. Making this salad a day ahead saves time. You get to enjoy the flavors more as they blend. To keep it fresh, store it in the fridge. Use a tight lid on the mason jar. Try to add the basil right before you serve it. This way, it stays bright and tasty. I love using fusilli or bowtie pasta. These shapes hold the dressing well and add fun to your plate. You can also use gluten-free pasta if needed. Look for shapes like gluten-free fusilli or penne. They work just as well. You can serve it warm, but it’s best cold. If you want a warm dish, try reheating the pasta before mixing. You can warm it gently on the stove or in the microwave. Mix it with the other ingredients quickly. Just remember, this salad shines when served cold. This blog post covers a vibrant pasta salad recipe that shines with fresh ingredients. You learned about the key components, the dressing, and how to layer it neatly in a mason jar. Plus, there are tips for flavor and storage. Experimenting with different ingredients can keep this dish exciting. Whether you add protein or seasonal veggies, the options are endless. Enjoy making this meal, and share it with others to brighten their day!

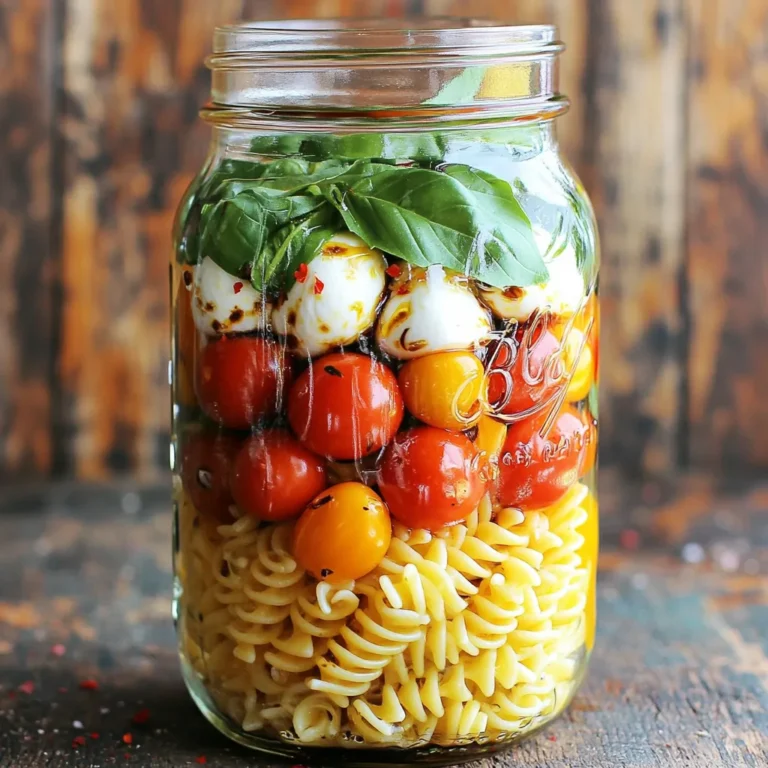
Caprese Pasta Salad Mason Jar Delightful Recipe

- 1 cup self-rising flour - 1 cup plain Greek yogurt - Cooking spray To make these bagels, I use a simple base of self-rising flour and plain Greek yogurt. Self-rising flour adds the right lift, while Greek yogurt gives moisture and flavor. The dough comes together quickly, making this recipe fun and easy. I always keep cooking spray on hand to ensure the bagels don’t stick to the air fryer. - Everything bagel seasoning - Sesame seeds - Poppy seeds While the bagels taste great on their own, toppings can take them to the next level. Everything bagel seasoning is a favorite of mine. It adds a savory crunch. Sesame and poppy seeds are also tasty options. You can sprinkle these on halfway through cooking for a delicious finish. Enjoy getting creative with the toppings! Start by taking a bowl. Add 1 cup of self-rising flour and 1 cup of plain Greek yogurt. Use a spoon to stir them together. Keep mixing until a shaggy dough forms. This means it should look a bit rough and not too smooth. If it feels too dry, you can add a little more yogurt. Next, move the dough to a floured surface. Use your hands to knead it gently for about 1 minute. You want it to feel smooth and elastic. After that, divide the dough into 4 equal pieces. Roll each piece into a log about 6 inches long. Take the ends of the log and pinch them together to make a bagel shape. Preheat your air fryer to 350°F (175°C). While it heats, lightly spray the air fryer basket with cooking spray. Place the bagels in the basket without touching each other. Now, air fry the bagels for 10 to 12 minutes. They should turn golden brown and puff up. If you want toppings, sprinkle them on the bagels after the first 5 minutes. When done, take them out and let them cool on a wire rack. Enjoy your warm bagels! To make great bagels, your dough needs to be well-kneaded. A well-kneaded dough feels smooth and elastic. You should not see any dry spots. If your dough is too sticky, sprinkle a bit of flour. Knead it in until the texture feels right. If it’s dry, add a little yogurt. Mix it in until you get that perfect balance. For air frying, set your air fryer to 350°F (175°C). Cook the bagels for 10 to 12 minutes. They should look golden brown when done. To ensure even cooking, do not overcrowd the basket. Leave space between each bagel. This helps hot air circulate and cook them evenly. These bagels are best served warm. Slice them open and spread with cream cheese. You can also add your favorite toppings. For a fun twist, try everything bagel seasoning or sesame seeds. Poppy seeds add a nice crunch too. Get creative and experiment with different flavors to find your favorite! {{image_2}} You can make your bagels even better. Try adding herbs or spices to the dough. A pinch of garlic powder or dried oregano can give a nice kick. You can also mix in some cheese for a savory twist. Don't be shy; let your taste buds guide you! Toppings make a huge difference too. After cooking for five minutes, sprinkle on everything bagel seasoning. Sesame seeds and poppy seeds are great choices as well. You can even try a sweet topping with cinnamon sugar. The options are endless! If you need gluten-free bagels, use gluten-free self-rising flour. Mix it with plain Greek yogurt as you would with regular flour. This will keep the same great taste and texture. For a vegan option, swap the Greek yogurt for a dairy-free yogurt. Make sure it has a similar texture. This way, you can enjoy a warm bagel without any animal products. Cooking should be fun and fit your needs! To keep your bagels fresh, store them in a plastic bag. Seal the bag tightly. Place it in the fridge if you plan to eat them within three days. This keeps them from drying out. If you want to save them longer, try freezing. Place bagels in a freezer-safe bag. Make sure to remove as much air as possible. They can last up to three months in the freezer. When you’re ready to eat, just pull one out. Let it thaw at room temperature or pop it in the microwave for a few seconds. To reheat bagels, use the air fryer for the best texture. Set the air fryer to 300°F (150°C). Heat the bagels for about 3-5 minutes. This brings back their crispiness. If you prefer, you can also use a toaster. Toast them on a medium setting until warm. Enjoy your bagels with cream cheese or your favorite spread! To check if your bagels are cooked, look for a golden brown color. They should feel firm to the touch. You can also tap the bottom; a hollow sound means they are done. If they need more time, return them to the air fryer for another minute or two. Always trust your eyes and ears! Yes, you can make the dough ahead of time! Store it in an airtight container in the fridge. Use it within two days for the best texture. If you want to freeze it, wrap it tightly in plastic wrap. It can last up to a month in the freezer. Just remember to thaw it in the fridge before using. If you don’t have self-rising flour, you can make your own. Combine 1 cup of all-purpose flour with 1.5 teaspoons of baking powder and a pinch of salt. Mix well before adding the Greek yogurt. This works great and gives you the same fluffy texture! In this blog post, we explored making easy bagels using just three main ingredients. You learned how to mix, knead, and cook them in an air fryer. We also shared handy tips for perfecting your dough and suggested fun toppings. Remember, you can customize your bagels to fit your taste and dietary needs. Making bagels at home is fun and creative. Try different flavors and toppings. With these steps, you can enjoy fresh bagels any time. Happy baking!

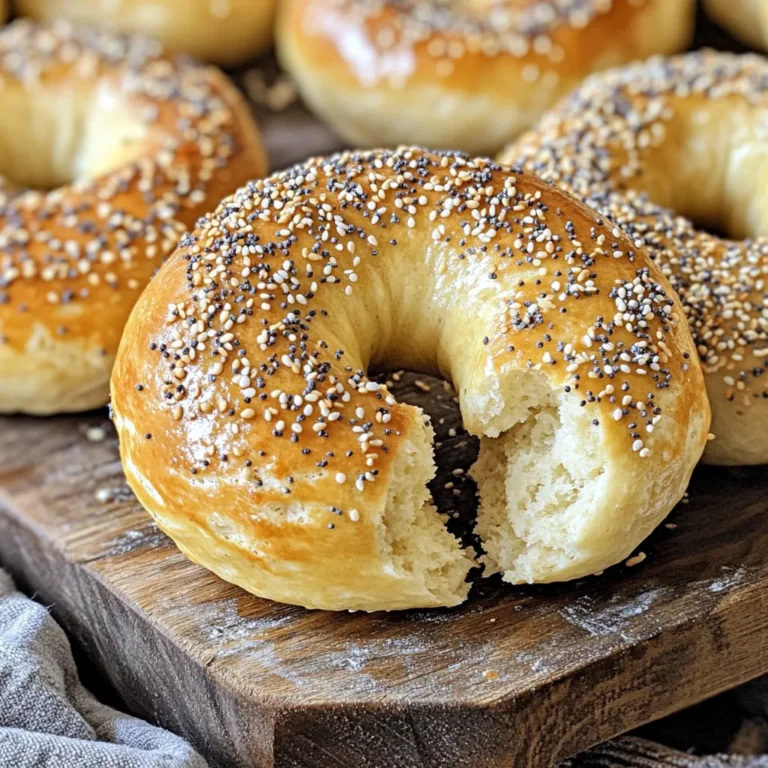
Two-Ingredient Dough Air Fryer Bagels Delight

- 12 oz (340g) pasta of choice (fettuccine or penne work great) - 2 tablespoons olive oil - 3 cloves garlic, minced - 4 cups baby spinach - 1 cup heavy cream - 1 cup vegetable broth - 1 cup grated Parmesan cheese - Zest of 1 lemon - Juice of 1 lemon - Salt and pepper to taste - Red pepper flakes (optional, for a kick) - Fresh parsley, chopped (for garnish) - 1 cup = 240 ml - 1 tablespoon = 15 ml - 12 oz = 340 g (for pasta) - 1 lemon = about 2 tablespoons juice - You can use whole wheat pasta for a healthier option. - Substitute cream with coconut milk for a dairy-free version. - Use nutritional yeast instead of Parmesan cheese for a vegan twist. - Swap baby spinach for kale or arugula if you prefer different greens. - Red pepper flakes can be replaced with fresh chili for more heat. To make creamy lemon spinach pasta, gather your ingredients first. This makes cooking easier and faster. You will need pasta, garlic, spinach, cream, broth, and cheese. Having everything ready keeps you organized. 1. Heat the oil: Use a large pot. Pour in 2 tablespoons of olive oil. Warm it over medium heat. Add 3 minced garlic cloves. Sauté for 1-2 minutes until it smells nice. Be careful not to burn the garlic. 2. Add pasta and liquids: Now, put in 12 ounces of uncooked pasta. Pour in 1 cup of vegetable broth and 1 cup of heavy cream. Stir it all together. Ensure the pasta is fully covered. 3. Simmer: Bring this mix to a simmer. Reduce the heat to low. Cover the pot and cook for about 10-12 minutes. Stir it often. This helps the pasta cook evenly. 4. Add spinach and lemon: When the pasta is almost done, add 4 cups of baby spinach. Next, add the zest and juice of 1 lemon. Mix well so everything combines. 5. Fold in cheese: Take the pot off the heat. Add 1 cup of grated Parmesan cheese. Stir until it melts and makes the dish creamy. Season with salt, pepper, and red pepper flakes if you like heat. 6. Adjust the sauce: If the sauce seems too thick, add more vegetable broth or cream. Stir well to get your desired creaminess. 7. Serve: Dish out the pasta while hot. Garnish with fresh parsley and more Parmesan if you want. Enjoy your meal! - Use heavy cream for richness. It makes the sauce smooth and thick. - Stir well when adding cheese. This helps it melt evenly. - If the sauce is too thick, add a splash of broth or cream. - Always taste before serving. Adjust salt and pepper as needed. This simple method ensures a creamy, flavorful pasta every time! When making creamy lemon spinach pasta, avoid these common errors: - Overcooking the garlic. This can make it bitter. Sauté it just until fragrant. - Incorrect pasta cooking time. Always check the package instructions for best results. - Skipping the lemon zest. This adds bright flavor. Don’t leave it out! - Adding spinach too early. Wait until the pasta is nearly done to add it. This keeps the spinach fresh. One-pot meals are quick and easy. Here are some tips: - Use a large pot. This ensures everything cooks evenly without spilling over. - Stir often. This helps the pasta cook evenly and prevents sticking. - Keep the lid on. Covering the pot helps the pasta cook faster and absorb flavors. - Adjust liquid as needed. If the sauce is too thick, add more broth or cream for balance. Want to elevate your dish? Try these flavor boosts: - Add red pepper flakes. They give a nice kick to the creamy sauce. - Incorporate fresh herbs. Basil or thyme can add depth to the flavor. - Use lemon zest and juice. They brighten the dish. Feel free to add more if you love lemon! - Experiment with cheeses. Try goat cheese or feta for a different taste. {{image_2}} You can easily make this creamy lemon spinach pasta your own. Adding proteins like grilled chicken, shrimp, or tofu boosts flavor and nutrition. For a heartier meal, try adding cooked bacon or sausage. You can also mix in more veggies, such as cherry tomatoes, bell peppers, or mushrooms. Just sauté them in the olive oil first. This gives your dish extra color and taste. If you want a vegan version, swap the heavy cream for coconut cream or cashew cream. Use nutritional yeast in place of Parmesan for a cheesy flavor. For gluten-free pasta, choose options made from rice, quinoa, or chickpeas. These swaps help everyone enjoy this dish without missing out on flavor. Feel free to experiment with different sauces. A light pesto can add a fresh twist. If you like a kick, try adding a splash of hot sauce. When it comes to cheese, you can use feta or goat cheese for a tangy flavor. Each option brings a new layer to this creamy lemon spinach pasta. To store your creamy lemon spinach pasta, let it cool to room temperature. Transfer it to an airtight container. This helps keep it fresh. Place the container in the fridge. It will last for about 3-4 days. If you want to keep it longer, consider freezing it. When you're ready to eat your leftovers, pull them from the fridge. Place the pasta in a pan over low heat. Add a splash of vegetable broth or cream to help it rehydrate. Stir gently until warmed through. You can also use a microwave. Heat it in short bursts, stirring in between. This keeps the pasta from drying out. For freezing, make sure to store the pasta in a freezer-safe container. It can last for up to 2-3 months in the freezer. When you're ready to enjoy, take it out and let it thaw in the fridge overnight. Heat it gently on the stove or in the microwave. If the sauce is too thick, add a bit more broth or cream. This will bring back its creamy texture. You can use milk or a plant-based cream. Start by mixing equal parts of milk and vegetable broth. This gives you a creamy texture without heavy cream. You can also add a bit of flour to thicken it. Just whisk it in while cooking. Yes, you can use whole wheat or gluten-free pasta. Just cook it according to the package directions. Keep an eye on the cooking time, as it may differ. Whole wheat adds a nice nutty flavor. Gluten-free pasta works well too, but it might change the texture slightly. If you lack Parmesan cheese, try nutritional yeast or another hard cheese. Pecorino Romano is a good choice and adds a salty kick. For a dairy-free option, look for vegan cheese or a mix of nuts blended into a powder. This dish can last about 3 to 4 days in the fridge. Store it in an airtight container to keep it fresh. When you reheat, add a splash of broth or water to help loosen the sauce. Enjoy your creamy lemon spinach pasta! This blog post covered all you need for creamy lemon spinach pasta. We explored ingredients, measurements, and useful swaps. I shared step-by-step cooking guidance and tips for perfect creaminess. We discussed common mistakes and best practices for one-pot meals. You learned about variations, storage, and reheating methods. Lastly, I answered important FAQs to help you succeed. Remember, cooking is fun and creative. With these tips, you can make delicious pasta that suits your taste and needs. Enjoy the journey of cooking!

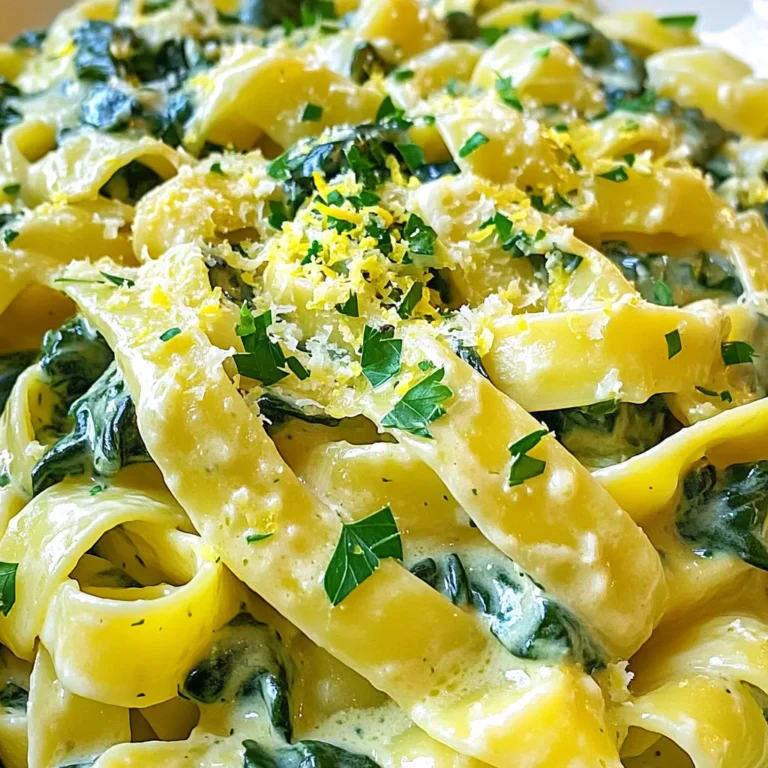
Creamy Lemon Spinach Pasta One Pot Delight

PREV 1 … 13 14 15 … 57 NEXT
flavor nest kitchen

explore

DessertsDinnerAppetizersDrinks

Our Policies

  • Cookie Policy
  • Copyright Policy
  • Disclaimer
  • GDPR Policy
  • Terms Of Use
Back to Top
  • About
  • Contact Us
  • Privacy Policy
© 2025 flavor nest kitchen