FREE DINNER EBOOK! Get your copy!
  • Cookie Policy
  • GDPR Policy
  • Disclaimer
  • Terms Of Use
  • Visit my other site: Fun Cookie Recipes
flavor nest kitchen
  • Home
  • Dinner
  • Desserts
  • Drinks
  • Appetizers
  • Contact
  • About
  • Privacy Policy
  • Home
  • Dinner
  • Desserts
  • Drinks
  • Appetizers
  • Contact
  • About
  • Privacy Policy
  • Cookie Policy
  • GDPR Policy
  • Disclaimer
  • Terms Of Use
Visit my other site: Fun Cookie Recipes

HOME / CATEGORIES /

Latest

To make delicious pumpkin cinnamon roll blondies, you need the following ingredients: - 1 cup pumpkin purée - 1 cup brown sugar - 1/2 cup granulated sugar - 1/2 cup unsalted butter, melted - 2 large eggs - 2 teaspoons vanilla extract - 1 1/2 cups all-purpose flour - 1 teaspoon baking powder - 1/2 teaspoon baking soda - 1 teaspoon ground cinnamon - 1/2 teaspoon ground nutmeg - 1/4 teaspoon salt - 1/2 cup cream cheese, softened - 1/4 cup powdered sugar - 1 tablespoon milk - 1 teaspoon vanilla extract (for frosting) Fresh pumpkin purée is key. It gives the blondies a rich flavor and moist texture. Canned pumpkin can work, but fresh often tastes better. Use pure pumpkin purée, not pumpkin pie filling. This ensures you control the sweetness and spices. You can take these blondies to the next level with a few optional add-ins: - Nuts: Chopped pecans or walnuts add crunch. - Chocolate: Swirl in dark chocolate chips for added sweetness. - Spices: Try adding ground ginger or cloves for a spicier kick. These enhancements let you customize the flavor. Mix and match to find your perfect blend. Experimenting with spices and add-ins keeps your baking fun and exciting. 1. Preheat the oven: First, set your oven to 350°F (175°C). This helps get the heat just right. 2. Prepare your pan: Grease a 9x9-inch baking dish. You can also line it with parchment paper for easy cleanup. 3. Mix wet ingredients: In a large bowl, combine 1 cup of pumpkin purée, 1 cup of brown sugar, 1/2 cup of granulated sugar, and 1/2 cup of melted butter. Whisk until it looks smooth. 4. Add eggs and vanilla: Crack 2 large eggs into the bowl. Pour in 2 teaspoons of vanilla extract. Whisk again until the mixture is smooth. 5. Mix dry ingredients: In another bowl, sift together 1 1/2 cups of all-purpose flour, 1 teaspoon of baking powder, 1/2 teaspoon of baking soda, 1 teaspoon of ground cinnamon, 1/2 teaspoon of ground nutmeg, and 1/4 teaspoon of salt. 6. Combine mixtures: Gradually fold the dry ingredients into the wet mixture. Be gentle! Mix just until you see no more flour. This keeps your blondies soft and fluffy. 1. Make the cream cheese mix: In a small bowl, blend 1/2 cup of softened cream cheese, 1/4 cup of powdered sugar, 1 tablespoon of milk, and 1 teaspoon of vanilla extract. Mix until smooth. 2. Dollop the cream cheese mix: Pour half of the blondie batter into your prepared pan. Spread it out evenly. 3. Swirl it: Spoon the cream cheese mix on top of the batter. Use a knife to gently swirl it in. Be careful not to overmix; you want a nice marbled look. 1. Pour the remaining batter: Pour the rest of the blondie batter over the cream cheese swirl. Spread it carefully to cover it completely. 2. Bake: Place the dish in the oven and bake for 25-30 minutes. Keep an eye on it! 3. Check for doneness: To see if the blondies are done, insert a toothpick into the center. If it comes out clean, they are ready. If not, bake a few more minutes. 4. Cool down: Let the blondies cool completely in the pan. This makes slicing easier. Once cool, cut them into squares and enjoy! To make the best pumpkin cinnamon roll blondies, follow these tips: - Avoid Overmixing: Mix the wet and dry ingredients just until combined. Overmixing can make your blondies tough. - Ensure Even Baking: Use an oven thermometer to check the temperature. This helps avoid underbaked or overbaked blondies. You want your blondies to look great! Here are some ideas: - How to Decorate and Serve: Dust cooled blondies with powdered sugar for a chic look. - Garnishing Ideas for a Festive Look: Add a drizzle of cream cheese frosting on top. Sprinkle cinnamon for extra flair. Pair your blondies with these tasty options: - Ideal Accompaniments for the Blondies: Serve with a scoop of vanilla ice cream or whipped cream. - Pairing with Drinks or Desserts: Enjoy with a cup of warm spiced chai or apple cider for a cozy touch. {{image_2}} You can change up the flavor of your pumpkin cinnamon roll blondies. Try adding new spices like ginger or cloves. These spices bring a warm and cozy taste to your treat. You can also experiment with frostings. For example, a maple glaze or a simple vanilla icing works great. Each option can give your blondies a fun twist. If you need gluten-free options, use almond flour or a gluten-free blend. This will keep the texture soft and moist. For a vegan version, replace the butter with coconut oil. You can use flax eggs instead of regular eggs. Mix one tablespoon of ground flaxseed with three tablespoons of water. Let this sit for a few minutes. This mix will act as a binder in your recipe. You can make these blondies more festive by adding seasonal flavors. Apples or maple syrup can enhance the taste and aroma. For a holiday theme, consider adding a sprinkle of chopped nuts or cranberries. These add both flavor and a pop of color. Enjoy these twists during fall or winter for a special treat! To keep your pumpkin cinnamon roll blondies fresh, store them in an airtight container. Make sure to let them cool completely before sealing. This prevents moisture buildup and keeps them soft. Use a glass or plastic container with a tight lid for best results. If you have a large batch, you can layer them with parchment paper to prevent sticking. If you want to save some for later, freezing is easy. Cut the blondies into squares and wrap each piece in plastic wrap. Then, place them in a freezer-safe bag or container. They can last up to three months in the freezer. When you're ready to enjoy them, let them thaw in the fridge overnight or at room temperature for a few hours. This keeps their yummy taste and texture. At room temperature, the blondies last about three days. If you store them in the fridge, they can last up to a week. To check freshness, look for any changes in smell or texture. If they feel dry or hard, it’s better to toss them. Enjoy your blondies while they are fresh for the best taste! You can check if your blondies are done by looking for a few signs. First, the edges should be slightly golden brown. The center should look set and not jiggly. Use a toothpick to test the middle. If it comes out clean or with just a few moist crumbs, they are ready. If it has wet batter on it, bake for a few more minutes. Be careful not to overbake, as they can get dry. Yes, you can use canned pumpkin. Canned pumpkin is often more convenient. It can save time and effort. However, fresh pumpkin can give a slightly different taste and texture. Fresh pumpkin may also have more moisture. If you use canned, make sure it is pure pumpkin and not pumpkin pie filling, which has added sugar and spices. Absolutely! You can make these blondies a day or two ahead of time. Just let them cool completely and store them in an airtight container. This helps keep them fresh. If you want to make them even earlier, you can freeze them. Wrap the cooled blondies tightly in plastic wrap, then place them in a freezer bag. They will stay good for up to three months. When ready to serve, thaw them in the fridge overnight. You now have all the tools to make delicious Pumpkin Cinnamon Roll Blondies. From the essential ingredients to baking tips, each step improves your results. Using fresh pumpkin purée brings out the best flavors. Remember, you can tweak the recipes with nuts or extra spices. These blondies are perfect for any season. Store them well and enjoy their taste for days. Baking can be fun and creative. Get ready to impress everyone with your tasty treats!

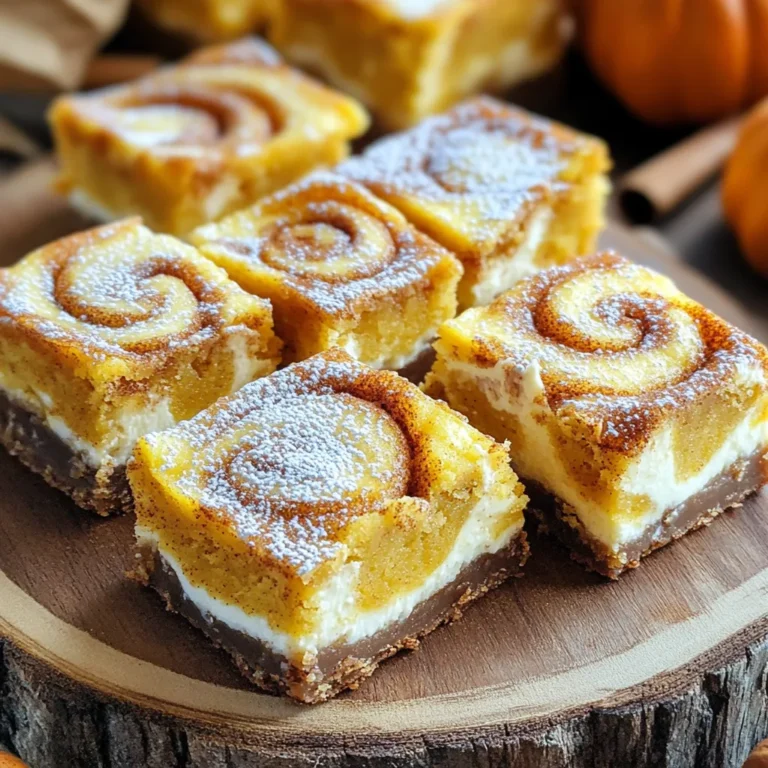
Pumpkin Cinnamon Roll Blondies Sweet and Spicy Treat

- 2 large Granny Smith apples, thinly sliced - 1 cup heavy cream - 1/2 cup powdered sugar - 1 teaspoon vanilla extract - 8 ounces cream cheese, softened - 1/2 cup caramel sauce (store-bought or homemade) - 12 graham crackers - 1 teaspoon ground cinnamon - Chopped pecans or walnuts - Mixing bowls - 9x9 inch square dish - Hand mixer or whisk Gathering the right ingredients and tools is key to making your Caramel Apple Icebox Cake shine. I love using Granny Smith apples for their tartness. It balances the sweet caramel perfectly. Heavy cream, powdered sugar, and vanilla extract create a delightful whipped cream. Cream cheese adds a rich layer to the cake. Don’t forget the caramel sauce; it’s the star of the show! For a fun twist, consider adding chopped pecans or walnuts on top. They bring a nice crunch. When it comes to equipment, you’ll need mixing bowls for your cream and filling. A 9x9 inch square dish is perfect for layering. Use a hand mixer or whisk to whip your cream to soft peaks. This cake is easy to make with these simple tools and ingredients. To start, grab a mixing bowl. Add 1 cup of heavy cream, 1/2 cup of powdered sugar, and 1 teaspoon of vanilla extract. Use a hand mixer or whisk to mix them well. Beat until you see soft peaks form. This step is key for a light and airy whipped cream. Soft peaks mean the cream holds its shape but is not too stiff. Set this bowl aside for later. Next, take another bowl and whip 8 ounces of softened cream cheese until it is smooth. This ensures a creamy base for your filling. Gradually pour in 1/2 cup of caramel sauce while mixing. Stir until the caramel and cream cheese blend well. This creates a rich and sweet filling. After that, fold in the whipped cream from earlier. Mix gently to keep the fluffiness. Now you have a delicious caramel cream filling. Now, it’s time to put it all together. Lay four graham crackers in a single layer at the bottom of a 9x9 inch square dish. Spread one-third of the caramel cream mixture on top, smoothing it evenly. Slice 2 large Granny Smith apples thinly and layer half over the cream. Sprinkle with half of 1 teaspoon of ground cinnamon for flavor. Repeat this by adding another layer of four graham crackers, another third of the cream, the rest of the apples, and cinnamon. Finish with the last layer of graham crackers and top with the remaining caramel cream. Cover the dish with plastic wrap and place it in the fridge for at least 4 hours, or overnight if you can wait! This helps the graham crackers soften. To get the best flavor, start with the right apples. I love using Granny Smith apples for their tartness. This balance makes the cake tasty and fresh. The next tip is chilling time. Allowing the cake to chill for at least four hours helps the flavors blend. If you can, let it chill overnight for even better taste. Softening the graham crackers is key for a great texture. You want them to absorb the cream without being too soggy. Lay the crackers flat and press down gently when layering. Using fresh ingredients is also important. Fresh cream cheese and cream give the best flavor and texture. It makes your cake light and fluffy. Presentation matters! When serving, cut the cake into neat squares. Place each piece on a dessert plate for a nice touch. Drizzling extra caramel sauce on top adds visual appeal. It makes the cake look delicious and inviting. You can also sprinkle a bit of cinnamon on top to enhance the look and flavor. Garnishing with chopped nuts can give it a nice crunch too. {{image_2}} You can change the apples in this recipe. Instead of Granny Smith, use Honeycrisp or Fuji apples. These types add a sweeter taste. You can also try pears for a different flavor. They will mix well with caramel. You can switch up the cream cheese too. Try using a flavored cream cheese, like strawberry or vanilla. This adds a new layer of taste to your cake. Want to spice things up? Add nutmeg or ginger. Just a pinch will make a big difference. These warm spices pair well with apples and caramel. You can also add chocolate or peanut butter. Use chocolate chips or a swirl of peanut butter in the cream. Both options make this cake even more delicious. Serve this cake with whipped cream or vanilla ice cream. Both options add creaminess and balance the sweetness. For special occasions, make it festive! Add sprinkles or a drizzle of chocolate. You can also use seasonal fruits on top. For fall, try adding cranberries or pecans for a lovely touch. To keep your Caramel Apple Icebox Cake fresh, use an airtight container. A glass dish with a tight lid works great. If you want to keep it in the original dish, cover it tightly with plastic wrap. This helps keep the cake moist and tasty for days. You can freeze portions of the cake if you have leftovers. Cut the cake into squares before freezing. Wrap each piece in plastic wrap, then place them in a freezer bag. This way, you can enjoy a slice anytime. To thaw, place the frozen cake in the fridge overnight. This keeps it from becoming soggy. The cake stays good in the fridge for about four days. After that, the texture may change. Watch for signs of spoilage, like a sour smell or watery filling. If you notice these, it's best to toss the cake. Enjoy your sweet treat while it’s still fresh! Yes, you can make this cake a day in advance. This gives the flavors time to blend. To prepare, follow the recipe and cover the dish tightly with plastic wrap. Store it in the fridge. This keeps the cake fresh and helps the graham crackers soften. If you make it early, you can enjoy your time with guests. Just remember to drizzle more caramel on top before serving! Making caramel sauce is easy! Here’s a quick recipe: - Ingredients: - 1 cup granulated sugar - 6 tablespoons unsalted butter - 1/2 cup heavy cream - 1 teaspoon vanilla extract - Pinch of salt - Instructions: 1. In a medium saucepan, heat the sugar over medium heat. Stir it often until it melts and turns golden. 2. Add the butter and stir until melted. 3. Slowly pour in the heavy cream, stirring constantly. 4. Remove from heat and add vanilla and salt. Let it cool before using. This caramel sauce is perfect for drizzling on your cake! If you want a different crust, try these options: - Digestive biscuits: These are similar in texture and flavor. - Vanilla wafers: They add a nice sweetness. - Butter cookies: These provide a rich taste. Use these options when you want to change things up or can’t find graham crackers. Each will bring its own charm to your cake! In this post, I shared how to create a delicious dessert using Granny Smith apples, whipped cream, and cream cheese. I walked through each step, from making the filling to assembling the cake. Remember to choose fresh ingredients for the best flavor and texture. Don't hesitate to try different fruits or spices to make it your own. With the right storage, you can enjoy this treat longer. Enjoy your cooking adventure and impress your friends and family with this sweet delight!

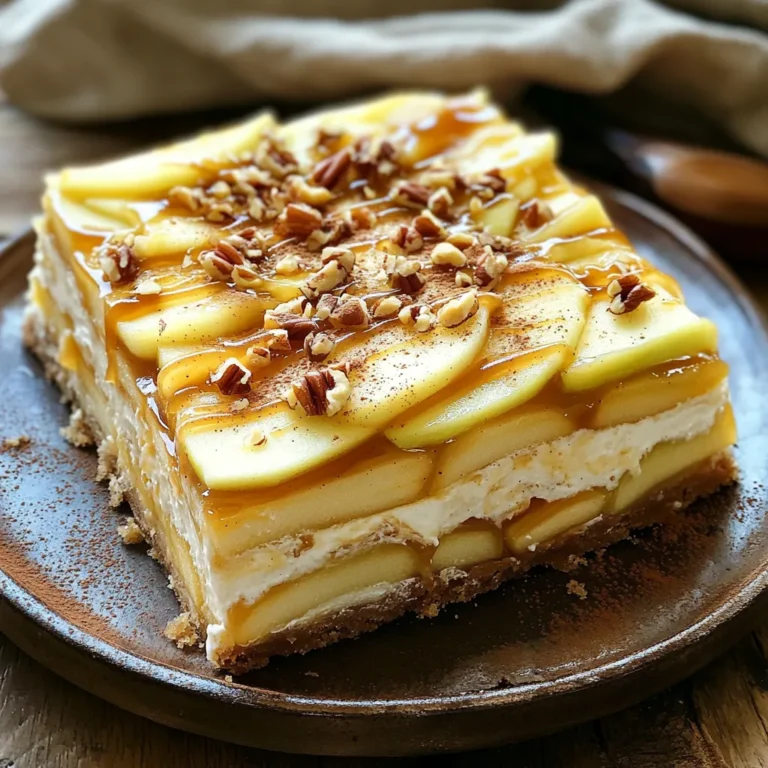
Caramel Apple Icebox Cake Quick and Easy Recipe

To make Air Fryer Garlic Parmesan Green Beans, you will need: - 1 pound fresh green beans, trimmed - 2 tablespoons olive oil - 4 cloves garlic, minced - 1/4 teaspoon red pepper flakes (optional) - 1/2 teaspoon salt - 1/4 teaspoon black pepper - 1/3 cup grated Parmesan cheese - 1 tablespoon lemon juice - Fresh parsley, chopped (for garnish) You can swap some ingredients if needed. For olive oil, you might use avocado oil. If you want less cheese, try using nutritional yeast for a dairy-free option. Instead of fresh garlic, garlic powder works in a pinch. Want more heat? Increase the red pepper flakes. You can also replace Parmesan with any hard cheese you like, such as Pecorino Romano. Fresh green beans are the best choice for this recipe. Look for bright green beans that snap easily. Avoid any that are limp or have brown spots. If you can, buy organic beans for better flavor and freshness. You can also use thin green beans, like haricots verts, for a more delicate dish. Always trim the ends before cooking to remove any tough parts. First, set your air fryer to 375°F (190°C). Preheating helps cook the green beans evenly. It only takes a few minutes for the fryer to get hot. Next, grab 1 pound of fresh green beans. Trim the ends off each bean. In a big bowl, mix the green beans with 2 tablespoons of olive oil. Add 4 cloves of minced garlic, 1/4 teaspoon of red pepper flakes (if you like spice), 1/2 teaspoon of salt, and 1/4 teaspoon of black pepper. Toss everything well so the beans are coated. Now, spread the green beans in a single layer in the air fryer basket. Cook them for 8-10 minutes. Halfway through, shake the basket to make sure they cook evenly. You want the green beans to be tender and a little crispy. Once done, take them out and sprinkle 1/3 cup of grated Parmesan cheese on top while they are hot. Drizzle with 1 tablespoon of lemon juice and toss gently. You can garnish with fresh parsley for a nice touch. Enjoy your crunchy green beans! To get those green beans crispy, use fresh beans. Trim the ends and dry them well. Toss the beans in olive oil and spices. This helps them cook evenly. The air fryer works best at 375°F. Cook for 8 to 10 minutes. Shake the basket halfway to ensure all sides get that crunch. The key is not to overcrowd the basket. This allows hot air to flow freely. Fresh, crisp beans are worth the wait. Garlic and cheese are stars in this dish. You can change the flavor by using different cheeses. Try using Asiago or Pecorino for a twist. For a spicy kick, add more red pepper flakes. You can also mix in some lemon zest. This adds a bright pop that pairs well with garlic. Feel free to experiment with herbs too. Basil or thyme can enhance the flavor even more. These green beans shine as a side dish. They pair well with grilled chicken or fish. You can also serve them with pasta for a full meal. Top with chopped fresh parsley for color. If you want to impress, use a sprinkle of lemon zest. This adds a fresh taste and bright look. They also work great on a holiday table. Everyone loves a veggie that tastes so good! {{image_2}} You can mix things up with different seasonings. Try adding lemon zest for a bright kick. A sprinkle of smoked paprika gives a nice depth. For a spicy twist, use chili powder or cayenne pepper. Herbs like thyme or oregano can add a fresh taste too. Experiment with the flavors you love! To make this dish heartier, add protein. Grilled chicken or shrimp pairs well with green beans. You can also toss in cooked sausage or bacon bits. These additions will add flavor and make your meal more filling. Just ensure the protein cooks through in the air fryer. Feel free to add other veggies to your mix. Carrots and bell peppers roast well alongside green beans. You can also try zucchini or broccoli for a colorful plate. Just cut them to similar sizes for even cooking. This way, you get a medley of flavors and textures! To store leftovers, let the green beans cool down. Place them in an airtight container. Keep the container in the fridge. The beans will stay fresh for about 3 days. When you’re ready to eat, you can reheat the green beans. Use the air fryer for the best results. Set it to 350°F (175°C). Heat for about 5 minutes. This helps keep them crispy. You can also use a microwave, but they may lose some crunch. Freezing the green beans is possible, but they may change texture. First, blanch them in boiling water for 2 minutes. Then, cool them in ice water right away. Drain and pat dry. Place them in a freezer bag. They can last for up to 3 months in the freezer. When ready, cook them straight from frozen or thaw before using. Yes, you can use frozen green beans. They cook well in an air fryer. Just add a few extra minutes to the cooking time. Check for doneness as you go. The best air fryer temperature for vegetables is 375°F (190°C). This heat cooks them well, making them tender and crispy. To make this recipe vegan, skip the Parmesan cheese. You can use nutritional yeast for a cheesy flavor. It adds a nice taste without dairy. Green beans are done when they are tender and slightly crispy. They should be bright green and not mushy. A quick taste test helps too! Yes, you can prepare the green beans ahead of time. Toss them with oil and spices, then store in the fridge. Cook them in the air fryer when ready to serve. In this blog post, we explored how to make tasty air-fried green beans. We covered key ingredients, preparation steps, and useful tips. You can enjoy different flavors by trying new seasonings or adding protein. Proper storage and reheating tips help keep leftovers fresh. Air frying gives a great crunch and is simple for anyone to do. Now, you can make delicious green beans that fit your tastes perfectly. Enjoy experimenting and sharing these easy recipes with others!

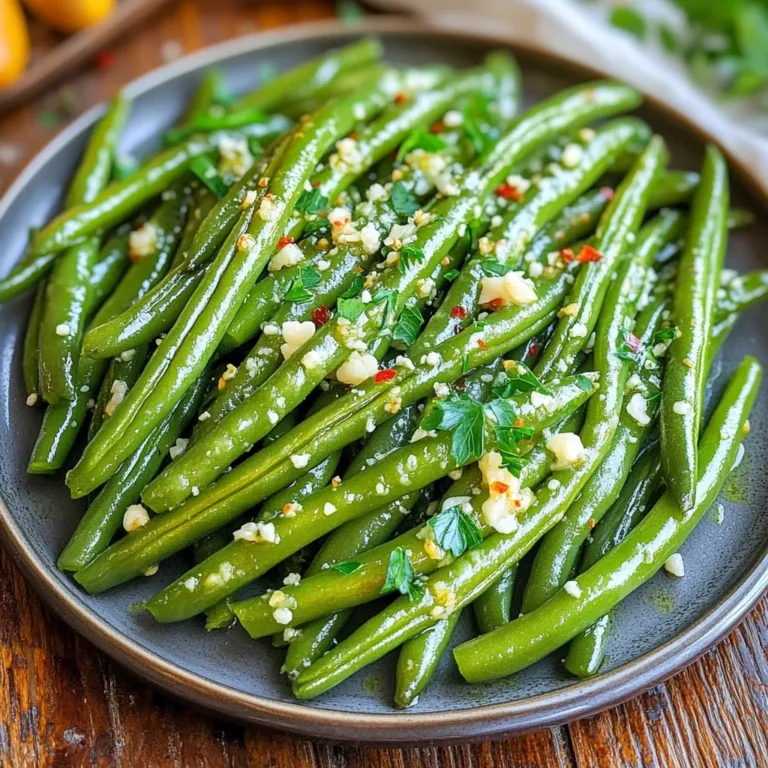
Air Fryer Garlic Parmesan Green Beans Quick and Crunchy

- 1 pound Italian sausage (or turkey sausage) - 1 medium onion, diced - 3 cloves garlic, minced - 1 can (15 oz) pumpkin puree - 4 cups chicken broth - 1 cup heavy cream - 1 teaspoon dried thyme - 1 teaspoon dried sage - ½ teaspoon nutmeg - 1 teaspoon salt - ½ teaspoon black pepper - Grated Parmesan cheese for serving To make this soup a true delight, you need some key ingredients. Start with one pound of Italian sausage or turkey sausage. This gives the soup a hearty base and a nice flavor. Next, add one medium onion, diced, and three cloves of minced garlic. These aromatics bring warmth and richness to your dish. The star of the show is one can of pumpkin puree. It adds creaminess and a lovely orange hue. For the broth, you'll use four cups of chicken broth to create a savory backdrop. Then, stir in one cup of heavy cream for that extra touch of richness. Herbs are essential, so don’t forget one teaspoon of dried thyme and one teaspoon of dried sage. These will elevate your soup's taste and aroma. For seasoning, use ½ teaspoon of nutmeg, one teaspoon of salt, and ½ teaspoon of black pepper. Adjust these to your liking. Lastly, for serving, consider adding grated Parmesan cheese. It melts beautifully and adds a great finish to each bowl. Enjoy the process and watch as your kitchen fills with amazing scents! First, take 1 pound of Italian sausage. Remove the casing and place it in a skillet. Cook it over medium heat until it browns. Use a spoon to break it apart as it cooks. This should take about 5 to 7 minutes. Once it is browned, transfer the sausage to your slow cooker. This step adds great flavor to the soup. Next, in the same skillet, add 1 medium diced onion and 3 cloves of minced garlic. Sauté them until they soften, which takes about 3 to 4 minutes. This will create a lovely base for your soup. After they are ready, add them to the slow cooker with the sausage. The aroma at this point is wonderful. Now, stir in the star of the show: 1 can of pumpkin puree. Then, add 4 cups of chicken broth and 1 cup of heavy cream. It’s time to add flavor too. Sprinkle in 1 teaspoon each of dried thyme and dried sage, along with ½ teaspoon of nutmeg. Finally, season with 1 teaspoon of salt and ½ teaspoon of black pepper. Mix everything well until it is combined. Cover the slow cooker and set the cooking time. You can choose to cook it on low for 6 to 8 hours or on high for 3 to 4 hours. About 30 minutes before you serve, add 1 package of gnocchi and 2 cups of roughly chopped spinach to the soup. Stir gently and let it cook until the gnocchi is tender. To adjust the seasoning of your soup, start with the basics. Taste the soup before serving. If it needs more zing, add a dash of salt or pepper. You can also try a squeeze of lemon juice. This helps balance the flavors and adds a nice acidity. If you use fresh herbs, add them at the end for a burst of flavor. Cooking gnocchi properly is key. If you cook it too long, it can get mushy. I recommend adding the gnocchi about 30 minutes before you serve. This way, it cooks just right. For the spinach, add it at the same time as the gnocchi. This keeps it bright and fresh, adding color to your soup. Garnishing makes a big difference. Top your soup with fresh parsley and a sprinkle of grated cheese. This adds a nice touch and makes it look appetizing. Consider serving the soup with crusty bread. It’s perfect for dipping and makes your meal feel cozy. Enjoy your delightful soup! {{image_2}} You can make this soup fit your needs. For a gluten-free option, choose gluten-free gnocchi. Many brands offer great choices. Look for ones made from rice flour or chickpeas. If you want a vegetarian version, swap the Italian sausage for mushrooms or lentils. Both add a hearty texture. You can also use veggie broth instead of chicken broth. Want to switch things up? You can replace Italian sausage with chicken sausage or even a spicy sausage. This change adds a different flavor. For a milder taste, use turkey sausage. Feel free to use other greens instead of spinach. Kale or Swiss chard work well. These greens add nutrition and taste. Just chop them roughly and stir them in. To make your soup pop, add spices like cayenne or paprika. These spices will give it a little kick. Start with a small amount and adjust to your taste. You can also try different herbs. Rosemary or basil can bring fresh flavors. Consider adding them toward the end of cooking. This helps keep their flavor bright and vibrant. To store your soup, let it cool first. Place it in an airtight container. You can keep it in the fridge for 3 to 4 days. Make sure to check for any odd smells before eating. If it smells fine, it should taste great too! You can freeze this soup for longer storage. Pour the cooled soup into freezer-safe bags. Remove as much air as possible before sealing. The soup can last up to 3 months in the freezer. When you are ready to eat, thaw it overnight in the fridge. To reheat, warm it slowly on the stovetop. This helps keep the texture right. If you use the microwave, do it in short bursts. Stir often to avoid hot spots. The best way to reheat is on the stovetop. Pour the soup into a pot, and heat it over medium heat. Stir it often to keep it smooth. If you prefer the microwave, use a safe bowl. Heat it for 1 to 2 minutes, stirring at each minute. This way, it warms evenly. Always taste before serving to check the flavor. Enjoy your cozy soup again! Yes, you can make this soup ahead of time. It tastes even better the next day. To prepare, follow the main steps and let it cool. Then, store it in a sealed container in the fridge. You can keep it there for up to three days. When ready to eat, just reheat on the stove. Stir occasionally until warm. This soup pairs well with many sides. Here are a few ideas: - Crusty bread: Perfect for dipping into the soup. - Green salad: A fresh salad can balance the rich flavors. - Garlic knots: These add a nice touch and flavor. - Cheesy breadsticks: These are great for a fun twist. Absolutely! Homemade gnocchi can make your soup even more special. If you use homemade, cook it fresh. Add it to the soup about 30 minutes before serving. This keeps it tender and delicious. If you use store-bought, follow the same steps. Just adjust the cooking time if needed. Homemade adds a personal touch that I know you'll love! This blog post explored a delicious Pumpkin Sausage Gnocchi Soup. We discussed key ingredients, including sausage, pumpkin puree, and cream. You learned how to cook the soup step by step and tips for flavor and texture. Moreover, we shared variations for dietary needs and ingredient swaps. Finally, we covered storage and reheating tips. Enjoy making this savory dish. It’s easy, comforting, and perfect for any meal.

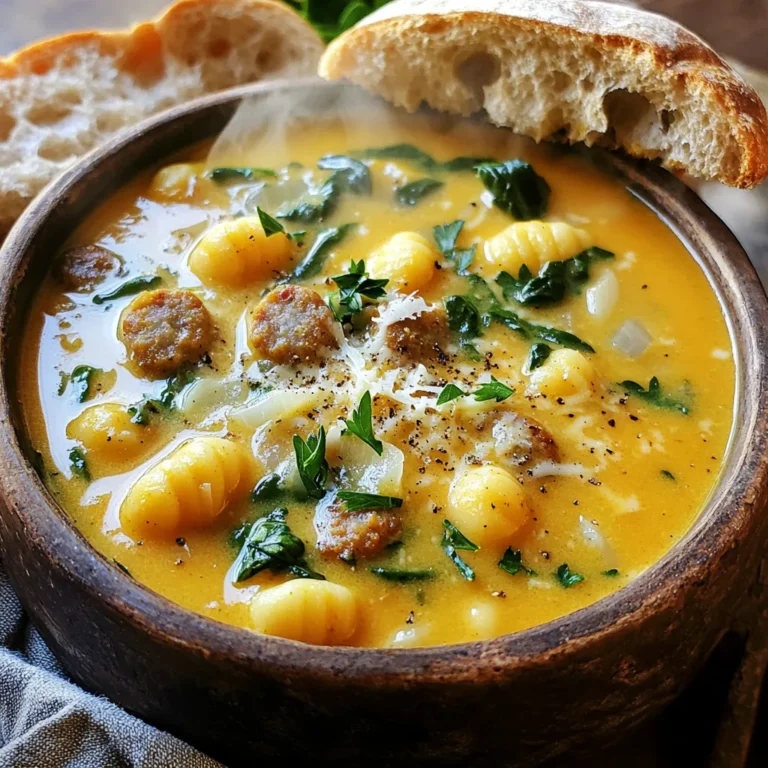
Pumpkin Sausage Gnocchi Soup Slow Cooker Delight

- 4 boneless, skinless chicken thighs - 2 cups Brussels sprouts, halved - 1 cup baby carrots - 1 bell pepper, sliced (any color) - 1 red onion, cut into wedges For the marinade, you will need: - 1/4 cup pure maple syrup - 3 tablespoons Dijon mustard - 1 tablespoon olive oil - 2 cloves garlic, minced - 1 teaspoon fresh rosemary, chopped (or 1/2 teaspoon dried) - 1 teaspoon smoked paprika - Salt and pepper to taste - You can swap vegetables based on what you have. Try zucchini, sweet potatoes, or green beans. - Feel free to add herbs like thyme or oregano. A pinch of cayenne adds heat. - To serve more people, double the chicken and veggies. - For fewer servings, halve the recipe. This dish is easy to scale up or down. First, you need to preheat your oven to 425°F (220°C). This high heat helps cook everything quickly and gives the chicken a nice crust. Next, prepare the marinade. In a medium bowl, whisk together 1/4 cup of pure maple syrup, 3 tablespoons of Dijon mustard, 1 tablespoon of olive oil, 2 minced garlic cloves, 1 teaspoon of chopped fresh rosemary, 1 teaspoon of smoked paprika, and a pinch of salt and pepper. Mix it well until you have a smooth blend. To marinate properly, take 4 boneless, skinless chicken thighs and place them in a large resealable bag or bowl. Pour half of your marinade over the chicken. Make sure each piece is well coated. Seal the bag or cover the bowl tightly. Let the chicken marinate in the fridge for at least 30 minutes. If you want more flavor, you can let it sit for up to 2 hours. While the chicken marinates, prep your veggies. Take 2 cups of halved Brussels sprouts, 1 cup of baby carrots, 1 sliced bell pepper, and 1 red onion cut into wedges. In a large bowl, toss the veggies with the remaining marinade. Make sure they are evenly coated. For even cooking, cut the vegetables into similar sizes. This way, they will cook at the same rate. Now it’s time to arrange your dish on the sheet pan. Line a large sheet pan with parchment paper for easy clean-up. Place the marinated chicken on one side of the pan. Spread the veggies on the other side in a single layer. Avoid crowding them to ensure even cooking. Place the pan in your preheated oven and roast everything for 25 to 30 minutes. The chicken should reach an internal temperature of 165°F (74°C) and the veggies should be tender and caramelized. You may want to broil them for the last 2-3 minutes to add extra crispiness. Once everything is cooked, let the dish rest for about 5 minutes before serving. This helps the juices settle. For a beautiful presentation, you can serve directly from the sheet pan or transfer it to a large platter. Drizzle any remaining pan juices over the dish for added flavor. Garnish with fresh herbs for a pop of color. Enjoy your meal! To make the marinade even better, add some orange juice or a splash of soy sauce. These flavors give a nice twist. You can also try adding a bit of ginger for warmth. Balancing sweetness and tang is key. Use more mustard if you like it tangy, or more maple syrup if you prefer sweetness. To ensure even cooking, cut the veggies to a similar size. This helps them roast at the same rate. Place the chicken and veggies in a single layer on the sheet pan. Use a meat thermometer to check the chicken. The safe internal temperature is 165°F (74°C). This step keeps your meal safe and tasty. For easy sheet pan clean-up, line your pan with parchment paper. It catches drips and makes washing up simple. After cooking, let the pan cool before washing. For storage, use airtight containers. Store leftovers in the fridge for up to three days. This keeps your meal fresh and ready to enjoy again. {{image_2}} You can switch the chicken thighs for other meats. Try turkey thighs for a leaner choice. They cook similarly, so the recipe works well. You could also use chicken breasts. Just remember, they cook faster. So keep an eye on them. For a vegetarian option, use tofu or tempeh. Marinate them just like the chicken. They soak up the flavors well. Another choice is chickpeas; they are hearty and filling. Using seasonal veggies can change the dish's taste. In spring, try asparagus or snap peas. They add a fresh crunch. In summer, use zucchini or cherry tomatoes for bright colors. In the fall, sweet potatoes or butternut squash are perfect. They bring sweetness and warmth. For winter, consider root veggies like parsnips or rutabagas. They roast beautifully and add depth. Spices can really change this dish. Try adding cumin for a warm flavor. Or use curry powder for a fun twist. If you like heat, add red pepper flakes for a kick. You can also play with sauces. Instead of maple syrup, try honey or agave. For a tangy twist, mix in balsamic glaze or soy sauce. Each option gives a unique flavor to your meal. To keep your Maple Mustard Chicken and veggies fresh, store them in an airtight container. This helps lock in flavor and moisture. Place the container in the fridge. Your leftovers will last for about three to four days. For meal prep, you can freeze the chicken and veggies. Let them cool before packing. Use freezer bags or containers for best results. Label them with the date. When ready to eat, thaw them overnight in the fridge. Reheat in the oven at 350°F (175°C) until warmed through. Don't let your leftovers go to waste! Toss leftover chicken into salads or wraps. You can also make a tasty stir-fry with any extra veggies. If you have leftover marinade, use it to create a dipping sauce or glaze for your next dish. Yes, you can use frozen chicken thighs. First, thaw them safely in the fridge overnight. If you're short on time, use the cold water method. Place the chicken in a sealed bag and submerge it in cold water. Change the water every 30 minutes until thawed. Once thawed, marinate the chicken as the recipe directs. Marinate for at least 30 minutes for the best flavor. If you have time, marinate for up to 2 hours. This dish pairs well with a variety of sides. Consider serving it with: - Brown rice or quinoa for a hearty base. - Garlic bread for a crunchy addition. - A fresh green salad for a light touch. - Mashed potatoes for comfort food lovers. These sides will complement the sweet and tangy flavors of the chicken. Check the chicken's internal temperature using a meat thermometer. It should read 165°F (74°C). If you don't have a thermometer, look for these signs of doneness: - The juices should run clear when pierced. - The meat should no longer be pink near the bone. - The chicken should feel firm to the touch. Make sure to test the thickest part of the thigh. Yes, you can prepare this dish in advance. Marinate the chicken and chop the veggies a day before. Store them in the fridge until you're ready to cook. This saves time on busy days. You can also cook the entire dish ahead of time. Just reheat it in the oven at 350°F (175°C) until warmed through. Absolutely! The sweet maple and tangy mustard mix appeal to many kids. If your child prefers milder flavors, reduce the Dijon mustard. You can also swap the veggies for their favorites, like peas or corn. The easy prep makes this recipe fun to cook together as a family. This recipe for Maple Mustard Chicken shows how easy tasty meals can be. We covered key ingredients, marinating tips, and cooking steps. I shared ways to customize flavors and prep for larger servings. Remember, cooking should be fun. Use fresh veggies and spices to make each dish unique. With practice, you’ll create meals your family will love. Now, grab your ingredients and start cooking! Enjoy your delicious creation!

Maple Mustard Chicken & Veggies Sheet Pan Delight

- 2 cups all-purpose flour - 1 cup sugar - 1 tablespoon baking powder - 1/2 teaspoon baking soda - 1/2 teaspoon salt - 3/4 cup unsalted butter, melted - 2 large eggs - 1 cup buttermilk - 2 cups apples, peeled and diced (preferably Granny Smith) - 1 teaspoon cinnamon - 1/2 teaspoon nutmeg The base of our muffins is all-purpose flour. It gives structure and lightness. Sugar adds sweetness and helps with browning. Baking powder and baking soda are key for rising, making our muffins fluffy. Unsalted butter provides rich flavor and moisture. Eggs bind the ingredients and add fluffiness. Buttermilk makes the muffins tender and adds tang. Apples give a juicy burst with each bite. The spices, cinnamon and nutmeg, add warmth and depth. - 1/2 cup all-purpose flour - 1/4 cup brown sugar - 1/2 teaspoon cinnamon - 1/4 cup cold unsalted butter, cubed The streusel topping is a delightful crunch. All-purpose flour and brown sugar create a sweet base. Cinnamon adds that cozy flavor we love. Cold butter helps form crumbly pieces that sit atop our muffins. - 1 cup powdered sugar - 2 tablespoons milk - 1/2 teaspoon vanilla extract The glaze is the finishing touch. Powdered sugar gives sweetness and smoothness. Milk thins the glaze for easy drizzling. Vanilla adds a lovely extra flavor. Together, they create a shiny layer over warm muffins. First, preheat your oven to 375°F (190°C). This step is key for a great bake. Next, grease your muffin tin or use paper liners. This will help the muffins pop out easily. In a large bowl, whisk together the dry ingredients. You will need 2 cups of all-purpose flour, 1 cup of sugar, 1 tablespoon of baking powder, 1/2 teaspoon of baking soda, and 1/2 teaspoon of salt. In another bowl, mix the wet ingredients. Combine 3/4 cup of melted unsalted butter, 2 large eggs, and 1 cup of buttermilk. Make sure it’s well mixed. Now, it’s time to bring it all together! Gradually add the wet mixture into the dry ingredients. Stir gently until just combined. Be careful not to overmix, as this can make your muffins dense. Next, fold in the diced apples. Use 2 cups of peeled and diced Granny Smith apples for the best flavor. Also, add 1 teaspoon of cinnamon and 1/2 teaspoon of nutmeg. These spices give your muffins a warm, cozy taste. To make the streusel topping, mix together 1/2 cup of all-purpose flour, 1/4 cup of brown sugar, and 1/2 teaspoon of cinnamon in a small bowl. Then, add 1/4 cup of cold unsalted butter, cubed. Use a fork or pastry cutter to mix until it looks like coarse crumbs. This topping will add a crunchy texture to your muffins. Fill each muffin cup about 2/3 full with the apple batter. Then, sprinkle a generous amount of the streusel topping over each muffin. Place your muffin tin in the preheated oven. Bake for 18 to 20 minutes. Check for doneness by inserting a toothpick into the center of a muffin. If it comes out clean, they are ready! While the muffins bake, prepare the glaze. In a bowl, whisk together 1 cup of powdered sugar, 2 tablespoons of milk, and 1/2 teaspoon of vanilla extract until smooth. Once the muffins cool for about 5 minutes, drizzle the glaze over them. This adds a sweet finish that ties everything together. To make light and fluffy muffins, use room temperature ingredients. This helps the batter mix well and rise properly. Also, combine your dry ingredients in one bowl and wet ingredients in another. When you mix them, stop as soon as they come together. Overmixing makes muffins dense and tough. You can add fun extras to your muffins. Try mixing in nuts, like walnuts or pecans, for crunch. Dried cranberries or blueberries add a sweet twist. You can also change the sweetness. If you like it less sweet, reduce the sugar. For more spice, add a pinch of ginger or cloves. Serving your muffins well makes them more inviting. Place them on a rustic wooden board for a nice touch. Garnish with thin apple slices and a sprinkle of cinnamon. When drizzling the glaze, use a spoon or squeeze bottle for control. A light drizzle creates a beautiful finish and makes them look amazing! {{image_2}} You can switch up the flavor of your muffins easily. Try using different apples, like Honeycrisp or Fuji. These apples add a sweet twist. You can also add citrus zest to your batter. A bit of lemon or orange zest brightens the flavor. This small change makes a big difference. If you need a gluten-free option, you can make simple swaps. Use a gluten-free flour blend instead of all-purpose flour. Most blends work well in muffins. Just be sure to check that the blend includes xanthan gum for texture. This way, everyone can enjoy your tasty muffins without worry. For a vegan version, replace eggs and buttermilk easily. Instead of eggs, use flaxseed meal mixed with water. This mix binds the ingredients well. For buttermilk, try almond milk with a splash of vinegar. Let it sit for a few minutes to curdle. This makes a perfect vegan-friendly muffin that tastes just as good! To keep your apple streusel muffins fresh, store them at room temperature. Place the muffins in an airtight container. This will keep them soft. They will stay fresh for about three days. If you want to keep them longer, refrigerate them. This will extend their life to about a week. Just remember, refrigeration can make muffins a bit dry. Freezing is a great option if you want to save muffins for later. First, cool the muffins completely. Then, wrap each muffin tightly in plastic wrap. You can also use aluminum foil. Place the wrapped muffins in a freezer bag. Make sure to remove as much air as possible. This will help avoid freezer burn. Your muffins can last up to three months in the freezer. When you’re ready to eat them, take out what you need. Reheat them in the oven at 350°F (175°C) for about 10 minutes. This will warm them up nicely. The shelf life of your apple streusel muffins depends on how you store them. At room temperature, they last for about three days. In the fridge, they will stay fresh for about a week. If frozen, they can last up to three months. Always check for any signs of spoilage before eating. Look for mold or an off smell. If everything seems good, enjoy your delicious muffins! Yes, you can use other fruits! Some great options include: - Pears - Peaches - Berries - Bananas These fruits work well in muffins. Just remember to adjust the sugar based on their sweetness. To check if your muffins are done, use a toothpick. Insert it into the center of a muffin. If it comes out clean, your muffins are ready. Generally, baking takes about 18-20 minutes. Keep an eye on them to avoid overbaking! You can easily replace buttermilk. Here are some options: - Milk with a splash of vinegar or lemon juice - Yogurt (diluted with water) - Almond milk or soy milk with vinegar These substitutes give a similar tangy flavor and moisture. Yes, you can make the batter ahead of time! Mix it and store it in the fridge for up to 24 hours. Just give it a gentle stir before you bake. If you store it longer, the leavening agents may lose their power, affecting the muffins' rise. Apple streusel muffins are easy and fun to make. You need the right ingredients, like apples, flour, and spices. Following step-by-step instructions helps ensure success. You can customize these muffins with nuts or other fruits. Remember to store them properly for freshness. Overall, these muffins are not just tasty; they are versatile. Enjoy baking and sharing these delightful treats with others. Your kitchen will be filled with warm, sweet smells that everyone loves. Happy baking!

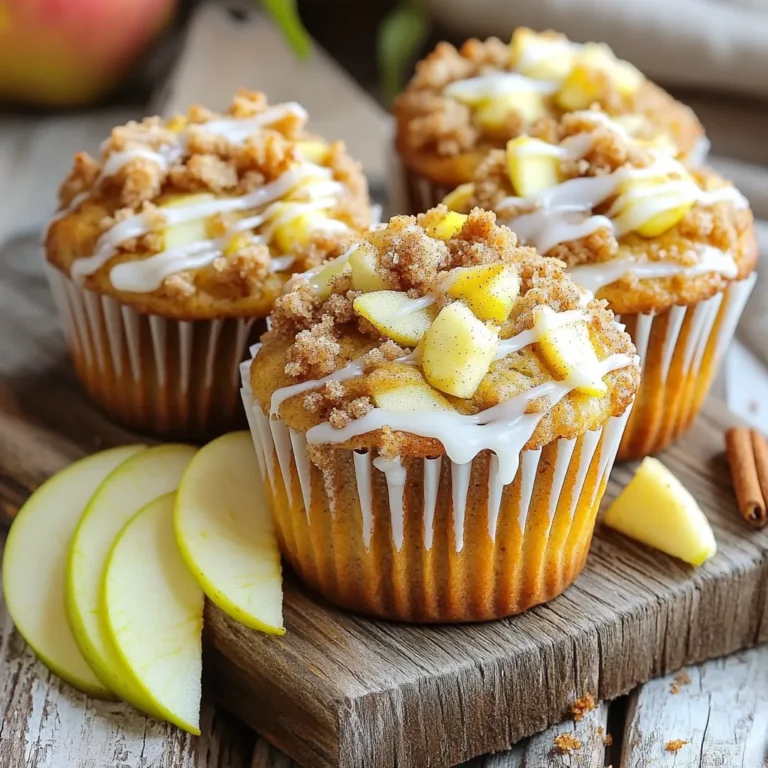
Irresistible Apple Streusel Muffins with Glaze Bakery

- 1 lb beef sirloin, thinly sliced against the grain - 3 cloves garlic, minced - 1-2 red chilies, sliced (adjust to your spice preference) - 1 red bell pepper, sliced - 1 green bell pepper, sliced - 1 medium onion, sliced - 2 tablespoons soy sauce - 1 tablespoon sesame oil - 1 tablespoon vegetable oil - 1 tablespoon cornstarch - 1 teaspoon ground black pepper - Salt to taste - Chopped green onions for garnish - Cooked rice or noodles for serving When you gather your ingredients, focus on freshness. Choose bright bell peppers and firm beef. The garlic and chilies add a punch, so pick the right heat level for you. If you love spice, go for two chilies. For a milder dish, stick with one. Using quality soy sauce and sesame oil will enhance the flavor. The cornstarch helps tenderize the beef and gives it a nice texture. This mix of ingredients makes for a quick, tasty dish. You can change the veggies if you like. Just keep the main flavors in mind. To start, take your beef sirloin and slice it thinly against the grain. This helps keep it tender. In a bowl, mix the beef with cornstarch, ground black pepper, and a pinch of salt. Toss the beef well, so it gets coated. Set it aside for about 10 minutes. This marinating step helps to create a nice texture. While the beef marinates, it’s time to get the veggies ready. Slice the red and green bell peppers into strips. Next, slice the onion and the chilies. For the garlic, mince it finely. Having all your veggies prepped makes cooking quick and easy. Heat a large skillet or wok over high heat. Add vegetable oil and wait until it shimmers. Now, add the marinated beef in a single layer. Let it sear for 2 to 3 minutes without stirring. This gives it a good brown crust. Then, stir-fry the beef for about 2 to 3 more minutes until it’s mostly cooked. Next, push the beef to one side of the skillet. Add the minced garlic and sliced chilies to the other side. Sauté them for about 30 seconds until they smell great. Then, add the sliced bell peppers and onion. Stir everything together and cook for another 2 to 3 minutes until the veggies are tender-crisp. Finally, drizzle soy sauce and sesame oil over the stir-fry. Toss everything together to coat it well. Cook for one more minute. Remove from heat and serve hot over cooked rice or noodles. Garnish with chopped green onions for freshness. Enjoy your meal! High heat is key to a great stir fry. It helps the beef brown nicely, sealing in the juices. Start by heating your skillet or wok until it shimmers. This shows it's hot enough. When you add the beef, don’t stir it right away. Let it sear for 2-3 minutes. This creates a tasty crust. Once you see that brown color, then stir it. The perfect sear makes a big difference in taste. You can change the spice level easily. If you like it hot, use more chilies. For a milder dish, use fewer. I suggest starting with one chili and tasting as you go. You can always add more later. Remember, the heat builds, so go slow. Your taste buds will thank you for this control. Soy sauce and sesame oil are your best friends. Use soy sauce for umami flavor. It adds saltiness and depth. Sesame oil gives a nutty taste. Add it at the end to keep its flavor bright. A little goes a long way, so start with one tablespoon. Mix well to coat all the ingredients. This balance creates a delicious dish that sings with flavor. {{image_2}} You can easily swap beef for chicken or tofu in this recipe. Both options work well. For chicken, use thinly sliced chicken breast or thigh. If you choose tofu, pick firm tofu. Press it to remove water, then cut it into cubes. The cooking time may vary slightly. Chicken usually takes about the same time as beef. Tofu cooks faster, so stir-fry until golden. This way, you can enjoy different flavors while keeping the same great taste. Feel free to mix up the veggies in your stir-fry. You can add broccoli, snap peas, or carrots. These vegetables add color and nutrients. If you want a sweeter taste, try adding sliced snow peas or baby corn. You can also substitute the bell peppers with zucchini or mushrooms. Just remember to adjust the cooking time based on the vegetables you choose. Stir-fry until they're tender but still crisp for the best texture. Serve garlic chili beef stir-fry over cooked rice or noodles. You can use jasmine rice, brown rice, or whole wheat noodles. For a low-carb option, try cauliflower rice or zucchini noodles. Adding a side of steamed veggies or a fresh salad can enhance your meal. For extra flavor, drizzle some extra soy sauce or chili oil on top. Garnish with chopped green onions for a fresh touch. This makes the dish look bright and inviting. To store leftovers, let the stir fry cool down first. Use an airtight container to keep the flavors fresh. This meal lasts up to three days in the fridge. When ready to eat, just take it out and reheat. The best way to reheat this dish is in a skillet. Heat it on medium until warm. Stir it well to heat evenly. You can also use a microwave. Place it in a bowl, cover it, and heat in short bursts. Stir between each burst for even warmth. Yes, you can freeze garlic chili beef stir fry. Place it in a freezer-safe container. It keeps well for up to three months. When you want to eat it, thaw it in the fridge overnight. Reheat it in a skillet for the best taste. This dish is quick! It takes just 15 minutes from start to finish. You spend 5 minutes prepping the ingredients and 10 minutes cooking. The fast cooking time makes this meal perfect for busy nights. Yes, you can! Use gluten-free soy sauce instead. Brands like Tamari work well and taste great. Just swap it in for regular soy sauce. This small change keeps the flavor while making it safe for gluten-free diets. This stir fry pairs well with cooked rice or noodles. You can also serve it with steamed broccoli or a fresh salad. These sides add color and balance to your meal. Enjoy your tasty and quick dinner! This article covered how to make garlic chili beef stir-fry. We explored main ingredients like beef sirloin, garlic, and chilies. You learned about key vegetables and seasonings. I shared step-by-step instructions for preparing your dish. You also discovered tips for cooking and storing leftovers. Always feel free to adjust spice levels to fit your taste. With a few changes, you can create your version. Whether you choose beef, chicken, or tofu, enjoy the meal you made. Happy cooking!

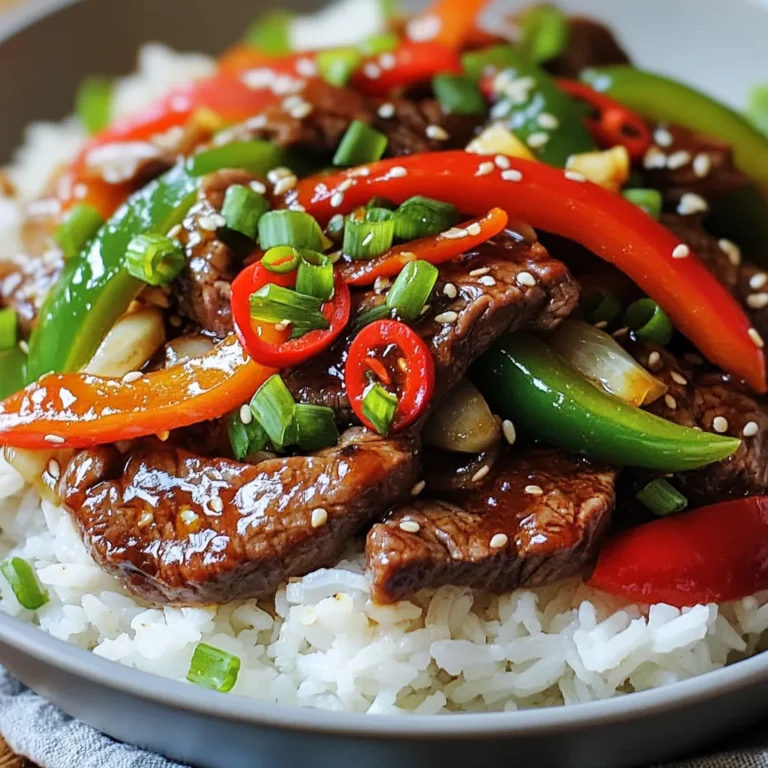
Garlic Chili Beef Stir Fry 15 Minutes Fast Recipe

- 1 pound ground beef - 1/2 cup breadcrumbs - 1/4 cup grated Parmesan cheese - 1 large egg, beaten - 2 cloves garlic, minced - 2 tablespoons fresh parsley, chopped - Salt and pepper to taste - 1/2 cup honey - 1/2 cup soy sauce (or coconut aminos) - 1 tablespoon rice vinegar - 1 teaspoon sesame oil - 1 teaspoon fresh ginger, grated - 1/4 teaspoon red pepper flakes (optional) I love using simple ingredients to create big flavors. For these meatballs, ground beef is the star. It gives a rich taste and great texture. I use breadcrumbs to bind everything together and add a little crunch. The grated Parmesan cheese adds a savory kick. The beaten egg helps hold the meatballs together, ensuring they stay juicy. Now for the flavor! Garlic is a must. I always use fresh garlic for the best taste. Fresh parsley brightens everything up. I season with salt and pepper to enhance the natural flavors. The honey gives a sweet touch, while soy sauce adds depth and umami. If you're looking for gluten-free, use coconut aminos instead. Rice vinegar, sesame oil, and ginger bring a lovely balance. The optional red pepper flakes add a hint of heat if you like spice. This blend of ingredients makes every bite unforgettable. - Combine the ground beef, breadcrumbs, Parmesan cheese, beaten egg, minced garlic, fresh parsley, salt, and pepper in a large mixing bowl. - Mix everything together until it’s well combined. You want to see no dry spots. - Roll the mixture into meatballs about one inch in diameter. Make sure they are uniform in size for even cooking. - Place the meatballs in a single layer on a baking sheet. This step helps if you want to chill them before cooking. - In a separate bowl, mix the honey, soy sauce, rice vinegar, sesame oil, grated ginger, and red pepper flakes if you like some heat. - Stir until everything is blended. This sauce brings the sweet and savory flavors together. - Place the rolled meatballs into the slow cooker. - Pour the honey garlic sauce over the meatballs. Ensure each meatball gets a good coat of sauce. - Cover the slow cooker and set it to cook on low for 6 hours or on high for 3 hours. This slow cooking makes them tender and flavorful. To make great meatballs, size matters. Ensure each meatball is about one inch. This helps them cook evenly. If they are all the same size, they will finish at the same time. Chilling the meat mixture is another smart trick. Pop it in the fridge for about 30 minutes. This makes the mixture easier to handle. You will find it less sticky and easier to roll into perfect balls. Your slow cooker needs a good cover. It helps keep moisture in. Without a tight cover, your meatballs may dry out. Also, use the low setting. Cooking on low for about six hours gives the best flavor. The meatballs soak up the sauce, making them tender and tasty. Serve these meatballs with rice or noodles. They soak up the sauce well and make a great pair. You can also add some glazed veggies for color and nutrition. For a nice touch, garnish with fresh parsley and sesame seeds. This adds a pop of color and some crunch. Your dish will look as good as it tastes! {{image_2}} You can switch up the meat to suit your needs. Ground turkey or chicken makes a leaner option. These meats still pack flavor but cut down on fat. If you prefer a vegetarian version, try using plant-based meat. This way, you can enjoy the same great taste without the meat. Looking for extra flavor? Adding crushed pineapple gives a sweet twist to your meatballs. The honey and pineapple blend well together. For those who like some heat, incorporate sriracha into the sauce. A little goes a long way, so start small and taste as you go. If you need a gluten-free option, it's easy to make those swaps. Use gluten-free breadcrumbs in your meat mixture. This keeps the texture just right. For the sauce, substitute soy sauce with coconut aminos. This keeps the flavor but removes the gluten. Enjoy these tasty meatballs without worry! After enjoying your slow cooker honey garlic meatballs, store any leftovers in an airtight container. This keeps the meatballs fresh and prevents them from drying out. You can store them in the refrigerator for up to 3 days. Just make sure they're cooled down before sealing them up. Freezing cooked meatballs is easy and great for meal prep. First, let the meatballs cool completely. Then, place them in a single layer on a baking sheet. Freeze them for about 1 hour. Once they are firm, transfer the meatballs to a freezer-safe bag or container. They will last for about 3 months in the freezer. When you’re ready to eat, just thaw them in the fridge overnight. To reheat, place them in a pan on low heat with a bit of sauce to keep them moist. Make a big batch of these honey garlic meatballs for quick meals. They are perfect for busy weeknights. Pair them with steamed rice or noodles for a complete meal. You can also serve them with fresh veggies or a salad for added color and nutrition. These meatballs are versatile and can work in wraps or sandwiches too! Slow cooker honey garlic meatballs last about 3 to 4 days in the fridge. Store them in an airtight container. Keeping them sealed helps keep them fresh. Ensure they cool down before you put them away. If you notice any odd smell or color, it’s best to toss them out. Yes, you can cook frozen meatballs in a slow cooker. Just make sure to add extra cooking time. I recommend cooking them on low for 8 hours or high for 4 hours. This ensures they heat all the way through. Always check that the meatballs reach 165°F for safe eating. You can serve honey garlic meatballs with many tasty sides. Here are some great ideas: - Steamed rice - Noodles or spaghetti - Glazed vegetables - Salad with a light dressing - Mashed potatoes These pairings complement the sweet and savory flavor of the meatballs well. Enjoy your meal! To sum up, this blog post covered how to prepare delicious slow cooker honey garlic meatballs. We discussed the main ingredients and shared step-by-step instructions. Remember to keep your meatballs uniform for even cooking and season them well. You can make healthy swaps and store leftovers efficiently. With these tips, your meals will be tasty and easy. Enjoy crafting your perfect dish!

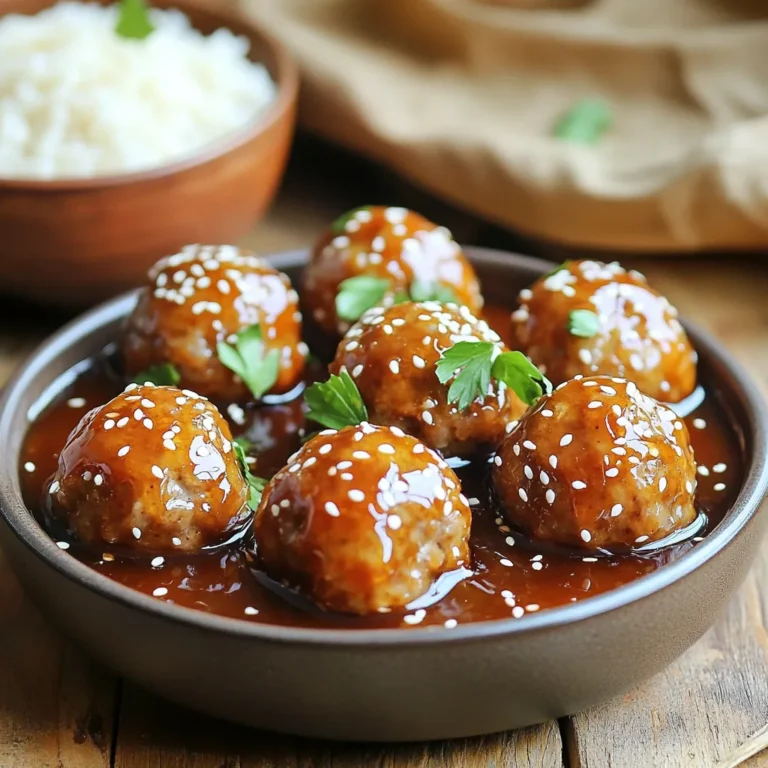
Slow Cooker Honey Garlic Meatballs Easy and Flavorful

- Chicken and Marinade Ingredients - 4 boneless, skinless chicken breasts - 1 cup buttermilk - Coating Ingredients - 1 cup panko breadcrumbs - 1/2 cup grated Parmesan cheese - 2 tablespoons ranch seasoning mix - 1 teaspoon garlic powder - 1 teaspoon onion powder - 1 teaspoon smoked paprika - 1/2 teaspoon salt - 1/2 teaspoon black pepper - Vegetables and Seasonings - 2 cups broccoli florets - 2 cups baby carrots - 2 tablespoons olive oil - Fresh parsley, chopped (for garnish) To make this dish, start with fresh, high-quality chicken. The buttermilk makes the chicken tender and flavorful. The panko breadcrumbs add a nice crunch. Using grated Parmesan gives a rich taste. For the veggies, I love using broccoli and baby carrots. They hold up well in the oven and get nicely roasted. Olive oil helps them cook perfectly. You can also add fresh parsley at the end for a pop of color and freshness. This recipe is easy to adapt. You can swap in other veggies or proteins based on your taste. Just remember to keep the cooking times in mind for each ingredient. Enjoy your cooking journey! Marinating Process Start by marinating the chicken breasts in buttermilk. This step makes the chicken tender and juicy. Use a deep bowl and make sure the chicken is fully submerged. Let it sit for at least 30 minutes. For best results, marinate overnight in the fridge. This extra time allows more flavor to soak in. Coating the Chicken with Breadcrumb Mixture Once marinated, take the chicken out. Let the excess buttermilk drip off. In another bowl, mix panko breadcrumbs, grated Parmesan, ranch seasoning, garlic powder, onion powder, smoked paprika, salt, and black pepper. Stir well to combine everything. Dredge each chicken piece in the breadcrumb mix. Ensure every part is coated well. This coating will create a nice crispy crust when baked. Tossing Veggies with Olive Oil and Seasonings Next, grab your broccoli and baby carrots. In a separate bowl, toss these veggies with olive oil, salt, and pepper. Make sure they are evenly coated. This step adds flavor and helps them roast nicely. Arranging on Sheet Pan Now it's time to arrange the chicken and veggies on the sheet pan. Place the breaded chicken on one side. Spread the tossed veggies on the other side. This keeps them from overlapping, ensuring even cooking. Oven Temperature and Timing Preheat your oven to 425°F (220°C). Once preheated, place the sheet pan in the oven and bake for 25-30 minutes. The high heat will help everything cook fast and evenly. Checking for Doneness To check if the chicken is done, use a meat thermometer. The internal temperature should reach 165°F (74°C). The chicken should look golden brown. The veggies will be tender and slightly caramelized. If everything looks good, it’s time to take it out! Overnight vs. Quick Marinade Marinating chicken is key for taste. You can marinate for 30 minutes, but overnight gives best flavor. The longer soak helps chicken absorb the buttermilk. This makes it juicy and tender. Flavor Enhancements Want more flavor? Add fresh herbs like thyme or rosemary to your marinade. You can also squeeze in lemon juice. This adds a zesty kick. Ensuring Even Coating For a crisp crust, coat chicken well. Dip in buttermilk first, then cover it in the breadcrumb mix. Press the crumbs gently to stick. This way, every bite is crunchy. Substitutions for Breadcrumbs Out of panko? Use crushed crackers or cornflakes instead. They give a nice crunch too. Gluten-free? Try almond flour or gluten-free breadcrumbs. Ideal Vegetable Combinations Broccoli and carrots work great together. You can add bell peppers or zucchini for more color and taste. Just remember to cut them evenly for even cooking. Tips for Tenderness and Flavor Toss veggies in olive oil well. This helps them roast nicely. Season with salt and pepper for flavor. If you want more, sprinkle garlic powder or Italian herbs. This makes them taste amazing! {{image_2}} You can switch chicken breasts for thighs. Thighs stay moist and add rich flavor. You can also use tofu for a plant-based choice. Press and cube the tofu before marinating. For seafood lovers, fish like salmon works well. It cooks fast and pairs great with ranch flavors. Feel free to change the veggies based on what’s in season. Zucchini, bell peppers, or asparagus can add color and taste. You can also mix in sweet potatoes for a sweet touch. For extra flavor, add garlic cloves or cherry tomatoes. They roast well and bring brightness to the dish. Experiment with different seasonings to change the flavor. Try taco seasoning for a spicy kick. You can also swap the ranch mix for Italian herbs. For a twist, brush the chicken with a teriyaki sauce. This adds a sweet and savory taste. Each variation brings new life to this easy sheet-pan meal. - Refrigeration Guidelines Allow the chicken and veggies to cool. Place them in an airtight container. Store in the fridge. They will stay fresh for up to three days. - Best Practices for Freezing To freeze, let the dish cool completely. Use freezer-safe bags or containers. Label them with the date. They can last up to three months in the freezer. Thaw in the fridge before reheating. - Oven vs. Microwave The oven gives the best results. Preheat to 350°F (175°C). Place the chicken and veggies on a baking sheet. Heat for about 15-20 minutes. The microwave is quicker but may not keep the texture. Heat on medium for 2-3 minutes. Check to make sure it’s warm throughout. - How Long It Lasts in the Fridge In the fridge, the dish lasts for three days. Always check for freshness before eating. If it smells off, throw it away. - Signs of Spoilage Look for changes in color or texture. If the chicken feels slimy or the veggies are mushy, discard them. Always trust your senses; if in doubt, don’t eat it. To check if your chicken is done, use a meat thermometer. The chicken should reach an internal temperature of 165°F (74°C). This ensures it is safe to eat. Look for clear juices when you cut into the chicken. If the juices run clear, your chicken is cooked. Yes, you can prepare this recipe ahead. Marinate the chicken in buttermilk the night before. This adds great flavor and tenderness. Keep the marinated chicken in the fridge until you are ready to bake. For veggies, you can chop and toss them with oil and spices ahead of time too. You can serve this dish with various sides. Some tasty options include: - Rice or quinoa - Mashed potatoes - Garlic bread - A fresh salad For sauces, consider ranch dressing or a tangy vinaigrette. These pair nicely with the flavors. Now you know how to make Sheet-Pan Parmesan Ranch Chicken with Veggies. We covered all the key ingredients, steps, and helpful tips. From the marinating process to the right baking time, you have the tools you need. Don't forget the variations and storage info to keep meals fresh. You can explore different proteins, veggies, and flavors. Whether for a busy night or meal prep, this recipe fits perfectly. Enjoy your cooking journey and create delicious meals with ease.

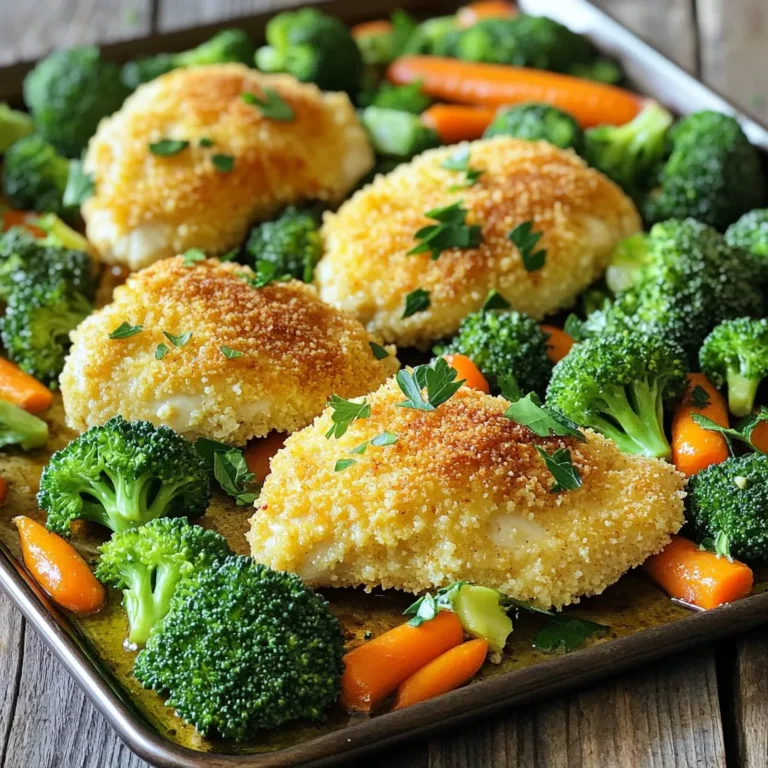
Sheet-Pan Parmesan Ranch Chicken and Veggies Delight

- 8 oz rice noodles - 2 tablespoons sesame oil - 1 tablespoon fresh ginger, grated - 2 garlic cloves, minced - 1 cup sugar snap peas, trimmed - 1 cup bell peppers, thinly sliced (any color) - 1 small cucumber, julienned I love using rice noodles in this dish. They cook quickly and soak up flavors well. Sesame oil adds a rich taste and aroma. Fresh ginger gives a warm, zesty kick, while garlic enhances the overall flavor. Sugar snap peas add a nice crunch, and colorful bell peppers bring vibrancy. The cucumber cools everything down and adds freshness. - ¼ cup soy sauce (or tamari) - 1 tablespoon rice vinegar - 1 teaspoon honey or maple syrup The sauce is simple but packed with flavor. Soy sauce or tamari forms the base, giving umami. Rice vinegar adds a tangy note. A touch of honey or maple syrup balances the saltiness with sweetness. This mix creates a perfect sauce for the noodles. - Sesame seeds - Fresh cilantro - Chopped green onions Garnishes make the dish pop. Sesame seeds add a nutty flavor and crunch. Fresh cilantro brightens the bowl. Chopped green onions bring a mild onion taste and a lovely green color. These small touches elevate your noodle bowl to a new level. To start, bring a large pot of water to a boil. This should take just a few minutes. Once the water is boiling, add the rice noodles. Cook them according to the package instructions, which is usually around 4 to 6 minutes. Timing is key here! After cooking, drain the noodles in a colander. Rinse them under cold water to stop the cooking process. This step helps keep them from becoming mushy. While the noodles cook, grab a small bowl for the sauce. In the bowl, whisk together the soy sauce, rice vinegar, honey or maple syrup, and sesame oil. Combine these flavors well. This sauce adds a rich taste and a hint of sweetness to the dish. The balance of flavors makes this noodle bowl so good! Next, heat a large skillet or wok over medium-high heat. Add a splash of sesame oil. Once the oil is hot, toss in the grated ginger and minced garlic. Stir for about 30 seconds. You want to smell that yummy aroma! Then, add the sugar snap peas and bell peppers. Stir-fry these veggies for about 3 to 4 minutes. They should be tender but still bright in color. Now it’s time to mix it all together! Add the cooked noodles to the skillet with the vegetables. Pour the sauce over the noodles and veggies. Toss everything together until well coated. Heat this mixture for about 2 to 3 minutes. This step ensures that every bite is full of flavor. When you’re ready to serve, divide the noodle bowl mixture into deep dishes. Top each bowl with julienned cucumber and chopped green onions. A sprinkle of sesame seeds adds a nice touch. If you love herbs, add fresh cilantro for extra flavor. For a special finish, drizzle a little sesame oil on top and maybe add a lime wedge on the side. This makes the dish pop! - Prepping ingredients in advance: Gather all your ingredients before starting. It makes cooking quick and fun. Chop the veggies and measure the sauces first. This way, you can cook without pausing. - High-heat cooking tips: Use a hot pan for stir-frying. This keeps the veggies crisp. When the oil shimmers, add the ginger and garlic. Stir them quickly for the best flavor. - Adding spice or heat: If you like heat, add red pepper flakes or sriracha. Start with a tiny amount and taste as you go. This helps you find your perfect level of spice. - Alternative sauces for variety: Try different sauces like hoisin or peanut sauce. These can change the flavor profile. You can also mix soy sauce with lime juice for a fresh twist. - Stylish serving suggestions: Use deep bowls for serving. Drizzle some sesame oil on top for a shiny finish. A few sesame seeds sprinkled on top make it look fancy. - Creative bowl assembly: Layer the noodles first, then add veggies. Top with cucumber and green onions. This makes each bowl look colorful and inviting. Add a lime wedge on the side for a pop of color. {{image_2}} For those needing gluten-free options, rice noodles are perfect. They cook quickly and taste great. If you want a different texture, try zucchini noodles or spiralized carrots. These swaps bring new flavors and keep your dish fresh. You can also change the vegetables. Use seasonal veggies for a lively dish. Try broccoli, snap peas, or bell peppers. If you find asparagus or bok choy, toss them in for a crunchy bite. The more colors on your plate, the better! Adding protein makes your meal heartier. Tofu is a great choice. Cube firm tofu and sauté it until golden. For a meaty option, shrimp adds a nice touch. Just cook shrimp for 2-3 minutes until they turn pink. Chicken is another good pick. Cook diced chicken in the pan until it’s no longer pink. Adjust your cooking time based on the protein you choose. Tofu cooks fast, while chicken needs a bit longer. Make sure everything is cooked through before serving. You can customize the flavor by playing with sweetness or saltiness. If you like it sweet, add a bit more honey or maple syrup. For a savory touch, increase the soy sauce. You can also change the sauce ingredients. Add a splash of orange juice for zest, or mix in some chili paste for heat. If you want a richer flavor, sesame paste can deepen the taste. These small adjustments make your noodle bowls unique and fun! To store leftovers, place the noodle bowls in an airtight container. Make sure to cool the dish to room temperature first. This way, it stays fresh for up to three days. Keep the garnishes, like cucumber and green onions, separate. This keeps them crunchy and bright. For best practices, label your containers with the date. This helps you track freshness. Store the bowls in the fridge, away from strong-smelling foods. This keeps the flavors intact. To reheat, use the microwave or a skillet. If using the microwave, heat in short bursts. Stir between each burst to avoid overcooking. If using a skillet, add a splash of water to steam the noodles. This keeps them moist and tender. Use glass or silicone containers for storage. These materials hold heat well and are easy to clean. Yes, you can freeze the noodle bowls! However, it’s best to freeze them before adding fresh veggies. To freeze, let the dish cool completely. Then, place it in a freezer-safe container. To thaw, move the container to the fridge overnight. When you're ready to eat, reheat as mentioned above. Adding fresh veggies after reheating adds crunch and flavor. This recipe is quick! It takes about 10 minutes to prep and 10 minutes to cook. You can have a delicious meal ready in just 20 minutes. Keep the rice noodles cooking time in mind, as they usually need 4-6 minutes. Rinsing them under cold water helps stop the cooking. Yes, you can easily make this dish vegetarian or vegan! To keep it vegetarian, just use honey in the sauce. For a vegan option, swap honey for maple syrup. You can also use tamari instead of soy sauce for a gluten-free version. Feel free to add extra veggies or even tofu for more protein. These noodle bowls are great on their own, but some sides can enhance your meal. Consider serving with: - A crisp side salad for freshness - Spring rolls for a fun crunch - Edamame for a protein boost - A light cucumber salad for added texture For drinks, try a sparkling water with a splash of lime or a nice green tea to keep things light and refreshing. This blog post shared a simple, tasty recipe for Minute Sesame Ginger Noodle Bowls. We covered the main ingredients, from rice noodles to fresh veggies. You learned how to make the sauce and combine it all. I shared tips for cooking fast and making your dish pop. In the end, this recipe is flexible. You can add proteins or try different flavors. I hope you feel ready to make your own delicious noodles! Enjoy your cooking adventure.

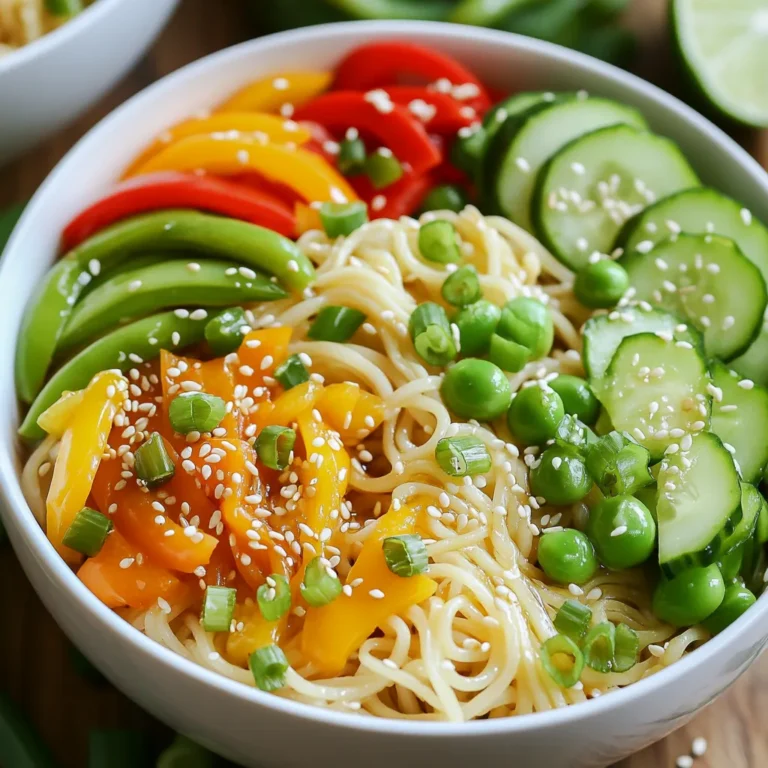
Minute Sesame Ginger Noodle Bowls Flavorful and Quick

PREV 1 … 14 15 16 … 57 NEXT
flavor nest kitchen

explore

DessertsDinnerAppetizersDrinks

Our Policies

  • Cookie Policy
  • Copyright Policy
  • Disclaimer
  • GDPR Policy
  • Terms Of Use
Back to Top
  • About
  • Contact Us
  • Privacy Policy
© 2025 flavor nest kitchen