FREE DINNER EBOOK! Get your copy!
  • Cookie Policy
  • GDPR Policy
  • Disclaimer
  • Terms Of Use
  • Visit my other site: Fun Cookie Recipes
flavor nest kitchen
  • Home
  • Dinner
  • Desserts
  • Drinks
  • Appetizers
  • Contact
  • About
  • Privacy Policy
  • Home
  • Dinner
  • Desserts
  • Drinks
  • Appetizers
  • Contact
  • About
  • Privacy Policy
  • Cookie Policy
  • GDPR Policy
  • Disclaimer
  • Terms Of Use
Visit my other site: Fun Cookie Recipes

HOME / CATEGORIES /

Latest

- 1 lb boneless, skinless chicken breasts, cut into bite-sized pieces - 4 tablespoons unsalted butter - 5 cloves garlic, minced - 1 teaspoon dried Italian herbs (oregano, basil, thyme) The main ingredients of this dish are simple but full of flavor. The chicken is the star. It should be boneless and skinless for ease. Cut it into bite-sized pieces to ensure quick cooking. The butter adds richness and a creamy texture. Garlic gives a bold taste that makes this dish pop. The dried herbs bring warmth and depth to the meal. - Salt and pepper to taste - 1 tablespoon fresh parsley, chopped (for garnish) - Juice of 1 lemon Adding salt and pepper enhances the flavor of the chicken. Fresh parsley adds a bright, fresh touch when you serve the dish. The lemon juice brings a zesty kick and balances the richness of the butter. This combination of flavors makes each bite exciting and delicious. To start, you need to season the chicken. Take the boneless, skinless chicken breasts and cut them into bite-sized pieces. This helps them cook evenly. Next, sprinkle salt, pepper, and dried Italian herbs over the chicken. Make sure every piece is nicely coated with the seasonings. This step adds great flavor to your bites. Now, it's time to cook! In a large skillet, melt 2 tablespoons of butter over medium-high heat. Once the butter is hot and bubbly, add the seasoned chicken bites. Cook them for about 5-7 minutes. Turn them occasionally to get a golden brown color. This makes them tasty and appealing. After the chicken is cooked through, lower the heat to medium. Push the chicken to one side of the skillet. Add the remaining 2 tablespoons of butter to the empty space. Once the butter melts, add the minced garlic. Sauté the garlic for 1-2 minutes until you can smell its rich aroma. This step is key for adding flavor. Now, mix the garlic butter with the chicken bites. Make sure each piece is coated in that delicious sauce. To brighten the dish, squeeze in the juice of one lemon. Finally, remove the skillet from heat. Sprinkle fresh parsley over the top for a nice touch. Your Minute Garlic Butter Chicken Bites are ready to serve! Enjoy this quick and tasty meal. To achieve the perfect golden brown, start with a hot skillet. Melt two tablespoons of butter over medium-high heat. Once it sizzles, add the chicken bites. Cook for about 5-7 minutes. Turn them gently to prevent burning. You want each piece to get a nice color. To ensure the chicken is cooked through, check the internal temperature. It should reach at least 165°F (75°C). If you don’t have a thermometer, cut a piece in half. The meat should be white, not pink. Let it rest after cooking. This keeps it juicy and tender. Adding extra herbs or spices can boost flavor. Consider fresh basil or thyme for a garden taste. You can also sprinkle in some red pepper flakes for heat. Experiment with flavors that you enjoy. For serving options, think about sides that complement the chicken. A fresh salad or steamed veggies work well. I also love serving it with rice or pasta to soak up the garlic butter. Use nice plates to make your meal look special. Presentation matters! {{image_2}} You can switch up the chicken for other proteins. Turkey works well instead of chicken. If you want a plant-based option, try tofu. Just cut it into bite-sized pieces like the chicken. Choose firm tofu for the best texture. You can also make it dairy-free. Look for butter alternatives made from oils. There are great options made from coconut or almond. These swaps let everyone enjoy this dish! If you like some heat, add red pepper flakes. Start with a pinch and taste. You can always add more if you want extra spice. The red pepper gives a nice kick to the buttery chicken. Try mixing different herbs for unique flavors. Instead of Italian herbs, use fresh rosemary or thyme. You can even add a bit of dill for a fresh taste. Each herb brings its own twist, making the dish exciting! To keep your Minute Garlic Butter Chicken Bites fresh, store them well. Use an airtight container. This will lock in flavor and moisture. Let them cool to room temperature first. If you place hot food directly in the fridge, it can raise the temperature inside. These chicken bites last about three to four days in the fridge. If you want to keep them longer, consider freezing them instead. Frozen chicken bites can stay good for up to three months. Just make sure to thaw them in the fridge before reheating. Reheating your chicken bites can be simple and quick. You want to keep them juicy and flavorful. The best way to do this is by using a skillet. Heat the skillet over medium heat. Add a small amount of butter or oil to prevent sticking. Place the chicken bites in the skillet. Cook for about five minutes. Stir occasionally to heat evenly. You can also reheat in the microwave, but be careful. Use a microwave-safe dish and cover it. Heat in short bursts, checking often to avoid drying them out. These methods will help you enjoy your chicken bites just like when they were first made! It takes about 15 minutes to cook garlic butter chicken bites. You spend 10 minutes prepping the chicken and 5 to 7 minutes cooking it in the skillet. This quick method makes it easy to enjoy a delicious meal fast. Yes, you can prepare garlic butter chicken bites ahead of time. Season the chicken and store it in the fridge for up to 24 hours. When you are ready to cook, just melt the butter and follow the steps. This way, you save time on busy days. Garlic butter chicken bites pair well with many sides. Here are some great options: - Steamed broccoli - Rice or quinoa - Garlic bread - A fresh green salad These sides add balance and flavor to your meal. This blog post shared a simple way to make garlic butter chicken bites. We covered key ingredients, step-by-step cooking, and helpful tips. You learned how to season, cook, and serve these bites perfectly. Consider adding your twist with different herbs or protein options. Remember, storing leftovers properly keeps them tasty for later. Enjoy making this dish for friends or family. It’s easy and fun! Try it today, and you’ll impress everyone at the table.

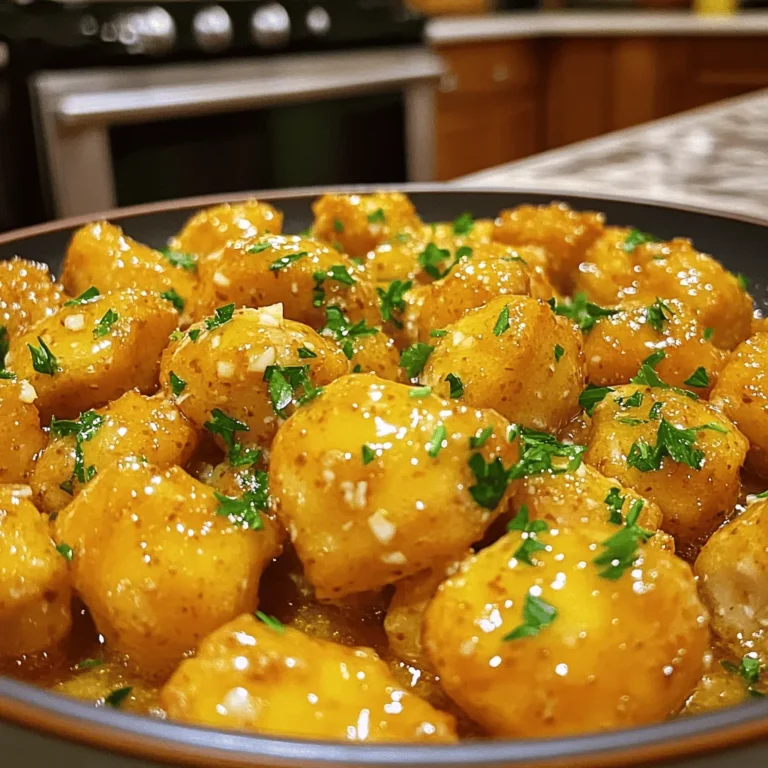
Minute Garlic Butter Chicken Bites Flavorful and Quick

- 1 large flatbread or naan - 1 cup fresh mozzarella cheese, sliced - 2 medium ripe tomatoes, sliced - 1/4 cup fresh basil leaves - 2 tablespoons olive oil - 1 garlic clove, minced - 1 teaspoon balsamic vinegar - Salt and pepper, to taste - Pinch of red pepper flakes (optional) The foundation of this recipe is simple yet vibrant. The flatbread or naan serves as the base. I love the way it crisps up in the oven, creating a perfect canvas for the toppings. Fresh mozzarella cheese adds a creamy richness that melts beautifully. Using ripe tomatoes brings a burst of flavor that brightens every bite. The fresh basil leaves add an aromatic touch, making the flatbread smell amazing. To enhance the flavors, we create a flavor base. The olive oil serves as a rich foundation. Mixing in minced garlic infuses a warm taste that complements the cheese and tomatoes. Balsamic vinegar adds a tangy depth, balancing the richness of the mozzarella. Don’t forget salt and pepper to season properly. If you like a bit of heat, a pinch of red pepper flakes can elevate the dish. This combination of ingredients is what makes this flatbread a true delight. 1. Preheat your oven to 400°F (200°C). This is the perfect temperature for a crispy flatbread. 2. In a small bowl, mix together olive oil, minced garlic, balsamic vinegar, salt, pepper, and red pepper flakes. This mix adds a rich flavor to the flatbread. 1. Place your flatbread on a baking sheet. Brush the garlic oil mixture evenly over the top. This gives a nice base for your toppings. 2. Next, layer fresh mozzarella slices across the flatbread. Make sure to cover it well. 3. Add the sliced tomatoes on top of the mozzarella. Slightly overlap them for great coverage. 4. Finally, sprinkle fresh basil leaves over the tomatoes. This adds a fresh, herbaceous kick. 1. Place the baking sheet in the oven. Bake for about 12-15 minutes. The cheese should melt and bubble, with a slight golden edge. 2. Remove it from the oven and let it cool for a minute. You can adjust the seasoning with more salt and pepper if needed. 3. Slice the flatbread into pieces. Enjoy it warm, and consider drizzling extra olive oil on top for added flavor. - Selecting fresh ingredients for optimal flavor: Always choose ripe tomatoes. Look for ones that feel firm but yield slightly to pressure. Pick fresh mozzarella that is soft and moist, as it melts beautifully. Fresh basil should be bright green and fragrant. - How to prevent soggy flatbread: To avoid sogginess, brush the flatbread with olive oil before adding toppings. Use less sauce or liquid ingredients. Bake the flatbread until the cheese is bubbly and the edges are crisp. - Adjusting seasoning to personal taste: Taste your garlic oil mixture before applying it. Add more salt, pepper, or red pepper flakes if you like. Remember, flavors can deepen during baking, so start with less and adjust after cooking if needed. - Pairing with side dishes or dips: This flatbread pairs well with a simple green salad or a fresh bowl of marinara sauce for dipping. You can also serve it with hummus for a unique twist. - Best wines to serve with the flatbread: A crisp white wine, like Pinot Grigio, complements the flavors nicely. If you prefer red, a light-bodied wine, like Chianti, works well too. {{image_2}} You can make your Tomato Basil Mozzarella Flatbread even more exciting by changing a few things. - Different Cheeses: Instead of fresh mozzarella, try goat cheese or feta. Each cheese adds a unique taste. Goat cheese gives a tangy flavor, while feta adds creaminess. - Extra Veggies: Want more crunch? Add bell peppers or arugula. Their colors and flavors will make your flatbread pop. Bell peppers bring sweetness, while arugula adds a peppery kick. Some people have special diets, but you can still enjoy this flatbread. - Gluten-Free Options: If you need gluten-free, look for flatbreads made from almond flour or cauliflower. These options taste great and still hold all your toppings. - Vegan Substitutes: For a vegan version, swap fresh mozzarella with a plant-based cheese. Nutritional yeast can also add a cheesy flavor without dairy. It’s a simple way to enjoy this dish while sticking to a vegan diet. To keep your Tomato Basil Mozzarella Flatbread fresh, wrap it tightly in plastic. Store it in the fridge for up to three days. This helps keep the flavors intact. Before you eat it, reheat it in the oven or a skillet. This method revives the cheese's creaminess and the flatbread's crispness. 1. Preheat your oven to 350°F (175°C). 2. Place the flatbread on a baking sheet. 3. Heat for about 10 minutes until warm. This way, each bite tastes like it just came out of the oven! If you want to freeze flatbread, do so before baking. Wrap it tightly in plastic and then foil. This prevents freezer burn and keeps the taste fresh. You can freeze it for up to three months. When you're ready to enjoy, there's a simple way to reheat it: 1. Preheat your oven to 400°F (200°C). 2. Remove the wrapping and place the flatbread on a baking sheet. 3. Bake for 12-15 minutes until the cheese melts and the edges are golden. This method helps keep your flatbread delicious and full of flavor! For short-term storage, place leftover flatbread in an airtight container. This helps keep it fresh for about three days in the fridge. If you want to store it long-term, wrap the flatbread tightly in plastic wrap or foil. Then, place it in a freezer-safe bag. This way, it can last up to three months without losing flavor. When ready to eat, thaw it in the fridge overnight before reheating. Yes, you can use store-bought flatbread. It saves time and still tastes great. Look for brands with simple ingredients. Some good options include whole wheat or gluten-free flatbreads. These can add different textures and flavors. Check the bakery section of your grocery store for fresh choices. You can personalize this flatbread to fit your taste. Try different cheeses like goat cheese or feta for a unique twist. Add veggies such as bell peppers or spinach for extra crunch. You can even drizzle some pesto or hot sauce for a kick. If you like it sweet, sprinkle a bit of honey over the top before serving. This blog post walked you through the tasty Tomato Basil Mozzarella Flatbread. We covered key ingredients, flavors, and steps to make it right. I shared tips on selecting fresh items and avoiding sogginess. You can even customize your flatbread with different toppings or cheeses. Finally, I gave advice on storing and reheating leftovers. Creating this delicious dish can be fun and rewarding. Enjoy making it your own!

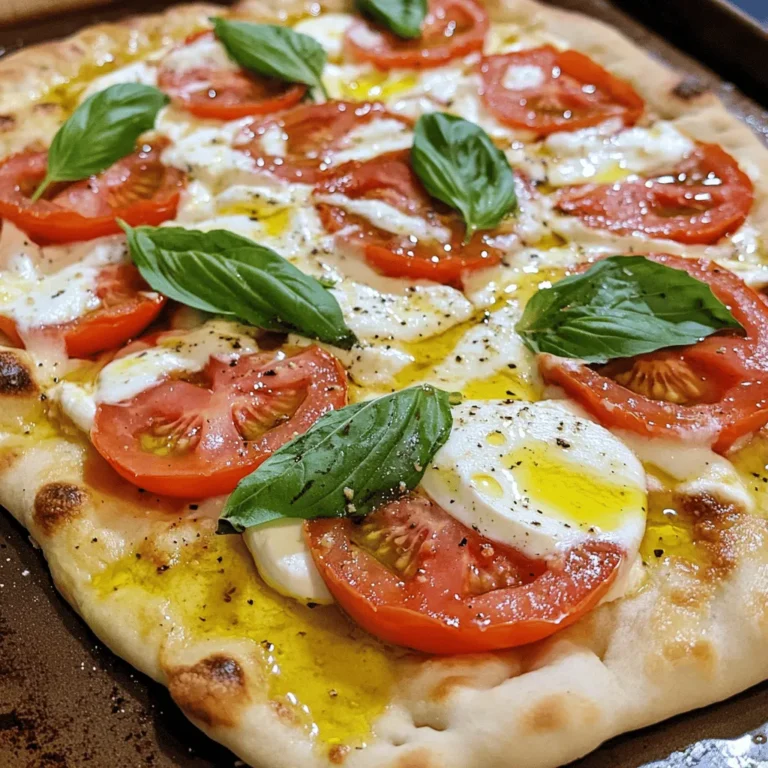
Tomato Basil Mozzarella Flatbread Flavorful Delight

- 2 ripe avocados - 1 cup panko breadcrumbs - ½ cup all-purpose flour - 2 large eggs - 1 teaspoon garlic powder - 1 teaspoon paprika - ½ teaspoon cayenne pepper (optional, for heat) - Salt and pepper to taste - Cooking spray (for air frying) To make crispy air fryer avocado fries, you need fresh avocados. Choose ripe ones for the best texture. These avocados will be soft and easy to scoop. You will also need panko breadcrumbs. Panko gives a great crunch. All-purpose flour helps the coating stick to the avocado. Eggs are essential for binding. They help the breadcrumbs cling well. Garlic powder and paprika add flavor and warmth. You can add cayenne pepper for extra heat, but it is optional. Don’t forget salt and pepper. They enhance all flavors in this dish. Lastly, cooking spray is key for air frying. It prevents sticking and gives a nice finish. With these ingredients, you can create a tasty snack that is both simple and fun to make. 1. Start by cutting the avocados in half. Use a sharp knife and be careful. 2. Remove the pit by gently twisting it out with a spoon or knife. 3. Scoop the green flesh from each half. Make sure to keep it intact. 4. Slice the avocado into wedges or thick fries. Aim for even sizes to cook well. 1. In a shallow bowl, mix the all-purpose flour, garlic powder, paprika, cayenne pepper, salt, and pepper. This mix adds great flavor. 2. Crack the two large eggs into another bowl. Beat them well with a fork or whisk. 3. Place the panko breadcrumbs in a third bowl. For extra crunch, toast them lightly in a pan before using. 1. Preheat your air fryer to 400°F (200°C) for about 5 minutes. This helps get the fries crispy. 2. Lightly spray the air fryer basket with cooking spray to prevent sticking. 3. Dredge each avocado slice in the flour mixture. Make sure it gets a good coating. 4. Dip the floured avocado into the beaten eggs. Let any excess egg drip off. 5. Coat the avocado in panko breadcrumbs, pressing lightly. Repeat for all slices. 6. Arrange the avocado fries in a single layer in the air fryer basket. Do not overcrowd them. 7. Lightly spray the tops of the fries with cooking spray. 8. Cook for about 10-12 minutes. Flip them halfway through for even cooking. Look for a golden brown color. 9. Once done, remove the fries and let them cool slightly before serving. Enjoy your crispy avocado fries! To keep your avocado fries crispy, use panko breadcrumbs. They offer great crunch. Make sure to coat them well. Dredge in flour first, then dip in egg. Finally, cover with panko. Lightly spray the fries with cooking spray before frying. This helps them crisp up nicely. Adjust seasonings to suit your taste. I suggest adding more garlic powder or paprika for a bolder flavor. If you like heat, include cayenne pepper. A pinch of salt and pepper is a must. Remember, you can always taste and tweak! For a zesty kick, try a lime dipping sauce. Just mix fresh lime juice with sour cream or yogurt. If you want spice, pair your fries with spicy mayo. Just mix mayo with sriracha or hot sauce. These sauces elevate the flavor of the fries. Consider serving them with fresh cilantro and lime wedges. They add color and freshness to your plate. You can prep avocado fries in advance. Slice the avocados and coat them with the breading. Place them on a tray, and cover with plastic wrap. Keep them in the fridge for up to a few hours. This saves time when you are ready to cook. For storage, avoid stacking them. Keep them in a single layer to prevent sticking. Once ready to cook, air fry them straight from the fridge. Just add a couple of extra minutes to the cooking time. {{image_2}} You can boost the taste of your avocado fries by adding spices or herbs. Try using cumin, onion powder, or Italian seasoning for a new twist. Each spice brings its own flavor, making every batch unique. If you want a vegan option for the batter, use almond milk or plant-based milk instead of eggs. This change keeps the fries crispy without losing flavor. Just dip the avocado slices in the milk before coating them with panko breadcrumbs. These crispy avocado fries pair well with many sides. Try serving them with a fresh salad or some crunchy veggies. They also go great with dips like spicy mayo or guacamole. For a complete meal, serve the fries with grilled chicken or fish. This combo adds protein and makes a balanced plate. You can even stack them on a burger for a tasty twist! To store cooked avocado fries, let them cool first. Place them in an airtight container. This keeps them fresh for later. You can store them in the fridge for up to 2 days. Avoid leaving them out at room temperature. The longer they sit, the less crispy they become. For the best texture when reheating, use your air fryer. Preheat the air fryer to 375°F (190°C). Place the leftover fries in a single layer. Heat for about 5 minutes. This method makes them crispy again. If you don’t have an air fryer, you can use the oven. Preheat your oven to 400°F (200°C). Spread the fries on a baking sheet in a single layer. Bake for about 8-10 minutes. Check to see if they are warm and crispy. Enjoy your tasty snack! Can I use frozen avocado fries? Yes, you can use frozen avocado fries. Just cook them in the air fryer without thawing. Adjust the time to ensure they cook through. What type of avocados work best? Ripe Hass avocados work best for this recipe. They have a creamy texture and rich flavor, making them perfect for frying. How do I prevent browning before cooking? To prevent browning, sprinkle the avocado slices with lemon or lime juice. This keeps them fresh and bright until you're ready to cook. Overview of calories per serving Each serving has about 250 calories. This makes a great snack or side dish for your meals. Dietary considerations These avocado fries are gluten-free if you use gluten-free flour and panko. They are also vegan if you substitute the eggs with a plant-based alternative. What to do if fries are soggy? If your fries turn out soggy, try air frying them longer. Increase the time by a few minutes to help them crisp up. Best practices for air frying in batches When air frying in batches, keep the fries in a single layer. This helps them cook evenly and stay crispy. Avoid overcrowding the air fryer basket. You now have a simple guide to make tasty air-fried avocado fries. We covered the ingredients, step-by-step prep, and cooking process. You learned how to achieve the perfect texture and explore variations for extra flavor. Remember, these fries are great for snacks or meals. Store leftovers properly to enjoy them later. With the right tips, you will impress anyone with your cooking. Enjoy exploring new flavors and diving into this delicious recipe!

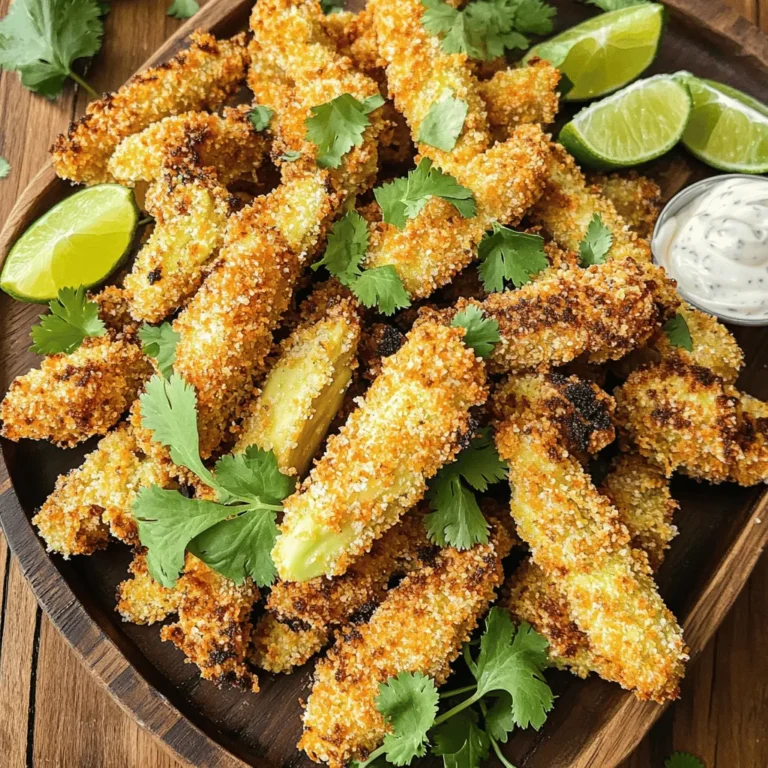
Crispy Air Fryer Avocado Fries Simple and Tasty Snack

To make Lemon Blueberry Crumble Donuts, gather these simple ingredients: - 1 cup all-purpose flour - 1/2 cup granulated sugar - 1/2 tsp baking powder - 1/2 tsp baking soda - 1/4 tsp salt - 1/2 cup buttermilk - 1 large egg - 1/4 cup unsalted butter, melted - 1 tsp vanilla extract - Zest of 1 lemon - 1 cup fresh blueberries - 1/4 cup rolled oats - 1/4 cup brown sugar - 1/4 cup flour (for crumble) - 1/4 tsp cinnamon These ingredients work together to create moist donuts with a sweet and tangy flavor. The fresh blueberries add bursts of juicy goodness. The lemon zest brightens each bite, while the crumble topping adds a lovely crunch. You can find most of these items in your pantry or local grocery store. When picking blueberries, look for firm, plump ones. They should be deep blue and free from any green spots. Fresh blueberries will make your donuts taste the best! First, set your oven to 350°F (175°C). This temperature helps the donuts rise well. While the oven warms up, grease your donut pan with non-stick spray. This step keeps the donuts from sticking. In a large bowl, take 1 cup of all-purpose flour. Add 1/2 cup of granulated sugar. Now, add 1/2 teaspoon of baking powder, 1/2 teaspoon of baking soda, and 1/4 teaspoon of salt. Whisk everything together until it looks nice and fluffy. This mix creates a good base for the donuts. In another bowl, combine 1/2 cup of buttermilk and 1 large egg. Next, pour in 1/4 cup of melted unsalted butter and 1 teaspoon of vanilla extract. Add the zest of 1 lemon for a bright taste. Whisk these wet ingredients together until smooth. This mix will keep the donuts moist. Now, carefully pour the wet mix into the dry mix. Gently stir until just combined. It’s okay if some dry bits remain. Over-mixing can make the donuts tough. Finally, fold in 1 cup of fresh blueberries. These berries add a burst of flavor to each bite. Take another bowl and mix 1/4 cup of rolled oats, 1/4 cup of brown sugar, 1/4 cup of flour, and 1/4 teaspoon of cinnamon. Add about 1 tablespoon of melted butter. Mix until it forms small crumbs. This crumble will give a nice, crunchy top to your donuts. Spoon the batter into your greased donut pan. Fill each cavity about two-thirds full. This amount allows room for the donuts to rise without spilling over. Evenly sprinkle the crumble mixture over the batter in each cavity. This adds a delightful crunch and extra flavor. Make sure you cover the batter well for the best results. Place the donut pan in the preheated oven. Bake for 15 to 18 minutes. Check if the tops are golden and use a toothpick to test. If it comes out clean, the donuts are ready. After baking, let the donuts cool in the pan for about 5 minutes. Then, transfer them to a wire rack to cool completely. Enjoy them as is, or drizzle a lemon glaze for extra sweetness later. To make fluffy donuts, use fresh baking powder and baking soda. These help the donuts rise well. Avoid over-mixing your batter. Mixing too much makes the donuts dense. Stir just until you no longer see dry flour. This keeps them light and airy. Always mix dry and wet ingredients in separate bowls first. This helps blend the flavors evenly. When you combine them, fold gently. Use a spatula to lift and turn the batter. This technique keeps air in and ensures a soft texture. Use fresh blueberries for the best flavor. Look for firm, plump berries with a deep color. Rinse them gently in cold water. Dry them on a paper towel before adding them to the batter. This prevents excess moisture from making the donuts soggy. Make your crumble topping special by mixing in nuts or spices. Chopped walnuts or pecans add a nice crunch. You can also change the spices. Try nutmeg or ginger for a unique twist. The crumble can be sweet or savory, depending on your taste. {{image_2}} You can switch up the fruit in these donuts. Try raspberries or strawberries instead of blueberries. Both fruits add a new twist. You can even mix fruits for extra flavor. Just keep the same amount of fruit. This way, you still get that yummy taste and texture. A glaze can add sweetness and shine to your donuts. You can make a simple lemon glaze using powdered sugar and lemon juice. Just mix until smooth. You could also try a vanilla glaze. Use vanilla extract in place of lemon juice. This gives a sweet touch that pairs well with the fruit. You can make these donuts vegan by swapping a few ingredients. Use almond milk instead of buttermilk. Replace the egg with a flax egg or applesauce. For a gluten-free option, use a gluten-free flour blend. Make sure the blend has a good rise. This way, everyone can enjoy these tasty treats! To keep your leftover donuts fresh, place them in an airtight container. A simple plastic or glass container works well. You can also wrap them in plastic wrap for extra protection. Store them at room temperature for up to two days. If you want them to last longer, consider refrigerating them. When you're ready to enjoy your donuts again, reheating is easy. Preheat your oven to 350°F (175°C). Place the donuts on a baking sheet and warm them for about 5-7 minutes. This method keeps the texture soft and the crumble topping nice and crunchy. Avoid using a microwave, as it can make the donuts chewy. If you want to save some donuts for a later date, freezing is a great option. First, allow the donuts to cool completely. Then, wrap each one tightly in plastic wrap. Place the wrapped donuts in a freezer-safe bag or container. They can stay in the freezer for up to three months. To enjoy, thaw them in the fridge overnight, then reheat as needed. Yes, you can use frozen blueberries. They will add moisture to the donuts. However, be careful when mixing them in. Stir gently to avoid breaking the blueberries too much. This keeps your batter from turning blue. To make a lemon glaze, mix 1 cup of powdered sugar with 2 tablespoons of lemon juice. Stir until smooth. Adjust the thickness by adding more sugar or juice. Drizzle this glaze over your cooled donuts for a tasty finish. Use a standard 6-cavity donut pan. This size works well for the recipe. A non-stick pan helps the donuts release easily after baking. You can find these pans in most kitchen supply stores. The donuts are done when they turn golden brown on top. You can also insert a toothpick into the center. If it comes out clean, the donuts are ready. This usually takes 15-18 minutes. Yes, you can double the recipe. Just use double the ingredients for each one. Make sure to bake in batches if you don’t have two pans. This way, you can enjoy more lemon blueberry crumble donuts! This blog post covered how to make delicious blueberry donuts. We discussed ingredients, step-by-step instructions, and handy tips. I shared ways to customize your donuts and how to store leftovers. Remember, these easy recipes can bring joy to your kitchen. Enjoy baking and sharing these treats with friends and family. You will love the taste and smell of fresh donuts!

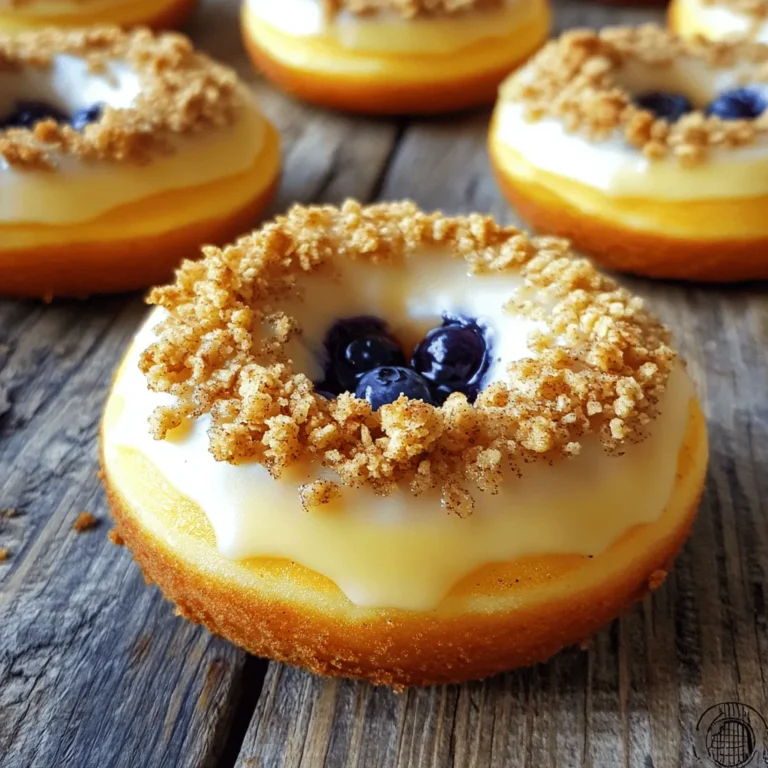
Lemon Blueberry Crumble Donuts Sweet and Simple Treat

To make the No-Bake Salted Caramel Pretzel Pie, you will need: - 2 cups pretzel sticks - ½ cup unsalted butter, melted - ¼ cup granulated sugar - 1 cup cream cheese, softened - 1 cup powdered sugar - 1 teaspoon vanilla extract - 1 cup heavy whipping cream - 1 cup caramel sauce (store-bought or homemade) - Sea salt for garnish Each of these ingredients plays a key role. The pretzels give a nice crunch, while the cream cheese adds creaminess. The caramel brings sweet flavor, and sea salt balances it all. Always choose fresh ingredients for the best flavor. Look for soft cream cheese, not the kind that feels hard or crumbly. Use high-quality caramel sauce. Store-bought is fine, but homemade can take the pie to another level. For the whipped cream, go for heavy cream with a high fat content. This helps it whip up nicely. If you need a gluten-free version, swap pretzel sticks for gluten-free pretzel options. For a dairy-free pie, use vegan cream cheese and coconut cream instead of heavy cream. You can also find dairy-free butter for the crust. These swaps keep the pie delicious while meeting your dietary needs. To start, crush 2 cups of pretzel sticks into small pieces. You can use a food processor or a rolling pin. Once crushed, mix them with ½ cup of melted unsalted butter and ¼ cup of granulated sugar. Stir until the mixture is well combined and looks like wet sand. Next, press this mixture into the bottom and up the sides of a 9-inch pie dish. Make sure it’s tightly packed to hold the filling. Refrigerate for 30 minutes to set. While the crust chills, prepare the cream cheese filling. In a large bowl, beat 1 cup of softened cream cheese with an electric mixer. Mix until it’s creamy and smooth. Gradually add in 1 cup of powdered sugar and 1 teaspoon of vanilla extract. Keep mixing until the filling is fluffy. In another bowl, whip 1 cup of heavy cream until stiff peaks form. Gently fold this whipped cream into the cream cheese mixture until it’s fully combined. Be careful not to deflate the whipped cream. Now, it’s time to assemble the pie. Remove the crust from the refrigerator. Spoon half of the cream cheese filling into the crust. Smooth it out evenly. Drizzle half of the caramel sauce over this layer. Then, add the remaining cream cheese filling and smooth out the top. Cover the pie with plastic wrap and refrigerate for at least 4 hours. For the best results, chill it overnight. When ready to serve, drizzle the remaining caramel sauce on top and sprinkle with sea salt. Enjoy this sweet and salty treat! When making No-Bake Salted Caramel Pretzel Pie, a few mistakes can spoil your fun. First, don’t rush the crust. Crushing the pretzels too finely can make it hard to hold together. Aim for small chunks. Next, don’t skip the chilling time after pressing the crust. It needs to set well to hold the filling. Lastly, be gentle when folding in the whipped cream. Overmixing can lead to a flat filling. To get the best texture, focus on the cream cheese. It should be very soft. I let it sit out for about 30 minutes before mixing. This helps it blend better. When whipping the cream, ensure it's cold for stiff peaks. Fold it gently into the cream cheese mixture. This keeps the filling light and fluffy. A smooth pie filling will give you that perfect bite. Chilling time is key for this pie. I suggest chilling it for at least four hours. However, overnight is even better. This extra time allows the flavors to meld and the filling to set perfectly. If you are in a hurry, you can chill it for a shorter time, but the texture may not be as creamy. {{image_2}} You can easily make this pie vegan. Start by using vegan butter instead of regular butter. For the filling, use dairy-free cream cheese. Coconut cream is a great substitute for heavy cream. Just chill a can of full-fat coconut milk, scoop out the solid cream, and whip it. This will give you a rich, creamy texture. Use maple syrup or a vegan caramel sauce to keep it sweet and delicious. If you want a gluten-free pie, swap the pretzel sticks for gluten-free pretzels. Many brands offer gluten-free options that taste just as good. Make sure your other ingredients, like the cream cheese and caramel sauce, are also gluten-free. Always check labels to avoid hidden gluten. Feel free to play with flavors! For a chocolate twist, mix cocoa powder into the cream cheese filling. You can also drizzle chocolate sauce on top before serving. If you love peanut butter, mix in some peanut butter into the cream cheese filling. This adds a nutty flavor that pairs well with the salty pretzels. You can also use peanut butter sauce on top for an extra treat. To keep your No-Bake Salted Caramel Pretzel Pie fresh, cover it well. Use plastic wrap or foil. This keeps out air and moisture. Store leftover pie in the fridge. This helps maintain its creamy texture. Avoid leaving the pie uncovered. It can dry out or absorb odors from other foods. In the refrigerator, this pie lasts about 3 to 5 days. The crust stays crunchy for the first couple of days. After that, it may soften. Make sure to check for any signs of spoilage before eating. If it looks or smells off, it's best to toss it. You can freeze the No-Bake Salted Caramel Pretzel Pie for longer storage. Wrap it tightly in plastic wrap, then in foil. This prevents freezer burn. It can last up to 2 months in the freezer. When you're ready to eat, move it to the fridge to thaw overnight. Enjoy your pie chilled, or let it sit at room temperature for a bit before serving. Yes, you can make this pie ahead of time. In fact, it tastes better when chilled overnight. This allows the flavors to blend. Just make sure to cover it tightly with plastic wrap. You can store it in the fridge for up to three days. If you're making it for a special event, prepare it a day early for best results. If you don't have heavy cream, try using coconut cream or Greek yogurt. Both options can add a creamy texture. For a lighter version, use half-and-half or whole milk. Keep in mind, these substitutes may change the taste slightly. Always choose the option that fits your dietary needs best. Making homemade caramel sauce is simple and fun. Here’s how to do it: - Ingredients: - 1 cup granulated sugar - 6 tablespoons unsalted butter, cut into pieces - ½ cup heavy cream - A pinch of salt - Instructions: 1. In a medium saucepan, heat the sugar over medium heat. 2. Stir constantly until the sugar melts and turns a golden color. 3. Remove from heat and add the butter, stirring until it melts. 4. Slowly pour in the cream while stirring. 5. Add the salt and mix well. Let it cool before using. This caramel sauce will add rich flavor to your pie. Enjoy! This blog post covered all the key steps to make a great pie. We explored the best ingredients and how to pick them. You learned how to prepare the crust and filling, then assemble the pie for the best results. I shared tips to avoid common mistakes and achieve smooth texture. We also discussed fun variations and how to store leftovers. Remember, a little care in each step can lead to a delicious treat you will love. Enjoy making your pie with these tips!

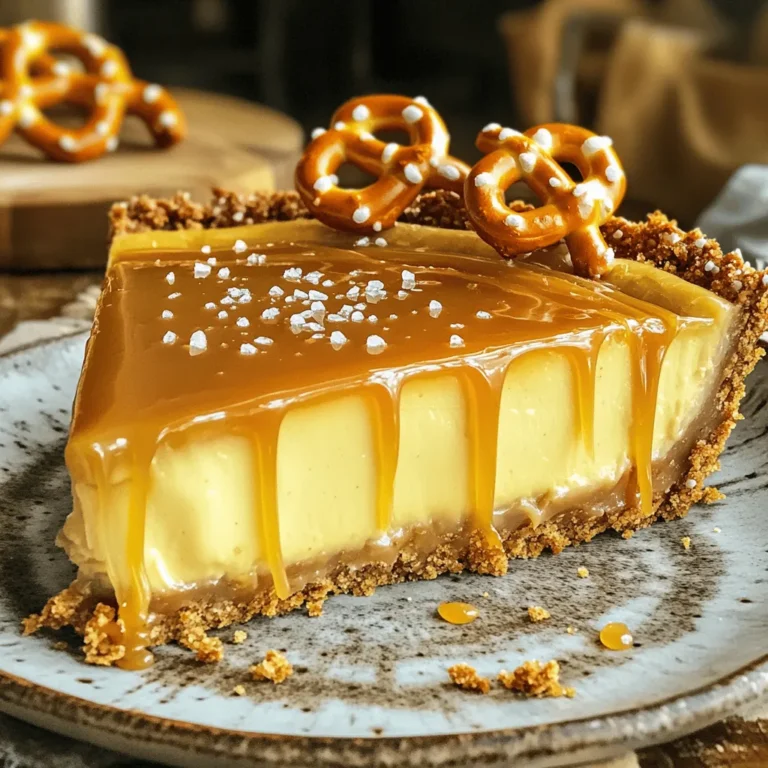
No-Bake Salted Caramel Pretzel Pie Delight

For this tasty Sheet Pan Sesame Ginger Tofu & Broccoli, you need fresh ingredients. Let's break it down. - 1 block (14 oz) firm tofu, pressed and cubed - 2 cups broccoli florets - 1 red bell pepper, sliced - 1 cup snap peas - 3 tablespoons sesame oil - 4 tablespoons soy sauce - 2 tablespoons fresh ginger, grated - 2 cloves garlic, minced - 2 tablespoons honey or maple syrup - 1 teaspoon sesame seeds - Salt and pepper to taste - 1 tablespoon green onions, sliced (for garnish) Now, let's talk about measurements. The tofu should be firm. It holds its shape well when cooking. I use two cups of broccoli. This adds great color and crunch. The red bell pepper gives a sweet taste. The snap peas add a nice crunch too. For the cooking oil, sesame oil shines in this recipe. It has a rich flavor. You can also use other oils. Olive oil or avocado oil work, but they change the taste a bit. Gather all these ingredients before you start. It makes cooking easier. Enjoy the process and get ready for a delightful meal! Pressing and cubing tofu Start by pressing the tofu. Wrap it in a clean towel and place something heavy on top. Let it sit for about 15 minutes. This step helps remove excess water. Once pressed, cut the tofu into bite-sized cubes. Prepping the vegetables Next, wash the broccoli and cut it into florets. Slice the red bell pepper into thin strips. Rinse the snap peas and set everything aside. This makes it easy to mix later. Mixing the glaze ingredients In a bowl, combine 3 tablespoons of sesame oil and 4 tablespoons of soy sauce. Add 2 tablespoons of freshly grated ginger and 2 minced garlic cloves. For sweetness, mix in 2 tablespoons of honey or maple syrup. Stir until all ingredients blend well. Flavor tips for the glaze To boost the flavor, taste the glaze and adjust as needed. A pinch of salt and pepper adds depth. You might try adding a splash of lime juice for brightness. This glaze is key for a tasty dish. Preheating the oven Before you bake, preheat your oven to 400°F (200°C). This step ensures even cooking. It’s important to get the oven hot so everything roasts nicely. Arranging on the baking sheet Line a large baking sheet with parchment paper. Spread the cubed tofu and prepared vegetables in a single layer. Drizzle the sesame ginger glaze over everything. Toss to coat, then arrange again. This helps them cook evenly. Tofu can be tricky, but it's important to get it right. Start with firm tofu for the best texture. Press it to remove excess water. This helps it absorb the flavor better. Aim for at least 30 minutes of pressing. Cube it into bite-sized pieces. This makes it easy to eat and helps it cook evenly. When seasoning tofu, use the sesame ginger glaze. Mix sesame oil, soy sauce, and grated ginger. This mix gives the tofu a rich flavor. Coat the tofu well by tossing it in the glaze. Let it soak for a few minutes. This enhances the taste and makes every bite delicious. Baking tofu and veggies on a sheet pan is easy. To get the best results, stir and flip the mixture halfway through cooking. This helps everything cook evenly. You want the tofu and vegetables to brown nicely. For perfect vegetable tenderness, choose fresh veggies. Broccoli and snap peas work great. Cut them into similar sizes so they cook at the same rate. The bell pepper adds a nice crunch. This mix of textures keeps every bite interesting. Serving your dish well makes it more enjoyable. After baking, arrange the tofu and veggies on a platter. This allows everyone to see the colors and textures. For garnishing, sprinkle sesame seeds on top. This adds a nice touch and some crunch. You can also add sliced green onions for color and flavor. Serve this dish warm for the best taste experience. Enjoy the vibrant look and taste of your sheet pan sesame ginger tofu and broccoli! {{image_2}} You can swap out the broccoli and snap peas for other veggies. Think about using: - Cauliflower florets - Carrots, sliced thin - Zucchini, cut into half-moons - Bell peppers, any color you like Seasonal vegetables work great too. In the fall, use Brussels sprouts or butternut squash. In spring, consider asparagus or green beans. These swaps keep the dish fresh and fun! Tofu is a star, but you have choices. Here are different types of tofu to try: - Silken tofu for a softer texture - Extra-firm tofu for a meatier bite You can also explore other plant-based proteins. Chickpeas or tempeh can replace tofu. Both add great flavor and texture. They soak up the sesame ginger glaze nicely! If you need gluten-free options, choose tamari instead of soy sauce. This swap keeps the dish safe for gluten-free diets. For vegan options, stick with maple syrup instead of honey. Both add sweetness without losing flavor. Vegetarians can enjoy this dish too! Just stick with the original recipe, and you’re set for a tasty meal. After you finish your meal, let the leftovers cool. Then, place them in an airtight container. Store the container in the fridge. Your dish will stay fresh for about three to four days. If you want to keep it longer, you can freeze it. For freezing, use a freezer-safe container. It can last up to three months in the freezer. Just make sure to label the container with the date. When you are ready to eat your leftovers, you have some good options. The best method is to reheat in the oven. Preheat your oven to 350°F (175°C). Spread the tofu and broccoli on a baking sheet. Heat for about 15 to 20 minutes. This method keeps the texture nice. You can also use a microwave, but it may make the tofu soft. If using the microwave, heat for 1-2 minutes. Check to see if it’s warm enough. Enjoy your tasty meal again! What is the best way to press tofu? To press tofu, wrap it in a clean kitchen towel. Place a heavy object on top, like a cast iron pan. Let it sit for at least 15 minutes. This removes excess water. Less water helps the tofu absorb flavors better. Can I use frozen tofu? Yes, you can use frozen tofu. Freezing changes the texture, making it firmer and spongy. Thaw it overnight in the fridge. Press it after thawing to remove extra water. This helps it soak up the sauce well. How long should I bake the tofu and veggies? Bake the tofu and veggies for 25-30 minutes. Flip them halfway through for even cooking. This helps everything become golden and slightly caramelized. What temperature is best for roasting? Set your oven to 400°F (200°C). This high heat helps veggies roast nicely. It also makes the tofu crisp on the outside. What can I use instead of honey? If you want a substitute for honey, use maple syrup. Agave syrup works too. Both add sweetness without changing the dish much. Can I skip the sesame oil? You can skip sesame oil, but it adds a unique flavor. If you want, use olive oil instead. It won’t taste the same, but it works well in this recipe. This blog post covered how to make a tasty baked tofu dish. We discussed the key ingredients, preparation steps, and cooking tips. You learned how to create a rich sesame ginger glaze and achieve perfect texture in your tofu. We also shared variations and storage advice for leftovers. Use this guide to enjoy a delicious meal that’s easy to make and can fit any diet. Cooking should be fun, so get creative and experiment with your favorite flavors!

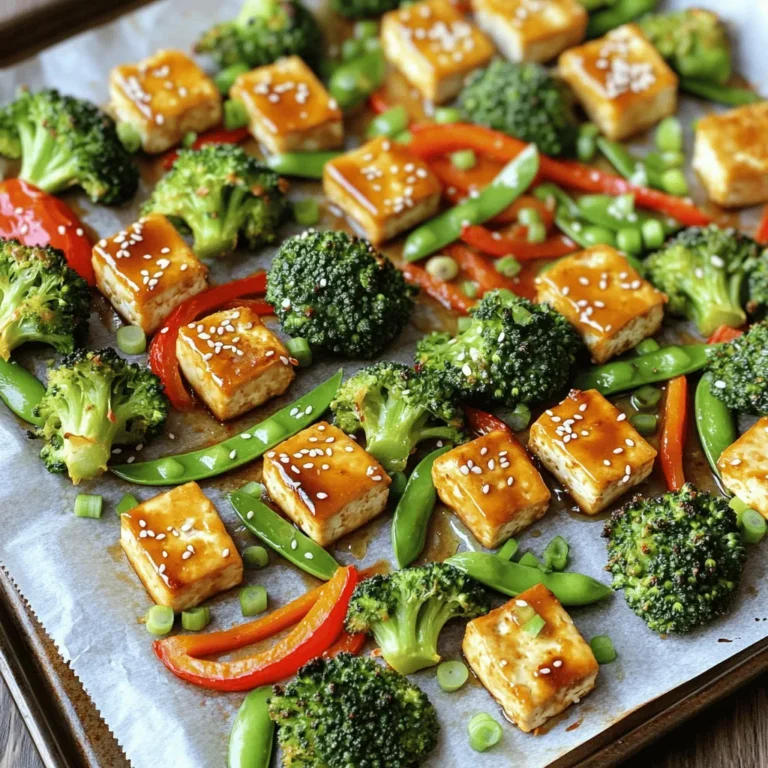
Sheet Pan Sesame Ginger Tofu & Broccoli Delight

- 4 boneless, skinless chicken breasts - 2 cups mushrooms, sliced (button or cremini) - 1 medium onion, finely chopped - 3 cloves garlic, minced - 1 cup chicken broth - 1 cup heavy cream - 2 tablespoons fresh thyme leaves (or 1 tablespoon dried thyme) - 2 tablespoons olive oil - Salt and pepper to taste - Fresh parsley, chopped When making Creamy Mushroom Thyme Chicken, you’ll want to gather all your ingredients first. This makes cooking smooth and fun. Start with the chicken. I like to use boneless, skinless chicken breasts for their ease and tenderness. Next, pick your mushrooms. Button or cremini mushrooms work great here. They add a nice earthy flavor. Chop a medium onion finely. This adds a sweet taste to the dish. Don't forget the garlic! Mince three cloves. Garlic gives a lovely aroma and depth. Now, for the sauce, you’ll need chicken broth and heavy cream. The broth adds flavor, while the cream brings richness. Thyme is key, too. Fresh thyme leaves are best, but dried thyme will work if that's what you have. Finally, grab olive oil for cooking. You’ll use it to sear the chicken. Salt and pepper will help bring all the flavors together. If you want a nice touch at the end, have fresh parsley on hand. It looks pretty and adds a fresh taste. With all these ingredients, you’re ready to create a tasty dinner that everyone will love! First, season the chicken breasts. Use salt and pepper on both sides. This adds flavor to the meat. Once seasoned, set the chicken aside. Letting it rest helps the flavors soak in. Next, heat olive oil in a large skillet over medium-high heat. Sear the chicken for about 5 to 7 minutes on each side. You want it golden brown. Once done, remove the chicken from the skillet and set it aside. In the same skillet, add the chopped onion and sliced mushrooms. Sauté them for about 5 minutes. You want the mushrooms to soften and the onion to turn translucent. Then, stir in the minced garlic. Cook it for 1 more minute until you smell its wonderful aroma. Now it's time to make the sauce. Pour in the chicken broth. Scrape any bits stuck to the skillet. Let it simmer for about 2 minutes. This helps build flavor. Reduce the heat to low, and stir in the heavy cream and thyme. Allow this mixture to simmer for 3 to 4 minutes. It should thicken slightly. Next, return the seared chicken to the skillet. Make sure to coat it well with the creamy sauce. Let it simmer for another 5 to 7 minutes. This will ensure the chicken is fully cooked and the sauce is creamy. Finally, taste the sauce. Adjust the seasoning with salt and pepper if needed. Your dish is now ready to enjoy! To get that nice golden crust, heat your skillet to medium-high. This helps lock in the juices. Make sure not to overcrowd the skillet. If you add too many chicken breasts, they will steam instead of sear. You want them to have some space to brown well. Want to add more depth to your dish? Consider adding a splash of white wine or a squeeze of lemon juice. These will brighten the flavors. Always taste as you go. This helps ensure the seasoning is just right. A little salt can make a big difference, so adjust as needed. Watch for signs that the sauce is ready. You want it to thicken slightly and coat the back of a spoon. If it seems too thin, you can add more cream to thicken it. Alternatively, if it’s too thick, add a little chicken broth to reach your desired texture. {{image_2}} You can switch chicken breasts with chicken thighs or turkey. Chicken thighs add more flavor and stay juicier. Turkey also works great and is leaner. For a vegetarian twist, try using tofu or extra mushrooms. Tofu absorbs flavors well and gives a nice texture. You can use various mushrooms for this dish. Shiitake, portobello, or oyster mushrooms add unique flavors. If you want a deep taste, opt for dried mushrooms. Just soak them in warm water first to rehydrate. Consider adding veggies to boost nutrition. Spinach, peas, or bell peppers pair well with the creamy sauce. Use seasonal vegetables for freshness. In summer, zucchini or asparagus work nicely. In fall, try adding kale or butternut squash for a comforting touch. To keep your creamy mushroom thyme chicken fresh, use airtight containers. Glass containers work great. They help you see the food and don’t stain. Store chicken in the fridge for up to four days. If you plan to eat it later, freeze it. When reheating, use a low heat setting on the stove. This helps keep the cream nice and smooth. Stir often to avoid lumps. If using a microwave, heat in short bursts. This way, you reduce the chance of the cream separating. To freeze, first allow the chicken to cool completely. Place it in a freezer-safe container. You can also use freezer bags; just remove as much air as you can. This helps prevent freezer burn. When ready to eat, defrost it overnight in the fridge. Reheat gently to enjoy a creamy dish again. Yes, you can prepare this dish ahead. Cook the chicken and sauce, then store them separately. The chicken stays juicy this way. You can make the sauce a day before. Just reheat it before serving. This saves time on busy nights. If you want to save even more time, chop your onions and mushrooms in advance. Store them in the fridge with a bit of lemon juice to keep them fresh. You have many options for sides. Here are some great ideas: - Rice: White or brown rice soaks up the creamy sauce well. - Pasta: Serve it over fettuccine or penne for a filling meal. - Mashed Potatoes: Creamy potatoes match the rich sauce perfectly. - Steamed Vegetables: Broccoli or green beans add color and crunch. - Salad: A fresh green salad balances the richness of the dish. You can use low-fat cream, but the sauce will be thinner. Heavy cream gives a rich and creamy texture. Low-fat options can still taste good but may lack some flavor. If you're cutting calories, try half-and-half for a better balance. It gives a nice creaminess without the full fat. Just keep in mind, the sauce may not be as thick or rich as using heavy cream. This blog post covered a tasty Creamy Mushroom Thyme Chicken dish. We looked at the main ingredients, from juicy chicken breasts to flavorful mushrooms. The step-by-step instructions made cooking easy. Tips on searing and sauce consistency helped enhance flavor. In my opinion, trying variations keeps this dish fresh. Don't be afraid to experiment with different vegetables or proteins. Enjoy cooking and make this dish your own!

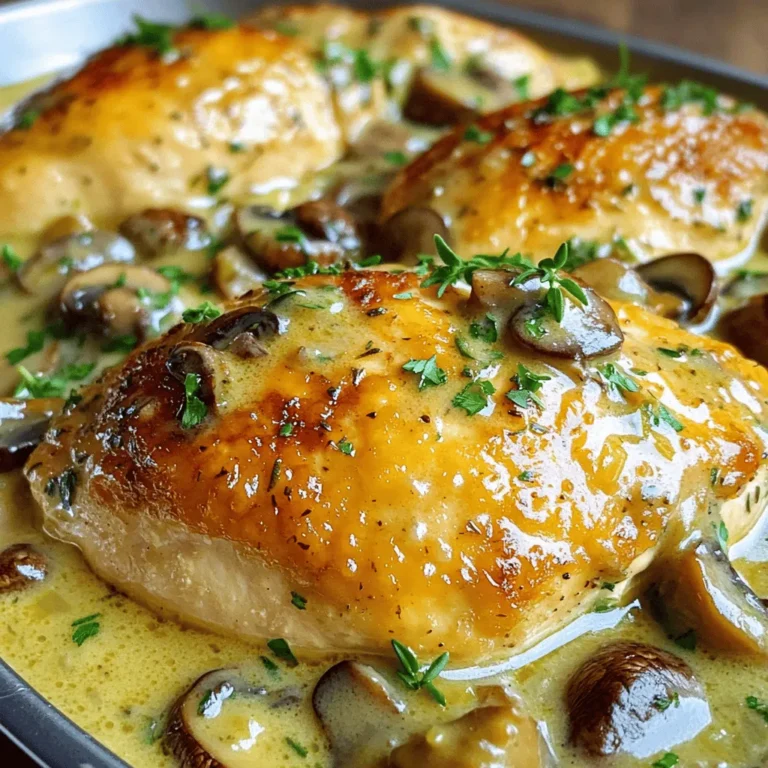
Creamy Mushroom Thyme Chicken Easy Dinner Delight

To make this bright and tasty salad, you will need the following main ingredients: - 12 oz cheese tortellini - 1 cup cherry tomatoes, halved - 1 cup fresh spinach, roughly chopped - ½ cup fresh basil, chopped - ¼ cup pine nuts, toasted - ½ cup pesto sauce (store-bought or homemade) - ½ cup cream cheese, softened - 1 tablespoon olive oil - Salt and pepper to taste - Grated Parmesan cheese for garnish These ingredients come together to create a creamy and flavorful dish. The cheese tortellini adds a nice bite, while the veggies bring freshness. You can also add a few optional ingredients to make your salad even better: - Diced cucumbers for crunch - Red onion for a sharp taste - Bell peppers for sweetness - Grated carrots for color These extras let you customize your salad and make it your own. Not all ingredients are set in stone. Here are some swaps you can try: - Use whole wheat tortellini for a healthier option. - Swap cream cheese for Greek yogurt for a lighter feel. - Replace pine nuts with walnuts or sunflower seeds if needed. - Use arugula instead of spinach for a peppery kick. These substitutions keep the dish tasty while catering to your needs. Feel free to get creative! To start, cook the cheese tortellini. Boil water in a pot and add the tortellini. Cook until they are al dente, which usually takes about 3 to 5 minutes. Drain the tortellini and rinse them under cold water. This stops the cooking process and cools them down quickly. Next, grab a large bowl. In this bowl, mix the pesto sauce and softened cream cheese. Stir them together until you have a smooth, creamy mixture. If the sauce feels too thick, add a splash of olive oil. This will help thin it out and make it easier to mix. Now, it’s time to combine everything. In the same large bowl, add the cooled tortellini, halved cherry tomatoes, chopped spinach, and fresh basil. Pour the creamy pesto mixture over the top. Gently toss all the ingredients together to coat them evenly. Add toasted pine nuts and season with salt and pepper. Toss again to make sure everything is mixed well. Let the salad sit for about 15 minutes. This wait time allows the flavors to blend beautifully. Serve it chilled or at room temperature, topped with grated Parmesan cheese. Enjoy your fresh and flavorful dish! To cook tortellini, follow the package directions closely. Typically, this takes 3 to 5 minutes. You want them al dente. This means firm but not hard. If you overcook them, they turn mushy. Drain them well, then rinse under cold water. This helps stop the cooking process. For a creamy sauce, mix pesto and cream cheese together. Use a bowl to blend them until smooth. If it feels too thick, add a splash of olive oil. This keeps the dressing creamy without making it runny. A creamy consistency helps the sauce coat the tortellini well. To serve your salad, use a large bowl or a platter. This makes it look inviting. Top your salad with grated Parmesan cheese. Sprinkle pine nuts on top for crunch. You can add a few basil leaves for color. Presenting your dish nicely makes it more enjoyable to eat. {{image_2}} You can make this salad more filling by adding proteins. Grilled chicken, shrimp, or even diced turkey work well. If you like fish, try adding smoked salmon. For a vegetarian option, chickpeas or white beans add great texture and protein. Simply mix in your choice of protein after combining the tortellini and veggies. This makes the salad enjoyable for lunch or dinner. To make this salad vegetarian, use vegetable broth to cook the tortellini. Choose tortellini filled with cheese or vegetables. For a vegan version, opt for plant-based tortellini and swap the cream cheese for cashew cream or a vegan spread. Also, make sure to use vegan pesto. These changes keep the dish full of flavor while fitting your dietary needs. Seasoning can take your salad to a new level. Add a squeeze of lemon juice for brightness. Fresh herbs like parsley or dill add more flavor. For a bit of heat, sprinkle in red pepper flakes. You can also try adding olives or sun-dried tomatoes for extra taste. These simple tweaks help you create a salad that suits your palate perfectly. To store your creamy pesto tortellini salad, use an airtight container. Make sure the lid seals tightly. This keeps the salad fresh and tasty. Place the container in the fridge. It will stay good for up to three days. If you notice any changes in smell or color, throw it away. Keep your ingredients fresh by storing them correctly. Place cherry tomatoes in a cool, dry spot. Do not refrigerate them right away. Fresh spinach should stay in its original packaging in the fridge. Basil is best in a glass of water on the counter. Cover it lightly with a plastic bag. This keeps it fresh longer. Pine nuts should stay in a sealed container in a cool place. You can serve this salad cold or at room temperature. If you prefer it warm, gently reheat it. Use a pan on low heat and stir slowly. This keeps the creamy texture smooth. Avoid using a microwave, as it can change the salad's flavor. Add a splash of olive oil if it seems dry when reheating. Enjoy every bite! Yes, you can use homemade pesto. It adds a fresh touch to the dish. Making your own is easy. Just blend fresh basil, garlic, nuts, cheese, and olive oil. Adjust the flavor to your liking. Adding homemade pesto makes the salad unique and delightful. This salad lasts about 3 days in the fridge. Store it in an airtight container. The flavors get better as it sits. However, the vegetables may lose some crunch. It’s best to eat it fresh for the best taste and texture. Yes, you can prepare this salad ahead of time. Make the salad a day before serving. Just keep it chilled in the fridge. The flavors will blend well overnight. If you add nuts, consider adding them just before serving to keep them crunchy. You can add many different vegetables. Try bell peppers, cucumbers, or zucchini for extra crunch. You can also use arugula or kale for a peppery flavor. Mix and match according to your taste. This salad is flexible and allows for creativity. Yes, you can make this salad gluten-free. Just choose gluten-free tortellini. Many brands now offer gluten-free options. Ensure that the pesto and other ingredients are gluten-free too. This way, everyone can enjoy this tasty dish without worry. This blog post covered how to make a creamy pesto tortellini salad. We discussed key ingredients, optional add-ins, and substitutions. You learned simple steps for cooking tortellini and making the pesto mixture. Tips for perfect texture and serving ideas were included. Variations for proteins, vegetarian options, and seasoning enhancements were also shared. Lastly, I provided storage info and answered common questions. I hope these tips help you create a delicious salad that suits your taste. Enjoy your cooking adventure!

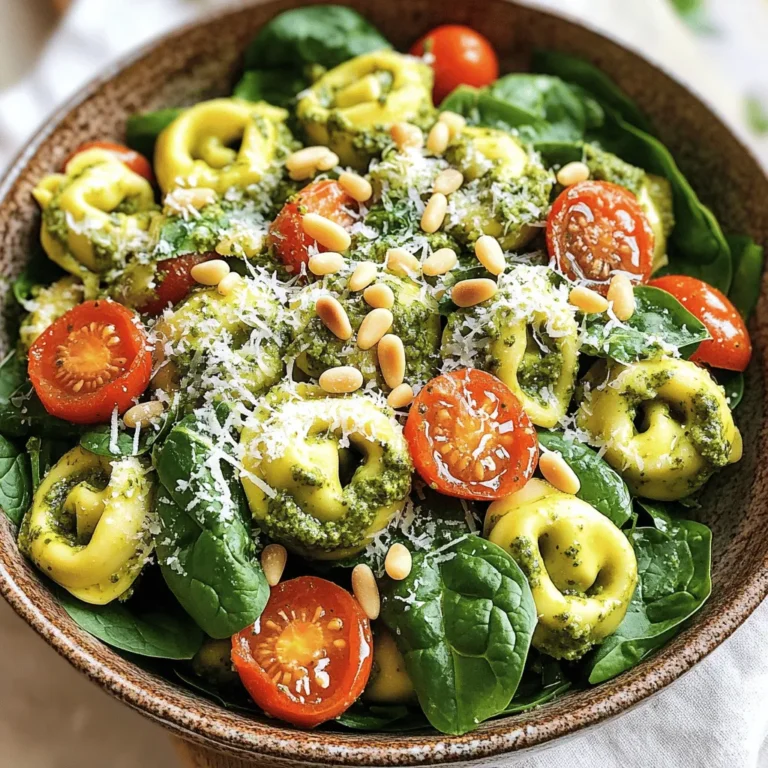
Creamy Pesto Tortellini Salad Fresh and Flavorful Dish

To make the brownie cups, you need: - 1 cup dark chocolate chips - ½ cup unsalted butter - 1 cup granulated sugar - 2 large eggs - 1 teaspoon vanilla extract - ½ cup all-purpose flour - ¼ cup cocoa powder - ½ teaspoon baking powder - ¼ teaspoon salt These ingredients give your brownie cups a rich and fudgy texture. The dark chocolate chips add deep flavor. Butter keeps them moist, while eggs help them rise. For the toppings, gather: - 1 cup vanilla ice cream - ½ cup store-bought salted caramel sauce - Sea salt flakes for garnish The vanilla ice cream balances the rich brownie. Salted caramel sauce adds a sweet and salty twist. A sprinkle of sea salt on top enhances the flavor. You’ll need some basic tools: - Muffin tin - Cupcake liners - Microwave-safe bowl - Mixing bowls - Whisk or spoon Using a muffin tin helps shape the brownies. Cupcake liners make it easy to remove them. A microwave-safe bowl is perfect for melting chocolate and butter. Start by preheating your oven to 350°F (175°C). Line a muffin tin with cupcake liners. In a microwave-safe bowl, mix 1 cup of dark chocolate chips and ½ cup of unsalted butter. Heat in the microwave for 30 seconds. Stir and heat again until smooth. Once melted, add 1 cup of granulated sugar and mix well. Then, add 2 large eggs one at a time, stirring after each. Add in 1 teaspoon of vanilla extract. In another bowl, whisk together ½ cup of all-purpose flour, ¼ cup of cocoa powder, ½ teaspoon of baking powder, and ¼ teaspoon of salt. Gradually fold the dry mix into the chocolate mix until combined. Pour the brownie batter into the prepared muffin tins. Fill each cup about two-thirds full. Bake for 18-20 minutes. Check if they are done by inserting a toothpick. If it comes out with a few moist crumbs, they are ready. Let the brownies cool in the tin completely. This helps them set properly. Once the brownies are cool, scoop out a small part from the center of each. This creates space for the ice cream. Add a generous scoop of vanilla ice cream into each brownie cup. Drizzle ½ cup of store-bought salted caramel sauce over the ice cream. Finish by sprinkling some sea salt flakes on top. This adds a nice touch and enhances the flavor. Serve the brownie sundae cups on a decorative platter for a beautiful presentation. To get the best brownie texture, use good chocolate. Dark chocolate chips add rich flavor. Make sure your butter is unsalted and melted well. Mix the sugar in until smooth. When you add the eggs, do it one by one. This helps the brownies rise. Don't overmix after adding the dry ingredients. Just fold until you see no flour. Bake them until a toothpick has a few moist crumbs. For extra flavor, try adding a pinch of espresso powder. It boosts the chocolate taste without being strong. You can also use a splash of almond extract instead of vanilla. This gives a nice twist. Consider adding chopped nuts like walnuts or pecans for crunch. They pair well with the soft brownies. If you love caramel, swirl some into the batter before baking. Serve these brownie cups warm for the best taste. Add a scoop of vanilla ice cream on top. Drizzle salted caramel sauce over the ice cream. Don’t forget the sea salt flakes; they balance the sweetness. For a fun touch, use colorful sprinkles or crushed candies on top. Present them on a nice platter. This makes the dessert look even more appealing. {{image_2}} You can switch out vanilla ice cream for other flavors. Try chocolate, coffee, or caramel ice cream. Each choice adds a new twist. If you love fruit, consider strawberry or raspberry ice cream. These flavors pair well with the rich brownie and salted caramel. Mixing flavors can make this dessert even more fun! The toppings can change every time you make this sundae. Instead of salted caramel sauce, use chocolate sauce or peanut butter sauce. You can add crushed nuts, sprinkles, or whipped cream. Fresh fruit like berries or bananas can add a nice touch. Feel free to mix and match toppings to create your perfect sundae cup. To make this dessert vegan, use vegan butter and dark chocolate. You can also swap out the eggs for flax eggs or applesauce. For gluten-free options, use almond flour or a gluten-free flour blend. This way, everyone can enjoy a delicious salted caramel brownie sundae cup! To keep your leftover brownies fresh, place them in an airtight container. Layer parchment paper between brownies to prevent sticking. Store them at room temperature for up to three days. If you want to keep them longer, consider refrigerating them. They will stay fresh for about a week in the fridge. When you're ready to enjoy your brownies again, you can reheat them easily. Place a brownie in the microwave for 10 to 15 seconds. Check to see if it's warm. If not, heat it for another 5 seconds. This method keeps the brownie soft and gooey. You can also warm them in an oven at 350°F for about 5 minutes. This works great for bringing back that fresh-baked taste. Freezing brownies is a smart way to save some for later. First, let them cool completely. Then, wrap each brownie in plastic wrap. Place the wrapped brownies in a freezer-safe bag. They can last up to three months in the freezer. When you want to eat them, thaw them in the fridge overnight. You can also reheat them straight from the freezer. Just add a few extra seconds in the microwave. Enjoy your sweet treat whenever you want! Yes, you can make these brownie cups ahead of time. Bake the brownie cups and let them cool. Store them in an airtight container for up to two days. When you're ready to serve, scoop out the center, add ice cream, and drizzle with caramel. This makes for a quick and easy dessert! You can use semi-sweet chocolate chips instead. They will give a sweeter flavor. You might also try milk chocolate chips for a creamier taste. If you're feeling adventurous, use white chocolate chips for a different twist! To make homemade salted caramel sauce, follow these steps: - In a saucepan, combine 1 cup of granulated sugar and ¼ cup of water. - Heat over medium heat until the sugar melts and turns a golden color. - Remove from heat and carefully stir in ½ cup of heavy cream. - Add ½ teaspoon of sea salt and mix well. - Let it cool before using. Store in a jar for up to two weeks. You learned how to make delicious brownie cups and their tasty toppings. We covered the key ingredients, tools, and step-by-step instructions for your sweet treat. Tips for perfect texture and flavor made it easy. You now know fun variations, how to store leftovers, and answers to common questions. Enjoy making these brownie cups for any occasion. I hope they bring joy to your kitchen and smiles to your friends!

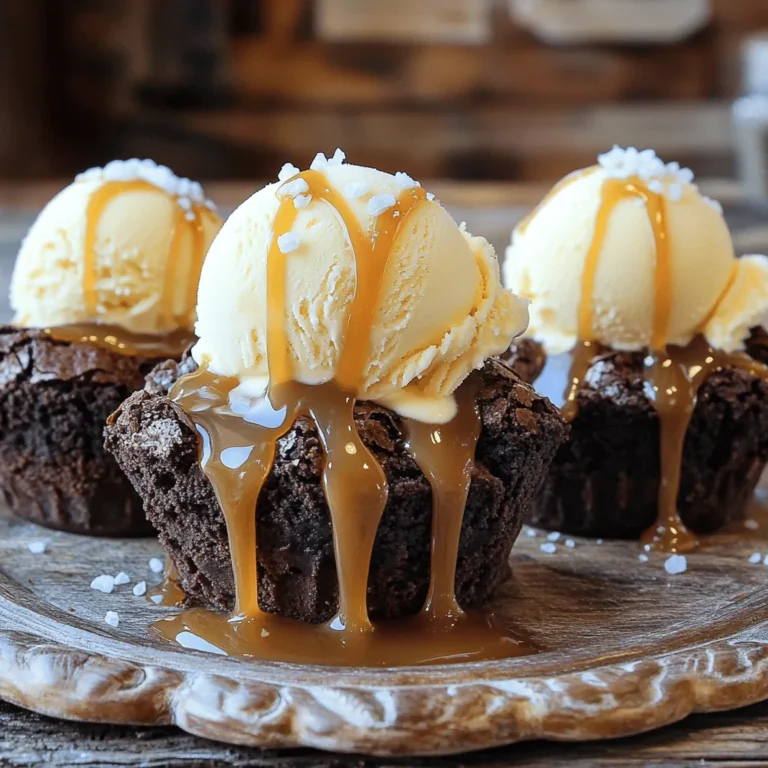
Salted Caramel Brownie Sundae Cups Delightful Treat

- Spinach: I always choose fresh spinach. It adds a nice crunch and color. - Strawberries: The sweet strawberries make the salad pop. Slice them thin for best flavor. - Red onion: Use thin slices of red onion. They give a sharp taste that balances sweetness. - Feta cheese: Crumbled feta adds creaminess. It pairs perfectly with the strawberries. - Sunflower seeds: These seeds add a delightful crunch. They also boost the salad's nutrition. - Olive oil: Use good quality olive oil. It brings richness to the dressing. - Apple cider vinegar: This vinegar adds tang. It brightens up the flavors. - Honey: A touch of honey provides sweetness. Adjust it based on your taste. - Poppy seeds: These seeds add a fun texture. They also give a unique look. - Seasoning: Don't forget salt and pepper. They enhance all the other flavors. This salad combines fresh ingredients for a delightful mix of tastes. Each part plays a role in making it fresh and flavorful. To make the dressing, start by gathering your ingredients. You will need olive oil, apple cider vinegar, honey, poppy seeds, salt, and pepper. In a small bowl, whisk these ingredients together. Mix until everything is well combined. You want a smooth consistency without any lumps. This dressing adds a sweet and tangy flavor that pairs well with the salad. Now, let’s put the salad together. In a large salad bowl, combine the fresh spinach, sliced strawberries, crumbled feta cheese, thinly sliced red onion, and sunflower seeds. Each ingredient adds its own taste and texture. The spinach provides a crisp base while the strawberries offer sweetness. The feta adds creaminess, and the sunflower seeds give a nice crunch. Next, it’s time to toss the salad. Drizzle the dressing over the salad and gently mix everything together. Make sure all the ingredients are coated evenly. This step ensures every bite is full of flavor. Let the salad sit for about 5-10 minutes. This helps the flavors meld together. You can serve it chilled or at room temperature for the best taste. Enjoy your fresh and flavorful salad! To boost the taste of your salad, let it sit for a bit before serving. This time allows the flavors to mix well. I suggest waiting about 5 to 10 minutes. This step makes a big difference. Balancing sweetness and acidity is key. The honey in the dressing adds sweetness. Apple cider vinegar gives a nice tang. Adjust these to match your taste. If you prefer a sweeter salad, add more honey. For more zing, splash in extra vinegar. When serving at gatherings, make it look great! Use a large, colorful bowl to show off the salad. You can layer the ingredients for a beautiful effect. This can impress your guests. Adding garnishes can elevate the dish. Try placing extra strawberries on top. Chopped nuts or fresh herbs add a pop of color. A sprinkle of extra feta cheese makes it even more appealing. Washing and slicing can take time. To save time, wash spinach and strawberries ahead of time. Store them in the fridge in a sealed bag. This keeps them fresh and ready to use. Making the dressing in advance is smart too. You can store it in the fridge for a few days. Just whisk it again before using. This way, you can whip up the salad quickly when you're ready to eat. {{image_2}} You can switch up the leafy greens in this salad for a fun twist. Try using kale or arugula instead of spinach. Both greens bring their own flavor and texture. If you want a milder taste, use mixed greens. If you're not a fan of feta cheese, there are great alternatives. Goat cheese adds a tangy kick. For a dairy-free option, try crumbled tofu or a nut-based cheese. Each option will change the salad's flavor, but all are delicious! Want to make your salad heartier? Add some protein! Grilled chicken works well and adds a nice touch. Chickpeas are a great plant-based option. They give a nice crunch and boost your fiber. You can also mix in seasonal fruits. Peaches or blueberries are great choices in the summer. In fall, try sliced apples or pears. Each fruit adds sweetness and freshness to the dish. Feel free to swap honey in the dressing with other sweeteners. Maple syrup offers a rich flavor. Agave nectar is another good choice. Each sweetener will change the taste slightly, so choose what you like best. You can also vary the types of vinegar you use. Balsamic vinegar provides a deeper sweetness. Lemon juice gives a bright, zesty kick. Experimenting with vinegar can change the whole vibe of your salad! To keep your salad fresh, store it in an airtight container. This helps prevent sogginess. If you have leftover dressing, store it in a separate jar. This keeps the salad crisp. Dressing can last up to a week in the fridge. I recommend eating the salad within two days for the best taste. Look for signs of spoilage, like brown spinach or mushy strawberries. If it smells bad, toss it out. Freshness is key for flavor. You can prepare your ingredients a day ahead. Wash and slice the strawberries and onions. Keep them in sealed bags. Assemble the salad just before serving. This ensures everything stays fresh and crunchy. Enjoy your vibrant dish! Yes, you can make this salad a day ahead. However, I recommend storing some parts separately. Keep the spinach, strawberries, and feta cheese in one bowl. Store the dressing in a jar. This keeps everything fresh. When ready to serve, mix them together. This way, your salad stays crisp and tasty! This salad pairs well with many dishes. You can serve it with grilled chicken for protein. It also goes great with a light pasta dish. If you want something simple, try crusty bread on the side. Each of these options adds more flavor to your meal. Yes, this salad is gluten-free! All the ingredients are safe for those avoiding gluten. Make sure to check the labels on your dressing ingredients. Some items might contain gluten as a hidden additive. But with fresh spinach, strawberries, and seeds, you can enjoy this salad worry-free. This blog post has shown you how to make a delicious Strawberry Spinach Poppy Seed Salad. We explored the fresh produce, dairy, and nuts you'll need. I shared simple steps to prepare the dressing, assemble the salad, and serve it well. Remember to enhance the flavor and presentation, and keep your ingredients fresh. You can easily swap ingredients or add proteins. Lastly, follow my tips on storage to enjoy leftovers. With these insights, you can create a tasty, healthy dish anytime!

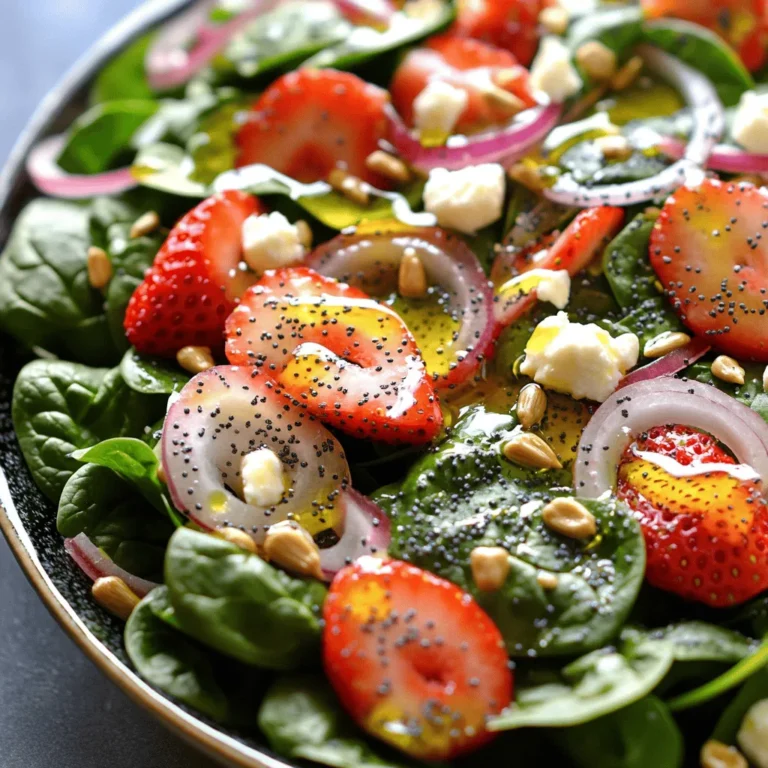
Strawberry Spinach Poppy Seed Salad Fresh and Flavorful

PREV 1 … 19 20 21 … 57 NEXT
flavor nest kitchen

explore

DessertsDinnerAppetizersDrinks

Our Policies

  • Cookie Policy
  • Copyright Policy
  • Disclaimer
  • GDPR Policy
  • Terms Of Use
Back to Top
  • About
  • Contact Us
  • Privacy Policy
© 2025 flavor nest kitchen