FREE DINNER EBOOK! Get your copy!
  • Cookie Policy
  • GDPR Policy
  • Disclaimer
  • Terms Of Use
  • Visit my other site: Fun Cookie Recipes
flavor nest kitchen
  • Home
  • Dinner
  • Desserts
  • Drinks
  • Appetizers
  • Contact
  • About
  • Privacy Policy
  • Home
  • Dinner
  • Desserts
  • Drinks
  • Appetizers
  • Contact
  • About
  • Privacy Policy
  • Cookie Policy
  • GDPR Policy
  • Disclaimer
  • Terms Of Use
Visit my other site: Fun Cookie Recipes

HOME / CATEGORIES /

Latest

Here are the main ingredients you need for Sweet Chili Chicken Lettuce Wraps. Each one adds to the flavor and texture. - 1 lb ground chicken - 1 tablespoon olive oil - 1 red bell pepper, finely diced - 1 green bell pepper, finely diced - 2 green onions, sliced - 2 cloves garlic, minced - 1 tablespoon fresh ginger, grated - 1/4 cup sweet chili sauce - 1 tablespoon soy sauce (or coconut aminos for a gluten-free option) - 1 teaspoon sesame oil - 1 head of butter or iceberg lettuce, leaves separated - 1/4 cup chopped fresh cilantro (for garnish) - Crushed peanuts (optional, for garnish) Using fresh ingredients makes a big difference. You get better flavor and texture. The ground chicken brings protein. The bell peppers add crunch and color. Garlic and ginger give a nice aroma. Sweet chili sauce gives a sweet and spicy kick. Feel free to mix in different veggies if you want. Just keep the main flavors in mind. This recipe is flexible. You can use what you have on hand. Enjoy cooking! First, I heat one tablespoon of olive oil in a large skillet over medium-high heat. Once the oil is hot, I add one pound of ground chicken. I break it apart with a spatula. I cook it for about five to seven minutes until it turns brown and is fully cooked. Next, I stir in two cloves of minced garlic and one tablespoon of grated fresh ginger. I let them cook for one to two minutes. This step makes the kitchen smell amazing! Now, I add a red bell pepper and a green bell pepper, both finely diced. I sauté the peppers for about three to four minutes. I want them to be tender but still a bit crisp. This adds great color and crunch to my dish. Next, I pour in a quarter cup of sweet chili sauce, one tablespoon of soy sauce, and one teaspoon of sesame oil. I stir everything together until well mixed. I let it heat through for two to three minutes. This makes the flavors come alive! Finally, I remove the skillet from the heat and fold in two sliced green onions. To assemble, I take a large lettuce leaf and add a generous spoonful of the chicken mixture into the center. I garnish it with chopped cilantro and optional crushed peanuts for some extra crunch. I wrap the lettuce around the filling and enjoy this tasty treat! To make your Sweet Chili Chicken Lettuce Wraps shine, adjust the sweetness and spice. If you want more heat, add a dash of sriracha or red pepper flakes. For less sweetness, reduce the sweet chili sauce. You can also try adding lime juice for extra zing. For fresh ingredients, swap the bell peppers for carrots or snap peas. You can use shredded cabbage instead of lettuce for added crunch. Consider using ground turkey or tofu for a lighter option. To serve, arrange the lettuce wraps on a large platter. Add lime wedges for squeezing over the wraps. This adds flavor and freshness. Sprinkle extra cilantro on top for color and taste. You can also place the crushed peanuts in a small bowl on the side. This lets guests add their own crunch. These little touches make your dish look inviting and fun! {{image_2}} You can switch the ground chicken for other proteins. Turkey works well and keeps it lean. Ground beef adds a rich flavor. If you prefer plant-based options, try crumbled tofu or lentils. Each choice brings a unique taste. You can match your protein to your diet or taste. To make this dish gluten-free, use coconut aminos instead of soy sauce. This gives a similar taste without gluten. For wraps, use lettuce leaves like butter or iceberg. You can also try cabbage leaves for a crunch. If you want low-carb options, these swaps work great. Adding more veggies can boost flavor and nutrition. Try carrots, mushrooms, or snap peas. Each brings a new taste and texture. You can also use spices like cumin or chili flakes for heat. For extra flavor, consider unique sauces like hoisin or peanut sauce. These can add a fun twist to your wraps. To keep your Sweet Chili Chicken Lettuce Wraps fresh, store them properly. First, let the chicken cool down. Once cooled, place it in an airtight container. This helps keep moisture in and prevents odors from mixing. You can store the chicken in the fridge for up to 3 days. If you want to freeze the chicken filling, spoon it into freezer-safe bags. Make sure to remove as much air as possible. You can freeze it for up to 2 months. When you're ready to eat, thaw it in the fridge overnight. When reheating the chicken mixture, you have a few options. You can use a skillet over medium heat. Stir it often until it’s warm. This usually takes about 5 minutes. You can also use a microwave. Place the chicken in a bowl and cover it. Heat it for 1-2 minutes until hot. To keep the lettuce crisp, do not reheat it. Instead, prepare fresh lettuce leaves when you're ready to serve. This way, your wraps stay crunchy and fresh. Yes, you can make these wraps ahead of time. Cook the chicken filling in advance and store it in the fridge. Just keep the lettuce separate until you are ready to serve. This way, the lettuce stays crisp and fresh. When you are ready to eat, simply warm the chicken filling and assemble your wraps. These wraps pair well with many sides. You can serve them with rice or quinoa for a filling meal. Fresh fruit like mango or pineapple adds a sweet touch. You can also add a side of spring rolls or a light salad for a colorful plate. Leftovers can stay fresh in the fridge for up to three days. Store the chicken filling in an airtight container to keep it fresh. The lettuce should be kept separate to avoid wilting. Always check for any off smells before eating leftovers. Yes, this recipe is great for meal prep. You can cook a larger batch of the chicken filling and divide it into portions. Store it in the fridge or freeze it for later. The lettuce can be washed and stored separately, ready for quick assembly. This makes it easy to grab a healthy meal on busy days. This blog post covered a tasty recipe for Sweet Chili Chicken Lettuce Wraps. We discussed the key ingredients, like ground chicken and fresh veggies. I explained each step, from cooking the chicken to mixing sauces and assembling wraps. You also learned tips for flavor, presentation, and variations like protein swaps. Remember, these wraps are versatile and perfect for family meals or meal prep. Enjoy getting creative in the kitchen and savoring this healthy dish!

Sweet Chili Chicken Lettuce Wraps Flavorful and Easy

To make delicious Raspberry White Chocolate Scones, you need the right ingredients. Here’s what you will need: - 2 cups all-purpose flour - 1/4 cup granulated sugar - 1 tablespoon baking powder - 1/2 teaspoon salt - 1/2 cup unsalted butter, cold and cubed - 1/2 cup heavy cream - 1 large egg - 1 teaspoon vanilla extract - 1 cup fresh raspberries (or frozen, thawed) - 1/2 cup white chocolate chips - Extra sugar for sprinkling Each ingredient plays a key role. The all-purpose flour gives structure. Granulated sugar adds sweetness. Baking powder helps the scones rise. A pinch of salt balances flavors. Cold butter creates a flaky texture. Heavy cream adds richness. The egg binds everything together. Vanilla extract gives a warm flavor. Fresh raspberries add tartness and color. White chocolate chips bring a creamy touch. Finally, extra sugar on top gives a nice crunch. With these ingredients, your scones will be soft, sweet, and bursting with flavor. They make a perfect treat for breakfast or tea time. Gather these items, and you’re ready to bake! Start by preheating your oven to 400°F (200°C). This step is key. While the oven warms, line a baking sheet with parchment paper. This helps prevent sticking. It also makes cleanup easy. Next, grab a large mixing bowl. Add 2 cups of all-purpose flour, 1/4 cup of granulated sugar, 1 tablespoon of baking powder, and 1/2 teaspoon of salt. Use a whisk to mix these dry ingredients well. This will give your scones a nice rise and flavor. Now, take 1/2 cup of cold, cubed unsalted butter. Add it to your flour mixture. Using a pastry cutter or your fingers, work the butter into the flour. Aim for a texture like coarse crumbs. This step adds richness to your scones. In a separate bowl, mix together 1/2 cup of heavy cream, 1 large egg, and 1 teaspoon of vanilla extract. Whisk until everything is blended. This mixture brings moisture and flavor to the dough. Pour the cream mixture into the dry ingredients. Stir gently until just combined. Be careful not to overmix! Gently fold in 1 cup of fresh raspberries and 1/2 cup of white chocolate chips. Turn the dough onto a floured surface and shape it into a thick round disc, about 1 inch high. Cut this disc into 8 equal wedges or use a round biscuit cutter for nice shapes. Place the scones on your prepared baking sheet. Space them a few inches apart to allow for rising. Brush the tops with a bit of extra cream and sprinkle sugar on top. Bake for 15-20 minutes until golden brown. Let them cool slightly before serving. Enjoy warm for the best taste! To get soft, flaky scones, start with cold butter. Cold butter helps create air pockets. These pockets make scones rise and stay fluffy. Avoid overmixing the dough. Mix just until the ingredients combine. If you see dry flour, that’s fine. Your scones will be tender and delicious. Always use a pastry cutter or your fingers to mix in the butter. You want the butter to break into small pieces. When adding wet ingredients, pour them in gently. Stir with a large spoon, not a whisk. This keeps the dough from getting too tough. To keep your scones fresh, store them in an airtight container. They do best at room temperature for 1-2 days. If you want to keep them longer, freeze them. Wrap each scone in plastic wrap. Then place them in a freezer bag. To reheat, warm them in the oven at 350°F for about 10 minutes. Enjoy them warm for the best taste! {{image_2}} You can swap raspberries for other berries. Blueberries, strawberries, or blackberries work well too. Each berry brings its unique taste. For example, blueberries add a sweet and juicy flavor. Strawberries give a lovely fruity burst. Just make sure to adjust the amounts if needed. If you prefer dark chocolate, feel free to change it up. Use dark chocolate chips instead of white chocolate chips. Dark chocolate adds a rich flavor that balances the berries. It gives a nice twist to the classic recipe. You might find this version even more indulgent. To make these scones gluten-free, swap all-purpose flour for a gluten-free blend. Many stores sell good gluten-free mixes. Just ensure the mix includes a binding agent, like xanthan gum. This change helps maintain the scones' texture. You can enjoy a delicious treat without gluten! Store leftover scones in an airtight container. This keeps them fresh longer. Make sure they are completely cool before you seal them. If stored correctly, they can last for up to three days at room temperature. If your kitchen is warm, refrigerate them to prevent spoilage. Freezing scones is easy and a great way to save them. First, let the scones cool completely. Then, wrap each scone in plastic wrap. Place them in a freezer-safe bag or container. They can stay in the freezer for about two months. To enjoy later, just thaw them at room temperature. Reheating scones can bring back their warm, fresh taste. The best method is in the oven. Preheat your oven to 350°F (175°C). Place the scones on a baking sheet and heat them for about 10 minutes. You can also use a microwave. Heat for about 15-20 seconds, but it may not be as crispy. Enjoy your scones warm for the best flavor! Yes, you can use frozen raspberries. Just make sure to thaw them first. This helps the scones stay soft and moist. Frozen raspberries may release more juice, so gently fold them into the dough. Scones are done when they turn golden brown. You can also check if they feel firm to the touch. If you insert a toothpick, it should come out clean. Keep an eye on them during baking. These scones pair well with clotted cream or butter. You can also serve them with a cup of tea or coffee. For a sweet touch, drizzle melted white chocolate on top. Fresh raspberries add color and flavor, too. Yes, you can make the dough ahead of time. Just shape it into a disc and wrap it tightly. Store it in the fridge for up to 24 hours. When ready, cut the scones and bake them fresh. Serve scones warm for the best taste. Place them on a rustic wooden board. Add some fresh raspberries and drizzle melted white chocolate on top. This makes for a lovely presentation. Enjoy with clotted cream or butter for extra richness. In this blog post, we explored how to make delicious Raspberry White Chocolate Scones. We covered the ingredients needed, step-by-step instructions, and helpful tips for the perfect bake. We also discussed fun variations and storage methods to keep your scones fresh. Remember, these scones are easy to make and great for any occasion. Try different berries or serve them warm with your favorite drink. Enjoy baking your scones!

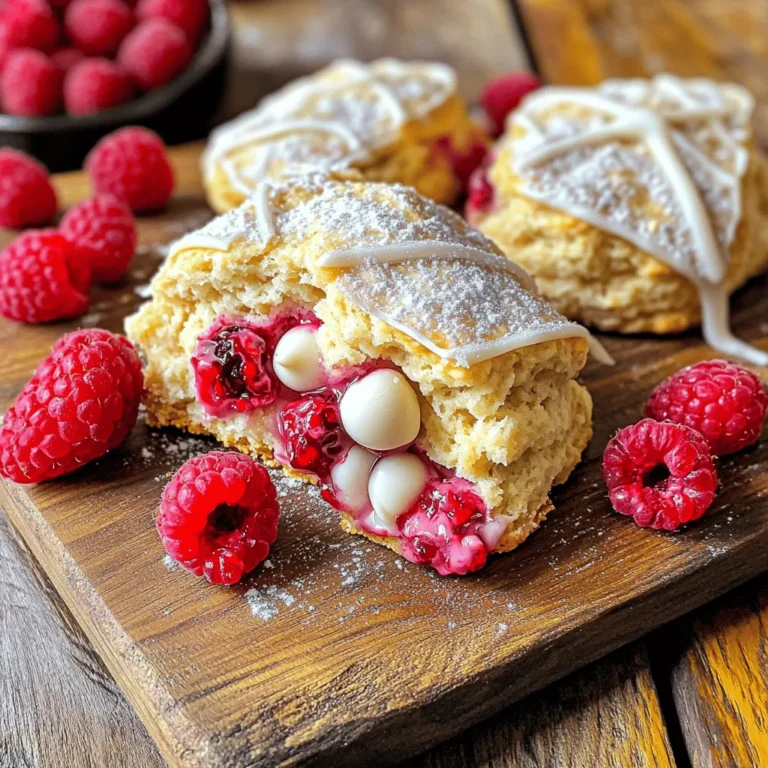
Raspberry White Chocolate Scones Delightful Treat Guide

To make savory garlic butter lobster tails, gather these ingredients: - 4 lobster tails - 1/2 cup unsalted butter - 4 cloves garlic, minced - 1 tablespoon fresh parsley, chopped - 1 teaspoon lemon zest - 1/2 teaspoon paprika - Salt and pepper to taste - Lemon wedges for serving You can swap some ingredients if needed. Use salted butter for extra flavor. You can also add more herbs like thyme or basil instead of parsley. If you don’t have fresh garlic, garlic powder works well too. For a citrus twist, swap lemon zest with lime zest. Fresh lobster tails taste great, but frozen ones can be just as good. Frozen tails are often caught and frozen quickly. This way, they keep their flavor. When buying, check for a firm shell and a fresh scent. If you choose frozen tails, thaw them in the fridge overnight for best results. To start, you need to prepare the lobster tails. First, preheat your oven to 425°F (220°C). Then, grab some kitchen shears. Carefully cut the top shell of each lobster tail down the center. Stop just before you reach the tail. This step helps the heat reach the meat. Next, gently pull apart the shell to expose the flesh. This will make it easy to coat the meat with garlic butter later. Now, let’s make the garlic butter. In a small saucepan, melt 1/2 cup of unsalted butter over medium heat. Once the butter is melted, add 4 cloves of minced garlic. Sauté for 1-2 minutes. You want it fragrant, but don’t let it brown. Remove the pan from the heat. Stir in 1 tablespoon of chopped fresh parsley, 1 teaspoon of lemon zest, and 1/2 teaspoon of paprika. Season with salt and pepper to taste. This mixture will make your lobster tails taste amazing. After preparing the lobster and garlic butter, it’s time to bake. Place the lobster tails on a baking sheet, flesh side up. Generously brush the garlic butter mixture over the meat. Make sure to cover it well. Save some butter for later. Bake the lobster tails for about 12-15 minutes. They are done when the meat is opaque and cooked through. In the last few minutes, baste the lobster with the reserved garlic butter. This adds even more flavor. Once done, let them rest for a couple of minutes. Serve with fresh lemon wedges for extra zest. Choosing fresh lobster tails is key for great flavor. Look for tails with a firm shell. They should feel heavy for their size. The meat should be slightly translucent, not cloudy. Check the color; it should be bright and vibrant. Avoid tails with a strong fishy smell. Fresh tails often have a mild ocean scent. To make the garlic butter shine, use fresh garlic. Mince the garlic finely for even flavor. Don't let it brown in the pan; you want the sweet aroma. Adding fresh parsley gives a pop of color and taste. Lemon zest adds brightness. The paprika gives warmth and a touch of spice. Mix these well into the melted butter for a balanced flavor. Cooking time can change based on the size of the lobster tails. For smaller tails, check the meat around 10 minutes. Larger tails may need up to 18 minutes. The lobster is done when it turns opaque and firm. Keep an eye on it; overcooking makes it tough. Basting with garlic butter helps keep the meat juicy. {{image_2}} You can add fresh herbs to your garlic butter. Try using basil, thyme, or dill. Just chop them finely and mix them in. This adds a fresh taste and extra color. You can use any herb you enjoy. Each adds a unique flavor. Experiment with different herbs for new twists. If you like heat, add red pepper flakes to the garlic butter. Start with a pinch and taste as you go. You can also add hot sauce for more spice. This gives the dish a nice kick. It balances well with the richness of the butter. A spicy version is great for those who love bold flavors. Baking lobster tails is easy and produces tender meat. Grilling gives a smoky flavor and a nice char. Both methods work well, but they offer different tastes. Baking is more hands-off, while grilling needs attention. If you want a quick meal, bake. For a fun outdoor experience, grill. Try both to find your favorite! After you enjoy your garlic butter lobster tails, store any leftovers right away. Place the tails in an airtight container. This keeps them fresh and tasty. Store them in the fridge for up to two days. If you leave them out, they can spoil quickly. To reheat lobster tails, the oven works best. Preheat your oven to 350°F (175°C). Place the lobster tails on a baking sheet. Cover them with foil to keep them moist. Heat for about 10 minutes or until warm. You can also use a microwave. If you do, heat in short bursts to avoid overcooking. If you want to save lobster tails for later, freezing is a great option. Start by cleaning the tails and removing the meat. Wrap each tail in plastic wrap. Make sure it's tight to avoid freezer burn. Then, place the wrapped tails in a freezer bag. Squeeze out any air before sealing. You can freeze them for up to three months. When ready to use, thaw in the fridge overnight before cooking. You can tell if lobster tails are cooked by looking at the color. The meat should be opaque and white. If it is still translucent or clear, it needs more time. Also, the internal temperature should reach 140°F (60°C). Use a meat thermometer for accuracy. Cook lobster tails for about 12-15 minutes at 425°F (220°C) for best results. Basting with garlic butter helps keep them moist and adds flavor. Yes, you can use salted butter instead of unsalted. However, you may want to reduce the salt in the recipe. Unsalted butter gives you more control over the salt level. This allows you to adjust the taste to your liking. Salted butter can add a nice flavor, but be mindful of the overall saltiness in the dish. The best sides for garlic butter lobster tails include simple and fresh options. Here are a few great ideas: - Garlic bread for dipping in the butter - Steamed asparagus or green beans for color and crunch - A light salad with lemon vinaigrette for freshness - Rice or quinoa to soak up the garlic butter - Mashed potatoes for a creamy side dish These sides complement the rich flavors of the lobster tails. Cooking garlic butter lobster tails is simple and fun. We covered each step, from choosing fresh tails to baking them to perfection. Don't forget the key tips for flavor and cooking times. You can also explore variations to suit your taste. Lastly, proper storage helps keep your meal fresh for later enjoyment. Enjoy this dish as a delightful treat or a special meal. Trust that your skills will impress everyone at the table.

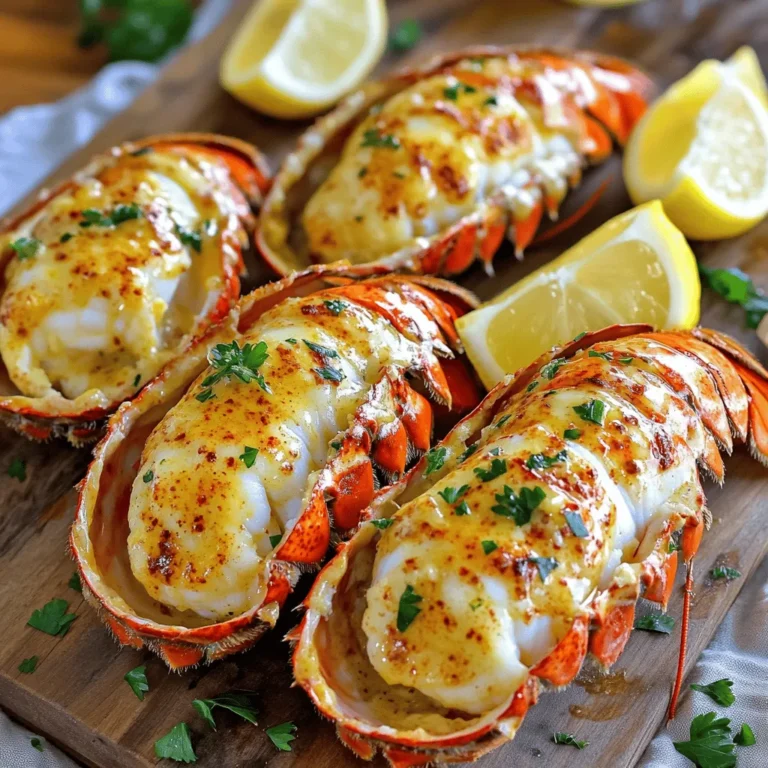
Savory Garlic Butter Lobster Tails Easy and Delicious

To make Air Fryer Greek Yogurt Bagels, you need a few key ingredients: - 1 cup plain Greek yogurt - 1 ½ cups all-purpose flour (plus extra for dusting) - 1 tablespoon baking powder - 1 teaspoon salt - 1 tablespoon honey (optional) These ingredients create a soft dough that yields chewy bagels. The Greek yogurt adds moisture and protein. You can make your bagels even better with some add-ins: - Fresh herbs like chives or dill - Shredded cheese for a savory touch - Minced garlic or onion for extra flavor Adding these ingredients can give your bagels a unique twist and impress your guests. Toppings can elevate your bagels to new heights. Here are some great options: - Everything bagel seasoning for a classic taste - Sesame seeds for a nutty crunch - A sprinkle of sea salt for extra flavor Feel free to mix and match toppings based on your taste. Enjoy your bagels warm and fresh! First, grab a large mixing bowl. Add 1 cup of plain Greek yogurt. Then, pour in 1 ½ cups of all-purpose flour, 1 tablespoon of baking powder, and 1 teaspoon of salt. If you want sweetness, add 1 tablespoon of honey. Mix everything together until a dough forms. If the dough feels sticky, sprinkle in more flour, a little at a time, until it feels right. Now, take the dough and place it on a floured surface. Knead it gently for about 1-2 minutes until it feels smooth. Then, divide the dough into 4 equal pieces. Roll each piece into a ball. Using your finger, poke a hole through the center to create a bagel shape. Make sure to gently stretch the hole a bit larger to get that classic bagel look. In a pot, bring water to a gentle simmer. This is key for the bagel's chewiness. Carefully drop each bagel into the water. Let them boil for about 30 seconds on each side. This step makes them taste great and helps them hold their shape. Use a slotted spoon to remove them and set them aside to drain. Preheat your air fryer to 330°F (165°C). Lightly brush the boiled bagels with water. Then, sprinkle everything bagel seasoning on top. Place the bagels in the air fryer basket in a single layer. Make sure not to overcrowd them! Air fry for 10-12 minutes, or until they turn golden brown and are fully cooked. Once done, remove them from the air fryer. Let them cool slightly before you enjoy! Getting the dough right is key. You want it soft but not too sticky. If your dough feels wet, add more flour, one tablespoon at a time. Mix it well. Kneading for 1-2 minutes helps make it smooth. It should come together easily without sticking to your hands or the counter. Don't rush this step; a good dough makes better bagels. To get that chewy bagel bite, boiling is a must. Boiling the bagels for 30 seconds on each side creates a nice crust. This is what sets them apart from bread. After boiling, air frying at 330°F gives them a crispy finish. Keep an eye on them while they cook. Once they are golden brown, they are done! Serve your bagels warm for the best taste. Cream cheese is a classic choice. You can also try avocado or hummus for a twist. Add fresh herbs like chives or dill to brighten the flavors. You can even slice them and make mini sandwiches! Enjoy your bagels fresh and warm for the best experience. {{image_2}} You can easily change the flavor of your bagels with Greek yogurt. Try adding a few ingredients during mixing. For a savory twist, mix in garlic powder or dried herbs. If you like sweet bagels, add cinnamon or vanilla extract. You can even fold in some shredded cheese for a cheesy flavor. Each variation gives you a unique taste! Toppings can make your bagels even better. The classic everything bagel seasoning is great, but you can be creative. Here are some ideas: - Sesame seeds - Poppy seeds - Dried onion flakes - Fresh herbs like dill or chives - A sprinkle of sea salt Try different combinations to discover your favorite topping mix! If you need gluten-free bagels, you can switch the flour. Use a gluten-free all-purpose flour blend instead. Make sure the blend has xanthan gum for better texture. You might need to adjust the yogurt amount for the right dough consistency. This way, everyone can enjoy tasty bagels! To keep your bagels fresh, let them cool down first. Place them in a paper bag to keep moisture at bay. You can also use an airtight container. This method helps them stay soft for about two days. If you want to keep them longer, freezing is better. You have a few good choices for reheating. The best way is to toast them. Just slice the bagel and pop it in the toaster until golden. If you prefer a soft bagel, you can microwave it for about 10-15 seconds. This warms it up but may not give it a crispy edge. Freezing is a great option if you have extras. Wrap each bagel tightly in plastic wrap, then place them in a freezer bag. Write the date on the bag to remember when you froze them. These can last up to three months in the freezer. When you want one, take it out and thaw it at room temperature. Then, reheat as desired. To make these bagels healthier, you can use whole wheat flour instead of all-purpose flour. This change adds fiber and nutrients. You can also reduce the amount of honey or skip it altogether. Another option is to top your bagels with sesame seeds or poppy seeds instead of everything bagel seasoning. This will cut down on added salt. Yes, you can use non-fat Greek yogurt for this recipe. It will still work well. The bagels may be slightly less rich in flavor, but they will still be tasty. Non-fat yogurt will also keep the calories low. If you want a bit more taste, add a little extra honey or a pinch of salt. Any air fryer will work for making bagels as long as it fits your dough size. A model with a basket is great for even cooking. I recommend looking for an air fryer with a temperature range up to 400°F (200°C). This gives you flexibility for other recipes too. Popular brands include Philips, Ninja, and Cosori. Bagels are done when they are golden brown and firm to the touch. You can also check the bottom; it should be slightly crispy. If you want to be sure, use a toothpick to test the inside. If it comes out clean, your bagels are ready to enjoy! You now have the tools to make delicious Air Fryer Greek Yogurt Bagels. We covered the ingredients, mixing, and shaping. You learned how to boil and air fry them for the best texture. Don't forget about the tips for perfect results and storage methods for longevity. Try different flavors and toppings to make each bagel unique. Enjoy every bite, knowing you crafted them with care. Simple, tasty, and satisfying, these bagels will be a hit!

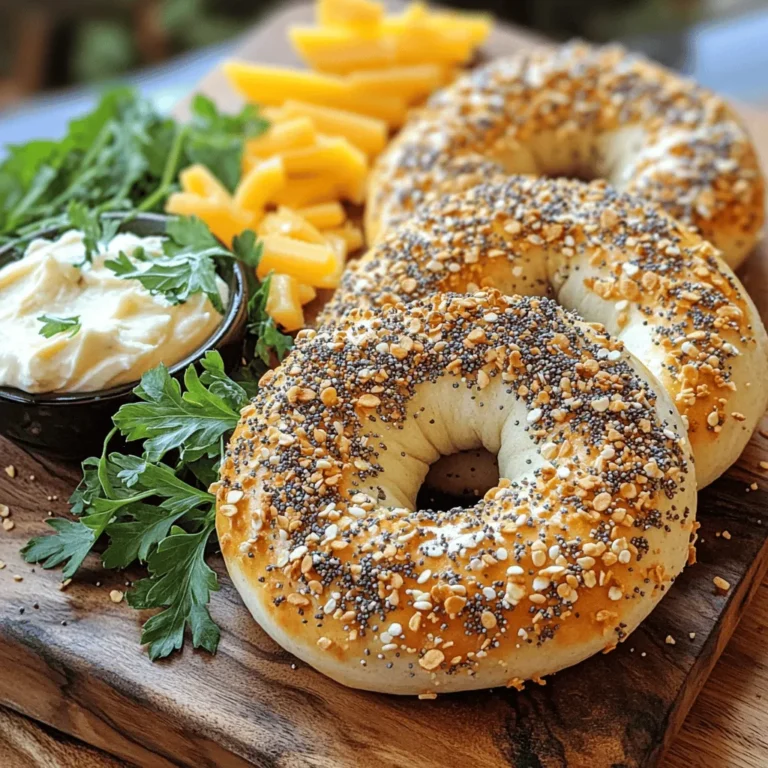
Air Fryer Greek Yogurt Bagels Simple and Tasty Recipe

- 1 ½ cups graham cracker crumbs - ½ cup unsalted butter, melted - ⅓ cup brown sugar - 1 (15 oz) can pure pumpkin puree - 1 cup cream cheese, softened - ½ cup powdered sugar - 1 tsp vanilla extract - 1 tsp pumpkin pie spice - ½ cup salted caramel sauce - Sea salt for garnish The ingredients for No-Bake Salted Caramel Pumpkin Bars are simple and easy to find. You need graham cracker crumbs for the crust. They give a nice crunch and flavor. Melted unsalted butter helps bind the crust together. Brown sugar adds sweetness and a rich taste. The filling is where the magic happens. Pure pumpkin puree is key for that fall flavor. Cream cheese makes it creamy and smooth. The powdered sugar sweetens the mix, while vanilla extract adds depth. Pumpkin pie spice brings warmth and that classic autumn aroma. Finally, the salted caramel sauce is a game changer. It adds a sweet and salty contrast. You can sprinkle sea salt on top for an extra burst of flavor. These ingredients come together to create a delightful treat. - Alternative crust options: You can use crushed cookies or oats for a different base. - Dairy-free alternatives: Swap cream cheese for a dairy-free cream cheese. Use coconut oil instead of butter. - Sweetener substitutes: Replace brown sugar with maple syrup or honey for a natural sweetness. These substitutions allow you to customize the recipe to fit your needs or preferences. Enjoy experimenting with these options! First, mix the graham cracker crumbs, melted butter, and brown sugar in a bowl. Use a fork or your hands to blend them well. You want a crumbly texture that sticks together. Next, press this mixture into the bottom of a 9x9-inch baking dish. Make sure to cover the whole bottom evenly. Once pressed, chill this crust in the refrigerator for about 10 to 15 minutes. This will help it set. In a clean bowl, start by mixing the cream cheese until it is smooth and creamy. This step is key to a nice texture. Then, add the pumpkin puree, powdered sugar, vanilla extract, and pumpkin pie spice. Mix everything together until there are no lumps. You want a smooth filling that will be rich in flavor. Now, remove the crust from the fridge. Pour the pumpkin filling over the crust. Spread it evenly with a spatula or the back of a spoon. Next, drizzle the salted caramel sauce on top. Use a knife to swirl the caramel into the pumpkin filling for a marbled look. Finally, return the dish to the refrigerator. Chill for at least 3 hours or until the bars are firm. This step is important to make sure your bars hold their shape when cut. To mix the ingredients smoothly, use room temperature cream cheese. This helps blend easily with the pumpkin puree. Start by mixing the cream cheese alone until creamy. Then add pumpkin puree and other ingredients gradually. Make sure there are no lumps. Chill the bars for at least three hours. This time allows the filling to set properly. If you can, leave them overnight. Keeping the bars in a cool spot helps maintain their shape. For a lovely presentation, serve these bars on a decorative plate. Drizzle some extra salted caramel on top. Add a sprinkle of cinnamon for a festive touch. This not only looks nice but adds flavor too. When cutting the bars, use a sharp knife. Dip the knife in warm water for clean cuts. This helps make each bar look neat and tasty. If the crust is too crumbly, add a bit more melted butter. This helps it hold together better. If the filling is too sweet, mix in a bit more pumpkin puree. This balances the flavors nicely. For spice adjustments, add more pumpkin pie spice or cinnamon. Taste as you go to find your perfect flavor. It’s all about making these bars just right for you! {{image_2}} You can easily change the flavor of your no-bake salted caramel pumpkin bars. Adding chocolate or butterscotch chips gives them a sweet twist. Simply mix in half a cup of chips into the pumpkin filling. You can also try different spices for new tastes. Swap the pumpkin pie spice for cinnamon or nutmeg to find your favorite. Want to impress at a party? Turn your bars into mini desserts. Cut them into small squares or use a cookie cutter for fun shapes. These bite-sized treats are perfect for sharing! You can also pair the bars with ice cream or whipped cream. A scoop of vanilla ice cream on top adds a creamy touch. Think about using fresh pumpkin instead of canned. Fresh pumpkin has a vibrant taste and texture. To use fresh pumpkin, roast and puree it until smooth. You can also mix in other fall flavors. Try adding a bit of maple syrup or chopped pecans for a cozy twist. These changes keep your bars fresh and exciting! To keep your No-Bake Salted Caramel Pumpkin Bars fresh, store them in the refrigerator. Place them in an airtight container. This helps prevent them from drying out. The cold air keeps the flavors bright and tasty. Make sure to cover them well, so they remain soft and creamy. If you want to save some bars for later, you can freeze them. Cut the bars into pieces before freezing. Wrap each piece in plastic wrap. Then, place them in a freezer-safe bag. This way, they stay fresh for up to three months. When you’re ready to enjoy them, take a bar out and let it thaw in the fridge. It usually takes a few hours to soften. In the refrigerator, your bars will last about five days. Keep an eye on them. If they start to smell off or look dry, it’s best to toss them. A good sign that the bars have gone bad is if the crust becomes hard or the filling separates. Always check for freshness before serving. No-Bake Salted Caramel Pumpkin Bars last about five days in the fridge. Keep them covered with plastic wrap or in an airtight container. The bars taste best when fresh, but they hold up well for a few days. Yes, you can make these bars ahead of time. They are perfect for parties or holidays. Prepare them a day or two in advance. Just remember to chill them for at least three hours. If you want a substitute for cream cheese, try using Greek yogurt or silken tofu. Both options give a creamy texture. You can also use dairy-free cream cheese for a vegan option. Chilling the bars for three hours helps them set properly. It makes cutting and serving easier. If you chill for less time, they may be too soft. Yes, you can use homemade salted caramel sauce. It adds a personal touch and extra flavor. Just make sure it’s thick enough to drizzle and swirl into the filling. In this blog post, we explored making delicious No-Bake Salted Caramel Pumpkin Bars. We covered simple ingredient choices, how to prepare the crust, and tips for a smooth filling. You learned about different ways to serve and store these tasty treats. Remember, the joy of this recipe lies in its flexibility and ease. You can adjust flavors, swap ingredients, and even make them days ahead. Enjoy the process and share these bars with friends, making fall a little sweeter.

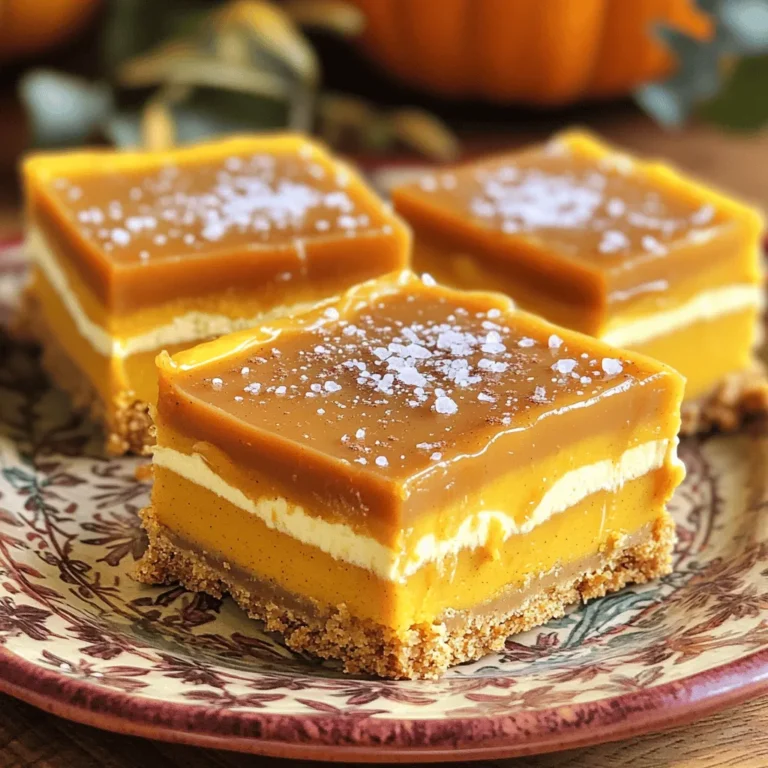
No-Bake Salted Caramel Pumpkin Bars Delightful Treat

For this creamy corn chowder, you will need: - 4 cups frozen sweet corn (or 6 fresh corn cobs, kernels removed) - 1 large onion, diced - 2 cloves garlic, minced - 3 medium potatoes, peeled and diced - 3 cups vegetable broth - 1 cup heavy cream (or coconut milk for a dairy-free option) - 1 teaspoon dried thyme - 1 teaspoon smoked paprika - Salt and black pepper to taste - 2 tablespoons olive oil These ingredients create a base full of flavor and texture. You can also add some tasty extras: - Fresh chives or parsley for garnish - A sprinkle of cheese on top - Crunchy bacon bits for a savory touch Each of these can make your chowder even more special. If you have dietary needs, here are some options: - For dairy-free, use coconut milk instead of heavy cream. - For gluten-free, ensure your vegetable broth is certified gluten-free. - If you want it vegan, skip the cream and use coconut milk. These swaps let everyone enjoy this dish without worry. Start by gathering your ingredients. You will need: - 4 cups frozen sweet corn (or 6 fresh corn cobs, kernels removed) - 1 large onion, diced - 2 cloves garlic, minced - 3 medium potatoes, peeled and diced - 3 cups vegetable broth - 1 cup heavy cream (or coconut milk for a dairy-free option) - 1 teaspoon dried thyme - 1 teaspoon smoked paprika - Salt and black pepper to taste - 2 tablespoons olive oil - Fresh chives or parsley for garnish In a medium skillet, heat the olive oil over medium heat. Add the diced onion. Cook it for about 5 minutes until it looks clear. Then, add the minced garlic and cook for 1 more minute until it smells great. Now, transfer the onion and garlic mix to your slow cooker. Add the frozen corn or fresh corn, the diced potatoes, and the vegetable broth. Next, add the dried thyme, smoked paprika, salt, and pepper. Give everything a good stir to mix well. Cover the slow cooker and cook on low for 6-7 hours or on high for 3-4 hours. You want the potatoes to be soft and tender. After cooking, use a potato masher to mash some of the corn and potatoes. This gives the chowder a creamy feel but still leaves some chunks for texture. Stir in the heavy cream or coconut milk until it blends well. Heat the chowder for another 15-20 minutes on low. Taste it and add more salt and pepper if you want. To serve, ladle the chowder into bowls. You can add a drizzle of cream on top and garnish with chopped chives or parsley. Enjoy with some crusty bread for dipping! To make your corn chowder creamy, use heavy cream or coconut milk. These options give a rich texture. When the chowder is done cooking, mash some corn and potatoes with a potato masher. This helps create a smooth base while leaving some chunks for texture. You can also blend a portion of the chowder in a blender for extra creaminess. Just be careful not to blend all of it. Flavor is key in making a great chowder. Start by sautéing the onion and garlic in olive oil. This step adds depth and warmth. Use smoked paprika for a subtle smoky taste. Dried thyme complements the corn well. Adjust salt and pepper to fit your taste. For an extra kick, try adding a splash of hot sauce or a sprinkle of cayenne pepper. Busy days call for easy meal prep. Chop your onions and dice potatoes the night before. Store them in the fridge until you’re ready to cook. You can also sauté the onions and garlic ahead of time. Just keep them in an airtight container, and add them to the slow cooker in the morning. If you use frozen corn, there’s no need to thaw it. Just toss it in the slow cooker straight from the freezer. This saves time and keeps the meal simple. {{image_2}} You can make your corn chowder even better with fun add-ins. Try adding diced bell peppers for crunch. Chopped carrots bring sweetness and color too. You can also mix in cooked bacon or ham for a savory twist. If you like beans, white beans add protein and texture. You can get creative and use what you have at home! To make this chowder dairy-free, just swap heavy cream for coconut milk. Coconut milk adds a rich taste. You can also use almond milk for a lighter option. If you want to keep it vegan, make sure your broth is vegetable-based. This way, everyone can enjoy a warm bowl of chowder! If you love heat, you can spice up your chowder. Add diced jalapeños or a pinch of cayenne pepper. For a smoky flavor, try adding chipotle peppers. You can also use hot sauce to taste. Start with a little, then add more if you dare! Enjoy the kick in every spoonful. After making your creamy corn chowder, let it cool. Transfer any leftovers to an airtight container. Store it in the fridge for up to 4 days. When you’re ready to eat, check for any signs of spoilage before diving in. If you want to save some for later, freezing is a great option. Allow the chowder to cool completely first. Pour it into freezer-safe bags or containers. Label them with the date. You can freeze it for up to 3 months. When you’re ready to enjoy it again, thaw it overnight in the fridge. To reheat, pour the chowder into a pot over medium heat. Stir often to prevent sticking. Heat until it is warm throughout. You can also reheat it in the microwave. Place it in a microwave-safe bowl and cover it. Heat in short bursts, stirring in between. This ensures even heating and keeps it creamy. Adjust the seasoning if needed before serving. Yes, you can use fresh corn! If you prefer fresh corn, take 6 corn cobs. Remove the kernels from the cobs and add them to your slow cooker. Fresh corn gives a sweet and bright flavor that really shines in chowder. Just remember, fresh corn may cook a bit faster than frozen corn, so keep an eye on it. Making this chowder gluten-free is easy! All you need to do is use gluten-free vegetable broth. Check the label to ensure there are no hidden gluten ingredients. The rest of the ingredients, like corn, potatoes, and cream, are already gluten-free. So, you can enjoy this tasty dish without worry! Absolutely! You can prep this chowder the night before. Just chop your veggies and mix everything in the slow cooker. Store it in the fridge overnight. In the morning, take it out and set it to cook. It’s a great way to save time on busy days! We explored key ingredients for corn chowder, including ideas for variations and dietary swaps. I shared step-by-step instructions for prep, slow cooking, and finishing touches. You also learned tips for creaminess, flavor, and time management. We discussed storage options, plus answered common questions. Corn chowder is simple to make and fun to customize. With these insights, you can enjoy a delicious bowl any time!

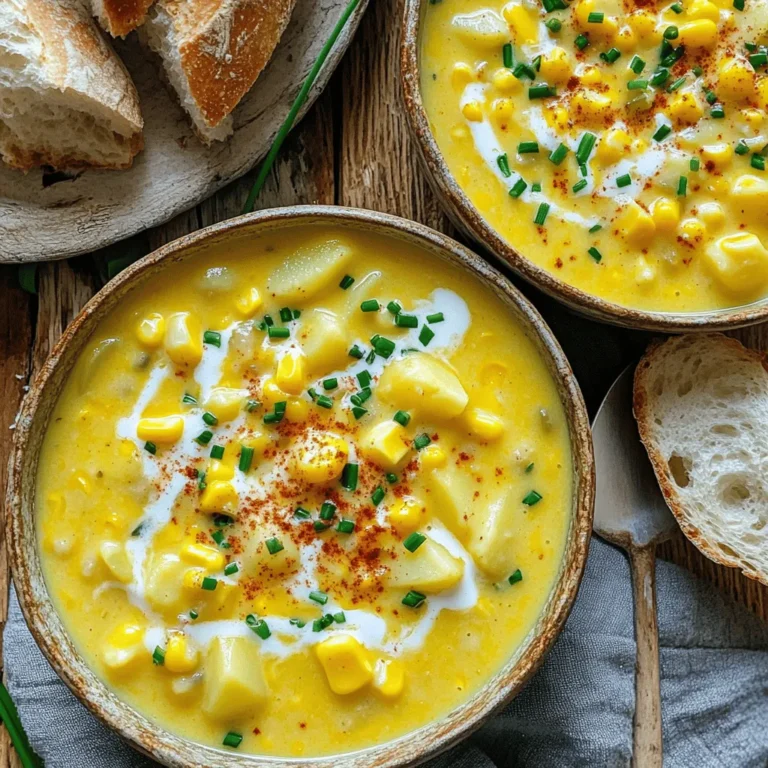
Slow Cooker Creamy Corn Chowder Simple and Tasty Recipe

- 1.5 lbs boneless, skinless chicken thighs - 2 cups broccoli florets - Marinade components The main star of this dish is the chicken thighs. They are juicy and tender, making them perfect for roasting. Broccoli florets add a nice crunch and bright color to the meal. For the marinade, we mix together simple yet flavorful ingredients that bring everything to life. - 2 tablespoons sesame oil - 4 tablespoons soy sauce - 3 cloves garlic, minced - 1 tablespoon fresh ginger, grated Sesame oil adds a nutty flavor. Soy sauce gives the dish a savory depth. Garlic and ginger are key players, too. They add warmth and zest, making this meal truly special. - 2 tablespoons honey - 1 tablespoon rice vinegar - 1 teaspoon red pepper flakes (optional) - Fresh cilantro Honey balances the savory and adds a hint of sweetness. Rice vinegar brightens up the flavors, giving a fresh twist. Red pepper flakes can add heat if you like spice. Finally, fresh cilantro finishes the dish with a pop of color and flavor. - First, preheat your oven to 425°F (220°C). This helps the chicken cook evenly. - In a large bowl, combine 2 tablespoons of sesame oil, 4 tablespoons of soy sauce, 3 minced garlic cloves, 1 tablespoon of grated ginger, 2 tablespoons of honey, and 1 tablespoon of rice vinegar. If you like heat, add 1 teaspoon of red pepper flakes. - Next, add 1.5 lbs of boneless, skinless chicken thighs to the marinade. Season with salt and pepper. Toss well to coat the chicken. - Let the chicken marinate for at least 15 minutes. For more flavor, let it sit in the fridge for up to 2 hours. - While the chicken marinates, prepare 2 cups of broccoli florets. - Toss the broccoli in a bowl with a drizzle of sesame oil, salt, and a sprinkle of sesame seeds. This adds flavor and a nice crunch. - Arrange the marinated chicken on one side of the sheet pan. Place the seasoned broccoli on the other side. - Bake the sheet pan in your preheated oven for 20-25 minutes. Check that the chicken reaches an internal temperature of 165°F (75°C). The broccoli should be tender and slightly crispy. - In the last 5 minutes of cooking, drizzle the remaining marinade over the chicken and broccoli. This boosts the flavor and moisture. - After baking, let the pan rest for a few minutes. Garnish with more sesame seeds and fresh cilantro before serving. Marinate your chicken for at least 15 minutes. This helps the chicken soak up all the tasty flavors. For extra flavor, you can marinate it for up to 2 hours in the fridge. Using fresh ginger and minced garlic boosts the taste even more. If you want a bit of heat, add red pepper flakes. This will make the dish more exciting. Always check the chicken's doneness. Use a meat thermometer to make sure it reaches 165°F (75°C). This keeps the chicken juicy and safe to eat. For the broccoli, you want it to be tender yet slightly crisp. This gives you a nice texture that pairs well with the chicken. Line your sheet pan with parchment paper. This makes cleanup a breeze. After baking, you can easily remove the leftovers without sticking. When serving, consider pairing this meal with rice or quinoa. They soak up the sauce well. You can also add a side salad for a fresh touch. Garnish with fresh cilantro and sesame seeds for a beautiful finish. {{image_2}} You can easily change the protein in this dish. Chicken thighs work well, but you could use chicken breasts or even salmon. Salmon adds a nice richness. For vegetables, broccoli is great, but feel free to swap it with carrots or bell peppers. Both add color and crunch. Want to kick up the heat? Adjust the spice levels by adding more red pepper flakes. If you prefer a sweeter taste, try using teriyaki sauce instead of soy sauce. Sweet chili sauce also makes a delightful alternative. This meal is perfect for meal prep. You can freeze leftovers for later. Just store them in airtight containers. If you want to prep in advance, marinate the chicken and cut veggies a day ahead. This makes cooking quick and easy on busy nights. To keep your sesame garlic chicken and broccoli fresh, follow these tips: - Refrigeration: Allow the dish to cool to room temperature before storing. - Containers: Use airtight containers to prevent moisture loss. Glass containers work great. When it's time to enjoy leftovers, reheating is key: - Oven Method: Preheat your oven to 350°F (175°C) and cover the dish with foil. Heat for about 15-20 minutes. - Microwave Method: Place the chicken and broccoli on a microwave-safe plate. Heat on medium power for 2-3 minutes, checking often. - Texture Tips: To keep the broccoli crisp, avoid overcooking. Heat just until warm. Add a dash of sesame oil for extra flavor when reheating. Yes, you can use frozen chicken or broccoli. When using frozen chicken, thaw it completely before marinating. This ensures even cooking and better flavor. For frozen broccoli, you can roast it directly from frozen. Just add a few extra minutes to the cooking time. This will help keep it crisp and bright. You can serve sesame garlic chicken with a variety of sides. Here are some ideas: - Steamed rice: White or brown rice works well. - Quinoa: A healthy grain that pairs nicely. - Noodles: Try soba or rice noodles for a twist. - Salad: A fresh green salad adds crunch. - Stir-fried vegetables: Extra veggies boost flavor and color. This dish lasts about 3 to 4 days in the fridge. Store it in an airtight container to keep it fresh. Make sure the chicken and broccoli are cooled before sealing. If you want to keep it longer, consider freezing it for up to 3 months. Just remember to thaw it overnight in the fridge before reheating. This blog post highlighted the key ingredients for a tasty sesame garlic chicken dish. You learned about choosing quality chicken thighs and bright broccoli florets. I shared tips for marinating and cooking, ensuring the best flavor and texture. Variations let you customize the recipe, and storage tips keep leftovers fresh. Cooking can be fun and simple. With the right tools and techniques, you can create meals that impress and satisfy. Enjoy experimenting and making this dish your own!

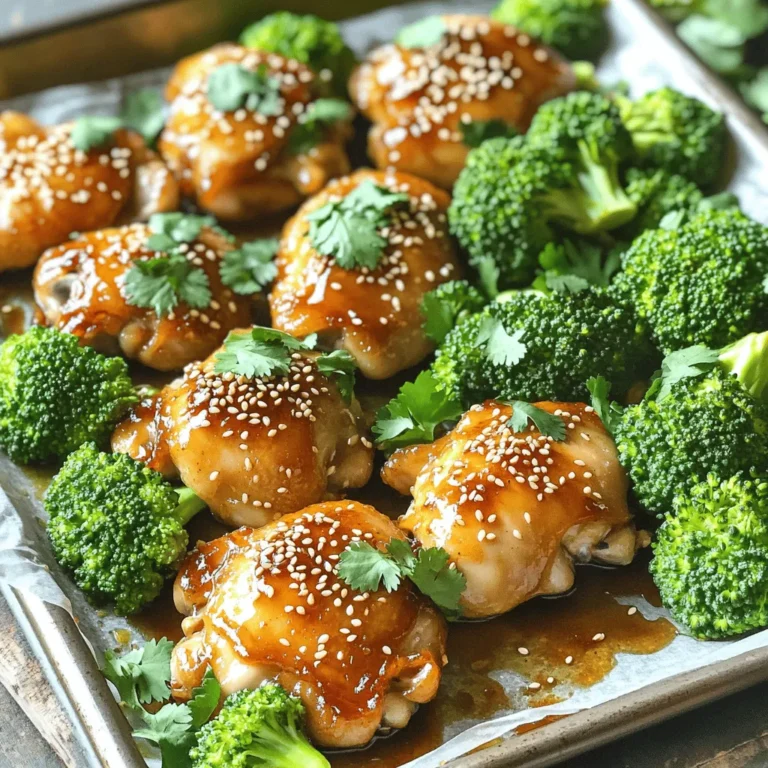
Savory Sesame Garlic Chicken Broccoli Sheet Pan Meal

- 1 pound ground beef - 1 cup cream cheese, softened - 1/2 cup shredded cheddar cheese - 1/4 cup diced jalapeños - 1/2 cup breadcrumbs - 1/4 cup grated Parmesan cheese - 1 teaspoon garlic powder - 1 teaspoon onion powder - 1 teaspoon smoked paprika - Salt and pepper to taste - Olive oil for frying - Fresh cilantro or parsley for garnish Gather these ingredients to create your jalapeño popper stuffed meatballs. The ground beef gives a rich flavor, while the cream cheese and cheddar provide creaminess. Diced jalapeños add a spicy kick, making each bite exciting. Breadcrumbs and Parmesan help bind the meatballs and give a nice crunch. The garlic and onion powders boost the overall taste. Smoked paprika gives a smoky note, while salt and pepper enhance everything. Don't forget olive oil for frying; it helps achieve that golden brown color. Finally, fresh cilantro or parsley can add a pop of color and freshness to your dish. 1. In a large bowl, combine 1 pound of ground beef with garlic powder, onion powder, smoked paprika, salt, and pepper. Mix until you have a uniform blend. 2. In another bowl, mix 1 cup of softened cream cheese, 1/2 cup of shredded cheddar cheese, and 1/4 cup of diced jalapeños. Stir until everything is well combined. 1. Take a handful of the beef mixture and flatten it into a patty in your palm. 2. Add about 1 tablespoon of the jalapeño popper filling to the center of the patty. 3. Carefully fold the beef over the filling, enclosing it completely. Roll it into a meatball shape. 4. Repeat this process with the remaining beef and filling until you shape all the meatballs. 1. Roll each meatball in breadcrumbs. Make sure they are fully coated. 2. Heat olive oil in a large skillet over medium heat until hot. 3. Gently add the meatballs in batches, avoiding overcrowding the skillet. 4. Cook for about 8-10 minutes, turning them occasionally. Look for a golden brown color and ensure they reach an internal temperature of 160°F. 5. Once cooked, remove the meatballs from the pan and place them on a paper towel-lined plate to drain excess oil. 6. Garnish with fresh cilantro or parsley before serving. To make great meatballs, avoid overmixing the meat. When you mix too much, the meatballs can become tough. Mix just until everything is combined. When sealing the meatballs, start by flattening the beef in your palm. Place one tablespoon of the jalapeño filling in the center. Carefully fold the meat over the filling. Make sure no filling shows. Roll it gently into a ball. For the best frying, use a large skillet over medium heat. Heat olive oil until it shimmers. This helps the meatballs cook evenly and get a nice crust. To check for doneness, use a meat thermometer. The safe internal temperature should reach 160°F. If you don't have a thermometer, cut one meatball in half. It should be brown inside with no pink. These meatballs pair well with many dipping sauces. Try ranch dressing or a spicy aioli for a kick. For side dishes, consider serving them with a fresh salad or crispy fries. You can also serve them on a hoagie for a delicious meatball sandwich. {{image_2}} You can easily make these meatballs vegetarian. Just swap the ground beef for plant-based meat. Look for brands that mimic the taste and texture of beef. This will keep the dish hearty and flavorful. For the cheese filling, consider using alternatives like vegan cream cheese or dairy-free cheddar. Make sure to check if the jalapeños are pickled or fresh for added zest. These changes let anyone enjoy this tasty treat. To spice things up, add more heat! Try mixing in cayenne pepper or crushed red pepper flakes. This will give your meatballs a nice kick. You can also use smoked gouda or pepper jack cheese instead of cheddar. These cheeses add depth and a unique flavor to each bite. You can serve these meatballs as appetizers or a main dish. For appetizers, use toothpicks for easy eating. Arrange them on a platter with dipping sauces like ranch or spicy aioli. As a main dish, serve them over pasta or in a sub sandwich. For plating, use a bed of greens or roasted veggies. This makes your meal look beautiful and adds extra flavor. To store leftovers safely, place the meatballs in an airtight container. Make sure they cool down first. You can keep them in the fridge for up to three days. When reheating, use the oven for the best results. Heat them at 350°F for about 10-15 minutes. This keeps them crispy on the outside. You can also use a microwave, but the texture may change. For freezing, let the meatballs cool completely. Place them in a freezer-safe bag or container. Be sure to label it with the date. The meatballs can last up to three months in the freezer. When you’re ready to cook them, thaw overnight in the fridge. You can then bake or fry them directly from frozen. Just add a few extra minutes to the cooking time. In the fridge, cooked meatballs last about three days. In the freezer, they can last for three months. Always check for signs of spoilage. Look for changes in color, smell, or texture. If anything seems off, it's best to discard them. Keeping an eye on these details helps you enjoy your dish safely. You can use ground turkey or chicken. Both will give a lighter taste. If you prefer a meatless option, use plant-based meat. Options like lentils or black beans can work too. Just ensure the textures fit your meatball goals. Yes, you can make the meatballs a day ahead. Shape them and store in the fridge. This saves time when you're ready to cook. You can also freeze them for later. Just thaw before cooking. These meatballs taste great with ranch or blue cheese dressing. A creamy chipotle sauce adds a nice kick. You can also serve them with marinara or barbecue sauce for a twist. Choose based on your flavor preference. Use a meat thermometer. The internal temperature should reach 160°F. If you don't have one, cut a meatball in half. The meat should be brown, and juices should run clear. This ensures they are safe to eat. Yes, baking is a healthier option. Preheat your oven to 400°F. Place the meatballs on a baking sheet and cook for 20-25 minutes. Ensure they are golden brown and cooked through, just like frying. These meatballs go well with a fresh salad or coleslaw. You can also pair them with rice or mashed potatoes for a filling meal. For a fun twist, serve them on sliders or in tacos. You now have the key ingredients and steps to make Jalapeño Popper Stuffed Meatballs. You learned about the main and additional ingredients, as well as tips for cooking and serving. Remember to follow the techniques for optimal flavor and texture. Be creative with variations that suit your tastes. You can store these meatballs easily, ensuring they stay fresh. With this guide, you can impress friends and family at your next meal. Enjoy experimenting and make this dish your own!

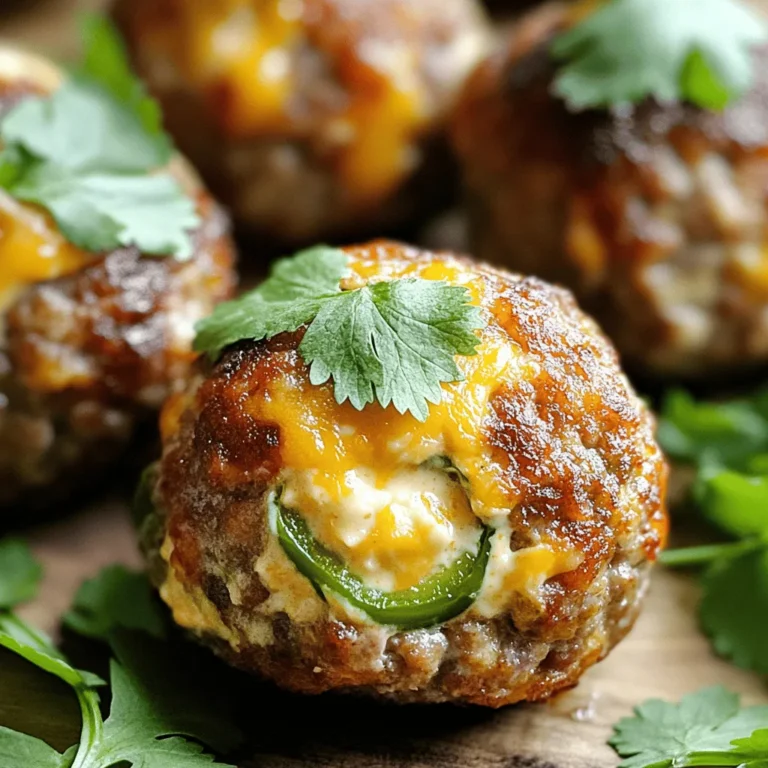
Jalapeño Popper Stuffed Meatballs Flavorful Recipe

- 2 medium zucchinis, spiralized (zoodles) - 1 pound large shrimp, peeled and deveined - 4 tablespoons unsalted butter - 4 cloves garlic, minced - 1/2 teaspoon red pepper flakes (optional) - 1 tablespoon lemon juice - Salt and pepper, to taste - 2 tablespoons fresh parsley, chopped (for garnish) - Grated Parmesan cheese (for serving, optional) This dish serves two people. Each serving is low in calories and high in taste. You get protein from shrimp and vitamins from zucchini. Here’s a quick look at the nutrition per serving: - Calories: 350 - Protein: 30g - Carbohydrates: 10g - Fat: 20g - Fiber: 2g To make Garlic Butter Zoodle Shrimp, you need some basic kitchen tools: - Spiralizer or julienne peeler - Large skillet - Cooking spatula - Knife and cutting board - Measuring spoons Having the right tools makes cooking easier and more fun. Enjoy crafting this tasty dish! To start, grab your zucchinis. You need two medium-sized ones. Use a spiralizer or a julienne peeler to turn them into zoodles. This step is fun and quick. Set the zoodles aside on a plate. They will wait for their turn in the skillet. Now, let’s cook the shrimp. Take a large skillet and melt four tablespoons of unsalted butter over medium heat. Once the butter melts, add four cloves of minced garlic. If you like heat, toss in half a teaspoon of red pepper flakes. Sauté this mix for about one minute. You want the garlic fragrant but not burnt. Next, add one pound of peeled and deveined shrimp to the skillet. Cook them for two to three minutes on one side until they turn pink. Flip the shrimp and cook for another two to three minutes. When done, season them with salt and pepper. Now, squeeze in one tablespoon of lemon juice. Give it a good stir to mix all those tasty flavors. It’s time to bring everything together. Gently add the zoodles to the skillet. Toss them with the shrimp and garlic butter. Heat everything through for about two to three minutes. You want the zoodles to be warm but still crisp. Finally, remove the skillet from heat. Garnish your dish with chopped fresh parsley. If you love cheese, add grated Parmesan on top. Serve your Garlic Butter Zoodle Shrimp right away for the best flavor and texture. Enjoy! To make the best garlic butter sauce, use fresh garlic. Fresh garlic gives the sauce a strong, rich taste. Start by melting the butter over medium heat. Add the minced garlic and red pepper flakes. Stir it gently for about one minute. Watch the garlic closely; you don’t want it to burn. A burnt garlic taste can spoil the dish. The butter should be bubbly but not browning. For juicy shrimp, choose large shrimp that are peeled and deveined. This saves time and makes cooking easier. Heat your skillet well before adding the shrimp. Cook them for about two to three minutes on one side. When they turn pink, flip them over. Cook for another two to three minutes. Always check for doneness; the shrimp should be opaque. Season with salt and pepper to enhance the flavor. Zoodles cook quickly, so don’t overdo it. After adding them to the skillet, toss gently with the shrimp. Heat them for only two to three minutes. You want them warm but still firm. Overcooking makes zoodles mushy. If you like, you can add a splash of lemon juice for extra taste. This brightens the dish and pairs well with the garlic butter. {{image_2}} You can easily swap shrimp for other proteins. Chicken breast works well in this recipe. Just cut it into small pieces and cook until golden. Tofu is another great option for a plant-based meal. It absorbs flavors well and adds a nice texture. You can also use scallops or fish instead. Both cook quickly and taste amazing with garlic butter. Zoodles are just one option. You can spiralize other veggies for fun twists. Carrots are sweet and colorful, while cucumbers add a refreshing crunch. Sweet potatoes can give a hearty feel. Even butternut squash works well. Each veggie brings its own flavor to the dish. Feel free to mix and match to find your favorite combo. The garlic butter sauce is simple but can be changed. For a spicy kick, add more red pepper flakes or some hot sauce. A splash of white wine can add depth to the sauce. You might also try adding herbs like basil or thyme for extra flavor. If you enjoy creaminess, stir in some heavy cream or cream cheese. These changes can create a new dish each time! Store any leftover Garlic Butter Zoodle Shrimp in an airtight container. Keep it in the fridge. It will stay fresh for up to two days. Make sure to cool it down first. Avoid letting it sit out too long. If you want, you can add more butter or lemon juice when reheating. To reheat, use a skillet over low heat. Add a splash of water or butter. This will help keep the zoodles from turning mushy. Stir often until heated through. You can also use a microwave. Place the dish in a microwave-safe bowl. Heat in short bursts, stirring in between. Be careful not to overheat, or the shrimp may become rubbery. I do not recommend freezing this dish. The zoodles can become watery and mushy. If you have extra shrimp, you can freeze that. Place shrimp in a freezer-safe bag. Remove as much air as possible before sealing. It will last for up to three months. Just remember to thaw it in the fridge before cooking. To spiralize zucchini, you need a spiralizer or a julienne peeler. 1. Wash the zucchinis. Rinse them under cool water. 2. Cut off the ends. Trim both ends of each zucchini. 3. Attach to the spiralizer. Place the zucchini in the device. 4. Turn and twist. Rotate the handle to create zoodles. 5. Collect the noodles. Let the zoodles fall into a bowl. This fun tool helps you make long, thin strands. They look like pasta and taste fresh. You can prep some parts ahead of time, but it’s best to cook fresh. - Spiralize the zucchini. Do this a few hours early. - Peel and devein shrimp. Keep them in the fridge until cooking. Cook everything right before serving. This keeps the zoodles crisp and shrimp tender. You can pair this dish with many sides for a complete meal. - Crusty bread. Great for dipping in any leftover garlic butter. - Mixed green salad. Adds a fresh crunch to your meal. - Steamed vegetables. Broccoli or asparagus work well beside this dish. Feel free to get creative and enjoy your meal! In this article, we covered how to make Garlic Butter Zoodle Shrimp. We explored ingredients, nutritional values, and useful equipment. I shared clear steps for preparing zoodles, cooking shrimp, and combining everything. Tips helped improve the sauce and shrimp cooking. We discussed variations for ingredients and sauces as well as proper storage. Now you have the tools to create a delicious dish. Enjoy your cooking and feel free to get creative!

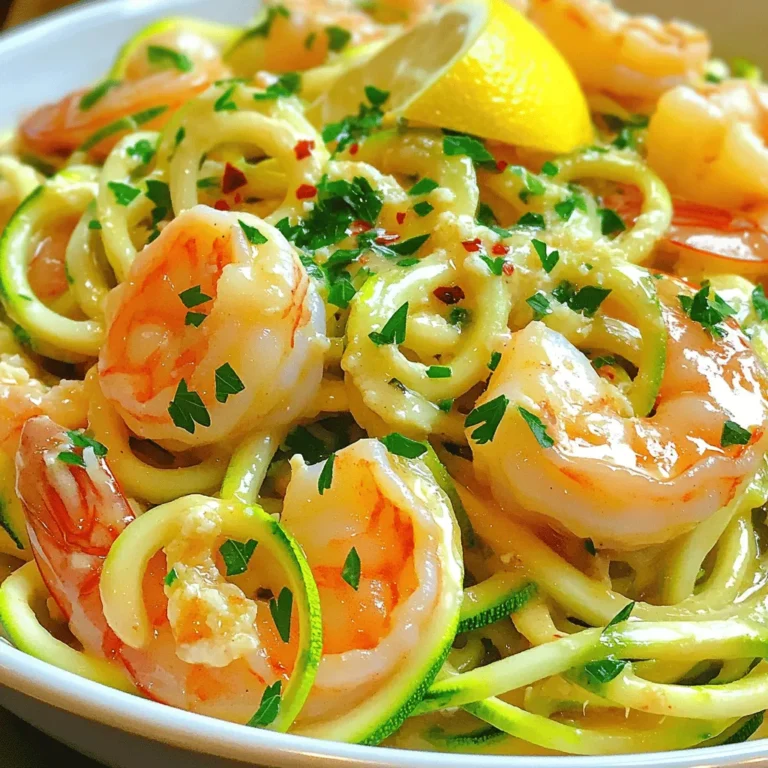
Garlic Butter Zoodle Shrimp 15-Minute Flavor Burst

To make these delightful rolls, you'll need the following ingredients: - 4 cups all-purpose flour - 1 packet (2 1/4 tsp) instant yeast - 1/2 cup granulated sugar - 1 teaspoon salt - 1 teaspoon ground cinnamon - 1/2 cup milk, warmed - 1/2 cup unsalted butter, melted - 2 large eggs - 1 cup packed brown sugar - 1 tablespoon ground cinnamon (for filling) - 1/2 cup chopped pecans - 1/2 cup caramel sauce (homemade or store-bought) - 1 cup powdered sugar (for icing) - 2 tablespoons milk (for icing) You can adjust the recipe to meet dietary needs: - Gluten-free flour: Use a gluten-free blend for the all-purpose flour. - Dairy-free options: Swap milk for almond or oat milk. Use coconut oil instead of butter. - Sweetener alternatives: Replace sugar with coconut sugar or a sugar substitute. Using fresh ingredients makes a big difference. Fresh flour and spices enhance flavor. Fresh yeast ensures your rolls rise well. If you use old or expired ingredients, your rolls might not turn out fluffy. For the best taste, always check the dates on your ingredients. Fresh ingredients lead to great results and a delightful treat! {{ingredient_image_1}} To start, grab a large mixing bowl. Combine 2 cups of all-purpose flour, instant yeast, granulated sugar, salt, and ground cinnamon. Mix these dry ingredients well. In another bowl, whisk together warmed milk, melted butter, and eggs. Pour this mixture into the dry ingredients. Stir until combined. Gradually add the remaining flour, 1/2 cup at a time. Keep mixing until you form a soft dough. Next, turn the dough onto a floured surface. Knead it for about 5 to 7 minutes until it feels smooth and elastic. After kneading, place the dough in a greased bowl. Cover it with a clean cloth and let it rise in a warm spot. Wait for about 1 hour, or until the dough doubles in size. While the dough rises, prepare the filling. In a small bowl, mix packed brown sugar and cinnamon for the filling. Set it aside. Once the dough has risen, punch it down. Roll it out into a 16x12-inch rectangle on a floured surface. Brush the dough with melted butter. Sprinkle the cinnamon-brown sugar mixture evenly over the dough. Then, top it with chopped pecans. Now, start rolling the dough from the longer side. Roll it tightly into a log. Pinch the seam to seal it well. Cut the log into 12 equal slices. Next, grease a 9x13-inch baking dish. Drizzle half of the caramel sauce in the bottom. Place the cinnamon roll slices in the dish, cut side facing up. Cover the dish with a cloth and let the rolls rise for another 30 minutes. While they rise, preheat your oven to 350°F (175°C). Now, bake the rolls for 25 to 30 minutes. Look for a golden-brown color. Remove them from the oven and let them cool for about 10 minutes. While the rolls cool, prepare the icing. Mix powdered sugar with milk until you achieve a smooth consistency. Drizzle the icing over the warm rolls. If you like, top them with more pecans and caramel sauce. Enjoy your tasty treat! Making caramel pecan cinnamon rolls can be a joy, but some mistakes can spoil the fun. Here are common pitfalls: - Using cold ingredients: Always warm your milk and use room temperature eggs. This helps the dough rise well. - Not measuring flour properly: Too much flour makes tough rolls. Use the spoon-and-level method for accuracy. - Skipping the first rise: Letting the dough rise is key. Don’t rush this step; it makes the rolls fluffy. - Overbaking: Keep an eye on your rolls. They should be golden brown, not dark brown or burnt. To get perfect rolls, follow these tips closely: - Knead the dough: Knead for 5-7 minutes until smooth and elastic. This builds gluten for a soft texture. - Roll evenly: When rolling out the dough, aim for a uniform thickness. This ensures even baking. - Seal the edge: Pinch the seam tight after rolling. This keeps the filling from spilling out. - Use a sharp knife: For slicing, a sharp knife cuts cleanly without squishing the rolls. Having the right tools makes your baking easier. Here are essentials for making cinnamon rolls: - Mixing bowls: Use large bowls for mixing dry and wet ingredients. - Rolling pin: A good rolling pin helps you flatten the dough evenly. - Sharp knife or dough cutter: This tool is great for cutting the rolled dough into slices. - 9x13-inch baking dish: This is perfect for baking your rolls and catching the caramel sauce. - Kitchen thermometer: Check dough temperature for perfect rising. Ideal is around 80°F (27°C). By avoiding mistakes, ensuring proper technique, and using the right tools, you can create delicious caramel pecan cinnamon rolls every time. Pro Tips Perfect Dough Consistency: Ensure that your dough is soft but not sticky. If it sticks to your fingers, add a little more flour, a tablespoon at a time, until it reaches the right consistency. Warm Rising Environment: For the best rise, place your dough in a warm, draft-free area. You can turn on your oven for a few minutes, then turn it off and place the dough inside to rise. Cutting the Rolls: Use a sharp knife or dental floss to cut the rolls evenly. This prevents squishing and keeps the layers intact for fluffy rolls. Caramel Sauce Tip: To enhance the flavor, warm the caramel sauce slightly before drizzling it over the rolls. This will make it easier to drizzle and help it soak into the rolls. {{image_2}} To make these rolls vegan, swap the butter and milk for plant-based options. Use almond or oat milk and vegan butter. Replace eggs with flaxseed meal or applesauce. Mix 1 tablespoon of flaxseed meal with 3 tablespoons of water. Let it sit until it thickens. This will act as your egg substitute. Follow the same steps as the original recipe, and you’ll have tasty vegan rolls. For a gluten-free version, use a gluten-free all-purpose flour blend. Make sure it has xanthan gum to help with texture. Follow the same instructions, but keep an eye on the baking time. Gluten-free dough can be a bit different, so check for a golden color. Enjoy your delicious gluten-free caramel pecan cinnamon rolls! You can easily change these rolls for the season. In the fall, add pumpkin puree to the dough for a warm flavor. For a fruity twist, mix in diced apples or apple pie spice. This adds a fresh taste that brightens up the rolls. Feel free to be creative and switch it up! To keep your caramel pecan cinnamon rolls fresh, store them in an airtight container. Place a piece of parchment paper between layers to prevent sticking. Keep the container at room temperature for up to 2 days. If you need more time, move them to the fridge. They will last about a week in the fridge. When you're ready to enjoy the rolls again, reheating is easy. You can use the microwave or oven. For the microwave, heat one roll for about 15-20 seconds. This warms it up without drying it out. If you prefer the oven, preheat it to 350°F (175°C). Place the rolls on a baking sheet and cover them with foil. Bake for 10-15 minutes until warm. Freezing your cinnamon rolls is a great option for long-term storage. First, let the rolls cool completely. Wrap each roll tightly in plastic wrap and then in aluminum foil. This keeps out air and moisture. Place the wrapped rolls in a freezer-safe bag or container. They can last up to 3 months in the freezer. To enjoy, thaw them overnight in the fridge and reheat as mentioned above. To make homemade caramel sauce, you need just a few simple ingredients. Here’s how: - Ingredients: - 1 cup granulated sugar - 6 tablespoons unsalted butter - 1/2 cup heavy cream - Steps: 1. Heat the sugar in a medium saucepan over medium heat. 2. Stir slowly until it melts and turns golden brown. 3. Add the butter and mix until melted. 4. Gradually whisk in the cream until smooth. 5. Let it cool before using. This sauce is rich and perfect for drizzling on your cinnamon rolls! Yes, you can prepare the dough in advance! Simply follow these steps: 1. After mixing the dough, let it rise as directed. 2. Once it has doubled in size, punch it down. 3. Wrap the dough tightly in plastic wrap. 4. Store it in the fridge for up to 24 hours. 5. When ready to use, let it come to room temperature before rolling it out. This makes it easier to enjoy fresh cinnamon rolls at any time! Instant yeast and active dry yeast are both used for baking, but they have key differences: - Instant yeast: - It can be mixed directly into dry ingredients. - It works faster and rises quicker. - Active dry yeast: - It must be dissolved in warm water before use. - It takes longer to rise. Both types can work in this recipe, but I prefer instant yeast for its quick results! In this post, we explored how to make delicious Caramel Pecan Cinnamon Rolls. We covered ingredients, including substitutions for different diets. I shared techniques for dough and filling preparation, baking, and icing. You learned tips to avoid common mistakes and ensure great results every time. We also discussed fun variations and how to store leftovers. Making these rolls can be simple and rewarding. Enjoy crafting this treat with fresh ingredients and your favorite twists. Happy baking!

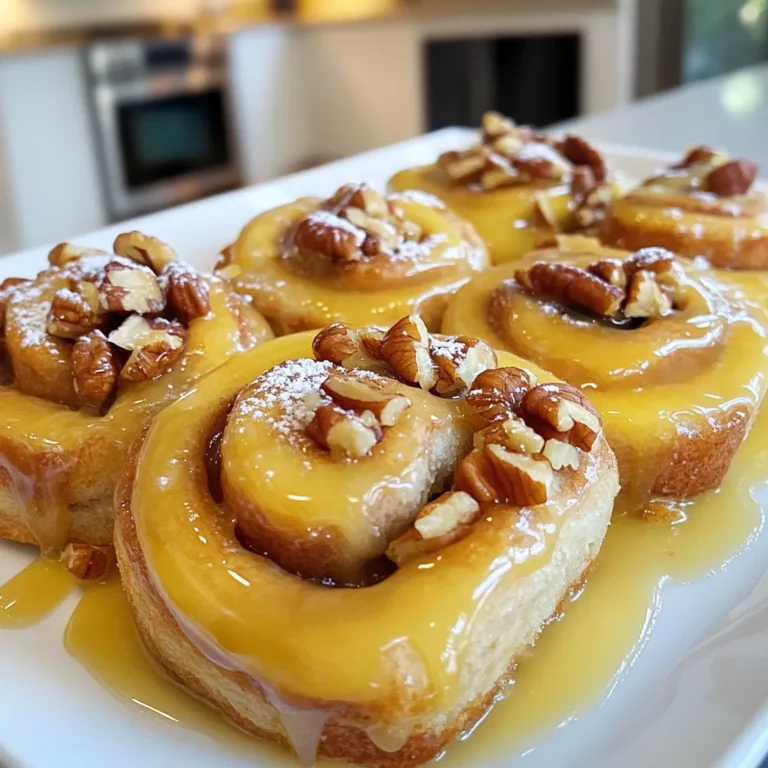
Caramel Pecan Cinnamon Rolls Irresistible Sweet Treat

PREV 1 … 20 21 22 … 57 NEXT
flavor nest kitchen

explore

DessertsDinnerAppetizersDrinks

Our Policies

  • Cookie Policy
  • Copyright Policy
  • Disclaimer
  • GDPR Policy
  • Terms Of Use
Back to Top
  • About
  • Contact Us
  • Privacy Policy
© 2025 flavor nest kitchen