FREE DINNER EBOOK! Get your copy!
  • Cookie Policy
  • GDPR Policy
  • Disclaimer
  • Terms Of Use
  • Visit my other site: Fun Cookie Recipes
flavor nest kitchen
  • Home
  • Dinner
  • Desserts
  • Drinks
  • Appetizers
  • Contact
  • About
  • Privacy Policy
  • Home
  • Dinner
  • Desserts
  • Drinks
  • Appetizers
  • Contact
  • About
  • Privacy Policy
  • Cookie Policy
  • GDPR Policy
  • Disclaimer
  • Terms Of Use
Visit my other site: Fun Cookie Recipes

HOME / CATEGORIES /

Latest

To make Sun-Dried Tomato Shrimp Pasta, you will need these simple ingredients: - 8 oz fettuccine or spaghetti - 1 lb large shrimp, peeled and deveined - 1 cup sun-dried tomatoes, packed in oil, drained and chopped - 3 cloves garlic, minced - 1/2 cup heavy cream - 1/4 cup grated Parmesan cheese - 2 tablespoons olive oil - 1 teaspoon red pepper flakes (optional) - Fresh basil leaves, for garnish - Salt and pepper to taste Each ingredient plays a key role in the dish's flavor. The shrimp gives a juicy and tender bite, while the sun-dried tomatoes add a rich, tangy taste. Garlic brings depth, and heavy cream creates a luscious sauce. Parmesan cheese adds a savory kick, and olive oil enhances the overall richness. The red pepper flakes can spice things up, so add them if you like heat. Finally, fresh basil gives a lovely touch of freshness and color. Make sure to gather all your ingredients before you start cooking. This prep helps your cooking flow smoothly and makes the process more enjoyable. To start, boil a large pot of salted water. Once it’s bubbling, add 8 oz of fettuccine or spaghetti. Cook the pasta until it's al dente, following the package instructions. This usually takes about 8 to 10 minutes. When done, drain the pasta but save about 1/2 cup of the pasta water. This water helps adjust the sauce later. Next, grab a large skillet and heat 2 tablespoons of olive oil over medium heat. Add 3 minced garlic cloves to the oil and sauté for about 30 seconds until it smells good. Now, season 1 lb of large shrimp with salt and pepper. Add the shrimp to the skillet and cook for 2 to 3 minutes on each side. You want them pink and opaque. Once cooked, remove the shrimp and set them aside. In the same skillet, add 1 cup of chopped sun-dried tomatoes and 1/2 cup of heavy cream. Stir them together and let it simmer for 2 to 3 minutes until it thickens a bit. Now, stir in 1/4 cup of grated Parmesan cheese. Keep stirring until the cheese melts and the sauce is smooth. Now, it’s time to combine! Add the cooked pasta and sautéed shrimp back into the skillet. Toss everything so the pasta and shrimp are coated in the sauce. If the sauce seems too thick, add some of the reserved pasta water to reach your desired consistency. Taste and add more salt and pepper if needed. To cook shrimp just right, use medium heat. This keeps them juicy. Cook them for about 2-3 minutes on each side. You want them pink and opaque. Overcooked shrimp are tough and chewy. For seasoning, sprinkle salt and pepper on the shrimp before cooking. This simple step makes a big difference. You can also add red pepper flakes for a little heat. Just a teaspoon can elevate the flavor. To adjust the sauce thickness, use reserved pasta water. Add a little at a time until you reach your desired thickness. If you want a creamier sauce, add more heavy cream. Let the sauce simmer to blend the flavors. Stir in the Parmesan cheese until it melts and becomes smooth. Garnishing your dish makes it look special. Use fresh basil leaves to add color and aroma. Place a few leaves on top right before serving. For an appealing dish, serve the pasta in shallow bowls. This allows the colors to pop and makes it more inviting. {{image_2}} You can easily change this dish to fit your diet. For gluten-free pasta, use brown rice or quinoa pasta. These options taste great and keep the dish light. If you need it dairy-free, try coconut cream or cashew cream. These substitutes add creaminess without dairy. Add more colors and nutrition by using vegetables. Spinach and bell peppers work well in this dish. They add crunch and flavor. You can also swap cheeses for different tastes. Feta or goat cheese can give a tangy kick that pairs nicely with sun-dried tomatoes. If shrimp isn't your favorite, switch to chicken. Cook it the same way until it’s golden brown. For a vegetarian option, try using chickpeas or tofu. Both choices soak up the sauce well. You can even explore different seafood like scallops or mussels for a unique twist. To store leftovers, let the pasta cool first. Place it in an airtight container. This keeps the pasta fresh and safe. You can store it in the fridge for up to three days. Be sure to check for any off smells before eating. If you want to freeze Sun-Dried Tomato Shrimp Pasta, use freezer-safe bags or containers. Make sure to remove excess air to prevent freezer burn. It freezes well for up to three months. When ready to eat, take it out and thaw in the fridge overnight. To reheat, you can use a microwave or stovetop. For the microwave, place the pasta in a bowl. Add a splash of water to keep it moist. Heat in short bursts, stirring in between. For stovetop, warm a pan over low heat. Add a bit of olive oil or sauce to keep it creamy. Gently stir until hot. This keeps the texture yummy! You can use fresh tomatoes, but they will change the dish. Fresh tomatoes add more moisture. This can make the sauce thinner. If you choose fresh, use about 2 to 3 medium tomatoes. Dice them and sauté with the garlic. You might want to add some extra olive oil to help with the sauce. To make this dish spicy, add more red pepper flakes. Start with one teaspoon and adjust to your taste. You can also add fresh chopped chili peppers. Jalapeños or serranos work well. If you want a different heat, try a dash of hot sauce. Just mix it in with the cream for a nice kick. This dish pairs well with many sides. A simple green salad adds freshness. Consider a Caesar salad for a classic mix. Garlic bread is also a great choice. It soaks up the lovely sauce. You could also serve it with roasted vegetables for added flavor and color. In this article, we explored a delicious Sun-Dried Tomato Shrimp Pasta recipe. I shared the key ingredients, step-by-step cooking instructions, and tips for perfect results. You can easily adjust the recipe for dietary needs or flavor preferences, making it versatile. Remember the best storage methods to keep leftovers fresh. Enjoy crafting this tasty dish, and feel confident to experiment. Cooking can be fun and rewarding when you try new things!

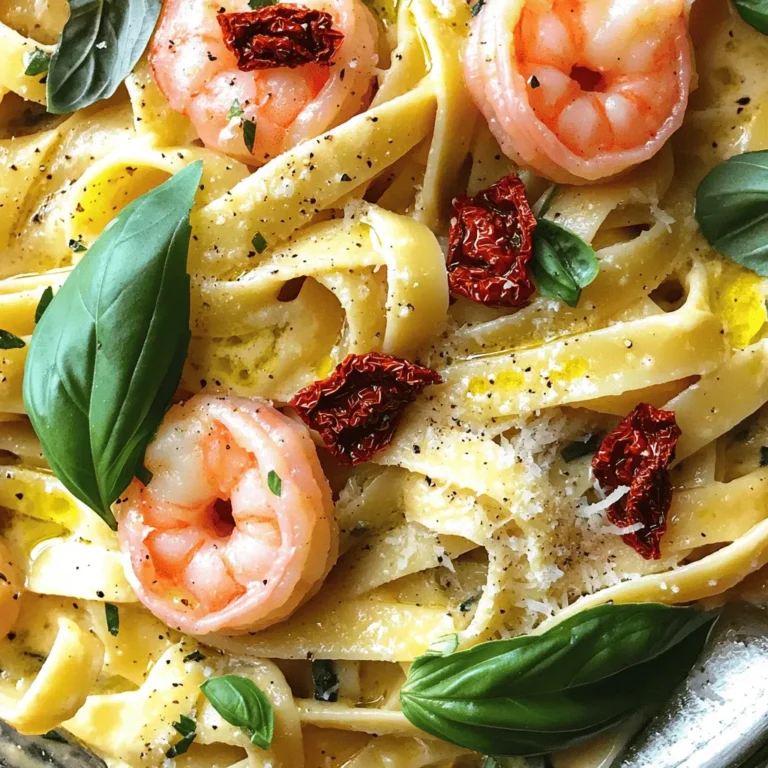
Sun-Dried Tomato Shrimp Pasta Flavorful and Simple Dish

- 2 cups all-purpose flour - 1 cup brown sugar, packed - 1/2 cup granulated sugar - 2 teaspoons baking powder - 1/2 teaspoon baking soda - 1 teaspoon ground cinnamon - 1/2 teaspoon salt - 3/4 cup whole milk - 1/4 cup unsalted butter, melted - 2 large eggs - 1 teaspoon vanilla extract - 1/4 cup pure maple syrup - 1/2 cup chopped pecans or walnuts (optional) - 1/4 cup powdered sugar for topping The main flavors in this loaf come from brown sugar and maple syrup. Brown sugar gives a rich, caramel taste. Maple syrup adds a warm, sweet note. Together, they create a cozy flavor that warms the heart. The cinnamon brings warmth and depth, making each bite delightful. The eggs and milk keep the loaf moist, while the butter adds a lovely richness. You can enhance this loaf by adding nuts like pecans or walnuts. These nuts provide crunch and contrast to the soft bread. If you want a twist, consider adding chocolate chips or dried fruits. Each choice gives the loaf a unique flavor and texture. These add-ins allow you to personalize your loaf, making it truly yours. Feel free to mix and match to find your favorite combination! 1. Preheat the oven to 350°F (175°C). This step warms the oven and helps the loaf rise well. 2. Prepare the loaf pan. Grease a 9x5-inch loaf pan with cooking spray or butter. This keeps the loaf from sticking. 3. Mix the dry ingredients. In a large bowl, whisk together the flour, brown sugar, granulated sugar, baking powder, baking soda, ground cinnamon, and salt. Make sure you mix well. This ensures a smooth batter. 1. Mix wet and dry ingredients. In another bowl, stir together the milk, melted butter, eggs, vanilla extract, and maple syrup. Blend until smooth. 2. Combine everything gently. Pour the wet mixture into the dry ingredients. Stir until just mixed. Be careful not to overmix. Too much mixing can make the loaf tough. If you like nuts, fold in the chopped pecans or walnuts at this point. 1. Bake the loaf. Pour the batter into the prepared pan. Smooth the top with a spatula. Bake for about 55-65 minutes. Check if it's done by inserting a toothpick in the center. It should come out clean. 2. Cool the loaf. Let the loaf cool in the pan for 10 minutes. Then, transfer it to a wire rack. Allow it to cool completely. This helps the flavors develop. Dust the top with powdered sugar before serving for a sweet touch. To ensure a light and fluffy loaf, do not overmix the batter. When you combine the wet and dry ingredients, mix just until you see no dry flour. Overmixing will make the loaf dense and tough. Even baking is key to a perfect loaf. Place your pan in the center of the oven. This helps the heat flow evenly around the loaf. If your oven has hot spots, rotate the pan halfway through baking. When serving your Maple Brown Sugar Donut Loaf, slice it thick and place it on a rustic wooden board. Drizzle some extra maple syrup on top. Sprinkle chopped nuts for a crunchy finish. This loaf tastes great with coffee or tea. The sweet flavors match well with a warm drink. For a fun twist, serve with a side of whipped cream. Enjoy your delightful treats with friends or family! {{image_2}} You can change the taste of your Maple Brown Sugar Donut Loaf easily. Try adding chocolate chips for a rich twist. You can use dark chocolate or white chocolate chips. Both add a sweet layer of flavor. For a seasonal touch, think about spices. In fall, add pumpkin spice for warmth. In winter, add nutmeg for a cozy vibe. You can also mix in dried fruit, like cranberries, for a burst of tartness. This loaf is super flexible! If you need a gluten-free loaf, swap the all-purpose flour with a gluten-free blend. Look for blends that work well for baking. They often include rice flour and starches. For a vegan option, replace the eggs with flax eggs. Mix one tablespoon of ground flaxseed with three tablespoons of water and let it sit until it thickens. Use coconut oil or vegan butter instead of regular butter. These simple swaps make it easy to enjoy this loaf without eggs or dairy. To store your leftover Maple Brown Sugar Donut Loaf, place it in an airtight container. This keeps the loaf fresh at room temperature for up to three days. You can also wrap it tightly in plastic wrap. This method helps lock in moisture and flavor. Avoid placing it in the fridge, as cold air can dry it out. For maximum flavor, enjoy the loaf within the first two days. If you have a slice or two left after that, consider reheating it briefly in the microwave. This warms the flavors and gives it a soft texture. If you want to keep your loaf for longer, freezing is a great option. First, let the loaf cool completely. Then, wrap it in plastic wrap and place it in a freezer-safe bag. Make sure to remove as much air as possible before sealing. This will help prevent freezer burn. You can freeze the loaf for up to three months. When you're ready to enjoy your loaf, take it out of the freezer. Place it in the fridge overnight to thaw. For quicker thawing, leave it at room temperature for a few hours. Once thawed, you can warm slices in the microwave for a soft, fresh taste. What can I substitute for brown sugar in this recipe? If you need a substitute for brown sugar, try using white sugar mixed with molasses. Use one cup of white sugar and add one tablespoon of molasses. Mix well until smooth. This will give you a similar flavor and moisture. How do I know when my loaf is fully baked? To check if your loaf is baked, insert a toothpick into the center. If it comes out clean or with a few crumbs, your loaf is ready. If it has wet batter, bake for a few more minutes. What to do if my loaf is too dry? If your loaf turns out dry, it may be due to overbaking or too much flour. To fix this, add a bit more milk to your batter next time. You can also brush the loaf with melted butter after baking for added moisture. How can I tell if my baking powder is still effective? To test baking powder, add a teaspoon to hot water. If it bubbles and fizzes, it’s good to use. If there’s no reaction, it’s time to buy a new container. Fresh baking powder helps your loaf rise nicely. In summary, this guide covers everything you need to make the perfect Maple Brown Sugar Donut Loaf. We discussed key ingredients, optional add-ins, and step-by-step instructions to ensure your baking success. Remember to mix carefully, consider variations, and store your loaf properly for lasting flavor. With these tips, you can enjoy this delicious treat any time. Experiment and have fun with your baking skills!

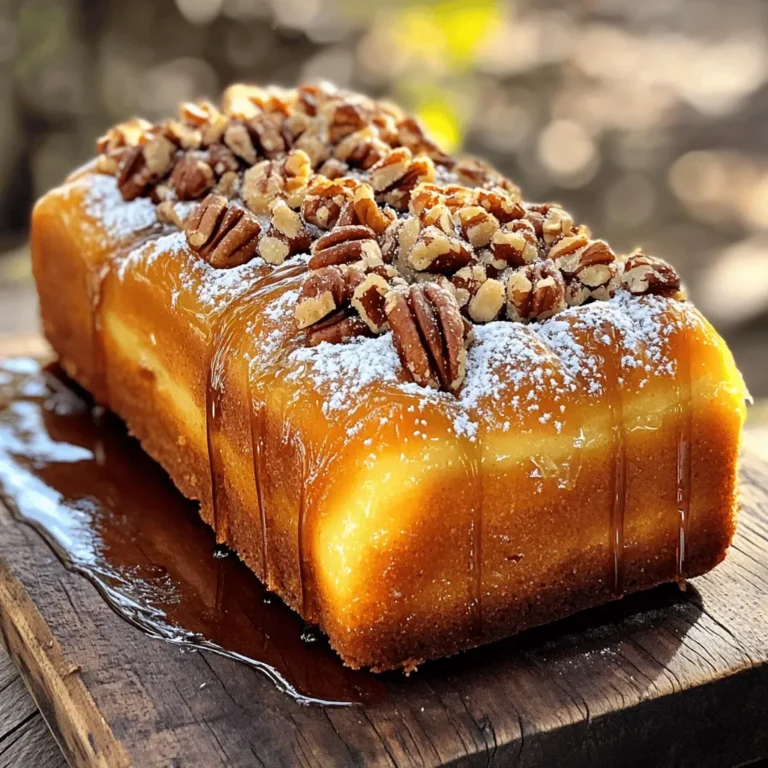
Maple Brown Sugar Donut Loaf Irresistible Flavor Recipe

To make slow cooker pumpkin spice cinnamon rolls, gather the following ingredients: - 2 cups all-purpose flour - 1 cup pumpkin puree - 1/2 cup milk - 1/4 cup granulated sugar - 2 tablespoons unsalted butter, melted - 1 sachet instant yeast (about 2 1/4 teaspoons) - 1/4 teaspoon salt - 1 tablespoon pumpkin pie spice - 1/3 cup brown sugar - 1 tablespoon ground cinnamon - 1/4 cup chopped pecans (optional) - 1 cup cream cheese frosting (store-bought or homemade) These ingredients work together to create soft and flavorful rolls. The pumpkin puree brings moisture and a rich taste. The spices add warmth and sweetness, making these rolls perfect for any occasion. You can also add pecans for a nice crunch, but they are optional. Gathering your ingredients ahead of time helps make the process smooth. Having everything ready makes cooking fun and stress-free. Enjoy the journey of making these delicious treats! - In a large bowl, combine 2 cups of all-purpose flour, 1/4 cup of granulated sugar, 1/4 teaspoon of salt, and 1 tablespoon of pumpkin pie spice. Mix well and set aside. - In a separate bowl, mix 1 cup of pumpkin puree, 1/2 cup of milk, 2 tablespoons of melted unsalted butter, and 1 sachet of instant yeast. Let it sit for about 5 minutes until it gets frothy. - Gradually add the wet mixture to the dry mixture. Stir until a dough forms. Knead the dough on a lightly floured surface for 5 minutes until it's smooth. - Roll the dough into a rectangle about 1/2 inch thick. - In a small bowl, mix 1/3 cup of brown sugar and 1 tablespoon of ground cinnamon. If you like, add 1/4 cup of chopped pecans. Spread this mix evenly over the rolled dough. - Starting from one edge, roll the dough into a log. Slice this log into 12 equal pieces. - Grease the slow cooker insert with cooking spray. Place the rolls inside, leaving space for them to rise. - Cover the slow cooker and set it to low. Cook for 2 to 3 hours. Check the rolls for doneness; they should be puffed and soft. To make the best pumpkin spice cinnamon rolls, focus on the dough. Aim for a dough that feels soft but not sticky. If it sticks to your fingers, add flour one tablespoon at a time until it feels just right. Checking for doneness is easy. Look for rolls that are puffed up and soft. You can gently poke one; if it springs back, they are ready. Drizzling cream cheese frosting is a must. It adds a rich, sweet flavor that pairs well with the spices. You can use store-bought frosting or make your own for a special touch. For drinks, hot coffee or tea works great. The warmth of the drink enhances the spices in the rolls. You can also serve them with apple cider for a seasonal twist. {{image_2}} You can make your pumpkin spice cinnamon rolls even better. Here are a few ideas: - Adding nuts or chocolate chips: Chopped pecans give a nice crunch. They add flavor and texture. If you love chocolate, you can mix in chocolate chips. They melt and create a rich taste. - Incorporating caramel or butterscotch sauce: Drizzling caramel or butterscotch sauce on top adds sweetness. It makes the rolls even more decadent. You can use store-bought sauce or make your own for a special touch. You can easily adapt this recipe for different diets. Here are some suggestions: - Gluten-free alternatives for flour: Use gluten-free all-purpose flour. This swap keeps the rolls soft and fluffy. Look for flour blends that include xanthan gum for best results. - Vegan substitutions for dairy ingredients: Replace milk with almond or oat milk. For butter, use a plant-based alternative. You can also use vegan cream cheese for the frosting. These swaps make the rolls friendly for everyone. Enjoy trying these variations. Each change brings a new twist to the classic pumpkin spice cinnamon rolls. To keep your cinnamon rolls fresh, store them in the fridge. Place them in an airtight container to prevent drying out. They can last up to four days this way. If you want to save them longer, try freezing. Wrap each roll in plastic wrap, then place them in a freezer bag. They will stay good for about three months. When you are ready to enjoy your leftover rolls, reheating them is easy. Use the microwave for quick warming. Heat for about 15 seconds at a time. Check often to avoid overheating. You can also use an oven for a crispier texture. Preheat the oven to 350°F and warm the rolls for about 10 minutes. This method keeps them soft and warm. If you want to avoid dryness, cover them with foil while reheating. You can tell when the cinnamon rolls are done by checking their size. They should be puffed up and soft. You can also gently press the top with your finger. If it springs back, they are ready. The cooking time is usually between 2 to 3 hours on low heat. Keep an eye on them to avoid overcooking. Yes, you can make these cinnamon rolls ahead of time. Prepare the dough and roll it up. Instead of cooking, wrap the rolls tightly in plastic wrap. Store them in the fridge for up to 24 hours. When ready to bake, just place them in the slow cooker. This method gives you fresh rolls with less morning fuss. If you want to switch up the frosting, there are many options. You can use vanilla icing or a simple glaze made of powdered sugar and milk. Another option is a maple syrup glaze for a fun twist. You can also try a chocolate frosting for a rich flavor. Pick what sounds best to you! You learned how to make tasty cinnamon rolls using simple ingredients and steps. We covered mixing dough, forming rolls, and cooking them in a slow cooker. Tips for perfecting your rolls and fun variations were shared. Remember, storing and reheating properly keeps them fresh. With this recipe, you can enjoy warm, sweet treats any time. Experiment with flavors and toppings to make it yours! Happy baking!

Slow Cooker Pumpkin Spice Cinnamon Rolls Delight

- 2 large sweet potatoes - 4 tablespoons unsalted butter - 4 garlic cloves - 1 teaspoon smoked paprika - 1 teaspoon salt - ½ teaspoon black pepper - 2 tablespoons fresh parsley The heart of this recipe is the sweet potatoes. They provide a soft, sweet base. The garlic butter adds rich flavor and depth. You’ll love how the smoked paprika gives a nice warmth. The salt and pepper balance the dish perfectly. Fresh parsley brings a splash of color and freshness. - Additional spices to enhance flavor - Suggested dips for serving Feel free to experiment! You can add cayenne for some heat. A sprinkle of cinnamon can bring a sweet twist. Try serving with ranch, aioli, or even a spicy ketchup. - Air fryer - Mixing bowl - Small bowl for garlic butter mixture - Cutting board and knife Using an air fryer makes cooking these fries quick and easy. A mixing bowl helps combine ingredients well. You’ll need a small bowl for the garlic butter mix. A cutting board and knife are essential for slicing the sweet potatoes. Gather these ingredients and tools, and you’re ready to create a delicious dish! To make sweet potato fries, start with two large sweet potatoes. Wash them well and peel if you prefer. Cut them into long, thin strips. Aim for about ¼ inch thick. This size helps them cook evenly. Place the cut fries in a bowl and rinse them in cold water. This step removes some starch and helps them become crispier. Tips for even cooking: - Pat the fries dry with a towel after rinsing. - Make sure they are all the same size for even cooking. - Avoid overcrowding the air fryer basket. Fry in batches if needed. In a small bowl, melt four tablespoons of unsalted butter. Once melted, add four minced garlic cloves. Then, mix in a teaspoon of smoked paprika, a teaspoon of salt, and half a teaspoon of black pepper. Stir until everything blends well. This mixture will coat the fries and add great flavor. Ensuring proper seasoning balance: - Taste the mixture. Adjust salt or garlic to your liking. - You can add more spices like cayenne if you want heat. First, preheat your air fryer to 400°F (200°C). This step is key for crispy fries. Preheat for about five minutes. Place the sweet potato fries in a large bowl and pour the garlic butter mixture over them. Toss the fries until all are coated. Arrange the fries in a single layer in the air fryer basket. Ensure they don’t overlap. Cook them for 15-18 minutes. Shake the basket halfway through. This movement helps them crisp up evenly. The fries are done when they turn golden brown. Remove them carefully and enjoy! To get your fries crispy, set your air fryer to 400°F (200°C). This temperature cooks the fries fast, making them crunchy outside and soft inside. Avoid overcrowding the basket. If fries touch, they may turn soggy. Fry in batches if needed, giving each fry space to breathe. For a richer garlic taste, try using roasted garlic instead of fresh. Roasted garlic has a sweet and mellow flavor. If you love garlic, feel free to add more. Start with four cloves, then adjust to match your taste. Always taste the garlic butter mixture before coating the fries. Serve your fries with a sprinkle of fresh parsley for color. You can also add a dash of smoked paprika on top. For dips, try a tangy yogurt sauce or a spicy ketchup. Pair these fries with grilled meats or a fresh salad for a complete meal. {{image_2}} For a spicy kick, try adding cayenne or chili powder. These spices give your fries heat and flavor. You can start with 1/4 teaspoon and adjust to your taste. If you prefer sweet flavors, mix in a bit of cinnamon or brown sugar. Cinnamon adds warmth, while brown sugar offers a nice caramel note. Both can make your fries a fun treat. If you follow a vegan diet, you can swap the butter for plant-based butter. This change keeps the garlic flavor strong without dairy. For those needing gluten-free options, rest assured that sweet potatoes are naturally gluten-free. Just ensure any seasonings or dips are also gluten-free. This way, everyone can enjoy these tasty fries. You can also bake sweet potato fries in the oven. Preheat your oven to 425°F (220°C). Spread the fries on a baking sheet with parchment paper. Bake for 20-25 minutes, flipping halfway for even cooking. If you want a different method, pan-frying works too. Heat oil in a skillet over medium heat. Fry the sweet potato fries until golden brown and crispy. Each method offers a unique texture and flavor to enjoy. To keep your garlic butter sweet potato fries fresh, refrigerate them in an airtight container. This method prevents moisture loss and keeps them tasty. I recommend eating the fries within three days for the best flavor. When reheating, the air fryer works best. Set it to 350°F (175°C) and heat for about 5–7 minutes. This makes them crispy again. Avoid using the microwave, as it can make the fries soggy. If you want to save some fries for later, freezing is a great option. First, let the fries cool completely. Next, spread them in a single layer on a baking sheet. Freeze for a few hours until solid. This way, they won't stick together. Once frozen, transfer the fries to a freezer bag. Remove as much air as you can to prevent freezer burn. They can last up to three months in the freezer. When you're ready to cook from frozen, preheat your air fryer to 400°F (200°C). Cook for 18–20 minutes, shaking the basket halfway through. This helps them cook evenly and stay crispy. In the fridge, your sweet potato fries will last about 3 to 5 days. After that, they may begin to lose their flavor and texture. Look out for signs of spoilage. If the fries smell off or look discolored, it’s best to toss them. Keeping an eye on your leftovers ensures you enjoy them at their best. Yes, you can use regular potatoes. Russet or Yukon Gold potatoes work well. They will have a different taste but will still be tasty. Cut them into similar fry shapes for even cooking. To get extra crispy fries, try these tips: - Use a thin layer of oil on the fries. - Do not overcrowd the basket; cook in batches. - Shake the basket halfway during cooking. - Cook for a bit longer if needed, watching closely. Many sauces complement these fries well. Try: - Garlic aioli for a rich flavor. - Chipotle mayo for a spicy kick. - Ketchup for a classic combo. - Ranch dressing for a creamy dip. Yes, you can prepare the garlic butter mix ahead. Just store it in the fridge. Warm it up before using it on the fries. This saves time when you are ready to cook. Soaking sweet potatoes is not required. However, if you soak them in water for 30 minutes, it can help them crisp up more. Make sure to dry them well before cooking. This post covered how to make delicious garlic butter sweet potato fries. I shared the main ingredients, optional seasonings, and needed kitchen tools. You learned step-by-step instructions for preparation, cooking tips for crispiness, and creative presentation ideas. Finally, I discussed variations, storage tips, and answered common questions. Enjoy using these tips to create a tasty snack. You’ll impress everyone and make cooking fun!

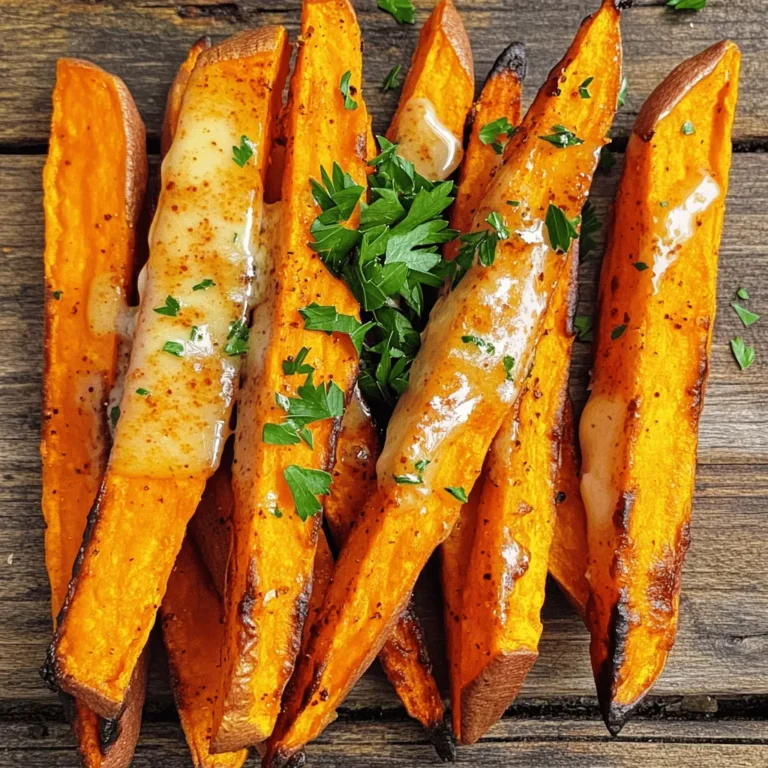
Garlic Butter Sweet Potato Fries Air Fryer Delight

- 1 can (15 oz) chickpeas, drained and rinsed - 2 tablespoons olive oil - 1 teaspoon smoked paprika - 1/2 teaspoon cumin - 1/2 teaspoon garlic powder - 1/4 teaspoon cayenne pepper (optional for heat) - Salt and pepper to taste Roasted chickpeas are the star of this dish. I always use canned chickpeas for ease. A good rinse removes excess sodium. Olive oil gives them a nice crisp. The spices add depth and warmth. Smoked paprika is my favorite for its rich flavor. Cumin brings an earthy taste. Garlic powder adds a savory kick. Cayenne pepper is optional, but it gives heat if you like spice. Always season with salt and pepper to taste. - 1 cup quinoa, rinsed - 2 cups vegetable broth or water Quinoa is a great grain for this bowl. I rinse it to remove bitterness. Cooking it in vegetable broth adds extra flavor. This base is fluffy and filling. It pairs well with the chickpeas and veggies. - 1 bell pepper, diced - 1 zucchini, diced - 1 cup cherry tomatoes, halved - 2 cups fresh spinach or kale - 1 avocado, sliced - 2 tablespoons tahini - Juice of 1 lemon - Fresh parsley, chopped (for garnish) The veggies bring color and nutrients. I love using bell pepper and zucchini. They add crunch and sweetness. Cherry tomatoes pop with flavor. Spinach or kale adds green goodness. For toppings, I use creamy avocado. Tahini sauce gives a nutty taste. A squeeze of lemon adds brightness. Fresh parsley makes it look pretty. Each bite is packed with flavor and fresh goodness. First, preheat your oven to 400°F (200°C). Grab a baking sheet and line it with parchment paper. In a bowl, combine the drained and rinsed chickpeas with olive oil, smoked paprika, cumin, garlic powder, cayenne pepper, salt, and pepper. Toss everything together until the chickpeas are well-coated. Spread the chickpeas evenly on the baking sheet. Roast them for 25-30 minutes, stirring once halfway through, until they turn crispy and golden brown. While the chickpeas roast, you can cook the quinoa. In a medium pot, bring 2 cups of vegetable broth or water to a boil. Once boiling, add 1 cup of rinsed quinoa. Reduce the heat to low, cover the pot, and let it simmer for about 15 minutes. When done, the quinoa should absorb all the liquid and be fluffy. Now, let's sauté the vegetables. In a sauté pan over medium heat, add the diced bell pepper and zucchini. Cook for 5-7 minutes until they become tender. Next, toss in the halved cherry tomatoes and fresh spinach. Sauté everything together for another 2-3 minutes, just until the spinach wilts. Season with salt and pepper to taste. To get crispy chickpeas, start with well-dried ones. After rinsing, pat them dry with a towel. This step helps them roast better. Next, toss the chickpeas with olive oil and spices. Spread them out evenly on a baking sheet. Remember to stir them halfway through roasting. This helps them crisp up all over, not just on one side. You can boost the flavor of your roasted chickpeas. Try adding more spices like onion powder or paprika. Fresh herbs like rosemary or thyme also work well. For sauces, tahini is great, but you could use hummus or yogurt too. A drizzle of hot sauce adds a kick if you like heat. Preparing these bowls in advance saves time. Cook a big batch of quinoa and store it in the fridge. Roast extra chickpeas and keep them in an airtight container. You can chop veggies ahead of time too. Store each component separately to keep them fresh. This way, you can mix and match for quick lunches or dinners. {{image_2}} You can swap quinoa for other grains. Brown rice works great for a nutty taste. Couscous cooks quickly and adds a soft texture. Farro brings a chewy bite that is satisfying. Each grain will change the flavor and feel of your bowl. Feel free to try your favorite! Seasonal vegetables can add freshness. Try sweet corn in summer for a burst of sweetness. In fall, butternut squash adds warmth and creaminess. You can also mix in broccoli, carrots, or asparagus. Use what you love or what’s on sale. Get creative! Want more protein? Tofu makes a great choice. Just cube and bake or sauté until golden. Tempeh is another option that gives a nutty flavor. If you prefer meat, grilled chicken adds heartiness. Each option elevates your bowl and keeps you full! To store leftover roasted chickpeas and vegetables, let them cool first. Place them in an airtight container. Keep the roasted chickpeas separate from the veggies. They stay crispier this way. You can store them in the fridge for up to three days. If you mix them, the chickpeas may lose their crunch. When reheating, I suggest using an oven. Preheat it to 350°F (175°C). Spread the chickpeas on a baking sheet. Warm them for about 10 minutes. This helps them stay crunchy. For veggies, you can use the microwave. Heat them for about 1-2 minutes. Stir halfway for even warming. You can freeze roasted chickpeas and veggies, but it’s best to freeze them separately. For chickpeas, place them in a freezer bag. Remove as much air as possible. Freeze them for up to three months. For veggies, blanch them first. Cool in ice water, then drain. Store them in a freezer bag too. To thaw, leave them in the fridge overnight. You can also use them straight from the freezer in soups or stews. You can swap tahini with several options. Here are a few good choices: - Nut butters, like almond or cashew butter - Sunflower seed butter - Greek yogurt for a creamy texture - A mix of olive oil and lemon juice These alternatives keep the dish tasty. Try what you have at home! Yes, you can easily make these bowls gluten-free. Quinoa is a great gluten-free grain. If you choose to add other grains, ensure they are certified gluten-free. Check labels on any packaged ingredients to avoid gluten. Roasted chickpeas can last for up to one week. Store them in an airtight container at room temperature. To keep them crispy, avoid refrigerating them. If they lose crunch, you can re-roast them for a few minutes to refresh. In this post, we explored a tasty way to make roasted chickpea bowls. You learned about main ingredients like chickpeas, quinoa, and fresh veggies. I shared steps for baking chickpeas and cooking quinoa. We also discussed tips for crispy chickpeas and variations for your bowl. These bowls are versatile and simple to prep in advance. Enjoy personalizing them with your favorite ingredients. Now, you can create your own healthy and delicious meals with ease.

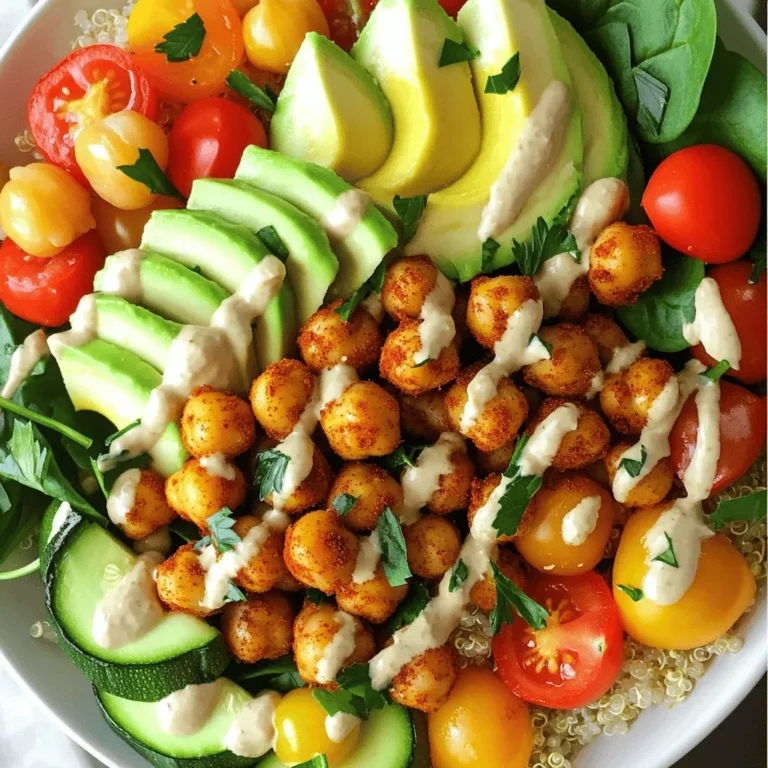
Roasted Chickpea Veggie Bowls Packed with Flavor

- 2 cups fresh apples, peeled and diced - 2 tablespoons brown sugar - 1 teaspoon cinnamon - 1 tablespoon lemon juice For the fresh ingredients, start with apples. I love using crisp apples like Granny Smith or Honeycrisp. They hold their shape well and add a nice tartness. Diced apples mix perfectly with brown sugar, cinnamon, and lemon juice. This mix brings out the sweet and tangy flavors. Cook them gently until soft yet firm, about 5-7 minutes. - 1 cup cream cheese, softened - 1/2 cup powdered sugar - 1 teaspoon vanilla extract - 1 cup heavy cream, whipped For the cheesecake filling, use softened cream cheese. It blends smoothly with powdered sugar and vanilla extract. Whip heavy cream in a separate bowl until it forms soft peaks. Gently fold the whipped cream into the cream cheese mix. This step makes the filling light and airy. - 1 cup graham cracker crumbs - 1/4 cup unsalted butter, melted - Optional: caramel sauce for drizzling The crust adds crunch to your trifle. Mix graham cracker crumbs with melted butter. This combination creates a rich and buttery base. You can also drizzle caramel sauce on top for extra sweetness and flavor. It makes your trifle look and taste amazing! To make the apple filling, you first cook the diced apples. In a medium saucepan, mix 2 cups of fresh apples, 2 tablespoons of brown sugar, 1 teaspoon of cinnamon, and 1 tablespoon of lemon juice. Cook over medium heat for about 5-7 minutes. Stir occasionally to keep everything from sticking. The apples should be soft yet hold their shape. Once done, take the pan off the heat and let the filling cool. This cooling step is key to keep the layers from mixing later. Next, let’s make the cheesecake filling. Start by softening 1 cup of cream cheese in a mixing bowl. Beat it until it's smooth and creamy. Then add in 1/2 cup of powdered sugar and 1 teaspoon of vanilla extract. Mix until everything is well combined. After that, fold in 1 cup of whipped cream. Do this gently to keep the mixture light and airy. Make sure it looks smooth with no lumps. This filling will add a rich layer to your trifles. Now for the fun part: assembling the trifles! Grab your serving glasses. Start with a layer of the graham cracker mixture at the bottom, which we will prepare next. Add a layer of the cheesecake filling on top of the crumbs. Then, spoon in a layer of the cooked apples. Repeat these layers until your glasses are full. Aim for a final layer of cheesecake at the top. For a charming finish, you can drizzle caramel sauce on top. This is optional, but it adds a sweet touch. Chill the trifles in the fridge. Cover each glass with plastic wrap to keep them fresh. Let them sit for at least 2 hours. This helps the layers set nicely. When it’s time to serve, be sure to drizzle caramel sauce on top. You can also add a sprinkle of cinnamon or a slice of apple for a decorative touch. Enjoy this delightful dessert with friends or family! Choosing the Best Apples For the best taste, use firm apples. Varieties like Granny Smith or Honeycrisp work well. They hold their shape and add a nice tartness. Select apples that are fresh and crisp. This makes a big difference in flavor. Flavor Enhancements Add a touch of lemon juice to keep apples bright. A sprinkle of nutmeg can deepen the flavor. You might also try adding a bit of vanilla extract for a sweet note. These simple tweaks can elevate your apple filling. Achieving the Right Texture Softened cream cheese is key for a smooth filling. Mix it well until creamy. Gently fold in the whipped cream to keep it light. This creates a fluffy cheesecake layer that everyone will love. Avoiding Common Mistakes Don’t overmix the cream cheese or whipped cream. This can make the texture dense. Make sure to let your cream cheese soften fully before mixing. Cold cream cheese can lead to lumps in your filling. Layering Techniques Start with a graham cracker layer at the bottom. Follow with cheesecake, then apples. Repeat layers for a beautiful effect. Make sure you finish with cheesecake on top for a nice look. Garnishing Ideas Use clear glasses to show off your layers. A sprinkle of cinnamon adds a lovely touch. You can also place a thin apple slice on top as a garnish. Drizzling caramel sauce right before serving adds sweetness and flair. {{image_2}} You can play with flavors in your Apple Pie Cheesecake Trifles. - Spiced Variations: Add a pinch of nutmeg or allspice to the apple filling. This gives the dish a warm, cozy touch. You can also mix in some cloves for a richer flavor. - Fruit Add-ins: Consider adding other fruits. Pears or peaches work well with apples. You can even try berries for a fresh twist. If you have dietary needs, you can still enjoy these trifles. - Gluten-Free Options: Use gluten-free graham cracker crumbs instead of regular ones. Check the labels to ensure they are safe for you. - Vegan Substitutes: Swap cream cheese for a vegan cream cheese. Use coconut whipped cream for the heavy cream. This way, you keep the creamy texture without dairy. How you serve these trifles can change the whole experience. - Pairing with Ice Cream: Serve your trifles with a scoop of vanilla ice cream. The cold ice cream complements the warm apple filling well. - Using Different Glassware: Try using mason jars or small bowls. This adds a fun touch to your dessert. Plus, you can personalize each serving. - Best Way to Store: Place your trifles in airtight containers. This keeps them fresh and prevents odors from mixing. If you used glasses, cover them with plastic wrap. - Freshness Duration: These trifles will stay good in the fridge for up to 3 days. After that, the layers may start to lose their texture. - How to Freeze: You can freeze the trifles, but it's best to freeze the layers separately. Freeze the cheesecake filling and the apple filling in airtight containers. The crust can also be stored in a zip-top bag. - Thawing Tips: To serve, thaw the layers in the fridge overnight. Once fully thawed, reassemble the trifles for the best taste and texture. - Creative Uses for Leftover Ingredients: If you have leftover apples, try them in oatmeal or yogurt. Use extra cheesecake filling as a dip for fruit. The graham cracker crust can also make a tasty snack on its own. Apple Pie Cheesecake Trifles last about 3 days in the fridge. To keep them fresh, store them in airtight containers. This helps prevent moisture loss and keeps the flavors strong. Yes, you can make these trifles a day ahead. Just prepare and layer them, then cover them tightly. Chill them overnight. This allows the flavors to blend nicely. You can use Greek yogurt as a substitute for cream cheese. It gives a similar creaminess. Soft tofu is another option. Blend it until smooth for a dairy-free choice. Yes, you can easily make these trifles nut-free. Just ensure your graham crackers do not contain nuts. Also, use nut-free butter for the crust. This way, everyone can enjoy the dessert! In this blog post, we explored how to make delicious Apple Pie Cheesecake Trifles. We covered fresh ingredients, cheesecake filling, and crust options. I shared step-by-step instructions for preparing the apple filling, making the cheesecake mix, and assembling the trifles. Remember, perfecting flavors and presentation makes a big difference. Try different variations and storage tips to enjoy your trifles longer. Let's get creative in the kitchen and make something special!

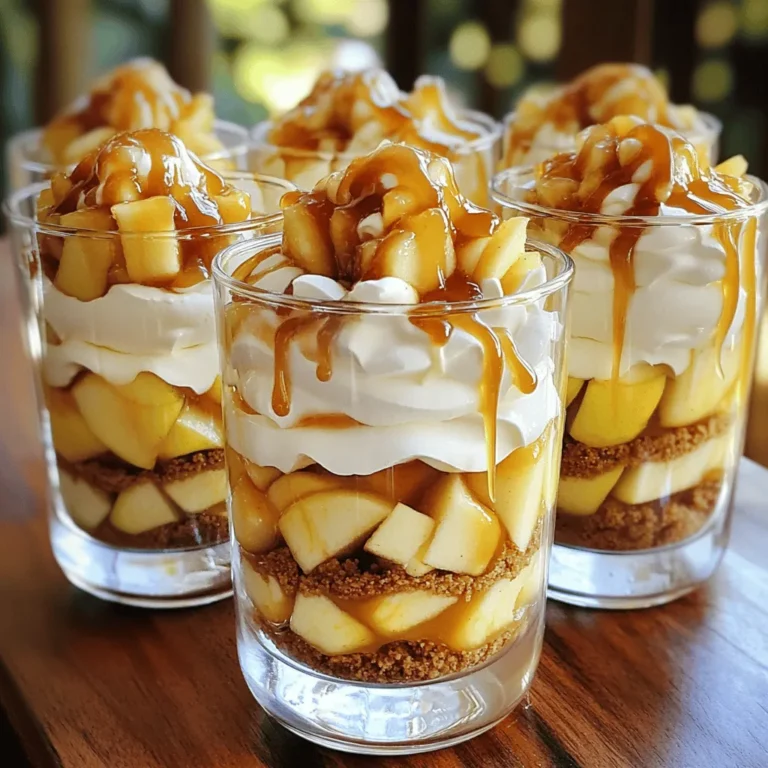
Apple Pie Cheesecake Trifles Delightful Dessert Recipe

To make this delightful dish, gather these key ingredients: - 1 pound gnocchi (store-bought or homemade) - 2 cups broccoli florets - 1 cup cherry tomatoes, halved - 1 cup bell peppers, chopped (any color) - 1 medium zucchini, sliced - 4 tablespoons olive oil - 4 cloves garlic, minced - ½ cup grated Parmesan cheese - 1 teaspoon Italian seasoning - Salt and pepper to taste - Fresh parsley, chopped (for garnish) You can add a few tasty toppings to elevate your dish. Consider: - Extra Parmesan cheese for more flavor - Crushed red pepper flakes for heat - Lemon zest for a fresh zing - Toasted pine nuts for crunch Choosing fresh veggies makes a big difference. Here are some tips: - Look for bright colors. They show freshness and flavor. - Choose firm veggies. They should feel solid and not soft. - Check for blemishes. Avoid vegetables with dark spots or wrinkles. - Buy in season. Seasonal produce tastes better and is often cheaper. These tips will help you create a vibrant and tasty meal with great texture and flavor. Enjoy your cooking! 1. Start by preheating your oven to 425°F (220°C). This step is key for crispy gnocchi. 2. Grab a large mixing bowl. Toss in 1 pound of gnocchi, 2 cups of broccoli florets, 1 cup of halved cherry tomatoes, 1 cup of chopped bell peppers, and 1 medium sliced zucchini. 3. Drizzle 4 tablespoons of olive oil over the mix. Add 4 minced garlic cloves, 1 teaspoon of Italian seasoning, and salt and pepper to taste. 4. Stir well to coat everything evenly. This helps all the flavors blend together nicely. 5. Line a large sheet pan with parchment paper. Spread the mixture in a single layer on the pan. This ensures even cooking. 1. Place the sheet pan in the preheated oven. Bake for 20-25 minutes. 2. Stir the mixture halfway through. This helps the gnocchi get crispy on all sides. 3. After 20-25 minutes, check if the gnocchi are golden and the veggies are tender. 4. Once done, take the pan out. Sprinkle ½ cup of grated Parmesan cheese over the top. 1. Preheat oven to 425°F (220°C). 2. Bake for 20-25 minutes. Stir halfway for even cooking. 3. Bake for an extra 5 minutes after adding cheese. This melts it perfectly. This simple process will lead you to a tasty and colorful dish that's sure to please! To get crispy gnocchi, use a high oven temperature. Preheat your oven to 425°F (220°C). Spread the gnocchi and vegetables in a single layer on the sheet pan. This ensures they bake evenly. Stir halfway through for the best results. The gnocchi will turn golden and crunchy, making each bite a delight. You can easily switch some ingredients. If you lack gnocchi, try using pasta. For veggies, zucchini can be swapped for asparagus or green beans. If you want a dairy-free option, replace Parmesan with nutritional yeast. You can also change the herbs. Use fresh basil instead of Italian seasoning for a twist. To store leftovers, let them cool completely. Place them in an airtight container. They will stay fresh in the fridge for up to three days. Reheat in the oven for the best texture. If you're short on time, you can use the microwave, but this may make them soft. Enjoy your meal again without losing flavor! {{image_2}} You can switch up the veggies in this dish. Try using asparagus or cauliflower. Carrots add a nice crunch and color. Spinach or kale bring in great flavor. Just keep the cooking times in mind. Softer veggies need less time, while firmer ones need more. To make this dish vegan, skip the Parmesan cheese. Use nutritional yeast instead. It gives a cheesy flavor without dairy. You can also use a plant-based gnocchi. Check labels to ensure they are dairy-free. This way, everyone can enjoy the meal. Adding protein can make this dish more filling. Chicken or shrimp works well with the flavors. Tofu or chickpeas are great plant-based options. Cook the protein separately and mix it in before serving. This adds a nice boost to your meal. This dish shines when paired with a simple salad. A fresh green salad with a light vinaigrette works well. You might also enjoy a slice of crusty bread. The bread helps scoop up any extra sauce. If you love protein, try adding grilled chicken or shrimp. These options add great flavor and make the meal more filling. Roasted or sautéed vegetables complement the gnocchi and veggies. Think about serving some garlic green beans or sautéed spinach. They add color and taste to your plate. A creamy soup, like tomato basil, also pairs nicely. It warms you up and balances the meal. For a light touch, serve some sliced cucumbers or a fruit salad. They bring a refreshing crunch. To impress your guests, serve the gnocchi in individual bowls. You can sprinkle extra Parmesan on top for a gourmet look. Use fresh parsley to add a splash of color. Arrange the vegetables artfully around the gnocchi. For a fun twist, serve with colorful plates or napkins. You can also add a lemon wedge for a pop of brightness. This makes the dish feel special and inviting. Yes, you can use frozen gnocchi. Just add them directly to your bowl. They will cook well in the oven. You do not need to thaw them first. This makes it easy on busy nights. To reheat leftovers, place them in the oven. Set the oven to 350°F (175°C). Bake for about 10-15 minutes. You can also use a microwave. Just heat in short bursts, stirring often. You can prep the gnocchi and veggies ahead of time. Toss them with oil and seasonings. Store them in the fridge for up to 24 hours. When ready, just bake as normal. The best vegetables include broccoli, cherry tomatoes, and bell peppers. Zucchini works well too. You can also use asparagus, carrots, or green beans. Choose your favorites to make it your own. You now have a clear guide for making a delicious gnocchi dish. We reviewed ingredients, cooking steps, and helpful tips. Remember to choose fresh veggies for the best flavor. You can always try new toppings or make fun variations to suit your taste. Don’t forget to store leftovers properly to enjoy later. With these steps, you can serve a tasty meal that impresses. Enjoy your cooking journey and share your delicious results!

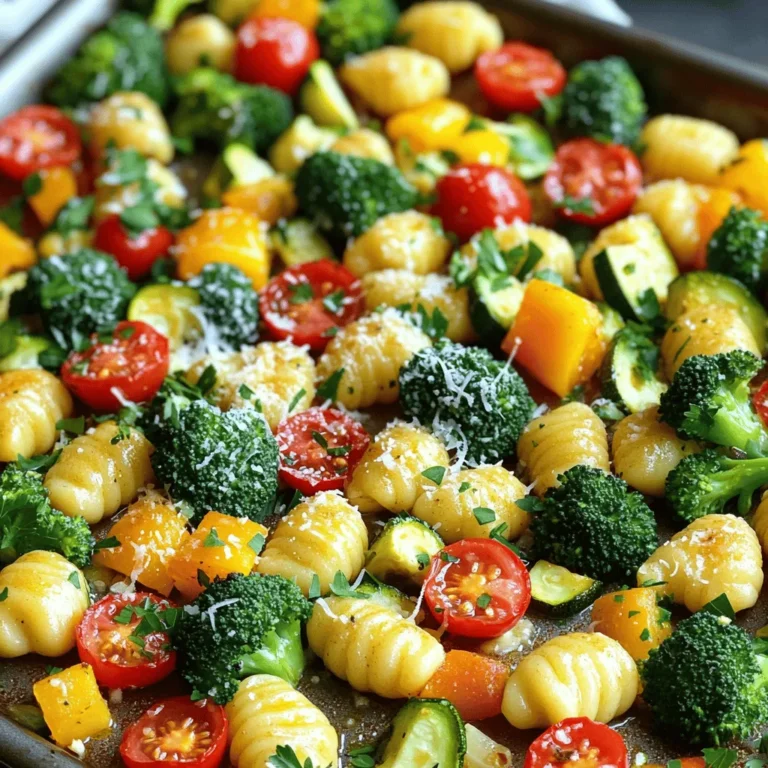
Sheet Pan Garlic Parmesan Gnocchi & Veggies Delight

- 2 large chicken breasts - 2 tablespoons chili powder - 1 teaspoon cumin - 1 teaspoon garlic powder - Zest and juice of 2 limes - 2 tablespoons olive oil - Salt and pepper to taste - 8 small corn tortillas - 1 cup shredded red cabbage - 1 avocado, sliced - ½ cup fresh cilantro, chopped - Lime wedges for serving The main ingredient in this recipe is chicken breasts. They soak up the marinade well and cook evenly. The marinade adds a tangy and spicy flavor. You’ll also need tortillas to hold all the tasty fillings. For toppings, I love using shredded cabbage for crunch, creamy avocado, and fresh cilantro for a burst of flavor. Lime wedges add that final zesty touch. You will need specific amounts to get the best taste. Here’s a quick guide: - Chicken: 2 large breasts for four servings. - Spices: 2 tablespoons chili powder, and 1 teaspoon each of cumin and garlic powder. - Lime: Use the zest and juice of 2 limes for a bright flavor. - Olive oil: 2 tablespoons help the spices stick to the chicken. - Tortillas: 8 small corn tortillas work best for folding. - Cabbage: 1 cup shredded for a crunchy bite. - Avocado: 1 sliced for creaminess. - Cilantro: ½ cup chopped for freshness. - Lime wedges: A few for serving. If you want more tacos, you can double the chicken and toppings. Adjust spices based on your taste. This way, you can enjoy these tacos with friends or family. To make the marinade, mix these in a bowl: - 2 tablespoons chili powder - 1 teaspoon cumin - 1 teaspoon garlic powder - Zest and juice of 2 limes - 2 tablespoons olive oil - Salt and pepper to taste Add the two large chicken breasts to the bowl. Make sure to coat them well in the marinade. For the best flavor, let the chicken marinate for at least 30 minutes. You can also let it sit for up to 2 hours in the fridge. This extra time helps the flavors soak into the chicken. You can cook the chicken on a grill or in a skillet. If you choose a grill, heat it to medium-high. Place the marinated chicken on the grill and cook for about 6-7 minutes on each side. If using a skillet, do the same. The chicken is done when it reaches an internal temperature of 165°F (75°C). After cooking, let the chicken rest for 5 minutes before slicing it. This keeps it juicy. To warm the tortillas, use a dry skillet over medium heat. Heat each corn tortilla for about 30 seconds on each side. This makes them nice and pliable. Warm tortillas are key for tasty tacos. They hold the filling well and add a soft texture. Now it's time to put it all together! Start by placing slices of the grilled chicken on each warmed tortilla. Next, add a layer of shredded red cabbage and a few slices of avocado. Top it off with fresh cilantro for bright flavor. For a zesty kick, squeeze some extra lime juice on top. You can also serve lime wedges on the side for extra fun! Marinating chicken is key to great taste. It allows spices to soak in and enhances flavor. I recommend marinating for at least 30 minutes. For more flavor, go up to 2 hours. You can adjust spices based on your taste. Add more chili powder for heat or lime juice for tang. To avoid dry chicken, don’t overcook it. Cook until it reaches 165°F (75°C). Let it rest for 5 minutes after cooking. This keeps juices inside. For tortillas, warm them gently. Use a dry skillet for about 30 seconds on each side. This makes them soft and easy to fold. Plating tacos can be fun and creative. Stack them on a colorful plate. Use a small bowl of lime wedges on the side. Add sliced avocado on top for a pop of color. Fresh cilantro adds visual appeal. It looks great and tastes fresh. {{image_2}} You can change the chicken with other proteins. Try shrimp, beef, or tofu for a twist. Each option brings a new taste to your tacos. For tortillas, you can switch corn for flour or whole wheat. Each type adds a different texture. If you want a gluten-free option, look for special gluten-free tortillas. To change the spice mix, try adding different herbs. Oregano or smoked paprika can give a new flavor. You can also use spices from other cuisines, like curry or za’atar. Want more heat? Add some chopped jalapeños or a dash of hot sauce. For sweetness, try mango or pineapple chunks. Each addition can change the taco's profile. These tacos pair well with simple sides. Serve them with black beans or Mexican rice. You might also enjoy a fresh salad with lime vinaigrette. For drinks, try a cold beer or a fruity margarita. A lime-flavored soda can also be a fun choice. Each of these options complements the bold flavors of your tacos. To store your leftover chili lime chicken tacos safely, first cool them down. Place any extra chicken, tortillas, and toppings in separate containers. Use airtight containers to keep them fresh. I recommend glass or plastic containers with tight lids. This helps prevent odors from mixing in your fridge. Proper storage keeps your food safe for up to three days. When you are ready to enjoy your tacos again, gently reheat the chicken. Use a skillet over low heat for the best results. This method keeps the chicken juicy. For the tortillas, warm them in a dry skillet for about 30 seconds on each side. This helps avoid dryness and keeps them soft. You want to bring back that fresh taste and texture. If you want to save some for later, freezing works well. Freeze the chicken and toppings separately from the tortillas. Wrap the chicken tightly in plastic wrap, then place it in a freezer bag. For the tortillas, stack them with parchment paper between each one. This prevents them from sticking together. When you are ready to eat, thaw the chicken overnight in the fridge. Reheat it in a skillet, and warm the tortillas as usual. This keeps everything tasting great! Yes, you can prepare many parts ahead. Marinate the chicken in advance. You can do this up to two hours before cooking. For best flavor, let it sit in the fridge. You can also slice the avocado and shred the cabbage ahead of time. Just keep them in separate airtight containers. Warm the tortillas right before serving for the best taste. If you don't want chicken, try other proteins. You can use shrimp or fish for a light option. If you prefer plant-based choices, use tofu or tempeh. Both can soak up the marinade well. Cook them the same way as chicken for great results. The spice level is mild to medium. The chili powder gives it a nice kick without being too hot. If you want more heat, add some cayenne pepper or sliced jalapeños. If you like less spice, reduce the chili powder. You can always adjust to fit your taste. There are many tasty toppings you can add. Besides the avocado and cabbage, try diced tomatoes or radishes. You can also add cheese or a dollop of sour cream. Fresh salsa or hot sauce will give it a nice zing. Lime wedges add a bright flavor too! This blog post covered how to make delicious chicken tacos. We discussed key ingredients, cooking methods, and tips for great flavor. I also shared ideas for variations, storage, and reheating. Tacos are not just tasty; they are fun to make. You can switch up the ingredients and customize them to suit your taste. Get creative with toppings and serving options. With these steps and tips, you can enjoy a fantastic taco meal anytime. Enjoy making, sharing, and savoring your tacos!

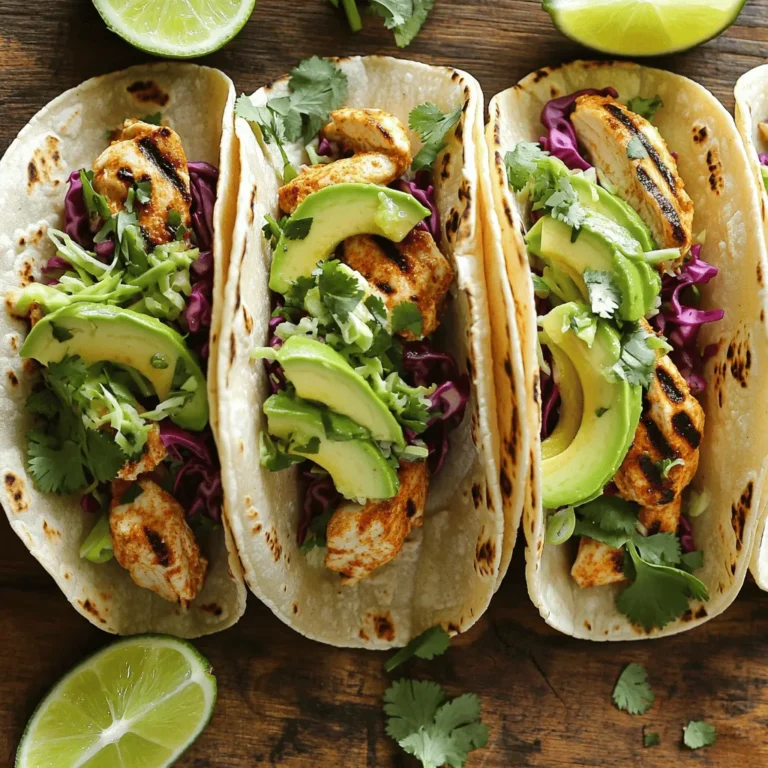
Chili Lime Chicken Tacos Flavorful and Easy Recipe

For a delicious Protein Chocolate Mint Smoothie Bowl, you will need a few key ingredients. Each plays an important role in taste and nutrition. Here’s what you need: - 1 ripe banana (frozen) - 1 cup fresh spinach - 1 cup almond milk (or any milk of your choice) - 1 scoop chocolate protein powder - ½ teaspoon peppermint extract - 2 tablespoons cocoa powder - 1 tablespoon chia seeds - Suggested toppings: granola, fresh mint leaves, dark chocolate shavings, sliced strawberries The frozen banana gives your bowl a creamy texture. Fresh spinach adds nutrients without being too noticeable. Almond milk keeps it light and smooth. Chocolate protein powder helps pack in protein. Peppermint extract adds a refreshing kick. Cocoa powder brings rich chocolate flavor. Chia seeds give extra fiber and healthy fats. For toppings, granola adds crunch. Fresh mint leaves enhance the minty taste. Dark chocolate shavings add a touch of indulgence. Sliced strawberries bring color and sweetness. Each ingredient combines to make a delightful and fresh smoothie bowl that’s a treat for your taste buds! Step 1: Combine Ingredients in Blender Start by adding all the ingredients into your blender. Use one frozen ripe banana, one cup of fresh spinach, one cup of almond milk, one scoop of chocolate protein powder, half a teaspoon of peppermint extract, two tablespoons of cocoa powder, and one tablespoon of chia seeds. Step 2: Blend Until Smooth Turn on the blender and blend the mixture on high speed. Blend until the mixture is smooth and creamy. This step is key for a great texture. Step 3: Adjust Flavor and Consistency After blending, taste the smoothie. If you want a stronger mint flavor, add a bit more peppermint extract. If the mixture is too thick, pour in more almond milk. Blend again briefly to mix. Adjusting flavors makes it just right for you. Step 4: Pour Into Serving Bowl Once you have the perfect blend, pour the smoothie mixture into a bowl. This is where your creation starts to shine. Step 5: Artistic Topping Arrangement Now, the fun part! Arrange your toppings. Place granola on one side, fresh mint leaves on another, and sprinkle dark chocolate shavings across the top. Finish with a few sliced strawberries for vibrant color and taste. Enjoy your beautiful protein chocolate mint smoothie bowl! To get that creamy texture, use a high-powered blender. It breaks down the ingredients well. Start with the frozen banana and spinach. These add great bulk and smoothness. Blend on high for about a minute. If it still feels chunky, blend a bit longer. If your smoothie bowl is too thick, just add more almond milk. Pour in a little at a time. Blend it again to see if it reaches your desired thickness. This way, you keep control over the texture. For mint lovers, I suggest using fresh mint leaves as a topping. They add a bright taste and a nice pop of color. If you want a stronger mint flavor, add more peppermint extract. Blend again briefly to mix it well. You can also introduce other flavors to your smoothie bowl. For example, mix in a bit of vanilla extract or some nut butter. These flavors pair well with chocolate and mint. You can even try adding a pinch of sea salt for balance. {{image_2}} You may want to switch some ingredients to fit your taste or diet. Here are some ideas: - Dairy-free options: Use coconut milk or oat milk instead of almond milk. Both choices add flavor and creaminess. - Protein powder alternatives: Try vanilla or unflavored protein powder for a different taste. You can also use plant-based protein powder if you prefer. - Sweetener alternatives: Instead of sweeteners like honey, use maple syrup or agave for a different sweetness. You can also skip sweeteners if your fruit is ripe enough. Toppings can change your smoothie bowl's look and taste. Here are some fun ideas: - Seasonal fruits: Add blueberries, raspberries, or peaches for a fresh twist. You can use whatever fruits are in season. - Nut and seed options: Sprinkle almonds, walnuts, or pumpkin seeds on top. They add crunch and boost nutrition. To keep your Protein Chocolate Mint Smoothie Bowl fresh, store leftovers in the fridge. Use an airtight container to prevent air from getting in. This helps keep the flavor and texture nice. It’s best to eat leftovers within 24 hours for the best taste. If you want to store your smoothie bowl for longer, you can freeze it. Pour the mixture into an ice cube tray or freezer-safe container. When you’re ready to eat, just blend the frozen cubes with a bit of almond milk. This keeps the minty chocolate flavor intact. To re-blend your smoothie bowl, you can use a blender. Add a splash of almond milk to help it blend smoothly. This brings back the creaminess. You can also use a food processor if that’s what you have. Blend until smooth and creamy again. If you don’t have a blender, you can stir it well by hand. This won’t make it as creamy, but it still works. Just remember to enjoy it cold for the best experience! To make this smoothie bowl vegan, use plant-based protein powder. You can also choose almond milk or any other non-dairy milk. Make sure the chocolate and toppings are vegan-friendly too. Yes, you can use various protein powders. Plant-based, whey, or casein protein all work well. Just pick one that suits your taste and dietary needs. Add healthy fats for more staying power. Consider adding nut butter or avocado. You can also increase the chia seeds or add oats for extra fiber. Yes, you can prep it ahead. Blend the smoothie and store it in the fridge for up to a day. Just remember to stir it well before serving. You learned how to make a tasty smoothie bowl. We covered all the steps, from blending ripe bananas and spinach to adding flavors like cocoa and peppermint. Remember to play with your ingredients and toppings to suit your taste. Keep your smoothie bowl fresh by storing it properly. With a few simple swaps, you can create endless variations. Enjoy mixing and matching to discover your favorite version of this nutritious treat!

Protein Chocolate Mint Smoothie Bowl Delightful and Fresh

- 1 cup graham cracker crumbs - 4 tablespoons unsalted butter, melted - 8 oz cream cheese, softened - 1/2 cup powdered sugar - 1 teaspoon vanilla extract - 1 lemon, zested and juiced - 1 cup heavy whipping cream - 1 cup fresh raspberries - 2 tablespoons honey (optional, for sweetness) In this recipe, I use simple and fresh ingredients. Graham cracker crumbs make the crust tasty and crunchy. I always melt unsalted butter to bind the crumbs together. Cream cheese gives the parfait its rich and creamy texture. I mix in powdered sugar for sweetness and vanilla extract for flavor. Fresh lemon zest and juice add brightness. Heavy whipping cream is key for a fluffy texture. Fresh raspberries provide vibrant color and flavor. You can add honey for extra sweetness if you like. - Mixing bowls - Electric mixer - Rubber spatula - Serving glasses or bowls To create these parfaits, I recommend using a few handy tools. Mixing bowls help you combine ingredients easily. An electric mixer makes beating the cream cheese quick and smooth. A rubber spatula is great for folding in the whipped cream without losing air. Finally, serving glasses or bowls show off the beautiful layers of your dessert. Having the right tools makes the process easier and more fun. Enjoy crafting these delightful parfaits! To start, grab a bowl. Mix 1 cup of graham cracker crumbs with 4 tablespoons of melted butter. Stir until all crumbs get coated. This mix gives your parfait a nice crunch. Next, press the crumb mixture into the bottom of your serving containers. You can use glasses or small bowls. Make sure to pack it down well. This crust will hold everything together. Now, let’s make the creamy layer. In a separate bowl, beat 8 oz of softened cream cheese with an electric mixer. You want it to be really smooth. Then, add in 1/2 cup of powdered sugar, 1 teaspoon of vanilla extract, and the zest and juice of 1 lemon. Mix everything until it’s well blended. This mixture adds a tangy, sweet flavor to the parfait. Next, we will whip the cream. Take 1 cup of heavy whipping cream and pour it into a clean bowl. Use your mixer to whip the cream until stiff peaks form. This means the cream should hold its shape. Once it’s ready, gently fold the whipped cream into the cream cheese mixture. Be careful not to deflate the cream. It should stay light and fluffy. Now it’s time to layer. Start with a layer of your graham cracker crust at the bottom of each glass. Then, add a layer of the cream cheese mixture. Top it off with a layer of fresh raspberries. Repeat these layers until your glass is full. End with the cream cheese mixture and add a few raspberries on top for a pretty finish. Cover the parfaits with plastic wrap. Place them in the fridge for at least 2 hours. This chilling time helps all the flavors blend. When you are ready to serve, take them out and remove the wrap. For a nice touch, drizzle a bit of honey on top. You can also add a mint sprig for a fresh look. Enjoy your delicious no bake raspberry lemon cheesecake parfaits! - Use cream cheese at room temperature. Cold cream cheese clumps up and does not mix well. - To achieve stiff peaks with heavy cream, whip it until you see peaks hold their shape. This makes the dessert light and airy. - Drizzle honey on top before serving. It adds a nice touch of sweetness. - Garnish with fresh mint sprigs. They make the parfaits look pretty and fresh. - Avoid overmixing the cream cheese mixture. This can make it dense and heavy. - Chill the parfaits long enough. If you don’t chill them, they won’t set properly. Aim for at least two hours in the fridge for the best results. {{image_2}} You can change the flavor of your parfaits by using different berries. Strawberries or blueberries work great. Each berry adds its own taste and charm. Another fun idea is to add a layer of chocolate. You can use melted chocolate or chocolate pudding. This twist makes the dessert richer. If you need a gluten-free option, use gluten-free graham crackers. They taste just as good. You can also swap out sweeteners. Instead of honey, try agave or maple syrup. These options will still give you that sweet touch without using sugar. For a vegan version, try plant-based cream cheese. It works well in this recipe. Use coconut whipped cream instead of heavy whipping cream. This keeps the dessert creamy and light. These changes let everyone enjoy this tasty treat. You can store your No Bake Raspberry Lemon Cheesecake Parfaits in the fridge for up to three days. This time frame keeps the flavors fresh and tasty. To keep them fresh, use airtight containers or cover them tightly with plastic wrap. This way, they won’t absorb other odors in your fridge. If you want to freeze these parfaits, follow these easy steps. First, assemble the parfaits in your serving glasses. Then, cover them with plastic wrap or foil. Place them in the freezer for up to a month. When you are ready to eat, move them to the fridge to thaw overnight. Expect some texture change when they thaw. The crust may become softer, and the cream may lose some fluffiness. However, the flavor will still be delightful! These parfaits last about 3 to 5 days in the fridge. Store them in airtight containers. If you want to freeze them, they can last for about 2 months. However, freezing may change the texture of the cream. Yes, you can make these parfaits a day in advance. This helps the flavors blend well. Just keep them in the fridge until you are ready to serve. You can use crushed cookies or nuts for a crust. Almonds or oats work well for gluten-free options. Try using crushed gluten-free cookies for a tasty alternative. Yes, you can use frozen raspberries. They may be a bit softer than fresh ones. The flavor will still be great, but the texture might change a little. If you use frozen, let them thaw before layering. These no-bake raspberry lemon cheesecake parfaits are simple to make and tasty. We covered the essential ingredients, tools, and step-by-step instructions. Remember to chill them for the best flavor. You can also try different flavors or make them vegan. With these tips, you'll avoid common mistakes and impress everyone. Enjoy creating this treat!

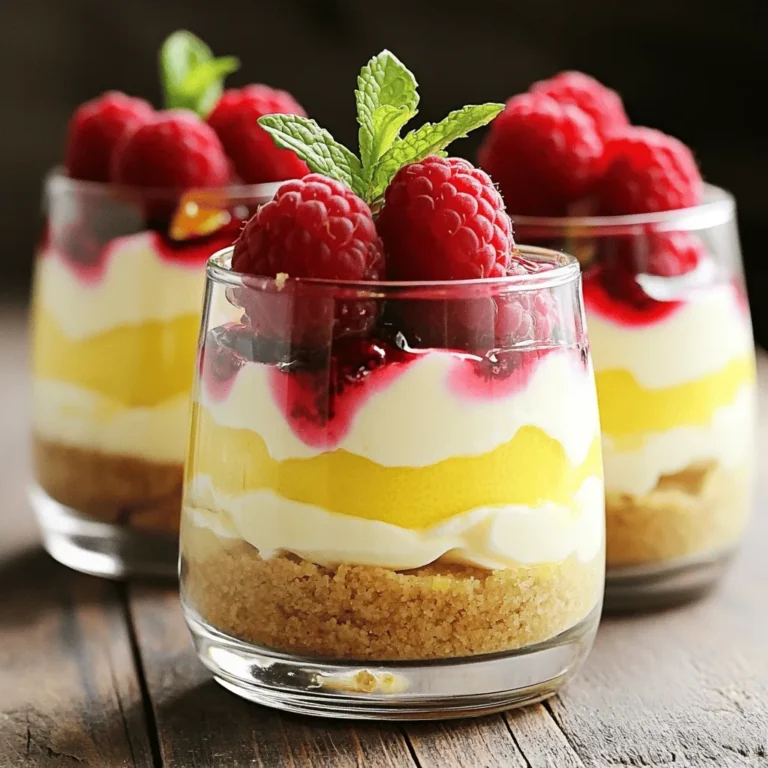
No Bake Raspberry Lemon Cheesecake Parfaits Delight

PREV 1 … 22 23 24 … 57 NEXT
flavor nest kitchen

explore

DessertsDinnerAppetizersDrinks

Our Policies

  • Cookie Policy
  • Copyright Policy
  • Disclaimer
  • GDPR Policy
  • Terms Of Use
Back to Top
  • About
  • Contact Us
  • Privacy Policy
© 2025 flavor nest kitchen