FREE DINNER EBOOK! Get your copy!
  • Cookie Policy
  • GDPR Policy
  • Disclaimer
  • Terms Of Use
  • Visit my other site: Fun Cookie Recipes
flavor nest kitchen
  • Home
  • Dinner
  • Desserts
  • Drinks
  • Appetizers
  • Contact
  • About
  • Privacy Policy
  • Home
  • Dinner
  • Desserts
  • Drinks
  • Appetizers
  • Contact
  • About
  • Privacy Policy
  • Cookie Policy
  • GDPR Policy
  • Disclaimer
  • Terms Of Use
Visit my other site: Fun Cookie Recipes

HOME / CATEGORIES /

Latest

- 1 lb salmon fillet, skin removed and cut into bite-sized cubes - 1/4 cup teriyaki sauce - 1 tablespoon sesame oil - 1 teaspoon grated fresh ginger - 1 clove garlic, minced - Salt and pepper to taste - 1 tablespoon green onions, sliced - 1 tablespoon sesame seeds Gather these ingredients for a fun and tasty snack. The salmon fillet is the star here. Use fresh salmon for the best flavor and texture. The teriyaki sauce adds a sweet and savory touch. Sesame oil brings a nutty flavor, which makes this dish special. Fresh ginger and garlic enhance the taste. A sprinkle of salt and pepper is all you need to season the salmon bites. For a lovely finish, we will garnish with green onions and sesame seeds. This step is simple but makes your dish look great! First, grab a bowl. Combine the teriyaki sauce, sesame oil, grated ginger, and minced garlic. Mix it well by whisking until everything combines. This step makes your salmon bites tasty and aromatic. A good marinade brings all the flavors together. Next, take your salmon cubes and add them to the marinade. Use a spoon to gently toss the salmon. Coat each piece well. Now, let it sit and marinate for about 15 to 30 minutes. This wait helps the salmon soak up all the yummy flavors. Now it's time to cook! Preheat your air fryer to 400°F (200°C). While that's heating, season the marinated salmon with a pinch of salt and pepper. This adds extra flavor. Place the salmon bites in the air fryer basket. Make sure they are in a single layer for even cooking. Air fry the salmon bites for 8 to 10 minutes. Remember to shake the basket halfway through. This ensures they cook evenly. When done, the salmon will be tender and slightly crispy. Remove the salmon bites and let them rest for a minute before serving. Enjoy your flavorful snack! To get the best results, always place the salmon in a single layer in your air fryer basket. This step ensures even cooking and a great texture. If you want your bites crispier, adjust the cooking time. For a soft texture, cook for 8 minutes. For a crunchier bite, go for 10 minutes. You can boost the taste of your teriyaki salmon bites. Try adding spices like chili powder or a splash of rice vinegar to the marinade. This small change adds new layers of flavor. Marinating longer gives a deeper taste. Aim for 30 minutes if you have the time. It makes a big difference. Serve your salmon bites with extra teriyaki sauce drizzled on top. This adds flavor and makes it look nice. A side of steamed rice pairs well, making it a full meal. For a pop of color, garnish with sliced green onions and sesame seeds. It makes your dish look and taste even better. {{image_2}} You can change the protein to suit your taste. Substitute salmon with chicken or tofu. Both options work well with teriyaki sauce. Chicken will give you a heartier bite. Tofu will add a nice, soft texture. Each choice brings a new flavor. You can still follow the same cooking steps. Want to kick up the taste? Add pineapple chunks for a fruity twist. They add sweetness and a fun texture. You can also mix in chili flakes for some heat. This will make your bites extra exciting. Adjust the amount based on your spice level. How you serve these bites can change the whole meal. Serve them in lettuce cups for a low-carb option. This adds a nice crunch and freshness. You can also pair them with quinoa or a fresh salad. Both options make for a balanced meal. They add fiber and nutrients to your plate. To keep your air fryer teriyaki salmon bites fresh, refrigerate them in an airtight container. They will stay good for up to 3 days. Make sure the container is sealed well to prevent any air from getting in. This keeps the flavors intact and your bites tasty. When you're ready to enjoy the leftovers, reheat them in the air fryer or microwave. The air fryer works best. It helps to keep the salmon crispy. If you use the microwave, heat them in short bursts. This prevents overcooking and keeps the texture nice. If you want to store them longer, freeze the salmon bites. Place them in a single layer on a baking sheet. This prevents them from sticking together. After they freeze, transfer them to a freezer bag. This way, you can enjoy your teriyaki salmon bites later. Just remember to label the bag with the date! You should marinate the salmon for 15 to 30 minutes. This time allows the flavors to soak in well. If you marinate too long, the salmon can become too soft. A shorter time gives a light flavor, while a longer time provides a deeper taste. Find a balance that works for you. Set your air fryer to 400°F (200°C). This high temperature cooks the salmon quickly and helps it get a nice crisp on the outside. It ensures even cooking without drying out the fish. Always preheat the air fryer for best results. Yes, you can use frozen salmon. Just make sure to thaw it first. You can place it in the fridge overnight or use the microwave. If using frozen salmon, increase the cooking time by a few minutes. Check for doneness to ensure it's cooked through. This blog post detailed a simple and tasty salmon bites recipe. We covered the main ingredients like salmon, teriyaki sauce, and sesame oil. You learned how to prepare the marinade, marinate the salmon, and properly cook it in an air fryer. Final thoughts: Don’t hesitate to try alternatives and adjust flavors. Enjoy experimenting and make this dish your own. Happy cooking!

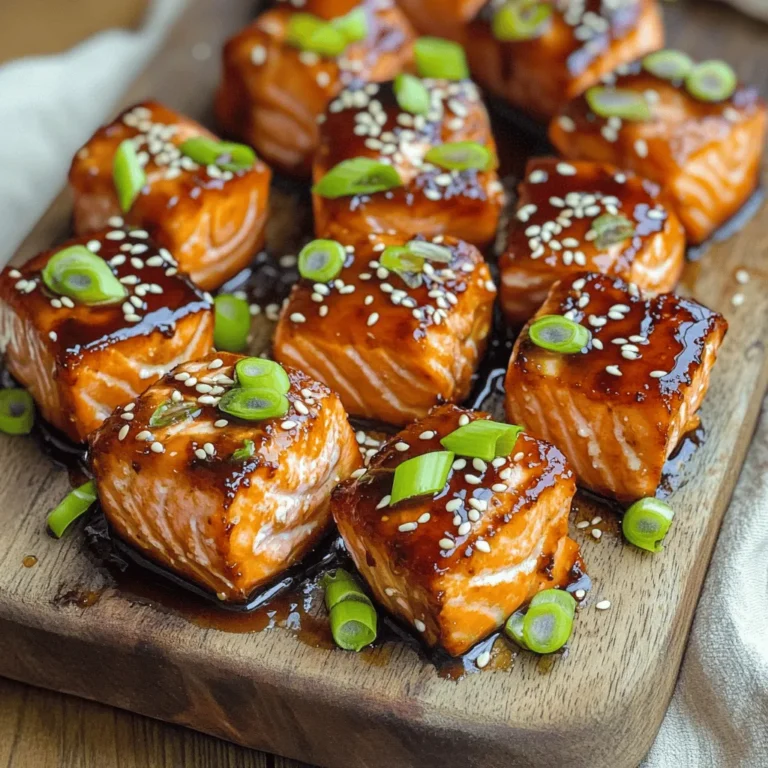
Air Fryer Teriyaki Salmon Bites Easy Flavorful Snack

To bake the perfect bakery style triple chocolate cookies, you need the following ingredients: - 1 cup unsalted butter, softened - 1 cup brown sugar, packed - 1/2 cup granulated sugar - 2 large eggs - 2 teaspoons vanilla extract - 2 cups all-purpose flour - 3/4 cup cocoa powder - 1 teaspoon baking soda - 1/2 teaspoon salt - 1 cup semisweet chocolate chips - 1 cup milk chocolate chips - 1/2 cup white chocolate chips - Sea salt for sprinkling Each ingredient plays a key role. The butter adds richness, while the sugars provide sweetness. Eggs give structure and moisture. Flour and cocoa powder form the base, creating that chewy texture. Baking soda helps the cookies rise, and salt balances the sweetness. The chocolate chips offer a delightful burst of flavor in every bite. I love adding a sprinkle of sea salt on top. It enhances the chocolate flavor and adds a gourmet touch. Keep these ingredients on hand, and you’ll be ready to whip up a batch of cookies that feel like a treat from your favorite bakery. 1. Preheat your oven to 350°F (175°C). Line two baking sheets with parchment paper. 2. In a large bowl, cream together 1 cup of softened unsalted butter, 1 cup of packed brown sugar, and 1/2 cup of granulated sugar. Mix until light and fluffy, about 2-3 minutes. 3. Beat in 2 large eggs, one at a time. Then stir in 2 teaspoons of vanilla extract until well combined. 1. In a separate bowl, combine 2 cups of all-purpose flour, 3/4 cup of cocoa powder, 1 teaspoon of baking soda, and 1/2 teaspoon of salt. 2. Gradually add this dry mixture to the wet ingredients. Mix until just combined. 1. Fold in 1 cup of semisweet chocolate chips, 1 cup of milk chocolate chips, and 1/2 cup of white chocolate chips. Make sure the chips are evenly mixed throughout the dough. 2. Use a cookie scoop or tablespoon to drop heaping tablespoons of cookie dough onto the prepared baking sheets. Leave about 2 inches between each cookie. 3. Lightly sprinkle a pinch of sea salt on top of each cookie dough ball for that extra flavor boost. 4. Bake in the preheated oven for 10-12 minutes, or until the edges are set but the center is still soft. 5. Remove from the oven and let the cookies cool on the baking sheet for 5 minutes. Then transfer them to a wire rack to cool completely. To make cookies that taste like they came from a bakery, start by creaming the butter and sugars. This step adds air and makes the cookies light and fluffy. Mix them for about 2-3 minutes until the mixture is pale and smooth. Next, watch the baking time closely. Bake the cookies until the edges set, but the center stays soft. This gives you that perfect chewy bite. A good rule is to check them at 10 minutes. If they look a bit underbaked, that’s just right! When it comes to presentation, arrange the cookies on a nice platter. Drizzle some melted chocolate on top for a fancy touch. You can also add chocolate curls for extra flair. Pair these cookies with a tall glass of cold milk or a warm cup of coffee. The flavors blend beautifully, making each bite a delight. Enjoying these cookies fresh out of the oven is the best way to savor their rich, chocolatey goodness! {{image_2}} You can change the types of chocolate in these cookies. Use dark chocolate for a rich taste. White chocolate can be swapped for butterscotch chips. If you prefer something different, try adding a mix of chocolates for fun. For gluten-free cookies, use almond flour or a gluten-free all-purpose blend. These options work well without losing flavor. Just remember to check the package for a one-to-one ratio with regular flour. Want to make your cookies even more special? Add nuts like walnuts or pecans for a nice crunch. You can also toss in dried fruits like cranberries or cherries for a fruity twist. Spices can take your cookies to the next level too. A sprinkle of cinnamon or a dash of nutmeg adds warmth and depth to the flavor. Don't hesitate to experiment; cooking is all about finding what you love! To keep your cookies fresh, follow these tips: - Use an airtight container: This helps keep cookies soft and chewy. - Layer with parchment paper: Place parchment between layers of cookies to avoid sticking. - Keep away from heat: Store in a cool, dry place away from sunlight. You can store cookies at room temperature for up to a week. If you need them to last longer, refrigeration is an option. Just remember to let them come to room temperature before serving. Freezing is a great way to save cookies for later. Here’s how to do it: - Freezing unbaked dough: Scoop cookie dough onto a baking sheet. Freeze for 1-2 hours. Then, transfer the dough balls to a freezer bag. They will last for up to three months. - Freezing baked cookies: Let cookies cool completely. Place them in an airtight container or freezer bag. They can also last for three months. To thaw, just remove your cookies from the freezer. Let them sit at room temperature for about 30 minutes. If you froze dough, bake them straight from the freezer. Just add 1-2 extra minutes to the baking time. Enjoy your fresh cookies anytime! To make your cookies softer, use more brown sugar. Brown sugar has moisture, which helps keep cookies soft. Also, do not overbake them. You want the edges set but the center still soft. Yes, you can use other sugars. You can try coconut sugar for a rich, caramel flavor. Using only granulated sugar will make your cookies less soft. Mixing sugars gives the best taste and texture. You can use applesauce or mashed banana as an egg substitute. Use 1/4 cup of either for one egg. This will keep your cookies moist. Remember, the flavor may change slightly with these substitutes. These cookies can last about one week at room temperature. Store them in an airtight container. They may last longer in the fridge, but they can become dry. Yes, you can make the dough ahead of time. Chill it in the fridge for up to three days. You can also freeze the dough for up to three months. Just scoop and bake when you are ready! These cookies are easy to make with simple ingredients and clear steps. We covered how to mix them right and tips for best results. You learned how to store and freeze your cookies for later. Remember, practice makes perfect. Don't be scared to experiment with flavors or textures. Soon, you'll create the perfect batch. Enjoy baking and tasting your delicious treats!

Bakery Style Triple Chocolate Cookies Delightful Treat

- Pasta type options: You can use 12 oz of penne or fusilli. Both hold sauce well. - Key flavors: Red peppers bring sweetness. Spices like paprika and Italian seasoning add depth. Cream gives a rich finish. - Optional ingredients for added richness: You might add ½ cup of grated Parmesan cheese for a cheesy touch. Fresh basil also brightens the dish. If you prefer a dairy-free option, use coconut milk instead of heavy cream. These ingredients combine to make a comforting meal that’s easy to prepare in one pot. To start, heat one tablespoon of olive oil in a large pot over medium heat. Once the oil is hot, add the finely chopped onion. Sauté the onion for about three to four minutes until it turns translucent. This step builds a tasty foundation for our pasta. Next, stir in three minced garlic cloves, one teaspoon of paprika, and one teaspoon of Italian seasoning. Let these cook for one more minute. You will love how this smells! The spices add depth and warmth to the dish, making each bite flavorful. Now, it’s time to bring everything together. Add 12 ounces of dry pasta to the pot. You can use penne or fusilli for this recipe. Then, mix in the roasted and diced red bell peppers and two cups of vegetable broth. Stir everything well to combine. Bring the mixture to a boil. Once boiling, reduce the heat to low. Cover the pot and let it simmer for about 12 to 15 minutes. Stir occasionally to keep the pasta from sticking. Check the pasta for doneness; it should be al dente. Once the pasta is cooked, it’s time for the magic. Stir in one cup of heavy cream or coconut milk for a dairy-free option. If you want to add richness, mix in half a cup of grated Parmesan cheese. Combine well until the sauce becomes creamy and everything is heated through. Finally, season the dish with salt and pepper to taste. Adjust the seasoning to your liking. This step is key to making the flavors pop. Enjoy the creamy goodness! To cook al dente pasta, boil it for 12 to 15 minutes. This gives the pasta a firm bite. Stir the pasta often to prevent sticking. To ensure the sauce thickens properly, let it simmer with the pasta. As the pasta cooks, it releases starch. This starch helps the sauce cling to the pasta. If the sauce feels too thin, let it cook a bit longer. Add extra spices or herbs to boost flavor. A pinch of red pepper flakes adds heat. Fresh herbs like parsley or thyme can brighten the dish. You can customize heat levels easily. Use spicy red peppers for a kick. If you like it milder, stick to sweet bell peppers. Adding a splash of hot sauce is another great option. {{image_2}} To make this dish dairy-free, I suggest using coconut milk instead of heavy cream. Coconut milk gives a rich taste without the dairy. You can also skip cheese or use a dairy-free cheese alternative. These swaps keep the creamy texture while accommodating different diets. Adding protein can make your meal heartier. Cooked chicken, shrimp, or tofu all work well. If you choose chicken or shrimp, add them to the pot after sautéing the onions and garlic. For tofu, toss it in with the pasta and broth. Adjust cooking time slightly to ensure they are heated through. Feel free to mix in other vegetables for extra color and nutrition. Spinach, peas, or zucchini can add freshness. You can also swap in seasonal veggies like asparagus in spring or butternut squash in fall. These options make the dish versatile and fun to customize. To keep your One Pot Creamy Red Pepper Pasta fresh, use airtight containers. Glass or plastic containers work well. Make sure to let the pasta cool before sealing. Store the leftovers in the fridge. They can last for about 3 to 5 days. If you want to keep it longer, freezing is a great option. For freezing, place the pasta in a freezer-safe container. Leave some space at the top, as it may expand. You can also freeze it in portions. It helps to thaw only what you need. The pasta can stay in the freezer for up to 3 months. Reheating your pasta can be simple and easy. The best method is to use the stovetop. Place the pasta in a pan with a splash of water or broth. Heat it over medium-low. Stir often to prevent sticking. This method helps keep the sauce creamy. You can also use the microwave. Transfer the pasta to a microwave-safe dish. Add a little water to keep it moist. Cover it with a lid or wrap. Heat in short bursts, stirring in between. Watch out for overcooked pasta. It can become mushy quickly. Aim for warm, not boiling. Enjoy your creamy pasta just like when it was fresh! Yes, you can use gluten-free pasta. This option works well for those with dietary needs. Just keep an eye on the cooking time. Gluten-free pasta often cooks faster than regular pasta. Start checking it at the 8-minute mark to avoid overcooking. To add some heat, use spicy peppers or hot sauce. You can try adding diced jalapeños or crushed red pepper flakes. These options give your dish a nice kick. If you like sauces, a dash of sriracha or chili paste can work wonders too. Adjust the spice level to your taste. This pasta pairs well with simple side salads or fresh bread. A light arugula salad with lemon vinaigrette is a great choice. Garlic bread also complements the creamy sauce nicely. For drinks, a crisp white wine like Sauvignon Blanc enhances the meal. If you prefer non-alcoholic options, sparkling water with lemon is refreshing. This blog post guides you in creating a flavorful pasta dish. We covered key ingredients like different pasta types and flavors to enhance your meal. I shared step-by-step instructions, tips for perfect texture, variations for dietary needs, and storage info. Remember to customize each step to suit your taste. Enjoy cooking and sharing this delicious pasta with friends and family!

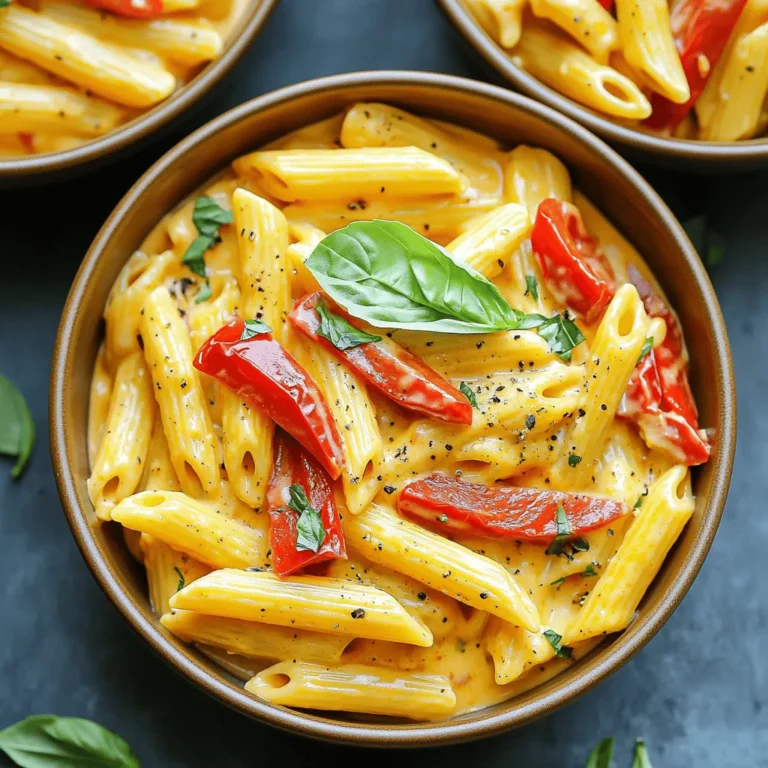
One Pot Creamy Red Pepper Pasta Comfort Meal

To make Sheet-Pan Sticky Orange Chicken, gather these key items: - 4 boneless, skinless chicken thighs - 1 cup orange juice (freshly squeezed for best flavor) - 1 tablespoon orange zest - 1/4 cup low sodium soy sauce - 2 tablespoons honey - 1 tablespoon sesame oil - 2 cloves garlic, minced - 1 inch ginger, minced - 1 teaspoon red chili flakes (optional for spice) - 2 cups broccoli florets - 1 red bell pepper, sliced - 1 tablespoon corn starch (optional, for thicker sauce) - Sesame seeds and green onions, for garnish You can easily swap some items in this recipe: - Chicken thighs: Use chicken breasts for a leaner option. - Orange juice: Store-bought juice works if fresh isn't available. - Soy sauce: Tamari is a great gluten-free choice. - Honey: Maple syrup can replace honey for a vegan option. - Sesame oil: Olive oil can be used if you don’t have sesame oil. - Broccoli: Cauliflower or green beans can be good substitutes. - Red bell pepper: Any color bell pepper is fine. To prepare this dish, you'll need: - A sheet pan - Parchment paper (for easy cleanup) - A mixing bowl - A whisk for mixing - A small pot for heating the marinade - A meat thermometer to check chicken doneness These ingredients and tools will help you create a flavorful and easy meal that shines on any table. Enjoy making this delightful dish! To start, you need to make the marinade. Grab a bowl and add the orange juice, orange zest, soy sauce, honey, sesame oil, minced garlic, and minced ginger. If you like some heat, add red chili flakes. Whisk all the ingredients until well mixed. This sauce will bring the chicken to life with sweet and tangy notes. Next, take your chicken thighs and put them in a resealable plastic bag or a shallow dish. Pour half of your marinade over the chicken. Make sure the chicken is covered well. This step is key for good flavor. Seal the bag or cover the dish, then place it in the fridge. Let it marinate for at least 30 minutes. For deeper flavor, you can let it sit overnight. After marinating, preheat your oven to 400°F (200°C). Line a sheet pan with parchment paper to make cleanup easy. Place the marinated chicken on one side of the pan. Pour the leftover marinade into a small pot. If you want a thicker sauce, mix corn starch with a little water and add it to the pot. Heat the marinade on medium, stirring until it thickens slightly. In a bowl, toss the broccoli florets and sliced red bell pepper with a bit of oil, salt, and pepper. Spread them out on the other side of the sheet pan next to the chicken. Bake everything in the oven for 25 to 30 minutes. Make sure the chicken reaches 165°F (74°C) inside. Halfway through, brush some thickened marinade on the chicken for extra flavor. Once done, take the pan out and let it rest for a few minutes. Slice the chicken and drizzle extra thickened marinade over it. For a nice finish, add sesame seeds and green onions on top before serving. Enjoy your meal! Marinating makes your chicken juicy and full of flavor. Use a resealable bag for easy coating. Pour half the marinade over the chicken. Seal the bag and shake gently. Let it sit in the fridge for at least 30 minutes. For even better taste, marinate overnight. The longer it sits, the more intense the flavor. Remember to reserve some marinade for later use. This helps to create a rich sauce while cooking. To bake the chicken just right, preheat your oven to 400°F (200°C). This hot temperature helps caramelize the sugars in the marinade. Place the chicken on one side of the sheet pan. Spread the veggies on the other side. This ensures even cooking for both. Bake for 25-30 minutes until the chicken reaches 165°F (74°C). Brush the chicken with the thickened marinade halfway through. This adds more flavor and keeps it moist. For a beautiful presentation, use a large platter. Place the sticky orange chicken in the center. Arrange the roasted veggies around it for color. Drizzle extra thickened sauce over the chicken for a glossy finish. Sprinkle sesame seeds and sliced green onions on top. This adds a nice crunch and fresh taste. Your dish will look as good as it tastes! {{image_2}} You can swap in any vegetables you love. Try carrots, snap peas, or zucchini. These choices add different tastes and colors. You can also use asparagus or bell peppers for a crunchy bite. Just remember to cut them into similar sizes. This helps them cook evenly with the chicken. If you want heat, add more red chili flakes. You can also use fresh jalapeños or sriracha. Mix a bit of sriracha into the marinade for a kick. This gives the dish a nice spicy twist. Be careful not to add too much spice if you prefer mild flavors. For a vegetarian twist, replace chicken with tofu or tempeh. Marinate them just like the chicken for great flavor. You can also use chickpeas if you want protein. Toss in more veggies, like bell peppers or cauliflower, to make it hearty. Just bake until everything is tender and golden. After your meal, let the sticky orange chicken cool. Place it in an airtight container. Make sure to store it in the fridge. Leftovers can last up to four days. Keep the chicken and veggies together for best flavor. To reheat, use your oven or microwave. If using an oven, preheat it to 350°F (175°C). Place the chicken and veggies on a baking sheet. Cover with foil to keep moisture in. Heat for about 15 minutes or until warmed through. In a microwave, place your food in a microwave-safe dish. Heat in short intervals, stirring in between, until hot. If you want to freeze your leftovers, do it right away. Place cooled chicken and veggies in a freezer-safe bag. Squeeze out as much air as possible before sealing. Label the bag with a date. You can freeze them for up to three months. To use, thaw in the fridge overnight before reheating. Yes, you can use many cuts of chicken. Chicken breasts work well, too. They will cook faster, so check them earlier. Bone-in chicken adds flavor but takes longer to cook. Adjust cooking time based on the cut you choose. To thicken the sauce, use corn starch. Mix one tablespoon of corn starch with water. Add this mix to your sauce while heating it. Stir well until it thickens. You can also simmer the sauce longer to reduce it. This will deepen the flavor and make it thicker. Great sides include steamed rice or quinoa. They soak up the sauce well. Roasted or sautéed vegetables like green beans and carrots are tasty too. A simple salad adds freshness and crunch. Choose sides that balance the sweet and savory flavors of the chicken. This blog post covered the key steps for making sticky orange chicken. We talked about ingredients, how to marinate, and cook the dish. I shared tips for a great bake and ideas for variations. Remember to store leftovers properly to enjoy later. This dish is fun to make and serves well. Try it out and adjust as you like. You’ll impress your family and friends with tasty food!

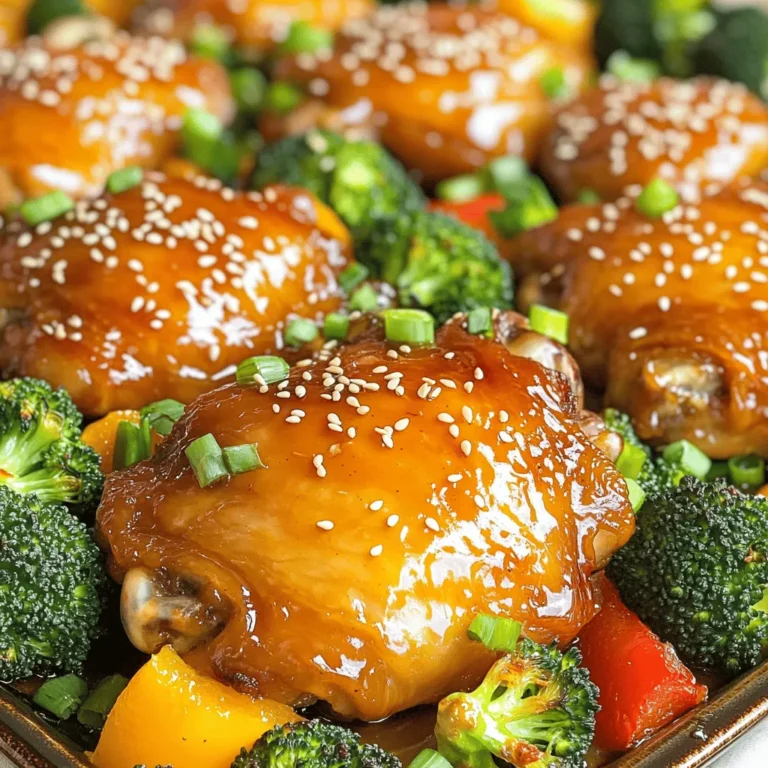
Sheet-Pan Sticky Orange Chicken Flavorful and Easy Meal

- 1 cup almond flour - 8 oz cream cheese, softened - 2 tablespoons matcha green tea powder - 1/2 cup Greek yogurt - Shredded coconut (for garnish) - 3 tablespoons melted coconut oil - 2 tablespoons maple syrup - 1/4 cup powdered sugar - 1 teaspoon vanilla extract - Fresh berries (for topping) - Mixing bowls - Serving cups - Spatula - Plastic wrap These ingredients come together to create a creamy, dreamy dessert. The almond flour forms a nutty base that gives texture. Softened cream cheese adds richness, while Greek yogurt makes it smooth and light. Matcha green tea powder gives the cups a vibrant green color and a unique taste. The shredded coconut is perfect for a fun garnish. Make sure to gather all your tools. Mixing bowls help you combine ingredients easily. Use serving cups that are pretty enough for your friends. A spatula helps you spread the filling smoothly. Lastly, plastic wrap keeps your treats fresh while they chill. You can find many of these ingredients in your local grocery store. Look for quality matcha powder for the best flavor. Enjoy making these delightful no-bake cheesecake cups! To start, gather your mixing bowl. Combine 1 cup of almond flour, 3 tablespoons of melted coconut oil, and 2 tablespoons of maple syrup. Mix these until they look crumbly. This helps form a solid crust. Next, press the mixture firmly into the bottom of each serving cup. Use the back of a spoon to compact it well. This step is key for a good base. In another bowl, beat 8 oz of softened cream cheese until smooth. This makes the filling creamy. Then, add 1/2 cup of Greek yogurt, 1/4 cup of powdered sugar, 2 tablespoons of matcha green tea powder, 1 teaspoon of vanilla extract, and a pinch of salt. Mix everything well. You want a creamy texture with no lumps. The matcha gives this dessert a lovely green hue and a unique flavor. Now, spoon the matcha cheesecake mixture over the crust in each cup. Smooth the top with a spatula for a nice finish. After that, cover the cups with plastic wrap. Refrigerate for at least 4 hours to let them set. Once set, remove from the fridge and add fresh berries on top. A sprinkle of shredded coconut adds a nice touch. Serve chilled and enjoy this delightful treat! To get a smooth and creamy cheesecake, follow these tips: - Ensure your cream cheese is well softened. This helps it blend easily. - Use room temperature ingredients. This creates a smoother mixture and avoids lumps. Presentation makes your cheesecake cups even more special. Here are some ideas: - Garnish with fresh berries. Blueberries, raspberries, or strawberries work wonderfully. - Add shredded coconut for a fun texture. Sprinkle it right before serving. - Serve on a decorative tray. It adds a nice touch to your dessert table. Avoid these mistakes to ensure your cheesecake cups are perfect: - Do not overmix the cheesecake filling. This can make it too airy. - Press the crust firmly into the cups. A good crust holds everything together. {{image_2}} You can change the flavor of your no-bake cheesecake cups easily. For a chocolate twist, use chocolate cream cheese instead of plain cream cheese. This adds a rich taste that chocolate lovers will enjoy. You can also blend in cocoa powder for an extra chocolate kick. For a fruit-flavored option, try strawberry or mango. Just puree fresh strawberries or mangoes and fold them into your cheesecake mixture. This adds a fresh and fruity flavor that is perfect for summer. If you want a vegan version, use plant-based cream cheese. There are many great brands available now. Substitute the Greek yogurt with a non-dairy yogurt for a creamy texture. For those with gluten issues, this recipe is easy to adapt. Ensure you use gluten-free almond flour. This way, you can enjoy the cheesecake without worry. When serving your cheesecake cups, consider fun toppings. Chopped nuts add crunch and flavor. A drizzle of chocolate sauce is always a hit too. You can also create themed dessert platters. Pair your matcha cheesecake cups with other desserts, like mini fruit tarts or chocolate mousse cups. This makes for a delightful presentation that will impress your guests. Store leftover no-bake matcha cheesecake cups in the fridge. Use airtight containers to keep them fresh. I suggest using clear glass jars or plastic cups with lids. This way, you can see how many are left. Make sure to cover the tops with plastic wrap if you use regular cups. You can freeze no-bake cheesecake cups. Just make sure they are well covered. Use plastic wrap or a freezer-safe container. When ready to eat, thaw them in the fridge overnight. This keeps the texture smooth and the taste fresh. These cheesecake cups last about 4 to 5 days in the fridge. Always check for spoilage before eating. Look for signs like a change in color or an off smell. If they seem watery or have a strange texture, it's best to throw them away. Yes, you can make these cheesecake cups ahead of time. I suggest preparing them a day before you plan to serve them. This gives the flavors time to meld together beautifully. Just remember to cover them well in the fridge. They taste better when they chill longer. You can use regular yogurt or sour cream instead of Greek yogurt. Both options work well. Regular yogurt will make the cheesecake a bit lighter. Sour cream adds a nice tangy flavor. Choose what you like best! To make your cheesecake cups sweeter, add more powdered sugar. Start with one tablespoon at a time. If you want less sweetness, reduce the powdered sugar. Taste as you go to find your perfect balance! You learned how to make delicious no-bake matcha cheesecake cups. We covered main ingredients like almond flour, cream cheese, and matcha powder. I shared tips for perfect texture and ways to avoid common mistakes. You can customize flavors or make dietary swaps, too. Don't forget to store leftovers properly. Try these fun cheesecake cups at your next gathering. They’re tasty, easy, and sure to impress your guests.

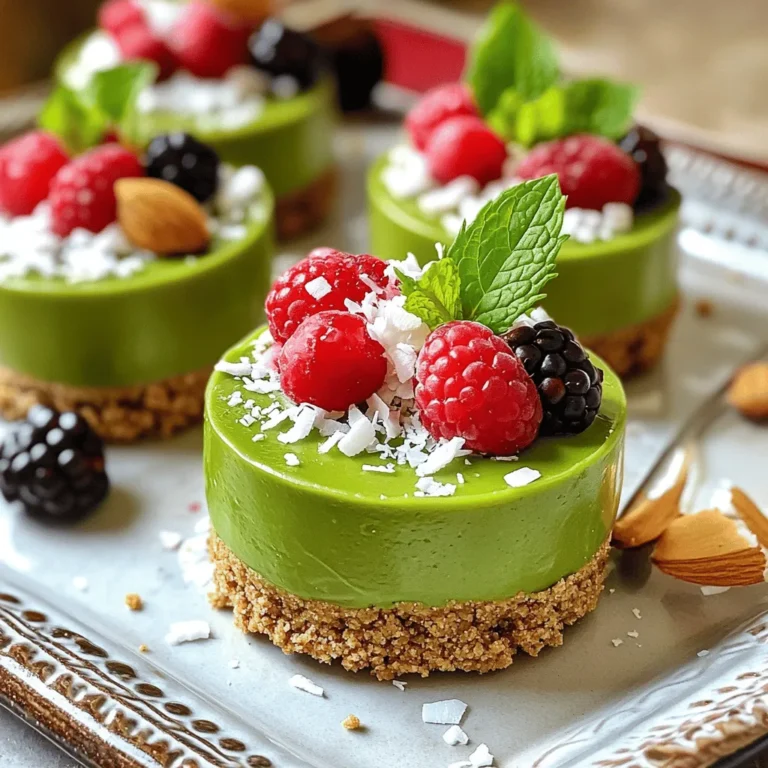
No-Bake Matcha Cheesecake Cups Delightful Treat

- 1 lb scallops, cleaned and patted dry - 4 tablespoons unsalted butter - 3 cloves garlic, minced - Zest and juice of 1 lemon - Salt and pepper, to taste - 2 tablespoons fresh parsley, chopped - Lemon wedges, for serving To make Minute Lemon Garlic Butter Scallops, you need fresh ingredients. The scallops should be cleaned and dried well. This helps them sear nicely. You also need unsalted butter. It gives a rich flavor and helps cook the garlic. Garlic is key in this recipe. I use three cloves, minced finely. The zest and juice of one lemon add brightness to the dish. Salt and pepper are simple but essential seasonings. They bring out the natural taste of the scallops. Fresh parsley adds color and a hint of earthiness. For serving, lemon wedges are a must! They enhance the dish with an extra burst of citrus. Gather these ingredients to create a quick and delicious meal. First, I melt butter in a skillet over medium-high heat. Watch for it to foam, which means it's ready. Next, I add the minced garlic to the skillet. I sauté it for about 30 seconds until it smells amazing. Be careful not to let it burn, or it will taste bitter. Now, I season the scallops with salt and pepper. I place them in the skillet in a single layer. It’s important not to move them around. I let them cook for about 2-3 minutes until a golden crust forms. Once they look nice and golden, I flip them over. At this point, I add the lemon zest and juice. I cook them for another 1-2 minutes until they are opaque and fully cooked. Once the scallops are done, I remove the skillet from the heat. I sprinkle fresh parsley over the scallops for a burst of flavor and color. Finally, I serve them hot with lemon wedges on the side. The lemon adds a bright finish to the dish. Enjoy! Choosing the right scallops Pick fresh, large scallops for the best taste. Look for dry scallops, not wet ones. Wet scallops often have added preservatives, which can alter the flavor. Best cooking temperature Cook scallops over medium-high heat. This heat level helps them brown nicely. Too low, and they won't sear; too high, and they may burn. Avoiding overcooking Scallops cook fast! Aim for 2-3 minutes on each side. When they turn opaque, they are done. Overcooked scallops become tough and chewy. Adding herbs and spices Fresh herbs like parsley add brightness. Try thyme or dill for more depth. A sprinkle of red pepper flakes can add a nice kick. Alternative sauces to pair Consider a white wine sauce for a different flavor. A light cream sauce can also work well. Both options complement the scallops beautifully. Suggested side dishes Pair scallops with light sides. A fresh salad or steamed asparagus works great. For a heartier option, serve them over creamy risotto or pasta. {{image_2}} You can boost the taste of your scallops with a few simple tricks. Adding white wine to the sauce brings a lovely depth. Just pour in a splash after you sauté the garlic. Let it reduce for a minute before adding the scallops. You can also infuse the dish with fresh herbs. Try thyme or basil for a different twist. Just chop them finely and add them along with the lemon juice. These herbs will brighten the dish and make it pop. If you follow a gluten-free diet, you're in luck! This recipe is naturally gluten-free. Just make sure your butter does not contain any additives. For a dairy-free option, swap the butter for olive oil or coconut oil. Both oils work well and keep the dish tasty. You can also use a dairy-free butter substitute. This way, everyone can enjoy these scallops! To keep your leftover scallops fresh, store them in the fridge. Place them in an airtight container. This helps lock in moisture and flavor. You can also use a resealable bag. Just make sure to remove as much air as possible. Leftover scallops should stay good for about one to two days. When it comes to reheating scallops, you want to avoid making them rubbery. The best method is to use low heat. You can use a skillet or a microwave. If using a skillet, heat a little butter on low. Then, add the scallops and cover the pan. Heat for a few minutes until warmed through. If using the microwave, place them on a plate. Heat in short bursts of 15 seconds. Check often to prevent overcooking. This way, you can enjoy your scallops again without losing their tasty texture. You can tell scallops are cooked by their color and texture. They should be opaque and firm. If they look milky or translucent, they need more time. Cook them until they turn a nice golden brown on the outside. This usually takes about 2-3 minutes per side. Yes, you can use frozen scallops. Just make sure to thaw them first. Place them in the fridge overnight or run them under cold water for quick thawing. Pat them dry before cooking. This helps them sear better and get that nice crust. You can store leftover scallops in the fridge for up to two days. Place them in an airtight container to keep them fresh. If you want to keep them longer, you can freeze them. Just make sure to use a freezer-safe container. Scallops pair well with many sides. You can serve them with a fresh salad, rice, or pasta. Steamed vegetables also make a great choice. Consider a light lemon sauce to enhance the dish. You can substitute olive oil for butter. It won’t have the same rich flavor, but it will still taste good. Use about the same amount of olive oil as the butter called for in the recipe. To add spice, consider using red pepper flakes or a pinch of cayenne pepper. Add them to the garlic while it cooks. This will give the dish a nice kick without overpowering the lemon flavor. Absolutely! This recipe cooks quickly but looks fancy. It’s perfect for impressing guests. Just pair it with a nice drink and some good bread, and you’re set for a delightful meal. This blog post shared a simple scallop recipe. You learned the best ingredients and step-by-step instructions. We also covered tips for perfecting scallops and variations to try. Remember to store leftovers well to keep them tasty. Cooking scallops can be easy and fun. With a few tricks, you can impress anyone. Try these ideas and enjoy your meal!

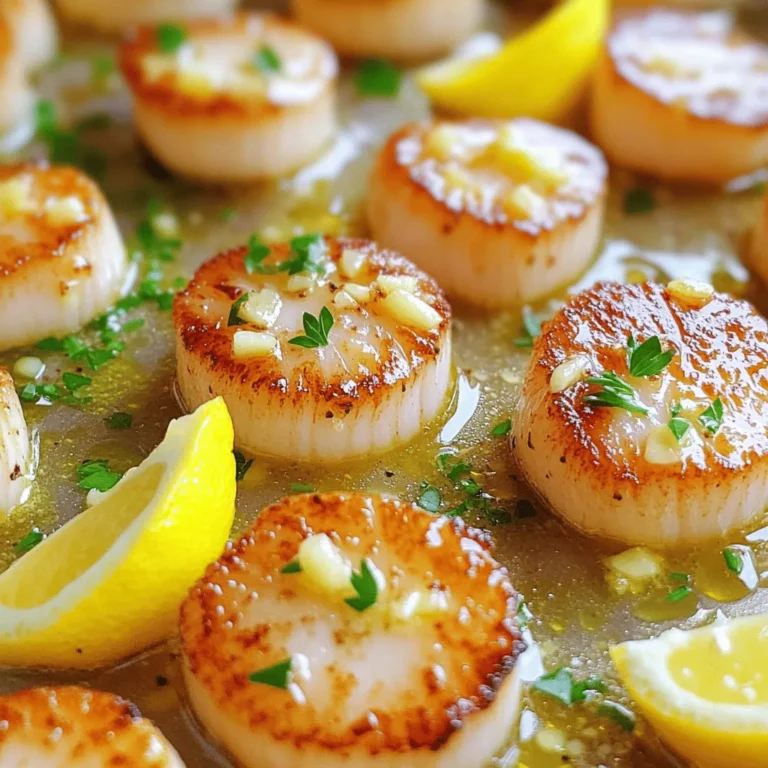
Minute Lemon Garlic Butter Scallops Quick Recipe

- 1 pound chicken breast, cut into bite-sized pieces - 1 cup buttermilk - 1 cup all-purpose flour - 1 teaspoon garlic powder - 1 teaspoon onion powder - 1 teaspoon smoked paprika - ½ teaspoon cayenne pepper (adjust for heat) - 1 teaspoon salt - ½ teaspoon black pepper - ½ cup hot honey (store-bought or homemade) - 2 tablespoons olive oil - Fresh parsley, chopped (for garnish) The chicken breast is the star of this dish. It gives a tender and juicy bite. Soaking it in buttermilk makes it even better. The buttermilk adds flavor and helps keep the chicken moist. Next, we use all-purpose flour to coat the chicken. This helps create a nice, crispy layer when we air fry it. The seasoning is important too. Garlic powder and onion powder bring depth. Smoked paprika adds a warm, smoky taste. If you like heat, cayenne pepper is perfect. Just adjust the amount based on your taste. For the glaze, hot honey gives a sweet and spicy kick. You can buy it or make your own. A bit of olive oil helps everything crisp up in the air fryer. Finally, fresh parsley is a great touch for color and flavor. It makes your dish look pretty and tastes fresh. Gathering these ingredients sets you up for success. Each one plays a key role in making your air fryer hot honey chicken bites delicious. To make the chicken tender, soak the bite-sized chicken pieces in buttermilk. You want to do this for at least 30 minutes. If you have time, marinate for up to 2 hours. This extra time brings out more flavor. In a separate bowl, mix the dry ingredients. Combine all-purpose flour, garlic powder, onion powder, smoked paprika, cayenne pepper, salt, and black pepper. Stir well to ensure all spices blend evenly. This step is key for flavor in each bite. After marinating, take the chicken out of the buttermilk. Let the extra buttermilk drip off. Now, dredge each piece in the flour mixture. Press lightly to coat each piece evenly. Next, preheat your air fryer to 400°F (200°C). This should take about 5 minutes. While the fryer heats up, lightly spray the basket with olive oil. Place the coated chicken bites in a single layer. Avoid overcrowding; work in batches if needed. Spray the tops of the chicken with more olive oil. Air fry them for 10-12 minutes. Flip halfway through cooking. The chicken should be golden brown and reach an internal temperature of 165°F. To get that perfect crunch, I use an olive oil spray. This helps the chicken get golden and crisp. Lightly coat the air fryer basket with it too. This keeps the chicken from sticking. When air frying, make sure to arrange the chicken bites in a single layer. Overcrowding can lead to soggy bites. Flip them halfway through cooking for even crispiness. Do you like it spicy? You can change the cayenne pepper amount. Start with a little and taste. You can always add more later. If hot honey is too much, try maple syrup. You can mix in some chili flakes for a similar kick. This way, you control the heat just how you like it. For a beautiful look, I love using fresh parsley. It adds color and a fresh taste. You can also add sliced green onions or sesame seeds for extra flair. Serve these bites with toothpicks for a fun touch. They make great appetizers for parties or game nights. Enjoy them with your favorite dipping sauce for a tasty twist. {{image_2}} You can switch out chicken for other proteins like tofu or shrimp. Tofu is a great choice for a vegetarian option. Just cut it into bite-sized pieces, similar to chicken. Shrimp cooks quickly and adds a nice seafood twist. For tofu, marinate it in buttermilk like the chicken. Cook the tofu for about 10 minutes in the air fryer. Make sure it’s golden brown. For shrimp, reduce the cooking time to just 6-8 minutes. Check that the shrimp turns pink and opaque. You can personalize your chicken bites by adding spices or marinades. Try adding smoked paprika or chili powder for a bolder flavor. If you want a kick, add a bit more cayenne pepper. You can also mix in sauces like BBQ or teriyaki for a sweet twist. Just drizzle the sauce over the chicken before cooking. This adds extra flavor and keeps the bites juicy. If you want a low-carb option, use almond flour or coconut flour instead of all-purpose flour. These flours provide a crispy coating while keeping carbs low. You can use eggs or a splash of milk as binding agents. This helps the flour stick to the protein. Both almond and coconut flour work well for a gluten-free diet. Enjoy these tasty bites without guilt. To keep your Air Fryer Hot Honey Chicken Bites fresh, store them quickly. Place the chicken bites in an airtight container. You can also use a glass dish with a lid. Make sure they cool down to room temperature first. This helps prevent sogginess. Refrigerate them within two hours of cooking. They will stay good for up to three days. When you want to enjoy your leftovers, you need to reheat them just right. The best way to keep them crispy is to use the air fryer. Preheat the air fryer to 375°F (190°C). Place the chicken bites in a single layer. Heat them for about 5-7 minutes. This method helps retain their crunchy texture. You can also use your oven if the air fryer isn’t an option. Just place them on a baking sheet and heat at 350°F (175°C) for about 10 minutes. If you want to save some chicken bites for later, freezing is a great choice. You can freeze them before or after cooking. If freezing uncooked, coat the chicken and place them on a tray. Once frozen, transfer them to a freezer bag. This way, they won’t stick together. If you freeze them after cooking, let them cool first. Store them in an airtight container or freezer bag. They are best used within three months. Marinate the chicken for at least 30 minutes. If you have time, soak it for up to 2 hours. This helps the chicken soak up the buttermilk. A longer marination time gives better flavor and tenderness. Yes, you can use alternatives like regular honey or maple syrup. You can also mix honey with hot sauce for a spicy twist. These options will give you a different but tasty result. Set your air fryer to 400°F (200°C). This high heat crisps the chicken bites perfectly. Preheating for about 5 minutes also helps them cook evenly. The chicken is done when it reaches an internal temperature of 165°F. Use a meat thermometer to check this. The bites should be golden brown and crispy on the outside. In this post, we covered the ingredients for a tasty air-fried chicken recipe. You learned about marinating chicken, preparing a flavorful coating, and making it crispy in the air fryer. I shared tips for adjusting spice levels and ensuring your dish looks great. There are even variations for different proteins and dietary needs. Experiment with the recipe and make it your own. Cooking should be fun, so enjoy every bite!

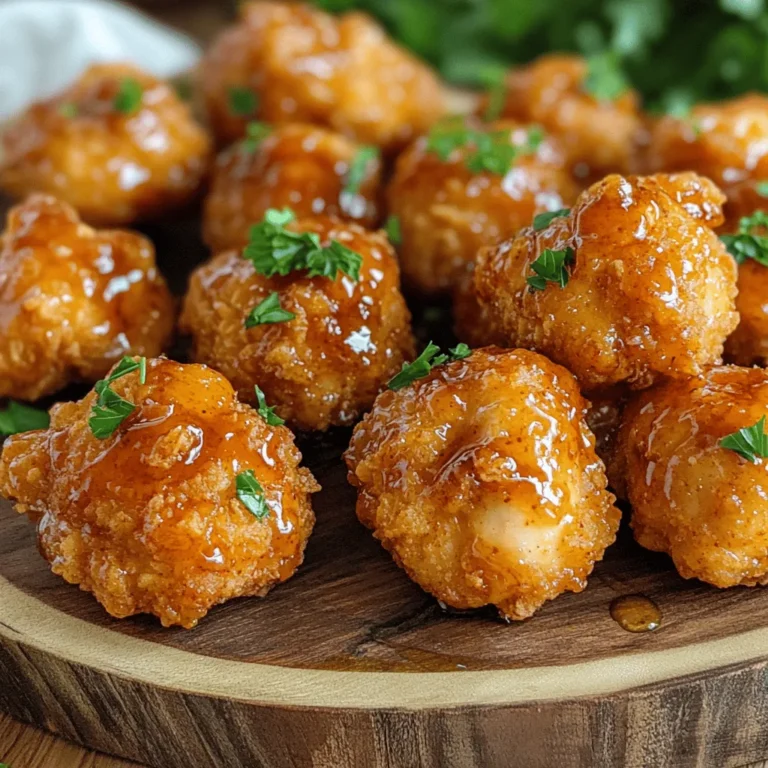
Air Fryer Hot Honey Chicken Bites Crisp and Tasty

- 2 lbs beef roast (chuck or brisket) - 1 jar (16 oz) whole pepperoncini peppers, undrained - 1 onion, sliced - 4 cloves garlic, minced For these sliders, you need a good beef roast. Chuck or brisket works best. Chuck has rich flavor, while brisket is tender and juicy. Both types cook well in a slow cooker. You also need pepperoncini peppers. They add a tangy, spicy kick to the beef. Their juices mix with the beef, giving it a nice flavor. Don’t drain the jar; the liquid is key! Next, you need aromatics: onion and garlic. They give depth to the dish. Slice the onion and mince the garlic. They will release their flavors while cooking. - 1 teaspoon dried oregano - 1 teaspoon Italian seasoning - 1 teaspoon black pepper - 1 teaspoon salt - Provolone cheese slices (optional) - Fresh basil leaves for garnish Seasonings make this dish shine. Dried oregano and Italian seasoning give it an authentic taste. Add salt and black pepper to enhance the flavors. Taste as you go to find your perfect balance. Provolone cheese is optional but delicious. It melts perfectly over the beef. Fresh basil adds a pop of color and fresh taste. Sprinkle some on top right before serving. - 12 slider buns - Types of buns to use - Toasting tips You need slider buns to hold this tasty filling. Soft, fluffy buns work best. Look for ones labeled as "slider" or "mini." Toasting the buns is key. Preheat your oven to 350°F (175°C). Split the buns and place them on a baking sheet. Toast them for about 5 minutes. This keeps them from getting soggy. Plus, it adds a nice crunch! To start, layer the beef roast in your slow cooker. Place it in the bottom. Next, add sliced onion and minced garlic on top. Sprinkle dried oregano, Italian seasoning, black pepper, and salt over the meat. Why should you season immediately? Seasoning right away helps the flavors blend well as the beef cooks. The spices soak into the meat, making every bite tasty. Now, let’s talk about cooking. You can choose between low and high settings on your slow cooker. Cooking on low takes about 8 hours. It gives the best flavor and tenderness. On the high setting, it takes around 4 hours. This is great if you are short on time, but the beef may not be as tender. Always check for tenderness; it should shred easily when done. After cooking, remove the beef from the slow cooker. Use two forks to shred the beef into small pieces. This technique works best and is simple. Once shredded, return the beef to the slow cooker. Mix it well with the pepperoncini and sauce. This ensures every bite is full of flavor. While the beef cools a bit, let’s toast the buns. Preheat your oven to 350°F. Split each slider bun and lay them on a baking sheet. Toast them for about 5 minutes. You want them to be lightly golden. This step adds a nice crunch and helps hold the beef. Now it's time to make the sliders. Take a toasted bun and add a generous spoonful of the beef mixture. If you like cheese, place a slice of provolone on top. Garnish with fresh basil leaves for a pop of color and flavor. Place the top half of the bun on the slider, and you're ready to serve! To get the best beef for your sliders, choose cuts like chuck or brisket. These cuts are full of flavor and become very tender when cooked slowly. Look for meat with good marbling. This fat keeps the beef juicy. For maximum tenderness, cook your beef low and slow. A slow cooker works great for this. Cook on low for eight hours or high for four hours. The beef should shred easily with a fork when it’s ready. To boost flavor, consider adding extra spices. You can try red pepper flakes for heat or smoked paprika for depth. Fresh herbs like thyme or rosemary also work well. Marinating your beef overnight can make a big difference. Use a mix of pepperoncini juice, garlic, and seasoning. This adds flavor right into the meat. For sides, crispy potato chips or a fresh salad pair nicely with the sliders. You can also serve coleslaw for a crunchy contrast. When it comes to drinks, consider light beers or a fruity soda. They balance the richness of the beef. For a great presentation, serve the sliders on a wooden board. Add a bowl of extra pepperoncini for guests. A sprinkle of fresh basil on top adds a nice touch and bright color. {{image_2}} To give your sliders a kick, add jalapeños or spicy cheese. - Jalapeños: Slice fresh jalapeños and mix them into the beef. You can add them when cooking or top your sliders with pickled jalapeños for crunch. - Spicy Cheese: Use pepper jack cheese instead of provolone. This cheese melts well and adds a nice heat. These spicy twists will make your sliders stand out! If provolone isn't your thing, try these cheese options: - Mozzarella: For a milder taste, mozzarella works great. It melts nicely and adds creaminess. - Cheddar: Sharp cheddar gives a nice flavor boost. It pairs well with the beef and pepperoncini. - Goat Cheese: For a tangy option, goat cheese is unique. Spread it on the bun before adding the beef. Experiment with different cheeses to find your favorite! For a gluten-free meal, swap regular buns for these alternatives: - Lettuce Wraps: Use large lettuce leaves as a wrap. They add crunch and freshness. - Gluten-Free Buns: Look for gluten-free slider buns at the store. They come in various flavors. - Sweet Potatoes: Slice sweet potatoes into rounds and bake them. Use them as a base for your beef. These options let everyone enjoy the sliders without worry! To store leftovers, place the sliders in an airtight container. This keeps them fresh and tasty. You can refrigerate them for up to three days. After that, the beef may lose its great flavor and texture. Always let the sliders cool before sealing them in the fridge. This helps avoid extra moisture, which can make them soggy. To freeze the sliders, first, let them cool completely. Then, wrap each slider tightly in plastic wrap. Place the wrapped sliders in a freezer bag for extra protection. They can last in the freezer for up to three months. When you’re ready to eat them, take them out and thaw them in the fridge overnight. This helps keep them moist when reheating. For reheating, I recommend using the oven for the best results. Preheat your oven to 350°F (175°C). Place the sliders on a baking sheet and cover them with foil. Heat for about 10-15 minutes. This way, the bread stays nice and crispy. If you’re in a hurry, you can use the microwave. Just heat them in 30-second bursts until warm. However, the bread may get a bit soft this way. You can serve many tasty sides with these sliders. Here are some great ideas: - Potato chips: These add crunch and are easy to grab. - Coleslaw: A fresh slaw balances the rich meat. - French fries: Crispy fries pair well with the beef flavors. - Salad: A simple green salad helps lighten the meal. - Pickles: These add a nice tang to each bite. These sides are simple and will please your guests. Yes, you can! Here are some tips for prep and storage: - Cook the beef: You can cook the beef a day before. Let it cool and store it in the fridge. - Store in jars: Keep the beef and peppers in jars to keep them fresh. - Reheat when ready: Warm them in the slow cooker or on the stove before serving. - Buns: Toast the buns just before serving for the best taste. This way, you save time on game day and still serve a great dish. Scaling the recipe is easy. Here’s how to adjust: - Double the ingredients: Use 4 lbs of beef and 2 jars of peppers for 24 sliders. - Cook time: The cook time stays the same, so no need to change that. - More buns: Have enough slider buns ready. Check how many you need. This method helps you make enough for everyone without stress. If you'd like a lighter or vegetarian option, consider these substitutes: - Shredded chicken: This works well with the same spices and peppers. - Pulled pork: A tasty alternative that pairs nicely with the sauce. - Mushrooms: Use large portobello mushrooms for a hearty, meat-like texture. - Veggie crumbles: These can mimic ground beef and absorb flavors well. These options let everyone enjoy sliders, even those who avoid beef. These Pepperoncini Italian Beef Sliders are a delightful treat. We covered key ingredients, like beef types, spices, and buns. I shared step-by-step instructions to ensure perfect sliders every time. You learned tips for flavor and serving, plus creative variations and storage methods. Enjoy making these sliders for your next gathering. They are simple, tasty, and sure to impress! Happy cooking!

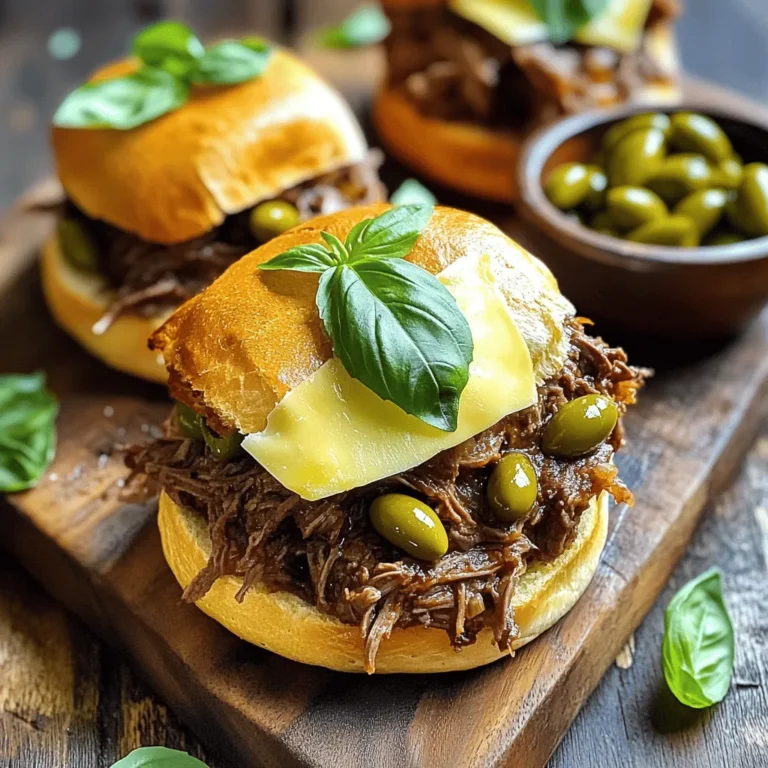
Pepperoncini Italian Beef Sliders Flavorful Game Day Treat

- 8 oz cheese tortellini - 2 cups fresh spinach, roughly chopped - 1 cup cherry tomatoes, halved - 1/2 cup feta cheese, crumbled - 3 cups vegetable broth - 3 cloves garlic, minced - 1 tablespoon olive oil - 1 teaspoon dried oregano - Salt and pepper to taste - Fresh basil leaves for garnish (optional) - Additional feta cheese for serving Gathering the right ingredients is key for this one-pot meal. First, you need cheese tortellini. I love using fresh or frozen ones. They cook quickly and soak up flavors well. Next, grab some fresh spinach. It wilts beautifully and adds color. You’ll also need cherry tomatoes, which add a sweet burst. Feta cheese is a must. It gives a creamy, salty kick to the dish. For the broth, I recommend vegetable broth. It keeps everything light and tasty. Garlic adds a strong aroma and flavor. Olive oil helps to sauté the garlic. Dried oregano adds an earthy taste. Don’t forget salt and pepper for seasoning! Finally, fresh basil leaves are optional but highly recommended. They add a lovely touch when you serve. You can also sprinkle more feta on top for extra flavor. This mix of ingredients creates a tasty, easy meal perfect for busy nights. First, heat 1 tablespoon of olive oil in a large pot over medium heat. Add 3 cloves of minced garlic and sauté for about 1 minute. You want the garlic to smell good, but not burn. Next, pour in 3 cups of vegetable broth and bring it to a simmer. This broth forms the tasty base for your dish. Now, add 8 oz of cheese tortellini to the pot. Cook according to package instructions, usually about 3-5 minutes. It’s key to check the doneness after 3 minutes. You want the tortellini soft but not mushy. Once the tortellini is ready, stir in 2 cups of roughly chopped spinach and 1 cup of halved cherry tomatoes. Cook for an additional 2-3 minutes until the spinach wilts. This makes the dish bright and healthy. Finally, reduce the heat to low and fold in 1/2 cup of crumbled feta cheese. Stir gently until the feta warms up. Don’t forget to season with 1 teaspoon of dried oregano, salt, and pepper to taste. Mix everything well for a lovely flavor. To get the best texture from your tortellini, follow these steps: - Use plenty of water: This helps keep them from sticking. - Check doneness: Taste a piece after 3 minutes. They should be tender but still firm. - Don’t rush the spinach: Add it at the right time. This keeps it bright and fresh. Be careful not to overcook the spinach. It should wilt but still hold its color. If you cook it too long, it may turn mushy. Plating is key for a lovely meal. Here’s how to present your dish: - Serve directly from the pot for a casual vibe. - For a nicer touch, spoon servings into shallow bowls. - Garnish with fresh basil and a sprinkle of feta. This adds color and taste. Pair this dish with a crisp side salad or garlic bread. These options add a nice crunch and complete your meal. Choosing the right pot makes cooking easier. Here are my top picks: - Large pot: A heavy-bottomed pot helps with even cooking. - Wooden spoon: It won’t scratch your pot and is perfect for stirring. - Ladle: Great for serving and makes it easy to scoop. Using these tools makes the process smooth and fun. Enjoy your cooking! {{image_2}} You can swap out the spinach for other greens. Kale, arugula, or Swiss chard all work well. They add different flavors and nutrients. For cheese, try goat cheese or ricotta instead of feta. Each cheese brings its own taste. You can also use chicken broth instead of vegetable broth. This change adds a richer flavor to your dish. To boost flavor, add spices like crushed red pepper or smoked paprika. Fresh herbs like parsley or thyme can add brightness too. For extra protein, mix in cooked chicken, shrimp, or chickpeas. These additions make the dish heartier and more filling. If you're gluten-free, look for gluten-free tortellini. Many brands offer tasty options. For a vegan dish, use plant-based tortellini and skip the feta. Instead, try nutritional yeast for a cheesy flavor. These swaps keep the meal delicious while meeting dietary needs. To keep your One-Pot Spinach Feta Tortellini fresh, let it cool. Then, place it in an airtight container. This helps keep the flavors strong. Store it in the fridge for up to three days. If you want to keep it longer, freezing is a good option. When you are ready to eat leftovers, you can reheat them easily. Use the microwave for quick heating. Place the tortellini in a bowl and cover it with a damp paper towel. Heat in one-minute bursts, stirring in between. For stovetop reheating, use a pan over low heat. Add a splash of broth if it seems dry. Stir often until warmed through. This will keep the dish tasty. Yes, this dish freezes well! To freeze, let the tortellini cool completely. Then, transfer it to a freezer-safe container or bag. Remove any air to prevent freezer burn. It can stay in the freezer for up to three months. When you're ready to eat, thaw it overnight in the fridge. Reheat it using the methods above, and enjoy a quick meal! Cooking this dish takes about 20 minutes in total. - Prep time: 10 minutes to gather and chop ingredients. - Cook time: 10 minutes to simmer and blend flavors. Yes, you can use frozen tortellini. Just add them directly to the pot. - Cook them for about 8-10 minutes. - Check the package for specific cooking times. You can add many veggies to make it heartier. - Try bell peppers for crunch. - Add zucchini for a summer taste. - Peas can add sweetness and color. - Broccoli florets also work well. Feel free to mix and match! This blog post covered a delicious One-Pot Spinach Feta Tortellini dish. We explored main ingredients, cooking steps, and storage tips. I shared helpful tricks to enhance flavor and texture. You can even adapt the recipe to fit dietary needs or use different veggies. Incorporating these ideas will make your cooking easier and more fun. Enjoy making this easy meal that tastes great and looks colorful. Remember, cooking should bring joy and satisfaction to your table. Now, go try it yourself and impress your loved ones!

One-Pot Spinach Feta Tortellini Easy Weeknight Meal

To make this tasty smoothie bowl, you need simple, fresh ingredients. Here’s what you will use: - 1 ripe banana, frozen - 1 cup strawberries, frozen - 2 tablespoons cocoa powder - 1 scoop chocolate protein powder - 1 cup almond milk (or milk of choice) - 1 tablespoon almond butter (or nut butter of choice) These main ingredients give the smoothie its creamy texture and rich flavor. The frozen banana and strawberries create a thick base, while cocoa powder and chocolate protein powder add chocolaty goodness. If you like a sweeter bowl, you can add these options: - 1 tablespoon honey - 1 tablespoon maple syrup For toppings, consider: - Fresh strawberries, sliced - Sliced banana - Granola - Chia seeds - Cacao nibs These toppings not only add flavor but also make your bowl look beautiful. Fresh fruits and crunchy granola make every bite exciting. If you want to mix things up, try these alternatives: - Swap almond milk for oat milk, coconut milk, or regular milk. - Use peanut butter or cashew butter instead of almond butter. - Change the fruits! Try blueberries or raspberries for a new taste. These swaps keep the recipe fun and allow you to use what you have at home. To make the smoothie base, gather your ingredients first. You will need: - 1 ripe banana, frozen - 1 cup strawberries, frozen - 2 tablespoons cocoa powder - 1 scoop chocolate protein powder - 1 cup almond milk (or milk of choice) - 1 tablespoon almond butter (or nut butter of choice) - 1 tablespoon honey or maple syrup (optional for sweetness) Start by adding the frozen banana and strawberries to your blender. Next, add the cocoa powder and chocolate protein powder. Pour in the almond milk and add the almond butter. If you want it sweeter, add honey or maple syrup. Blend everything on high until it is completely smooth. To achieve the best texture, blend in short bursts. Stop to scrape the sides as needed. This will help mix all the ingredients well. Make sure you blend until the mixture is thick and creamy. This thickness is key for holding toppings later on. If your mix is too thin, add a bit more frozen fruit or protein powder. Once your smoothie is ready, pour it into a bowl. Now, it’s time to make it look amazing! You can top it with fresh strawberry slices and banana slices. Add a sprinkle of granola for crunch, chia seeds for health, and cacao nibs for extra chocolate flavor. Feel free to be creative! Use a shallow bowl to show off those toppings. You can even add some edible flowers for a pretty touch. Enjoy your delightful creation right away! To make your smoothie bowl even better, try these tips. First, use ripe bananas. They add natural sweetness and creaminess. Frozen strawberries give a nice chill and smooth texture. You can also add a pinch of salt. This small touch brings out the rich chocolate taste. If you want a thicker bowl, add more frozen fruit. Blend well to keep it creamy. This smoothie bowl is easy to tailor. For a vegan option, use plant-based protein powder and almond milk. If you need it nut-free, swap almond butter for sunflower seed butter. You can skip the sweetener too. Use ripe fruit for natural sweetness. This way, everyone can enjoy it! A colorful bowl makes your smoothie look great. Use a shallow bowl to spread out your toppings. Arrange fresh strawberry and banana slices in a fan shape. Sprinkle granola and chia seeds for crunch. For a fancy touch, add edible flowers. They make your bowl pop! Serve immediately for the best taste. {{image_2}} You can change up this smoothie bowl easily. Try adding peanut butter for a nutty taste. Swap strawberries for raspberries to add a tart twist. For a tropical vibe, use mango instead. Each fruit brings unique flavors and makes your bowl fun. If you want to switch protein powders, that’s simple too. Use vanilla protein powder for a sweet taste. Plant-based protein powders work well for a vegan option. Just remember that this will change the flavor a bit. Experiment to find what you like best. Seasonal fruits are a great way to mix things up. In spring, add fresh blueberries for a burst of color. Summer is perfect for peaches or cherries. In fall, you can add diced apples or pears. Winter calls for citrus fruits like oranges or grapefruits to brighten your bowl. If you have leftover smoothie, pour it into a sealable container. Store it in the fridge. It will stay fresh for one day. Before eating, stir it well. If it seems thick, add a little milk and mix again. You can freeze extra smoothie or its ingredients. Pour the smoothie into ice cube trays. This makes great smoothie pops. For fruit, slice and freeze them in a single layer. Once frozen, store them in bags. This keeps them fresh for months. You do not need to reheat the smoothie bowl. Enjoy it cold for the best taste. If you want to warm up the smoothie, do it gently. Use a microwave and heat for a few seconds. Stir well and check the temperature before enjoying. Yes, you can make this smoothie bowl vegan. To do this, simply use plant-based protein powder. Also, opt for maple syrup instead of honey. Choose almond milk or coconut milk as your base. All these swaps ensure your bowl stays delicious and vegan-friendly. You have several choices to replace almond milk. Soy milk, oat milk, or coconut milk are great alternatives. Each option adds its own unique flavor. They all work well in this smoothie bowl without changing the taste too much. To thicken your smoothie bowl, add more frozen fruit. Frozen bananas or strawberries work best. You can also add a bit of rolled oats or chia seeds. Both options will help achieve that thick, creamy texture you want. Yes, this smoothie bowl is great for meal prep! You can prepare the smoothie base ahead of time. Store it in an airtight container in the fridge. Just keep toppings separate until you're ready to eat. This way, your bowl stays fresh and tasty! You learned how to make a delicious chocolate strawberry protein smoothie bowl. We covered key ingredients and ways to customize it. You also got tips for blending and serving. Options for flavors and seasonal fruits keep it fresh. Remember to store leftovers properly for later. Experiment with different ingredients that fit your needs. Enjoy this tasty treat as part of your routine!

Chocolate Strawberry Protein Smoothie Bowl Delight

PREV 1 … 23 24 25 … 57 NEXT
flavor nest kitchen

explore

DessertsDinnerAppetizersDrinks

Our Policies

  • Cookie Policy
  • Copyright Policy
  • Disclaimer
  • GDPR Policy
  • Terms Of Use
Back to Top
  • About
  • Contact Us
  • Privacy Policy
© 2025 flavor nest kitchen