FREE DINNER EBOOK! Get your copy!
  • Cookie Policy
  • GDPR Policy
  • Disclaimer
  • Terms Of Use
  • Visit my other site: Fun Cookie Recipes
flavor nest kitchen
  • Home
  • Dinner
  • Desserts
  • Drinks
  • Appetizers
  • Contact
  • About
  • Privacy Policy
  • Home
  • Dinner
  • Desserts
  • Drinks
  • Appetizers
  • Contact
  • About
  • Privacy Policy
  • Cookie Policy
  • GDPR Policy
  • Disclaimer
  • Terms Of Use
Visit my other site: Fun Cookie Recipes

HOME / CATEGORIES /

Latest

- 1 ½ cups all-purpose flour - 1 teaspoon baking powder - ½ teaspoon baking soda - ½ teaspoon salt - 1 teaspoon ground cinnamon - ½ teaspoon ground nutmeg - ¼ teaspoon ground ginger - ½ cup unsalted butter, softened - 1 cup granulated sugar - 2 large eggs - 1 teaspoon vanilla extract - 1 cup canned pumpkin puree - 8 ounces cream cheese, softened - ⅓ cup powdered sugar - 1 teaspoon vanilla extract (for the cream cheese layer) When making pumpkin cream cheese marble cake, the right ingredients are key. I love starting with fresh, quality items. The flour, sugar, and spices create a warm, inviting flavor. The pumpkin adds moistness, while the cream cheese gives a rich, creamy layer. Make sure to use unsalted butter. It helps control the salt levels in your cake. For the pumpkin, I prefer canned puree, but you can make your own if you like. Just remember to choose ripe pumpkins for the best flavor. Gather all your ingredients before you start. This makes the process smooth and fun. You can even measure them out in small bowls. It feels like a mini cooking show! - 9-inch round cake pan - Mixing bowls - Electric mixer or whisk - Spatula - Parchment paper - Measuring cups and spoons Using the right tools makes a big difference. A 9-inch round cake pan fits this recipe perfectly. I always line the bottom with parchment paper. It helps the cake come out easily without sticking. Mixing bowls are essential for combining ingredients. I like a big bowl for the wet mix and a smaller one for the dry. An electric mixer or a whisk works well for beating everything together. A spatula is great for folding in the ingredients gently. With the right equipment in hand, you’re ready to create a delightful cake that everyone will love! 1. Preheat your oven to 350°F (175°C). This heat helps the cake rise well. 2. Grease a 9-inch round cake pan. Line the bottom with parchment paper. This helps with easy removal. 3. In a medium bowl, mix together the dry ingredients: - 1 ½ cups all-purpose flour - 1 teaspoon baking powder - ½ teaspoon baking soda - ½ teaspoon salt - 1 teaspoon ground cinnamon - ½ teaspoon ground nutmeg - ¼ teaspoon ground ginger Set this mixture aside for later. 1. In a large bowl, beat together the softened butter and granulated sugar. Mix until light and fluffy. This takes about 3-4 minutes. 2. Add the eggs one at a time. Mix well after each egg. 3. Stir in 1 teaspoon of vanilla extract and the 1 cup of pumpkin puree. Mix until everything is smooth. 1. Gradually fold the dry ingredients into the pumpkin mixture. Do not overmix; just combine until moistened. 2. In another bowl, mix together the cream cheese layer. Beat 8 ounces of softened cream cheese, ⅓ cup powdered sugar, and 1 teaspoon vanilla extract. Mix until smooth. 1. Pour half of the pumpkin batter into the prepared cake pan. 2. Dollop half of the cream cheese mixture on top. 3. Use a knife or skewer to swirl them together gently for a marbled look. 4. Pour the remaining pumpkin batter into the pan. Top with the rest of the cream cheese mixture. Swirl again. 5. Bake in your preheated oven for 40-45 minutes. The cake is done when a toothpick comes out clean from the center. Enjoy the baking process and look forward to a cake that is moist and delicious! - Ensure ingredients are at room temperature: This helps the butter and sugar mix together well. It makes the batter light and fluffy. Cold butter can lead to a dense cake. Always take your eggs and butter out of the fridge an hour before baking. - Proper mixing techniques to avoid dense cake: Mix the wet and dry ingredients separately first. When combining, fold gently. Overmixing can make the cake tough. Stop mixing as soon as you see no dry flour. - Dusting with powdered sugar: After your cake is cool, sprinkle powdered sugar on top. This adds a sweet touch and looks pretty. Use a fine sieve for an even dusting. - Serving suggestions: Serve slices with whipped cream or a scoop of vanilla ice cream. These add creaminess and flavor. A sprig of mint or a few pecan halves makes a great garnish. - Fixing a sunken cake: A sunken cake often means it was underbaked. Always check for doneness with a toothpick. If it comes out clean, it’s ready. If the center sinks after baking, it may be from too much mixing or too much liquid. - Ways to avoid overbaking: Keep an eye on your cake as it bakes. Start checking at the 40-minute mark. Every oven is different. If the top is browning too fast, cover it loosely with foil. This helps it bake evenly. {{image_2}} You can make this cake even more fun! Try adding chocolate chips or nuts to the batter. This adds a nice crunch and rich flavor. You can also switch up the cream cheese layer. Instead of plain, use vanilla or spices like cinnamon. This gives the cake a twist. If you need gluten-free options, use a gluten-free all-purpose flour. This keeps the texture light. For a vegan version, use a plant-based butter and replace eggs with flax eggs. Just mix one tablespoon of flaxseed meal with three tablespoons of water for each egg. These swaps keep the cake tasty for everyone. As the seasons change, so can your cake! Try adding other fall spices like allspice or cloves. They bring warmth and depth. For festive toppings, consider caramel sauce or pecans. This makes your cake not just delicious but also beautiful for the holidays. To keep your pumpkin cream cheese marble cake fresh, you have two main options: room temperature and refrigerator storage. - Room Temperature: If you plan to eat the cake within two days, store it at room temperature. Place it on a cake stand or plate, and cover it with a cake dome or plastic wrap. This keeps the cake moist and prevents it from drying out. - Refrigerator Storage: If you need to store it longer, the fridge is your best bet. Wrap the cake tightly in plastic wrap or aluminum foil. This helps keep the flavors intact and stops it from absorbing other odors in your fridge. You can also freeze the cake for later enjoyment. Here’s how: - How to Freeze: First, let the cake cool completely. Then, slice it into portions for easy thawing. Wrap each slice tightly in plastic wrap, ensuring no air gets in. Place the wrapped slices into a freezer-safe bag or container. - Best Practices for Thawing: When you’re ready to eat, take out a slice and let it thaw in the fridge overnight. If you’re in a hurry, you can thaw it at room temperature for about 1-2 hours. Knowing how long your cake lasts helps you enjoy it at its best. - Room Temperature: The cake stays fresh for about 2 days when stored at room temperature. - Refrigerator: In the fridge, it lasts about 5-7 days. - Freezing: If frozen, the cake can last up to 3 months without losing its flavor. Just remember to wrap it well! Storing your pumpkin cream cheese marble cake correctly ensures you enjoy its deliciousness for days. You can make your own pumpkin puree at home. Start with fresh pumpkins. Cut them in half, remove the seeds, and roast until soft. Scoop out the flesh and blend it until smooth. If you don't have pumpkin, try butternut squash or sweet potato as a substitute. Both add a similar flavor and texture to your cake. Yes, you can make this cake ahead of time. Bake the cake and let it cool completely. Once cool, wrap it tightly in plastic wrap. Store it at room temperature for up to three days. You can also freeze the cake for up to three months. Just be sure to wrap it well. Thaw it overnight in the fridge when you're ready to enjoy it. If you have leftover cream cheese mixture, you can use it in many ways. Spread it on toast or bagels for a tasty breakfast. You can also use it as a dip for fruits or crackers. Another great option is to mix it into pancake batter for cream cheese pancakes. The possibilities are endless! This blog post guided you through making a delicious pumpkin cake with a cream cheese layer. We covered each key step, from gathering ingredients to baking and presenting your cake. Remember to follow tips for baking success, like using room temperature ingredients. Also, explore variations to make it your own. Whether for a party or a cozy night in, this cake will impress. Enjoy making sweet memories with this recipe. Happy baking!

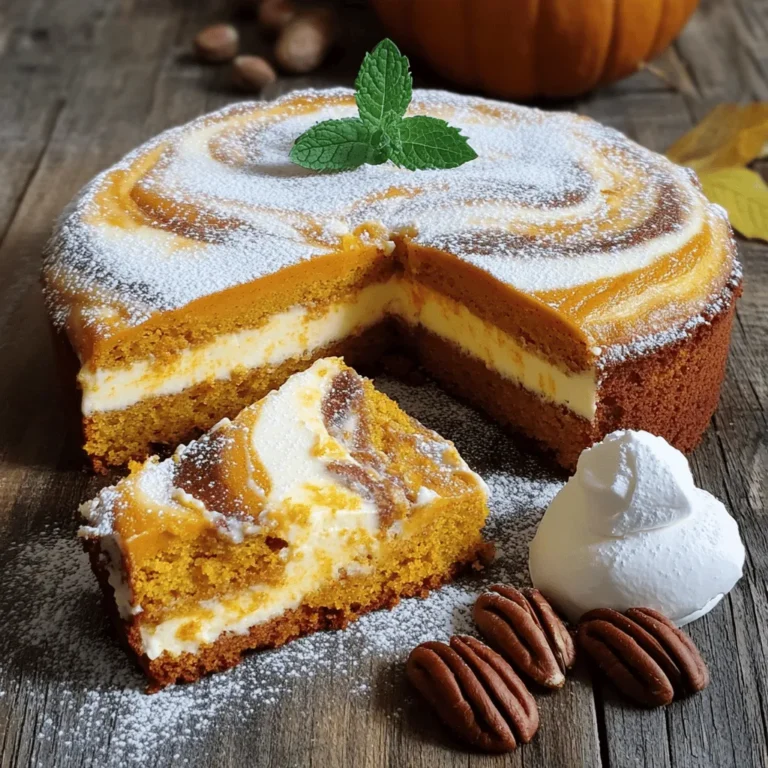
Pumpkin Cream Cheese Marble Cake Delightfully Moist

- 2 medium apples, peeled and diced (Granny Smith or Honeycrisp work well) - 1 tablespoon lemon juice - 1 cup all-purpose flour - 1 cup rolled oats - 1/2 cup brown sugar, packed - 1/4 cup granulated sugar - 1/2 teaspoon baking powder - 1/2 teaspoon baking soda - 1/2 teaspoon cinnamon - 1/4 teaspoon nutmeg - 1/2 cup unsalted butter, melted - 1/2 cup milk - 1 large egg - 1 teaspoon vanilla extract - 1/2 cup caramel sauce (store-bought or homemade) - Optional: 1/4 cup chopped walnuts or pecans - You can use other apple types like Fuji or Braeburn. These add nice sweetness. - For a gluten-free option, use almond flour or a gluten-free flour blend. - To go dairy-free, swap butter with coconut oil and milk with almond milk. - For baking, Granny Smith apples add tartness. Honeycrisp apples are sweet and crisp. - Fresh spices, like cinnamon and nutmeg, boost flavor. Use whole spices when you can. Grating them fresh gives the best taste. 1. Preheat your oven to 350°F (175°C). This helps muffins bake evenly. 2. Line a muffin tin with paper liners or grease them with cooking spray. This prevents sticking. 3. In a medium bowl, toss the diced apples with 1 tablespoon of lemon juice. This keeps the apples fresh and adds zing. 1. In a large mixing bowl, combine: - 1 cup all-purpose flour - 1 cup rolled oats - 1/2 cup packed brown sugar - 1/4 cup granulated sugar - 1/2 teaspoon baking powder - 1/2 teaspoon baking soda - 1/2 teaspoon cinnamon - 1/4 teaspoon nutmeg Mix these dry ingredients well. This step mixes flavors and helps muffins rise. 2. In another bowl, whisk together: - 1/2 cup melted unsalted butter - 1/2 cup milk - 1 large egg - 1 teaspoon vanilla extract Mix until smooth. This keeps the batter moist. 3. Pour the wet ingredients into the dry ingredients. Stir gently until just combined. Be careful not to over-mix. This keeps muffins fluffy. 4. Fold in the diced apples and optional chopped nuts. This adds texture and flavor to each bite. 1. Divide the muffin batter evenly among the muffin cups. Fill each about 2/3 full. This allows space for the muffins to rise. 2. Drizzle about 1 tablespoon of caramel sauce on top of each muffin. Use a toothpick or knife to swirl it gently. This creates a sweet surprise inside. 3. For the crumble topping, mix: - 1/4 cup rolled oats - 2 tablespoons flour - 2 tablespoons brown sugar - Any remaining melted butter Mix until crumbly, then sprinkle it over each muffin. This adds a crunchy finish. 4. Bake in the preheated oven for 18-22 minutes. Check with a toothpick; it should come out clean or with a few moist crumbs. 5. Let the muffins cool in the pan for about 5 minutes. Then, transfer them to a wire rack to cool completely. Enjoy the warm, sweet aroma! - Checking doneness: Use a toothpick. Insert it into the center. If it comes out clean, your muffins are done. If it has batter, bake a few more minutes. - Adjusting baking time for different ovens: Not all ovens heat the same. Check muffins a few minutes early. Note how your oven behaves for future baking. - Pairing with beverages: These muffins go great with coffee or warm apple cider. The sweetness of the muffins complements the drinks well. - Enhancing flavors with additional toppings: Drizzle more caramel sauce on top right before serving. A sprinkle of powdered sugar also adds a nice touch. - Adding spices or extracts: Consider adding a dash of vanilla or almond extract for extra flavor. You can also mix in a pinch of ginger for a warm kick. - Using seasonal flavors or fruits: In fall, try adding pumpkin puree. In spring, fresh berries can brighten the muffins and add a new twist. {{image_2}} You can give your caramel apple crumble muffins a twist. Try making choco-chip caramel apple muffins. Just add 1/2 cup of chocolate chips to the batter. The chocolate melts and mixes well with the apples. It adds a rich, sweet flavor that pairs perfectly with caramel. Another fun option is pumpkin spice caramel apple muffins. Replace half of the cinnamon with pumpkin spice. This will give your muffins a cozy fall flavor. You can also add 1/2 cup of pumpkin puree to the batter for extra moisture. Nuts can add a nice crunch to your muffins. Chopped walnuts or pecans work great in this recipe. Just mix in 1/4 cup of your favorite nuts when you fold in the apples. This will give your muffins an extra layer of texture. If you prefer nut-free options, skip the nuts altogether. You can also use seeds like sunflower seeds or pumpkin seeds. They will add crunch without the nut allergy risk. Crumble toppings can be fun to play with. Try using a mix of oats, flour, and sugar for a crunchy topping. This will add a sweet crunch that everyone will love. You can also use streusel instead of a crumble. For a simple streusel, mix together 1/4 cup of flour, 1/4 cup of brown sugar, and 2 tablespoons of butter. This will create a buttery, sweet topping that melts in your mouth. Just sprinkle it on top before baking. To keep your muffins fresh, use an airtight container. I recommend a plastic or glass container with a tight lid. This helps prevent them from drying out. Store the muffins at room temperature for up to three days. If you live in a humid place, the fridge may be a better option. Just note that refrigerating can make them a bit dry. If you want to save some muffins for later, freezing is a great choice. First, let the muffins cool completely. Then, wrap each muffin in plastic wrap. Place them in a freezer-safe bag or container. They can last up to three months in the freezer. When you are ready to eat, take one out and let it thaw at room temperature. For quick reheating, pop it in the microwave for about 15-20 seconds. These caramel apple crumble muffins taste best when fresh. They will stay yummy for about three days at room temperature. If stored in the fridge, they last about a week. In the freezer, they maintain flavor and texture for three months. Enjoy them while they are fresh for the best taste! Yes, you can prepare these muffins ahead of time. To do this, mix your dry ingredients and wet ingredients separately. Store the dry mix in an airtight container. Keep the wet ingredients in the fridge. When you're ready to bake, combine them. This keeps the muffins fresh and fluffy. You can also bake and store them. Let them cool, then wrap them in plastic. Keep them in the fridge or freezer. When you want one, pop it in the microwave for a few seconds. Both homemade and store-bought caramel sauces are great! If you have time, homemade sauce is rich and creamy. It tastes fresh and allows you to control the flavor. For store-bought, choose a high-quality brand. Look for one with natural ingredients. This option saves time and still tastes good. No matter which you choose, drizzle it on top for that sweet touch. You can make simple swaps to make these muffins healthier. Use whole wheat flour instead of all-purpose flour. This adds fiber and nutrients. You can reduce sugar by using applesauce instead of some brown sugar. This keeps the muffins sweet and moist. Another tip is to use low-fat milk or a milk substitute. You can also cut back on butter by using applesauce or yogurt. These swaps keep the taste while making them healthier. This blog post covers everything you need for perfect apple muffins. We discussed the best ingredients, how to prepare and bake them, plus tips for storing and serving. Remember to choose fresh apples and spices for the best taste. Explore variations to keep it fun, and don’t hesitate to make substitutions if needed. Enjoy baking and sharing your delicious muffins with others. Your kitchen will smell amazing, and your friends will love the treats!

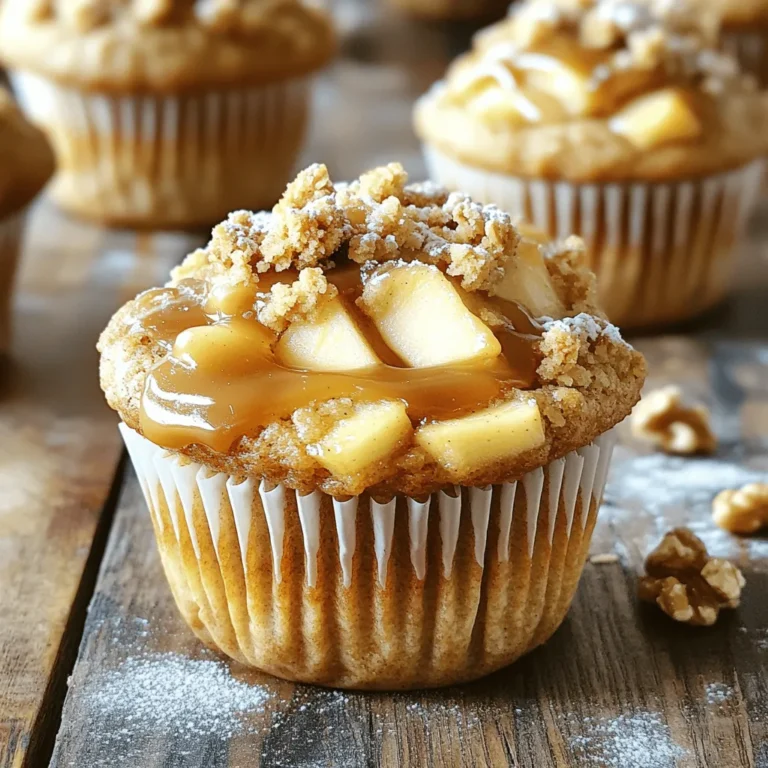
Caramel Apple Crumble Muffins Irresistible Treats

- 2 cups all-purpose flour - 1/2 cup unsweetened cocoa powder - 1 tablespoon baking powder - 1/2 teaspoon baking soda - 1/2 teaspoon salt - 1 cup granulated sugar - 1/2 cup brown sugar, packed - 1/2 cup unsalted butter, melted - 2 large eggs - 1 teaspoon vanilla extract - 1 cup buttermilk - 1/2 cup brewed espresso, cooled - 1 cup semi-sweet chocolate chips - 1/2 cup chopped walnuts (optional) - Chocolate chips for topping To make Bakery-Style Chocolate Chip Espresso Muffins, you need key ingredients. First, the dry ingredients create a rich base. The flour and cocoa powder give the muffins their structure and flavor. Baking powder and baking soda help them rise. Salt enhances the taste. Next, for the wet ingredients, you have sugars, butter, and eggs. The granulated and brown sugars add sweetness and depth. Melted butter adds moisture and richness. Eggs bind everything together, while vanilla extract adds a lovely aroma. Buttermilk makes the muffins tender, and espresso offers a coffee kick. Finally, for add-ins, chocolate chips are a must. They melt into gooey pockets of goodness. Chopped walnuts add a nice crunch, but they are optional. Topping the muffins with extra chocolate chips gives them a bakery-style finish that is hard to resist. Gather these ingredients to create a delightful treat! - Preheat the oven to 375°F (190°C). - Prepare the muffin tin with paper liners or grease it well. - Sift the flour, cocoa powder, baking powder, baking soda, and salt. - In a bowl, combine granulated sugar, brown sugar, melted butter, eggs, and vanilla extract. - Then, incorporate buttermilk and cooled espresso into this mixture. - Gradually add the dry ingredients to the wet ingredients. - Fold in chocolate chips and walnuts gently, ensuring even mixing. - Distribute the batter into muffin cups, filling each about 3/4 full. - Top with extra chocolate chips. - Bake for 18 to 20 minutes or until a toothpick comes out clean. - Avoid overmixing the batter: This prevents tough muffins. Mix gently until just combined. - Ensure ingredients are at room temperature: Room temperature eggs and buttermilk help create a smooth batter. - Use high-quality chocolate and espresso: Great ingredients make a big difference in taste. Choose rich and bold flavors. - Allow muffins to rest for a few minutes before serving: This gives flavors time to meld and enhances the taste. - Dust with powdered sugar: A light sprinkle adds a sweet touch and looks nice. - Serve warm with coffee or espresso: The warmth enhances flavors and makes for a cozy treat. {{image_2}} You can switch up your chocolate chips for a fun twist. Try using dark chocolate or white chocolate chips. They add a unique flavor and look beautiful in the muffins. You can even use flavored chocolate chips, like caramel or mint, to surprise your taste buds. Each option changes the muffin taste and makes it special. If you want to mix things up, try different nuts. You can substitute walnuts with pecans for a sweeter crunch. If you prefer no nuts, just leave them out. For a healthier option, add seeds like sunflower or pumpkin. They boost nutrition and add a nice texture. For gluten-free muffins, use gluten-free all-purpose flour. Make sure to check the package for the right measurements. You might need to adjust the other ingredients a bit to keep the texture right. This way, everyone can enjoy these tasty muffins! To keep your muffins fresh, store them in an airtight container. This helps lock in moisture. They will stay good at room temperature for up to 3 days. If you want to enjoy them later, consider freezing. Wrap each muffin individually in plastic wrap. This keeps them from getting freezer burn. You can freeze them for up to 3 months. When you’re ready to eat one, thaw it at room temperature. You can also use a microwave for quick thawing. To reheat, warm the muffins in the oven or microwave. If using the oven, set it to 350°F (175°C). This helps them regain their soft texture. For the microwave, heat in short bursts. This keeps them moist but check carefully to avoid drying them out. Yes, you can use instant coffee. Mix 1 tablespoon of instant coffee with 1/2 cup of hot water. Allow it to cool before adding it to your batter. Instant coffee will give a similar flavor, but it may not be as strong as brewed espresso. This change can affect the muffins' taste slightly. These muffins stay fresh for about 3 days at room temperature. Store them in an airtight container to keep them soft. For longer storage, place them in the fridge, where they stay good for up to a week. You can also freeze them for up to 3 months. Wrap each muffin tightly in plastic wrap before freezing. Yes, you can make these muffins vegan. Replace eggs with flax eggs or applesauce. Use a dairy-free butter and substitute buttermilk with almond milk mixed with vinegar. This will keep the muffins moist and fluffy while making them plant-based. The best way to measure flour is by using the spoon-and-level method. First, fluff up the flour in its container. Then, use a spoon to scoop flour into your measuring cup without packing it down. Finally, level off the top with a straight edge. This method ensures accuracy and prevents dry muffins. You now have everything to bake delicious chocolate espresso muffins. We explored the essential dry and wet ingredients, combined them step-by-step, and added tips for great texture and flavor. You can also try different variations to suit your taste. Remember, these muffins are easy to store and can be a treat anytime. Bake a batch today and enjoy the rich taste and warm aroma they bring. You'll love how simple it is to create a delightful snack!

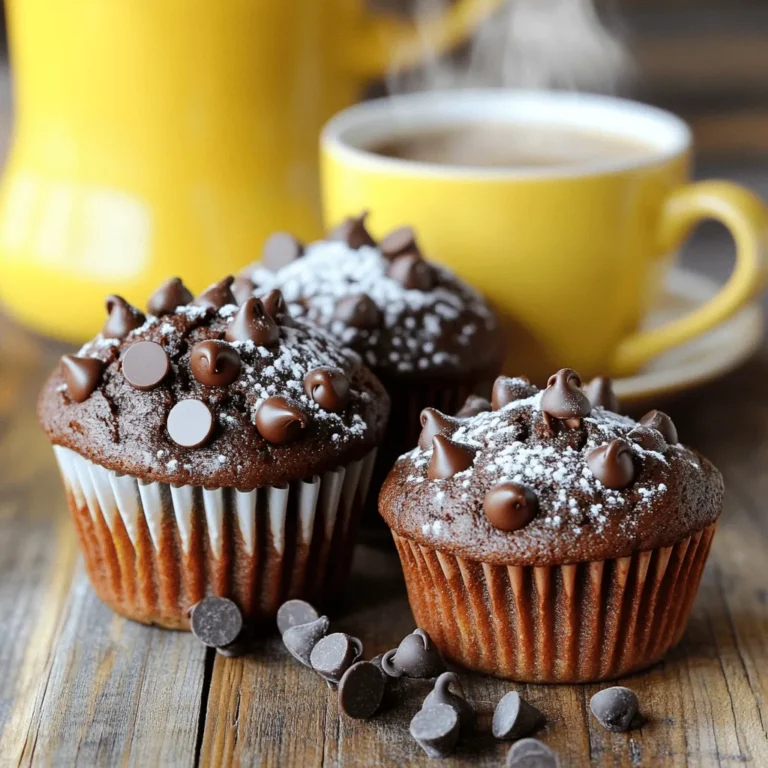
Bakery-Style Chocolate Chip Espresso Muffins Delight

Here’s what you need for a rich and creamy Tuscan chicken soup: - 1 lb boneless, skinless chicken breasts - 4 cups low-sodium chicken broth - 1 cup heavy cream - 1 can (14 oz) diced tomatoes, undrained - 1 cup chopped fresh spinach - 1/2 cup sun-dried tomatoes, chopped - 1 medium onion, diced - 2 cloves garlic, minced - 1 teaspoon Italian seasoning - 1/2 teaspoon crushed red pepper flakes (adjust for spice level) - Salt and pepper to taste - 2 tablespoons olive oil - Fresh basil leaves for garnish - Grated Parmesan cheese for serving You can swap some ingredients to fit your taste or diet: - Chicken: Use turkey breasts or thighs for a different flavor. - Cream: Substitute with coconut milk for a dairy-free option. - Spinach: Kale or Swiss chard can replace spinach for a heartier bite. - Broth: Vegetable broth works well if you want a lighter taste. - Sun-dried tomatoes: Fresh tomatoes can work, but add more for flavor. When shopping, here are some tips: - Chicken: Look for chicken breasts that are pink with no dark spots. Fresh chicken should feel firm and moist. - Spinach: Choose bright green leaves with no yellow or brown edges. Fresh spinach should feel crisp. - Tomatoes: Pick tomatoes that are firm and fragrant. Avoid soft spots or wrinkles. - Onion and Garlic: Choose firm onions and plump garlic bulbs. These should feel heavy for their size. By picking quality ingredients, you boost the soup's flavor and nutrition! To make Slow Cooker Creamy Tuscan Chicken Soup, start by gathering your ingredients. Here’s how to prepare it: 1. Sauté onion and garlic: Heat 2 tablespoons of olive oil in a skillet over medium heat. Add 1 diced medium onion and 2 minced garlic cloves. Cook for about 5 minutes, or until the onion is clear. 2. Mix ingredients in the slow cooker: Transfer the onion and garlic into your slow cooker. Add 1 pound of boneless, skinless chicken breasts. Pour in 4 cups of low-sodium chicken broth and 1 can of diced tomatoes (14 oz), undrained. 3. Add the rest: Stir in 1/2 cup of chopped sun-dried tomatoes, 1 teaspoon of Italian seasoning, and 1/2 teaspoon of crushed red pepper flakes. Season with salt and pepper to taste. Mix everything well. 4. Cook: Cover the slow cooker. Set it to low for 6-7 hours or high for 3-4 hours. The chicken should be fully cooked and tender. 5. Shred the chicken: After cooking, take out the chicken. Use two forks to shred it into bite-sized pieces. Return the shredded chicken to the slow cooker. 6. Add cream and spinach: Pour in 1 cup of heavy cream and add 1 cup of chopped fresh spinach. Stir until the spinach wilts and the soup heats up, about 10 minutes. Adjust seasoning if needed. - Low and slow: Cooking on low for 6-7 hours gives the best flavor. This method lets the chicken become very tender. - High setting: If you're short on time, the high setting (3-4 hours) will work too. Just check the chicken for doneness. - Check for doneness: Use a meat thermometer. The chicken should reach an internal temperature of 165°F. - Serve hot: Ladle the soup into bowls. - Garnish: Top each bowl with fresh basil leaves and a sprinkle of grated Parmesan cheese. - Pair with bread: This soup tastes great with crusty bread or a side salad. Enjoy your creamy, savory soup! One mistake is not sautéing the onion and garlic first. This step adds depth to the soup. Another error is not shredding the chicken properly. Shredded chicken mixes better with the soup. Lastly, avoid adding too much liquid. The cream will make the soup rich, so balance is key. To boost flavor, try adding fresh herbs like basil or parsley. These add a bright taste. You can also use more Italian seasoning for a bolder flavor. Crushed red pepper flakes can adjust the heat. Start with a little, then taste and add more if needed. A good slow cooker is essential for this recipe. Use one with multiple heat settings for flexibility. A sturdy knife helps chop the onion and garlic easily. Use a cutting board to keep your workspace clean. Finally, two forks are great for shredding chicken smoothly. {{image_2}} To make a vegetarian version of this soup, you can replace the chicken with hearty veggies. Use 1 can of chickpeas for protein and texture. Add 1 cup of chopped zucchini and 1 cup of diced carrots for flavor. You can also use vegetable broth instead of chicken broth. This will keep the soup rich and tasty without meat. For a dairy-free version, swap the heavy cream with coconut milk. This adds a nice creaminess without dairy. You can also skip the Parmesan cheese or use a dairy-free alternative. Look for vegan cheese at the store. Adjust the seasoning to balance the flavors, as coconut milk can be sweeter than cream. You can change the vegetables based on the season. In the spring, add fresh asparagus or peas for a bright touch. In the fall, try using diced butternut squash or sweet potatoes for warmth. Always add some greens, like kale or Swiss chard, to keep it fresh. These small changes can make the soup feel new and exciting every time you make it! After enjoying your Slow Cooker Creamy Tuscan Chicken Soup, store leftovers properly. First, let the soup cool down to room temperature. This helps prevent bacteria growth. Use airtight containers to keep the soup fresh. Label each container with the date. Store in the fridge for up to three days. If you want to keep it longer, freezing is a great option. To freeze your soup, ensure it is completely cool. Pour it into freezer-safe containers, leaving some space at the top. This allows for expansion as it freezes. You can also freeze it in smaller portions. This makes it easy to reheat just what you need later. The soup can last up to three months in the freezer. Remember to label the containers with the date before storing. When you’re ready to enjoy your soup again, reheat it gently. If frozen, let it thaw in the fridge overnight. You can reheat the soup on the stove over medium heat. Stir occasionally to prevent sticking. If it's too thick, add a splash of chicken broth or cream. You can also use a microwave; heat in short bursts, stirring in between. Always check the temperature to ensure it’s hot before serving. Enjoy your delicious soup just like the first time! You can store this soup in the fridge for up to five days. Make sure to keep it in an airtight container. This helps maintain its rich flavors. If you want to keep it longer, freeze the soup. It stays fresh for about three months in the freezer. Just thaw it in the fridge before reheating. Yes, you can use frozen chicken! Just add an extra hour to the cooking time. If you use frozen chicken, make sure it's fully cooked before shredding. This method works well and saves prep time. Just remember to check the chicken's internal temperature. It should reach 165°F to be safe. Serve the soup with crusty bread for dipping. A fresh salad also pairs well, adding a crunchy texture. You can also enjoy it with a side of garlic bread or cheesy breadsticks. For a heartier meal, serve it with a creamy risotto. Each option enhances the soup's flavors beautifully. This blog post covered everything you need for Slow Cooker Creamy Tuscan Chicken Soup. We explored ingredients, cooking steps, and useful tips. I shared variations for different diets and ways to store your soup. Remember to choose fresh ingredients for the best flavor. Each step and tip is key to success. With practice, you'll create a tasty dish your whole family will love. Happy cooking!

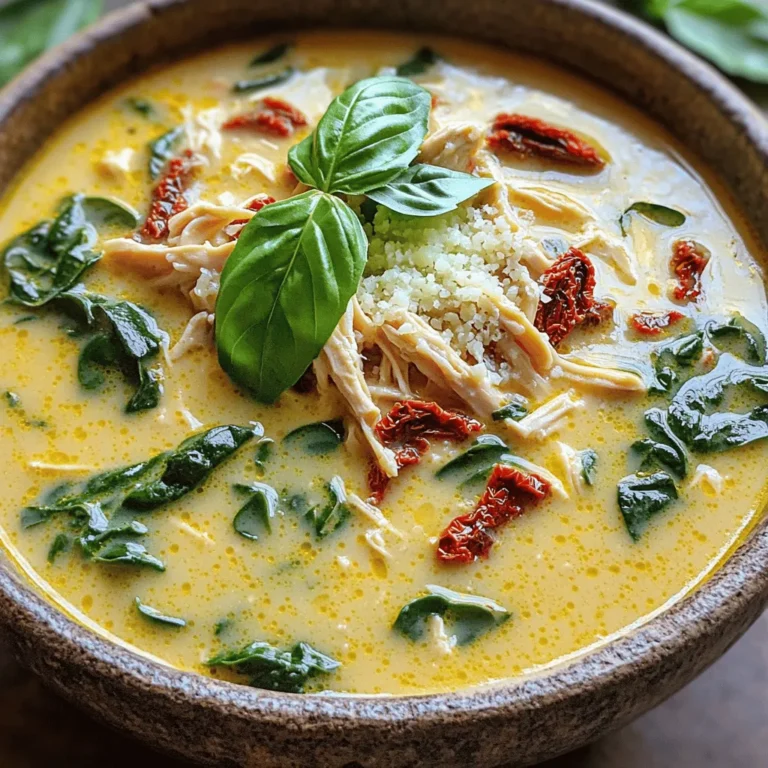
Savory Slow Cooker Creamy Tuscan Chicken Soup Recipe

- 1 ½ cups graham cracker crumbs - ½ cup unsalted butter, melted - ¼ cup brown sugar - 1 can (15 oz) pumpkin puree - 1 cup cream cheese, softened - ¾ cup powdered sugar - 1 teaspoon vanilla extract - ½ teaspoon ground cinnamon - ¼ teaspoon ground nutmeg - ½ cup caramel sauce (plus extra for drizzling) - 1 cup whipped cream (for topping) Creating no-bake caramel pumpkin pie bars is simple, and it starts with gathering the right ingredients. The base of these bars comes from graham cracker crumbs, which give a sweet crunch. You need 1 ½ cups for the crust. The crust also requires ½ cup of melted unsalted butter and ¼ cup of brown sugar to make it rich and flavorful. For the filling, the star is 1 can of pumpkin puree. This gives it that lovely orange hue and great taste. You will also need 1 cup of softened cream cheese for a smooth texture. Add ¾ cup of powdered sugar for sweetness, along with 1 teaspoon of vanilla extract, ½ teaspoon of ground cinnamon, and ¼ teaspoon of ground nutmeg for warmth and spice. Finally, don’t forget about the caramel! You will use ½ cup of caramel sauce to swirl into the filling, plus some extra for drizzling on top. Top off each bar with 1 cup of whipped cream for a delightful finish. With these ingredients, you will create a dessert that is both easy and delicious. Each bite will remind you of the cozy flavors of fall. - In a medium bowl, mix 1 ½ cups graham cracker crumbs, ½ cup melted butter, and ¼ cup brown sugar. - Stir until the crumbs look like wet sand. This mix will hold your bars together. - Next, press the mixture into the bottom of an 8x8 inch baking dish. Use parchment paper for easy removal. - In a large bowl, beat 1 cup of softened cream cheese until it's smooth. - Gradually add in ¾ cup powdered sugar, 1 teaspoon vanilla extract, ½ teaspoon ground cinnamon, and ¼ teaspoon ground nutmeg. - Mix well until everything is combined. This creates a tasty filling for your bars. - Then, gently fold in 1 can (15 oz) of pumpkin puree. Make sure it’s mixed well for a smooth texture. - Spread the pumpkin filling evenly over the crust. Use a spatula to smooth the top. - Drizzle ½ cup caramel sauce over the pumpkin filling. Swirl it gently with a knife for a pretty marbled look. - Cover the dish with plastic wrap. Refrigerate for at least 4 hours or until set. This helps the flavors blend and firm up the bars. - Choosing the right cream cheese: Use full-fat cream cheese for a rich and creamy filling. Make sure it is room temperature. This helps it blend smoothly with the other ingredients. - Tips for a well-set dessert: Chill the bars for at least four hours. This step helps the filling firm up. If you want a firmer texture, leave them in the fridge overnight. - Adding spices for extra warmth: Try adding a pinch of ground ginger or cloves to the filling. These spices add depth to the flavor. - Substituting caramel with chocolate or other sauces: If you love chocolate, swap caramel for chocolate sauce. This twist gives the bars a new taste. - Serving suggestions and garnishes: Top each bar with whipped cream and a drizzle of caramel. You can also add a sprinkle of cinnamon for a pop of color. - How to cut and serve bars neatly: Use a sharp knife to cut the bars. Clean the knife between cuts for neat edges. Serve on a pretty plate for a nice touch. {{image_2}} You can switch up the toppings to make your No-Bake Caramel Pumpkin Pie Bars even more fun. Try adding chopped nuts like pecans or walnuts. They add a nice crunch and flavor. You could also use chocolate shavings instead. Dark chocolate pairs well with the pumpkin. If you want a lighter touch, consider different whipped topping options. You can use flavored whipped cream or even coconut whipped cream for a twist. For a lighter version of these bars, think about low-fat cream cheese. It works well and still tastes great. You can also use alternative sweeteners, like honey or stevia, instead of powdered sugar. This change can lower the sugar content while keeping the sweetness. Just adjust the amount based on your taste. Make these bars even more special for the holidays. You can add cranberries for a festive touch. They give a sweet and tart flavor that complements the pumpkin. Another idea is to incorporate maple flavors. Swapping some caramel sauce for maple syrup creates a fall-themed dessert. Each of these variations makes the bars unique and seasonal. You should store your No-Bake Caramel Pumpkin Pie Bars in the fridge. They stay fresh and tasty for longer that way. If you want to keep them for a month or more, put them in the freezer. To store them in the fridge, cover the dish with plastic wrap. This keeps moisture in and prevents them from drying out. If you freeze them, wrap each bar in plastic wrap. Then, place them in an airtight container or a zip-top bag. In the fridge, these bars last about 5 to 7 days. If you freeze them, they can last up to 2 months. Check for signs of spoilage. If you see any mold or off-smells, it’s best to throw them away. A change in texture can also mean they've gone bad. If they feel slimy or overly dry, avoid eating them. Always trust your senses to judge freshness. Yes, you can make these bars ahead of time. I recommend making them a day before you plan to serve them. This allows the flavors to meld and the filling to set nicely. Store the bars in the fridge, covered with plastic wrap. They will stay fresh for up to five days. If you want to keep them longer, consider freezing them. Wrap them tightly in plastic wrap, then place them in an airtight container. They can last in the freezer for up to three months. Just remember to thaw them in the fridge overnight before serving. If you need an alternative to graham crackers, there are many options. You can use gluten-free cookies for a similar flavor and texture. Another option is to use crushed vanilla wafers or even digestive biscuits. For a nutty twist, consider almond flour mixed with a bit of butter and sugar. This will give you a unique flavor that pairs well with pumpkin. Feel free to get creative with whatever you have at home. To make these bars dairy-free, you can substitute the cream cheese with a dairy-free cream cheese alternative. Many brands offer great options that taste just as good. For the whipped cream, you can use coconut cream or a dairy-free whipped topping. Just make sure to chill coconut milk overnight and whip it before adding. This way, you still get that fluffy texture without dairy. Enjoy your delicious dessert without the dairy! This blog post covered a delicious pumpkin dessert. We started with essential ingredients, then moved through each step of the recipe. I shared tips for the best texture and flavor. You learned about tasty variations and smart storage practices. In the end, this dessert is customizable and easy to make. Enjoy making it your own!

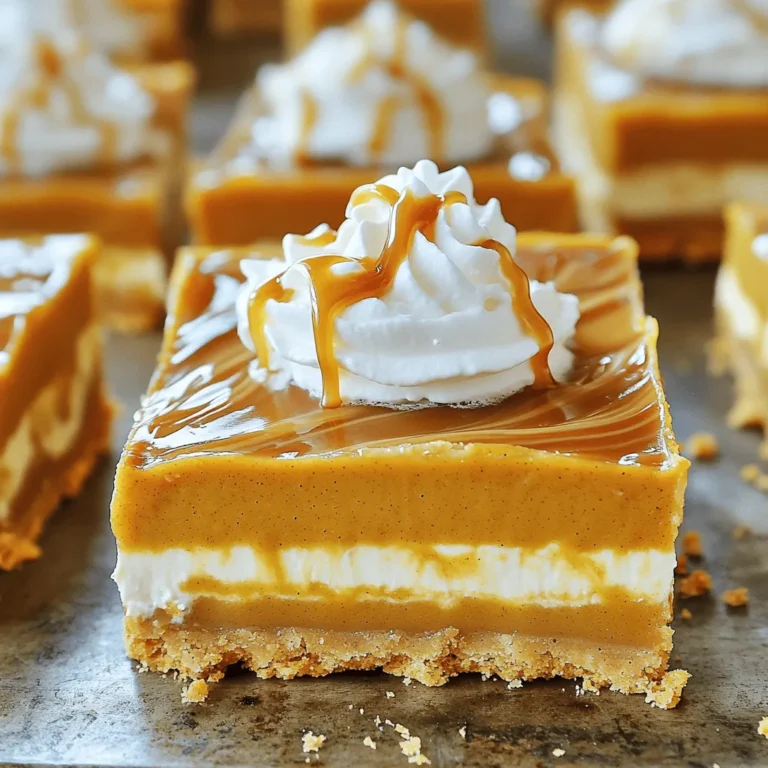
No-Bake Caramel Pumpkin Pie Bars Simple Yet Delicious

To make cozy autumn squash and apple soup, gather these simple ingredients: - 1 medium butternut squash, peeled and cubed - 2 medium apples, peeled and chopped (preferably Granny Smith or Honeycrisp) - 1 medium onion, chopped - 2 cloves garlic, minced - 1 tablespoon olive oil - 4 cups vegetable broth - 1 teaspoon ground cinnamon - 1/2 teaspoon nutmeg - Salt and pepper to taste - 1/2 cup coconut milk (optional for creaminess) - Fresh thyme leaves for garnish If you need to adjust for dietary needs, consider these swaps: - Use sweet potatoes instead of butternut squash for a sweeter taste. - Swap apples for pears for a different flavor profile. - Choose low-sodium broth if you watch your salt intake. - Omit coconut milk for a lighter soup. You can use almond milk instead if desired. - For a nut-free option, skip the coconut milk entirely. When picking squash and apples, look for these signs of freshness: - Choose butternut squash that feels heavy for its size. The skin should be smooth and firm. - Select apples that are crisp and have no bruises. Bright skin shows they are fresh. - Avoid squash with soft spots or blemishes. This means they may be past their prime. - For apples, check for a pleasant smell, which indicates ripeness. These tips will help ensure your soup tastes delicious and fresh! First, gather your ingredients. You need: - 1 medium butternut squash, peeled and cubed - 2 medium apples, peeled and chopped - 1 medium onion, chopped - 2 cloves garlic, minced - 1 tablespoon olive oil - 4 cups vegetable broth - 1 teaspoon ground cinnamon - 1/2 teaspoon nutmeg - Salt and pepper to taste - 1/2 cup coconut milk (optional) - Fresh thyme leaves for garnish Start by peeling the butternut squash. Cut it into small cubes. Then, peel and chop the apples. I like using Granny Smith or Honeycrisp for their tartness. Next, chop the onion and mince the garlic. This mix of flavors will add depth to the soup. In a large pot, heat the olive oil over medium heat. Add the chopped onion and cook until it turns translucent, about 5 minutes. This step brings out the sweetness of the onion. Stir in the minced garlic and let it cook for one more minute. You will smell its lovely aroma fill the kitchen. Now, add the cubed butternut squash and chopped apples. Mix everything well. Sprinkle in the ground cinnamon, nutmeg, salt, and pepper. These spices give the soup a warm, cozy flavor for autumn. Next, pour in the vegetable broth. Increase the heat to bring the mixture to a boil. Once it starts boiling, reduce the heat to low. Let it simmer for about 25-30 minutes. The squash and apples should become tender during this time. After simmering, it's time to blend. Use an immersion blender to mix the soup until smooth. If you don't have one, carefully transfer the soup in batches to a countertop blender. Blend until it is creamy and velvety. If you want a creamier soup, stir in the coconut milk. This step adds a rich texture. Taste the soup and adjust the seasoning if needed. Add more salt or pepper to enhance the flavor. Serve the soup hot. Garnish with fresh thyme leaves for a pop of color. This cozy autumn squash and apple soup pairs well with crusty bread. Enjoy this warm bowl of comfort! To cook this soup well, always prep your ingredients first. Chop the squash and apples into even pieces. This helps them cook at the same rate. Use fresh squash and apples for the best taste. Store any leftovers in an airtight container in the fridge. They will stay good for about three days. If you want to keep it longer, freeze the soup. It can last up to three months in the freezer. Just make sure to let it cool before you freeze it. Spices can make this soup shine. Besides cinnamon and nutmeg, consider adding ginger for a spicy kick. You could also sprinkle in a bit of cayenne pepper for warmth. A dash of smoked paprika can add depth. Taste as you go to find your perfect balance. Adding spices right before blending helps keep their flavors bright. Don’t forget to check the seasoning before serving. Adjust the salt and pepper to match your taste. This soup pairs great with crusty bread or a fresh salad. A slice of sourdough adds a nice texture. For a drink, try a light white wine like Sauvignon Blanc. It complements the soup’s sweetness. If you prefer non-alcoholic options, apple cider works well too. It enhances the apple flavor in the soup. Enjoy your cozy meal with friends or family for a warm autumn gathering! {{image_2}} You can easily switch ingredients to change the taste. Use sweet potatoes instead of butternut squash. They add a different sweetness and texture. Try adding pears for a unique twist. They pair well with apples and add depth. For spice lovers, add a pinch of cayenne or chili powder. This will give your soup a warm kick. To make this soup vegan, skip the coconut milk or use a plant-based cream. Almond milk or oat milk can work too. These options keep it creamy without dairy. Ensure your vegetable broth is vegan as well. This way, you keep the soup rich while meeting dietary needs. Mix in other vegetables for more flavor. Carrots and parsnips add sweetness and color. You could also add celery for a fresh crunch. If you want a green touch, try spinach or kale. These greens not only boost nutrition but also add nice color. Just toss them in during the last few minutes of cooking. After making cozy autumn squash and apple soup, let it cool. Once cool, transfer it to an airtight container. You can keep it in the fridge for up to four days. This soup tastes great even after a day or two. The flavors deepen as it sits. To freeze the soup, allow it to cool completely. Pour it into freezer-safe containers, leaving space at the top for expansion. Seal tightly and label with the date. You can freeze the soup for up to three months. This is a great way to have a warm meal ready when you need it. When ready to eat, thaw the soup in the fridge overnight. Heat it in a pot on medium heat, stirring often. If it seems too thick, add a splash of broth or water. You can also use the microwave, heating in short bursts. Make sure to stir in between to ensure even heating. Enjoy your warm, cozy soup! Yes, you can use frozen squash or apples. They work well in this soup. Just add them directly to the pot. There is no need to thaw them first. The soup will still taste great! This soup lasts for about 3 to 5 days in the fridge. Make sure to store it in an airtight container. It will stay fresh and tasty for you to enjoy later. Just reheat it on the stove or in the microwave. Squash is low in calories and full of fiber. It helps digestion and keeps you full. Apples are also high in fiber. They contain vitamins A and C, which are good for your skin and immune system. Together, they make this soup both delicious and healthy! In this blog post, we explored a tasty soup made with squash and apples. We discussed key ingredients, substitutions, and tips for selecting fresh produce. I shared step-by-step instructions for preparation and cooking, plus tricks to enhance flavors. We also covered storing leftovers and answered common questions. This soup is versatile and easy to make. Try different variations and enjoy the fresh flavors. With proper storage, you can savor this dish long after cooking. Enjoy your delicious creation!

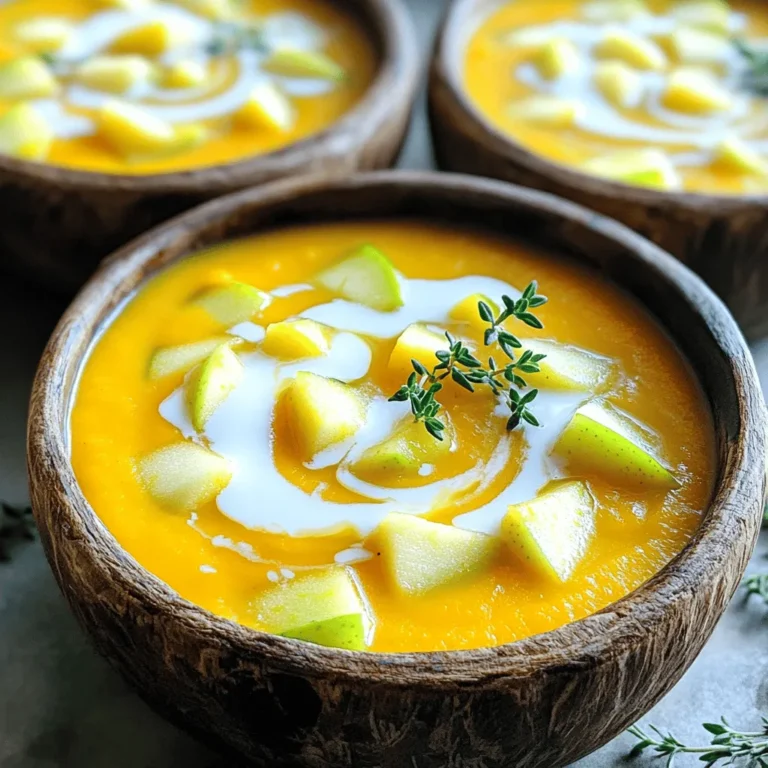
Cozy Autumn Squash and Apple Soup Scrumptious Delight

- 1 pound chicken breast, cut into 1-inch cubes - 2 tablespoons honey - 3 tablespoons soy sauce - 2 tablespoons sriracha (adjust according to spice preference) - 3 cloves garlic, minced - 1 tablespoon fresh ginger, grated - 1 tablespoon rice vinegar - 1 tablespoon sesame oil - Salt and pepper to taste - Skewers (wooden or metal) - Fresh cilantro, chopped (for garnish) Gathering the right ingredients is key to making Air Fryer Spicy Honey Garlic Chicken Skewers. Start with fresh chicken breast, as it cooks well and stays juicy. Cut the chicken into 1-inch cubes. This size ensures even cooking and easy skewer placement. Next, you need the marinade. It adds flavor and moisture. Combine honey, soy sauce, sriracha, minced garlic, grated ginger, rice vinegar, and sesame oil in a bowl. The honey balances the heat from the sriracha, giving a sweet and spicy kick. Add salt and pepper for taste, but don’t overdo it. Keep it simple. Don’t forget your skewers! You can use wooden or metal ones. Wooden skewers need soaking in water to prevent burning. Finally, fresh cilantro adds a nice touch as a garnish. It enhances the dish with a pop of color and fresh flavor. Now, you’re ready to dive into the fun part—cooking! To start, gather your ingredients for the marinade. In a large bowl, mix: - 2 tablespoons honey - 3 tablespoons soy sauce - 2 tablespoons sriracha - 3 cloves garlic, minced - 1 tablespoon fresh ginger, grated - 1 tablespoon rice vinegar - 1 tablespoon sesame oil Stir these together well. This mix will give your chicken a sweet and spicy kick. The garlic and ginger add depth. Now, take your chicken breast, cut into 1-inch cubes. Add the chicken to the marinade. Make sure each piece is fully coated. Cover the bowl and place it in the fridge. Let it marinate for at least 30 minutes. If you have time, marinate overnight for even better flavor. Before cooking, preheat your air fryer to 400°F (200°C). This step takes around 5 minutes. While it heats, thread the marinated chicken onto skewers. Leave a little space between each piece. This helps them cook evenly. Next, lightly coat the air fryer basket with cooking spray or oil. This helps prevent sticking. Place the skewers in the basket in a single layer. Avoid overlapping to ensure even cooking. Now, air fry the chicken at 400°F (200°C) for 10-12 minutes. Halfway through, flip the skewers for even browning. The chicken is done when it’s cooked through and slightly charred. Once cooked, remove the skewers and let them rest for a minute. Before serving, garnish with chopped fresh cilantro. This adds a nice touch to your dish. To perfect the marinade, start with the right balance. If you like heat, add more sriracha. For less spice, cut the sriracha in half. Marinating the chicken for at least 30 minutes is key. If you have time, let it sit overnight. This will deepen the flavor and make the chicken more tasty. Prevent sticking by lightly coating the air fryer basket with cooking spray. This small step helps the skewers slide out easily. To ensure even cooking, place the skewers in a single layer. Avoid stacking them. Flip the skewers halfway through cooking for equal heat distribution. Serving is just as important as cooking. Use a large platter for the skewers. Drizzle any leftover marinade on top for more flavor. Adding chopped cilantro gives a fresh look. You can also add lime wedges on the side. This brightens the dish and enhances the taste. {{image_2}} You can easily switch out the chicken for shrimp or tofu. Both options work well with the marinade. Shrimp cooks fast and soaks up flavor beautifully. Tofu adds a nice texture and protein for a vegetarian meal. You can also try using other chicken cuts like thighs or wings. Thighs stay juicy and add a rich flavor. Wings have that crispy element that everyone loves. For a fresh twist, add citrus flavors like lime juice. Lime brightens the dish and balances the sweetness of honey. You can also swap honey with agave or maple syrup. These alternatives give a unique taste while keeping the dish sweet. If you want a vegetarian option, use vegetable skewers. Bell peppers, zucchini, and mushrooms work great. You can also mix meats on the skewers. Combine chicken with beef or pork for different flavors and textures. This way, everyone can enjoy the skewers in their own way. To keep your Air Fryer spicy honey garlic chicken skewers fresh, refrigerate them. Place the leftover skewers in an airtight container. They last in the fridge for about three days. For longer storage, freeze them. Wrap each skewer tightly in plastic wrap, then place them in a freezer bag. They can stay in the freezer for up to three months. When you’re ready to enjoy your skewers again, use the air fryer for the best results. Preheat the air fryer to 350°F (175°C). Place the skewers in the basket and heat for about 5-7 minutes. This keeps them crispy and tasty. You can also use a microwave, but the skewers might lose their crispness. To maintain flavor and texture, cover them with a damp paper towel in the microwave. Heat in short bursts until warmed through. For quick weeknight meals, pre-marinating the chicken is key. Prepare the marinade ahead of time and coat the chicken. Store it in the fridge for up to 24 hours before cooking. This makes dinner a breeze! Serve the skewers with rice or a fresh salad for a complete dish. You can also add roasted veggies on the side to boost nutrition and flavor. Air frying chicken skewers takes about 10 to 12 minutes. Preheat your air fryer to 400°F (200°C) for 5 minutes. Once ready, place the skewers in the basket. Flip them halfway through for even cooking. The chicken should be cooked through and slightly charred. Always check that the internal temperature reaches 165°F (75°C). This way, you know the chicken is safe to eat. Yes, you can! If you don’t have an air fryer, use a grill or oven. For grilling, preheat your grill to medium-high heat. Cook the skewers for about 10 to 15 minutes, turning them often. If using an oven, set it to 400°F (200°C). Place the skewers on a baking sheet. Bake for around 15 to 20 minutes, flipping halfway through. Both methods yield tasty results! These skewers pair well with many side dishes. Here are some great options: - Rice: Jasmine or basmati rice adds a nice touch. - Salad: A fresh salad with greens and light dressing brightens the meal. - Vegetables: Roasted or steamed veggies make a healthy choice. - Dips: Serve with a yogurt sauce or extra sriracha for heat. Feel free to mix and match your favorites! We explored how to make Air Fryer Spicy Honey Garlic Chicken Skewers. You learned about key ingredients, like chicken cubes and marinade components. I provided clear step-by-step instructions, tips for perfecting the dish, and variations to try. In my opinion, this recipe is simple and fun. You can impress family and friends with great taste. Don’t be afraid to experiment with different proteins or spices. Enjoy this dish any time and get creative with your meals!

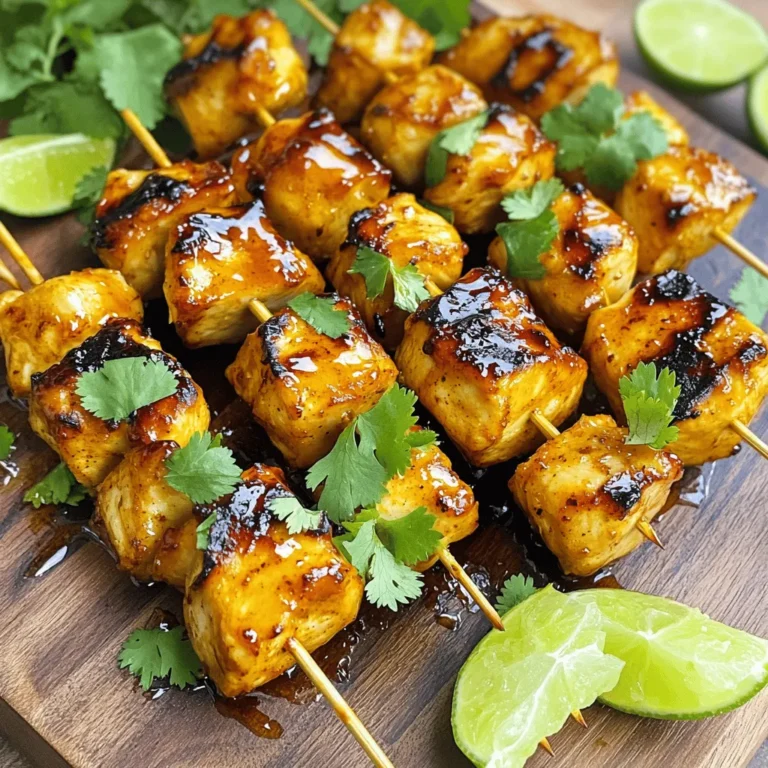
Air Fryer Spicy Honey Garlic Chicken Skewers Delight

- 4 large russet potatoes, cut into wedges - 1/4 cup olive oil - 4 cloves garlic, minced - 1/2 cup grated Parmesan cheese - 1 teaspoon paprika - 1 teaspoon dried oregano - 1/2 teaspoon black pepper - 1 teaspoon salt - Fresh parsley, chopped (for garnish) To make crispy Parmesan garlic potato wedges, you need simple yet flavorful ingredients. The russet potatoes give a nice texture. The olive oil helps them crisp up in the oven. Garlic brings in a strong flavor. Parmesan cheese adds a cheesy, salty touch. You can enhance the flavor with a few optional ingredients. Consider adding chili powder for a spicy kick. You can also mix in fresh herbs like rosemary or thyme for a fresh taste. If you have dietary needs, there are easy swaps. For a vegan option, replace Parmesan with nutritional yeast. You can also use sweet potatoes instead of russet potatoes for a different flavor. These ingredients make the perfect base for a tasty snack. They combine to create a crunchy outside and a soft inside, making each bite irresistible. 1. Preheating the oven First, set your oven to 425°F (220°C). This heat will help your wedges get crispy. 2. Preparing the baking sheet Line a baking sheet with parchment paper. This step makes cleanup easy. It also helps the wedges not stick. 1. Tossing the potatoes with olive oil In a large bowl, add your potato wedges. Pour in 1/4 cup of olive oil. Mix well so each wedge gets coated. 2. Adding seasoning and tossing again Next, add the minced garlic, Parmesan cheese, paprika, oregano, black pepper, and salt. Toss everything together again until the wedges are well coated. You want them to look tasty and ready to bake! 1. Spreading the wedges on the baking sheet Now, spread the seasoned potato wedges in a single layer on the baking sheet. Make sure they are not touching. This helps them get crispy. 2. Monitoring baking time and flipping instructions Bake the wedges for 30 to 35 minutes. Halfway through, take them out and flip them over. This ensures both sides get golden brown and crispy. Enjoy the smell while they bake! To get those potato wedges super crispy, avoid overcrowding the baking sheet. If the wedges are too close, they will steam instead of crisp. Spread them out so the hot air can circulate. For the best results, place the baking sheet on the middle rack in your oven. This helps the heat reach all sides evenly. You can spice up your wedges by adding your favorite herbs or spices. Try adding chili powder for a kick or rosemary for a fresh taste. You can also switch up the cheese. While Parmesan is great, cheddar or gouda can add a new twist. Mix and match to find your favorite flavor profile. These potato wedges pair well with many dips. Try serving them with ranch, garlic aioli, or even spicy ketchup. They also make a great side dish. Serve them alongside grilled chicken, burgers, or a fresh salad for a complete meal. The options are endless! {{image_2}} You can easily change the flavor of your potato wedges. Want some heat? Try adding chili powder. It gives them a spicy kick. If you prefer a fresh taste, use chopped herbs like rosemary or thyme. These herbs add a nice touch and make the wedges taste bright. If you want a healthier option, use an air fryer. It cooks the wedges with less oil, while still keeping them crispy. Just toss them in the air fryer for about 20 minutes. For a different twist, grill the wedges. Grilling gives them a smoky flavor that is hard to beat. Need gluten-free options? Use gluten-free breadcrumbs instead of Parmesan for some crunch. If you're vegan, skip the cheese and add more garlic for flavor. You can also use nutritional yeast as a cheese substitute. This way, everyone can enjoy your crispy wedges! To keep your crispy Parmesan garlic potato wedges fresh, follow these simple tips: - Cool completely: Let the wedges cool down to room temperature. This helps prevent sogginess. - Use an airtight container: Store them in a container that seals well. This keeps air out and maintains crispness. - Layer with paper towels: Place paper towels in the container. This absorbs moisture and keeps the wedges crispy. - Refrigerate promptly: Store leftovers in the fridge within two hours of cooking. When you're ready to enjoy those wedges again, reheating is key. - Oven method: Preheat your oven to 375°F (190°C). Spread the wedges on a baking sheet in a single layer. Bake for 10-15 minutes or until hot and crispy again. - Microwave method: For a quick option, place wedges on a microwave-safe plate. Heat in 30-second intervals until warm. Note that this may not keep them crispy, so use this method when you're in a hurry. Crispy Parmesan Garlic Potato Wedges last about three to four days in the fridge. Make sure to store them in an airtight container. This keeps them fresh and tasty. If you want, you can reheat them for a quick snack. Yes, you can freeze these potato wedges. After baking, let them cool completely. Then, place them in a freezer-safe bag. They can last up to three months in the freezer. When you want to enjoy them, just bake them straight from the freezer. You can serve crispy potato wedges with a variety of dips. Ranch dressing, ketchup, or garlic aioli are great choices. They also pair well with burgers, grilled chicken, or as a side to a fresh salad. The options are endless! To make crispy potato wedges in the air fryer, start by preheating it to 400°F (200°C). Toss the wedges in olive oil and seasoning as usual. Place them in a single layer in the air fryer basket. Cook for about 15 to 20 minutes, shaking the basket halfway through for even cooking. Enjoy your crispy, golden wedges! You learned how to make crispy parmesan garlic potato wedges from start to finish. We covered ingredients, step-by-step prep, and tips for maximum flavor. Remember to avoid overcrowding the baking sheet for the best crispiness. Explore variations like spicy or grilled versions to keep it fresh. Storing and reheating properly ensures you enjoy every last bite. These wedges are a great side dish for many meals. Enjoy making this tasty treat with your own twists and substitutions for your needs. Happy cooking!

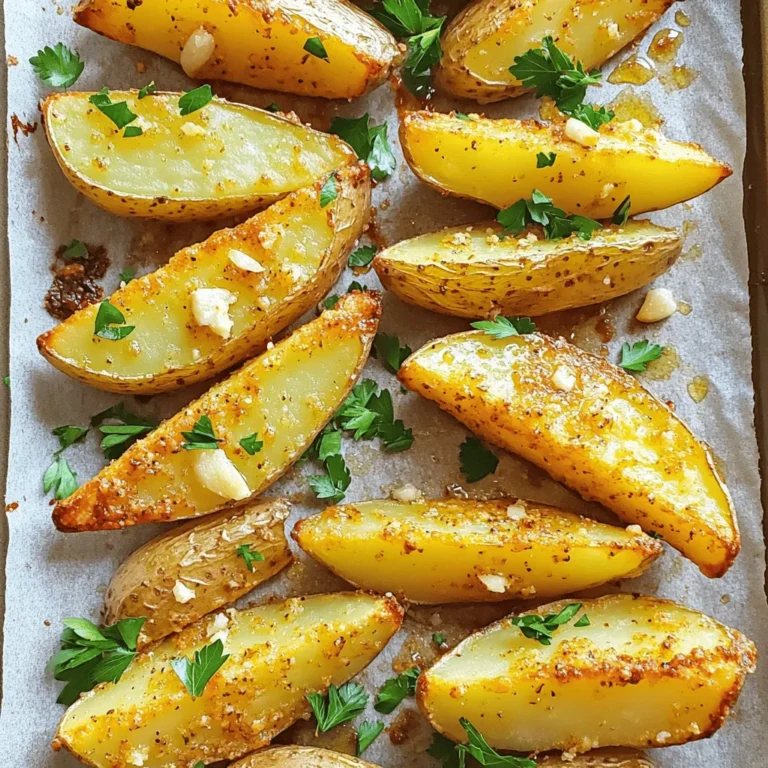
Crispy Parmesan Garlic Potato Wedges Irresistible Snack

- 1 lb ground chicken - 1/2 cup breadcrumbs - 1/4 cup grated Parmesan cheese - 1/4 cup chopped fresh parsley - 2 cloves garlic, minced - 1 egg, lightly beaten - 1 teaspoon dried oregano - 1 teaspoon salt - 1/2 teaspoon black pepper - 1 cup mushrooms, sliced - 1 cup chicken broth - 1/2 cup heavy cream - 1 tablespoon olive oil - Fresh parsley, for garnish To make Chicken Marsala meatballs, gather these fresh and flavorful ingredients. Ground chicken is key for a light texture. Breadcrumbs help hold the meatballs together. Parmesan cheese adds a savory touch. Fresh parsley gives a hint of color and taste. Minced garlic brings aroma and flavor. The egg binds the mixture. Dried oregano adds depth. Salt and pepper enhance all the flavors. Mushrooms are essential. They create a rich sauce. Chicken broth is the base for the sauce. Heavy cream makes it creamy and smooth. Olive oil gives a nice finish to the mushrooms. Finally, fresh parsley works as a garnish for a pop of color. - Large mixing bowl - Baking sheet - Parchment paper - Skillet - Cooking spoon Using the right tools makes cooking easier. A large mixing bowl helps mix the meatball ingredients well. A baking sheet lined with parchment paper keeps cleanup simple. A skillet is perfect for cooking the mushrooms and sauce. A cooking spoon helps you stir without making a mess. With these tools, you can whip up Chicken Marsala meatballs in no time! {{ingredient_image_1}} - Preheat the Oven: Set your oven to 400°F (200°C). This gets it hot enough for baking the meatballs. - Prepare Meatball Mixture: In a large bowl, mix together the ground chicken, breadcrumbs, Parmesan cheese, chopped parsley, minced garlic, egg, oregano, salt, and pepper. Use your hands to combine, but don’t overmix. This keeps the meatballs tender. - Form Meatballs: Take portions of the mixture and roll them into golf ball-sized meatballs. Place each meatball on a baking sheet lined with parchment paper. - Bake Meatballs: Bake the meatballs in your preheated oven for 20-25 minutes. They should look golden brown and be fully cooked. - Cook Mushrooms: While the meatballs bake, heat olive oil in a large skillet over medium heat. Add sliced mushrooms and sauté until they turn brown and tender, which takes about 5-7 minutes. - Make Sauce: Once the mushrooms are cooked, pour in the chicken broth. Scrape any bits from the bottom of the skillet to add flavor. Let it simmer for a few minutes. Then, stir in the heavy cream and bring it to a gentle simmer. - Combine Meatballs and Sauce: Once the meatballs are done baking, transfer them to the skillet with the mushroom sauce. Gently stir to coat each meatball in the sauce. - Simmer Together: Allow the meatballs to simmer in the sauce for an extra 5 minutes. This helps them soak up the rich flavors. - Serve: Serve your chicken Marsala meatballs over pasta or with crusty bread. Don’t forget to garnish with fresh parsley for a pop of color and flavor! Avoid Overmixing Mix your meatball ingredients just until combined. If you mix too much, the meatballs will be tough. Keep it light and fluffy. This ensures a tender bite that melts in your mouth. Using Fresh Ingredients Always use fresh herbs and spices. Fresh parsley and garlic boost flavor. They make your meatballs taste bright and vibrant. Also, fresh chicken makes a big difference. It gives your dish the best taste. How to Enhance Flavor Sauté mushrooms in olive oil until golden. This adds depth to the sauce. Use good-quality chicken broth for a rich base. A dash of white wine can lift the flavor too. Just remember to let it cook off. Thickening the Sauce If your sauce is too thin, simmer it longer. This reduces the liquid and thickens it naturally. You can also mix a bit of cornstarch with water to thicken quickly. Just stir it in slowly. Best Pairings for Chicken Marsala Meatballs Serve your meatballs over pasta or with crusty bread. They soak up the sauce well. You can also serve them with rice or mashed potatoes. This makes a hearty meal. Alternative Serving Ideas Try them in a sub roll for a tasty sandwich. Top with extra sauce and cheese. You can even serve them as an appetizer. Just use toothpicks for easy eating. Pro Tips Use Fresh Herbs: Fresh parsley enhances the flavor significantly compared to dried herbs. Add it just before serving for the best aroma. Don't Overmix: When combining the meatball ingredients, mix just until combined. Overmixing can lead to tough meatballs. Brown the Mushrooms: Ensure the mushrooms are well-browned before adding the broth. This adds depth to the sauce. Simmer for Flavor: Allow the meatballs to simmer in the sauce for a few minutes to absorb all the delicious flavors before serving. {{image_2}} You can swap ground chicken for ground turkey. Turkey gives a different taste and is leaner. It works well in this recipe. Use the same amount of turkey as chicken. For gluten-free options, try almond flour or gluten-free breadcrumbs. These options keep the meatballs moist and tasty. Your guests won't notice the difference. Adding wine can boost the flavor of your sauce. Marsala wine is traditional, but you can use white wine too. Just cook it down to enhance the taste. If you want a vegetarian sauce, try using vegetable broth instead of chicken broth. You can add more mushrooms or even spinach for extra flavor. If you want low-calorie options, use less cream. You can replace heavy cream with Greek yogurt or a light cream. This change keeps the taste good without adding too many calories. For a dairy-free option, skip the Parmesan cheese and heavy cream. Use coconut milk instead. It adds a nice creaminess without dairy. Best Practices To keep your chicken Marsala meatballs fresh, store them in an airtight container. This helps prevent them from drying out. You can also separate layers with parchment paper. This way, they won’t stick together. How Long They Last In the fridge, these meatballs last for about three to four days. Make sure to check for any signs of spoilage before eating. Freezing Tips If you want to save meatballs for later, freezing works well. Place them on a baking sheet in a single layer. Freeze until solid, then transfer them to a freezer bag. Make sure to squeeze out as much air as possible. This helps prevent freezer burn. Reheating Instructions To reheat, take out the meatballs and let them thaw overnight in the fridge. You can also reheat them directly from frozen. Place them in a skillet with a bit of sauce over low heat. Cover and cook for about 10-15 minutes until heated through. Make-Ahead Storage For easy meals, you can make these meatballs ahead of time. Prepare and cool them completely before storing. This way, you have a quick meal ready whenever you need it. Portioning for Future Meals Portion the meatballs into servings. This helps you grab just what you need. Pair them with pasta or a salad for a complete meal. Planning meals this way saves time and effort during busy days. - Checking Internal Temperature: Use a meat thermometer. The meatballs should reach 165°F (74°C) inside. This means they are safe to eat. - Visual Cues of Doneness: Look for a golden brown color. The meatballs should not be pink inside. If juices run clear, they are done. - Tips for Meal Preparation and Planning: Yes, you can make them ahead. Prepare the meatballs and store them in the fridge for up to two days. You can also freeze them for longer storage. Just thaw before cooking. - Recommended Side Dishes and Accompaniments: Serve these meatballs with pasta or crusty bread. A fresh salad pairs well too. Garlic bread is a great choice to soak up the sauce. You can also add steamed veggies for color and nutrients. To make Chicken Marsala meatballs, you need simple ingredients and clear steps. We discussed how to prepare and cook these tasty meatballs, including tips for perfecting the dish. You can customize them with ingredient changes or sauce variations. Storing and reheating are also easy. By following this guide, you can enjoy a delicious meal at home. Happy cooking!

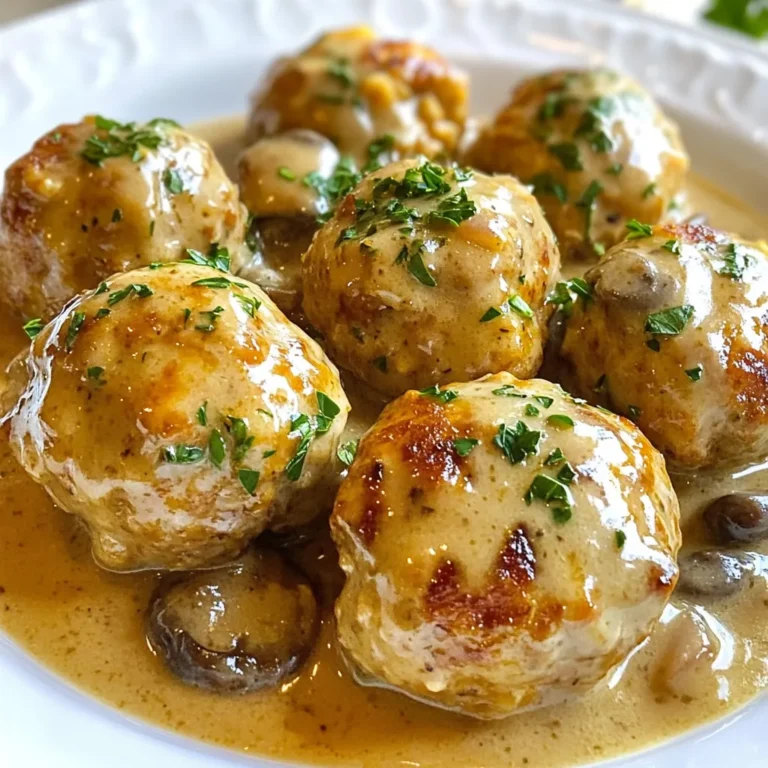
Chicken Marsala Meatballs Flavorful and Easy Recipe

- 1 lb ground chicken - 1/2 cup breadcrumbs - 1/4 cup grated Parmesan cheese - 1 large egg - 2 cloves garlic, minced - Zest of 1 lemon - Juice of 1 lemon - 2 tablespoons fresh parsley, chopped - 1 tablespoon fresh basil, chopped - 1 teaspoon dried oregano - Salt and pepper to taste - Olive oil spray - 1 cup cherry tomatoes, halved - 1 zucchini, diced - 1 bell pepper, diced To make delicious sheet pan lemon herb chicken meatballs, gather these fresh ingredients. Start with one pound of ground chicken, which gives the meatballs their base. Add half a cup of breadcrumbs for texture and a quarter cup of grated Parmesan cheese for a savory touch. Next, crack open a large egg to bind the mixture. Minced garlic adds flavor, while the zest and juice of one lemon bring a bright, zesty kick. Fresh herbs like parsley and basil enhance the aroma and taste. A teaspoon of dried oregano adds depth, and don't forget to season with salt and pepper to your liking. Finally, prepare your vegetables. You’ll need one cup of halved cherry tomatoes, one diced zucchini, and one diced bell pepper. These veggies will roast alongside the meatballs, soaking up all those tasty flavors and adding color to your meal. This combination of ingredients creates a delightful dish that is both easy to prepare and full of flavor. First, preheat your oven to 400°F (200°C). Line a large baking sheet with parchment paper. This will help with easy cleanup later. Next, grab a large mixing bowl. Combine the ground chicken, breadcrumbs, grated Parmesan, and egg. Add minced garlic, lemon zest, and lemon juice. Toss in chopped parsley, basil, oregano, salt, and pepper too. Use your hands to mix everything well. Make sure all the ingredients blend nicely. Now, it’s time to shape the meatballs. Take a small amount of the chicken mixture in your hands. Roll it into a ball about 1.5 inches in diameter. Place each meatball onto the prepared baking sheet. Keep some space between them. This will help them cook evenly. In another bowl, gather the cherry tomatoes, zucchini, and bell pepper. Toss them with a drizzle of olive oil, salt, and pepper. Spread the veggies around the meatballs on the baking sheet. This way, they cook together and share flavors. Lightly spray the meatballs with olive oil. This helps them brown nicely in the oven. Now, it’s time to bake. Place the baking sheet in the preheated oven. Set a timer for 18-20 minutes. The meatballs should be cooked through and reach an internal temperature of 165°F (75°C). The vegetables should be tender and colorful. After baking, remove the sheet from the oven. Let it cool for a few minutes before serving. Enjoy your delicious meal! Choosing the right ground chicken Use lean ground chicken for the best results. Lean meat helps the meatballs stay moist without being greasy. If you prefer more flavor, you can use a mix of dark and light meat. Techniques for binding ingredients To bind the meatballs, mix the ingredients gently. Over-mixing can make them tough. Add breadcrumbs and egg for good binding. The egg helps hold everything together. Variations of herbs and spices to try Feel free to experiment with herbs. Try adding thyme or cilantro for a different taste. Fresh herbs add bright flavors. You can also switch dried oregano for Italian seasoning. Adding heat with red pepper flakes or garlic If you like spice, add red pepper flakes. Just a pinch can elevate your meatballs. You can also increase the garlic for more flavor. This will give the dish a lovely kick. Serving suggestions with garnishes Serve the meatballs on a large platter. Drizzle them with fresh lemon juice for brightness. A sprinkle of chopped parsley adds color and flavor. Creative plating ideas for visual appeal Arrange the meatballs and veggies in a colorful pattern. Use a mix of bright cherry tomatoes and green zucchini. This makes the dish fun to look at and eat! {{image_2}} You can swap ground chicken for ground turkey or beef. This change keeps the meatballs tasty and moist. Turkey has a lighter flavor, while beef adds richness. For a dairy-free option, use nutritional yeast instead of Parmesan cheese. Nutritional yeast gives a cheesy flavor without dairy. It’s a great choice for those with lactose intolerance or vegan diets. Feel free to mix in other vegetables. Broccoli, carrots, or spinach can add color and nutrition. Use what you have on hand or what's in season. Seasonal veggies often taste better and are fresher. Try using asparagus in spring or squash in the fall. Each veggie brings its unique flavor. This keeps your meal exciting and fresh! You can change the flavor profile of your meatballs easily. For a Mediterranean twist, add sun-dried tomatoes and feta cheese. Fresh herbs like dill or mint also work well. If you want an Asian-inspired version, try ginger and green onions. Sesame oil can give a nice depth. Each variation transforms the dish into something new and fun. After your meal, let the meatballs cool down. Place the leftovers in an airtight container. Store the meatballs in the fridge for up to three days. This keeps them fresh and safe to eat. I recommend clear glass or BPA-free plastic containers. They make it easy to see what's inside. To freeze the meatballs, let them cool completely. Arrange them in a single layer on a baking sheet. Place the baking sheet in the freezer for about an hour. This makes them firm and prevents them from sticking together. After that, transfer the meatballs to a freezer-safe bag. Label the bag with the date. You can freeze them for up to three months. When you're ready to enjoy them, take the meatballs out of the freezer. Thaw them in the fridge overnight. For reheating, place them in the oven at 350°F (175°C) for about 15 minutes. You can also microwave them for quick meals, but the oven keeps them crispy. Enjoy every bite! You can check if the chicken meatballs are done by using a meat thermometer. The internal temperature must reach 165°F (75°C). If you don’t have a thermometer, cut one meatball in half. It should be cooked through, with no pink inside. The outside should be golden brown. Yes, you can make these meatballs ahead of time. You can prepare them and place them on the baking sheet. Cover them and store in the fridge for up to 24 hours. When you are ready, bake as directed. This makes meal prep easy and quick. These meatballs pair well with various sides. You can serve them with a fresh salad for a light meal. Rice or quinoa also works great to soak up the lemon flavor. For a heartier option, consider serving them with garlic bread or pasta. Yes, these meatballs are a healthy choice. They use lean ground chicken, which is lower in fat than beef. The fresh herbs and veggies add vitamins and fiber. You can also control the salt and oil used, making them a smart meal. To add spice, you can mix in red pepper flakes or cayenne pepper. Add them to the chicken mixture before forming meatballs. For a different kick, try adding minced jalapeños or a dash of hot sauce. Adjust the amount to fit your spice level. You now have a clear path to make delicious Sheet Pan Lemon Herb Chicken Meatballs. We covered ingredients, preparation, baking, and storage. Remember to use fresh herbs and choose the right ground chicken for great flavor and texture. Feel free to experiment with substitutes and variations to fit your taste. With these tips, you can serve up tasty meatballs that are also healthy. Enjoy the process, and impress your family and friends with your cooking skills!

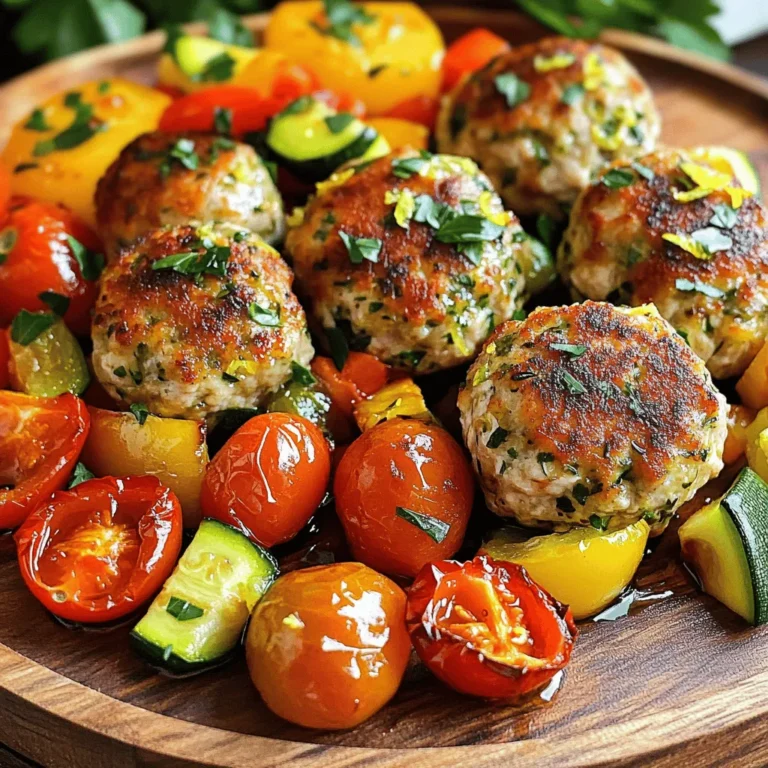
Sheet Pan Lemon Herb Chicken Meatballs for Dinner

PREV 1 … 28 29 30 … 57 NEXT
flavor nest kitchen

explore

DessertsDinnerAppetizersDrinks

Our Policies

  • Cookie Policy
  • Copyright Policy
  • Disclaimer
  • GDPR Policy
  • Terms Of Use
Back to Top
  • About
  • Contact Us
  • Privacy Policy
© 2025 flavor nest kitchen