FREE DINNER EBOOK! Get your copy!
  • Cookie Policy
  • GDPR Policy
  • Disclaimer
  • Terms Of Use
  • Visit my other site: Fun Cookie Recipes
flavor nest kitchen
  • Home
  • Dinner
  • Desserts
  • Drinks
  • Appetizers
  • Contact
  • About
  • Privacy Policy
  • Home
  • Dinner
  • Desserts
  • Drinks
  • Appetizers
  • Contact
  • About
  • Privacy Policy
  • Cookie Policy
  • GDPR Policy
  • Disclaimer
  • Terms Of Use
Visit my other site: Fun Cookie Recipes

HOME / CATEGORIES /

Latest

- 12 oz fettuccine pasta - 1 lb large shrimp, peeled and deveined - 2 tablespoons Cajun seasoning - 3 tablespoons olive oil - 2 cloves garlic, minced - 1 cup heavy cream - 1 cup grated Parmesan cheese - 1/2 cup chicken broth - Salt and pepper to taste - Fresh parsley, chopped for garnish To create a tasty Cajun Shrimp Alfredo, gather the right ingredients. Start with 12 ounces of fettuccine pasta for a hearty base. You need one pound of large shrimp, already peeled and deveined. The Cajun seasoning brings heat and flavor, so use two tablespoons. For cooking, have three tablespoons of olive oil ready. You will also need two cloves of minced garlic to add depth. One cup of heavy cream makes the sauce rich. One cup of grated Parmesan cheese adds creaminess and a cheesy kick. A half cup of chicken broth helps to balance the sauce. Finally, season with salt and pepper to taste. Garnish your dish with fresh parsley for a pop of color and freshness. With these ingredients, you will make a dish that is both simple and flavorful. Each component plays an important role, making every bite delicious. Enjoy the process of gathering these items. The right ingredients will set the stage for a fantastic meal! {{ingredient_image_1}} - First, fill a large pot with water. Add a generous amount of salt. - Bring the water to a full boil. This step is key for flavor. - Add 12 oz of fettuccine pasta. Cook it until al dente, usually 8-10 minutes. - Once cooked, drain the pasta. Reserve 1/2 cup of the pasta water for later. - In a medium bowl, take 1 lb of shrimp. Make sure they are peeled and deveined. - Toss the shrimp with 2 tablespoons of Cajun seasoning. Coat them well. - Heat 2 tablespoons of olive oil in a large skillet over medium-high heat. - Add the seasoned shrimp. Sauté for about 2-3 minutes on each side. - Cook until shrimp turn pink and opaque. Remove them from the skillet and set aside. - In the same skillet, add another tablespoon of olive oil. - Toss in 2 cloves of minced garlic. Sauté for 30 seconds until fragrant. - Pour in 1/2 cup of chicken broth and 1 cup of heavy cream. Stir well to combine. - Bring this mixture to a simmer for about 2-3 minutes. - Gradually whisk in 1 cup of grated Parmesan cheese. Let it melt to form a smooth sauce. - If the sauce seems too thick, add reserved pasta water a little at a time. - Add the cooked fettuccine and the sautéed shrimp back into the skillet. - Toss everything together until the pasta and shrimp are well coated with the sauce. - Taste and adjust the seasoning with salt and pepper as needed. To get the perfect shrimp texture, start with large shrimp. They cook quickly and stay juicy. When seasoning, coat the shrimp well with Cajun seasoning. This brings out their flavor. Sauté shrimp for just 2-3 minutes per side. Watch for them to turn pink and opaque. This means they are done. If your sauce is too thick, don’t worry! Use the reserved pasta water to adjust the consistency. Add a little at a time until you reach your desired creaminess. The sauce should coat the pasta without being too heavy. For visual appeal, serve Cajun Shrimp Alfredo in shallow bowls. The wide surface shows off the colorful dish. Sprinkle fresh parsley on top for a pop of green. This adds freshness and looks nice. You can also add an extra sprinkle of Parmesan. It enhances the flavors and makes the dish feel special. Consider serving with a slice of garlic bread or a simple salad on the side. These make a great balance to the rich pasta. Pro Tips Perfectly Cooked Pasta: Always cook your pasta al dente for the best texture. It should have a slight bite to it that complements the creamy sauce. Shrimp Searing: Ensure your skillet is hot enough before adding the shrimp. This will give them a nice sear and enhance their flavor. Cheese Quality Matters: Use freshly grated Parmesan cheese instead of pre-grated versions for a creamier sauce. The flavor and texture are significantly better. Adjusting Sauce Consistency: If your sauce is too thick, add the reserved pasta water gradually. This not only thins the sauce but also helps it adhere to the pasta. {{image_2}} You can swap the fettuccine for other pasta types. Penne or linguine works well too. If you want a fun twist, try using whole wheat or zucchini noodles. For proteins, shrimp is great, but chicken or sausage also shines in this dish. You can use grilled chicken for a lighter option. Andouille sausage adds a nice Cajun kick. Add vegetables to boost flavor and nutrition. Spinach wilts nicely into the sauce. Bell peppers add sweetness and color. You can sauté them with the shrimp for a tasty mix. Experiment with spice blends for different heat levels. You can use smoked paprika for a smoky flavor. Or try cayenne pepper to kick it up a notch. Want a lighter version? Swap heavy cream for half-and-half or Greek yogurt. This keeps that creamy texture but cuts the fat. If you're gluten-free, choose gluten-free pasta. Many brands make great alternatives that taste good. Look for options made from brown rice or chickpeas for added nutrition. To keep your Cajun Shrimp Alfredo fresh, store it in the fridge. Use an airtight container. This will help keep moisture in and flavors strong. If stored well, it lasts for up to three days. Make sure to let it cool to room temperature before sealing. Reheating pasta can be tricky. You want to keep it tasty and creamy. I find the best way is to use the stove. Place the pasta in a skillet over low heat. Add a splash of chicken broth or water to help it heat evenly. Stir often to avoid sticking. This way, you keep the pasta smooth and creamy. You can also use the microwave. Just cover the dish and add a bit of liquid. Heat in short bursts, stirring in between. This keeps the sauce from drying out. Enjoy your delicious leftovers! You can use half-and-half or whole milk. They will make the sauce thinner. If you want a richer taste, try using cream cheese or sour cream. These options will also add some tang and creaminess. Yes, you can prep a few parts in advance. Cook the pasta and shrimp separately, then store them. Keep them in the fridge for up to two days. When you are ready, warm the shrimp and pasta in the sauce. This keeps everything fresh and tasty. The spice comes from the Cajun seasoning. It can vary by brand. Usually, it has a nice kick but is not too hot. If you like more heat, add extra seasoning or some hot sauce. Adjust it to your taste! Great sides include garlic bread or a fresh salad. You could also serve roasted vegetables or steamed broccoli. These sides balance the rich flavors of the dish and keep your meal light. This blog post covers how to make a tasty Cajun Shrimp Alfredo. You learned about the key ingredients and their roles in the dish. We reviewed clear step-by-step instructions, cooking tips, and creative variations to suit your taste. Try these ideas to make this dish your own. With simple swaps, you can adjust flavors or make it lighter. Enjoy making this creamy pasta dish, and share your results with others! Cooking can be fun, so dive in and savor every bite.

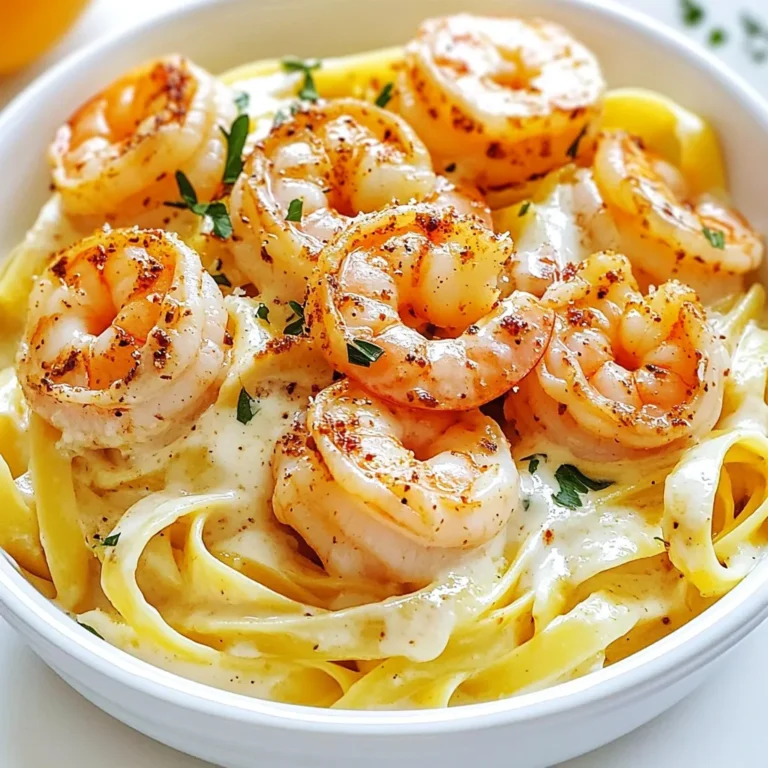
Cajun Shrimp Alfredo Simple and Flavorful Recipe

- Large shrimp (1 lb / 450g), peeled and deveined - Olive oil (3 tablespoons) - Garlic (4 cloves, minced) - Chili paste (1-2 tablespoons, adjust to spice preference) - Soy sauce (1 tablespoon) - Honey (1 teaspoon) - Green onions (2, sliced) - Bell pepper (1, red or yellow, sliced) - Cooked jasmine or brown rice (2 cups) - Salt and pepper to taste - Fresh cilantro for garnish Gather these ingredients before you start. Fresh shrimp is key for great flavor. The olive oil helps the shrimp cook well. Garlic adds a nice kick. Adjust chili paste to fit your spice level. Soy sauce and honey balance the heat with sweet and salty flavors. Green onions and bell peppers bring freshness and crunch. The rice serves as a hearty base for the dish. Cilantro adds a pop of color and taste, making your bowls look great. These ingredients are easy to find at any grocery store. Use high-quality items for the best results. First, you need to make the shrimp marinade. In a mixing bowl, combine these ingredients: - 1 lb large shrimp, peeled and deveined - 3 tablespoons olive oil - 4 cloves garlic, minced - 1-2 tablespoons chili paste (you can adjust this for spice) - 1 tablespoon soy sauce - 1 teaspoon honey - Salt and pepper to taste Mix everything well. Make sure the shrimp is coated evenly. This step adds great flavor. Next, heat a large skillet over medium-high heat. Once it’s hot, add the marinated shrimp. Cook them for about 2-3 minutes on one side. You will see them turn pink. This means they are cooking well. After 2-3 minutes, flip the shrimp over. This helps them cook evenly on both sides. Now, it’s time to add some color and crunch. Add sliced bell pepper to the skillet with the shrimp. Cook for another 2-3 minutes. You want the peppers to be tender-crisp. This adds a nice texture to your dish. Once everything is cooked, you can remove it from the heat. Enjoy the vibrant colors and wonderful smells. To ensure your shrimp are fully cooked, look for a pink color. Cook them until they curl into a C shape. This means they are done. For best results, heat your skillet over medium-high heat. This allows the shrimp to sear nicely without overcooking. Presentation matters! Serve your chili garlic shrimp in deep bowls. This keeps the rice and shrimp from spilling. Add lime wedges on the side for a fresh burst of flavor. Sprinkle extra green onions on top for a pop of color and taste. Cleaning up doesn't have to be hard. After cooking, let the skillet cool. Wipe it with a paper towel to remove excess oil. For easier cleanup, line your skillet with aluminum foil before cooking. This saves time and effort. {{image_2}} To change the spice level, you can adjust the chili paste. If you want more heat, add an extra tablespoon. For less heat, reduce to one tablespoon or even less. You can also try using sriracha or a milder hot sauce. These options give you more choices based on your taste. You can swap shrimp for other proteins like chicken or tofu. Chicken works well when cut into bite-sized pieces. Tofu can absorb the flavors well, especially if you use firm tofu. You can also mix in different vegetables. Try zucchini, snap peas, or broccoli for a fresh twist. They all add great crunch and flavor. For rice, jasmine and brown rice are both great options. Jasmine rice is soft and fragrant, while brown rice gives a nutty taste. You can also serve this dish with quinoa or cauliflower rice. Quinoa is high in protein and cauliflower rice is low in carbs. Both choices add unique flavors and textures to your bowl. To keep your chili garlic shrimp bowls fresh, store leftovers quickly. Place them in the fridge within two hours of cooking. Use airtight containers for best results. This prevents moisture loss and keeps flavors intact. I recommend glass containers as they are easy to clean and won’t absorb smells. To reheat your shrimp bowls, use a microwave or a skillet. For the microwave, place the bowl on a microwave-safe plate. Heat in short bursts of 30 seconds. Stir between bursts to heat evenly. If you prefer a skillet, add a splash of water to help steam. This keeps the shrimp tender. Avoid overcooking to prevent a rubbery texture. If you want to save shrimp bowls for later, freezing works well. First, store each component separately. Place the shrimp, rice, and veggies in airtight bags. Remove as much air as possible. For best quality, use them within three months. To thaw, move them to the fridge overnight. Reheat as mentioned above for a quick meal. To make the shrimp less spicy, adjust the chili paste. Start with one tablespoon instead of two. You can also swap chili paste for sweet chili sauce or use less garlic. Both options will help balance the heat. Always taste as you go, so you can find your perfect spice level. Yes, you can prep the shrimp and veggies ahead of time. Marinate the shrimp and store it in the fridge for up to two hours before cooking. Cooked shrimp bowls can last in the fridge for three days. Store the shrimp and rice separately to keep the rice fluffy. Pair your chili garlic shrimp bowls with a fresh salad or steamed veggies. A cucumber salad adds a nice crunch. You can also serve with lime wedges for a zesty kick. Other options include avocado slices or a side of garlic bread for extra flavor. Chili garlic shrimp bowls are both simple and packed with flavor. In this post, we covered key ingredients, from shrimp to fresh veggies. I shared easy steps to cook the shrimp just right and added tips for cleanup and serving. You can also tweak the spice level or swap proteins. Overall, this dish is a great choice for a quick meal that tastes amazing. I hope you feel inspired to try making these shrimp bowls at home! Enjoy your cooking adventure!

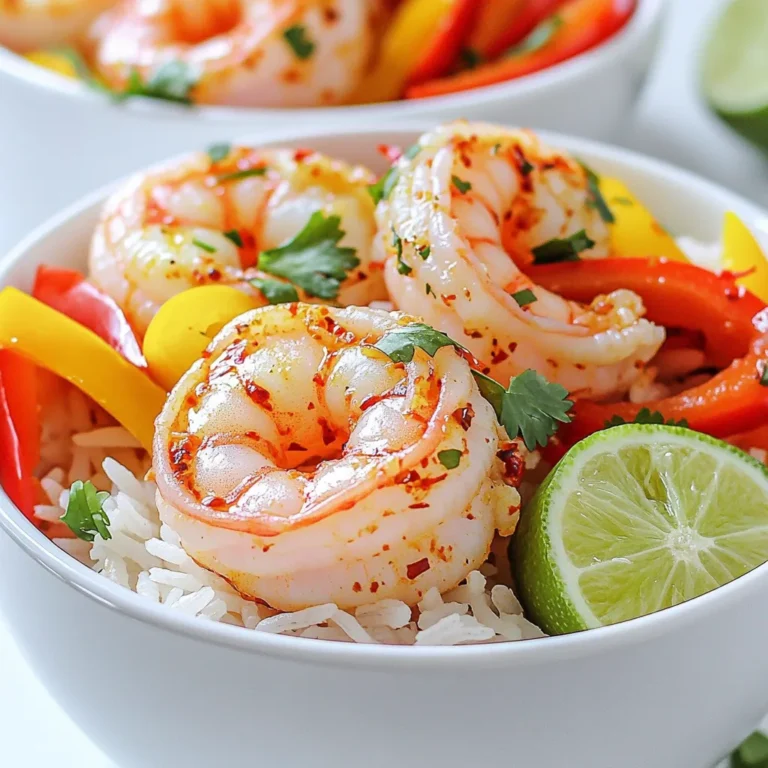
Chili Garlic Shrimp Bowls 15 Minutes Quick and Simple

- 2 lbs chicken wings - 1/4 cup honey - 1/4 cup soy sauce (low sodium) - 4 garlic cloves, minced - 1 tablespoon fresh ginger, grated - 1 tablespoon sesame oil - Salt and pepper to taste - 1 teaspoon red pepper flakes (optional, for heat) - 1 tablespoon sesame seeds (for garnish) - 2 green onions, sliced (for garnish) The chicken wings are the star of this dish. I always choose fresh wings for the best flavor. The marinade is a mix of honey, soy sauce, garlic, ginger, and sesame oil. This blend makes the wings sweet, salty, and rich in flavor. If you want a kick, add red pepper flakes. Just a teaspoon gives a nice heat. For garnish, I like to sprinkle sesame seeds and green onions. They make the dish look bright and fresh. These ingredients come together to create a delightful meal. The sweet and savory notes balance well, making each bite a joy. Enjoy the process of gathering these items and let your kitchen fill with amazing scents! First, you need to preheat your oven to 400°F (200°C). This step is key to getting crispy wings. A hot oven helps cook them evenly and nicely. Next, let’s make the marinade. In a large bowl, whisk together: - 1/4 cup honey - 1/4 cup soy sauce (low sodium) - 4 garlic cloves, minced - 1 tablespoon fresh ginger, grated - 1 tablespoon sesame oil - 1 teaspoon red pepper flakes (optional) Whisk until all ingredients blend well. This mix will give your wings a sweet and savory flavor. Now, it’s time to marinate the wings. Add 2 lbs of chicken wings to the bowl with the marinade. Toss them well until they are fully coated. For the best taste, let them marinate for at least 30 minutes. If you have time, you can let them sit for up to 2 hours in the fridge. This soaking helps the flavors sink in. When you are ready, prepare your baking sheet. Line a large sheet pan with parchment paper or aluminum foil. This makes cleanup easy. Place the marinated wings on the pan in a single layer. Make sure they are not crowded. Bake them in your preheated oven for 25-30 minutes. Flip the wings halfway through so they brown evenly. Check the internal temperature; it should reach 165°F (75°C) for safe eating. For extra flavor, glaze the wings. Brush on any remaining marinade during the last 5 minutes of baking. When they are done, take them out of the oven. Sprinkle with sesame seeds for a nice touch. Add sliced green onions on top for freshness. Now they are ready to serve! To make your wings burst with flavor, marination is key. You want to coat the wings well with the marinade. Mix honey, soy sauce, garlic, ginger, and sesame oil in a large bowl. Toss the wings in until they are fully covered. For the best taste, let them sit in the fridge for at least 30 minutes. If you can, aim for two hours. This helps the flavors soak in deep. Crispy wings are a must. To get that crunch, place your oven rack in the center. This allows hot air to circulate evenly. Bake the wings at 400°F (200°C) for 25-30 minutes. Flip them halfway through for even cooking. If you want extra crispiness, brush some marinade on during the last five minutes of baking. When it comes to serving, presentation matters. Arrange the wings on a big platter. Drizzle any extra marinade over them for a shiny look. Garnish with sesame seeds and sliced green onions. Pair your wings with celery sticks and a tasty dip like ranch or blue cheese. This makes your dish not only yummy but also a feast for the eyes! {{image_2}} You can change the taste of your honey garlic chicken wings by adding new spices or sauces. Try using different sauces like barbecue or teriyaki for a twist. A dash of smoked paprika can add a depth of flavor. If you want heat, add more red pepper flakes or some hot sauce. Experimenting with flavors makes your dish unique and fun! You can cook these wings in an air fryer or on a sheet pan. The air fryer makes the wings crispy in less time. Set it to 375°F and cook for about 25 minutes. Remember to shake the basket halfway through. If you prefer the oven, stick with the sheet pan method for easy cleanup. Both methods give you tasty wings, so choose what suits you best! Making your wings fit special diets is easy. For a gluten-free option, use tamari instead of soy sauce. This swap keeps the flavor while removing gluten. To lower sodium, choose low-sodium soy sauce and limit added salt. You can also skip the sesame oil if you want a lighter dish. Adjusting these ingredients helps everyone enjoy the meal. After you enjoy your honey garlic chicken wings, store any leftovers in an airtight container. You can keep them in the fridge for up to three days. If you want to store them longer, freeze the wings. Place them in a freezer-safe bag or container. They can last for about three months in the freezer. Just make sure to label the container with the date. To keep your wings crispy when reheating, I suggest using the oven. Preheat your oven to 375°F (190°C). Place the wings on a baking sheet lined with parchment paper. Bake for about 10-15 minutes, or until heated through. You can also use an air fryer. This method gives wings a nice crunch. Set the air fryer to 350°F (175°C) and heat for about 5-7 minutes. Avoid using the microwave, as it can make the wings soggy. Enjoy your tasty leftovers! I suggest marinating chicken wings for at least 30 minutes. For the best flavor, aim for 2 hours. This allows the honey and garlic to soak in well. Place the wings in the fridge during this time. The longer you marinate, the tastier they get. Yes, you can use other chicken parts! Thighs or drumsticks work great. Just keep in mind that cooking times may vary. Wings cook faster, while thighs and drumsticks need more time. Adjust your baking time to ensure they cook through. To get crispy wings, follow these tips: - Use a single layer on the sheet pan. - Don’t overcrowd the wings. - Flip them halfway through baking. - Bake at a high temperature of 400°F (200°C). - Brush with marinade in the last few minutes for extra crunch and flavor. These steps help create that perfect crispy texture you crave! In this blog post, we covered how to make delicious chicken wings from start to finish. You learned about the main and optional ingredients, how to prep the oven, and the steps to create a tasty marinade. We also discussed tips for marination and achieving crispiness, plus fun variations you can try. I hope you feel ready to make your wings perfect. Get experimenting and enjoy every bite!

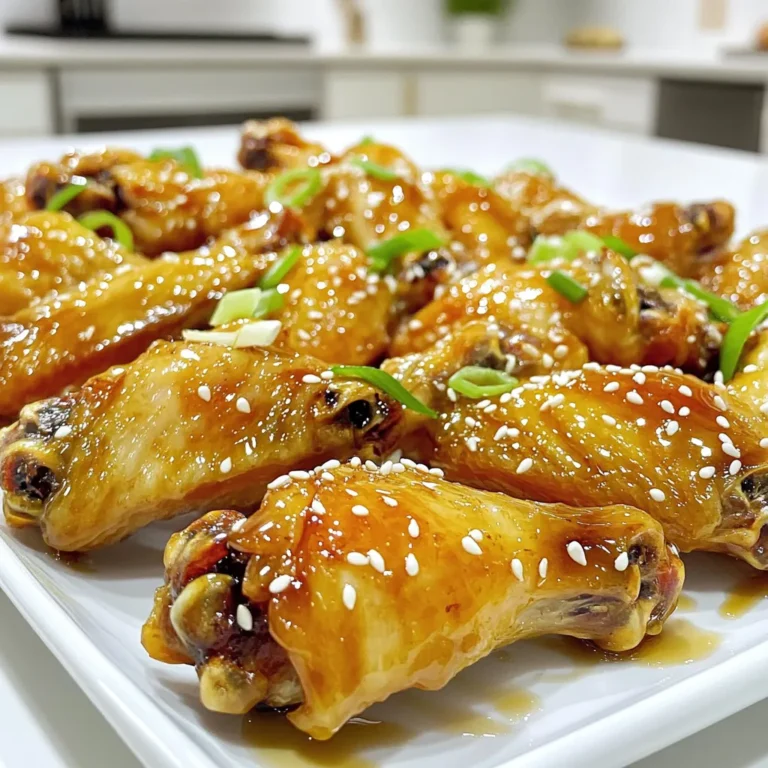
Honey Garlic Chicken Wings Sheet Pan Delightful Recipe

To make Garlic Roasted Fingerling Potatoes, you need a few key ingredients: - 1.5 lbs fingerling potatoes, halved lengthwise - 4 cloves garlic, minced - 3 tablespoons olive oil - 1 teaspoon fresh rosemary, chopped - 1 teaspoon fresh thyme, chopped - Salt and pepper to taste - Zest of 1 lemon These ingredients work together to create a tasty dish. Fingerling potatoes are small, smooth, and have a rich flavor. The garlic adds a strong aroma, while the herbs bring freshness. Olive oil helps in roasting and adds a nice taste. You can change the flavor with some optional seasonings. Here are a few ideas: - Paprika for a smoky touch - Parmesan cheese for a cheesy twist - Crushed red pepper for heat - Fresh basil for a different herb flavor These additions can make your potatoes unique. Feel free to play around with these flavors. You can create your own version of this dish! Garnishes add a visual pop and extra flavor. Here are some great options: - Fresh parsley for a bright green touch - Lemon wedges for added zest - Chopped chives for a mild onion flavor Adding a garnish can make your dish look fancy. It also enhances the taste. Don't skip this step when serving! Start by washing 1.5 pounds of fingerling potatoes. Rinse them under cold water. Next, cut each potato in half lengthwise. This helps them cook evenly. In a large mixing bowl, add the halved potatoes. Now, add 4 cloves of minced garlic. Pour in 3 tablespoons of olive oil. Then, sprinkle in 1 teaspoon of fresh rosemary and 1 teaspoon of fresh thyme. Don't forget to add salt and pepper to taste! Finally, add the zest of 1 lemon. Toss everything together until the potatoes are well coated. Preheat your oven to 425°F (220°C). Spread the coated potatoes on a baking sheet lined with parchment paper. Ensure they are in a single layer for even cooking. Roast them in the oven for about 25 to 30 minutes. Halfway through, stir the potatoes for even browning. They are done when golden brown and crispy. Once finished, take them out and let them cool slightly. Serve them on a platter and sprinkle with fresh parsley for a pop of color. Enjoy your tasty garlic roasted fingerling potatoes! To get crispy garlic roasted fingerling potatoes, start with dry potatoes. After washing, pat them dry with a towel. This helps them crisp up in the oven. Cut them in half lengthwise for even cooking. The more surface area, the crispier they will get. Use high heat, around 425°F (220°C), to roast them. Make sure to spread them out on the baking sheet. If they are too close, they will steam instead of roast. Stir them halfway through cooking to ensure even browning. You can mix up the flavors in this dish. For a spicy kick, add a pinch of red pepper flakes. If you love herbs, try using fresh thyme or dill. You can also swap rosemary for oregano. For a zingy twist, add lemon zest or a splash of balsamic vinegar. The key is to balance the flavors and keep it tasty. Experiment with your favorite flavors to make it your own. Using the right tools makes cooking easier. A large mixing bowl is great for tossing the potatoes. A good chef’s knife helps with cutting. A sturdy baking sheet lined with parchment paper saves cleanup time. A spatula is handy for flipping the potatoes. If you want extra crispiness, consider using a wire rack on your baking sheet. This allows air to flow around the potatoes, making them even crispier. {{image_2}} You can add fresh herbs to change the taste. Try using parsley, dill, or basil. Mix these herbs with minced garlic, olive oil, and your potatoes. This mix will bring a fresh flavor. Use about one tablespoon of each herb for a great taste. If you like heat, add some spice. Use red pepper flakes or cayenne pepper. Toss in about half a teaspoon with garlic, olive oil, and potatoes. This adds a nice kick to your dish. You can also serve it with a yogurt dip to cool it down. For a rich flavor, use butter and lemon. Melt three tablespoons of butter and mix it with garlic and lemon juice. Toss this mix with your potatoes before roasting. The butter will make the potatoes creamy and the lemon will brighten the taste. You can even add lemon zest for extra zing. After you enjoy your garlic roasted fingerling potatoes, store any leftovers. Place them in an airtight container. This keeps them fresh and tasty. They can last in the fridge for up to four days. Make sure they cool down to room temperature first. This helps avoid steam build-up, which can make them soggy. To reheat the potatoes, preheat your oven to 375°F (190°C). Spread the potatoes on a baking sheet. Heat for about 10-15 minutes. This will make them warm and crispy again. If you prefer the microwave, place them on a microwave-safe plate. Heat in short bursts of 30 seconds until warm. The oven is best for keeping the crispness. You can freeze leftover garlic roasted fingerling potatoes. Place them in a freezer-safe bag or container. Squeeze out the air before sealing. They can last in the freezer for up to three months. When you are ready to eat them, thaw in the fridge overnight. Reheat them as mentioned before for the best texture. Fingerling potatoes are small, elongated potatoes. They often have a creamy texture and a rich flavor. Their unique shape makes them fun to cook and eat. You can find them in various colors, like yellow, red, or purple. They cook quickly and roast well, making them perfect for many recipes. You can store roasted fingerling potatoes in the fridge for about 3 to 5 days. Make sure to keep them in an airtight container. If you want to keep them longer, consider freezing them. Frozen roasted potatoes can last for about 1 to 2 months. Just remember, they may lose some texture after freezing. Yes, you can use other types of potatoes. Yukon Gold or baby red potatoes work well. Just keep in mind that cooking times may vary. Cut larger potatoes into smaller pieces to ensure even roasting. The key is to pick potatoes that roast well and have great flavor. This blog post covered how to make garlic roasted fingerling potatoes. We explored key ingredients, optional seasonings, and tasty garnishes. I guided you through easy steps to prepare, mix, and roast your potatoes. You learned tips for crispy texture and variations for extra flavor. Finally, I shared how to store and reheat leftovers. Try these potatoes for your next meal. Enjoy their delicious taste and simple prep!

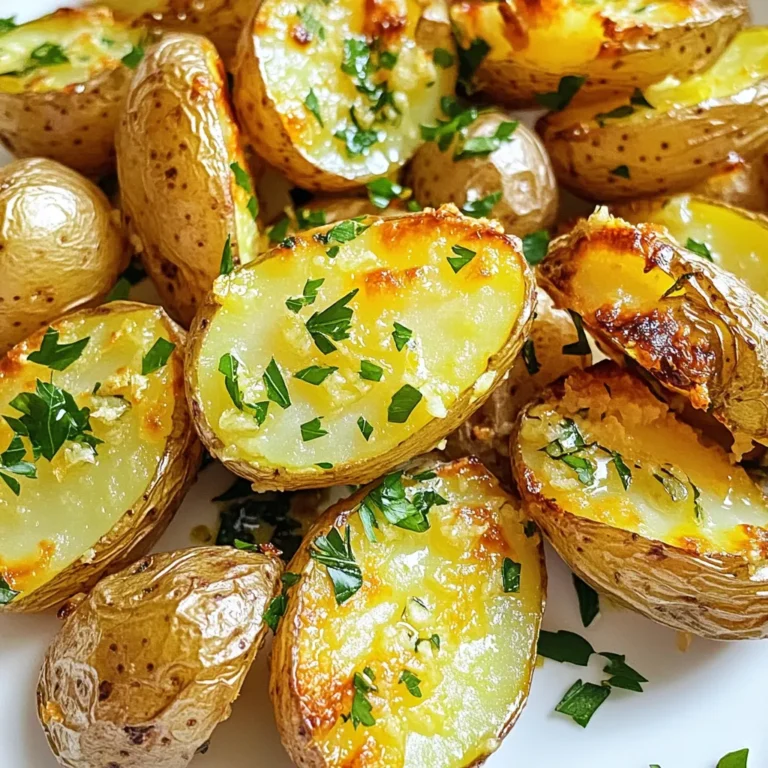
Garlic Roasted Fingerling Potatoes Simple and Tasty

- 1 cup pure pumpkin puree - 1/2 cup granulated sugar - 1/2 cup brown sugar, packed - 1/4 cup vegetable oil - 2 large eggs - 1 teaspoon vanilla extract The main ingredients bring the heart and soul to these muffins. Pumpkin puree gives them a rich flavor and moist texture. The sugars add sweetness and depth. The vegetable oil keeps the muffins soft and tender. Eggs help bind everything together, making them fluffy. Vanilla extract adds a warm, inviting aroma. - 1 1/2 cups all-purpose flour - 1 teaspoon baking powder - 1 teaspoon baking soda - 1 teaspoon ground cinnamon - 1/2 teaspoon ground nutmeg - 1/4 teaspoon ground ginger - 1/4 teaspoon salt The dry ingredients are key for structure. All-purpose flour forms the base. Baking powder and baking soda create lift, making them rise. The spices like cinnamon, nutmeg, and ginger give these muffins their fall flavor. Salt balances the sweetness and enhances the taste. - 1/2 cup chopped pecans - 1/4 cup cinnamon sugar Toppings add crunch and extra flavor. Chopped pecans give a nice texture and nutty taste. A sprinkle of cinnamon sugar on top creates a sweet crust. These toppings are optional but make a big difference in taste and presentation. First, preheat your oven to 350°F (175°C). This step is key. It ensures that your muffins bake evenly. Next, get your muffin tin ready. You can line it with paper liners or grease it with cooking spray. This helps the muffins come out easily. In a large bowl, combine the wet ingredients. Add 1 cup of pure pumpkin puree, 1/2 cup of granulated sugar, 1/2 cup of brown sugar, 1/4 cup of vegetable oil, 2 large eggs, and 1 teaspoon of vanilla extract. Mix everything well until it's smooth. In a separate bowl, whisk together your dry ingredients. Use 1 1/2 cups of all-purpose flour, 1 teaspoon of baking powder, 1 teaspoon of baking soda, 1 teaspoon of ground cinnamon, 1/2 teaspoon of ground nutmeg, 1/4 teaspoon of ground ginger, and 1/4 teaspoon of salt. Now, it's time to combine the wet and dry ingredients. Gradually mix the dry ingredients into the wet ones. Stir gently until just combined. Be careful not to overmix; this keeps your muffins light and fluffy. Finally, fold in 1/2 cup of chopped pecans, making sure they are evenly spread throughout the batter. Fill each muffin liner about 2/3 full with the batter. This allows room for the muffins to rise. Sprinkle a generous pinch of cinnamon sugar on top of each muffin. This gives them a sweet crust. Bake in your preheated oven for about 18-20 minutes. Check for doneness by inserting a toothpick into the center. If it comes out clean, they are ready. Let the muffins cool in the tin for 5 minutes before moving them to a wire rack to cool completely. Enjoy your delightful pumpkin pecan coffee cake muffins! - Avoid overmixing the batter. This keeps your muffins light and fluffy. Mix just until the dry ingredients blend in. If you see a few lumps, that’s okay! - Use fresh ingredients for the best flavor. Check your baking powder and spices to ensure they are still good. - Serve warm muffins with maple syrup. The sweet syrup pairs great with pumpkin flavor. - Add cream cheese frosting on top for a rich twist. Cream cheese brings a nice tang that balances the sweetness. - Garnish with additional pecans for added crunch. Just sprinkle them on top right before serving. - Use decorative muffin liners to make your treats pop. Fun colors or patterns make them look even more inviting. {{image_2}} To make your Pumpkin Pecan Coffee Cake Muffins gluten-free, you can swap the all-purpose flour with gluten-free flour. This change works well, but make sure to choose a blend that includes xanthan gum for better texture. You can also use almond flour or coconut flour, but these may need adjustments in moisture. If you want to change up the nuts, consider using walnuts or almonds. Both add a different crunch and flavor. Walnuts give a more earthy taste, while almonds add a mild, sweet note. Just chop them up and fold them into the batter like you would with pecans. To make your muffins even more exciting, try adding chocolate chips or dried fruits. Dark chocolate chips can add richness, while raisins or cranberries give a sweet and tangy twist. Just mix in about 1/2 cup of your chosen add-ins before baking. You can also experiment with spices to change the flavor. Adding a pinch of allspice or cardamom can elevate the muffin’s taste. Each spice brings a unique warmth, perfect for fall. Just remember, a little goes a long way! If you want mini muffins, adjust the baking time. Fill the mini muffin tins about halfway and bake them for about 12-15 minutes. Check for doneness with a toothpick. To turn this recipe into cupcakes, fill standard cupcake liners about 2/3 full. Bake for 20-25 minutes. Top with cream cheese frosting for a special touch. These cupcakes will impress at any gathering! To keep your pumpkin pecan coffee cake muffins fresh, store them in an airtight container. This method helps lock in moisture and flavor. You can keep them at room temperature for up to three days. If your home is warm, consider refrigerating them. Just remember to wrap each muffin in plastic wrap before placing them in the fridge. This keeps them from drying out. If you want to save muffins for later, freezing is a great option. Let the muffins cool completely, then wrap them tightly in plastic wrap. Place the wrapped muffins in a freezer-safe bag or container. They can last in the freezer for about three months. When you’re ready to enjoy them, simply take out a muffin and reheat it. You can do this in the microwave for about 15-20 seconds or bake it at 350°F (175°C) for 10 minutes. This will bring back their warm, fresh flavor. At room temperature, these muffins stay fresh for about three days. Always check for signs of spoilage. If you see mold, an odd smell, or if the muffins feel dry and hard, it’s best to toss them. Keeping an eye on these signs will help you enjoy your coffee cake muffins at their best. Yes, you can use canned pumpkin puree. It saves time and is easy to find. Canned pumpkin is often smoother than fresh. This helps your muffins stay moist. If using fresh pumpkin, cook and mash it first. Drain any excess water for best results. To make dairy-free muffins, substitute the eggs with flax eggs. Use 1 tablespoon of ground flaxseed mixed with 2.5 tablespoons of water for each egg. You can also replace the oil with dairy-free yogurt. For a richer taste, try coconut oil. Always check labels to ensure the products are dairy-free. Yes, frosting can make your muffins even more fun! Cream cheese frosting pairs well with pumpkin flavor. You can also use maple frosting for a sweet touch. If you prefer a lighter option, a simple glaze of powdered sugar and milk works great too. Try adding chopped pecans on top for crunch. If your muffins sink, it may be due to overmixing. Mixing too much can add air that collapses during baking. Another reason is underbaking. Make sure to check with a toothpick. If it comes out clean, your muffins are done. Finally, make sure your oven is at the right temperature. An oven thermometer can help with this. This blog covers how to make delicious pumpkin muffins. We explored the best ingredients, step-by-step instructions, and helpful baking tips. Don't forget about the fun variations you can try, like adding chocolate chips or nuts. Store your muffins properly to keep them fresh longer. Remember, baking is all about experimenting. So, enjoy mixing flavors and toppings. Your perfect pumpkin muffins await!

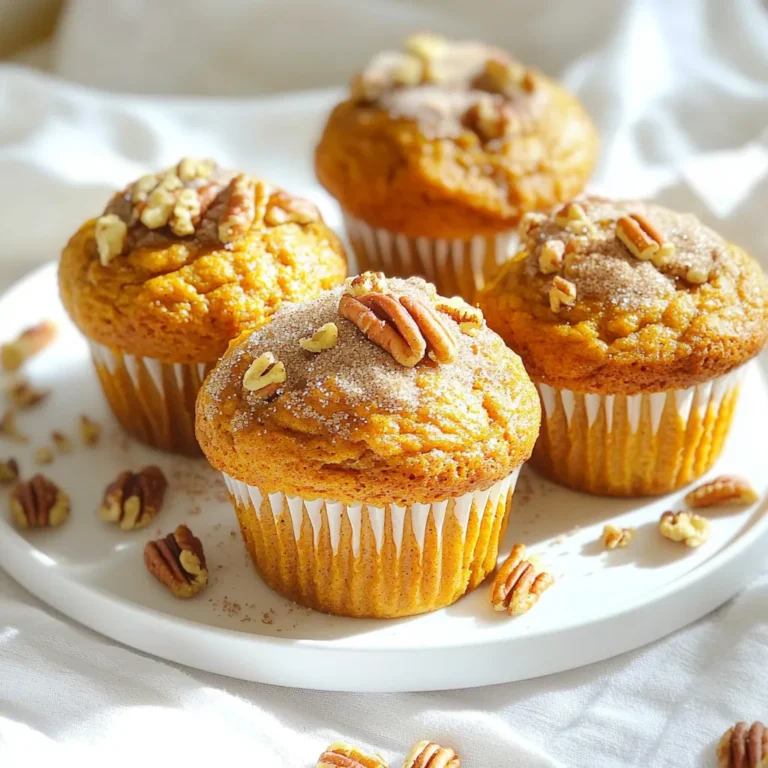
Pumpkin Pecan Coffee Cake Muffins Easy Fall Treat

- 2 lbs beef chuck roast - 1 cup BBQ sauce (your choice) - 1/2 cup beef broth - 1 medium onion, sliced - 4 cloves garlic, minced - 1 tablespoon brown sugar - 1 teaspoon smoked paprika - 1 teaspoon ground cumin - 1/2 teaspoon black pepper - Salt to taste - 4 hamburger rolls - Coleslaw (for topping, optional) When you look at this list, you might feel a bit excited. Each ingredient plays a big role in making your BBQ beef sandwiches shine. The beef chuck roast is the star. It becomes so tender when cooked low and slow. Use any BBQ sauce you love. It adds that sweet and tangy flavor we crave. Onions and garlic bring a nice aroma and taste. Brown sugar adds sweetness that balances the spices. Smoked paprika gives it a hint of smoky flavor. Ground cumin adds warmth. Salt and pepper help bring all these tastes together. Don't forget the hamburger rolls. They hold everything in place and give a nice crunch when toasted. If you want, add some coleslaw on top. It gives a cool, crunchy contrast to the warm beef. Enjoy cooking this simple dish delight! To start, you need to trim any excess fat from the beef chuck roast. This helps the meat cook better and keeps it tender. Next, season the roast with salt, black pepper, smoked paprika, and ground cumin. This gives the beef a rich flavor. Now, let's layer the onions and garlic in the slow cooker. Begin with the sliced onions at the bottom. Then, sprinkle the minced garlic on top. This will add a great aroma and depth to the dish as it cooks. In a bowl, mix your BBQ sauce, beef broth, and brown sugar. Stir it well to combine. Pour this mixture over the seasoned beef in the slow cooker. This sauce will keep the beef moist and flavorful. Set your slow cooker on low for about 8 hours. If you are short on time, you can set it on high for about 4 hours. The beef is ready when it is fork-tender. This means it should easily shred apart. Once the beef is done, carefully take it out of the slow cooker. Use two forks to shred the beef into bite-sized pieces. Then, mix the shredded beef back into the sauce in the slow cooker. This helps the meat soak up all that delicious flavor. Next, toast your hamburger rolls lightly. This adds a nice crunch to your sandwiches. Now, it's time to assemble! Place a generous amount of BBQ beef on the bottom half of the roll. If you like, add coleslaw for some extra crunch and flavor. Finally, put the top half of the roll on. Enjoy your BBQ beef sandwich! For the best BBQ sauce, choose one that you love. I like a sauce that blends sweet and tangy notes. You can also mix different sauces for a unique taste. To adjust seasoning, taste as you go. Add a pinch of salt if needed. A dash of smoked paprika can boost the flavor too. Many factors can change cooking time. The size of the beef and your slow cooker affect how long it cooks. Always check the meat for tenderness. The beef should pull apart easily with a fork. If it’s still tough, let it cook longer. Serve your sandwiches on a nice platter. Stack the beef high for a mouthwatering look. Add some coleslaw on top for crunch and color. For sides, try chips or a fresh salad. They pair well with BBQ beef and add a nice touch to the meal. {{image_2}} You can change up the meat to suit your taste. For example, brisket or pulled pork can work great. Each meat gives a different flavor and texture. You might also want to make your own BBQ sauce. Homemade sauce lets you control the sweetness and spice. Store-bought sauce is quick and easy if you’re short on time. Want to spice things up? You can add peppers or jalapeños. These will give your BBQ beef a nice kick. Using other spices can also change the taste. Consider adding chili powder, onion powder, or even a hint of cinnamon for a unique twist. Each spice adds depth and makes the dish your own. BBQ beef sandwiches are great, but you can get creative. Make sliders for parties. They’re easy to grab and share. Another fun idea is to serve the beef as a burrito or wrap. Just add some rice, beans, and veggies. It’s a fun twist and perfect for a quick meal. To keep your BBQ beef fresh, store it in an airtight container. Make sure to let it cool down before sealing. This method helps lock in flavor and moisture. Your BBQ beef will last up to four days in the fridge. If you want to save some for later, freezing works great. First, let the beef cool completely. Then, place it in a freezer-safe bag. Try to remove as much air as you can before sealing. This method helps prevent freezer burn. It can last for up to three months in the freezer. To thaw, just move it to the fridge overnight. For reheating, use a microwave or stove until hot. Leftover BBQ beef is super versatile. You can use it in tacos, chili, or pasta. It also makes a tasty topping for baked potatoes. If you want a fun twist, try making BBQ beef sliders. Just place the beef on small rolls and add your favorite toppings. You can even create a BBQ beef bowl with rice and veggies. The options are endless! Yes, you can use other cuts of beef. Some good options include: - Brisket - Round roast - Flank steak Each cut has its own flavor. Chuck roast is great for slow cooking. It becomes tender and juicy. Brisket is rich and has a nice fat content. Round roast is leaner but still good. Flank steak cooks fast but can be tasty. Just adjust your cooking time based on the cut you choose. To add some heat to your BBQ beef, try these tips: - Add jalapeño slices or diced hot peppers. - Use spicy BBQ sauce. - Mix in cayenne pepper or hot sauce. Start with a small amount of heat. You can always add more. Remember, everyone’s spice level is different. Taste as you go to find what you like best. Yes, you can cook BBQ beef on the stovetop. Here’s how to do it: 1. Start by browning the beef in a large pot over medium heat. 2. Once browned, remove the beef and set it aside. 3. Sauté the onions and garlic in the same pot until soft. 4. Return the beef to the pot and add the BBQ sauce mixture. 5. Cover and simmer on low heat for about 2-3 hours. The beef will still become tender and soak up the flavors. Just check it often to avoid burning. This guide covered everything you need to make delicious BBQ beef sandwiches. We explored top ingredients, step-by-step cooking, and creative serving ideas. You can mix flavors by swapping meats or adding spices. Remember, the right BBQ sauce makes a big difference. Store leftovers properly so you can enjoy them later. Feel free to get creative with your leftovers for new dishes. With these tips, you’ll impress everyone with tasty BBQ beef sandwiches. Enjoy your cooking adventure!

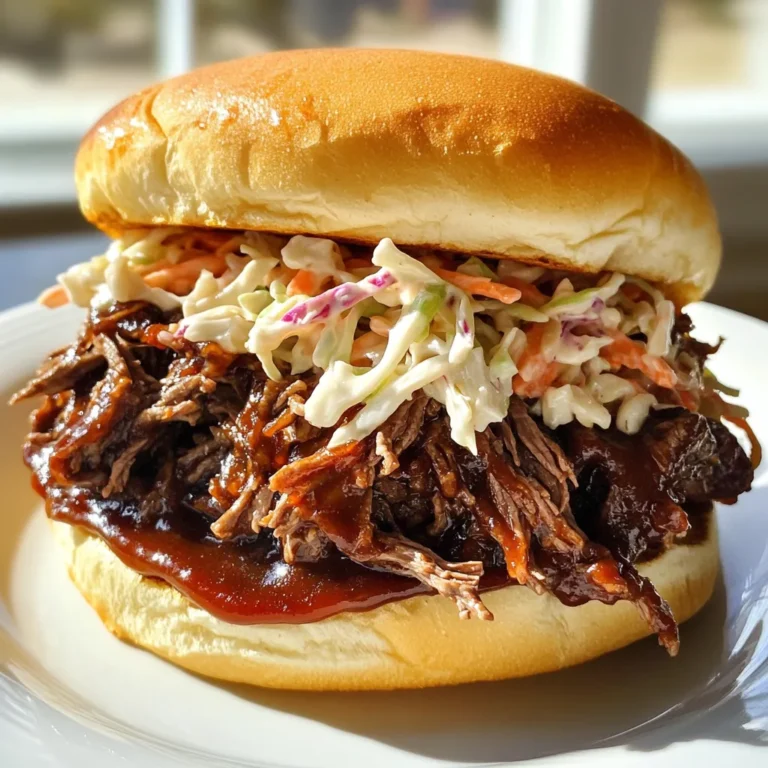
BBQ Beef Sandwiches Slow Cooker Simple Dish Delight

- Chicken and Marinade Components - 1.5 lbs chicken breast, cut into 1-inch cubes - 3 tablespoons olive oil - Zest and juice of 2 lemons - 4 cloves garlic, minced - 2 teaspoons dried oregano - 2 teaspoons dried thyme - 1 teaspoon smoked paprika - Salt and pepper to taste - Vegetables for Kebabs - 1 red bell pepper, cut into 1-inch pieces - 1 green bell pepper, cut into 1-inch pieces - 1 red onion, cut into quarters - Herbs and Spices - Dried oregano and thyme add depth - Smoked paprika gives a nice smoky flavor - Fresh herbs work too, if you prefer Gather these ingredients before you start. They make a big difference in flavor. The chicken, marinated well with lemon and spices, will be juicy and tender. The veggies add color and crunch to your kebabs. You can use fresh herbs for more taste. {{ingredient_image_1}} To start, I gather my ingredients. I need olive oil, lemon zest, lemon juice, minced garlic, oregano, thyme, smoked paprika, salt, and pepper. I place these in a large bowl. Then, I whisk them together until they blend well. This mix becomes my marinade. Next, I add the chicken breast cubes to the bowl. I make sure every piece is coated in the marinade. It’s fun to mix them up! After that, I cover the bowl and place it in the fridge. I let the chicken marinate for at least one hour. For even more flavor, I sometimes marinate it overnight. While my chicken marinates, I prepare the skewers. I choose either metal or wooden skewers. If I use wooden ones, I soak them in water for about 30 minutes. This step keeps them from burning on the grill. Now it’s time to assemble! I take the marinated chicken, red bell pepper, green bell pepper, and red onion. I thread them onto the skewers, alternating the ingredients. This not only looks great but also adds flavor in every bite. When I'm ready to grill, I preheat my grill to medium-high heat. It’s important to get it hot. I place the skewers on the grill carefully. I cook them for about 10 to 15 minutes. I turn them often to ensure they cook evenly. To check for doneness, I use a meat thermometer. The chicken should reach an internal temperature of 165°F. Once done, I remove them from the grill. I let them rest for a few minutes before serving. This helps keep them juicy and flavorful. Marinade Variations You can change the marinade for new flavors. Try using lime juice instead of lemon. Add fresh herbs like basil or cilantro for a twist. For a spicy kick, mix in some chili powder or red pepper flakes. This makes each meal fun and unique. Cooking Temperature Advice Grill the kebabs over medium-high heat for the best result. This helps the chicken cook evenly and get nice grill marks. Use a meat thermometer to check the chicken's internal temperature. It should reach 165°F for safety. If the heat is too low, the chicken may dry out. If too high, it could burn outside before cooking inside. Complementary Sides Serve these kebabs with refreshing sides. A simple green salad with tomatoes and cucumbers works well. You can also pair them with rice or quinoa for a filling meal. Hummus or tzatziki sauce makes a great dip, adding creamy flavor. Presentation Ideas for Serving Make your dish visually appealing! Place the kebabs on a large platter. Add fresh herbs and lemon wedges around them for color. This not only looks nice but adds a burst of flavor when served. Pro Tips Marinate Longer for Flavor: For the best flavor, allow the chicken to marinate overnight. This lets the herbs and lemon penetrate the meat, resulting in a more flavorful dish. Use a Meat Thermometer: To ensure your chicken is perfectly cooked, use a meat thermometer to check that the internal temperature reaches 165°F. This prevents undercooking and ensures food safety. Alternate Ingredients Smartly: When threading the kebabs, alternate between chicken, bell peppers, and onion. This not only enhances the presentation but also allows the flavors to meld together during grilling. Rest Before Serving: After grilling, let the kebabs rest for a few minutes. This allows the juices to redistribute throughout the chicken, keeping it moist and tender when served. {{image_2}} Substitutes for Chicken You can swap chicken with turkey or pork. Both work well with the marinade. You should cut the meat into cubes like the chicken. Turkey is leaner, while pork adds a different taste. You can follow the same grilling steps for these meats. Vegetarian Alternatives For a veggie-friendly option, use tofu or tempeh. Cut them into cubes and marinate just like chicken. You can also use mushrooms or zucchini for a nice texture. These options grill well and soak up the lemon flavor. Alternative Herbs and Spices If you want to change the taste, try different herbs. Basil, cilantro, or rosemary can all add a twist. Each herb gives a unique flavor to the dish. You can mix and match to find your favorite. Adding Heat: Spicy Variants To make it spicy, add red pepper flakes or cayenne pepper to the marinade. Start with a little and taste it. You can always add more heat. This makes the dish exciting and delicious for those who like fire in their food. After enjoying your Lemon Herb Grilled Chicken Kebabs, you might have some left. To store them, let the kebabs cool down first. Once cool, place them in an airtight container. This helps keep them fresh. You can store them in the refrigerator for up to three days. If you want to keep them longer, consider freezing. You can freeze your kebabs successfully. First, wrap each kebab individually in plastic wrap. Then, place them in a freezer-safe bag or container. Make sure to remove as much air as possible. This prevents freezer burn. You can freeze the kebabs for up to three months. Thawing Tips To thaw your frozen kebabs, move them to the fridge overnight. This slow thaw keeps them safe and tasty. If you need them quicker, you can use the microwave. Just remember to cook them right after thawing to keep them safe. Enjoy your meal even after storing! You should marinate the chicken for at least 1 hour. For even more taste, let it sit overnight. This allows the chicken to soak up all the lemon and herb flavors. The longer you marinate, the more tender and flavorful your chicken will be. Yes, you can prepare these kebabs ahead of time. You can marinate the chicken the night before and assemble the skewers in advance. Just keep them in the fridge until you are ready to grill. This saves time on busy days and makes it easy to serve a quick meal. To reheat grilled kebabs, place them in a preheated oven at 350°F for about 10-15 minutes. You can also use a microwave, but this may make them less crispy. If you have time, reheating on the grill for a few minutes adds a nice char and keeps the flavors fresh. - Additional Common Questions on Grilling and Ingredients - Always check your chicken's internal temperature. It should reach 165°F for safe eating. - If you want to add veggies, zucchini or mushrooms work great too. - Soaking wooden skewers prevents them from burning during grilling. You learned how to make tasty chicken kebabs from scratch. We covered the key ingredients and easy steps, from marinating to grilling. I shared tips for perfect results and fun ways to serve. You can also try different proteins and flavors or store leftovers properly. Remember, kebabs are versatile and fun. With practice, you will impress friends and family with your grilling skills. Enjoy experimenting and creating your own unique kebabs!

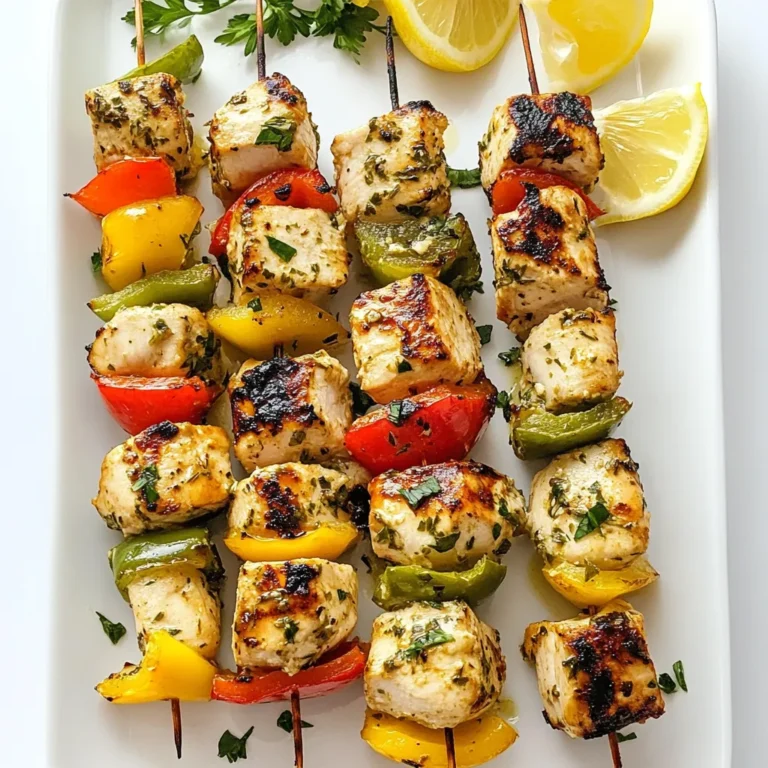
Lemon Herb Grilled Chicken Kebabs Flavorful Meal Idea

To make Fiesta Taco Salad Cups, gather these key ingredients: - 1 lb ground turkey or beef - 1 packet taco seasoning (or homemade seasoning) - 1 cup canned black beans, rinsed and drained - 1 cup corn kernels (fresh, frozen, or canned) - 1 cup cherry tomatoes, halved - 1 avocado, diced - 1 cup shredded lettuce (romaine or iceberg) - ½ cup shredded cheese (cheddar or a mix) - ¼ cup sour cream or Greek yogurt - 1 tablespoon lime juice - 12 small taco shells or tortilla cups - Fresh cilantro, chopped (for garnish) - Salt and pepper to taste Using these ingredients gives your taco cups great flavor and texture. The ground turkey or beef serves as the base, while the beans add protein. The corn and tomatoes bring sweetness and color. Don't forget the avocado for creaminess! You can use store-bought taco seasoning or make your own. Store-bought seasoning is quick and easy. Just follow the packet's instructions. Homemade seasoning allows you to control the spices. Mix these spices for a great flavor: - 1 tablespoon chili powder - 1 teaspoon cumin - 1 teaspoon garlic powder - 1 teaspoon onion powder - ½ teaspoon paprika - ½ teaspoon salt - ¼ teaspoon black pepper With homemade seasoning, you can adjust the heat or flavor to your liking. Taste as you go! Garnishes add a fresh touch to your taco cups. Here are my favorites: - Fresh cilantro, chopped - Lime wedges - Sliced jalapeños for heat - Extra shredded cheese - Diced red onions These garnishes not only look great but also enhance the flavor. Try different combinations to find your favorite! {{ingredient_image_1}} First, heat a large skillet over medium heat. Add the ground turkey or beef to the pan. Cook for about 7 to 10 minutes, stirring often. You want it to brown nicely. Make sure there is no pink left in the meat. After cooking, drain any extra fat from the pan. Next, add the taco seasoning to the meat. If you want, you can use a homemade mix. Pour in 2 to 3 tablespoons of water. Stir everything well. Let it simmer for about 5 minutes. This helps the meat soak up all those great flavors. Season with salt and pepper to taste. Set the meat aside when done. While the meat simmers, it’s time to prepare the toppings. In a bowl, combine the diced avocado, halved cherry tomatoes, corn, and black beans. Drizzle with lime juice. This adds a nice zing. Sprinkle a pinch of salt for taste. Gently toss the mixture to combine. Be careful not to mash the avocado. You want those pretty chunks to stay whole. Set this bowl aside for later. Now comes the fun part: assembling the taco salad cups! Grab your taco shells or tortilla cups. Start by filling each cup with a generous spoonful of the seasoned meat. Make sure it’s filled nicely. On top of the meat, add a spoonful of the avocado-corn-tomato mixture. Then, layer some shredded lettuce. Finish with a sprinkle of shredded cheese. For a creamy touch, add a dollop of sour cream or Greek yogurt. Top everything off with fresh chopped cilantro for a burst of color. Arrange the taco cups on a large platter. You can also serve lime wedges on the side for extra zest. Enjoy your colorful fiesta! When you cook meat, start with a hot skillet. This helps brown the meat well. I like to use ground turkey or beef. Brown it for about 7-10 minutes. Make sure it's fully cooked. Drain any fat to keep it lean. After that, add taco seasoning. A splash of water helps it mix well. Let it simmer for five minutes. This makes the meat juicy and full of flavor. To dice an avocado, first cut it in half. Remove the pit by carefully tapping a knife into it. Twist to pull it out. Now, scoop the flesh into a bowl. Cut it into small squares while still in the skin. Use a spoon to scoop out the pieces. This method keeps your avocado neat and fresh. For parties, arrange the taco cups on a big platter. This makes them easy to grab. You can add lime wedges for an extra zest. Guests love to squeeze lime on top! Also, consider setting out extra toppings. Things like salsa, jalapeños, or extra cheese can make it fun. This way, everyone can customize their own cup. Pro Tips Choose Lean Meat: Opt for lean ground turkey or beef to keep your taco cups healthier without sacrificing flavor. Customize Your Toppings: Feel free to add other toppings like jalapeños, olives, or diced bell peppers to suit your taste. Make Ahead: Prepare the meat mixture and toppings ahead of time to save time during assembly when serving guests. Vibrant Presentation: Use a variety of colored vegetables for garnish to make your taco salad cups visually appealing. {{image_2}} You can easily make this dish vegetarian or vegan. Replace the ground turkey or beef with cooked lentils or black beans. This keeps the protein but makes it plant-based. Use vegan cheese or skip it altogether. For the sour cream, opt for cashew cream or a dairy-free yogurt. Your friends will love the taste just as much! If you want a different protein, try cooked chicken or tofu. For chicken, shred cooked rotisserie chicken for ease. If you choose tofu, press it to remove extra water, then cube and sauté it. Add taco seasoning to boost the flavor. These swaps keep the meal fun and fresh. You can elevate your taco cups with different dressings and sauces. A zesty lime vinaigrette adds a bright kick. You can also use salsa or guacamole for a rich flavor. For a creamy touch, try ranch dressing or a spicy mayo. Each option brings its own twist to the dish! To store leftover salad cups, keep them in an airtight container. Place a paper towel inside to absorb moisture. This keeps the shells crisp. Store in the fridge for up to three days. Avoid stacking the cups to prevent them from getting soggy. If you want to reheat the salad cups, take out the meat mixture. Warm it in a skillet over medium heat. Stir occasionally until hot. This usually takes about 5 minutes. You can warm the taco shells in the oven for a few minutes too. Just keep an eye on them so they don’t burn. You can prep many parts ahead of time. Cook the meat and store it in the fridge. Chop the veggies and keep them in separate containers. This way, you can quickly assemble the cups later. If you want to make the taco shells crispy, bake them right before serving. Making things easy makes cooking fun! Yes, you can make Fiesta Taco Salad Cups ahead of time. Prepare the meat and toppings separately. Store them in the fridge in airtight containers. When ready to serve, fill the taco cups and enjoy. This method saves time, especially for parties or busy days. You can add many fun toppings to your taco cups. Here are some ideas: - Sliced jalapeños for heat - Chopped green onions for crunch - Black olives for a briny taste - Salsa for extra flavor - Guacamole for creaminess Feel free to mix and match your favorites! Making taco seasoning from scratch is easy and fun. You will need these simple spices: - 1 tablespoon chili powder - 1 teaspoon cumin - 1 teaspoon garlic powder - 1 teaspoon onion powder - 1 teaspoon paprika - 1 teaspoon oregano - Salt and pepper to taste Mix all the spices in a bowl. Use this seasoning for your meat when cooking. Adjust the amounts to suit your taste! Fiesta Taco Salad Cups are fun and easy to make. We covered main ingredients and seasoning options. I shared tips for cooking meat and dicing avocados. You can customize with veggie options or alternative proteins. Remember, these cups are great for parties and easy to prep ahead. Store leftovers properly to enjoy later. With these ideas, you'll impress your friends and family. Enjoy making and sharing your delicious Fiesta Taco Salad Cups!

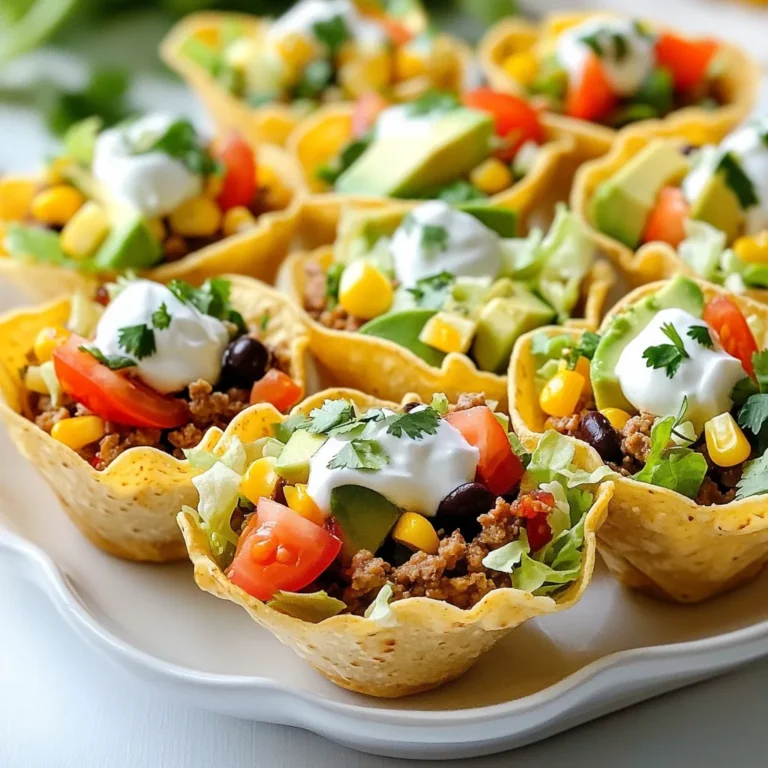
Fiesta Taco Salad Cups Flavorful and Fun Recipe

- 1 cup orzo pasta - 2 tablespoons olive oil - 1 small onion, finely chopped - 3 cloves garlic, minced - 1 can (14.5 oz) diced tomatoes, undrained - 1 cup vegetable broth - 1/2 cup heavy cream - 1 cup fresh basil leaves, chopped - Salt and pepper to taste - Grated Parmesan cheese for garnish This dish is simple yet full of flavor. You will love how the orzo pasta cooks in the broth and tomato sauce. The creamy texture from the heavy cream makes it rich and satisfying. The fresh basil adds a bright taste that pairs well with the tomatoes. If you want to change things up, there are good options. You can use gluten-free pasta if you need a gluten-free meal. For a vegan version, swap the heavy cream for coconut cream or cashew cream. Nutritional yeast can replace the Parmesan cheese for a cheesy flavor without dairy. You can also use fresh tomatoes if you prefer, just chop about two cups. Each serving has about 320 calories. You get around 12g of protein and 15g of fat, mostly from the cream and olive oil. The dish also has about 40g of carbs, making it a hearty meal. Plus, it includes vitamins from the basil and tomatoes, adding some health benefits. This dish is not just tasty; it also packs some nutrition. 1. Start by heating the olive oil in a large saucepan over medium heat. 2. Once hot, add the finely chopped onion. Sauté it until soft, about 3-4 minutes. 3. Next, stir in the minced garlic. Sauté for 1-2 minutes until it smells good. 4. Add the orzo pasta to the pan. Stir well to coat it in the oil. Toast the orzo for about 2 minutes, stirring often. 5. Pour in the diced tomatoes with their juices and the vegetable broth. Bring this mixture to a boil. 6. When it boils, reduce the heat to low and cover the pan. Let it simmer for 10-12 minutes. Stir occasionally until the orzo cooks and most of the liquid is gone. 7. Take the pan off the heat. Stir in the heavy cream and chopped basil. Add salt and pepper to taste. Sautéing helps build flavor in your dish. Always keep the heat moderate so the onions cook evenly. Stir often to prevent burning. When simmering, keep the lid on. This traps steam and helps the orzo cook well. Stir occasionally to keep the pasta from sticking. To serve, ladle the creamy orzo into bowls. Garnish with grated Parmesan cheese on top. Add a few fresh basil leaves for a pop of color. Serve warm for the best taste. This dish looks great and tastes even better! Many cooks struggle with overcooking the orzo. This creates a mushy texture. To avoid this, check the orzo a minute early. You want it al dente, not soft. Also, don't skip the sautéing step. This helps build flavor. If you forget to toast the orzo, it will lack that nice, nutty taste. Want to kick up the flavor? Add a pinch of red pepper flakes for heat. You can also stir in a splash of balsamic vinegar. This adds a sweet and tangy note. Fresh herbs work wonders, too. Try adding parsley or thyme alongside the basil. You can even toss in a handful of spinach for extra nutrients. You need a large saucepan for this dish. A good wooden spoon makes stirring easier. I also recommend a sharp knife for chopping. It saves time and effort. Lastly, use a measuring cup for the orzo. This ensures you get the right amount. These tools will make your cooking smoother and more enjoyable. {{image_2}} You can make this creamy tomato basil orzo even more exciting. Try adding some cooked chicken or shrimp for protein. You can also toss in some spinach or kale for extra greens. If you like a bit of heat, add red pepper flakes. Mushrooms can add a nice earthy flavor too. For a twist, consider adding olives or sun-dried tomatoes. These add-ins will give your dish a new flavor profile. If you need a gluten-free dish, swap out orzo for gluten-free pasta. Quinoa or rice can also work well. To make it dairy-free, replace heavy cream with coconut milk or a nut-based cream. Nutritional yeast can give a cheesy flavor without dairy. Just make sure to check all labels to ensure they fit your dietary needs. These adjustments keep the dish tasty while fitting your lifestyle. This orzo dish pairs well with many sides. A simple green salad can balance the creaminess. You might also serve it with garlic bread for a comforting meal. Roasted vegetables are another great choice to add some crunch. For a lighter option, try a fresh tomato salad. Each of these sides complements the flavors of the creamy tomato basil orzo beautifully. Store your creamy tomato basil orzo in an airtight container. Make sure it cools down to room temperature first. This helps keep the dish fresh. Place the container in the fridge. It will stay good for up to three days. Reheat individual portions in the microwave or on the stove. Add a splash of broth if it seems dry. To freeze this dish, let it cool completely. Then, transfer it to a freezer-safe container. Seal it tightly to prevent freezer burn. It can last up to three months in the freezer. When you're ready to eat it, thaw it overnight in the fridge. Reheat on the stove, adding a bit of cream or broth for creaminess. Creamy tomato basil orzo stays fresh for about three days in the refrigerator. If you freeze it, it can last for three months. After this time, the flavors may fade, and the texture may change. For the best taste, enjoy it within these time frames. Yes, you can. While orzo gives a nice texture, other pastas work well too. You can use: - Arborio rice for a risotto-style dish. - Ditalini for a bite-sized option. - Couscous for a fun twist. Each type will change the dish slightly, but they will still taste great! To make this meal vegetarian, just use vegetable broth. Here are some tips: - Skip the Parmesan cheese or use a vegetarian alternative. - Add more veggies like spinach or mushrooms. - Use plant-based cream for richness. These swaps keep the dish yummy and meat-free! If you need a substitute for heavy cream, here are some good options: - Coconut milk for a rich and creamy flavor. - Cashew cream for a nutty taste. - Silken tofu blended until smooth for a dairy-free option. These alternatives keep your dish creamy and delicious! This blog post covered ingredients, cooking steps, and useful tips for your dish. I shared substitutions and nutritional info to help you make smart choices. You learned key tips to avoid mistakes and enhance flavor. Finally, we discussed how to store and serve your meal. In closing, use these insights to create a dish that delights your taste buds. Enjoy your cooking journey!

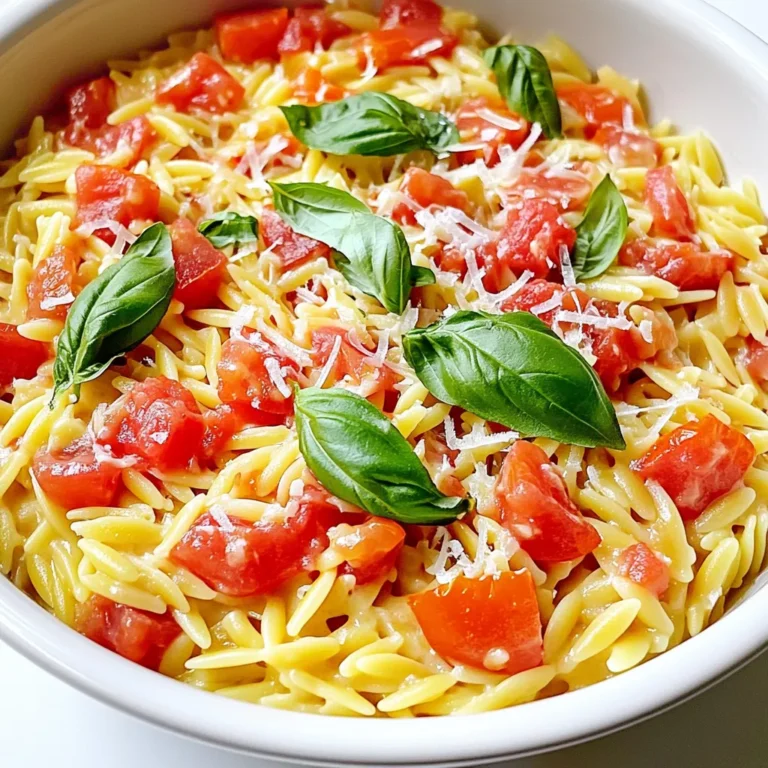
Creamy Tomato Basil Orzo Perfect Weeknight Meal

To make these tasty treats, you need some key items. Here’s what you’ll gather: - 1 cup pumpkin puree - 1 cup granulated sugar - 1/2 cup brown sugar, packed - 1/2 cup vegetable oil - 2 large eggs - 2 cups all-purpose flour - 1 teaspoon baking soda - 1 teaspoon baking powder - 1 teaspoon ground cinnamon - 1/2 teaspoon ground ginger - 1/2 teaspoon ground nutmeg - 1/4 teaspoon salt - 1 teaspoon vanilla extract These ingredients create a moist and flavorful cookie base. The pumpkin gives it a nice texture and taste for fall. The filling makes these whoopie pies special. Here’s what you will need: - 1/2 cup cream cheese, softened - 1/4 cup butter, softened - 2 cups powdered sugar - 1 teaspoon vanilla extract This filling is creamy and sweet. It adds a rich flavor that balances the spices in the cookies. You can change your whoopie pies to fit your taste. Here are some fun ideas: - Add chocolate chips for a sweet surprise. - Mix in chopped nuts for a crunch. - Use maple extract instead of vanilla for a unique flavor. - Try adding a pinch of cloves for extra spice. These options let you create a version that is perfect for you and your guests. Start by preheating your oven to 350°F (175°C). Line two baking sheets with parchment paper. This helps the whoopie pies bake evenly. In a large bowl, mix the pumpkin puree, granulated sugar, brown sugar, and vegetable oil. Stir until everything combines well. Next, add the eggs one at a time, then pour in the vanilla extract. Mix until your batter looks smooth. In another bowl, whisk the flour, baking soda, baking powder, cinnamon, ginger, nutmeg, and salt together. This adds warmth and spice to your whoopie pies. Slowly add the dry mix to the wet ingredients. Stir gently until just combined. Be careful not to overmix. This keeps your pies soft and fluffy. Now, use a tablespoon or cookie scoop to drop batter onto your prepared sheets. Space them about 2 inches apart. Bake for 12 to 15 minutes. Check for firm edges and a springy top. Let them cool on the sheets for 5 minutes. Then transfer them to wire racks to cool completely. This step is important, as hot cookies can melt the filling. While your cookies cool, make the filling. In a bowl, beat the softened cream cheese and butter together until smooth. Gradually add the powdered sugar and vanilla extract. Mix until creamy and well combined. This filling adds a rich, sweet contrast to the spiced cookies. Once your cookies are cool, spread a generous amount of filling on the flat side of one cookie. Top it with another cookie to create a sandwich. Enjoy your delightful pumpkin whoopie pies! To make great pumpkin whoopie pies, follow these tips: - Use fresh pumpkin puree. This makes a big difference in flavor. - Measure your flour correctly. Use the spoon and level method. It helps avoid dry pies. - Room temperature ingredients are key. Mix well for a smooth batter. - Don’t skip the spices. They add warmth and depth to your pies. When baking, watch out for these errors: - Overmixing the batter. This can make your pies tough. Mix just until combined. - Not cooling the cookies. If warm, the filling will melt. Let them cool completely. - Incorrect oven temperature. Use an oven thermometer for accuracy. This ensures even baking. - Ignoring the spacing. Keep at least 2 inches apart to avoid sticking. The right texture is soft and cake-like. Here’s how to get there: - Use both granulated and brown sugar. This gives a nice balance of sweetness. - Beat eggs in one at a time. This helps incorporate air for fluffiness. - Sift dry ingredients together. This adds air and prevents clumps. - Check for doneness. The edges should be firm, and tops spring back when pressed. By following these tips and tricks, your pumpkin whoopie pies will be a hit! {{image_2}} You can easily make vegan pumpkin whoopie pies. For this, swap the eggs with flax eggs. Mix 1 tablespoon of ground flaxseed with 2.5 tablespoons of water. Let it sit for 5 minutes. Use coconut oil instead of vegetable oil. For the filling, replace cream cheese with a mix of coconut cream and powdered sugar. This keeps it rich and tasty. To make gluten-free whoopie pies, use a gluten-free flour blend. Many brands work well. Just ensure it has xanthan gum for proper texture. You can follow the same recipe steps. The whoopie pies will still be light and soft. The filling can stay the same, as it is naturally gluten-free. Feel free to get creative with flavors! You can add chocolate chips to the batter for a sweet twist. Try mixing in some chopped nuts for crunch. A dash of espresso powder can enhance the pumpkin flavor, too. You might also like adding a hint of orange zest to brighten the filling. Each variation brings new joy to your holiday treats! To keep your pumpkin whoopie pies fresh, store them in an airtight container. Place parchment paper between layers to avoid sticking. They stay good at room temperature for 2-3 days. If you want to keep them longer, consider the fridge. In the fridge, they last up to a week. The cool air maintains their soft texture and flavor. Freezing whoopie pies is a great option for longer storage. First, let them cool completely. Then, wrap each pie tightly in plastic wrap. Place them in a freezer-safe bag or container. Label the bag with the date. They can stay in the freezer for up to 3 months. When you’re ready to enjoy them, just take them out and let them thaw. Reheating whoopie pies is simple. If they are frozen, thaw them in the fridge overnight. For a warm treat, you can use a microwave. Heat for about 10-15 seconds. Check to ensure they do not get too hot. You can also reheat them in the oven. Set it to 350°F (175°C) and warm for about 5 minutes. Enjoy them warm for a cozy snack! You can use sweet potato puree or butternut squash puree instead of pumpkin puree. Both options give a similar taste and texture. You can also use applesauce for a lighter flavor, but it will change the texture a bit. Yes, you can make these whoopie pies in advance. Bake the cookie parts and cool them completely. You can store them in an airtight container for up to three days. Prepare the filling just before serving for the best taste and texture. Serve your pumpkin whoopie pies on a festive platter. Dust them with powdered sugar for a charming look. You can add autumn leaves or small pumpkins to your display for extra flair. They are great at room temperature and perfect for sharing. Pumpkin whoopie pies last about two to three days at room temperature. Keep them in a cool, dry place in an airtight container. If you want them to last longer, store them in the fridge for up to a week. You learned about the key ingredients, steps, and tips for making pumpkin whoopie pies. Remember to try variations like vegan or gluten-free. Store your treats correctly to keep them fresh. With this guide, you can bake with confidence. Enjoy creating these delicious pies and sharing them with others. They will love the taste and texture. Keep experimenting, and you will find new favorites. Happy baking!

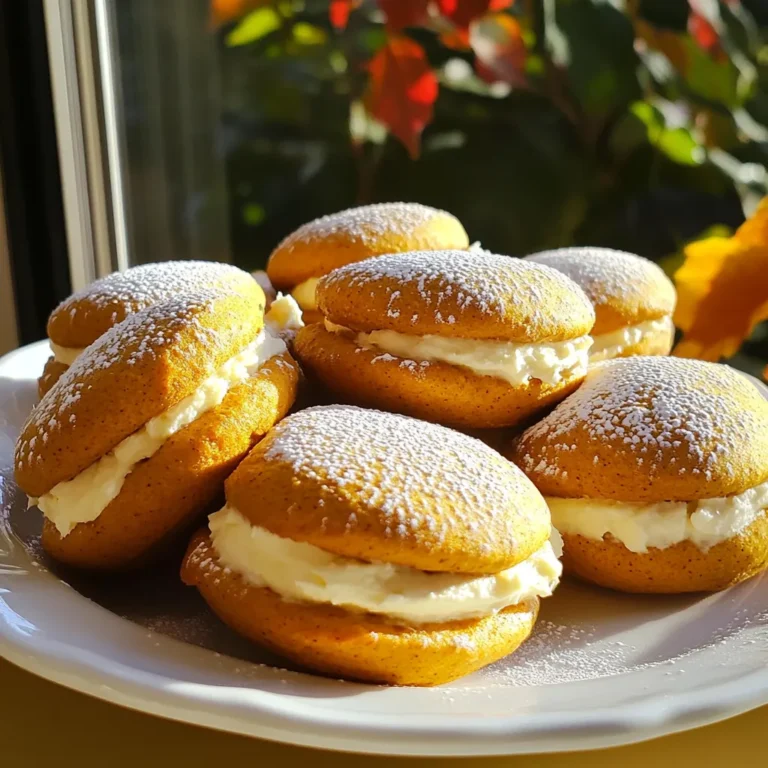
Pumpkin Whoopie Pies Delightful Holiday Treat Recipe

PREV 1 2 3 4 … 57 NEXT
flavor nest kitchen

explore

DessertsDinnerAppetizersDrinks

Our Policies

  • Cookie Policy
  • Copyright Policy
  • Disclaimer
  • GDPR Policy
  • Terms Of Use
Back to Top
  • About
  • Contact Us
  • Privacy Policy
© 2025 flavor nest kitchen