FREE DINNER EBOOK! Get your copy!
  • Cookie Policy
  • GDPR Policy
  • Disclaimer
  • Terms Of Use
  • Visit my other site: Fun Cookie Recipes
flavor nest kitchen
  • Home
  • Dinner
  • Desserts
  • Drinks
  • Appetizers
  • Contact
  • About
  • Privacy Policy
  • Home
  • Dinner
  • Desserts
  • Drinks
  • Appetizers
  • Contact
  • About
  • Privacy Policy
  • Cookie Policy
  • GDPR Policy
  • Disclaimer
  • Terms Of Use
Visit my other site: Fun Cookie Recipes

HOME / CATEGORIES /

Latest

For this recipe, I use 4 large carrots. These carrots give your fries a sweet taste. They should be cut into fry shapes. Aim for uniform sizes so they cook evenly. You need a few key seasonings to make these fries pop. Start with 3 cloves of minced garlic. This adds a strong, bold flavor. Then, add 1/4 cup of grated Parmesan cheese. This cheese brings a rich, salty taste. For extra flavor, include 1 teaspoon of garlic powder and 1 teaspoon of paprika. Garlic powder boosts the garlic flavor, while paprika adds a nice warmth. Don’t forget 1/2 teaspoon of salt and 1/4 teaspoon of black pepper. These enhance all the other flavors. You will need 2 tablespoons of olive oil. This helps the fries crisp up nicely in the air fryer. Finally, for a bright finish, use fresh parsley, chopped as a garnish. It not only looks nice but adds a fresh taste, too. First, take four large carrots. You want to cut them into fry shapes. Aim for even sizes. This helps them cook evenly. Rinse the carrots under cold water. Peel them if you like, but the skin adds flavor. After cutting, set them aside in a large bowl. Now, let’s add some flavor! In the same bowl, pour in two tablespoons of olive oil. This helps the spices stick. Next, add three cloves of minced garlic. Garlic brings a rich taste. Then, sprinkle in a quarter cup of grated Parmesan cheese. For extra flavor, add one teaspoon of garlic powder and one teaspoon of paprika. Don’t forget half a teaspoon of salt and a quarter teaspoon of black pepper. Mix everything well. Make sure each carrot fry is coated in the tasty mix. Time to cook! Preheat your air fryer to 400°F (200°C) for about five minutes. While it heats, arrange the carrot fries in the air fryer basket. Make sure they are in a single layer. This step is key for crispiness. Cook the fries for about 15 to 20 minutes. Shake the basket halfway through. This helps them cook evenly and become golden brown. Once done, take them out. You can sprinkle more Parmesan and fresh parsley on top. Enjoy your hot and crispy carrot fries! To get that perfect crunch, space is key. Make sure the carrot fries do not touch. This helps hot air flow around them. Shake the basket halfway through cooking. This ensures even cooking and crispiness. If you want extra crunch, cook them for a few more minutes. Just keep an eye on them to avoid burning. Set your air fryer to 400°F (200°C) for best results. Preheat it for about 5 minutes. This helps the fries cook evenly. Cooking time should be around 15 to 20 minutes. Remember to check for that golden brown color. Every air fryer is a bit different, so adjust as needed. Serve your fries hot for the best taste. They make a great snack or side dish. Pair them with a dip like ranch or garlic aioli. You can also sprinkle extra Parmesan on top for added flavor. Fresh parsley adds a nice touch too! Enjoy them with friends or family for a fun treat. {{image_2}} You can change the flavors of your carrot fries easily. Try these options: - Cajun Spice: Use a mix of cayenne, onion powder, and thyme for a kick. - Italian Herbs: Mix in dried oregano, basil, and a bit more garlic. - Smoky Flavor: Add smoked paprika or liquid smoke for depth. - Sweet and Savory: Combine cinnamon and brown sugar for a twist. Each option brings a new taste to the fries, making them fun to eat. Carrots are great, but many other veggies work well too. Here are some ideas: - Zucchini: Cut into sticks, they get crispy and tasty. - Sweet Potatoes: Their natural sweetness pairs well with garlic. - Parsnips: Slightly sweet with a hint of earthiness, they fry nicely. - Bell Peppers: They add color and a crunchy bite. These veggies can change the whole dish while keeping it healthy. You can make this recipe vegan with a few swaps. Use these ideas: - Nutritional Yeast: Replace Parmesan with nutritional yeast for a cheesy flavor. - Plant-Based Oil: Use any oil you prefer, like avocado or canola oil. - Garlic Powder: Keep the garlic flavor strong with garlic powder. - Cashew Cream: For a creamy dip, blend soaked cashews with garlic and lemon. These swaps make it easy to enjoy carrot fries as a vegan snack. After you enjoy your carrot fries, let them cool down. Place any leftovers in an airtight container. Store them in the fridge for 3 to 5 days. This helps keep them fresh. If you have a lot, consider dividing them into smaller portions. This way, you can grab just what you need. To reheat your carrot fries, use the air fryer. Set it to 350°F (175°C). Heat them for about 5 to 7 minutes. This makes them crispy again. You can also use an oven for this. Just place them on a baking sheet and warm them at the same temperature. Remember to check on them to avoid burning! You can freeze carrot fries if you want to save some for later. First, let them cool completely. Spread them on a baking sheet in a single layer. Freeze them for about 1 to 2 hours. Once frozen, transfer them to a freezer bag. Remove all the air before sealing. They will stay fresh for up to 3 months. To cook from frozen, just add a few extra minutes to your air fryer time. Yes, you can use baby carrots. Just cut them into fry shapes. They may cook faster, so watch closely. Taste may differ slightly, but they still taste great! It takes about 15-20 minutes to cook carrot fries. Set your air fryer to 400°F (200°C). Shake the basket halfway through for even cooking. Look for a golden brown color and crispy texture. You can serve these fries with many dips. Try ranch, garlic aioli, or marinara sauce. They also pair well with grilled meats or as a side to sandwiches. Enjoy them as a healthy snack or a fun side dish! This article covered how to make tasty carrot fries. We discussed the best ingredients, like fresh carrots and seasonings. I shared step-by-step instructions for prepping and cooking in an air fryer. You learned tips for crispiness and serving ideas. We also explored variations, storage methods, and answered common questions. I hope you feel ready to try this simple recipe at home. Enjoy your carrot fries with your favorite dips!

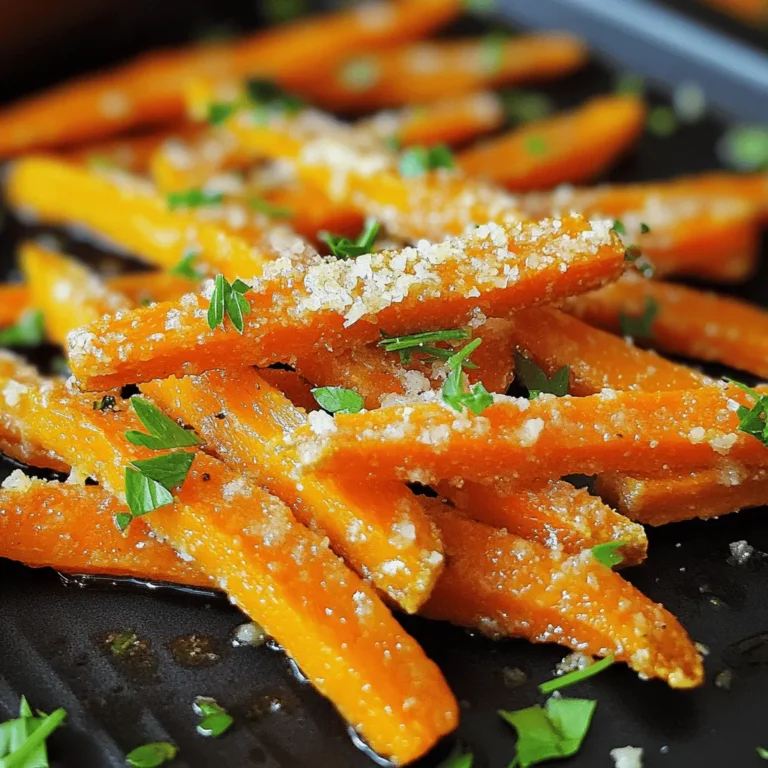
Air Fryer Garlic Parmesan Carrot Fries Delightful Snack

To make tasty Strawberry Shortcake Overnight Oats, you need simple items. Here’s what you will use: - 1 cup rolled oats - 1 cup almond milk (or milk of choice) - 1 cup Greek yogurt (vanilla flavored) - 1 tablespoon maple syrup (or honey) - 1 teaspoon vanilla extract - 1 cup fresh strawberries, hulled and sliced - 2 tablespoons almond slices (or crushed graham crackers for a shortcake crunch) - Fresh mint leaves for garnish (optional) These ingredients work together to create a creamy and sweet breakfast. The oats soak up the milk and yogurt, making them soft and delicious. You can easily swap some ingredients if you need to. Here are some ideas: - Use any milk you like, such as soy or oat milk. - If you want a non-dairy option, try coconut yogurt instead of Greek yogurt. - Maple syrup can be replaced with agave syrup or any sweetener you prefer. - Use frozen strawberries if fresh ones are not available. Just thaw them before use. These swaps keep the dish tasty while fitting your needs. Adding garnishes makes your oats look pretty and adds flavor. Here are some fun options: - Sprinkle almond slices or crushed graham crackers on top for a crunch. - Add a dollop of whipped cream for extra sweetness. - Fresh mint leaves give a nice touch and fresh flavor. Feel free to get creative with your garnishes. They can make breakfast feel special! Start by gathering your ingredients. You need rolled oats, almond milk, Greek yogurt, maple syrup, and vanilla extract. In a medium bowl, mix the rolled oats and almond milk. Then, add the Greek yogurt, maple syrup, and vanilla extract. Stir until everything is well combined. This mix should be smooth and creamy. Next, gently fold in half of the sliced strawberries. You will use the rest for topping later. Once the mixture is ready, divide it into two jars or containers. Make sure they have lids. Seal the jars tightly to keep the oats fresh. Now, place the jars in the refrigerator. Let them chill overnight. If you are short on time, four hours will work too. This soaking process helps the oats absorb the liquid and become soft. In the morning, take the jars from the fridge. Give the oats a good stir. If the mixture seems thick, add a bit more milk to loosen it up. Now it’s time to add the toppings. Place the remaining sliced strawberries on top of each jar. For a nice crunch, sprinkle almond slices or crushed graham crackers. If you like, add fresh mint leaves for a pop of color and flavor. Enjoy your delicious strawberry shortcake overnight oats! To get the best texture, use rolled oats. They soak up the liquid well. You want your oats soft but not mushy. Let them sit in the fridge for at least four hours. Overnight is even better. If your oats feel too thick in the morning, add a splash of milk. This will bring them back to life and make them creamy. To boost the flavor, try adding spices like cinnamon or nutmeg. A pinch can make a big difference. You can also mix in a spoonful of almond butter for a nutty kick. For a sweeter taste, add more maple syrup or honey. Fresh herbs like mint can give a fresh twist. You can change the flavor each time you make it! If you're looking for a low-calorie option, use low-fat Greek yogurt or skip it altogether. You can replace almond milk with oat milk for a vegan version. For a lower sugar option, use a sugar substitute or skip the sweetener. You can also load your oats with chia seeds for added fiber. This keeps your breakfast healthy and filling. {{image_2}} You can switch up the fruit in your overnight oats. Try using blueberries or raspberries. You might even enjoy adding peaches when they are in season. Each fruit brings its unique taste. Mixing different fruits adds color and flavor. You can create your signature blend of fruits. Greek yogurt is great, but you can mix it up. Try strawberry or coconut yogurt for a different twist. You can use dairy-free yogurts like almond or soy. Each type brings a new flavor and texture. It adds fun to your oats and keeps breakfast exciting. Want to boost nutrition? Add chia seeds or protein powder. Chia seeds give a nice crunch and healthy fats. Protein powder can help keep you full longer. You can also mix in nuts or seeds for extra texture. These add-ins give your oats a healthy kick. You can store your Strawberry Shortcake Overnight Oats in the fridge. Use jars or containers with lids. This keeps them fresh. Make sure to seal them tightly. You can layer the oats with toppings in separate jars. This keeps everything crisp. These oats last about three to five days in the fridge. For best flavor, eat them within the first two days. Check for any changes in smell or texture. If they seem off, it's best to toss them. Always use clean utensils to avoid contamination. You don’t need to heat overnight oats. They taste great cold. If you prefer them warm, you can microwave them. Add a splash of milk to help them heat evenly. Warm them for about 30 seconds, then stir. Enjoy them hot if that’s your style! Yes, you can make Strawberry Shortcake Overnight Oats ahead of time. This recipe is perfect for meal prep. You can prepare it the night before or up to three days in advance. Just store the oats in the fridge in sealed jars. That way, you have a tasty breakfast ready to go! If you do not have almond milk, you can use other milk types. Regular cow's milk works great. You can also try oat milk, coconut milk, or soy milk. Each option will change the flavor slightly. Choose the one you like best! To make this recipe dairy-free, use dairy-free yogurt. Look for coconut or soy yogurt. For gluten-free oats, ensure you buy certified gluten-free rolled oats. This way, you can enjoy the dish without worry. You can still have a delicious treat! In this blog post, we explored how to make tasty strawberry shortcake overnight oats. We covered key ingredients, substitutions, and optional garnishes. You learned the steps to prepare, refrigerate, and serve your oats. We also shared tips for texture and flavor, plus healthy alternatives. Variations included seasonal fruits and different yogurt options. Finally, we discussed how to store your oats for the best quality. Enjoy this quick, healthy breakfast that you can customize to suit your taste!

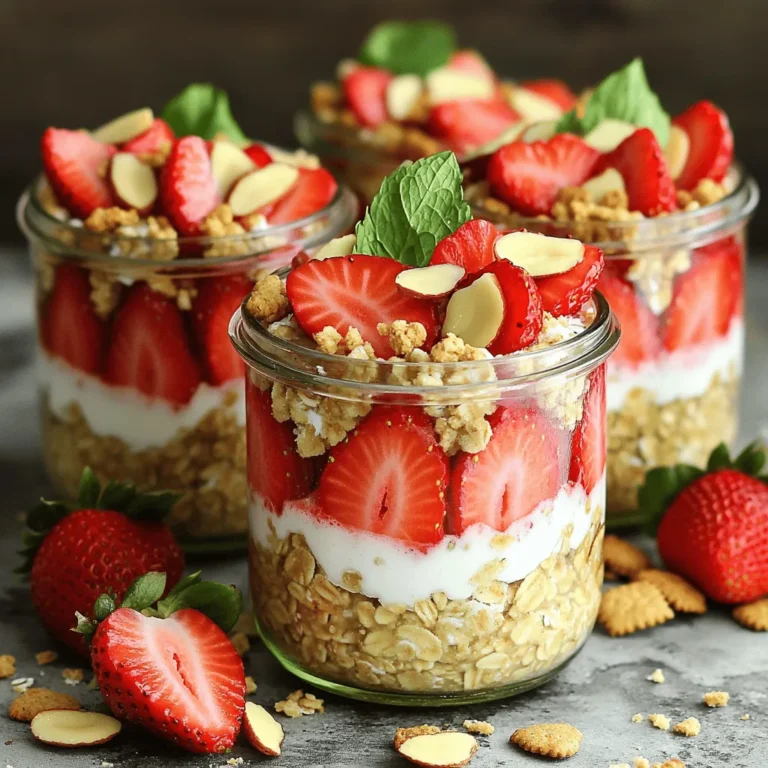
Strawberry Shortcake Overnight Oats Simple Delight

To make creamy garlic shrimp stuffed avocados, gather these fresh ingredients: - 2 ripe avocados - 1 pound large shrimp, peeled and deveined - 3 tablespoons butter - 4 cloves garlic, minced - 1/2 teaspoon red pepper flakes (adjust for spice tolerance) - 1/2 cup heavy cream - 1/2 teaspoon paprika - Salt and pepper to taste - 2 tablespoons fresh parsley, chopped - 1 tablespoon lemon juice Each ingredient plays a key role in the dish. The ripe avocados provide a creamy base. Large shrimp add protein and flavor. Butter and garlic create a savory aroma. Red pepper flakes give a hint of heat. Heavy cream brings richness. Paprika adds color and depth. Fresh parsley brightens the dish. Lemon juice adds freshness and balance. With these simple yet vibrant ingredients, you create a delightful meal that is both satisfying and beautiful. Preparing the skillet Start by heating a large skillet over medium heat. Add 3 tablespoons of butter and let it melt. This step is vital. It gives flavor to the shrimp and garlic. Cooking the shrimp Once the butter melts, add 4 cloves of minced garlic and 1/2 teaspoon of red pepper flakes. Sauté for about 1 minute until the garlic smells good. Next, add 1 pound of large shrimp, seasoned with salt, pepper, and 1/2 teaspoon of paprika. Cook for 2-3 minutes. The shrimp should turn pink and be fully cooked. Making the creamy sauce Now, reduce the heat to low. Pour in 1/2 cup of heavy cream and stir well. Let it simmer for 2-3 minutes until the sauce thickens. Remove the skillet from heat and mix in 2 tablespoons of chopped parsley and 1 tablespoon of lemon juice. Taste and adjust the seasoning if needed. Preparing the avocados While the shrimp mixture cools, cut 2 ripe avocados in half and take out the pit. Use a spoon to scoop out a bit of the flesh. This gives more room for the filling. Filling the avocado halves Spoon the creamy garlic shrimp mixture into each avocado half. Pack it nicely to fill each half well. Presentation tips Serve the stuffed avocados on a bright plate. You can garnish with extra parsley for a pop of color. Ideal side dishes Pair these delicious avocados with a fresh salad or tortilla chips. They balance the creamy flavors perfectly. Choosing the right shrimp For this dish, you want large shrimp. Large shrimp cook well and fill the avocado nicely. Look for shrimp that are firm and have a fresh smell. If you can, buy shrimp that are wild-caught. They taste better than farmed shrimp. Cooking times and techniques Cook the shrimp quickly. Heat a skillet on medium heat. Add butter, then garlic and red pepper flakes. When the garlic smells good, add the shrimp. They only need 2-3 minutes until they turn pink. Overcooking can make them rubbery. How to store ripe avocados Store ripe avocados at room temperature. If you want to slow down ripening, put them in the fridge. Check them daily. Once they are ripe, use them within a couple of days for the best taste. Techniques for cutting and scooping Cut the avocado in half and twist to separate. Use a spoon to scoop out some flesh. This makes more room for the shrimp. Be careful not to scoop too deep; you want the avocado to hold its shape. Adding spices and herbs Feel free to play with flavors! Add more garlic or herbs like cilantro. A pinch of cayenne can kick up the heat. Adjust spices based on your taste. Modifications for creamy texture If you like it creamier, add more heavy cream. You can also mix in cream cheese for richness. Another option is to stir in a bit of sour cream. This makes the filling even more delicious! {{image_2}} You can change the seafood in this dish. Consider using scallops or crab for a twist. Both options give a unique taste while keeping it creamy. If you want a vegetarian dish, swap the shrimp for chickpeas or mushrooms. These alternatives can soak up the creamy sauce well. Adding cheese can enhance the flavor of the shrimp mixture. Try cream cheese for a richer taste. You could also sprinkle some shredded cheddar or feta on top before serving. This adds a nice touch. Experimenting with sauces can also change the dish. A splash of hot sauce can bring heat. Alternatively, a drizzle of soy sauce adds umami. You can serve these stuffed avocados cold or warm. Cold versions work well for summer picnics. Warm servings are comforting on chilly days. You can also use these avocados as appetizers or a main dish. For an appetizer, serve smaller portions. When serving as a main dish, pair it with rice or a salad for a complete meal. How do you store leftover stuffed avocados? To store leftover stuffed avocados, place them in an airtight container. Cover the avocados tightly to keep them fresh. You can also squeeze some lemon juice on top to slow browning. The avocados can last in the fridge for up to two days. What are the shelf life considerations? The shrimp filling should stay fresh for about three days in the fridge. However, the avocado itself will brown quickly. So, it’s best to eat these stuffed avocados as soon as possible for the best taste and texture. What are the best methods for reheating the shrimp filling? To reheat the shrimp filling, use a skillet over low heat. Stir often to avoid burning. You can also microwave it in short bursts, stirring in between. This keeps the shrimp tender and the sauce creamy. How can you prevent avocado browning? To prevent browning, keep the avocado halves covered tightly with plastic wrap or in an airtight container. Adding lemon juice to the cut sides also helps maintain their vibrant green color. You can enjoy this dish with many tasty sides. Here are some great options: - Rice: A light, fluffy rice pairs well and soaks up the sauce. - Salad: A fresh green salad adds crunch and balances the creaminess. - Chips: Tortilla chips are fun for dipping and add texture. - Grilled Veggies: Grilled zucchini or peppers bring more flavor to your meal. - Quinoa: This nutty grain is a healthy choice and complements the shrimp. To add some heat, you can adjust a few things: - Red Pepper Flakes: Increase the amount for more heat. - Hot Sauce: Drizzle some on top or mix it in the shrimp. - Chili Powder: Add a pinch to the shrimp for a warm kick. - Jalapeños: Chop fresh jalapeños and add them to the filling. Yes, you can use frozen shrimp in this recipe. Here’s how: - Thaw First: Make sure to thaw the shrimp before cooking. Place them in the fridge overnight or run them under cold water. - Cook Time: Frozen shrimp may need a minute or two longer to cook. Keep an eye on them until they turn pink. - Quality: Choose shrimp that is peeled and deveined for best results. In this post, we explored how to make Creamy Garlic Shrimp Stuffed Avocados. We covered the ingredients, preparation steps, and tips to enhance flavor. Remember, the right shrimp and fresh avocados make all the difference. You can try various substitutions or serve it warm or cold. Enjoy experimenting with flavors and impressing your guests. Following these steps will help you create a delicious dish every time. Keep this guide handy for your next kitchen adventure!

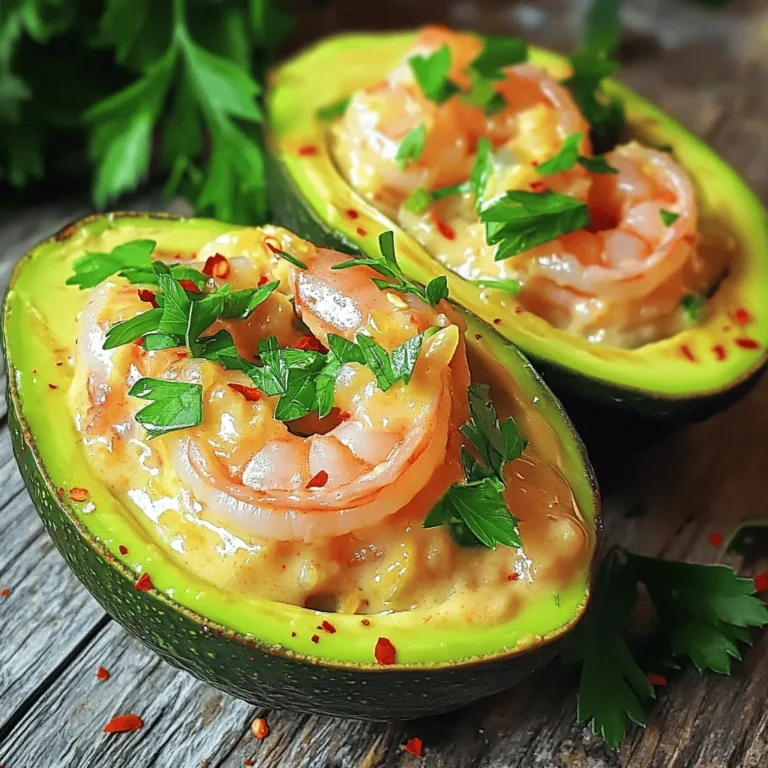
Creamy Garlic Shrimp Stuffed Avocados Delightful Meal

- 1 cup unsalted butter (2 sticks) - 1 cup brown sugar, packed - 1/2 cup granulated sugar - 2 large eggs - 2 teaspoons vanilla extract - 3 cups all-purpose flour - 1 teaspoon baking soda - 1 teaspoon cinnamon - 1/2 teaspoon salt - 1/4 teaspoon nutmeg - 1/2 cup chopped pecans (optional) - 1/4 cup unsalted butter, softened - 1/2 cup brown sugar, packed - 1 tablespoon cinnamon - 1 cup powdered sugar - 2-3 tablespoons milk - 1/2 teaspoon vanilla extract Gather these ingredients before you start. The butter is key for flavor. Using unsalted butter helps control the saltiness. Brown sugar adds moisture and a rich taste. Granulated sugar adds sweetness and texture. Eggs bind the mix and give rise. Vanilla extract boosts the flavor. Flour forms the cookie base. Baking soda helps with rising and gives a nice texture. Cinnamon, salt, and nutmeg add warmth and spice. Chopped pecans bring a nice crunch, but they are optional. For the cinnamon filling, use softened butter to mix well with the sugars. This creates a sweet, gooey center. For icing, powdered sugar gives sweetness, while milk makes it spreadable. Vanilla adds a lovely note to the icing. These ingredients work together to create a delightful treat. Each bite will remind you of fresh cinnamon rolls, but in cookie form! - Melt butter in a skillet over medium heat. - Cook until golden brown and nutty aroma develops. - Remove from heat and let cool slightly. - Combine brown butter, brown sugar, and granulated sugar in a bowl. - Mix in eggs and vanilla extract until smooth. - Whisk together flour, baking soda, cinnamon, salt, and nutmeg. - Gradually fold into the wet mixture and add chopped pecans if desired. - Mix softened butter, brown sugar, and cinnamon in a small bowl. - Preheat oven to 350°F (175°C). - Scoop and flatten cookie dough, add filling, and seal. - Place on baking sheet and bake for 10-12 minutes. - Prepare icing while cookies cool, then drizzle over cookies. To make brown butter, watch it closely. It can burn fast. Use a light skillet to see the color change. The butter will foam first. Keep stirring until it turns golden brown. You will know it’s ready when it smells nutty. This step adds a rich flavor to your cookies. Mix the dry ingredients gently. Overmixing can make cookies tough. You want a soft dough. Chill the dough for about 30 minutes. This helps the cookies stay thick when baking. Chilling makes a big difference in texture. For icing, you can adjust the milk amount. More milk makes it thinner. Less milk makes it thicker. Add vanilla extract for extra flavor. This simple step makes the icing even better. Drizzle it over cooled cookies for a sweet finish. {{image_2}} If you want to skip the nuts, just leave out the chopped pecans. This way, everyone can enjoy these cookies, even those with nut allergies. The dough will still be rich and tasty without them. You can change the spices to fit the season. Try using pumpkin spice for fall or ginger for a warm, cozy flavor. These tweaks can make your cookies fresh and exciting. Don’t be scared to get creative! For a new taste, swap out brown sugar with coconut sugar or maple syrup. Both options add a unique flavor that can surprise your taste buds. Just remember that the texture might change slightly with these sweeteners. Enjoy experimenting! You can keep these cookies fresh by placing them in an airtight container. They will stay good for up to 5 days. This is perfect for enjoying them throughout the week. Just make sure the cookies are fully cooled before you store them. To save some cookies for later, freeze the unbaked cookie balls or the baked cookies. Place them in a freezer-safe bag. They can stay in the freezer for up to 3 months. When you need a sweet treat, you can bake them straight from the freezer. Just add a few extra minutes to the baking time. If you want to enjoy your cookies warm and soft again, you can reheat them. Place them in the oven at 350°F for about 5 minutes. You can also use the microwave. Just heat for 10-15 seconds. This way, they stay soft and delicious, just like when they came out of the oven. Yes, just omit additional salt from the recipe. Salted butter can add a nice flavor, but it may change the overall taste. I prefer unsalted for better control over the saltiness. Underbake slightly to retain moisture. This helps keep the cookies soft and chewy. Also, consider chilling the dough for 30 minutes before baking. Chilling prevents spreading and adds a great texture. You can use flax eggs or applesauce for an egg-free version. For a flax egg, mix 1 tablespoon of ground flaxseed with 2.5 tablespoons of water. Let it sit for 5 minutes until it thickens. Use 1/4 cup of applesauce as a substitute for one egg. Both options work well! This recipe gives you delicious cookies with a rich brown butter flavor. You learned about the key ingredients and how to make the dough, filling, and icing. I shared tips to help you achieve the best texture and flavor. Remember, you can change ingredients if needed and store cookies properly. Now, gather your ingredients and start baking. Enjoy the warm, tasty cookies with friends and family!

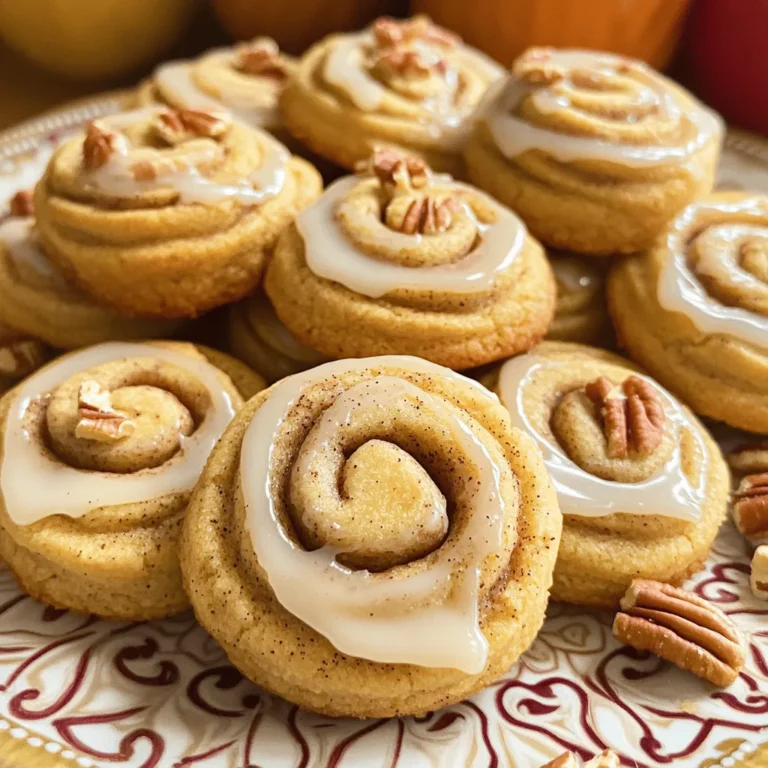
Brown Butter Cinnamon Roll Cookies Delightful Treat

For this tasty Slow Cooker Veggie Lasagna Soup, gather these simple ingredients: - 1 tablespoon olive oil - 1 medium onion, chopped - 3 cloves garlic, minced - 2 medium carrots, diced - 1 bell pepper (any color), diced - 1 zucchini, diced - 1 cup mushrooms, sliced - 1 can (28 oz) crushed tomatoes - 4 cups vegetable broth - 2 teaspoons dried oregano - 1 teaspoon dried basil - 1 teaspoon red pepper flakes (optional) - 8 lasagna noodles, broken into pieces - 1 cup ricotta cheese - 1 cup shredded mozzarella cheese - 1/2 cup grated Parmesan cheese - Salt and pepper to taste - Fresh basil or parsley for garnish You can make this soup even better by adding: - Spinach or kale for more greens - Chickpeas or lentils for added protein - A splash of balsamic vinegar for extra flavor - A dollop of pesto on top when serving If you have dietary needs, here are some easy swaps: - Use gluten-free lasagna noodles for a gluten-free version. - Swap ricotta cheese for a non-dairy option like cashew or almond cheese. - Replace vegetable broth with chicken broth if you prefer. - Use different herbs like thyme or rosemary instead of oregano and basil. These ingredients and options make this soup fun to customize. You can play with flavors and textures to suit your taste! First, gather all your ingredients. You need onion, garlic, carrots, bell pepper, zucchini, and mushrooms. Start by heating olive oil in a large skillet. Add chopped onion and minced garlic. Sauté them for about 3-4 minutes. The onions should look clear. Next, add diced carrots, bell pepper, zucchini, and mushrooms. Cook these for 5-6 minutes. You want them to soften but not mushy. Once done, transfer the mixed veggies to your slow cooker. In the slow cooker, mix in crushed tomatoes and vegetable broth. Add dried oregano, basil, and red pepper flakes if you like heat. Stir everything well. Season with salt and pepper as needed. Cover the slow cooker and set it to cook. If you choose low, let it cook for 6-8 hours. If you pick high, it will cook for 3-4 hours. The longer the time, the richer the flavors. About 30 minutes before you serve, break the lasagna noodles into pieces. Stir these into the soup. Cover the slow cooker again and cook until the noodles are tender. Once the noodles are ready, mix in ricotta cheese. Stir until it blends nicely. Serve your soup hot. Top each bowl with shredded mozzarella and grated Parmesan cheese. For a fresh touch, add basil or parsley on top. To boost flavor, use fresh herbs. Fresh basil or parsley adds a bright taste. You can also try adding a splash of balsamic vinegar. It adds a nice tang. If you love spice, increase the red pepper flakes. This adds warmth to the soup. For the best texture, sauté the veggies first. This helps them soften before cooking. Breaking the lasagna noodles into smaller pieces makes them easier to eat. Stir them in about 30 minutes before serving. This way, they stay firm but tender. Serve the soup hot in bowls. Top each bowl with mozzarella and Parmesan cheese. Add a sprinkle of fresh herbs for a pop of color. Pair it with crusty bread for a complete meal. You can also add a side salad for extra crunch. {{image_2}} You can add protein to make this soup heartier. Ground turkey or beef works well. Cook the meat in a skillet before adding it to the slow cooker. For a plant-based option, try lentils or chickpeas. These add protein while keeping the dish veggie-friendly. Feel free to mix in your favorite veggies. Spinach or kale adds greens and nutrients. Eggplant and butternut squash bring a sweet taste. You can also try broccoli or cauliflower for added crunch. The key is to cut them small so they cook well. If you need a gluten-free meal, swap regular noodles for gluten-free ones. Look for brands that work well in soups. You can also use rice or quinoa as a noodle substitute. Just cook them separately and stir them in at the end. This keeps everything tasty and safe for everyone. After enjoying your Slow Cooker Veggie Lasagna Soup, let it cool down. Once cool, place the soup in an airtight container. It will stay fresh in the fridge for up to three days. Make sure to label the container with the date. This helps keep track of how long it has been stored. You can freeze the soup for longer storage. Pour the cooled soup into freezer-safe bags or containers. Leave some space at the top for expansion. The soup can last up to three months in the freezer. When you are ready to eat it, remember to label it. This way, you know what you have on hand. To reheat, take the soup out of the fridge or freezer. If frozen, let it thaw in the fridge overnight. Heat the soup on the stove over medium heat. Stir it often, so it warms evenly. You can also use the microwave. Just heat it in short bursts, stirring in between. Enjoy it hot, topped with cheese and fresh herbs! Yes, you can. Use a large pot on the stove. Heat the olive oil first. Add the onion and garlic. Cook until soft. Then, add the veggies just as in the recipe. Stir in the crushed tomatoes and broth. Let it simmer for about 30 minutes. Finally, add the noodles and cheeses. You can store leftover soup for up to five days. Keep it in an airtight container. Place it in the fridge. If you want to keep it longer, freeze it. It can last for about three months in the freezer. Just make sure to cool it first before storing. Yes, you can use fresh noodles. They will cook faster than dried ones. Break them into smaller pieces, just like the dried noodles. Add them to the soup about 10-15 minutes before serving. This way, they will cook perfectly without getting mushy. This blog post gives you a full guide on making a tasty lasagna soup. We covered the key ingredients, cooking steps, and different ways to make it your own. You can add extras, choose proteins, or even go gluten-free. Storing and reheating tips help you enjoy leftovers too. Remember, cooking can be fun! Use this recipe as a base and get creative. Enjoy every bowl of your delicious lasagna soup. Happy cooking!

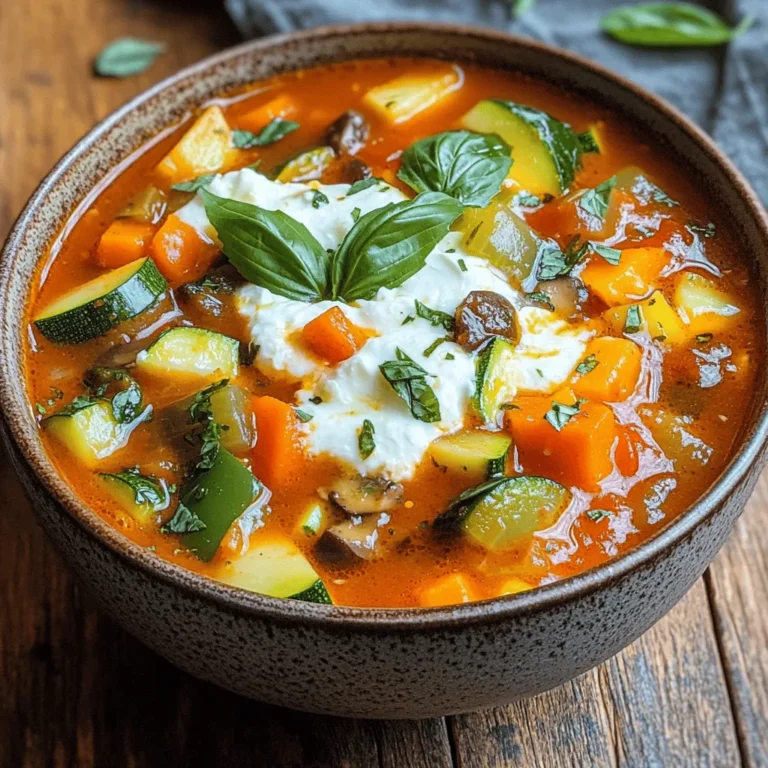
Slow Cooker Veggie Lasagna Soup Tasty and Simple Dish

For this dish, you need four fresh salmon fillets. Look for fillets that are bright in color and firm to the touch. Fresh salmon has a clean smell, not fishy. The fillets will soak up the sweet chili ginger sauce, making them very tasty. This sauce is the star of the dish. You will need: - 1/4 cup sweet chili sauce - 2 tablespoons fresh ginger, grated - 2 tablespoons soy sauce - 1 tablespoon honey - 1 tablespoon lime juice Mix these ingredients well. The sweet chili sauce adds sweetness, while the ginger gives a nice kick. Soy sauce adds salt, honey adds depth, and lime juice brightens the whole mix. This sauce makes the salmon and veggies burst with flavor. To balance the rich salmon, I love using colorful vegetables. For this recipe, gather: - 2 cups broccoli florets - 1 red bell pepper, sliced - 1 cup snap peas - 2 tablespoons sesame oil - Salt and pepper to taste These veggies add crunch and color. The broccoli and snap peas are crisp, while the red bell pepper adds sweetness. Toss them in sesame oil before baking. This oil complements the salmon and enhances the dish. Start by preheating your oven to 400°F (200°C). This heat helps the salmon cook evenly. Line a large sheet pan with parchment paper. This makes cleanup easy. In a small bowl, mix together the sweet chili sauce, fresh ginger, soy sauce, honey, and lime juice. Whisk until smooth. Place the salmon fillets on the sheet pan. Season them with salt and pepper. Brush the sweet chili mixture over the salmon. Make sure each piece is well coated. Grab another bowl for the veggies. Add the broccoli florets, sliced red bell pepper, and snap peas. Pour in the sesame oil. Toss the vegetables until they are evenly coated. Sprinkle a pinch of salt and pepper over them. Arrange the tossed vegetables around the salmon on the sheet pan. Slide the pan into the oven. Bake for 12-15 minutes. The salmon should flake easily with a fork. The vegetables need to be tender but still crisp. Once done, take the pan out. Garnish the salmon with sesame seeds and lime wedges for a burst of flavor. To get perfectly cooked salmon, start with fresh fillets. Look for bright, shiny skin. This means the fish is fresh. Preheat your oven to 400°F (200°C) for even cooking. Bake the salmon for 12-15 minutes. Check if the salmon flakes easily with a fork. If it does, it is ready! If the salmon is thick, it may need a bit more time. Always use a meat thermometer. The internal temperature should reach 145°F (63°C). For a flavor boost, try adding more spices. A pinch of red pepper flakes adds heat. You can also add minced garlic for depth. If you like a sweet touch, drizzle more honey on top. For a zesty kick, add lime zest to the sauce. Don't forget to let the salmon marinate for 15-30 minutes. This helps the flavors soak in. Using fresh herbs like cilantro or basil also lifts the dish. Presentation makes your meal shine. You can serve the salmon straight from the sheet pan. This gives a casual, fun vibe. If you want something fancier, transfer it to a platter. Garnish the salmon with sesame seeds and lime wedges. Add a sprinkle of fresh cilantro or green onions for color. Arrange the veggies around the salmon for a vibrant look. People eat with their eyes first, so make it pop! {{image_2}} You can switch up the veggies in this dish. Broccoli, red bell pepper, and snap peas work great, but many others can shine too. Try carrots, asparagus, or zucchini for new tastes. Each veggie brings its own flavor and texture. This keeps your dish fresh and exciting every time you make it. Do you like heat? You can add more spice to your sweet chili sauce. A pinch of red pepper flakes adds a nice kick. If you prefer mild flavors, reduce the sweet chili sauce. The balance between sweet and spicy can really change the dish. You can find your perfect level of heat. No salmon? No problem! You can use other fish like trout or cod. Chicken also works if you prefer poultry. Just adjust the cooking time based on what you use. Each option offers a unique taste, so feel free to experiment. You might just discover a new favorite! To keep your Sheet Pan Sweet Chili Ginger Salmon fresh, store it in the fridge. Place leftover salmon and veggies in an airtight container. This helps retain flavor and texture. You can refrigerate them for up to three days. When ready to eat, check for any off smells or discoloration. If everything looks good, you can reheat and enjoy! If you want to save some for later, freezing is a great option. First, let the salmon and veggies cool completely. Wrap them tightly in plastic wrap or foil. Then, place them in a freezer-safe bag. Label the bag with the date. You can freeze the dish for up to three months. When you’re ready to eat, thaw it in the fridge overnight. To reheat, preheat your oven to 350°F (175°C). Place the salmon and veggies on a baking sheet. Cover them with foil to keep moisture in. Bake for about 10-15 minutes, or until heated through. You can also reheat in the microwave. Heat in short bursts, stirring in between to ensure even warming. Enjoy your tasty meal! You can serve this dish with rice or quinoa. Both pair well with the flavors. A fresh green salad adds crunch and brightness too. You might also enjoy a side of crusty bread to soak up the sauce. For a fun twist, try serving it in lettuce wraps. This gives a fresh, crunchy bite that contrasts nicely with the salmon. The salmon is done when it flakes easily with a fork. It should have a bright pink color in the center. If you have a food thermometer, the internal temperature should reach 145°F (63°C). If you press the salmon with a fork, it should feel firm, not mushy. Watch closely as it cooks; overcooked salmon can become dry. Yes, you can use other fish like trout or tilapia. These fish have a similar texture and cook quickly. Just remember to adjust cooking times if needed. Thicker fish will take longer to cook, while thinner ones will cook faster. Always check for doneness with the same methods used for salmon. This way, you'll enjoy a tasty meal no matter the fish! You can create a quick and healthy dish with salmon, sweet chili ginger sauce, and veggies. I shared step-by-step instructions to help you bake it perfectly. Use my tips to ensure your salmon turns out great every time. You can even try different veggies or fish for new flavors. Don’t forget about storing leftovers safely. This easy recipe makes meal prep fun and delicious. Enjoy your cooking adventure and impress your family with this tasty dish!

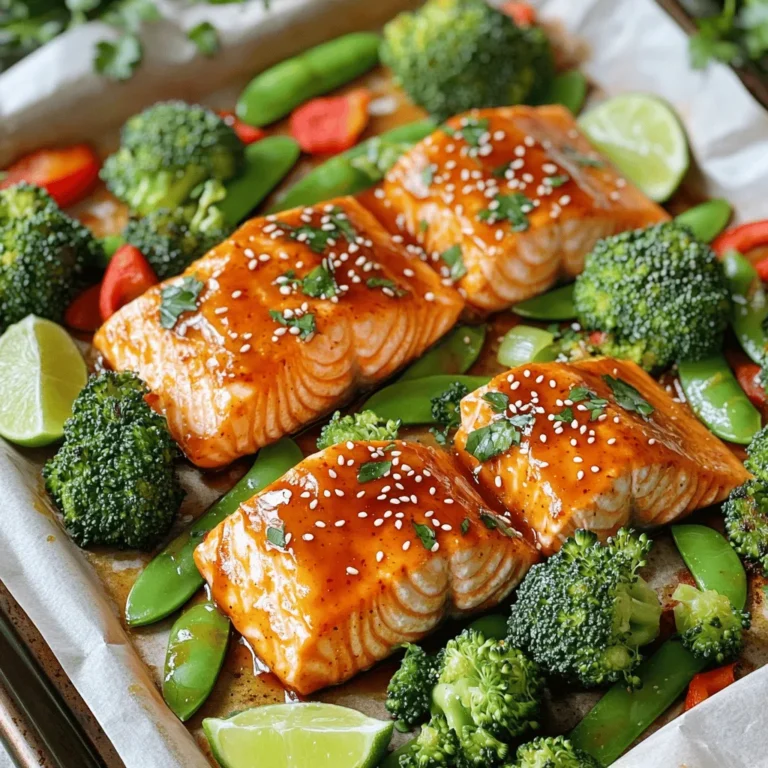
Sheet Pan Sweet Chili Ginger Salmon Flavor Explosion

- 1 can (15 oz) chickpeas, drained and rinsed - 1 tablespoon olive oil - 1 teaspoon smoked paprika - 1 teaspoon garlic powder - 1 teaspoon cumin - 1/2 teaspoon chili powder - Salt and pepper to taste - 8 small corn tortillas - 1 cup red cabbage, shredded - 1 avocado, sliced - 1 cup pico de gallo (or your favorite salsa) - Fresh cilantro for garnish - Lime wedges for serving The star of this recipe is the chickpeas. They give a great crunch and protein. I use canned chickpeas for ease, but you can also use dried ones if you prefer. Just soak and cook them first. For flavor, I mix in spices like smoked paprika, garlic powder, and cumin. These spices bring warmth and depth. I adjust salt and pepper based on taste. Next, we have the taco components. Corn tortillas hold everything together. You can warm them up easily on a skillet. Toppings like shredded red cabbage and sliced avocado add freshness. Pico de gallo or salsa gives a nice kick. Fresh cilantro adds a burst of flavor. Lastly, lime wedges brighten up the dish. Each ingredient plays a role in making these tacos tasty and fun to eat. Prepping the air fryer Start by setting your air fryer to 400°F (200°C). This high heat helps the chickpeas get crispy. Preheating takes just a few minutes and makes a big difference. Coating the chickpeas In a mixing bowl, add one can of drained and rinsed chickpeas. Pour in one tablespoon of olive oil, followed by one teaspoon each of smoked paprika, garlic powder, and cumin. Add half a teaspoon of chili powder, plus salt and pepper to taste. Toss everything well until all the chickpeas are coated in the spices. This step is vital for flavor! Air frying process Place the spiced chickpeas in the air fryer basket in a single layer. Make sure they have space to cook evenly. Air fry for 15 minutes, shaking the basket halfway through. The chickpeas should turn golden and crispy. If they need more time, check them in 2-minute intervals. Tips for achieving pliable tortillas To make your corn tortillas soft and easy to fold, warming them is key. Avoid cold tortillas, as they can crack. The best method for warming Use a dry skillet over medium heat. Place each tortilla in the skillet for about 30 seconds on each side. You want them warm and flexible, not crispy. Layering the ingredients Once your chickpeas are done and your tortillas are warm, it’s time to build your tacos. Place a generous spoonful of crispy chickpeas in the center of each tortilla. This is where the flavor begins! Presentation tips Top the chickpeas with shredded red cabbage, sliced avocado, and pico de gallo. These colors and textures make your tacos look great. Finish with fresh cilantro and a squeeze of lime juice for extra zest. Serve with lime wedges on the side for added flavor. To make your chickpeas crispy, the air fryer is your best friend. Start by preheating it to 400°F (200°C). This step helps the chickpeas cook evenly. When you place them in the basket, keep them in a single layer. Shaking the basket halfway through cooking is key. It helps the heat reach all sides of the chickpeas. If you skip this, they may cook unevenly. You want them golden brown and crunchy for the best taco experience. You can adjust the spice level to fit your taste. If you like heat, add more chili powder. For a milder flavor, reduce the amount. The smoked paprika and cumin work well together, adding depth to the dish. Feel free to mix in other spices too. Experiment with cayenne for heat or oregano for earthiness. There’s no wrong way to season; find your perfect blend. These tacos pair well with sides like rice or a fresh salad. You can also serve them with a cold drink, like a light beer or sparkling water. For garnishes, cilantro adds a fresh touch. A squeeze of lime juice brightens the flavors. Try adding some sliced radishes for a crunchy, peppery bite. Enjoy your tasty creation! {{image_2}} You can swap chickpeas for other beans. Black beans or pinto beans work well. They add a different taste and texture. If you want a vegan option, just stick with beans and vegetables. For a vegetarian twist, consider adding cheese or sour cream. Tacos are fun to customize. Try toppings like shredded lettuce, diced tomatoes, or jalapeños. You can also add roasted veggies or sautéed mushrooms for extra flavor. For something different, mix in some quinoa or brown rice for a hearty filling. Store-bought salsas can save time. Look for fresh options with no added sugars. A mango salsa adds a sweet touch. If you want to make your own, try mixing diced tomatoes, onions, cilantro, and lime juice. You can also add a pinch of salt for flavor. This fresh salsa pairs perfectly with your tacos. To keep your chickpeas fresh, store them in an airtight container. Place them in the fridge. They will last for up to five days. For best results, keep them separate from other items. This way, they stay crispy longer. For the tortillas, wrap them in a clean kitchen towel. This helps to keep them from drying out. You can also store them in a zip-top bag. Make sure to squeeze out the air. Store them in the fridge for up to a week. To reheat chickpeas, the air fryer is the best choice. Set it to 400°F (200°C). Place the chickpeas in the basket and heat for 5-7 minutes. Shake the basket halfway through. This keeps them crispy. If you don't have an air fryer, you can use the oven. Spread the chickpeas on a baking sheet. Bake them at 400°F (200°C) for the same time. You can also microwave them, but they won't be as crispy. Just warm them for about 1-2 minutes. Yes, you can use dried chickpeas. First, soak them overnight in water. This softens them. After soaking, cook the chickpeas in boiling water for about 1-2 hours. You want them tender but not mushy. Drain and rinse them before seasoning. Then, follow the same steps as with canned chickpeas. You will love the fresh taste! For crispy chickpeas, set your air fryer to 400°F (200°C). Cook them for 15 minutes. Shake the basket halfway through. This helps them crisp evenly. Keep an eye on them the last few minutes. You want them golden brown and crunchy. To make these tacos gluten-free, use corn tortillas. They are naturally gluten-free. Always check the label to be sure. You can also use lettuce wraps for a fresh twist. They add a nice crunch too! Enjoy your tasty tacos without worry. This blog post outlined how to make tasty chickpea tacos with ease. You learned about the main ingredients, the step-by-step prep, and useful tips for crispiness. I shared variations to keep your meals fresh and fun, and covered how to store leftovers properly. Remember, you can customize the spices and toppings to your taste. These tacos are not just healthy; they are also simple and tasty. Enjoy your cooking and share your own twists on this recipe!

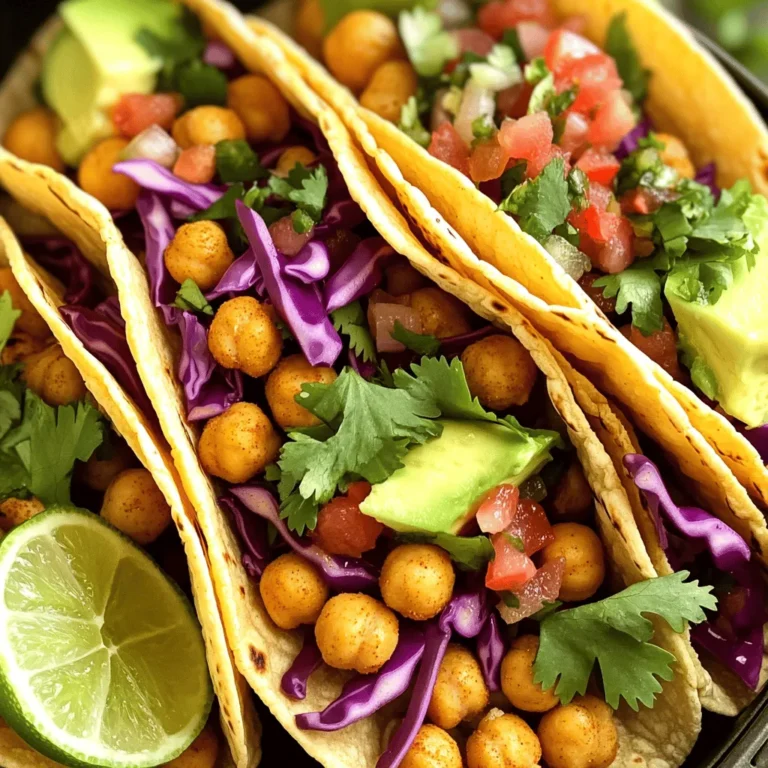
Air Fryer Crispy Chickpea Tacos Tasty and Easy Recipe

- 1 cup ricotta cheese - 1 cup fresh blueberries - 1 cup all-purpose flour - 1 cup milk - 2 large eggs - Zest of 1 lemon - 2 tablespoons lemon juice - 1 tablespoon baking powder - 1/2 teaspoon baking soda - 2 tablespoons sugar - 1/4 teaspoon salt When I make Lemon Blueberry Ricotta Pancakes, I start with the main ingredients. Ricotta cheese gives the pancakes a creamy texture. Fresh blueberries add sweet bursts of flavor. All-purpose flour provides the base for this fluffy delight. Next, I gather the additional ingredients. Milk adds moisture, while eggs help bind everything together. The zest and juice of a lemon give the pancakes a bright flavor that makes them stand out. Finally, I pay attention to the baking essentials. Baking powder and baking soda help the pancakes rise. Sugar adds just the right amount of sweetness, and salt balances the flavors. Each ingredient plays a vital role in creating the perfect pancake. Start by mixing the wet ingredients. In a large bowl, whisk together 1 cup of ricotta cheese, 1 cup of milk, 2 large eggs, the zest of 1 lemon, and 2 tablespoons of lemon juice. Make sure this mixture is smooth. Next, combine the dry ingredients in another bowl. Mix 1 cup of all-purpose flour, 2 tablespoons of sugar, 1 tablespoon of baking powder, 1/2 teaspoon of baking soda, and 1/4 teaspoon of salt. Now, gently add the dry mix to the wet mix. Stir it slowly until just combined. It’s okay if some lumps remain; overmixing can make the pancakes tough. Finally, fold in 1 cup of fresh blueberries. This step adds bursts of flavor. Prepare your skillet by preheating it over medium heat. Use butter or oil to lightly grease the surface. Pour about 1/4 cup of batter for each pancake onto the skillet. Cook them until bubbles form on the surface, which takes about 2-3 minutes. When the time is right, flip the pancakes. Cook for another 2-3 minutes until they turn golden brown. If needed, adjust the heat to avoid burning. For serving, stack the pancakes high and add extra blueberries on top. A drizzle of maple syrup adds sweetness. You can dust them with powdered sugar for a pretty finish. Arrange them on a bright plate to make your meal look inviting. Enjoy every bite of these delightful pancakes! To make the best Lemon Blueberry Ricotta Pancakes, avoid overmixing the batter. When you mix, stop as soon as the dry and wet ingredients combine. Some lumps are okay. Overmixing can make the pancakes tough. Next, adjust the cooking heat. Start with medium heat to cook pancakes evenly. If they burn, lower the heat slightly. If pancakes cook too slow, increase the heat a bit. You can add spices like cinnamon to the batter for extra warmth. A dash of nutmeg also works well. Feel free to use different fruits too. Try diced strawberries or sliced bananas for a fun twist. For gluten-free pancakes, swap all-purpose flour with a gluten-free blend. This will keep the texture light and fluffy. If you want dairy-free options, use almond milk and a dairy-free ricotta. Both will keep your pancakes tasty while meeting your dietary needs. {{image_2}} You can swap ricotta cheese for Greek yogurt. This change gives a nice tang. The texture stays creamy, and it's a bit lighter. For syrup, try different options. Maple syrup is classic, but honey works well too. You might also enjoy agave syrup or berry syrup for a fruity touch. Want to mix things up? Use lime or orange zest instead of lemon. These citrus flavors add a fun twist to the pancakes. You can also toss in chocolate chips. They melt slightly and give a sweet surprise in every bite. Make these pancakes special by using seasonal fruits. In summer, add peaches or raspberries. In fall, try apples or pears. These fruits bring new flavors and freshness to the dish. You can also adapt this recipe for holidays. For a festive touch, add spices like cinnamon or nutmeg. Top with whipped cream and a sprinkle of zest for an extra flair. To store leftover pancakes, cool them first. Place them in a single layer. Use an airtight container to keep them fresh. If you have many pancakes, separate layers with parchment paper. This helps to avoid sticking. Store them in the fridge for up to three days. The best way to reheat pancakes is in a skillet. Heat the skillet over medium-low heat. Add a small amount of butter or oil. Place the pancake in the pan and warm it for about one to two minutes on each side. You can also use a microwave. Just heat for 20-30 seconds. If you want to freeze pancakes, stack them with parchment paper in between. Place them in a freezer-safe bag. They can stay fresh for up to three months. Ricotta cheese should be fresh for the best taste. Check the date on the package. It usually lasts about one week after opening. Fresh blueberries are best eaten within a few days, but they can last up to a week in the fridge. Pancakes can be stored for about three days in the fridge. If frozen, they last much longer. Yes, you can prepare the batter in advance. Mix the wet and dry ingredients separately. Store them in the fridge for up to 24 hours. When ready to cook, gently mix the wet and dry ingredients. Fold in the blueberries right before cooking. This keeps them fresh and tasty. You can make these pancakes gluten-free! Substitute the all-purpose flour with a gluten-free mix. Look for a blend that contains xanthan gum for better texture. This way, you can enjoy the same fluffy goodness without gluten. Absolutely! Let the pancakes cool completely. Layer them with parchment paper in a freezer bag. They will keep well for up to two months. To reheat, pop them in a toaster or microwave. They taste great even after freezing! To make fluffier pancakes, add an extra egg white. Whip it until it's frothy and fold it gently into the batter. Also, avoid overmixing the batter; some lumps are okay. This helps add air and keeps them light. In this blog post, we covered how to make delicious lemon blueberry ricotta pancakes. We discussed each ingredient, from the main ones like ricotta cheese and blueberries to baking essentials. The step-by-step instructions made the cooking process easy. Plus, I shared tips for perfecting the recipe and variations to try. Don't forget to store leftovers properly for later enjoyment. Whether you’re a seasoned cook or new to pancakes, this recipe is fun and tasty. Enjoy experimenting with flavors and make these pancakes your own!

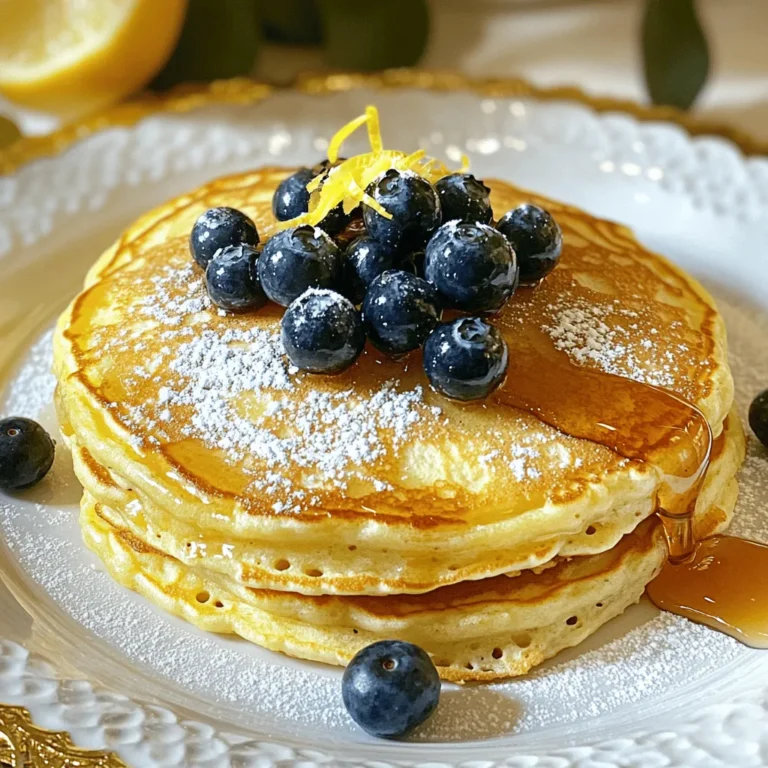
Lemon Blueberry Ricotta Pancakes Simple and Delightful

To make Pumpkin Cinnamon Sugar Monkey Bread, gather the following items: - 2 cans of refrigerated biscuit dough - 1 cup pumpkin puree - 1 tablespoon pumpkin pie spice - 1/2 cup granulated sugar - 1/2 cup packed brown sugar - 1/2 cup unsalted butter, melted - 1 teaspoon vanilla extract - 1/4 teaspoon salt - Optional: Chopped pecans or walnuts for added crunch Each ingredient plays a key role in this tasty treat. The refrigerated biscuit dough provides a fluffy base. Pumpkin puree adds moisture and a rich flavor. Pumpkin pie spice gives that warm fall taste. Granulated sugar and brown sugar create a sweet, caramelized crust. Unsalted butter helps everything blend together. Vanilla extract enhances the overall flavor. A touch of salt balances the sweetness. If you want extra crunch, add some nuts. Make sure to use fresh ingredients for the best results. This recipe is all about layers of flavor and texture. Get ready to enjoy a warm, gooey treat that is perfect for sharing! First, open the cans of refrigerated biscuit dough. Cut each biscuit into quarters. Place all the pieces in a large mixing bowl. This sets the stage for our monkey bread. In a separate bowl, combine the granulated sugar, brown sugar, pumpkin pie spice, and salt. Mixing well is key to a tasty blend. You want every bit of the sugar to get the spice flavor. Add the sugar mixture to the biscuit pieces. Toss them together until each piece is well coated. This step gives the monkey bread its sweet, spiced crust. Take your time here for even coverage. In another bowl, mix the pumpkin puree, melted butter, and vanilla extract. Pour this mixture over the coated biscuit pieces. Gently stir to combine, making sure every piece gets a nice coating of pumpkin goodness. Spray the inside of your slow cooker with cooking spray. Layer the biscuit pieces neatly in the slow cooker. If you like, add chopped nuts for crunch. Stacking them properly helps them cook evenly. Cover the slow cooker and set it on low heat. Cook for about 2 to 3 hours. Check for doneness by inserting a toothpick into the center. If it comes out clean, your monkey bread is ready. If not, continue cooking in 30-minute increments. Using fresh ingredients is key. Fresh pumpkin puree makes a big difference in flavor. You can use canned puree, but fresh is best for taste. Always check the expiration date on your biscuit dough. Fresh dough bakes better. Adjusting spice levels is fun. Taste as you go. If you want more pumpkin spice, add a bit more. Like it sweeter? Add extra sugar to the mix. You can serve the monkey bread right from the slow cooker. It looks warm and inviting. If you want to impress, transfer it to a nice plate. Drizzle with a glaze made from powdered sugar and milk. This adds a sweet touch. A sprinkle of cinnamon on top makes it look pretty and tasty. You can also add chopped nuts for crunch. Overcrowding the slow cooker is a big mistake. Leave enough space for the biscuits to rise. If they are too packed, they won’t cook evenly. Not checking doneness can ruin your bread. Use a toothpick to test. If it comes out clean, it’s done. If not, keep cooking in 30-minute chunks. This ensures you get a fluffy, perfect monkey bread every time. {{image_2}} You can change the flavors of pumpkin cinnamon sugar monkey bread easily. For a warm twist, add nutmeg to your spice mix. Nutmeg gives a deeper, autumn flavor. You can also mix in chocolate chips or dried fruits. Chocolate chips add sweetness, while dried fruits bring a chewy contrast. Both options make this treat extra special. If you want to try something new, use homemade biscuit dough. This dough can make your monkey bread taste fresher. You can also opt for gluten-free biscuit alternatives. Many stores sell gluten-free dough that works just as well. This way, everyone can enjoy this yummy dessert. Topping your monkey bread can take it to the next level. You can sprinkle nuts and seeds on top for a crunchy bite. Pecans or walnuts work well, adding texture and flavor. Another fun option is to drizzle cream cheese frosting or a simple glaze. This extra sweetness makes every bite even better. To keep your pumpkin cinnamon sugar monkey bread fresh, you should refrigerate it. Place any leftover pieces in an airtight container. This will help keep moisture in and prevent drying out. You can also use plastic wrap to cover the bread if you don’t have a container. When you're ready to enjoy the leftovers, you can use either a microwave or an oven. The microwave is quick and easy. Just place a piece on a plate and heat it for about 20-30 seconds. If you want crispier edges, the oven is better. Preheat it to 350°F (175°C) and bake for about 10 minutes. This keeps the texture nice and fluffy. If you want to save some monkey bread for later, you can freeze it. Wrap each piece tightly in plastic wrap, then place them in a freezer bag. This keeps them fresh and safe from freezer burn. When you're ready to eat, take out a piece and let it thaw in the fridge overnight. For faster thawing, you can leave it at room temperature for a few hours. Yes, you can use an oven. The cooking time will change. In the oven, preheat to 350°F. Bake for about 30 to 40 minutes. Check for doneness by using a toothpick. The monkey bread should be golden brown and fluffy. If you can't find pumpkin puree, use applesauce. It gives a similar texture and moisture. You can also use mashed bananas for a sweet twist. Each option will change the final flavor slightly, but both work well. Monkey bread lasts about 3 to 5 days in the fridge. Store it in an airtight container to keep it fresh and safe. If you notice any signs of spoilage, it’s best to discard it. Yes, you can double the recipe for larger batches. Just make sure your slow cooker can hold the extra dough. You may need to adjust the cooking time. Start checking for doneness after 3 hours. This blog explains how to make pumpkin monkey bread in a slow cooker. You learned about the ingredients, step-by-step instructions, and helpful tips. We explored variations and storage options. Now, get creative with your pumpkin monkey bread! Try different toppings and spices to make it yours. Enjoy it warm and share it with friends. This recipe is fun, easy, and perfect for any occasion. Your kitchen will smell amazing too!

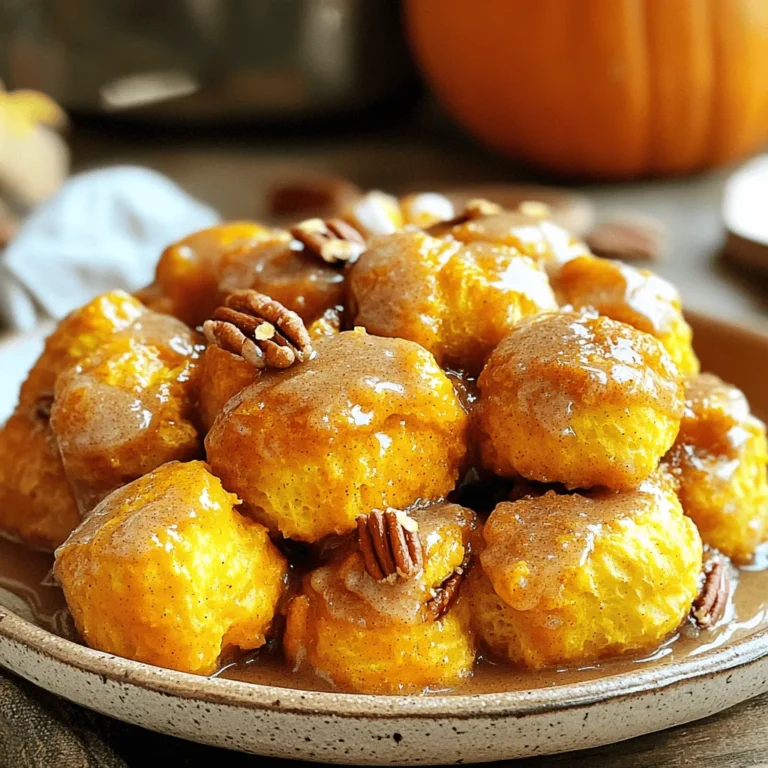
Pumpkin Cinnamon Sugar Monkey Bread Slow Cooker Treat

- 1 pound fresh broccoli florets - 3 tablespoons olive oil - 4 cloves garlic, minced - 1/2 cup grated Parmesan cheese - 1 teaspoon garlic powder - 1/2 teaspoon crushed red pepper flakes (optional) - Salt and pepper to taste - 1 tablespoon lemon juice - Fresh parsley, chopped (for garnish) When I make crispy garlic Parmesan broccoli in the air fryer, I start with fresh broccoli florets. This keeps the dish bright and tasty. I wash and trim the broccoli, making sure to cut the florets into even sizes. This helps them cook evenly. Next, I grab my olive oil. Three tablespoons give the broccoli a nice coat and help it crisp up well. I love using minced garlic; four cloves add a strong flavor. If you like garlic, don't hold back! For seasoning, I use half a cup of grated Parmesan cheese. It melts and creates a wonderful crust on the broccoli. I also add a teaspoon of garlic powder for extra punch. If you want a bit of heat, go for half a teaspoon of crushed red pepper flakes. Don’t forget salt and pepper! You can adjust these to your taste. A tablespoon of lemon juice brightens everything up. Finally, I sprinkle fresh chopped parsley on top for color and freshness. These ingredients come together to make a dish that is crunchy, savory, and full of flavor. Set your air fryer to 400°F (200°C). This step should take about 5 minutes. Preheating helps to make the broccoli crispier. In a large mixing bowl, combine these ingredients: - 1 pound fresh broccoli florets - 3 tablespoons olive oil - 4 cloves garlic, minced - 1 teaspoon garlic powder - 1/2 teaspoon crushed red pepper flakes (optional) - Salt and pepper to taste Toss everything until the broccoli is well-coated. This will help all the flavors stick to the florets. Next, sprinkle in 1/2 cup grated Parmesan cheese. Toss gently again so the cheese mixes well with the broccoli and other ingredients. Place the broccoli in the air fryer basket in a single layer. If your air fryer is small, you may need to cook it in batches. Cook for 8-10 minutes. Be sure to shake the basket halfway through to ensure even cooking. After 10 minutes, check the broccoli. It should be crispy and tender. If you want it crispier, cook for another 2 minutes. Once done, remove the broccoli from the air fryer. Drizzle with 1 tablespoon of fresh lemon juice and toss again to combine. Now, your crispy garlic Parmesan broccoli is ready to enjoy! To make sure your broccoli cooks evenly, shake the basket halfway through. This simple step mixes the florets and helps them crisp up. If you forget to shake, some pieces may cook faster than others. I recommend setting a timer for halfway through the cook time. This keeps your broccoli perfectly crispy and tender. If you want your broccoli even crispier, cook for a few extra minutes. After the initial 10 minutes, check for doneness. If it needs more time, add 2 minutes. Keep an eye on it, though. The goal is crispy, not burnt. Each air fryer may cook a bit differently, so adjust as needed to reach your preferred level of crispiness. To evenly distribute garlic and cheese, toss the broccoli well before air frying. Start with the olive oil, garlic, and seasonings. Mix these first to coat each floret. After that, sprinkle the Parmesan cheese and toss again. This ensures every bite is full of flavor. For an extra zing, add a squeeze of lemon juice just before serving. {{image_2}} You can switch up the cheese if you want. Try using Pecorino Romano for a sharper taste. If you prefer a creamier texture, go for mozzarella. For a twist, use feta cheese. Each option brings its own flavor to the dish, making it fun to explore. Want more heat? Add cayenne pepper or chipotle powder. For a milder kick, stick with black pepper or paprika. You can also mix in herbs like oregano or thyme. This gives your broccoli a unique taste each time you make it. Play with flavors to find your favorite. Broccoli pairs well with many vegetables. Try adding cauliflower for extra crunch. Carrots can add sweetness, and bell peppers can bring color. You could even throw in some asparagus for variety. Mixing in other veggies not only boosts flavor but also makes your dish more colorful and exciting. To keep your crispy garlic Parmesan broccoli fresh, store it in an airtight container. Let it cool completely before sealing. Place it in the fridge. It will stay good for about 3 to 4 days. Avoid stacking too many pieces on top of each other. This helps keep the broccoli from getting soggy. When it's time to enjoy the leftovers, you have a few options. The best way is to use the air fryer. Preheat it to 350°F (175°C). Place the broccoli in the basket and heat for about 4 to 5 minutes. This will bring back the crispiness. You can also use a microwave, but this may make the broccoli softer. Heat it for about 30 seconds and check if it's warm enough. If you want to save your crispy broccoli for later, freezing is a good option. First, cool the broccoli completely. Spread it on a baking sheet and freeze for 1 to 2 hours. Once frozen, transfer it to a freezer bag. Squeeze out as much air as you can. You can keep it frozen for up to 3 months. To use it later, thaw in the fridge overnight, then reheat using the air fryer for the best result. Using frozen broccoli is okay, but it has pros and cons. Pros: - Frozen broccoli is quick and easy to use. - It lasts longer and is often less expensive. Cons: - Frozen broccoli may be softer after cooking. - It may lose some flavor compared to fresh. If you choose frozen, reduce cooking time by a couple of minutes. This helps keep it crisp. Air frying broccoli takes about 8 to 10 minutes at 400°F (200°C). - Start with 8 minutes, then check for crispness. - If you want it crispier, add 2 more minutes. Make sure to shake the basket halfway through. This helps all sides cook evenly. Yes, you can easily make this recipe vegan. Here are some substitutions: - Replace Parmesan cheese with nutritional yeast for a cheesy flavor. - Use avocado oil or any vegetable oil instead of olive oil. These swaps keep the flavor strong while making the dish plant-based. Enjoy your crispy garlic broccoli! This blog post covered a simple and tasty air-fry broccoli recipe. We started with fresh ingredients like broccoli, garlic, and olive oil. You learned step-by-step how to cook it perfectly and tips for crispiness. We also shared fun variations to match your taste. Remember, you can adjust seasonings and garnishes to make it your own. This dish is easy to store and reheat, ensuring you enjoy it later. Try this recipe to enjoy healthy and delicious broccoli any day of the week. Happy cooking!

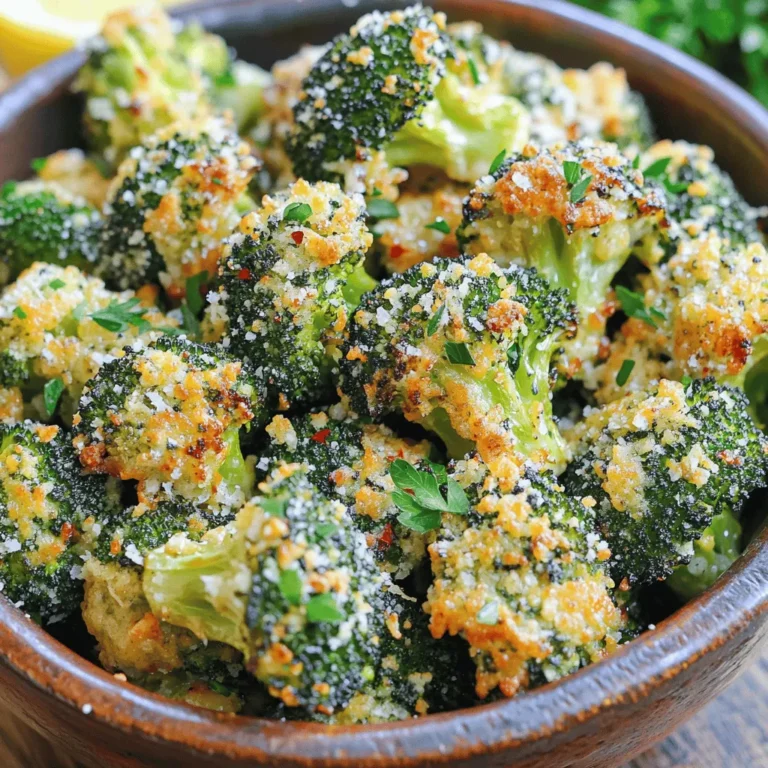
Crispy Garlic Parmesan Broccoli Air Fryer Delight

PREV 1 … 29 30 31 … 57 NEXT
flavor nest kitchen

explore

DessertsDinnerAppetizersDrinks

Our Policies

  • Cookie Policy
  • Copyright Policy
  • Disclaimer
  • GDPR Policy
  • Terms Of Use
Back to Top
  • About
  • Contact Us
  • Privacy Policy
© 2025 flavor nest kitchen