FREE DINNER EBOOK! Get your copy!
  • Cookie Policy
  • GDPR Policy
  • Disclaimer
  • Terms Of Use
  • Visit my other site: Fun Cookie Recipes
flavor nest kitchen
  • Home
  • Dinner
  • Desserts
  • Drinks
  • Appetizers
  • Contact
  • About
  • Privacy Policy
  • Home
  • Dinner
  • Desserts
  • Drinks
  • Appetizers
  • Contact
  • About
  • Privacy Policy
  • Cookie Policy
  • GDPR Policy
  • Disclaimer
  • Terms Of Use
Visit my other site: Fun Cookie Recipes

HOME / CATEGORIES /

Latest

- 2 cups fresh strawberries, hulled and sliced Fresh strawberries are the star of this dessert. Their sweetness and bright color make your cake pop. Choose ripe strawberries for the best flavor. - 1 cup heavy whipping cream - 1/2 cup cream cheese, softened - 1/4 cup sour cream These dairy ingredients add creaminess. The heavy cream whips up light and fluffy. Cream cheese and sour cream give a rich texture. - 1/2 cup powdered sugar - 1 teaspoon vanilla extract - Fresh mint leaves for garnish (optional) Powdered sugar sweetens the cream without graininess. Vanilla extract adds a warm flavor. Mint leaves add a fresh touch, making the cake look pretty. - 12-15 honey graham crackers Graham crackers form the base of the cake. Their honey flavor pairs well with the strawberries. They soak up the cream, making each bite delicious. 1. Start with a large mixing bowl. 2. Whip heavy cream until it begins to thicken. 3. Add powdered sugar and vanilla extract. 4. Keep whipping until soft peaks form. Whipped cream is the magic in this cake. It adds lightness and flavor. Make sure it’s thick and fluffy for the best results. 1. In a separate bowl, combine softened cream cheese and sour cream. 2. Mix until smooth and creamy. 3. Gently fold in the whipped cream. This cream cheese filling is rich and tangy. Folding in the whipped cream makes it airy. It balances the sweetness of the cake. 1. Take an 8x8 inch dish. 2. Start with a layer of graham crackers at the bottom. 3. Spread a layer of the cream mixture over the crackers. 4. Add a layer of sliced strawberries. 5. Repeat the layers until you use all the ingredients. 6. End with the cream mixture on top. Layering is key to this cake. The graham crackers soak up moisture and soften. Each bite should have cream and strawberries. 1. Cover the dish with plastic wrap. 2. Refrigerate for at least 4 hours or overnight. Chilling allows the flavors to blend. It also helps the cake set properly. The longer you wait, the better it tastes! To make the best whipped cream, start with a chilled mixing bowl and beaters. Cold tools help the cream whip faster. Whip the heavy cream until it thickens nicely. Be careful not to over-whip. If you go too far, it turns into butter, and that’s not what we want! Layering is key to a great icebox cake. Alternate layers of graham crackers, cream, and strawberries. This gives each bite a mix of flavors. Always use fresh strawberries. They add a burst of flavor and sweetness that frozen ones can’t match. When it’s time to serve, get creative! Drizzle chocolate or caramel sauce over the top. This adds a nice touch and makes it even more delicious. Don’t forget a dollop of whipped cream for each slice. It makes the dessert extra creamy and rich. Enjoy your beautiful cake! {{image_2}} You can have fun with the flavors in this cake. Instead of strawberries, try using blueberries or raspberries. Both fruits give a fresh taste and vibrant colors. They also work well with the cream and graham crackers. For a zesty twist, add lemon zest to the cream filling. This bright flavor can lift the whole dessert. If you want a vegan version, swap in dairy-free cream cheese and whipped cream. These options taste great and work well in the recipe. For those who need gluten-free options, use gluten-free graham crackers. This way, everyone can enjoy the cake without worry. Presentation matters, especially for a dessert this lovely. You can serve the cake in individual glass cups. This idea makes it look fancy and fun. For a colorful touch, top each cup with extra fruits or edible flowers. Fresh mint leaves also make a great garnish. These small details will impress your guests and make the cake even more delightful. Store your leftovers in an airtight container. Cover it well to keep moisture out. This way, your cake stays fresh. It is best to eat it within 3-4 days. After that, the taste may fade. You can freeze servings for later. Cut the cake into pieces and wrap them well. Use plastic wrap and place them in a freezer bag. When you're ready to enjoy, take out a piece. Thaw it in the fridge overnight. This keeps the texture and flavor intact. This cake is a cold dessert, so no reheating is needed. If it has sat out for a while, you can freshen it up. Just place it back in the fridge for about 30 minutes. This makes it cool and tasty again. Yes, you can use frozen strawberries in this recipe. However, fresh strawberries taste much better. Frozen strawberries may be softer and watery after thawing. If you use frozen ones, let them thaw completely. Drain any extra juice to keep the cake from getting soggy. Fresh strawberries add a nice crunch and vibrant flavor that frozen ones lack. The cake needs to chill for at least 4 hours. For the best flavor and texture, let it set overnight. This time allows the layers to blend and firm up. The chilling process is key to getting that perfect slice. You want to ensure the cake holds its shape when served. Absolutely! You can prepare this cake a day in advance. This makes it a great option for busy days. Just layer the ingredients and refrigerate. It will be ready when you need it. The flavors will deepen, making it even tastier. Perfect for parties, potlucks, or family gatherings. Yes, this cake is great for celebrations! Its beautiful layers and fresh strawberries make it a showstopper. You can serve it at birthdays, picnics, or holidays. Garnish it with mint leaves for a fancy touch. Everyone will love this no-bake dessert. It’s simple, delicious, and perfect for any event! This icebox cake recipe combines fresh strawberries, whipped cream, and cream cheese. You learned how to prepare the layers and set the dessert for maximum flavor. Plus, we explored fun tips like using different fruits or gluten-free options. With these steps, you can impress friends and family. Don’t hesitate to try different flavors or presentations. Each variation will make your cake special. Enjoy making this cool treat that suits any occasion!

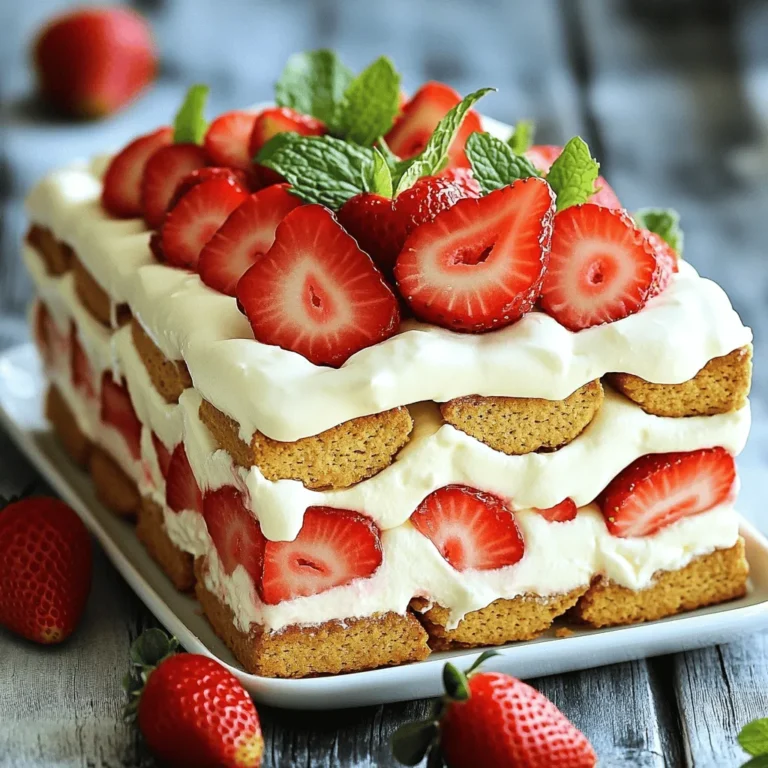
No-Bake Strawberry Shortcake Icebox Cake Delight

- 1 tablespoon olive oil - 1 small onion, diced - 2 cloves garlic, minced - 4 cups vegetable broth - 1 cup orzo pasta - 2 cups fresh spinach, roughly chopped - 1 medium lemon, juiced and zested - 1 cup heavy cream or coconut cream for a dairy-free option - Salt and pepper to taste - 1 teaspoon dried thyme (or 1 tablespoon fresh thyme) - Fresh parsley, chopped (for garnish) To create this One-Pot Creamy Lemon Spinach Orzo Soup, gather all your ingredients first. This helps you stay organized and makes cooking easier. Start with olive oil. It gives your soup a nice base flavor. Next, you need a small onion and garlic. Dicing the onion and mincing the garlic releases their strong aromas. Vegetable broth is key for a rich taste. Use four cups to ensure your soup stays flavorful. Orzo pasta adds heartiness. It cooks quickly and absorbs the broth well. Fresh spinach brightens the dish. Use about two cups, roughly chopped. The lemon juice and zest give your soup a fresh, tangy kick. For creaminess, add either heavy cream or coconut cream. The choice depends on your diet. Season the soup with salt and pepper. A teaspoon of dried thyme brings depth. Finally, fresh parsley adds color and freshness when you serve. This combination makes a delicious, comforting soup. Each ingredient plays a role, enhancing the overall taste. Start by heating 1 tablespoon of olive oil in a large pot over medium heat. Add 1 small diced onion. Sauté it for about 5 minutes until it turns soft and clear. Next, stir in 2 cloves of minced garlic. Cook for 1 more minute until you smell that lovely garlic scent. Now, pour in 4 cups of vegetable broth. Bring the broth to a boil. This step builds a nice, flavorful base for our soup. Once the broth is boiling, add 1 cup of orzo pasta and 1 teaspoon of dried thyme. Stir everything well. Let it simmer for about 8 to 10 minutes. Stir it occasionally. You want the orzo to be al dente, which means it should have a little bite to it. Keep an eye on the time, as overcooked orzo can turn mushy. When the orzo is cooked, turn the heat down to low. Add 2 cups of roughly chopped spinach, 1 medium lemon's juice, and the zest from that same lemon. Stir this mixture for about 2 to 3 minutes. You want the spinach to wilt down nicely. Now, pour in 1 cup of heavy cream or coconut cream for a dairy-free option. Mix it well and let it heat through for another 2 to 3 minutes. Finally, season the soup with salt and pepper to taste. Adjust it to your liking. Let it sit for a minute to thicken before serving. To make the best soup, start with sautéing. Heat olive oil in your pot. Add diced onion and cook until soft. This takes about five minutes. Then, add minced garlic for a minute. This step builds flavor. When you add orzo, stir it often. This keeps it from sticking to the pot. Cook it until al dente. It should have a slight bite, which takes about eight to ten minutes. If you want a dairy-free soup, use coconut cream. It adds rich flavor and keeps it creamy. You can also use other greens. Kale or Swiss chard work great. They add nutrition and flavor to your soup. For extra flavor, try adding fresh herbs. Basil or dill pairs well with lemon. You can also use a pinch of red pepper flakes for heat. Garnishing makes your dish look pretty. Top each bowl with fresh parsley and lemon zest. This adds color and a fresh burst of flavor. Serve with crusty bread for a full meal experience. {{image_2}} You can make this soup heartier by adding protein. Chicken or shrimp works well. Cook bite-sized pieces in the pot before adding the broth. This ensures they soak up all the flavor. For a vegetarian option, try chickpeas or lentils. These add texture and protein without meat. Herbs can change the flavor of your soup. Try adding fresh basil or dill. These herbs bring a nice twist to the lemon taste. If you want some heat, add a pinch of red pepper flakes or cayenne. This gives the soup a warm kick. The broth you use can change the soup’s taste. Chicken broth adds rich flavor. It pairs well with the creamy lemon. If you want a lighter soup, use water or low-sodium broth. This keeps it fresh and bright without being too heavy. To store your soup leftovers, let it cool to room temperature. Next, pour the soup into a container with a tight-sealing lid. I recommend using glass or BPA-free plastic containers. These types keep the soup fresh and make reheating easy. Make sure to store it in the fridge within two hours of cooking. If you want to freeze your orzo soup, do so in an airtight container. I like to use freezer-safe bags for easy storage. Leave some space at the top for expansion. To thaw, place the soup in the fridge overnight or use the microwave. When reheating, warm it slowly on the stove over low heat. You may need to add a splash of broth or water to help it return to the right consistency. In the fridge, this soup lasts about 3 to 4 days. If you freeze it, it can last up to 3 months. Always check for any off smells or changes in texture before eating. With these tips, you can enjoy your One-Pot Creamy Lemon Spinach Orzo Soup at your own pace! To make this soup, start by heating olive oil in a pot. Add diced onion and sauté until soft. Next, stir in minced garlic for a minute. Pour in vegetable broth and bring to a boil. Add orzo pasta and thyme, cooking until the orzo is firm. Lower the heat, then mix in spinach and lemon juice. Finally, stir in the cream and season with salt and pepper. Let it sit briefly before serving. Yes, you can use whole wheat orzo. It has a slightly nuttier flavor. The texture will be a bit firmer than regular orzo. This change can make the soup more hearty. Whole wheat orzo may also need a few extra minutes to cook. Keep an eye on it so it doesn’t get mushy. This soup pairs well with crusty bread or a fresh salad. A simple green salad with lemon vinaigrette complements the soup's flavors. You could also add a side of garlic bread for a tasty treat. For a lighter option, serve with sliced cucumbers or cherry tomatoes. Each of these sides enhances the soup experience! This blog post outlined how to make a tasty One-Pot Creamy Lemon Spinach Orzo Soup. We covered the key ingredients, from olive oil to fresh parsley. I shared easy steps for cooking, plus helpful tips to perfect your dish. You learned about variations, storage, and common questions. Enjoy making this soup for a cozy meal! With a few simple steps, you’ll create a dish that warms both body and soul. Happy cooking!

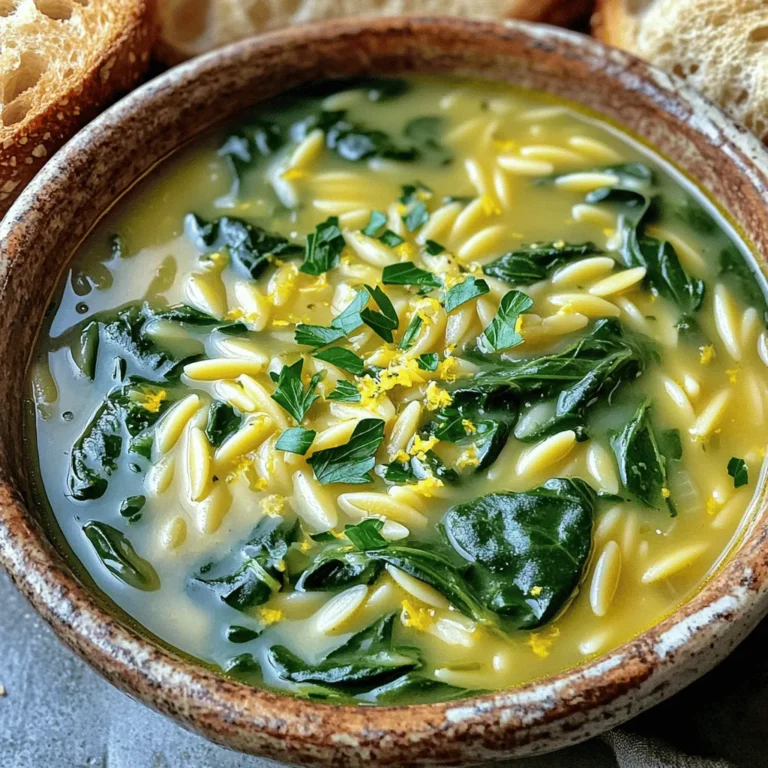
One-Pot Creamy Lemon Spinach Orzo Soup Delight

- 4 large eggs - 1/4 cup milk - Salt and pepper, to taste - 1 tablespoon olive oil or butter - 1 small bell pepper, diced - 1/4 cup onion, finely chopped - 1/2 cup spinach, chopped - 1/2 cup shredded cheese (cheddar, mozzarella, or your favorite) - 4 large flour tortillas - Salsa or hot sauce for serving To keep your ingredients fresh, buy them from a local market or store. Choose bright bell peppers and crisp spinach for the best taste. Look for eggs that are clean and have no cracks. Check cheese for freshness by smelling it; it should smell like cheese! Store your veggies in the fridge to keep them crisp. You will need a few basic tools to make this dish: - A mixing bowl for whisking the eggs - A skillet for cooking the eggs and veggies - A spatula to stir and serve - A cutting board and knife for chopping veggies - A flat surface for wrapping the tortillas This easy setup makes cooking a breeze. You'll enjoy the fun of preparing this dish with just a few simple tools! Start by cracking 4 large eggs into a bowl. Add 1/4 cup of milk. Whisk them together well. Season with salt and pepper to taste. This mixture will be creamy and flavorful. Next, heat 1 tablespoon of olive oil or butter in a skillet over medium heat. Once hot, add 1/4 cup of finely chopped onion and 1 small diced bell pepper. Cook these for 3-4 minutes until they soften. Then, stir in 1/2 cup of chopped spinach. Cook for about 1 minute until the spinach wilts. Now, pour your egg mixture into the skillet. Stir gently to mix it with the veggies. Cook for 4-5 minutes while stirring. The eggs should be scrambled and fully cooked. Once done, remove from heat and stir in 1/2 cup of shredded cheese. Lay a large tortilla on a flat surface. Spoon a portion of the egg and veggie mix into the center. Fold in the sides and roll from the bottom. Repeat this with the other tortillas. For a crispy finish, place the wraps seam-side down in the skillet. Toast for 2-3 minutes until golden brown. Serve warm with salsa or hot sauce on the side for dipping. Enjoy your tasty breakfast! To make the best scrambled eggs, start with fresh eggs. Whisk them well with milk before cooking. This mix adds creaminess and helps the eggs stay fluffy. Cook on medium heat. Stir gently and often. Overcooking makes eggs dry. Remove them from heat when they are still slightly runny. The heat will finish cooking them. To build a great wrap, use large tortillas. Place the egg and veggie mix in the center. Leave space on the sides for easy folding. Fold those sides inward first. Then, roll the wrap from the bottom up. This method keeps all the filling inside. For a crispy finish, toast the wraps seam-side down. This step adds flavor and texture. For a fun presentation, slice the wraps in half. Arrange the halves on a plate. Serve them with a small bowl of salsa or hot sauce. You can also sprinkle fresh herbs on top for color. Try adding a side of fruit for a bright touch. A colorful plate makes the meal more appealing. {{image_2}} You can change the taste by swapping ingredients. Try using different veggies like mushrooms or zucchini. For a spicy kick, add jalapeños or chipotle peppers. You can also use different cheeses, like feta or pepper jack. If you want a meatier wrap, add cooked sausage or bacon bits. Each swap brings a new flavor and keeps things fun! You don’t have to cook these wraps on the stove. Try baking them in the oven for a hands-off method. Preheat the oven to 375°F. Place the wrapped tortillas on a baking sheet and bake for about 10-12 minutes. You can also use a microwave for a quick option. Just heat them for 30-60 seconds until warm. You can make this recipe vegan too. Substitute eggs with silken tofu or chickpea flour. Use plant-based milk, like almond or oat milk. For cheese, try vegan cheese or nutritional yeast for a cheesy flavor. Replace butter with olive oil or coconut oil. These swaps keep the wrap tasty while meeting dietary needs. To keep your TikTok tortilla egg breakfast wraps fresh, let them cool first. Wrap each one in plastic wrap or foil. Place them in an airtight container. Store in the fridge for up to three days. This helps lock in the flavors and keeps them tasty. Reheating is easy. You can use a skillet or microwave. If using a skillet, heat on low for about 3-4 minutes. Turn them often for even heating. In the microwave, place a wrap on a plate. Heat for 30 seconds, then check. If it's not hot, heat in 10-second bursts until warm. To freeze, wrap each tortilla tightly in plastic wrap. Then, place them in a freezer bag. Make sure to remove as much air as possible. They can stay in the freezer for up to two months. When ready to eat, thaw in the fridge overnight before reheating. This keeps them moist and delicious. Yes, you can make these wraps ahead. After cooking, let them cool completely. Wrap each one in foil or plastic wrap. Store them in the fridge for up to three days. When ready to eat, just reheat them in a skillet or microwave. This saves time on busy mornings. You can use many different veggies in these wraps. Try mushrooms, zucchini, or tomatoes. You can even add kale or broccoli for extra crunch. Just make sure to chop them small so they cook evenly. Mix and match your favorites for a fun twist on the recipe. I love serving these wraps with salsa or hot sauce. They add a nice kick. You can also try sour cream or guacamole for a creamier taste. If you want something different, try a yogurt-based sauce. It adds a fresh flavor and balances the meal. This blog post covered key steps for making delicious wraps. We explored the right ingredients, cooking methods, and how to store leftovers. I shared tips on perfecting your eggs and ideas to present your dishes. You can mix flavors or adjust for diets like vegan. Use this knowledge to create tasty wraps that impress. Enjoy your cooking journey and have fun experimenting!

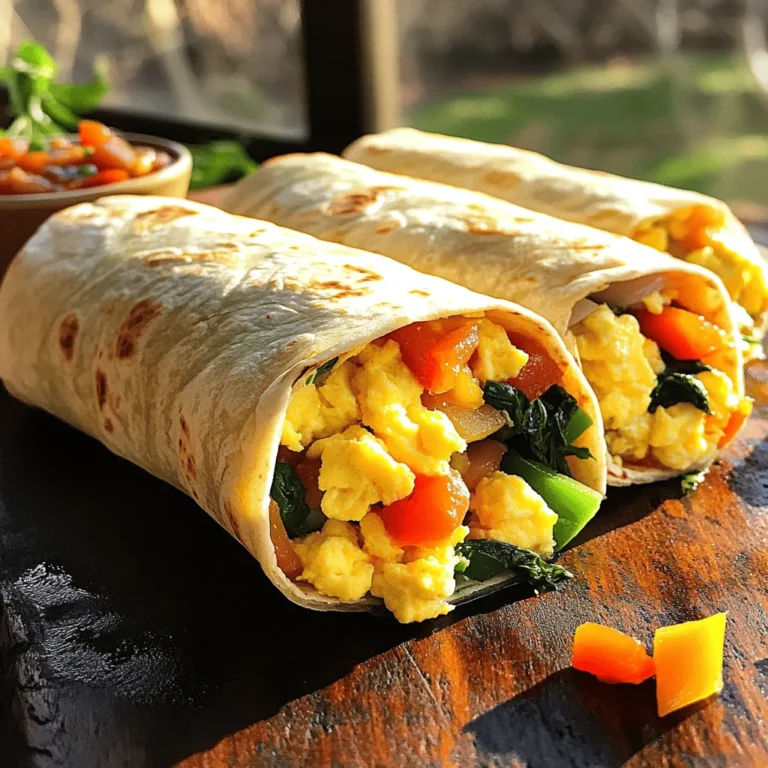
TikTok Tortilla Egg Breakfast Wraps Easy and Tasty Meal

- 1 lb salmon fillet, skinless and boneless, cut into 1-inch cubes - 3 tablespoons soy sauce (or tamari for gluten-free) - 2 tablespoons honey or maple syrup - 1 tablespoon grated fresh ginger - 2 cloves garlic, minced - 1 teaspoon sesame oil - 1 tablespoon cornstarch - 2 green onions, finely sliced - Sesame seeds - Try different sweeteners for varied sweetness. - Use gluten-free substitutes if needed. This recipe has simple but rich flavors. The salmon is the star here. It cooks quickly and stays moist. The marinade adds a sweet and savory touch. Use a good soy sauce or tamari for the best taste. Honey or maple syrup works well for sweetness. Fresh ginger and garlic bring a nice kick. The sesame oil adds depth to the flavor. Cornstarch is key for that crispy bite. It helps achieve a lovely texture in the air fryer. For garnish, green onions provide a fresh crunch. Sesame seeds add a nutty taste and look pretty. You can mix and match sweeteners. If you prefer a different flavor, feel free to swap them out. This dish is also gluten-free if you choose tamari. With these ingredients, you can create a delightful meal in no time! Start by whisking together the marinade. In a bowl, mix the following: - 3 tablespoons soy sauce (or tamari for gluten-free) - 2 tablespoons honey (or maple syrup) - 1 tablespoon grated fresh ginger - 2 cloves minced garlic - 1 teaspoon sesame oil Whisk these ingredients well until they blend into a smooth mix. The honey adds sweetness, while ginger and garlic provide depth. Next, add your salmon cubes to the marinade. Use 1 lb of skinless, boneless salmon, cut into 1-inch pieces. Toss the cubes gently to coat them. Let the salmon marinate for at least 15 minutes. For better flavor, you can marinate it for up to 1 hour in the fridge. The longer it sits, the more the flavors soak in. Now it’s time to cook! Preheat your air fryer to 375°F (190°C) for about 5 minutes. While it heats, sprinkle 1 tablespoon of cornstarch over the marinated salmon. Toss gently to coat. This helps create a crispy skin. Place the salmon bites in a single layer in the air fryer basket. Avoid overcrowding the basket to ensure even cooking. Air fry the salmon for 8-10 minutes. Shake the basket halfway through to promote even cooking. Check that the internal temperature reaches 145°F (63°C). When done, carefully take them out and serve. Enjoy these tasty bites! Cornstarch is your best friend for crispy salmon bites. It forms a nice coating that helps them fry up crunchy. Make sure to sprinkle it evenly over the salmon. Toss gently to coat each piece. Also, avoid overcrowding the air fryer basket. If you fit too many pieces in, they steam instead of fry. Cook in batches if needed. For the best flavor, marinate the salmon for at least 15 minutes. This helps the marinade soak in well. If you have time, let it sit for an hour in the fridge. You can also add other spices to your marinade. A pinch of red pepper flakes adds a nice heat. Fresh herbs like cilantro can brighten the flavor too. Choose an air fryer with good reviews for even cooking. I recommend models that let you check the food without opening the drawer. To check for doneness, the salmon should reach 145°F (63°C). Use a meat thermometer to be sure. This way, you avoid undercooking or overcooking your salmon bites. {{image_2}} You can change the taste of your teriyaki salmon bites in fun ways. One option is to add sesame seeds and furikake. This adds a nutty crunch and a burst of umami. Furikake is a Japanese seasoning that can enhance the flavor. You can also make a spicy version by adding chili flakes or sriracha. This will give your bites a nice kick. Adjust the spice level to fit your taste. While air frying gives nice crispiness, you can try baking or grilling salmon bites, too. Baking requires a preheated oven at 400°F (200°C) for about 12-15 minutes. Just keep an eye on them. Grilling can add great flavor as well. Grill them over medium heat for about 3-4 minutes per side. Both methods can still achieve a tasty meal. What you pair with your salmon bites can really elevate the meal. A simple side of rice or quinoa works well. You can also serve them with a fresh salad for a lighter option. For extra flavor, consider adding dips or sauces like a tangy soy sauce or a creamy avocado sauce. These will complement the teriyaki flavor and make each bite even better. To store leftovers, let the salmon bites cool down first. Place them in an airtight container. This keeps them fresh and prevents strong smells. You can store them in the fridge for up to three days. Make sure to label your container with the date. If you want to freeze salmon bites, first, let them cool completely. Then, place them in a freezer bag or a tight container. Remove as much air as possible to avoid freezer burn. You can freeze them for up to three months. To reheat, thaw them overnight in the fridge. Then, air fry them at 375°F (190°C) for about 5-7 minutes. This keeps them crispy. When stored properly, the shelf life of teriyaki salmon bites is about three days in the fridge. If frozen, they can last up to three months. Always check for any off smells or changes in texture before eating leftovers. Marinate the salmon for at least 15 minutes. This time allows the flavors to soak in. For even better taste, try marinating for up to 1 hour in the fridge. The longer you marinate, the more robust the flavor. Yes, you can use frozen salmon. However, thaw it completely before marinating. This ensures the marinade coats the salmon well. Thaw it in the fridge overnight or use a quick thaw method under cool running water. The ideal internal temperature for cooked salmon is 145°F (63°C). Use a meat thermometer to check. At this temperature, the salmon should be flaky and moist, not dry. Yes, this recipe can be gluten-free. Use tamari instead of soy sauce. Tamari is a gluten-free soy sauce. Always check labels to ensure other ingredients are also gluten-free. To add heat, mix in chili flakes or sriracha into the marinade. Start with a small amount and adjust to taste. You can also add sliced jalapeños for an extra kick. This recipe for air-fried salmon bites offers a simple, tasty dish. You learned about the main ingredients and optional variations to suit your taste. I shared steps for marinating and cooking, plus tips for the best results. These salmon bites are adaptable, whether you want them sweet or spicy. With easy storage methods, you can enjoy leftovers too. Experiment with flavors and serving ideas for a fun meal. Now, it's your turn to try cooking these bites and impress everyone around you!

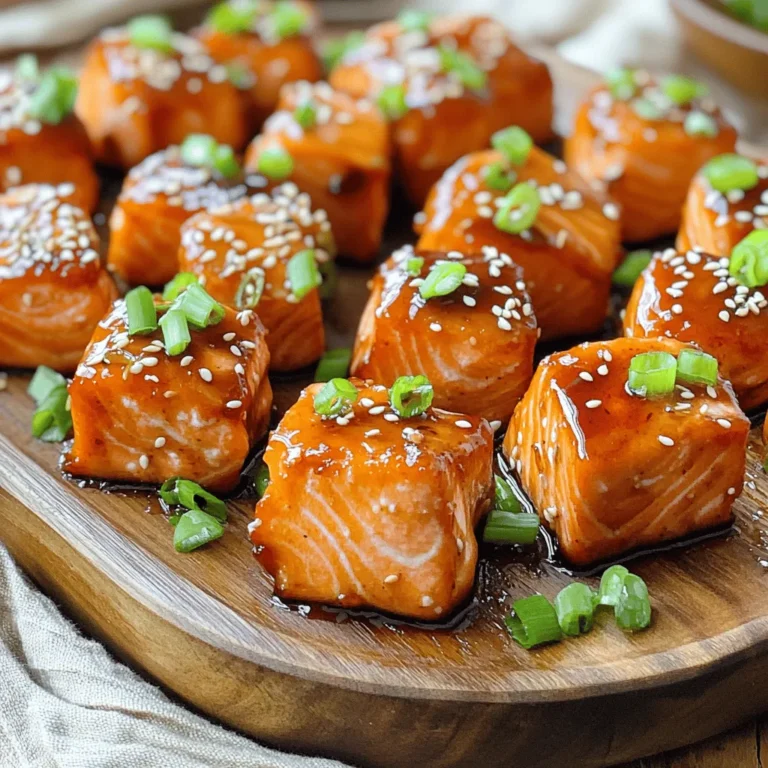
Air Fryer Teriyaki Salmon Bites Quick and Flavorful Meal

To make these tasty donut holes, gather the following ingredients: - 1 cup all-purpose flour - 1/2 cup shredded carrots - 1/4 cup granulated sugar - 1/4 cup brown sugar - 1/2 teaspoon baking powder - 1/2 teaspoon baking soda - 1/2 teaspoon ground cinnamon - 1/4 teaspoon ground nutmeg - 1/4 teaspoon salt - 1/2 cup buttermilk (or milk with 1/2 tsp vinegar) - 1 large egg - 1/4 cup vegetable oil - 1/2 teaspoon vanilla extract - 1/2 cup powdered sugar (for glaze) - 2 tablespoons pure maple syrup (for glaze) These ingredients blend well to create a moist, flavorful donut hole. If you lack any key items, consider these swaps: - All-purpose flour: Use whole wheat flour for a nuttier taste. - Buttermilk: Mix regular milk with vinegar as a quick alternative. - Vegetable oil: Swap it with melted coconut oil or melted butter. - Brown sugar: You can use white sugar, but the flavor will change slightly. These substitutes work well, but they may alter the taste or texture a bit. Fresh carrots make a big difference in flavor. Here’s how to choose the best ones: - Look for firm, smooth carrots without cracks or soft spots. - Check for vibrant color. Deep orange carrots usually taste sweeter. - Avoid carrots with green tops, as this means they are overripe. - Try to buy organic carrots when possible. They tend to be fresher and tastier. Selecting fresh carrots will enhance your donut holes, making them even more delicious! To make these tasty donut holes, start by gathering your ingredients. You will need all-purpose flour, shredded carrots, sugars, baking powder, baking soda, spices, buttermilk, an egg, oil, and vanilla. Preheating your oven to 350°F (175°C) is key. This temperature helps the donut holes rise well. You can use a mini muffin pan or a silicone mold. Greasing the pan is important to prevent sticking. 1. In a large bowl, mix the flour, granulated sugar, brown sugar, baking powder, baking soda, cinnamon, nutmeg, and salt. Whisking these dry ingredients together ensures even mixing. 2. In another bowl, combine the buttermilk, egg, vegetable oil, and vanilla extract. Whisk these wet ingredients until they blend well. 3. Pour the wet mix into the dry mix. Stir gently until just combined. Be careful not to overmix. Then, fold in the shredded carrots. This adds moisture and flavor to your batter. 4. Now, fill each mini muffin cup or mold about 3/4 full with batter. You can use a spoon or piping bag for this step. 5. Bake these in your preheated oven for 10-12 minutes. To check if they are done, insert a toothpick in the center. If it comes out clean, they are ready. 6. Let the donut holes cool in the pan for about 5 minutes. After that, transfer them to a wire rack to cool completely. While the donut holes cool, you can make the maple glaze. In a bowl, mix the powdered sugar and pure maple syrup. Stir until the mix is smooth and creamy. Once the donut holes are cool, dip the tops into the glaze. Place them back on the rack for a few minutes. This allows the glaze to set and gives a nice finish. Enjoy your sweet treat! When making Maple Glazed Carrot Cake Donut Holes, avoid a few common mistakes. - Overmixing the Batter: Mix just until combined. This keeps your donut holes light and fluffy. - Not Measuring Ingredients Accurately: Use a kitchen scale or measuring cups. Accurate measurements lead to better results. - Skipping the Cooling Step: Let the donut holes cool before glazing. This prevents the glaze from melting off. For a perfect maple glaze, follow these steps: - Use Fresh Ingredients: Always use fresh powdered sugar and pure maple syrup. - Mix Thoroughly: Whisk the powdered sugar and maple syrup until smooth. There should be no lumps. - Adjust Consistency: If the glaze is too thick, add a drop of milk. If too thin, add more powdered sugar. Aim for a pourable consistency. You can take your Maple Glazed Carrot Cake Donut Holes to the next level by adding flavors: - Nuts: Chopped walnuts or pecans add crunch and depth. - Dried Fruits: Raisins or pineapple can add sweetness and texture. - Spices: A pinch of ginger or cloves can enhance the spice profile. - Zest: Add orange or lemon zest for a bright, fresh flavor. Experiment with these tips to create your perfect donut holes! {{image_2}} You can make your donut holes even more fun! Try adding chopped nuts, like walnuts or pecans. These add a nice crunch and flavor. Dried fruits, such as raisins or cranberries, bring sweetness and chewiness. You might also want to add some coconut flakes for a tropical twist. Just mix these in when you fold in the carrots. While maple glaze is delightful, you can switch it up! A cream cheese glaze pairs well with carrot flavors. Simply blend cream cheese, powdered sugar, and a bit of milk. If you want a citrus zing, try a lemon glaze. Just mix powdered sugar with lemon juice. For toppings, sprinkle cinnamon sugar or toasted coconut on top. Each option gives a new taste to your donut holes. If you need gluten-free donut holes, swap the all-purpose flour with a gluten-free blend. Make sure it has a binding agent like xanthan gum. For a vegan option, replace the egg with a flaxseed egg. Mix one tablespoon of ground flaxseed with three tablespoons of water. Let it sit for five minutes to thicken. Use plant-based milk in place of buttermilk. These adjustments let everyone enjoy the treat! To keep your maple glazed carrot cake donut holes fresh, use an airtight container. Place them in a cool, dry spot. This way, they stay soft and tasty. You can store them at room temperature for up to three days. If you want to keep them longer, refrigerate them. Just remember to seal them well to prevent drying out. If you want to enjoy warm donut holes, reheating is simple. Preheat your oven to 350°F (175°C). Place the donut holes on a baking sheet. Heat them for about 5 to 7 minutes. This warms them up without making them tough. You can also use the microwave. Heat each donut hole for about 10 to 15 seconds. This is quick and easy! To freeze your donut holes, let them cool completely first. Then, place them in a single layer on a baking sheet. Freeze for about an hour. After that, transfer them to a freezer bag. Squeeze out the air and seal it well. They can last up to three months in the freezer. When you’re ready to eat, take out the desired amount. Let them thaw at room temperature for about an hour. If you want them warm, follow the reheating steps mentioned above. Enjoy your sweet treat anytime! You can tell the donut holes are done when a toothpick comes out clean. Insert it into the center of one. If it’s clean, they are ready. Bake them for 10-12 minutes at 350°F (175°C). The tops will look golden brown. They should spring back when you press them gently. Yes, you can make the batter ahead of time! Mix it up and store it in the fridge for a few hours. Just remember to give it a good stir before you fill your molds. This helps keep the donut holes light and fluffy. You might find Maple Glazed Carrot Cake Donut Holes at bakeries that focus on unique treats. Look for shops that specialize in gourmet donuts or seasonal flavors. Calling ahead can save you a trip. If they don’t have them, ask if they can make them fresh! Making maple glazed carrot cake donut holes is fun and rewarding. We covered the key ingredients, discussed substitutes, and shared tips for choosing the best carrots. I provided a clear guide to prepare and bake them, with detailed glaze instructions. You learned common mistakes to avoid, how to enhance flavors, and many delicious variations. Lastly, I gave storage tips to keep your donut holes fresh. Now, enjoy creating this tasty treat at home. The joy of baking brings smiles, and these donut holes will surely impress!

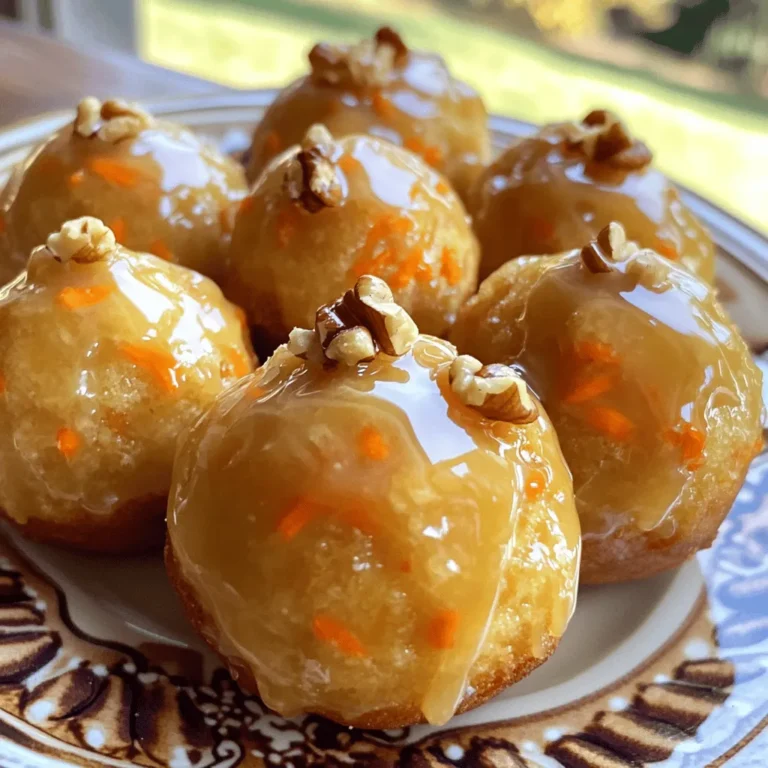
Maple Glazed Carrot Cake Donut Holes Delight Recipe

- 2 packs instant ramen noodles - 1 red chili, thinly sliced - 1 bell pepper, julienned - 1 small zucchini, julienned - 1 cup snap peas - 4 cloves garlic, minced - 3 green onions, chopped - 3 tablespoons soy sauce - 1 tablespoon honey or maple syrup - 1 tablespoon sesame oil - 2 tablespoons vegetable oil - Sesame seeds - Fresh cilantro - Bring a pot of water to a boil. - Add 2 packs of instant ramen noodles. - Cook them for 2-3 minutes as per the package. - Drain the noodles and set them aside. - In a small bowl, mix together: - 3 tablespoons soy sauce - 1 tablespoon sesame oil - 1 tablespoon honey or maple syrup - Stir well to combine the flavors. - Heat 2 tablespoons of vegetable oil in a large skillet. - Add 4 minced garlic cloves and 1 sliced red chili. - Sauté for about 30 seconds until fragrant. - Toss in 1 julienned bell pepper, 1 julienned zucchini, and 1 cup snap peas. - Stir-fry these for 3-4 minutes until they are tender but still crisp. - Add the drained ramen noodles to the skillet. - Pour the sauce over the noodles and veggies. - Gently toss everything until well coated. - Stir in 3 chopped green onions and cook for 1-2 more minutes. - Serve hot, garnished with sesame seeds and fresh cilantro if you like. To avoid burnt garlic, keep a close eye on it. Garlic cooks fast. Sauté it for only 30 seconds. If it turns brown, it will taste bitter. To ensure vegetables stay crunchy, stir-fry them over high heat. This helps them cook quickly. Cook just until they are tender but still bright. Aim for about 3-4 minutes of cooking time. To adjust the heat level, use more or less chili. Slice the red chili thinly for a stronger kick. If you prefer less heat, remove the seeds. You can also add other sauces and spices. Try adding a splash of oyster sauce for depth. A hint of ginger can give your dish a nice twist. For presentation, serve the stir-fry in deep bowls. Add a wedge of lemon or lime on the side. This lets everyone squeeze fresh juice over their meal. You can pair your ramen stir-fry with a simple salad. A cucumber salad or edamame works well. These sides add freshness and balance to your meal. {{image_2}} You can change the veggies in this dish. Try broccoli, carrots, or mushrooms. Each veggie adds a new taste and texture. You can also swap proteins. Tofu is a great choice for vegans. If you want meat, chicken or shrimp works well. Just cook them before adding to the stir-fry. Want to change the flavor? You can add curry powder or fresh ginger. Both give a warm kick. If you want more heat, use extra chili or chili flakes. This makes the dish even spicier and more exciting. If you need gluten-free options, use rice noodles instead of ramen. Be sure to check the sauce for hidden gluten. For a vegan dish, skip the honey and use maple syrup instead. This keeps the dish sweet and tasty without any animal products. To store leftover stir-fry, let it cool first. Place it in an airtight container. This keeps it fresh and tasty. Store in the fridge for up to three days. Make sure to label the container with the date. This way, you won’t forget how long it’s been there. The best way to reheat stir-fry is in a skillet. Heat a little oil over medium heat. Add the cold stir-fry and cook, stirring often. This helps to warm it up evenly. You can also use a microwave if you’re in a hurry. Place it in a microwave-safe bowl. Heat in 30-second bursts, stirring in between, until hot. If you want to freeze the stir-fry, use a freezer-safe container. Let it cool completely before you freeze it. It can last up to two months in the freezer. When ready to eat, thaw it overnight in the fridge. Reheat it in a skillet or microwave for best results. To make your stir-fry spicier, you can add some tasty ingredients. Here are a few suggestions: - More red chili: Slice up extra red chilies for added heat. - Chili paste: Mix in a spoonful of chili paste or sriracha. - Hot sauce: Drizzle your favorite hot sauce over the dish. - Crushed red pepper: Sprinkle crushed red pepper flakes while cooking. These additions will boost the spice level, so adjust based on your taste. Yes, you can use regular ramen noodles! Just remember that cooking times will change. Regular noodles usually take longer to cook, about 4-5 minutes. Follow the package instructions for the best results. You want them tender but not mushy. Drain them and follow the same steps in the recipe. You can serve many side dishes with your stir-fry. Here are some great options: - Spring rolls: These add a nice crunch and freshness. - Edamame: A healthy and tasty snack to go with your meal. - Miso soup: A warm soup that complements the flavors of the stir-fry. - Rice: Steamed rice or fried rice makes the meal more filling. These sides will enhance your dining experience and add variety to your plate. This post shared a simple recipe for Minute Garlic Chili Ramen Stir-Fry. You learned about key ingredients like instant noodles and fresh veggies. We covered step-by-step instructions to make the dish tasty and easy. Tips helped you avoid common mistakes while cooking. I also shared ways to customize the dish for your taste and dietary needs. Remember, cooking should be fun, so feel free to experiment! Enjoy your meal and share your results with others.

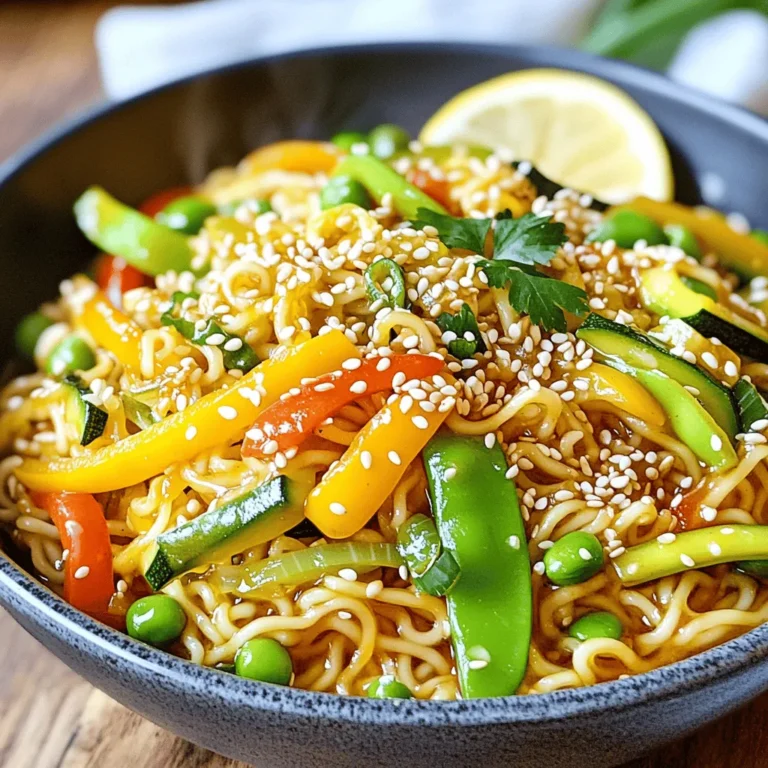
Minute Garlic Chili Ramen Stir-Fry Quick and Easy Meal

To make High-Protein Snickerdoodle Overnight Oats, gather these items: - 1 cup rolled oats - 1 cup unsweetened almond milk (or milk of choice) - 1/2 cup Greek yogurt (plain or vanilla) - 2 tablespoons chia seeds - 1 tablespoon maple syrup (optional, for sweetness) - 1 tablespoon cinnamon (plus extra for topping) - 1 teaspoon vanilla extract - 1 scoop vanilla protein powder (optional) - A pinch of salt - Chopped nuts (like pecans or walnuts) for garnish - Sliced apples or banana for topping You can easily swap some ingredients to fit your taste or diet. Try these: - Use coconut milk instead of almond milk for a tropical flavor. - Substitute regular yogurt with dairy-free yogurt for a vegan option. - Replace chia seeds with flax seeds if you prefer. - Use honey or agave syrup instead of maple syrup for sweetness. - Add different spices like nutmeg or pumpkin spice for variety. Each serving of these oats provides a balanced meal. Here’s a breakdown: - Calories: Approximately 350 - Protein: About 20 grams - Carbohydrates: Around 45 grams - Fat: Roughly 10 grams - Fiber: Approximately 8 grams These numbers can vary based on your choices and portion sizes. This dish offers a good mix of protein, fiber, and healthy fats, making it a great start to your day! 1. Start by taking a large mixing bowl. 2. Add 1 cup of rolled oats to the bowl. 3. Pour in 1 cup of unsweetened almond milk, or your preferred milk. 4. Add 1/2 cup of Greek yogurt. You can use plain or vanilla yogurt. 5. Next, sprinkle in 1 tablespoon of cinnamon for that snickerdoodle flavor. 6. Then, mix in 1 teaspoon of vanilla extract for extra taste. 7. Stir in 2 tablespoons of chia seeds, which help with texture. 8. If you want some sweetness, add 1 tablespoon of maple syrup. 9. Mix in a pinch of salt to balance the flavors. 10. If you want more protein, add 1 scoop of vanilla protein powder. 11. Stir everything well until fully combined. 12. Cover the bowl tightly, and place it in the fridge. 13. Let it soak for at least 4 hours or overnight. - Ensure you stir well to break up any clumps. - Soaking overnight helps the oats absorb liquid and become soft. - If you forget to soak it overnight, let it sit for at least 4 hours. - Check the consistency in the morning. If it's thick, add a splash of milk. - Serve the oats in individual bowls or jars for a nice look. - Top with chopped nuts like pecans or walnuts for crunch. - Add a sprinkle of cinnamon for extra flavor. - Slice apples or bananas and place them on top. - You can enjoy them cold or warm them in the microwave for 30 seconds. To get the best texture, use rolled oats. They soak up liquid well. Mix all your ingredients well to avoid clumps. Let your oats sit overnight. This gives them time to soften. If they seem too thick in the morning, add a splash of almond milk. Stir until you reach your desired creaminess. The sweetness level can change based on your taste. I suggest starting with one tablespoon of maple syrup. You can add more if you like it sweeter. If you prefer natural sweetness, use ripe bananas on top. Apples also add a nice touch and flavor. To boost protein, use Greek yogurt. It adds creaminess and nutrition. You can also add a scoop of vanilla protein powder. This helps if you want a filling meal. Chopped nuts, like pecans or walnuts, are great too. They add healthy fats and extra protein. {{image_2}} You can easily change the flavor of your high-protein snickerdoodle overnight oats. Here are some tasty ideas: - Chocolate: Add 1 tablespoon of cocoa powder. This adds a rich taste. - Pumpkin Spice: Mix in 2 tablespoons of pumpkin puree and 1 teaspoon of pumpkin spice. This gives a cozy fall flavor. - Nutty: Stir in almond or hazelnut extract. This adds a nice nutty touch. You can adjust the recipe to fit your dietary needs: - Vegan: Use plant-based yogurt and almond milk. You can skip the protein powder or use a vegan version. - Gluten-Free: Choose gluten-free rolled oats. This makes the recipe safe for gluten-sensitive folks. Toppings can change your oats in fun ways. Here are some great options: - Fruits: Try berries, peaches, or mango. They add freshness and vitamins. - Nuts: Pecans or walnuts give a crunch. They also add healthy fats. - Seeds: Add pumpkin or sunflower seeds for more protein and texture. - Sweeteners: Drizzle honey or agave syrup for extra sweetness. - Spices: Sprinkle nutmeg or cardamom to spice it up. These variations keep your snickerdoodle overnight oats exciting and delicious! You can mix and match to find your favorite flavors. To store your high-protein snickerdoodle overnight oats, find a clean, airtight container. You can use a glass jar or a plastic container with a tight lid. Fill your container with the oats, leaving some room at the top. This space allows for any expansion as the oats soak up liquid. The oats stay fresh for about 3 to 5 days in the fridge. I recommend eating them within this time for the best taste and texture. If you notice any extra liquid, just stir it in before eating. Always check for any off smells before you dig in. If you prefer warm oats, you can easily reheat them. Just remove your oats from the fridge and transfer them to a microwave-safe bowl. Heat them for about 30 seconds. Stir and check the temperature. If they need more warmth, heat for another 15 seconds. Enjoy them warm or cold, based on your mood! Yes, you can use different types of oats. Instant oats and steel-cut oats work well. Instant oats will soak up liquid faster. Steel-cut oats take longer to soften, so adjust the soaking time. Rolled oats are best for a creamy texture. They blend well with yogurt and milk. You can keep overnight oats in the fridge for up to five days. Just make sure to store them in an airtight container. This will keep them fresh and tasty. If you notice any changes in smell or texture, it's best to toss them. Absolutely! Meal prepping overnight oats is easy. You can make several jars at once. Just follow the recipe and divide the mixture into jars. This way, you have breakfast ready for the week. Grab one in the morning, and you're all set! We covered everything about making delicious overnight oats. You now know the full list of ingredients, how to prepare them step-by-step, and tips for great texture. You can customize flavors and make dietary adjustments. Don’t forget about storage to keep them fresh. With your new knowledge, you can enjoy tasty, healthy overnight oats that fit your needs. Explore different variations to keep it exciting. Start today and make your breakfast a joyful experience!

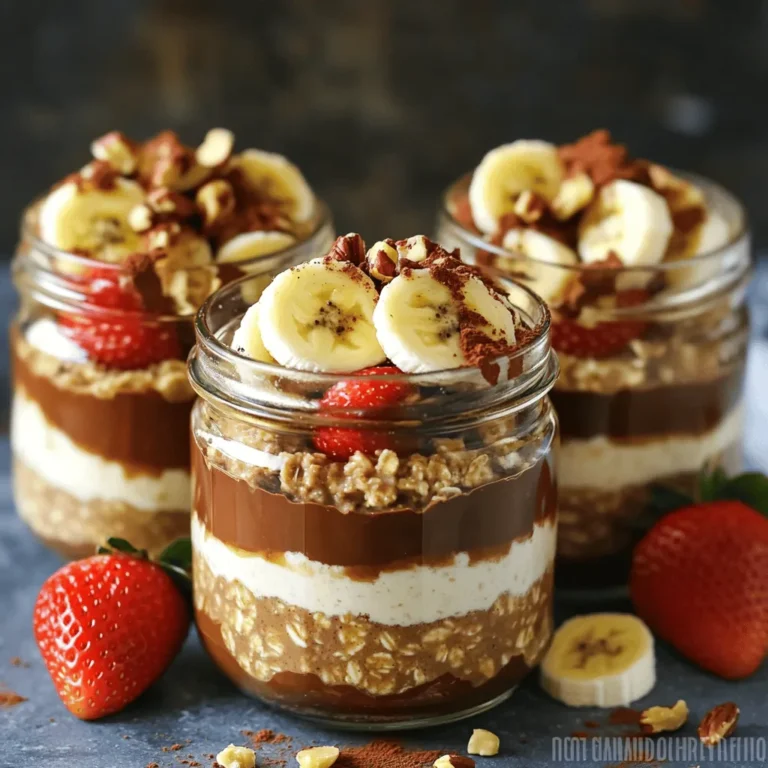
High-Protein Snickerdoodle Overnight Oats Recipe

Here’s a list of what you need for roasted garlic tomato soup: - 2 cups ripe tomatoes, halved - 1 head of garlic, top sliced off - 1 medium onion, chopped - 2 tablespoons olive oil - 4 cups vegetable broth - 1 teaspoon sugar - 1 teaspoon dried basil - Salt and pepper to taste - ½ cup heavy cream (optional for creaminess) - Fresh basil leaves for garnish Using ripe tomatoes gives the soup a fresh taste. The garlic, roasted until soft, adds a sweet flavor. The onion adds depth. Olive oil helps everything blend well. Vegetable broth creates a rich base. Sugar balances the acidity. Dried basil adds a lovely herb taste. Salt and pepper enhance all the flavors. Heavy cream makes it creamy, but you can skip it. Finally, fresh basil adds a bright finish. Gather these ingredients before you start cooking. This will make your cooking process smooth and enjoyable. {{ingredient_image_1}} 1. Preheating the oven Start by preheating your oven to 400°F (200°C). This high heat helps caramelize the tomatoes and garlic, bringing out their flavors. 2. Preparing tomatoes and garlic for roasting Halve the tomatoes and slice the top off the head of garlic. Place them cut side up on a baking sheet. Drizzle with 1 tablespoon of olive oil. Add salt and pepper to taste. 3. Roasting process Roast the tomatoes and garlic in the oven for about 25-30 minutes. Look for lightly caramelized tomatoes and soft garlic. This step is key for deep flavor. 1. Sautéing onions In a large pot, heat the remaining tablespoon of olive oil over medium heat. Add the chopped onion. Sauté until the onion turns translucent, about 5 minutes. This builds a flavor base. 2. Adding roasted ingredients Once the garlic is cool enough to handle, squeeze the roasted cloves out of their skins and add them to the pot with the onions. Stir for one minute to combine. Then add the roasted tomatoes and their juices. 3. Blending the soup Pour in the vegetable broth. Add sugar, dried basil, plus more salt and pepper to taste. Bring the soup to a simmer. Let it cook for about 15 minutes. This allows the flavors to meld. Use an immersion blender to puree until smooth. 1. Adding heavy cream (if desired) If you want a creamy soup, stir in ½ cup of heavy cream. Simmer for an additional 5 minutes to heat through. 2. Serving suggestions Serve the soup warm. Garnish with fresh basil leaves for a pop of color. Enjoy it with crusty bread or a side salad for a complete meal. Choose ripe tomatoes for the best flavor. I love using Roma or San Marzano tomatoes. They have a rich taste and cook down nicely. When picking tomatoes, look for ones that feel heavy and firm. Their skin should be smooth and free of blemishes. A deep red color often signals ripeness. Roasting brings out natural sweetness in tomatoes. Preheat your oven to 400°F (200°C). Roast for about 25 to 30 minutes. You want them to caramelize slightly. This process deepens the flavors. Keep an eye on the garlic too; it should be soft and golden. For blending, an immersion blender is super handy. It lets you blend right in the pot. If you use a regular blender, do it in batches. Make sure to let the steam escape to avoid spills. Blend until smooth, or leave it a bit chunky if you like texture. Aim for a silky consistency for your soup. Pro Tips Use Sweet Tomatoes: Opt for sweeter varieties like cherry or heirloom tomatoes for a richer flavor. Roast Garlic for Depth: Roasting garlic brings out its natural sweetness and mellows its sharpness, enhancing the soup's flavor. Adjust Consistency: For a thicker soup, add less broth; for a thinner consistency, add more as needed. Herb Variations: Experiment with different herbs such as thyme or oregano for a unique twist on the classic basil flavor. {{image_2}} You can make your roasted garlic tomato soup more filling by adding protein. Beans and lentils are great choices. They add nutrition and texture. Consider using chickpeas or black beans. Simply stir them in during the simmering stage. If you prefer meat, you can add diced chicken. Use cooked chicken to keep it simple. You can also use vegetable protein, like tofu, for a hearty touch. For a vegan version, skip the heavy cream. Instead, use coconut milk or cashew cream. These will still give you a creamy texture. You can also enhance flavor with nutritional yeast. It adds a cheesy note without any dairy. Blend it in just before serving for the best taste. Do you like heat? Spice it up! Add chili flakes or diced poblano peppers. Both options bring a nice kick. Start with a pinch of chili flakes. You can always add more if you want. For poblano peppers, roast them with the tomatoes. This will deepen their flavor. Adjust the heat to match your taste. Enjoy experimenting! You can store leftovers for up to five days. Make sure to keep the soup in an airtight container. This helps keep the flavors fresh. I recommend using glass containers. They are easy to clean and won't stain. You can freeze the soup for later use. Let the soup cool completely before you freeze it. Pour it into freezer-safe containers, leaving some space at the top. This allows for expansion. You can also use freezer bags for easy storage. To thaw, place the soup in the fridge overnight. When you reheat the soup, do it slowly on the stove. This helps keep it creamy. Stir it often to avoid burning. If the soup seems thick, add a splash of vegetable broth or water. This brings back its smooth texture. Yes, you can use canned tomatoes. Canned tomatoes are great when fresh ones aren't in season. Choose whole or diced canned tomatoes for the best flavor. Drain some juice if the soup is too watery. Using canned tomatoes saves time and adds flavor. They often come with seasonings that enhance the taste. Just remember, fresh tomatoes give that vibrant taste. If your soup is too thin, there are easy ways to thicken it. You can add more vegetables like chopped carrots or potatoes. Cook them with the soup until soft, then blend. Another option is to stir in a little cornstarch mixed with water. This will help achieve a thicker texture quickly. You can also add more heavy cream for creaminess. Roasted Garlic Tomato Soup pairs well with many sides. Grilled cheese sandwiches are a classic choice. Their crispy texture contrasts nicely with the soup. You can also serve it with a fresh salad. A simple green salad or a Caesar salad adds crunch. For something heartier, try garlic bread or crusty baguette slices. These options make your meal more filling and satisfying. This blog post detailed a simple recipe for Roasted Garlic Tomato Soup. We covered essential ingredients, preparation steps, and cooking instructions. You learned tips for choosing ripe tomatoes and perfecting the roast for rich flavor. We also discussed variations like adding protein or making it vegan. Finally, we shared storage information to keep your soup fresh. Enjoy making and sharing this soup with loved ones. Simple ingredients create a dish full of warmth and flavor. Happy cooking!

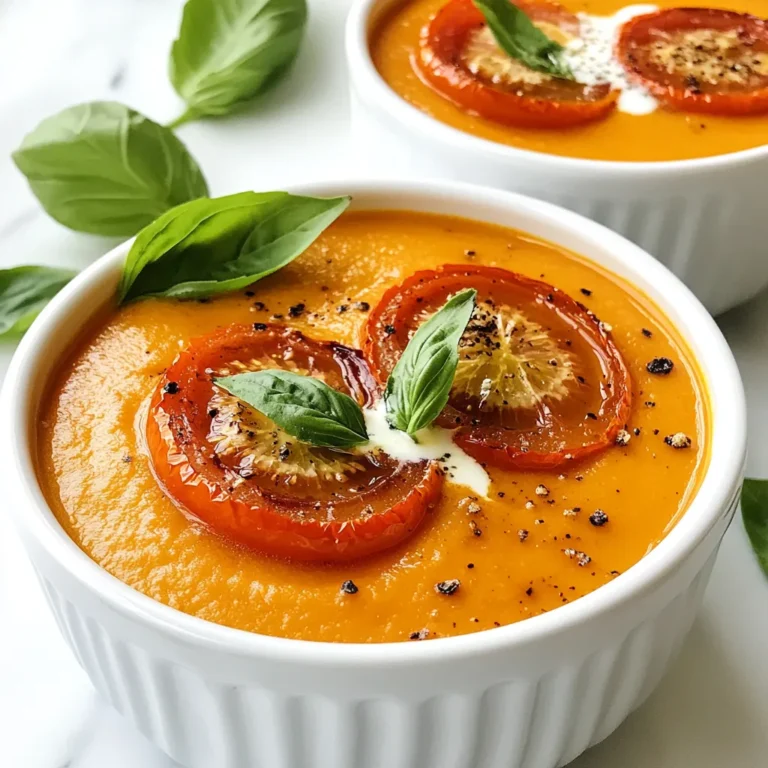
Roasted Garlic Tomato Soup Flavorful and Easy Recipe

- 1 cup rolled oats - 2 cups almond milk or preferred milk - 1/4 cup creamy peanut butter - 2 tablespoons honey or maple syrup - 1/4 cup unsweetened cocoa powder - 1/2 teaspoon vanilla extract - A pinch of salt These ingredients create a rich and satisfying base. The rolled oats provide fiber, while almond milk adds creaminess. Creamy peanut butter delivers a delicious nutty flavor. Sweeteners like honey or maple syrup bring sweetness, and cocoa powder gives a chocolatey taste. Vanilla extract adds warmth, and salt enhances all the flavors. - 1/4 cup dark chocolate chips - Sliced bananas or strawberries for topping Optional add-ins can elevate your dish. Dark chocolate chips add extra chocolate goodness. Fresh fruits like bananas or strawberries offer a burst of flavor and color. You can mix and match these toppings based on your preferences. Adding them makes the oats more fun and tasty! First, grab a large mixing bowl. Add 1 cup of rolled oats. Pour in 2 cups of almond milk or your choice of milk. Next, scoop in 1/4 cup of creamy peanut butter. Add 2 tablespoons of honey or maple syrup for sweetness. Then, mix in 1/4 cup of unsweetened cocoa powder and 1/2 teaspoon of vanilla extract. Don’t forget a pinch of salt to balance the flavors. Now it’s time to mix! Use a whisk to combine everything. Whisk until the mixture is smooth. Make sure there are no lumps of cocoa powder or peanut butter. If you like, you can fold in 1/4 cup of dark chocolate chips at this stage. This adds a nice touch of extra chocolate flavor. Once your mixture is ready, divide it evenly among jars or containers with lids. Make sure to seal them tightly. Place the jars in the fridge. It’s best to let them chill overnight, or at least for 4-6 hours. This allows the oats to soak up the milk and soften. In the morning, stir the oats. If they are too thick, add a little more milk to reach your desired consistency. To make the perfect overnight oats, consistency matters. If your oats seem too thick, add more milk. Start with a little and mix well. This helps you reach the texture you want. A smooth mixture is key. Whisk well to break up lumps. Ensure no cocoa powder or peanut butter remains clumpy. A smooth blend makes a big difference in taste. Presentation can elevate your dish. Serve your oats in clear jars. This lets the beautiful layers shine through. For a final touch, sprinkle some cocoa powder on top. Crushed nuts add a nice crunch too. These small details make your dish look great and more appetizing. Sweetness is personal. If you want your oats sweeter, you can adjust this easily. Start with the recipe's suggested amount. Taste the mixture before it chills. If it needs more sweetness, add a bit more honey or maple syrup. Choose your sweetener based on your taste. Some prefer honey, while others love maple syrup. Both work well and add flavor. {{image_2}} You can make peanut butter cup overnight oats even tastier by adding spices. Try adding a dash of cinnamon for warmth. It adds flavor without extra sugar. You can also use flavored protein powder. Options like chocolate or vanilla can boost taste and nutrition. If you want a dairy-free version, use plant-based milk. Almond, soy, or oat milk work well. For sweetening, swap honey with maple syrup or agave. These options keep the recipe vegan and just as tasty. Seasonal fruits can brighten your oats. In summer, try fresh berries. In fall, add diced apples with cinnamon. For holidays, use festive toppings like crushed peppermint or pumpkin spice. These little changes keep your oats fun and exciting all year long. Store your peanut butter cup overnight oats in the fridge. They stay fresh for up to five days. Use airtight containers to keep them from drying out. If you want to save them longer, you can freeze them. Just make sure to use freezer-safe jars or bags. Leave some space at the top of the jar to allow for expansion. You can enjoy these oats cold straight from the fridge. If you prefer them warm, heat them in a microwave. Start with 30 seconds, then stir and check the heat. If you want to add some flair, refresh your toppings. Sliced bananas or strawberries work great. A sprinkle of cocoa powder can also add a nice touch. These oats can last for a good while, but some signs of spoilage to watch for include: - An off smell - Mold on the surface - Changes in texture If you notice any of these signs, it’s best to toss the oats. Always trust your senses when it comes to food safety. Yes, you can use quick oats. Quick oats cook faster and absorb liquid quickly. However, they may lead to a softer texture. Rolled oats give a heartier feel. If you prefer a chewier bite, stick with rolled oats. These oats last for about five days in the fridge. Make sure you store them in airtight containers. If you notice any off smell or change in texture, it's best to toss them out. Absolutely! You can make these oats up to five days ahead. Just prepare them, store them in the fridge, and enjoy them each morning. This makes breakfast easy and quick. If you need a substitute, try almond butter or sunflower seed butter. Both options provide a similar creamy texture. They also add their unique flavors, making the dish fun. Yes, you can make this recipe gluten-free. Just use certified gluten-free oats. Most almond milks and other ingredients are also gluten-free. Always check the labels to be sure. You've learned how to create delicious overnight oats using simple ingredients. We covered key components, mixing techniques, and storage tips to help you succeed. Remember, you can adjust flavors and sweetness to fit your taste. Whether you prefer classic or creative variations, there's a recipe for everyone. Enjoy your wholesome breakfast, and don't hesitate to experiment! Your morning routine will never be the same.

Peanut Butter Cup Overnight Oats Tasty and Simple Dish

- 1 lb chicken thighs, boneless and skinless, cut into bite-sized pieces - 1 cup basmati rice, rinsed - 1 medium onion, finely chopped - 3 garlic cloves, minced - 1 inch ginger, grated - 1 teaspoon turmeric powder - 1 pinch of saffron threads - 1 teaspoon cumin powder - 1 teaspoon coriander powder - 2 cups chicken broth (or vegetable broth for a vegetarian option) - 1 tablespoon olive oil - Salt and pepper to taste - 1/2 cup frozen peas - Fresh cilantro for garnish - Lemon wedges, for serving The fresh ingredients form the base of this dish. Chicken thighs bring tenderness and flavor. Basmati rice adds a nice texture. Onion, garlic, and ginger create depth and aroma. For spices, turmeric gives a vibrant color and earthy taste. Saffron adds a unique touch. Cumin and coriander introduce warm notes to the dish. Broth ensures the dish stays moist. Olive oil adds richness. Salt and pepper enhance all the flavors. Frozen peas offer a pop of color and sweetness. Fresh cilantro and lemon wedges add brightness when serving. Each ingredient plays a key role in creating the delicious Saffron Turmeric Chicken & Rice One Pot Delight. First, take a small bowl. Soak the saffron threads in two tablespoons of warm water. This step helps release their color and flavor. Set this aside while you prepare the rest of the meal. Next, grab a large, deep pot. Heat one tablespoon of olive oil on medium heat. Add the finely chopped onion. Sauté for about 4 to 5 minutes until it turns translucent. Then, stir in the minced garlic and grated ginger. Cook for one more minute until the aroma fills your kitchen. Now, add the chicken pieces to the pot. Season them with salt, pepper, cumin, and coriander. Cook the chicken pieces for 7 to 8 minutes. You want them browned on all sides. Sprinkle turmeric powder over the browned chicken and mix well. Then, pour in two cups of chicken broth. Bring it to a gentle simmer. Next, stir in the rinsed basmati rice along with the soaked saffron and its water. Cover the pot, reduce the heat to low, and let it simmer for about 15 minutes. The rice should absorb all the liquid and become tender. In the last 5 minutes of cooking, fold in half a cup of frozen peas. This adds color and sweetness to the dish. Once the rice is cooked, remove the pot from heat. Let it rest, covered, for another 5 minutes. After the resting time, fluff the rice with a fork. This step separates the grains for a better texture. Garnish with fresh cilantro to add a pop of color. Serve with lemon wedges on the side for a zesty touch. Enjoy your saffron turmeric chicken and rice delight! To keep your rice from getting mushy, rinse it well. Rinsing removes extra starch. This helps the rice stay separate and fluffy. After rinsing, soak the rice for about 30 minutes. This step lets the grains absorb water and cook evenly. The best rice for this dish is basmati. It has a lovely aroma and a light, fluffy texture. You can also use jasmine rice for a slightly different taste. Both types work well with saffron and turmeric. You can add more spices to boost flavor. Consider using cardamom or cinnamon for warmth. A pinch of chili powder can add a nice kick if you like heat. When it comes to herbs, fresh cilantro shines in this dish. It adds brightness and freshness. Dried herbs can work too, but they won’t have the same impact. If you use dried herbs, add them earlier in the cooking process. This dish pairs well with a simple salad. A fresh cucumber salad or a side of roasted vegetables can balance the meal. For drinks, I recommend a light white wine. A chilled Sauvignon Blanc complements the dish's flavors. If you prefer non-alcoholic options, serve it with a refreshing mint lemonade. This drink will add a zesty touch. {{image_2}} You can make a tasty vegetarian version by swapping chicken for tofu or chickpeas. Tofu absorbs flavors well. Use firm tofu and cut it into cubes. Sauté it just like you would with chicken. If using chickpeas, drain and rinse canned chickpeas. Add them in step 6, right before you mix in the rice. This swap keeps the dish hearty and satisfying. If you want to switch up the protein, shrimp or fish works great. For shrimp, peel and devein them first. Add them to the pot after browning the onions, garlic, and ginger. Cook until they turn pink, about 3-5 minutes. For fish, use firm white fish like cod. Cut it into chunks and add it with the rice. Adjust cooking time to ensure the fish stays tender. To add more texture, consider adding dried fruits or nuts. Raisins or dried apricots can bring a sweet touch. Toss them in when you add the rice. Nuts like almonds or cashews add a nice crunch. Toast them lightly in the pot before mixing in the rice for extra flavor. These tweaks make the dish fun and exciting every time you cook it! To store leftovers, let the dish cool down first. Place it in an airtight container. Store it in the fridge for up to three days. This keeps the chicken and rice fresh. Make sure to separate the portion sizes if you want to reheat only a part. For freezing, use freezer-safe containers or bags. Divide the dish into smaller portions. It freezes well for up to three months. When ready to eat, thaw it overnight in the fridge. This prevents ice crystals from forming and keeps texture. To reheat, use the stovetop or microwave. If using the stovetop, add a splash of broth. Heat gently over low heat. If using a microwave, cover the dish with a lid. Heat in short bursts, stirring between. This helps keep the chicken moist and the rice fluffy. Yes, you can use brown rice. However, you must adjust the cooking time. Brown rice takes longer to cook than basmati. You will need about 40-45 minutes for brown rice to become tender. Make sure to add more liquid, too. Use about 2.5 cups of broth for every cup of brown rice. Keep an eye on it and check for doneness. Saffron adds a unique flavor and color. However, if you don’t have saffron, you can still enjoy this dish. You can use turmeric alone for color. Alternatively, you could use a pinch of smoked paprika for a different taste. Remember, the flavor will change a bit without saffron, but it will still be tasty. If you want more heat, add red pepper flakes. Start with a small pinch and taste as you go. You can also use fresh chili peppers or hot sauce. Another option is to add some cayenne pepper into the spice mix. Adjust the spice level to suit your taste! This post shared how to make a tasty dish using fresh ingredients like chicken thighs and basmati rice. We explored spices like turmeric and saffron, and how to prepare them. I showed you step-by-step instructions, tips to enhance flavors, and variations for different tastes. Storing and reheating leftovers properly helps keep the dish great for later. Enjoy trying out these methods and sharing your meal with friends and family. Cooking can be fun!

Saffron Turmeric Chicken & Rice One Pot Delight

PREV 1 … 32 33 34 … 57 NEXT
flavor nest kitchen

explore

DessertsDinnerAppetizersDrinks

Our Policies

  • Cookie Policy
  • Copyright Policy
  • Disclaimer
  • GDPR Policy
  • Terms Of Use
Back to Top
  • About
  • Contact Us
  • Privacy Policy
© 2025 flavor nest kitchen