FREE DINNER EBOOK! Get your copy!
  • Cookie Policy
  • GDPR Policy
  • Disclaimer
  • Terms Of Use
  • Visit my other site: Fun Cookie Recipes
flavor nest kitchen
  • Home
  • Dinner
  • Desserts
  • Drinks
  • Appetizers
  • Contact
  • About
  • Privacy Policy
  • Home
  • Dinner
  • Desserts
  • Drinks
  • Appetizers
  • Contact
  • About
  • Privacy Policy
  • Cookie Policy
  • GDPR Policy
  • Disclaimer
  • Terms Of Use
Visit my other site: Fun Cookie Recipes

HOME / CATEGORIES /

Latest

- 1 pound chicken tenders - 1 cup buttermilk - 1 cup breadcrumbs - 1/2 cup finely crushed everything bagels or everything bagel seasoning - 2 tablespoons grated Parmesan cheese - 1 teaspoon garlic powder - 1 teaspoon onion powder - 1/2 teaspoon paprika - Salt and pepper to taste - 1 tablespoon olive oil The main ingredients for Baked Everything Bagel Chicken Tenders are simple yet flavorful. Chicken tenders are the star of this dish. They are juicy and cook quickly. Buttermilk adds moisture and flavor. It also makes the chicken very tender. Next, we have breadcrumbs. They give a nice crunch. You can use regular or whole wheat. The crushed everything bagels or seasoning bring that iconic bagel flavor. It gives the tenders a unique twist! The seasoning is key to making these tenders pop. Grated Parmesan cheese adds a rich taste. Garlic and onion powder give depth. Paprika adds a bit of warmth and color. Salt and pepper enhance all these flavors. Finally, olive oil helps the coating crisp up in the oven. It also adds a touch of healthy fat. All these ingredients come together to create a dish that's hard to resist. This flavor-packed meal is perfect for any night of the week! 1. Preheat the oven: Set your oven to 400°F (200°C). This ensures that your chicken tenders cook evenly. While it heats, you can prepare the rest of the recipe. 2. Soaking chicken in buttermilk: Take 1 pound of chicken tenders and place them in a bowl. Pour 1 cup of buttermilk over the chicken. Let it soak for at least 30 minutes. This step makes the chicken juicy and flavorful. 1. Mixing the breadcrumb mixture: In a separate bowl, combine 1 cup of breadcrumbs and 1/2 cup of finely crushed everything bagels. Add in 2 tablespoons of grated Parmesan cheese, 1 teaspoon of garlic powder, 1 teaspoon of onion powder, 1/2 teaspoon of paprika, and salt and pepper to taste. Mix until everything is well blended. 2. Coating technique for chicken tenders: After soaking, remove the chicken tenders from the buttermilk. Let the extra buttermilk drip off. Take each tender and coat it in the breadcrumb mixture. Press down gently to make sure the coating sticks well. 1. Arranging chicken on the baking sheet: Line a baking sheet with parchment paper. Place the coated chicken tenders on the sheet. Leave some space between each piece for even cooking. 2. Drizzling with olive oil: Drizzle 1 tablespoon of olive oil over the chicken. This will help the coating turn golden and crispy as it bakes. 3. Baking time and flipping tips: Bake the chicken in the oven for 20-25 minutes. Halfway through, flip the tenders to get them crispy on both sides. The chicken should be cooked through and golden brown when done. To make your Baked Everything Bagel Chicken Tenders pop, consider these marinades: - Honey mustard: A sweet and tangy mix. - Garlic and herb: A classic blend that adds depth. If you want to switch up the seasonings, try: - Cajun spice: Adds a bit of heat. - Smoked paprika: Gives a nice smoky flavor. For the best crunch, bake at 400°F (200°C). This heat makes the coating crisp. Be sure to flip the tenders halfway for even cooking. Drizzling olive oil is key. It helps the coating brown and become crispy. Use just enough to coat without making them greasy. Serve these tenders with tasty dipping sauces such as: - Ranch: A classic favorite. - Honey mustard: Sweet and savory. - Yogurt dip: Light and refreshing. For a beautiful presentation, arrange the tenders on a platter. Sprinkle fresh herbs on top for color. Place dipping sauces in small bowls around the tenders to make it inviting. {{image_2}} You can change up the texture by using panko instead of regular breadcrumbs. Panko gives a crunchier bite. It also browns well in the oven. If you want a twist, try using crushed crackers or cornflakes for a fun crunch. For a different flavor, you can swap everything bagel seasoning. Try a mix of sesame seeds, garlic powder, and onion flakes. You can also use Italian seasoning for a fresh taste. Just remember, keep the ratios balanced. Chicken tenders are great, but you can use chicken breasts or thighs, too. Breasts are lean and cook fast, while thighs add more flavor and moisture. If you want a plant-based option, tofu works well. Press it to remove moisture, then coat as you would chicken. Fish like salmon or cod can also be a tasty option. Just adjust the cooking time since fish cooks faster. For gluten-free needs, use gluten-free breadcrumbs or crushed nuts. Almond flour can also work as a great substitute. If you're avoiding dairy, skip the Parmesan cheese or use a dairy-free alternative. Buttermilk can be replaced with almond milk mixed with a bit of vinegar or lemon juice. This gives a similar tangy effect. These substitutions help everyone enjoy this dish! To keep your Baked Everything Bagel Chicken Tenders fresh, store them in an airtight container. This helps keep them from drying out. Place the container in the fridge. They stay good for about 3 to 4 days. If you want them to last longer, freeze them. They can last for up to 2 months in the freezer. When it’s time to enjoy leftovers, the best way to reheat them is in the oven. Preheat the oven to 375°F (190°C). Place the chicken tenders on a baking sheet. This helps them regain their crispiness. Bake for about 10 to 15 minutes. If you want to use a microwave, place a paper towel under the chicken. This helps absorb moisture and avoid sogginess. Heat in short bursts until warm, checking often to keep them crispy. Bake chicken tenders for 20 to 25 minutes at 400°F (200°C). The chicken should be cooked through and golden brown. Flip the tenders halfway for even cooking. This step helps them get crispy on all sides. Yes, you can use frozen chicken tenders. However, thaw them before soaking in buttermilk. This makes the coating stick better. You may need to adjust the baking time slightly if they are still a bit frozen. If you don't have buttermilk, you can make your own. Mix 1 cup of milk with 1 tablespoon of vinegar or lemon juice. Let it sit for five minutes. This creates a sour milk that works well in the recipe. Yes, you can make these tenders ahead of time. Prepare them and store in the fridge for up to one day. Bake them just before serving for the best texture. You can also freeze them after coating for later use. This post shared how to make tasty baked chicken tenders. We covered key ingredients like chicken, buttermilk, and breadcrumbs. I also shared tips to get crunchy texture and enhance flavors. In the end, you can adapt the recipe with different coatings and proteins. Don't forget to try out the storage tips and reheating methods for the best results. Enjoy your cooking!

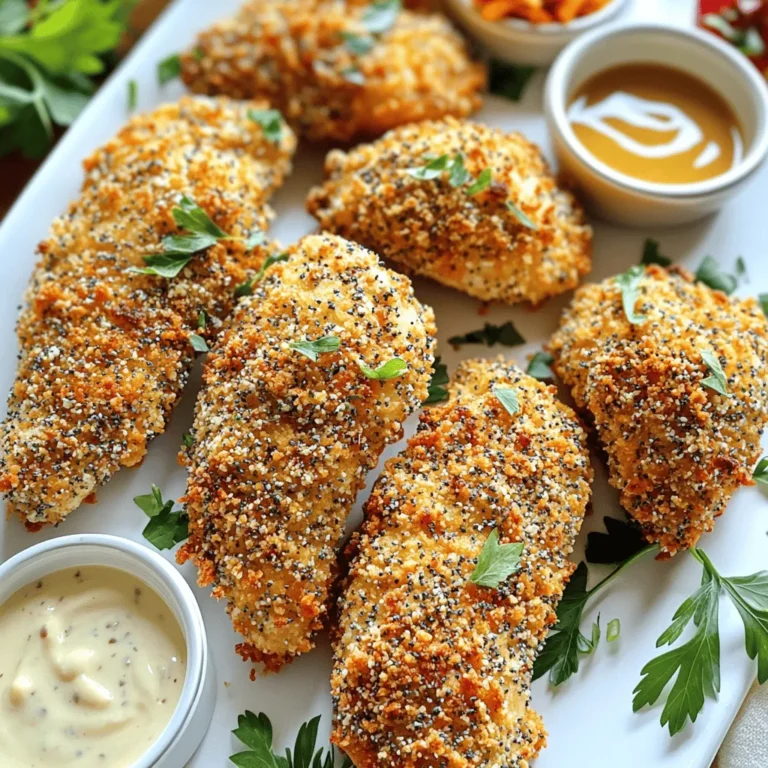
Baked Everything Bagel Chicken Tenders Delight

- 4 cups fresh or frozen corn kernels - 1 medium onion, diced - 2 cloves garlic, minced - 1 red bell pepper, diced - 1 jalapeño pepper, seeded and minced (adjust to preference) - 4 cups vegetable broth - 1 teaspoon ground cumin - 1 teaspoon smoked paprika - 1 tablespoon lime juice - 1/2 cup heavy cream or coconut milk - Salt and pepper to taste - Fresh cilantro, chopped (for garnish) - Crumbled cotija cheese (optional, for garnish) - Tortilla strips (for added crunch) Each ingredient plays a key role in making this soup burst with flavor. The corn gives a sweet base. The onion and garlic add depth. Red bell pepper brings a nice color and sweetness. The jalapeño gives it a kick, but you can adjust it to your taste. Vegetable broth serves as a rich backdrop and keeps it hearty. Ground cumin and smoked paprika bring warmth and a slight smokiness. Lime juice adds brightness, making each bite fresh. Heavy cream or coconut milk rounds it out, giving a creamy texture. Finish with salt and pepper to enhance all the flavors. Fresh cilantro adds a burst of color and herby goodness. If you like, sprinkle some crumbled cotija cheese on top for a salty touch. Finally, tortilla strips add a delightful crunch. With these ingredients, you can create a soup that feels like a warm hug on a chilly day. 1. Set the Instant Pot to 'Sauté' mode. This step gets your pot ready. It heats up fast. 2. Add olive oil and sauté onion. Pour in a drizzle of olive oil. Let it warm. Add the diced onion. Cook for about 3-4 minutes. The onion should turn soft and clear. 3. Incorporate garlic, red bell pepper, and jalapeño. Next, add minced garlic, diced red bell pepper, and minced jalapeño. Stir them around for another 2 minutes. This will bring out their flavors. 1. Add the main ingredients to the pot. Now, mix in corn kernels, vegetable broth, ground cumin, smoked paprika, and lime juice. Give it a good stir. This creates a rich base for your soup. 2. Seal the Instant Pot and cook. Close the lid tightly. Make sure the valve is set to 'Sealing.' Choose 'Manual' mode and set it for 8 minutes. 3. Quick release of pressure. After the time is up, carefully do a quick release. Watch out for steam. Once the pressure is gone, you can open the lid. 1. Stir in cream or coconut milk. Add heavy cream or coconut milk for a creamy touch. This makes the soup smooth and rich. 2. Season and blend flavors. Taste the soup and add salt and pepper as needed. Let it simmer on 'Sauté' mode for 5 more minutes. This helps all the flavors mix well. 3. Serving suggestions. Serve the soup hot. Top it with fresh cilantro, crumbled cotija cheese, and crispy tortilla strips. This adds flavor and crunch to each bite! To boost flavor, adjust the spice with jalapeño. Start with half a pepper for mild heat. You can always add more later. If you want it spicy, keep the seeds. Add lime juice for brightness. A sprinkle of smoked paprika deepens the taste. For more depth, try adding a pinch of chili powder. Crunchy toppings make this soup special. I recommend tortilla strips for a great crunch. You can also use crushed corn chips. Fresh cilantro adds a burst of flavor and color. Crumbled cotija cheese gives a creamy finish. For a twist, try diced avocado or pickled red onions. Most Instant Pot models work well for this soup. I recommend the 6-quart size for best results. You will also need a good knife for chopping. A cutting board is essential for safe prep. A measuring cup helps with liquids. Finally, have a ladle ready for serving. {{image_2}} You can change up the ingredients to suit your taste. Try using fresh herbs instead of dried spices. Fresh cilantro or parsley adds a nice touch. For cream, you can use dairy-free options like coconut milk. This keeps your soup light and tasty. Want to boost the flavor? Add some smoked sausage or chicken. Both will give the soup a heartier feel. You can also mix in other vegetables like zucchini or bell peppers. These add color and extra nutrients. Pair this soup with sides for a complete meal. Cornbread or tortilla chips work great. You can use leftovers for easy meal prep. Just store them in the fridge for later. This soup reheats well and tastes even better the next day! After enjoying your soup, let it cool down. Pour it into an airtight container. This helps keep it fresh. Store it in the fridge. The soup lasts for about 3 to 5 days. If you notice any off smell, it's best to toss it. To freeze the soup, start by cooling it completely. Then, pour it into freezer bags. Press out as much air as you can before sealing. Lay the bags flat in the freezer. This saves space and makes thawing easier. The soup can last up to 3 months in the freezer. When you’re ready to enjoy it again, take the bag out and place it in the fridge overnight. For a quick reheat, use the microwave or stovetop. Add a little broth if it seems thick. To refresh the flavor, consider adding lime juice or fresh spices. This can make it taste as good as new. Garnishes can elevate your soup too. Sprinkle chopped cilantro on top. Crumbled cotija cheese adds a rich touch. Don't forget crispy tortilla strips for that perfect crunch! Yes, you can make this soup dairy-free. Instead of heavy cream, use coconut milk. Coconut milk gives a nice, creamy texture. It also adds a slight sweetness that pairs well with the corn. You can easily adjust the spice levels. For a mild soup, remove the jalapeño seeds. You can also skip the jalapeño altogether. If you want more heat, add extra jalapeños. You can even sprinkle in some cayenne pepper for an extra kick. This soup pairs well with many dishes. Consider serving it with tortilla chips or crusty bread. A fresh salad or grilled vegetables make great sides too. For a full meal, you might add tacos or quesadillas. Enjoy experimenting with your favorite sides! This blog post covered all you need to make a tasty Mexican Street Corn Soup. We explored key ingredients, easy steps, and helpful tips. You learned about flavor variations and how to store leftovers. Try using fresh herbs or add some smoked sausage for a twist. Remember, you can adjust spice levels to fit your taste. With these ideas, you can enjoy a delicious bowl anytime! Cooking doesn't have to be hard. Get your Instant Pot ready and dive in!

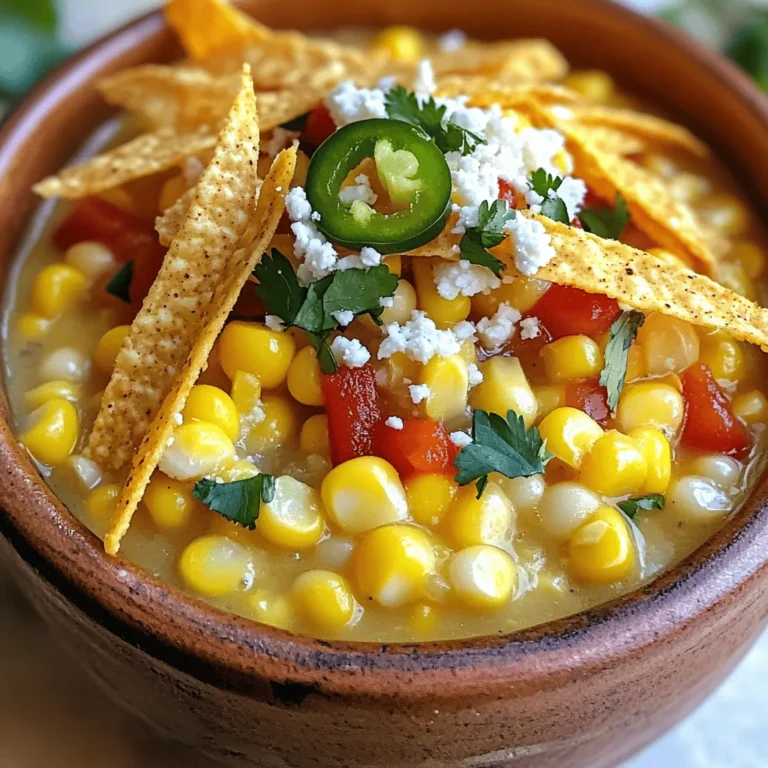
Instant Pot Mexican Street Corn Soup Flavor Boost

- 8 oz cream cheese, softened - 1 cup powdered sugar - 1/2 cup sour cream - 1 teaspoon vanilla extract - 1/2 cup salted caramel sauce (store-bought or homemade) - 1/2 cup finely chopped pecans, plus extra for garnish - 1/4 teaspoon sea salt - Graham crackers, apple slices, or pretzels for dipping For this dip, I recommend using full-fat cream cheese. It gives a rich and creamy texture. Choose a high-quality salted caramel sauce for the best flavor. If you prefer, make your own at home. Fresh pecans add a nice crunch and nutty taste. For the sour cream, use full-fat for creaminess. The vanilla extract should be pure, not imitation. This will enhance the dip's overall flavor. If you want a lighter version, use low-fat cream cheese. You can swap sour cream with Greek yogurt. For a nut-free option, skip the pecans or use sunflower seeds. If you do not like caramel, try chocolate sauce instead. You can also use honey for a different sweet touch. 1. Start with 8 ounces of cream cheese. Let it sit out to soften. 2. In a large bowl, beat the cream cheese using an electric mixer. Mix until smooth. 3. Slowly add 1 cup of powdered sugar. Mix on low speed to combine well. 4. Next, add 1/2 cup of sour cream and 1 teaspoon of vanilla extract. 5. Keep mixing until the dip is smooth and creamy. 1. Fold in 1/2 cup of salted caramel sauce. Make sure it mixes evenly. 2. Gently stir in 1/2 cup of finely chopped pecans. Save some for topping. 3. Taste your dip. If you want, add 1/4 teaspoon of sea salt. Adjust to your liking. - If the dip feels too thick, add a little more sour cream. - For a thinner dip, mix in more caramel sauce. - Make sure to mix well at each step. This helps the flavors blend. You can prepare this dip a day in advance. Just mix all the ingredients and store it in the fridge. This gives the flavors time to blend. When you are ready to serve, just top it with extra caramel and pecans. If you have any dip left, store it in an airtight container. It will keep well in the fridge for about three days. Before serving, mix it up again to restore its creamy texture. For a richer taste, add a bit more caramel or some chopped chocolate. A sprinkle of cinnamon can also add warmth. Experiment with different dippers too, like fresh strawberries or chocolate chip cookies, for a fun twist. {{image_2}} You can change up the taste of your dip easily. Try adding a bit of almond extract for a nutty twist. You can also mix in some chocolate chips for a sweet surprise. If you like spice, a pinch of cinnamon can add warmth. Another fun idea is to swirl in a fruit puree, like raspberry or strawberry. Each of these flavors will change the dip and make it unique. Toppings can give your dip extra flair. Instead of just pecans, try chopped walnuts or hazelnuts. You can even add crushed toffee for a crunchy bite. For a fruity touch, sprinkle fresh berries on top. Drizzling more salted caramel sauce or chocolate syrup can make it look even more tempting. Get creative with your toppings to suit your taste. Presentation matters when serving your dip. Arrange graham crackers, apple slices, or pretzels around the bowl for a fun display. You can also serve the dip in individual cups for easy sharing. If you want to impress guests, add a few sprigs of mint for color. This dip works great for parties, game nights, or family gatherings. Enjoy finding the best way to serve it! To keep your salted caramel pecan cheesecake dip fresh, place it in an airtight container. Cover the top with plastic wrap before sealing the lid. This helps prevent air from getting in, which can change the dip's texture. When stored properly, it stays creamy and delicious. Glass containers work best for this dip. They do not absorb flavors and keep the dip fresh longer. If you prefer plastic, choose BPA-free containers. Make sure they have a tight-fitting lid to avoid spills and keep the dip safe. Your dip can last in the fridge for about 3 to 5 days. If you want to store it longer, you can freeze it. However, freezing may change the dip’s texture. To freeze, place it in a freezer-safe container. Thaw it in the fridge overnight before serving. Mix it again to restore its creamy texture. Yes, you can make this dip vegan. Use vegan cream cheese instead of regular cream cheese. Look for plant-based sour cream too. Choose a vegan caramel sauce for the sweet touch. This way, you keep the same great taste while making it vegan. If your dip is too runny, add more cream cheese. You can also mix in more powdered sugar. Another option is to use a bit of cornstarch. Just mix it with a little water first to avoid clumps. Stir it in slowly until you reach the right thickness. You can use many fun dippers! Graham crackers work great. Fresh apple slices add a nice crunch. Pretzels bring a salty kick. You can also try vanilla wafers or even chocolate cookies for a sweet twist. Get creative and enjoy! In this post, you learned about the best ingredients for your dip and how to mix them. I shared tips for prep, storage, and ways to enhance flavors. You can also try fun variations and find answers to common questions. Remember, using fresh ingredients makes any dish better. Storage is key to keeping your dip tasty. Enjoy creating and sharing your delicious dip with friends and family!

Salted Caramel Pecan Cheesecake Dip Delight

To make these fluffy pancakes, gather the following ingredients: - 1 cup ricotta cheese - 1 cup all-purpose flour - 1/2 cup milk - 2 large eggs - 1/4 cup granulated sugar - Zest of 1 lemon - 2 tablespoons fresh lemon juice - 1 teaspoon baking powder - 1/2 teaspoon baking soda - 1/4 teaspoon salt - 1 teaspoon vanilla extract - Butter or oil for cooking - Powdered sugar and lemon slices for serving (optional) Measuring ingredients correctly makes a big difference in cooking. Use dry measuring cups for flour and sugar. For liquids like milk, use liquid measuring cups. Always level off dry ingredients with a straight edge for accuracy. When measuring sticky items like ricotta, pack it into the cup and then level it off. This method helps you get the right amount. If you want to make these pancakes allergy-friendly, here are some ideas: - For dairy-free, use a plant-based ricotta or silken tofu blended until smooth. - Substitute almond milk or oat milk for regular milk. - Use gluten-free flour in place of all-purpose flour. - Replace eggs with a "flax egg," which is made by mixing 1 tablespoon of ground flaxseed with 2.5 tablespoons of water. Let it sit for a few minutes to thicken. These swaps keep the flavor while catering to dietary needs. Enjoy your cooking! {{ingredient_image_1}} To start, gather all your ingredients. In a big bowl, whisk the ricotta cheese, milk, lemon juice, eggs, lemon zest, and vanilla. Mix until smooth. In another bowl, sift the flour, baking powder, baking soda, sugar, and salt. This helps your pancakes rise. Gradually add the dry mix to the wet mix. Stir gently; lumps are okay. Heat a non-stick skillet over medium heat. Add a little butter or oil to coat the pan. Pour about 1/4 cup of batter for each pancake. Cook until bubbles form on top, about 2-3 minutes. Carefully flip the pancake. Cook until both sides are golden brown, around 2-3 minutes more. Use a thin spatula to flip easily. If the pancake sticks, slide the spatula under gently. Serve pancakes warm. Dust them with powdered sugar and add lemon slices on top for a fresh look. Enjoy this treat with family and friends! To get the best texture, start with fresh ricotta cheese. It makes your pancakes light and creamy. Mix the wet and dry ingredients gently. Overmixing can lead to tough pancakes. Aim for some lumps in the batter; they help keep the pancakes soft. Also, cook them on medium heat. If the heat is too high, the outside cooks too fast. For a bright lemon taste, use fresh ingredients. The zest of one lemon adds a strong flavor. Fresh lemon juice is key too; it makes a big difference. You can even add a bit more zest if you love lemon. If you want a sweeter taste, try adding a touch of vanilla extract. This gives a nice balance to the tartness. One common mistake is using old ingredients. Always check the freshness of your baking soda and baking powder. They should be active for the best rise. Another mistake is cooking the pancakes too long. Watch for bubbles on the surface; that’s your cue to flip them. Lastly, do not skip the resting time for the batter. Letting it sit for a few minutes allows the flavors to blend better. Pro Tips Use Fresh Ricotta: For the best flavor and texture, opt for fresh ricotta cheese instead of the pre-packaged varieties. It makes a significant difference in creaminess. Don’t Overmix: When combining the wet and dry ingredients, mix until just combined. Overmixing can lead to dense pancakes instead of fluffy ones. Adjust Heat Carefully: If your pancakes are browning too quickly, lower the heat. Cooking them on medium to low heat allows the insides to cook through without burning the outsides. Experiment with Toppings: While powdered sugar and lemon slices are delicious, consider adding fresh berries, whipped cream, or a drizzle of honey for extra flavor and presentation. {{image_2}} You can make these pancakes even better by adding fruits or nuts. For a fruity twist, try adding blueberries or sliced bananas to the batter. Just fold them in gently before cooking. If you like nuts, chopped walnuts or pecans work well too. They add a nice crunch and flavor. Remember to cut the fruit into small pieces. This way, they cook evenly and fit nicely in each pancake. You can switch up the flavors in many ways. Mix in some chocolate chips for a sweet treat. You can also try adding spices like cinnamon or nutmeg for warmth. For a tropical vibe, use coconut milk instead of regular milk. You can also add lime zest and juice for a different citrus flavor. Each option brings a unique taste and makes these pancakes fun! How you serve these pancakes can change the whole dish. A dusting of powdered sugar makes them look fancy. Fresh berries on top add both color and flavor. You can drizzle maple syrup or honey for sweetness. If you want something tangy, a dollop of yogurt or whipped cream works great too. For a special touch, add lemon slices or zest right before serving. This gives an extra burst of lemon flavor. Enjoy experimenting with your favorite toppings! If you have leftover creamy lemon ricotta pancakes, store them in an airtight container. Place parchment paper between each pancake to keep them from sticking. They will stay fresh in the fridge for up to three days. To reheat pancakes, use a microwave or skillet. For the microwave, heat them for 30 seconds. Check if they are warm. If not, heat in 10-second bursts. For the skillet, warm on low heat for about two minutes on each side. This keeps them soft and tasty. To freeze pancakes, let them cool completely first. Then, stack them with parchment paper in between. Place them in a freezer-safe bag or container. They can be frozen for up to two months. When you want to eat them, just reheat them as mentioned above. Enjoy a quick breakfast any day! Using ricotta cheese makes pancakes richer and creamier. It adds moisture and flavor. Ricotta also gives a nice texture that feels soft and fluffy. Plus, it provides more protein than regular pancake batter. This helps you feel full longer and enjoy a tasty meal. Yes, you can make a vegan version. Substitute the ricotta with vegan cream cheese or silken tofu. Use plant-based milk instead of regular milk. Replace eggs with flax eggs or applesauce. These swaps keep the pancakes tasty and fluffy while making them vegan-friendly. To make fluffier pancakes, separate the eggs. Whisk the egg whites until they form peaks. Fold them into the batter gently. This adds air to the mix, making the pancakes rise better. Also, don't overmix the batter; a few lumps help keep them soft and fluffy. These pancakes pair well with many toppings. You can use fresh fruit like berries or sliced bananas. Maple syrup adds sweetness, while a dollop of whipped cream brings creaminess. For a zesty kick, serve with extra lemon slices or lemon curd. Powdered sugar on top looks nice and tastes great too! Now you know how to make creamy lemon ricotta pancakes. We covered key ingredients, cooking steps, and tips to master the texture. Don't forget about fun variations, like added fruit or nuts. Storing and reheating pancakes can keep them fresh for later enjoyment. With this guide, you can impress anyone at breakfast. Enjoy your cooking journey and savor every bite of your tasty pancakes!

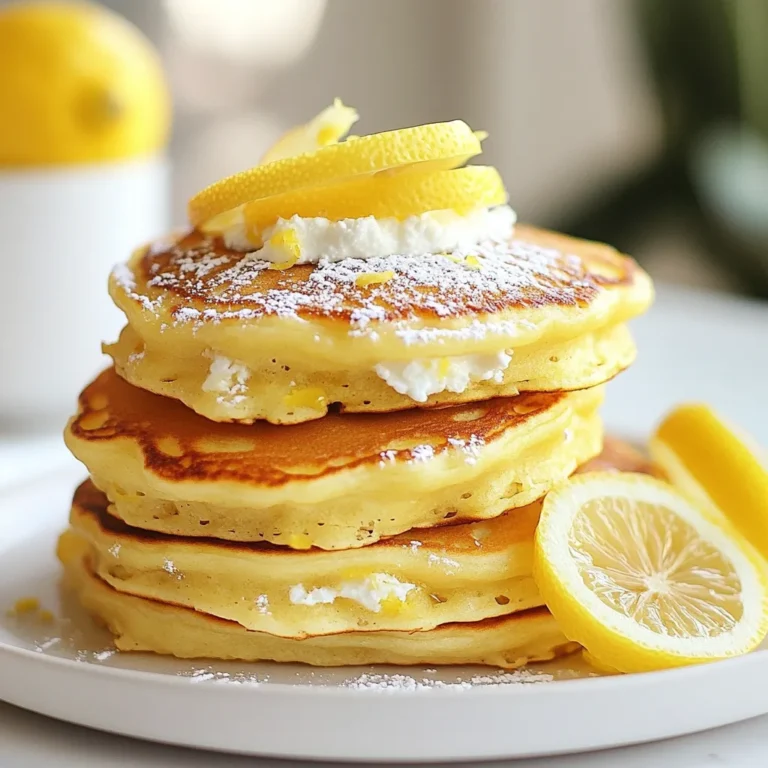
Creamy Lemon Ricotta Pancakes Flavorful and Easy Recipe

To make cinnamon sugar churro waffles, you need: - 1 cup all-purpose flour - 1 teaspoon baking powder - 1/4 teaspoon salt - 1/2 teaspoon ground cinnamon - 1 tablespoon sugar - 1 cup milk - 1 large egg - 1/4 cup melted butter - 1/4 cup granulated sugar (for coating) - 2 teaspoons ground cinnamon (for coating) - Optional: Whipped cream and chocolate sauce for serving You can swap all-purpose flour with a gluten-free blend if needed. For a dairy-free option, use almond milk instead of regular milk. If you want to cut sugar, reduce the amount in the batter. You can also use coconut oil in place of butter for a different flavor. For best results, use a dry measuring cup for flour and a liquid measuring cup for milk. When measuring flour, spoon it into the cup and level it off with a knife. This method prevents packing too much flour. When measuring sugar, scoop it directly from the container and level it off as well. Accurate measuring ensures your waffles come out perfect every time! Start by preheating your waffle maker. Each maker is different. Follow the manufacturer’s instructions. This step is key for crispy waffles. In a large bowl, add the flour, baking powder, salt, cinnamon, and sugar. Use a whisk to mix them all together. Make sure there are no lumps. This blend creates a solid base for the waffles. In another bowl, whisk the milk and egg. Make sure they blend well. Then, add the melted butter and mix again. This mix adds moisture and richness to your waffles. Once your waffle maker is ready, lightly grease it. Use cooking spray or melted butter for added flavor. Pour the batter onto the hot iron, close it, and cook for about 3-5 minutes. Wait until they turn golden brown and crispy. As soon as the waffles are done, remove them carefully. Place them in a shallow dish with cinnamon and sugar. Coat both sides well. This step gives the waffles their churro-like sweetness. Serve warm, and add whipped cream or chocolate sauce if you like. Enjoy the delightful crunch! To get crispy churro waffles, you need a hot waffle maker. Preheat it according to the instructions. Use a light spray of cooking oil or melted butter on the plates. This helps the waffles crisp up nicely. Pour the batter in and close the lid tightly. Cook until golden brown, usually about 3-5 minutes. If you open it too soon, the waffles may be soft. One common mistake is overmixing the batter. Stir just enough to combine the wet and dry ingredients. Lumps are okay! Another mistake is not preheating the waffle maker well. If it's not hot enough, the waffles will not cook evenly. Also, remember to coat the waffles in cinnamon sugar right after cooking. If you wait too long, they won’t stick well. Serve your churro waffles warm for the best taste. Drizzle some chocolate sauce on top for sweetness. A dollop of whipped cream adds a nice touch too. Try adding fresh fruit like strawberries or bananas for a fruity flavor. You can also sprinkle extra cinnamon sugar on top if you want more sweetness. Enjoy these tasty treats with your favorite hot drink! {{image_2}} You can make these churro waffles even tastier. Try adding Nutella to the batter for a rich twist. You can also mix in fruits like mashed bananas or blueberries. These add sweetness and moisture. Chocolate chips are another fun option. They melt into the waffle and bring joy in every bite. While cinnamon sugar is a classic, you can switch things up. Instead of cinnamon sugar, try coating the waffles in melted chocolate. This makes them even more indulgent. You can also use maple syrup for a sweet glaze. A dusting of powdered sugar gives a nice touch too, adding a soft sweetness. For those with dietary needs, making gluten-free churro waffles is simple. Just use a gluten-free flour blend instead of all-purpose flour. For dairy-free, use almond milk or oat milk in place of regular milk. Coconut oil can replace melted butter for a dairy-free option. This way, everyone can enjoy these delightful waffles. Store leftover waffles in an airtight container. Let them cool down first. They can last up to three days in the fridge. If you want to keep them longer, freezing is a great option. To reheat, pop the waffles in a toaster or an oven. Use the toaster for a quick fix. For the oven, preheat it to 350°F and heat for about 5-7 minutes. This will make them warm and crispy again. To freeze, wrap each waffle in plastic wrap or foil. Place them in a freezer-safe bag. They will keep well for up to two months. When you're ready, just thaw them in the fridge overnight before reheating. Enjoy your churro waffles whenever you like! Yes, you can make churro waffles ahead of time. Cook them, then let them cool. Place them in an airtight container. You can keep them in the fridge for up to three days. When you are ready to eat, just reheat them in the toaster. This keeps them crispy and tasty. Churro waffles pair well with many toppings. Here are some good options: - Whipped cream - Chocolate sauce - Caramel sauce - Fresh fruit, like strawberries or bananas - Ice cream for a dessert twist You can mix and match these toppings to find your favorite combination. You will know the waffles are done when they are golden brown and crispy. Most waffle makers have a light that signals when they are ready. If yours does not, check at about 3-5 minutes. Gently open the waffle maker. If it releases easily and looks golden, it is ready to serve. Yes, you can use a regular waffle maker for this recipe. Just make sure it is preheated and greased lightly. The batter works well in both traditional and Belgian waffle makers. Enjoy the same great taste with your preferred style! You learned about the key ingredients and how to prepare delicious churro waffles. Accurate measurements and the right cooking steps are crucial for great results. I shared tips to ensure your waffles are crispy and tasty. You also explored fun variations and storage methods. Try these ideas next time you cook. Enjoy the process and make each bite special. Happy cooking!

Cinnamon Sugar Churro Waffles Quick and Easy Recipe

Here is what you need to make Garlic Parmesan Roasted Cauliflower: - 1 medium head of cauliflower, cut into florets - 4 cloves of garlic, minced - 1/4 cup grated Parmesan cheese - 3 tablespoons olive oil - 1 teaspoon garlic powder - 1 teaspoon paprika - Salt and pepper to taste - Fresh parsley, chopped (for garnish) Each ingredient plays a key role. The cauliflower brings a nice texture. Garlic adds a strong flavor. Parmesan gives a rich, cheesy taste. Olive oil helps everything roast well. Garlic powder and paprika enhance the taste even more. Lastly, salt and pepper bring all the flavors together. When you gather these ingredients, make sure they are fresh. Fresh garlic and cauliflower make a big difference. I always recommend using high-quality cheese. It improves the dish's overall flavor. You’ll love how these simple ingredients create a tasty side dish everyone will enjoy. First, set your oven to 425°F (220°C). This is the perfect heat for roasting. Next, grab a baking sheet and line it with parchment paper. This keeps the cauliflower from sticking and makes clean-up easy. In a large bowl, add the cauliflower florets. Then, mix in the minced garlic and olive oil. Add garlic powder, paprika, salt, and pepper. Toss everything well until the cauliflower is coated. It should look shiny and flavorful. Spread the coated cauliflower in a single layer on the baking sheet. This helps it cook evenly. Roast the cauliflower for 20 minutes. Keep an eye on it; you want it tender but not mushy. If you like a little char, let it roast a bit longer. After 20 minutes, take the baking sheet out of the oven. Sprinkle the grated Parmesan cheese over the cauliflower. This adds a rich flavor. Return the baking sheet to the oven for another 10-15 minutes. You want the cheese to melt and get golden. Once it looks bubbly and delicious, it’s ready to be enjoyed. To get crispy cauliflower, follow these tips: - Cut cauliflower into even florets. This helps them cook at the same rate. - Use a hot oven, around 425°F (220°C). This ensures a nice brown color. - Spread the florets in one layer on the baking sheet. Crowding them can make them steam. - Toss with olive oil and spices well. This helps all sides get crispy. You can add fun flavors to your cauliflower: - Try adding a pinch of cayenne for heat. - Use Italian herbs like oregano or thyme for a fresh taste. - A squeeze of lemon juice brightens the dish. - Experiment with smoked paprika for a deeper flavor. Garlic Parmesan Roasted Cauliflower pairs well with many dishes: - Serve it as a side with grilled chicken or fish. - Mix it into a salad for added crunch and flavor. - Use it as a topping on pizza for a gourmet touch. - It’s great with pasta or risotto for a hearty meal. {{image_2}} You can easily add protein to your Garlic Parmesan Roasted Cauliflower. For meat lovers, try mixing in grilled chicken or shrimp. These proteins add flavor and make the dish heartier. If you prefer plant-based options, consider adding chickpeas or tofu. Both options pack protein and can soak up the tasty garlic and cheese flavors. While Parmesan is classic, other cheeses can bring a new twist. Try using feta for a tangy kick. Cheddar adds a sharp flavor that many enjoy. For a creamy finish, you could use goat cheese. Each cheese gives the dish a unique taste, so feel free to experiment! Herbs and spices can really change this dish. If you love heat, add a pinch of cayenne pepper. For a fresh taste, toss in some thyme or rosemary. These herbs complement the garlic well. You can also try lemon zest for brightness. Mixing and matching spices lets you create your perfect flavor profile! To keep your Garlic Parmesan Roasted Cauliflower fresh, store it in an airtight container. Place it in the fridge within two hours of cooking. It stays great for about 3 to 5 days. If you want to keep it longer, freeze the cauliflower. Use a freezer-safe bag or container. It can last up to 3 months in the freezer. Just remember to label it with the date! When you’re ready to enjoy leftovers, reheating is key. The best method is to use the oven. Preheat it to 350°F (175°C). Spread the cauliflower on a baking sheet. Heat for about 10 to 15 minutes. This keeps the texture crispy and the cheese flavorful. You can also use a microwave, but it may make the cauliflower soft. If you go this route, heat in short bursts for about 1 to 2 minutes. This dish is best when fresh. It stays tasty in the fridge for about 3 to 5 days. If frozen, it keeps well for 3 months. After that, the quality may drop, but it’s still safe to eat. Always check for signs of spoilage, like an odd smell or discoloration, before eating leftovers. Yes, you can use frozen cauliflower. Just thaw it first. Pat it dry to remove excess moisture. This helps the cauliflower roast well. The cooking time may be a bit longer. Check for tenderness to know when it's done. To make this dish vegan, skip the Parmesan cheese. You can use nutritional yeast instead. It gives a cheesy flavor without dairy. Also, make sure the olive oil is pure. This keeps the recipe plant-based and delicious. This roasted cauliflower pairs well with many dishes. Try serving it with grilled chicken or fish. It also goes great with quinoa or rice. For a vegetarian option, serve it next to a hearty salad. You can also enjoy it as an appetizer. Yes, you can prep this dish ahead of time. Cut the cauliflower and mix the ingredients. Store them in the fridge for up to one day. When you’re ready, just roast it as directed. It saves you time and still tastes great. Absolutely! You can use a vegan cheese alternative. Or try a different hard cheese like Pecorino or Grana Padano. Each will give a unique flavor. Just remember to adjust the quantity based on taste. Enjoy experimenting with your favorites! This blog post showed you how to make Garlic Parmesan Roasted Cauliflower. You learned the key ingredients, easy steps, and important tips for perfecting the dish. We covered ways to boost flavor and different variations to try. Remember to store leftovers properly and reheat them well. Enjoy this tasty recipe that offers crispiness and rich flavor. It’s a versatile side that pairs well with many meals. Cooking should be fun, so feel free to experiment with your favorite ingredients. Happy cooking!

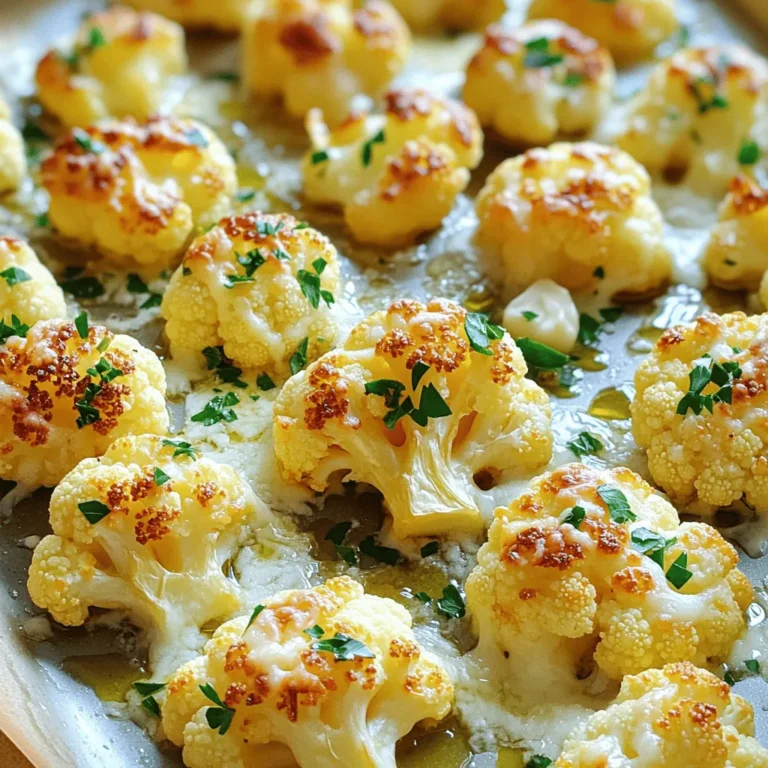
Garlic Parmesan Roasted Cauliflower Tasty Side Dish

- 1 lb large shrimp, peeled and deveined - 1/4 cup sweet chili sauce - 2 tablespoons fresh lime juice - 1 tablespoon lime zest - 2 cloves garlic, minced - 1 teaspoon fresh ginger, grated - 1 tablespoon olive oil - Salt and pepper to taste - 1 bell pepper (red, yellow, or green), cut into chunks - 1 red onion, cut into chunks - Skewers (wooden or metal) To make the best Sweet Chili Lime Shrimp Skewers, you need fresh and quality ingredients. Start with large shrimp. They should be peeled and deveined to save prep time. The sweet chili sauce gives a nice balance of sweetness and heat. Fresh lime juice and lime zest add bright flavors. Garlic and ginger enhance the taste and aroma. Olive oil helps the marinade stick to the shrimp. You can choose any bell pepper color you like. Each adds a bit of crunch and sweetness. The red onion gives a great bite and color to the skewers. If you use wooden skewers, soak them in water first. This prevents burning on the grill. Gather these ingredients before you start. It makes cooking easier and more fun! - In a medium bowl, add sweet chili sauce, lime juice, lime zest, minced garlic, grated ginger, olive oil, salt, and pepper. - Mix until well blended. You want the flavors to combine fully. - Add the shrimp to the marinade. Make sure to coat the shrimp evenly. - Cover the bowl and refrigerate for 30 minutes to 1 hour. This helps the shrimp soak in all the good flavors. - If you use wooden skewers, soak them in water for at least 20 minutes. This prevents burning on the grill. - Preheat your grill or grill pan over medium-high heat. A hot grill gives the shrimp a nice char. - Thread the marinated shrimp, bell pepper chunks, and onion chunks onto the skewers. Alternate the shrimp and veggies for a colorful look. - Once the grill is hot, place the skewers on it. Cook for about 2-3 minutes per side. The shrimp should turn pink and opaque. - Brush the skewers with any leftover marinade while grilling for extra flavor. Enjoy! - For this recipe, use large shrimp. They cook well and have a great taste. - Look for shrimp that are firm and pink. They should smell like the ocean, not fishy. - If you can, buy shrimp that are wild-caught. They often taste better. - You can adjust the marinade. Add more lime juice for tang or extra chili sauce for spice. - Fresh herbs like cilantro or parsley can add a nice touch. They brighten the dish. - Try adding a pinch of red pepper flakes for heat. It gives a nice kick to each bite. - Grilling is the best method. It gives shrimp a nice char and smoky flavor. - If you don’t have a grill, you can bake them at 400°F for about 10 minutes. - Cook shrimp until they turn pink and opaque. This usually takes 2-3 minutes per side on the grill. {{image_2}} You can swap shrimp for chicken or tofu. Both options work well. For chicken, use boneless thighs or breasts, cut into bite-size pieces. Marinate them the same way as shrimp. Adjust cooking times to about 5-7 minutes per side on the grill. Tofu needs a bit longer to absorb flavors. Use firm tofu and press it before marinating. Cook it for about 3-4 minutes on each side. Feel free to mix in other veggies. Zucchini, cherry tomatoes, or mushrooms add great flavor. You can also use seasonal veggies. In summer, try corn or asparagus. In fall, butternut squash or Brussels sprouts work nicely. Just cut them into similar sizes for even cooking. Want a spicy kick? Add chili flakes or diced jalapeños to the marinade. This gives the skewers a nice heat. If you prefer a sweeter flavor, increase the sweet chili sauce. You can also add a touch of honey for more sweetness. For a tangy twist, add extra lime juice. Adjust these flavors to fit your taste! To keep your Sweet Chili Lime Shrimp Skewers fresh, follow these tips: - Place leftovers in an airtight container. - Refrigerate within two hours of cooking. - Consume within two days for best taste. Using a glass or plastic container will help keep them safe and fresh longer. When it’s time to enjoy leftovers, you have two great options: - Microwave: Heat skewers on a microwave-safe plate. Cover with a damp paper towel to trap steam. Heat for 30-second bursts until warm. - Oven: Preheat the oven to 350°F. Place skewers on a baking sheet. Heat for about 10 minutes, turning halfway through. This helps keep the shrimp juicy and tasty. Avoid overcooking, as it can dry them out. If you need to store skewers for a longer time, freezing works well: - How to freeze: Wrap the skewers tightly in plastic wrap. Then place them in a freezer bag. Remove as much air as possible to prevent freezer burn. - Thawing methods and tips: For best results, thaw in the fridge overnight. If you’re short on time, you can use the microwave on a defrost setting. This method keeps the shrimp safe and keeps the flavors intact. Enjoy your meal anytime! You should marinate the shrimp for 30 minutes to 1 hour. This time allows the shrimp to soak up the sweet chili sauce, lime juice, and spices. For the best taste, cover the shrimp in the marinade. This helps the shrimp absorb all those great flavors. If you leave them too long, the shrimp can get mushy. So, stick to this time for juicy, flavorful shrimp. Yes, you can prepare these skewers ahead of time. You can marinate the shrimp and cut the veggies a few hours before you plan to cook. Store the marinated shrimp in the fridge. Keep the veggies separate until you are ready to grill. This keeps everything fresh and tasty. When you are ready, just thread them onto the skewers and grill. These skewers pair well with many side dishes. You can serve them with rice, quinoa, or a fresh salad. A crisp cucumber salad adds a nice crunch. Grilled corn on the cob or garlic bread also makes a great side. If you want to add some heat, spicy dipping sauces work well too. Just think of what you love! In this article, we explored how to make Sweet Chili Lime Shrimp Skewers. You learned about key ingredients, preparation steps, and grilling tips. We also discussed how to select fresh shrimp and suggested ways to customize your skewers. Remember, grilling is fun and opens new taste experiences. Use these tips to create your special dish. Enjoy cooking and impress yourself and others with your skills!

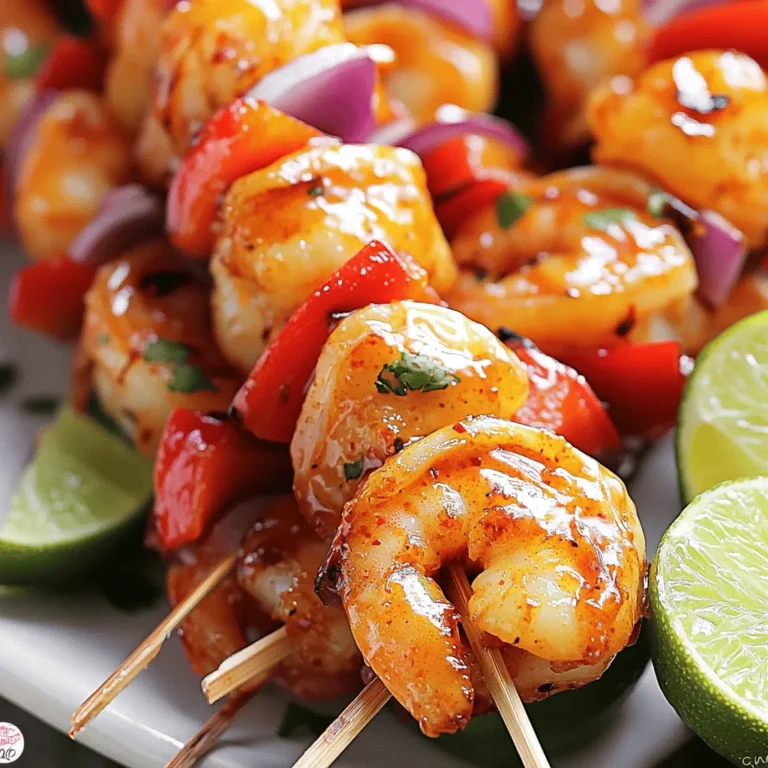
Savory Sweet Chili Lime Shrimp Skewers Easy Recipe

To make the Mango Coconut Chia Pudding, you need a few simple ingredients. Each one adds flavor and texture to our dish. Here’s what you will gather: - Coconut Milk - Almond Milk - Chia Seeds - Maple Syrup or Honey - Vanilla Extract - Ripe Mango - Shredded Coconut - Salt - Fresh Mint Leaves for Garnish Each ingredient plays a key role. Coconut milk gives a creamy base. Almond milk adds a nutty touch. Chia seeds thicken the pudding and add nutrition. Maple syrup or honey adds sweetness without overpowering. Vanilla extract brings warmth and depth to the flavor. Using a ripe mango is crucial. It adds natural sweetness and a bright color. Shredded coconut gives a nice texture and extra coconut flavor. A pinch of salt balances the sweetness, enhancing all the flavors. Finally, fresh mint leaves serve as a lovely garnish, adding a pop of freshness. Gather these ingredients and get ready to create a delicious, healthy snack. Whisking the Milk and Sweeteners Start with a medium bowl. Add 1 cup of coconut milk and 1/2 cup of almond milk. Then, mix in 2 tablespoons of maple syrup and 1 teaspoon of vanilla extract. Don’t forget a pinch of salt. Whisk these ingredients together until smooth. This step helps blend the flavors well. Adding and Mixing Chia Seeds Next, add 1/4 cup of chia seeds to your milk mixture. Stir the mixture well to keep the chia seeds from clumping together. This helps them absorb the liquid evenly. You want them to expand nicely in the next step. Refrigeration Process Cover the bowl tightly with plastic wrap or a lid. Place it in the fridge for at least 4 hours or overnight. The chia seeds will soak up the liquid, thickening the pudding. This waiting time is key for a creamy texture. Adjusting Sweetness if Necessary After chilling, take the bowl out and give it a good stir. Taste the pudding. If you want it sweeter, add a bit more maple syrup. Mix well to ensure the sweetness is even. Serving the Pudding Spoon the thickened chia pudding into individual bowls or glasses. Top each serving with diced mango. Sprinkle 1/4 cup of shredded coconut on top for added texture. For a fresh touch, garnish with mint leaves. Enjoy your tasty, healthy snack! How to Avoid Clumping of Chia Seeds To prevent clumping, stir the chia seeds into the milk mix right away. Make sure you mix well after adding the seeds. If you see clumps, stir again after 15 minutes. This helps the seeds spread out evenly. Best Time to Refrigerate Refrigerate the pudding for at least four hours. For the best texture, overnight is best. This gives the chia seeds time to soak up the liquid. The longer you wait, the thicker your pudding will be. Serving Recommendations Serve the pudding in clear glasses or bowls. Layer the diced mango right on top. This makes it look pretty and fresh. Add a sprinkle of shredded coconut for texture. Finish with mint leaves for color and flavor. This makes the dish stand out for any occasion. {{image_2}} You can make mango coconut chia pudding even more fun by trying different fruits. Pineapple gives a zesty twist, while berries add a burst of color and flavor. You can mix and match these fruits to suit your taste. If you want to change the sweetness, consider using dairy-free sweeteners like agave or coconut sugar. They work well and keep the pudding plant-based. You can adjust the sweetness to your preference. Adding spices can bring warmth and depth to your pudding. A dash of cinnamon adds a cozy flavor, while nutmeg offers a hint of earthiness. Start with a small pinch and taste as you go. These variations keep your pudding fresh and exciting. Try new fruits, sweeteners, and spices to create your perfect snack! Refrigeration Guidelines Store your mango coconut chia pudding in the fridge. Use an airtight container for best results. It stays fresh for about 4 to 5 days. If you see any change in smell or texture, it’s best to toss it out. Freezing Tips You can freeze this pudding if you want to keep it longer. Place it in a freezer-safe container. Leave some space at the top. The chia seeds may change texture after thawing, but it will still taste good. Thaw it in the fridge overnight before you enjoy it. Best Practices for Storage Duration For the best taste and texture, eat the pudding within 4 to 5 days of making it. If you freeze it, use it within a month for the best flavor. Be sure to label your container with the date. This way, you won’t forget how long it has been stored. Chia seeds are small, but they pack a big punch. They are full of fiber, which helps keep you full. They also have protein, which is good for muscles. Chia seeds provide omega-3 fatty acids, helping heart health. They are rich in calcium, which is great for bones. Plus, they are loaded with antioxidants, which fight free radicals. Adding chia seeds to your diet can give you many health perks. Yes, you can make this pudding in advance. In fact, it is best to prepare it ahead of time. The pudding needs at least 4 hours to thicken, but overnight is even better. This lets the chia seeds soak up the liquid and swell. You can store it in the fridge for up to 5 days. That means you can enjoy healthy snacks all week long! Making this pudding vegan is easy! Simply use maple syrup instead of honey, as it is plant-based. You can also choose almond milk or any other plant-based milk. This will keep the pudding entirely vegan. You can enjoy it without worry, and it still tastes great! This post shared how to make a tasty chia seed pudding. You learned about each ingredient, from coconut milk to ripe mango. I walked you through simple steps for preparation, plus tips to make it perfect. You can try fun variations to mix up flavors. Lastly, I covered how to store your pudding so it stays fresh longer. Enjoy this easy and nutritious treat as part of your healthy diet!

Mango Coconut Chia Pudding Perfect for Healthy Snacking

To make a great roasted tomato basil soup, you need simple ingredients that pack a lot of flavor. Here’s what you’ll need: - 2 pounds ripe tomatoes, halved - 1 onion, chopped - 4 cloves garlic, unpeeled - 3 tablespoons olive oil - 2 cups vegetable broth - 1 teaspoon sugar - Salt and pepper to taste - 1 cup fresh basil leaves, roughly chopped - ¼ cup heavy cream (optional for creaminess) Ripe tomatoes are key. They give the soup its rich, sweet flavor. Look for deep red tomatoes that feel heavy for their size. The onion and garlic add depth to the taste. Roasting them brings out their natural sweetness. Olive oil helps the veggies roast nicely and adds a touch of richness. Vegetable broth is the base of the soup, giving it body and flavor. A hint of sugar balances the acidity of the tomatoes. Fresh basil is essential. It brightens the soup and adds a lovely aroma. If you want a creamy texture, add heavy cream. It makes the soup feel even more comforting. Gather these ingredients, and you're ready to make a bowl of warmth that feels like a hug. 1. Preheating the oven Start by heating your oven to 400°F (200°C). This step is key for roasting. The high heat will caramelize the tomatoes and onions, making them sweet and rich in flavor. 2. Preparing the baking sheet Take a large baking sheet and arrange your halved tomatoes, chopped onion, and unpeeled garlic cloves on it. Make sure they are spread out evenly. Drizzle with olive oil. Sprinkle salt and pepper to taste. Toss everything to coat well. 1. Timing and temperature Place the baking sheet in the oven. Roast the vegetables for 30 to 35 minutes. This timing ensures the tomatoes get soft and the garlic becomes tender. 2. Key indicators for readiness Look for the tomatoes to be caramelized and soft. The garlic should feel tender when pressed. These signs mean your vegetables are ready to come out. 1. Blender tips for a creamy texture Let the roasted mix cool for a few minutes. Squeeze the garlic out of its skins and toss the skins. Transfer the mix to a blender. Add vegetable broth, sugar, and half of the fresh basil. Blend until smooth and creamy. 2. Adjusting flavor with cream Pour the blended soup into a pot and heat it over medium-low heat. If you want a richer taste, stir in heavy cream. Adjust the seasoning with more salt and pepper if needed. Enjoy your delicious roasted tomato basil soup! To get the best flavor from your soup, perfect roasting is key. Here are some tips: - Achieving perfect caramelization: Roast your tomatoes at 400°F. This high heat brings out their natural sweetness. Look for a golden-brown color on the edges. That’s the caramelization you want. - Choosing the right tomatoes: Use ripe tomatoes for the best taste. Varieties like Roma or heirloom work well. They have more flavor and less water. This gives your soup a richer texture. Blending your soup correctly helps you avoid messes. Here's how you can do it: - How to avoid splatter: Allow your roasted veggies to cool a bit before blending. Use a towel to cover the blender lid. This keeps hot soup from splattering. - Ensuring smooth consistency: Blend in batches if needed. Add a bit of vegetable broth to help the blender. This ensures a creamy soup without chunks. To make your soup stand out, consider adding more flavors: - Additional herbs and spices: Besides basil, try adding thyme or oregano. A pinch of red pepper flakes gives a nice kick. - Balancing acidity and sweetness: The sugar in your recipe helps balance the acidity of tomatoes. If your soup tastes too acidic, add a bit more sugar or a splash of cream. Adjusting these flavors can elevate your soup to a new level. {{image_2}} You can easily make this soup vegan. Just skip the heavy cream. Instead, try coconut milk for a rich texture. It adds a nice sweetness too. You can also use cashew cream, which blends smoothly. For extra flavor, a splash of lemon juice helps brighten the soup. Want to make your soup heartier? Add protein like beans or chicken. Chickpeas work well for a vegan option. If you use cooked chicken, shred it and stir it in at the end. This adds warmth and substance. If you add protein, check the cooking time. You may need a few extra minutes to heat it through. To boost flavors, consider adding extra herbs. Oregano or thyme can enhance the taste. You can also use different broth types. Chicken broth gives a deeper flavor, while vegetable broth keeps it light. Experiment and find what you enjoy most in your bowl. To keep your roasted tomato basil soup fresh, follow these steps: - Refrigeration: Store the soup in an airtight container. It lasts up to 4 days in the fridge. Make sure to let it cool before sealing. - Freezing: For long-term storage, freeze the soup in portions. Use freezer-safe containers or bags. It stays good for about 3 months. Remember to label with the date. When reheating, aim to keep the soup's flavor intact: - Best practices: Heat the soup slowly on the stove over low to medium heat. Stir often for even warming. - Avoiding separation: If you added cream, don’t let it boil. This helps keep the texture smooth and creamy. Knowing how long your soup lasts helps prevent waste: - Leftovers: You can store leftover soup in the fridge for up to 4 days. - Signs of spoilage: If the soup smells sour or has mold, it’s time to toss it out. Always trust your senses! Can I use canned tomatoes instead? Yes, you can use canned tomatoes. Look for whole or diced tomatoes. Use about 2 cans for this recipe. Drain them before adding to the blender. Canned tomatoes can save time and still taste great. How do I make it spicier? To spice it up, add red pepper flakes or diced jalapeños. You can also use hot sauce in the soup. Start small and taste as you go. This way, you control the heat level. What are the health benefits of this soup? Roasted tomato basil soup is rich in vitamins and minerals. Tomatoes are high in vitamin C and antioxidants. Basil has anti-inflammatory properties. This soup is low in calories and can fit into a healthy diet. What to do if the soup is too acidic? If the soup tastes too acidic, add a pinch of sugar. This helps balance the flavors. You can also add more cream or broth. Taste as you go until it feels right. How to thicken the soup if it’s too thin To thicken the soup, simmer it longer to reduce liquid. You can also add a bit of cornstarch mixed with water. Blend in more roasted tomatoes for added thickness too. Best accompaniments for the soup Serve this soup with a fresh salad or grilled cheese. A sprinkle of Parmesan cheese on top adds flavor. You can also drizzle olive oil for extra richness. Ideal bread pairings for a complete meal Pair the soup with crusty bread or a baguette. It’s perfect for dipping. Garlic bread is another great option to enhance the meal. Enjoy every bite! Roasted tomato basil soup is a simple and tasty dish. We covered essential ingredients, steps, and tips to make it perfect. You learned about vegan options and how to store leftovers. Each tip helps you enjoy the best flavors. In the end, this soup is more than a recipe. It’s a warm hug on cold days. You can make it your own with different herbs or proteins. Enjoy your cooking!

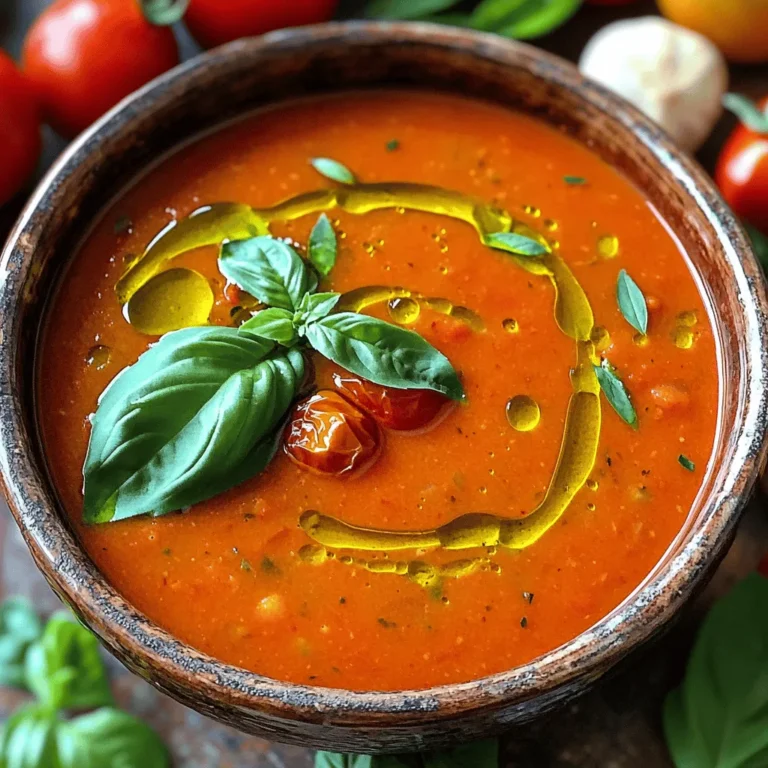
Roasted Tomato Basil Soup Savory and Comforting Bowl

You need 1 cup of creamy peanut butter. This gives the brownies a rich, nutty flavor. The creaminess helps make the texture smooth and fudgy. Use 1 cup of granulated sugar. This adds sweetness and helps the brownies rise. The sugar also creates a nice crust on top. You will need 2 large eggs. They bind the ingredients together. Eggs also help the brownies rise, giving them a light texture. The dry mix includes 1/2 cup all-purpose flour, 1/3 cup unsweetened cocoa powder, 1/4 teaspoon baking powder, and 1/4 teaspoon salt. Together, they make the brownies tender and chocolaty. The flour adds structure, while cocoa gives that deep chocolate taste. For the chocolate swirl, gather 1/2 cup of semi-sweet chocolate chips and extra peanut butter. Melt the chocolate to create a gooey swirl. The extra peanut butter adds depth and richness, making each bite even better. First, set your oven to 350°F (175°C). This step is key for even baking. Next, grab an 8x8-inch baking pan. You can grease it or line it with parchment paper. This makes it easier to take out the brownies later. In a large bowl, mix 1 cup of creamy peanut butter and 1 cup of granulated sugar. Stir them together until the mix is smooth and creamy. Then, add 2 large eggs, one at a time. Make sure to mix well after each egg. Finally, stir in 1 teaspoon of vanilla extract until it’s fully combined. Now it's time for the dry ingredients. Gently fold in 1/2 cup of all-purpose flour, 1/3 cup of unsweetened cocoa powder, 1/4 teaspoon of baking powder, and 1/4 teaspoon of salt. Be careful not to overmix; you want a nice, thick batter. Take 1/2 cup of semi-sweet chocolate chips and melt them. Use a microwave-safe bowl and heat them in 30-second bursts. Stir in between until it's smooth. Drizzle the melted chocolate over the brownie batter. Then, use a knife or toothpick to swirl it into the batter. This creates a pretty marbled look. Pour the brownie mix into your prepared pan. Spread it out evenly. Bake in the oven for 20-25 minutes. Check for doneness by inserting a toothpick into the center. It should come out with a few moist crumbs. Let the brownies cool for at least 15 minutes before cutting them into squares. To get soft and fudgy brownies, mix the batter gently. Overmixing can lead to dry brownies. Aim for a smooth blend without lumps. Bake them just until a toothpick comes out with a few moist crumbs. This keeps the middle gooey and delicious. For the best flavor, use semi-sweet chocolate chips. They melt perfectly and add rich taste. Use a microwave for melting. Heat in short bursts to avoid burning. Stir well between each interval to get a smooth texture. To create a beautiful swirl, drizzle melted chocolate over the batter. Use a knife or toothpick to gently swirl it. Don’t overdo it; you want to see the layers. Adding dollops of peanut butter gives extra flair and flavor. This makes your brownies look gourmet and inviting. {{image_2}} If you want to switch things up, try different nut butters. Almond butter can add a nice twist. Cashew butter gives a creamier texture. Sunflower seed butter works well too if you need a nut-free option. Each choice will give your brownies a unique taste. You can play with the chocolate in these brownies. Dark chocolate chips add a rich flavor. Milk chocolate chips make them sweeter. If you love white chocolate, sprinkle some over the top for a fun look. You could also add cocoa nibs for a crunchy surprise. Need to cater to dietary needs? You can use egg substitutes like flaxseed meal or applesauce. For a gluten-free option, swap all-purpose flour with almond flour or a gluten-free blend. These changes keep the brownies tasty while fitting different diets. To keep your Peanut Butter Chocolate Swirl Brownies fresh, store them in an airtight container. Place parchment paper between layers to prevent sticking. This method keeps them moist and tasty. Store them at room temperature for up to four days. If you want to keep them longer, consider freezing. To freeze your brownies, first let them cool completely. Cut the brownies into squares. Wrap each square tightly in plastic wrap. Then, place the wrapped brownies in a freezer-safe bag or container. This way, they stay fresh for up to three months. When you want to enjoy them, simply take out as many as you need. To reheat your brownies, first remove them from the container. Place them on a microwave-safe plate. Heat them for about 10-15 seconds. Check to see if they are warm enough. If not, heat in additional 5-second intervals. Enjoy your warm, gooey brownies straight from the microwave! You can check if the brownies are done by using a toothpick. Insert it into the center. If it comes out with a few moist crumbs, they are done. If it comes out wet with batter, they need more time. Bake for 20-25 minutes for best results. Yes, you can use natural peanut butter. It may change the texture a bit. Natural peanut butter can be thinner or oilier. Just mix it well before using. The flavor will still be rich and tasty. The best way to cut brownies is using a sharp knife. First, let them cool for at least 15 minutes. For cleaner cuts, wipe the knife with a damp cloth between cuts. This keeps the edges neat and pretty. These brownies can last in an airtight container for up to four days. They can also be frozen for up to three months. Just thaw them in the fridge before enjoying. In this post, we explored how to make delicious brownies with peanut butter and chocolate. We covered key ingredients like sugar, eggs, and various dry ingredients. You learned step-by-step instructions for mixing and baking, plus tips for perfect texture. We also discussed fun variations and proper storage methods. Making brownies is easy and fun. With the right tips, you can enjoy a treat your way. So, gather your ingredients and get baking! Your perfect brownie awaits.

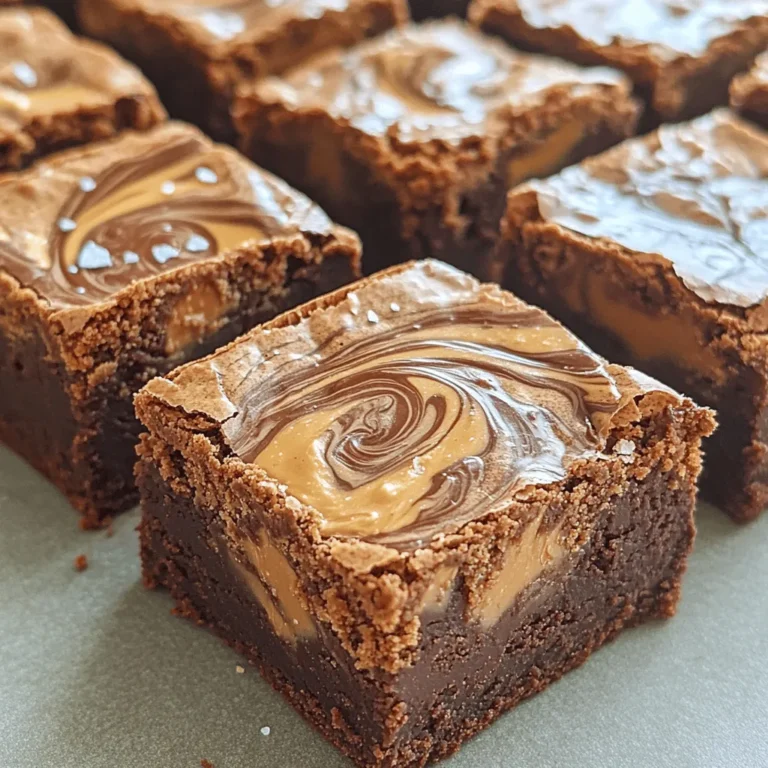
Peanut Butter Chocolate Swirl Brownies Irresistible Treat

PREV 1 … 33 34 35 … 57 NEXT
flavor nest kitchen

explore

DessertsDinnerAppetizersDrinks

Our Policies

  • Cookie Policy
  • Copyright Policy
  • Disclaimer
  • GDPR Policy
  • Terms Of Use
Back to Top
  • About
  • Contact Us
  • Privacy Policy
© 2025 flavor nest kitchen