FREE DINNER EBOOK! Get your copy!
  • Cookie Policy
  • GDPR Policy
  • Disclaimer
  • Terms Of Use
  • Visit my other site: Fun Cookie Recipes
flavor nest kitchen
  • Home
  • Dinner
  • Desserts
  • Drinks
  • Appetizers
  • Contact
  • About
  • Privacy Policy
  • Home
  • Dinner
  • Desserts
  • Drinks
  • Appetizers
  • Contact
  • About
  • Privacy Policy
  • Cookie Policy
  • GDPR Policy
  • Disclaimer
  • Terms Of Use
Visit my other site: Fun Cookie Recipes

HOME / CATEGORIES /

Latest

- 2 ripe avocados, halved and pitted - 1 cup cooked chicken, shredded - 1 tablespoon Cajun seasoning - 1/4 cup cream cheese, softened - 1/4 cup shredded cheddar cheese - 1/4 cup corn (canned or frozen) - 1/4 cup diced tomatoes - 2 tablespoons green onions, chopped - Salt and pepper to taste - Fresh cilantro for garnish For this recipe, you need fresh ingredients. Start with ripe avocados. They should yield slightly when pressed. Next, use cooked chicken. You can shred rotisserie chicken for ease. Cajun seasoning adds a nice kick. You can find it at most stores. Cream cheese brings creaminess to the dish. It blends well with the other flavors. Shredded cheddar cheese adds a sharp taste. Use your favorite brand. If you have corn, use either canned or frozen. Both work great. Diced tomatoes add freshness. They also add color to the dish. Green onions give a nice crunch. They should be chopped finely. Season with salt and pepper to your taste. Lastly, fresh cilantro adds brightness. It’s a perfect garnish for the stuffed avocados. Each ingredient plays a role in making this dish tasty and fun. First, I take a mixing bowl and add the shredded chicken. Then, I sprinkle in the Cajun seasoning. This step is key, as it gives the chicken a bold flavor. I make sure to mix well so that every piece of chicken is coated. Next, I add the softened cream cheese and shredded cheddar cheese to the bowl. This adds creaminess and richness to the dish. I blend everything together until I see a nice, smooth mixture. Now, it’s time to add some color and texture. I pour in the corn, diced tomatoes, and chopped green onions. These ingredients not only taste great but also make the dish pop visually. I stir everything together gently. After mixing, I taste the mixture and season it with salt and pepper to my liking. This small step ensures every bite bursts with flavor. I take my ripe avocados, halving them and removing the pits. Then, I scoop the chicken mixture into each half, pressing down a bit to pack it in. This makes sure each avocado is filled nicely. Finally, I garnish the stuffed avocados with fresh cilantro. This adds a fresh touch and a bright green color. The dish is now ready to enjoy! To make the best Cajun chicken stuffed avocados, start with ripe avocados. Choose avocados that feel slightly soft when you gently squeeze them. If they are hard, they need more time to ripen. If they feel mushy, they may be overripe. To avoid browning, sprinkle the avocado flesh with lime juice. This will keep your dish looking fresh and bright. You can also cover the avocados tightly with plastic wrap to limit air exposure. Feel free to get creative with your filling. You can add black beans, jalapeños, or even diced bell peppers. For a twist, consider using cooked shrimp instead of chicken. If you like it spicy, increase the Cajun seasoning. You can also add hot sauce for an extra kick. For a milder taste, reduce the seasoning or use less spicy ingredients. Serve your stuffed avocados with tortilla chips or a fresh salad. They pair well with a side of rice or quinoa for a full meal. For a lovely presentation, place the stuffed avocados on a colorful platter. Garnish with more cilantro and lime wedges. This adds a pop of color and makes the dish more inviting. {{image_2}} You can easily change the flavor of your Cajun chicken stuffed avocados. Try different spice blends like taco seasoning or smoked paprika. These can give your dish a new twist. If you want to switch the protein, use shrimp or turkey instead. Both pair well with the creamy avocado. If you want a meatless dish, there are great substitutes for chicken. Try using chickpeas or black beans for protein and texture. For cheese, you can use plant-based options like cashew cheese or tofu cream cheese. These will still offer a rich taste and creamy feel. To make this dish lower in carbs, skip the corn. Instead, fill the avocados with diced bell peppers or zucchini. These veggies add crunch and flavor without the carbs. You can also mix in some spinach for extra nutrients. This keeps your meal light and fresh while still being delicious. To keep your stuffed avocados fresh, refrigerate them right away. Place them in an airtight container. This helps to keep the avocados from browning. You can store them for up to a day. If you want to save the filling, freeze it separately. Place the filling in a zip-top bag. Squeeze out the air before sealing. You can freeze the filling for up to three months. When you're ready, thaw it overnight in the fridge. To reheat stuffed avocados, the best method is to use a microwave. Place the avocado halves on a microwave-safe plate. Heat them for about 30 seconds. Check the filling and heat more if needed. Avoid overheating to keep the avocado soft. For the filling, if frozen, thaw it first in the fridge. Then, reheat it in a skillet over low heat. Stir gently until warm. This method keeps the texture nice. Use glass or plastic containers for storage. Make sure they have tight lids to keep air out. The best avocados for stuffing are Hass avocados. They have a rich, creamy texture. Their dark, bumpy skin shows ripeness. You want them to feel slightly soft when you press gently. Other types like Bacon and Fuerte avocados can work too, but they are less creamy. Always choose ripe avocados for the best taste and texture. Yes, you can prepare the chicken filling ahead of time. Mix the chicken with Cajun seasoning and other ingredients. Store it in an airtight container in the fridge. You can stuff the avocados just before serving. This keeps the avocados fresh and prevents browning. If you want to prep the avocados early, sprinkle lime juice on them to slow browning. Yes, you can make this dish dairy-free. Substitute cream cheese with a plant-based cream cheese. For cheddar cheese, use a dairy-free cheese alternative. You can also skip the cheese altogether. The dish will still be tasty with the Cajun chicken and fresh ingredients. Don’t forget to adjust salt and pepper to taste. Stuffed avocados last about 30 minutes in the fridge before browning. After that, the avocados may start to brown and lose flavor. If you have leftover filling, store it in an airtight container. It can last up to three days in the fridge. Just remember to fill the avocados just before eating for the best experience. In this article, we explored how to create delicious stuffed avocados. We discussed the key ingredients and the steps to prepare the filling. I shared tips for selecting ripe avocados and ways to customize your dish. You can also adapt the recipe for different diets or make it vegetarian. Remember to store any leftovers properly for later enjoyment. Now, you have all the tools to impress your friends and family with this tasty treat! Enjoy your cooking adventure!

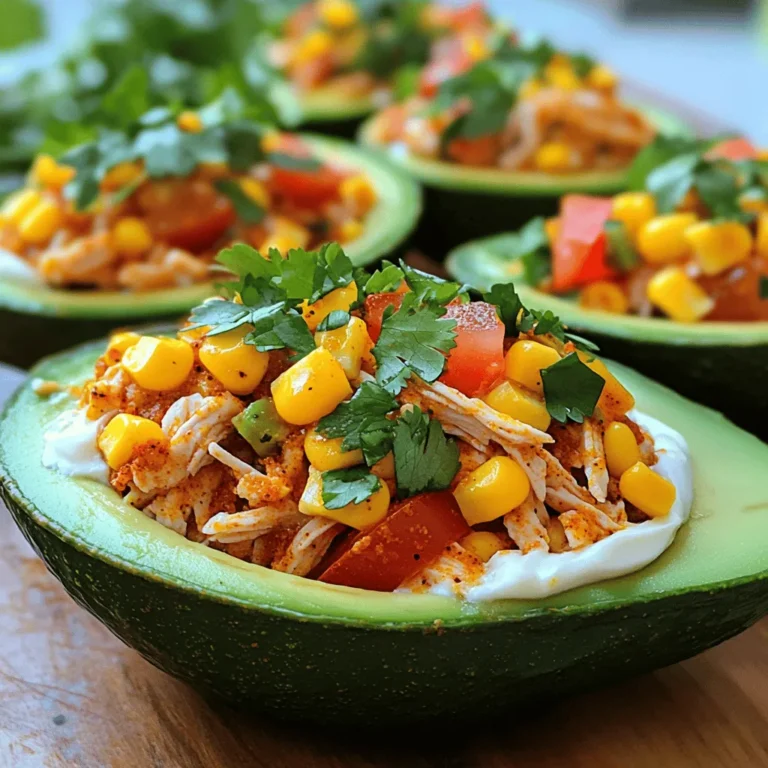
Cajun Chicken Stuffed Avocados Flavorful and Easy Dish

- 1 tablespoon olive oil - 1 medium onion, diced - 2 cloves garlic, minced - 4 cups vegetable broth - 1 can (14 oz) crushed tomatoes - 1 teaspoon dried basil - 1 teaspoon dried oregano - 1 cup heavy cream (or coconut cream for dairy-free) - 9 oz fresh cheese tortellini - 3 cups fresh spinach, roughly chopped - Grated Parmesan cheese - Fresh basil leaves This creamy tomato spinach tortellini soup is easy to make and full of flavor. You start with olive oil, diced onion, and minced garlic. This mix adds a nice base. After that, vegetable broth and crushed tomatoes go in. They bring a rich taste and color. Next, we add dried basil and oregano. These herbs give the soup a lovely aroma. Then, you pour in heavy cream for creaminess, or coconut cream if you prefer dairy-free. Fresh cheese tortellini adds a nice bite. Lastly, you fold in fresh spinach. It brings a pop of color and nutrients. For those who like a little extra, sprinkle grated Parmesan cheese and fresh basil leaves on top. These garnishes make the soup feel special. - Heat 1 tablespoon of olive oil in a large pot over medium heat. - Add 1 medium diced onion. Sauté until it turns soft, about 5 minutes. - Once the onion is clear, stir in 2 minced garlic cloves. Cook for 1 more minute. - Pour in 4 cups of vegetable broth and 1 can of crushed tomatoes. - Add 1 teaspoon of dried basil and 1 teaspoon of dried oregano. Bring everything to a simmer. - Stir in 1 cup of heavy cream. Let it simmer for 5 minutes to thicken. - Toss in 9 ounces of fresh cheese tortellini. Cook until they float, about 4-5 minutes. - Gently fold in 3 cups of roughly chopped spinach. Cook for 2-3 minutes until wilted. - Season with salt and pepper to taste. Enjoy! Choosing the right tortellini Select tortellini that adds flavor and texture. Fresh cheese tortellini works best. It provides a nice bite and richness. If you want a twist, try spinach or mushroom tortellini for added taste. Adjusting seasoning for flavor Taste your soup as it cooks. Add salt and pepper gradually to find the right balance. Fresh herbs enhance the taste. A sprinkle of dried herbs can also boost flavor. Dairy-free options with coconut cream Coconut cream gives a rich, creamy texture without dairy. Use it for a vegan version. It pairs well with tomatoes and spinach. Just be careful not to add too much, as it can be quite strong. Balancing creaminess and acidity When using coconut cream, balance it with more tomatoes. This keeps the soup fresh and bright. If using heavy cream, add a little lemon juice for a nice zing. Best pairings with bread or salads Serve your soup with crusty bread for dipping. A fresh salad also pairs well. Try a simple green salad with a light vinaigrette. This adds crunch and freshness to your meal. Storing leftovers properly Store leftover soup in an airtight container. It lasts about three days in the fridge. If you want to keep it longer, freeze it in portions. Just remember to leave space for expansion. {{image_2}} You can change a few ingredients to suit your taste. For a richer flavor, use chicken broth instead of vegetable broth. This small swap adds a nice depth to the soup. If you want different greens, consider swapping spinach for kale or Swiss chard. Both options give great texture and taste. Just chop them roughly, just like you would with spinach. Want to make your soup heartier? Add cooked chicken or sausage. Both options bring in protein and flavor. Just cook the meat ahead of time and stir it in when you add the tortellini. For a vegetarian twist, use beans or lentils. They add protein and fiber without meat. Choose canned beans for convenience, or cook dried lentils ahead of time. If you like heat, add red pepper flakes or chili powder. Start with a pinch, then adjust to your liking. This adds a nice kick to the creamy base. Infusing herbs into the soup will change the flavor profile. Try adding thyme or rosemary for a fresh taste. You can also use fresh herbs at the end for brightness. To store leftovers, let the soup cool first. Then, pour it into an airtight container. Seal it well to keep out air. You can keep it in the fridge for up to three days. Ensure you reheat only what you will eat. This way, the soup stays fresh. If you want to freeze the soup, use freezer-safe containers. Leave some space at the top so the soup can expand. It can last up to three months in the freezer. When reheating, thaw it in the fridge overnight. Heat it gently on the stove to keep the flavors bright. You can make this soup ahead of time for busy weeks. It tastes even better the next day! Portion it into single servings for quick meals. Just reheat on the stove or in the microwave when you're ready to eat. This makes it easy to enjoy a warm, tasty meal anytime. You can easily make this soup vegan. Use coconut cream instead of heavy cream. For the tortellini, choose a vegan option from your store. Instead of using vegetable broth, check that it is vegan-friendly. You can also add extra veggies like mushrooms or zucchini for more flavor. Yes, you can use frozen tortellini. Just add it to the pot straight from the freezer. Cook it for about 7-10 minutes until it floats. This longer cooking time helps the tortellini heat through. Keep an eye on the soup to ensure it doesn’t get too thick. This soup pairs well with several sides. Try crusty bread for dipping. A fresh salad makes a nice side too. You can also serve it with a grilled cheese sandwich. For a light touch, fresh basil leaves can add a pop of color. This blog post covered how to make delicious Creamy Tomato Spinach Tortellini Soup. We discussed key ingredients like olive oil, diced onion, and fresh spinach. I shared step-by-step instructions to guide your cooking. Plus, I provided tips for storage and meal prep to keep your soup fresh. Remember, you can add your twist with spices or proteins. Enjoy this easy, tasty dish any day!

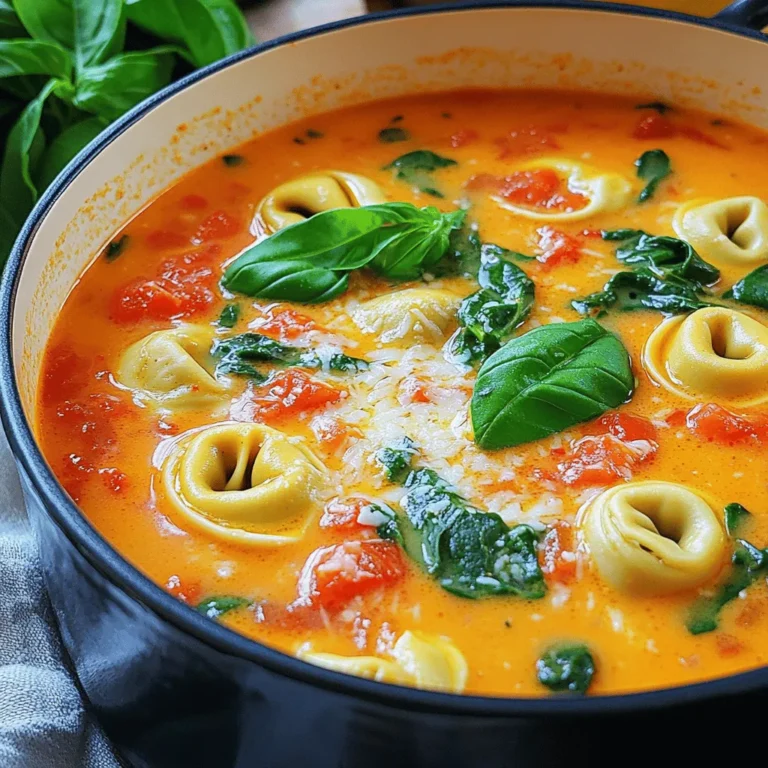
Creamy Tomato Spinach Tortellini Soup Delightful Recipe

- 1 cup unsalted butter (for browning) - 1 ½ cups granulated sugar - 1 tablespoon vanilla extract - 2 large eggs - 2 ¾ cups all-purpose flour - 2 teaspoons cream of tartar - 1 teaspoon baking soda - ½ teaspoon salt - 2 tablespoons cinnamon sugar (for rolling cookies) For this recipe, I use precise measurements. This keeps the cookies soft and chewy. If you need a dairy-free option, try using plant-based butter. You can swap granulated sugar for coconut sugar for a different taste. - Unsalted butter: Browning it adds a rich, nutty flavor. This makes your cookies unique. - Granulated sugar: It sweetens the dough and helps create a nice texture. - Vanilla extract: This adds warmth and depth to the cookies. - Eggs: They bind the dough and help it rise. - All-purpose flour: This is the base of the cookies. It gives them structure. - Cream of tartar: This keeps the cookies chewy and adds a slight tang. - Baking soda: This acts as a leavening agent, helping the cookies puff up. - Salt: A little salt enhances the overall flavor. - Cinnamon sugar: Rolling the cookies in this mixture gives them a sweet and spicy finish. Each ingredient plays a key role in making these brown butter snickerdoodle cookies a delightful treat. 1. Brown the Butter: Start by melting the unsalted butter in a saucepan over medium heat. Stir it often. In about 5 to 7 minutes, it will turn golden brown and smell nutty. This is key for flavor. Once done, take it off the heat and let it cool a bit. 2. Mix Wet Ingredients: In a large bowl, combine the brown butter and granulated sugar. Whisk them together until smooth. Next, add the vanilla extract and the eggs. Mix until everything is well blended. 3. Prepare Dry Ingredients: In another bowl, whisk together the all-purpose flour, cream of tartar, baking soda, and salt. This mix gives your cookies structure and helps them rise. 4. Combine Ingredients: Slowly add the dry mix to the wet mix. Stir gently until just combined. Be careful not to overmix; this keeps your cookies soft. 5. Chill the Dough: Cover the bowl with plastic wrap. Refrigerate the dough for at least 30 minutes. Chilling helps improve the cookie's texture. 6. Preheat & Prepare: While the dough chills, preheat your oven to 350°F (175°C). Line a baking sheet with parchment paper to prevent sticking. 7. Form Cookies: In a small bowl, mix sugar and cinnamon for rolling. Scoop rounded tablespoons of dough and roll them into balls. Coat each ball well in the cinnamon sugar mix. 8. Bake: Place the dough balls on the baking sheet, leaving about 2 inches between each. Bake for 10 to 12 minutes. Look for lightly golden edges. 9. Cool & Serve: After baking, let the cookies cool on the sheet for 5 minutes. Then, transfer them to a wire rack to cool completely. Enjoy your delicious cookies! - When browning butter, watch it closely. It can burn quickly. - Mix wet ingredients until just combined for a soft cookie. - Chill the dough well; this makes a big difference in texture. - Use a cookie scoop for even-sized dough balls. - Don't skip browning the butter. It adds depth to the flavor. - Avoid overmixing the dough; this can make cookies tough. - Forgetting to chill the dough can lead to flat cookies. - Make sure to space the cookies well on the sheet; they spread as they bake. To make brown butter, heat your unsalted butter in a saucepan over medium heat. Stir it often. Watch for the color change. It should turn a golden brown and smell nutty. This process takes about 5 to 7 minutes. Be careful not to burn it. Once you see the color change, take it off the heat and let it cool slightly. Brown butter adds a rich flavor to your cookies. For soft cookies, do not overmix your dough. Mix just until the flour disappears. Chilling the dough also helps. Cover it with plastic wrap and chill for at least 30 minutes. This makes the cookies thicker and chewier. When shaping the cookies, roll them gently into balls. This helps them bake evenly. After baking, let your cookies cool on the baking sheet for about 5 minutes. This helps them firm up. Then, transfer them to a wire rack to cool completely. For serving, stack them on a plate or arrange them in a jar. They look great and taste even better. Store any leftovers in an airtight container to keep them fresh. Enjoy these cookies with a glass of milk or coffee! {{image_2}} You can make your brown butter snickerdoodle cookies even more fun. Try adding chocolate chips or nuts. Chopped pecans or walnuts give a nice crunch. You can also toss in toffee bits for a sweet twist. For a hint of zest, add orange or lemon zest. This brings a fresh flavor to each bite. If you need gluten-free cookies, swap the all-purpose flour for a gluten-free blend. Look for one that works well in baking. For a vegan option, use coconut oil instead of butter. Use plant-based milk and a flax egg for the eggs. Combine one tablespoon of flaxseed meal with three tablespoons of water. Let it sit for a few minutes to thicken. This mixture will help bind your cookies. You can try different sugars for rolling. Instead of regular sugar, use brown sugar for a richer taste. You can mix in spices too. Try adding ginger or nutmeg to the cinnamon sugar for extra warmth. For a fun twist, roll in crushed candy canes during the holidays. This adds a festive touch and a minty flavor. To keep your brown butter snickerdoodle cookies fresh, store them in an airtight container. Use a container that seals well. This prevents air from drying out the cookies. Place a piece of bread in the container to help keep the cookies soft. The bread adds moisture, and they stay nice and chewy. You can freeze both the dough and the baked cookies. For dough, scoop the balls onto a baking sheet. Freeze them for about an hour until firm. Then, transfer the frozen balls into a zip-top bag. They can last up to three months in the freezer. For baked cookies, let them cool completely. Then, wrap them in plastic wrap and place them in a container. They also freeze well for up to three months. Baked cookies stay fresh at room temperature for about one week. Make sure you store them in an airtight container. For longer freshness, freezing is best. When you want to enjoy them, just thaw them at room temperature. Reheat in the oven for a few minutes for that fresh-out-of-the-oven taste. Brown butter is made by cooking unsalted butter until it turns golden brown. This process gives it a deep, nutty flavor. Regular butter is just melted without this step. The unique taste of brown butter adds richness to your snickerdoodles. It sets these cookies apart from others, making them extra special. Yes, you can adjust the sugar amount. If you want less sweetness, reduce the granulated sugar by a quarter cup. This change will make the cookies less sweet but still tasty. You can also add more cinnamon for flavor without adding sugar. Experiment with the balance that suits your taste best. Look for the edges of the cookies to turn lightly golden. The centers should look slightly soft but not doughy. If you press the cookies gently, they should spring back. Remove them from the oven and let them cool on the baking sheet for a few minutes. This helps them firm up. Enjoy the perfect snickerdoodle! This article covered the essential ingredients and their measurements for the perfect cookies. I shared step-by-step cooking instructions and tips to avoid common mistakes. You learned how to achieve great textures and flavors. We also explored variations for different diets and flavor preferences. Lastly, storing tips ensure your cookies stay fresh. Baking cookies can be fun and rewarding. With these insights, you can make delicious treats every time. Now, it's time to get baking and enjoy your creations!

Brown Butter Snickerdoodle Cookies Delightful Treat

- Salmon and Rice Components - 2 salmon fillets - 1 cup jasmine rice - 1 ½ cups water - Teriyaki Sauce Ingredients - ¼ cup soy sauce - 2 tablespoons honey - 1 tablespoon rice vinegar - 1 teaspoon sesame oil - 1 inch ginger, grated - 2 cloves garlic, minced - Fresh Vegetables and Garnishes - 1 cup broccoli florets - ½ red bell pepper, thinly sliced - 1 avocado, sliced - 2 green onions, chopped - Sesame seeds for garnish - Salt and pepper to taste These ingredients create a tasty and colorful dish. The salmon is rich in flavor and pairs well with the sweet and tangy teriyaki sauce. Jasmine rice serves as a soft base for your bowl. Fresh veggies add crunch and color, making your meal not just tasty but also visually appealing. Feel free to adjust the veggies based on what you like or have on hand. This flexibility makes the dish fun and personal. You can also play with the teriyaki sauce, adding more honey for sweetness or more soy sauce for saltiness. To cook the jasmine rice, rinse it under cold water. Keep rinsing until the water runs clear. This step removes excess starch and helps the rice stay fluffy. In a saucepan, combine one cup of rice with one and a half cups of water. Bring the mixture to a boil over high heat. Once it starts boiling, reduce the heat to low. Cover the saucepan and let it simmer for 15 minutes. After that time, remove it from heat but keep it covered for another five minutes. This resting period allows the rice to finish cooking. To make the teriyaki sauce, gather your ingredients. In a small bowl, mix together the soy sauce, honey, rice vinegar, sesame oil, grated ginger, and minced garlic. Whisk these ingredients until they are well combined. This sauce will give your salmon a sweet and savory flavor. Heat a non-stick skillet over medium-high heat. While the skillet heats, season the salmon fillets with salt and pepper. When the skillet is hot, place the salmon skin-side down. Pour half of the teriyaki sauce over the salmon. Cook for about 4 to 5 minutes until the skin is crispy. Then, flip the salmon and cook for another 3 to 4 minutes. You want it flaky but not dry. Remove it from the heat and let it rest for a few minutes. This helps keep the salmon moist. While the salmon cooks, prepare the vegetables. Steam the broccoli florets and sliced red bell pepper in a steamer basket. Steam them for about 5 to 7 minutes. They should be tender but still bright in color. This method keeps their nutrients and adds a nice crunch. Now, it’s time to assemble your bowls. Start with a base layer of jasmine rice in each serving bowl. Then, add the flaked salmon on top. Arrange the steamed vegetables and avocado slices next. Drizzle the remaining teriyaki sauce over the top for added flavor. For the final touch, garnish each bowl with chopped green onions and a sprinkle of sesame seeds. This adds a nice crunch and makes the dish look appealing. Enjoy your delicious teriyaki salmon rice bowls! To get crispy skin on your salmon, start with a dry fillet. Pat it with paper towels before cooking. Heat your skillet until it is hot. Place the salmon skin-side down and don’t move it for a few minutes. This helps the skin crisp up nicely. Overcooking salmon is common. Use a timer to keep track. Cook it for about 4-5 minutes on the skin side. Then flip and cook for another 3-4 minutes. Salmon should be opaque and flake easily with a fork. If it's still shiny in the middle, give it another minute or two. For fluffier rice, rinse jasmine rice under cold water. This removes starch that makes it sticky. After rinsing, let the rice soak for about 30 minutes. This helps it cook evenly. Use a 1:1.5 ratio of rice to water. This means for every cup of rice, add 1.5 cups of water. Once the rice is done cooking, let it sit covered for 5 minutes. This resting time helps the rice grains separate. You can customize your teriyaki sauce to fit your taste. If you like it sweeter, add more honey. For a bolder flavor, increase the soy sauce. You can also add a bit of red pepper flakes for heat. Experiment with different flavors too! Try adding orange juice for a citrus twist or sesame seeds for extra crunch. This makes each bowl unique and tasty. {{image_2}} If you want to switch things up, try chicken or tofu instead of salmon. Both options work well with the teriyaki sauce. For chicken, use boneless thighs or breasts. Cook them in the same way as the salmon. For tofu, use firm tofu and press it to remove excess water. Cut it into cubes and pan-fry until golden. The sauce will enhance the flavor of both meats. You can also change the grain base. Quinoa, brown rice, or cauliflower rice make great choices. Quinoa adds protein and a nutty taste. Brown rice offers a chewier texture and more fiber. Cauliflower rice gives a low-carb option. Simply prepare them as you would jasmine rice. Each grain adds its own unique twist to the bowl. Feel free to swap in seasonal veggies for added freshness. Instead of broccoli and bell pepper, use snap peas, carrots, or spinach. Seasonal vegetables provide different colors and flavors. They keep the dish exciting and nutritious. Just steam or sauté them to your liking, then layer them in your bowl. Enjoy the variety! To keep your teriyaki salmon rice bowls fresh, store them in airtight containers. Place the salmon, rice, and veggies in separate sections if possible. This helps maintain their taste and texture. Refrigerate the bowls within two hours of cooking. They will stay good for up to three days. Always label your containers with the date. This way, you know when to eat them. When reheating, use the microwave for the quickest option. Heat in short bursts, about 30 seconds, mixing in between. This helps avoid hot spots. If you want to keep the salmon crispy, use the oven. Preheat the oven to 350°F (175°C) and heat for about 10 minutes. Cover with foil to keep it moist. Check that the salmon is warm throughout but not overcooked. You can freeze the salmon and rice bowls for later meals. First, let everything cool completely. Then, place the salmon, rice, and veggies in freezer-safe bags. Remove as much air as possible before sealing. Label the bags with the date. They will last about three months in the freezer. To thaw, move them to the fridge overnight. Reheat as mentioned above. If you need a soy sauce substitute, you have a few options. Coconut aminos work well for a gluten-free choice. It has a similar taste but is less salty. You can also use tamari, which is a gluten-free soy sauce made from fermented soybeans. If you want to go low-sodium, look for low-sodium soy sauce. Just remember, each option has a different flavor, so adjust to your taste. Perfectly cooked salmon should be opaque and flake easily with a fork. If it is still translucent in the center, it needs more time. A good rule is to cook salmon for 4-5 minutes skin-side down, then flip for another 3-4 minutes. The internal temperature should reach 145°F. If you’re unsure, use a meat thermometer for a precise reading. Yes, you can make teriyaki sauce ahead of time. It keeps well in the fridge for up to a week. Just mix your ingredients and store them in an airtight container. For longer storage, you can freeze the sauce in ice cube trays. Once frozen, transfer the cubes to a freezer bag. This way, you can use just what you need later. For side dishes, consider steamed edamame or a simple cucumber salad. Both add freshness and crunch. You could serve pickled ginger for a nice zing. Another option is a seaweed salad, which complements the flavors of the teriyaki salmon well. These sides enhance your meal without taking away from the main dish. In this blog post, we explored how to create a delicious teriyaki salmon rice bowl. We covered main ingredients like salmon, rice, and fresh veggies. Each step showed how to cook rice, make teriyaki sauce, and prepare the salmon. I shared helpful tips for perfecting each element. You can customize your dish with different proteins and grains. Proper storage and reheating techniques keep leftovers tasty. Embrace these simple methods to enjoy a healthy and satisfying meal. Now it’s your turn to get cooking and make this dish your own!

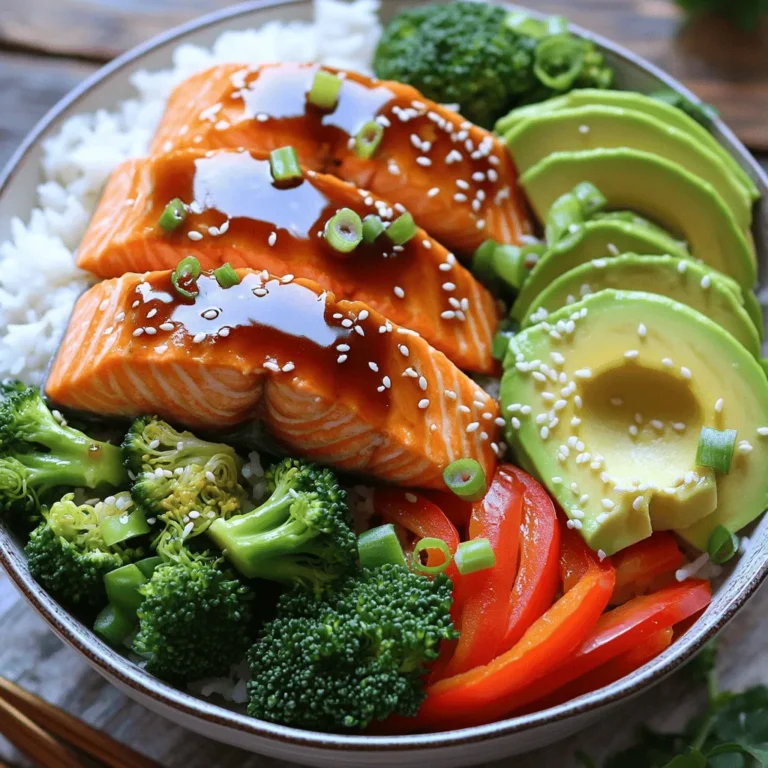
Teriyaki Salmon Rice Bowls Flavorful and Simple Recipe

To make chocolate hazelnut crepes, you need the following key ingredients: - 1 cup all-purpose flour - 2 large eggs - 1 ½ cups milk - 2 tablespoons melted butter - 1 tablespoon sugar - A pinch of salt - ½ cup chocolate hazelnut spread (like Nutella) - 1/4 cup hazelnuts, chopped These ingredients come together to create a light and delicious treat. The flour and eggs form the base, while milk adds creaminess. Sugar gives a hint of sweetness, and the chocolate hazelnut spread is the star of the dish. You can make your crepes even better with these optional garnishes: - Fresh berries (strawberries, raspberries, or blueberries) - Whipped cream - A dusting of powdered sugar These toppings add color and flavor, making your crepes look and taste amazing. Fresh berries bring a tartness that balances the sweetness, while whipped cream adds richness. If you have special dietary needs, here are some substitutions: - Use gluten-free flour for a gluten-free option. - Swap eggs with flaxseed meal mixed with water for a vegan option. - Choose dairy-free milk, like almond or oat milk, for lactose-free crepes. These substitutions help everyone enjoy chocolate hazelnut crepes, no matter their diet. Experimenting with these options can lead to new favorite flavors. To start, grab a mixing bowl. Add 1 cup of all-purpose flour. Then, crack in 2 large eggs. Next, pour in 1 ½ cups of milk. Whisk until the mixture is smooth. After that, melt 2 tablespoons of butter and add it to the bowl. Toss in 1 tablespoon of sugar and a pinch of salt. Mix again until everything is combined. Let the batter rest for 30 minutes. This step helps create soft crepes. Now, heat a non-stick skillet over medium heat. Lightly grease it with butter or oil. Pour about 1/4 cup of batter into the skillet. Quickly swirl it around to cover the bottom evenly. Cook for about 1-2 minutes. You know it’s ready when the edges lift and the surface looks set. Carefully flip the crepe and cook for another minute. Once done, stack the crepes on a plate. Repeat with the rest of the batter. Now comes the fun part! Take a warm crepe and spread a generous tablespoon of chocolate hazelnut spread on one half. Sprinkle chopped hazelnuts over the spread. Fold the crepe in half, then fold it again to form a triangle. If you like, serve the crepes warm with fresh berries on the side. A dollop of whipped cream and a dusting of powdered sugar make it even better! Enjoy your delicious treat. To get the best crepe texture, make sure your batter is smooth. Whisk the flour, eggs, and milk until no lumps remain. Letting the batter rest for 30 minutes helps develop a nice texture. This gives the flour time to absorb the liquid. If the batter seems thick, add a splash of milk to thin it out. Use a non-stick skillet for cooking your crepes. This helps prevent sticking and makes flipping easier. Preheat the skillet on medium heat before adding the batter. Lightly grease it with butter or oil. Pour just enough batter to cover the bottom. Swirl it around quickly. This helps create an even layer. Cook the crepe until the edges lift before flipping. Serve the crepes warm for the best taste. You can keep them warm in a low oven while you finish cooking. If you stack them, place a piece of parchment paper between each crepe. This keeps them from sticking. Add your toppings right before serving. Fresh berries or whipped cream add a perfect touch. Dust with powdered sugar for extra sweetness. {{image_2}} You can switch up the flavor of your crepes easily. Try peanut butter, almond butter, or even cookie butter. Each spread brings a new taste. For a fruity twist, use strawberry or raspberry jam. These options keep the treat fun and interesting. If you need a nut-free option, swap the chocolate hazelnut spread for sunbutter or soy nut butter. Both spreads give a creamy texture without nuts. You can also use a chocolate spread that is nut-free. Check the label to be sure it meets your needs. Fruits add freshness and color to your crepes. Try using sliced bananas, strawberries, or peaches. You can mix the fruits with a bit of honey for extra sweetness. Another fun idea is to make a fruit compote. Just cook your favorite berries in a pan until they soften and thicken. Serve the compote hot over the crepes for a delightful treat. To keep leftover crepes fresh, stack them on a plate. Place parchment paper between each crepe. Cover the stack with plastic wrap. Store them in the fridge for up to 3 days. This helps to keep them from sticking together. When you're ready to enjoy your crepes, you can reheat them easily. Place a crepe in a non-stick skillet over low heat. Heat it for about 30 seconds on each side. You can also use the microwave. Just place a crepe on a microwave-safe plate and heat for 10-15 seconds. This warms them up quickly. If you want to save crepes for later, freezing is a great option. Stack the crepes with parchment paper in between. Wrap the stack tightly in plastic wrap. Then, place them in a freezer-safe bag. They can stay frozen for up to 2 months. When you’re ready to use them, thaw the crepes in the fridge overnight. Then, reheat as mentioned above. Yes, you can make crepes ahead of time. Just prepare the batter and cook the crepes. After cooking, stack them with parchment paper between each one. This keeps them from sticking together. Store the stack in an airtight container in the fridge for up to three days. When you are ready to eat, just reheat them. To reheat crepes, use a skillet over low heat. Place one crepe in the skillet for about 30 seconds on each side. This warms the crepe without making it crispy. You can also use a microwave, but that may make the crepes a bit chewy. If using a microwave, wrap them in a damp paper towel to keep them soft. Making gluten-free crepes is easy! Swap the all-purpose flour with a gluten-free flour blend. Look for a blend that includes xanthan gum. This will help keep the crepes stretchy and soft. Follow the same steps in the recipe, and enjoy delicious gluten-free crepes! In this post, we explored the simple steps to make delicious chocolate hazelnut crepes. We covered key ingredients, cooking techniques, and helpful tips for the perfect texture. We also discussed fun variations, storage tips, and answered common questions. Remember, making crepes is easy and fun! Try different fillings and enjoy them fresh or stored. Now, grab your tools and start cooking. Enjoy every delicious bite of your homemade crepes!

Chocolate Hazelnut Crepes Simple and Delicious Treat

- Baby carrots or regular carrots: Use one pound of baby carrots. If you have regular carrots, peel and cut them into sticks. Both work well. - Honey and its substitutes: Honey gives a sweet touch. You can use maple syrup if you prefer. - Unsalted butter: Two tablespoons of unsalted butter add richness to the dish. - Garlic and its preparation: Use three cloves of garlic, minced finely. Fresh garlic gives the best flavor. - Soy sauce or tamari options: One tablespoon of soy sauce adds depth. You can use tamari for a gluten-free option. - Fresh or dried thyme: Thyme adds a nice herbal note. Use one teaspoon of fresh or half a teaspoon if dried. - Seasoning essentials (salt and pepper): Salt and pepper enhance all flavors. Adjust to taste. - Optional garnish (chopped parsley): Chopped parsley adds color and freshness. It is not necessary but looks great on the plate. This ingredient list makes the recipe easy and quick. Each item plays a key role in creating a tasty dish. To start, we need to blanch the carrots. Boil a pot of water. Add the carrots and let them cook for 4-5 minutes. This makes them tender but still crisp. Drain the carrots and set them aside. If you don’t have baby carrots, you can use regular carrots. Just peel them and cut them into sticks. Now, let's move on to the cooking part. In the same pot, melt 2 tablespoons of unsalted butter over medium heat. Once the butter melts, add 3 minced garlic cloves. Sauté the garlic for about 1 minute. You want it to be fragrant and golden, but be careful not to burn it. Next, add in 3 tablespoons of honey, 1 tablespoon of soy sauce, and 1 teaspoon of fresh thyme. Stir well to mix everything together. This creates a lovely honey garlic glaze. Once the glaze is ready, return the blanched carrots to the pot. Toss them in the honey garlic mixture. Cook for another 5-7 minutes. Stir occasionally until the carrots are well coated and tender. After the carrots are cooked, it’s time to season. Add salt and pepper to taste. Cook for another minute to let the flavors blend. Now, remove the pan from heat. Transfer the glazed carrots to a serving dish. For a nice touch, sprinkle some chopped parsley on top. This adds color and freshness to your dish. Enjoy your honey garlic glazed carrots! To boost the taste of your honey garlic glazed carrots, try using different spices and herbs. Consider adding a pinch of cinnamon or nutmeg for warmth. You can also experiment with rosemary or dill for a fresh twist. These herbs can elevate the dish and add variety. To achieve the perfect glaze, make sure to cook the carrots until they are tender but not mushy. The glaze should coat the carrots well to create a shiny, sweet layer. Stir the carrots often while they cook to ensure even coverage. Blanching carrots is a simple method that helps keep their bright color and crunch. This technique softens them just enough for the glaze to stick. Blanch for about 4-5 minutes, and they will turn out perfect. Be cautious with the garlic. It can burn quickly if you cook it too long over high heat. Sauté it just until fragrant and golden. Keep stirring to avoid burning. If you burn the garlic, it can make the dish taste bitter. These carrots pair well with many main dishes. Serve them alongside roasted chicken or grilled fish. They also work great with pork chops or steak. The sweetness of the glaze will balance well with savory meats. For creative plating, arrange the glazed carrots in a circular pattern on the plate. Drizzle any leftover glaze over the top. A sprinkle of fresh parsley adds a pop of color and freshness. This adds a nice touch for special occasions. {{image_2}} You can switch honey for maple syrup. It adds a unique flavor. Maple syrup works well in this dish. Try using different carrots, too. You can use regular carrots, sliced into sticks. Colorful carrots, like purple or yellow, can make the dish pop. To make this recipe vegan, replace the butter with olive oil. You can also skip honey and use agave syrup instead. For those who need gluten-free options, use tamari instead of soy sauce. This small change keeps the flavor intact. Want a burst of freshness? Add some citrus zest, like lemon or orange. It brightens the dish and adds a lovely twist. If you like heat, sprinkle some chili flakes in. They give a nice kick and balance the sweetness. To keep your honey garlic glazed carrots fresh, store them in the fridge. Use an airtight container. This helps lock in moisture and flavor. Make sure the carrots are cool before sealing the container. Eat them within three to four days for the best taste. When reheating, use the stovetop for best results. Heat a pan over low heat. Add a splash of water or a bit of butter. Stir the carrots gently until they warm up. This method keeps the carrots tender and avoids sogginess. If you want to save some glazed carrots, freezing is a great option. First, let the carrots cool completely. Place them in a freezer-safe container or bag. Remove as much air as possible. When you're ready to eat them, thaw in the fridge overnight. Reheat on the stovetop or in the microwave. This way, you can enjoy their sweet, savory flavor even later! Yes, you can use frozen carrots. They are convenient and save time. However, frozen carrots may not have the same crunch as fresh ones. They can also cook faster, so watch them closely. If you choose frozen carrots, skip the blanching step. Just heat them with the glaze until warm. To balance sweetness, you can add more soy sauce. This adds a salty flavor that cuts the sweetness. You might also try adding a splash of vinegar for tang. Taste as you go. Adjust until you find the flavor you love. These carrots go well with many dishes. Try serving them with roasted chicken or grilled steak. They also pair nicely with rice or quinoa. For a vegetarian option, serve them with a hearty salad or pasta. The sweet and savory flavor complements many cuisines. This blog post gave you a complete guide to honey garlic glazed carrots. We covered all the ingredients, cooking steps, and tips for perfect results. You can easily make this dish your own with variations and substitutions. Remember, practice helps improve your skills. Enjoy serving this flavorful side dish, and don't forget to share your creations! Happy cooking!

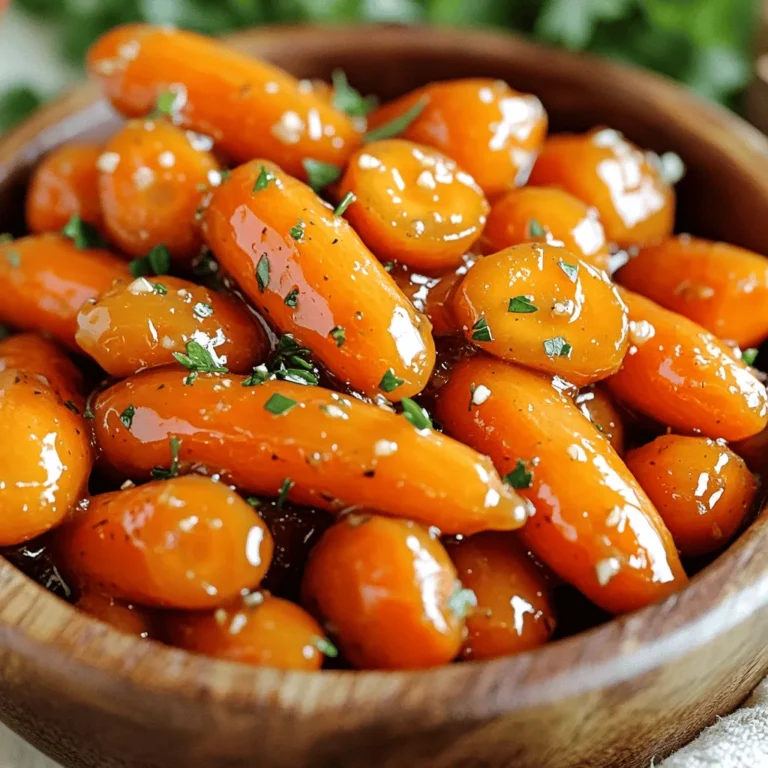
Honey Garlic Glazed Carrots Flavorful and Easy Recipe

- 1 lb (450g) boneless skinless chicken thighs - 1 cup basmati rice, rinsed - 1 small onion, diced - 2 cloves garlic, minced You start with boneless skinless chicken thighs. They cook well and stay juicy. Next, use basmati rice. Rinsing it helps remove extra starch. This keeps the rice fluffy. Diced onions add sweetness, while minced garlic brings strong flavor. Together, these ingredients form a tasty base. - 1 cup chicken broth - 1 teaspoon paprika - 1 teaspoon dried thyme - Salt and pepper to taste Chicken broth makes the dish moist and flavorful. Paprika adds a hint of warmth. Thyme gives a lovely herbal note. Always season with salt and pepper to balance flavors. These simple seasonings elevate the whole meal. - 1 cup frozen peas and carrots - Fresh parsley for garnish Frozen peas and carrots add color and nutrition. They cook quickly, blending with the rice. Fresh parsley is perfect for a pop of green. It also adds freshness when you serve. These veggies make the dish look and taste great! First, gather all your ingredients. Start by dicing one small onion into small pieces. You want it to blend well with the chicken and rice. Next, mince two cloves of garlic. This adds great flavor to the dish. Now, rinse one cup of basmati rice under cold water. This helps remove excess starch. Rinsing gives you a fluffier texture when cooked. Set your Instant Pot to 'Sauté' mode. Pour in one tablespoon of olive oil. Once it’s hot, add the diced onion. Cook until it turns translucent, about three to four minutes. Stir in the minced garlic and cook for one more minute until fragrant. Then, add one pound of boneless, skinless chicken thighs. Season both sides with salt, pepper, one teaspoon of paprika, and one teaspoon of dried thyme. Sauté the chicken until it is lightly browned, about five minutes. Next, pour in one cup of chicken broth. Make sure to scrape any brown bits from the bottom of the pot. This adds more flavor to your meal. Spread the rinsed basmati rice evenly over the chicken. Then, add one cup of frozen peas and carrots on top. Do not stir this mixture. Close the Instant Pot lid. Set it to 'Manual' or 'Pressure Cook' on high for ten minutes. Ensure the valve is in the sealing position. After cooking, let it naturally release for ten minutes. This helps keep the rice moist. After ten minutes, switch to a quick release to let out any remaining pressure. Carefully open the lid. Use a fork to fluff the rice, mixing in the chicken and veggies. Enjoy your tasty dish! To enhance the flavor of your Instant Pot chicken and rice, try these tips: - Add More Seasoning: You can increase the paprika or thyme. This gives the dish a richer taste. - Use Fresh Herbs: Fresh thyme or rosemary adds a bright note. You can toss these in before serving. The natural release time is key for great results. Letting the pot sit for 10 minutes helps the rice absorb moisture. This makes the rice fluffy and not mushy. Avoid common mistakes to get the best dish: - Overcooking the Rice: If you cook the rice too long, it turns mushy. Stick to the 10-minute cook time. - Not Searing the Chicken: Searing gives the chicken a nice crust. This adds flavor and makes the dish more appealing. Pair your chicken and rice with these ideas: - Side Dishes: A simple green salad works well. You can also serve it with steamed broccoli. - Best Sauces and Toppings: A splash of soy sauce or a drizzle of sriracha adds a nice kick. For a fresh touch, sprinkle some lime juice on top. {{image_2}} You can change the chicken in this dish. Try chicken breast instead of thighs. Chicken breast is leaner and cooks faster. Just keep an eye on it to avoid dryness. You can also swap out the veggies. If you don't have peas and carrots, use what you like. Bell peppers, broccoli, or green beans work well, too. Just chop them into small pieces so they cook evenly. Enhancing flavor is fun and easy. You can add spices like cumin, chili powder, or garlic powder. Each spice adds a new taste that can change your meal. Another great tip is to use coconut milk. This makes the dish creamier and gives it a rich flavor. Just replace half the chicken broth with coconut milk for a tasty twist. If you need a gluten-free meal, use gluten-free broth. Many brands offer options that taste great. Just check the label to be sure. For a vegetarian version, swap the chicken for tofu. Press the tofu to remove extra water, then cube it. Cook it like the chicken for a delicious meat-free meal. You still get all the great flavors! To keep your Instant Pot chicken and rice fresh, store leftovers in the fridge. Use airtight containers to avoid moisture loss. Glass or BPA-free plastic containers are great options. Let your meal cool before sealing it. This helps prevent condensation inside the container. You can freeze portions of chicken and rice for later. Use freezer-safe bags or containers. Make sure to remove as much air as possible from bags. Label your containers with the date. To thaw, place them in the fridge overnight. Reheat in the microwave or on the stove until warmed through. In the fridge, your chicken and rice can last for about 3-4 days. Always check for signs of spoilage. Look for any off smells, changes in texture, or mold. If you notice any of these, it's best to discard the dish. Keeping it stored properly helps maintain its taste and safety. It takes about 10 minutes to cook chicken and rice in the Instant Pot. After cooking, let it sit for 10 minutes to release pressure naturally. Then, finish with a quick release. So, the total time is around 35 minutes, including prep time. Yes, you can use brown rice, but it needs adjustments. Brown rice takes longer to cook. Use 1.25 cups of broth and set the Instant Pot for 22-25 minutes. Remember to let the pressure release naturally for at least 10 minutes for the best texture. You can add many things to boost the flavor. Try using chicken stock instead of water. Adding a bay leaf or a squeeze of lemon juice can enhance taste. You can also mix in fresh herbs like thyme or rosemary before serving. Yes, you can make this dish on the stove. Start by sautéing the onion and garlic, then add the chicken. After browning the chicken, add broth, rice, and veggies. Cover and simmer on low for about 20-25 minutes. Make sure to check the rice for doneness. In this blog post, we explored a simple recipe using chicken thighs and basmati rice. We covered each ingredient, from spices to veggies, and detailed the cooking steps in your Instant Pot. I shared tips to perfect your dish and how to store leftovers safely. Don’t forget, you can adapt this recipe to fit your taste or dietary needs. Enjoy your meal with family and friends, knowing you can make it your own. Happy cooking!

Instant Pot Chicken and Rice Easy Family Meal

- 1 cup quinoa, rinsed - 2 cups vegetable broth - 1 teaspoon olive oil - 1 small onion, diced - 2 garlic cloves, minced - 1 cup cherry tomatoes, halved - 1 cup fresh mozzarella, diced - 1 cup fresh basil leaves, chopped - 1 teaspoon dried oregano - Salt and pepper to taste - ¼ cup grated Parmesan cheese (for topping) I love using quinoa as the base for this dish. It gives a hearty feel. Quinoa is also packed with protein, making it a great choice. The vegetable broth adds a deep flavor that makes each bite special. Don’t skip the olive oil; it helps sauté the onion and garlic. These two ingredients lay the foundation for a savory background. Cherry tomatoes bring a sweet burst when cooked. Fresh mozzarella melts beautifully, creating a creamy texture. The basil adds freshness, while oregano gives that classic Italian taste. Finally, the Parmesan cheese on top creates a nice, golden crust. You can change up the mozzarella for other cheeses. Try goat cheese for a tangy twist. Or use a mix of cheeses for a cheesy delight. You could even go dairy-free with a plant-based cheese. Seasonings bring the dish to life. I use dried oregano for its earthy flavor. Fresh basil adds a bright note. You can also add red pepper flakes for some heat. Salt and pepper are key to enhance all the flavors. Adjust them to your liking for the best taste. Start by rinsing 1 cup of quinoa in cold water. This removes any bitter taste. In a medium saucepan, bring 2 cups of vegetable broth to a boil. Add the rinsed quinoa to the broth and stir. Lower the heat, cover the pot, and let it simmer for about 15 minutes. Once done, the quinoa should be fluffy and the broth fully absorbed. Remove it from heat and set it aside. Next, heat 1 teaspoon of olive oil in a large skillet over medium heat. Add a diced small onion and sauté it for about 3-4 minutes. You want it to be soft, not browned. Then, add 2 minced garlic cloves and cook for another 1-2 minutes until you smell that wonderful garlic aroma. Now, toss in 1 cup of halved cherry tomatoes. Cook these for about 5 minutes. They should soften and release some juice. In a large mixing bowl, combine your cooked quinoa with the sautéed veggies. Add 1 cup of diced fresh mozzarella and 1 cup of chopped fresh basil leaves. Sprinkle in 1 teaspoon of dried oregano, plus salt and pepper to taste. Mix everything well so the flavors combine nicely. Now, transfer this mixture to a lightly greased 9x9-inch baking dish, smoothing the top. For a cheesy finish, sprinkle ¼ cup of grated Parmesan cheese evenly on top. Preheat your oven to 375°F (190°C). Once the oven is ready, place your baking dish inside. Bake it for 25-30 minutes. You’ll know it’s done when the top is golden and bubbly. Once out of the oven, let it cool for 5 minutes before you serve. Enjoy the comforting flavors of this Caprese Quinoa Bake! To cook quinoa perfectly, rinse it under cold water first. This removes the bitter outer coating. - Boil 2 cups of vegetable broth in a medium saucepan. - Add 1 cup of rinsed quinoa and reduce the heat. - Cover and simmer for 15 minutes. The quinoa should be fluffy and absorb all the liquid. If it’s still wet, cook for a few more minutes. For a stunning look, garnish your Caprese Quinoa Bake with fresh basil leaves. - Drizzle extra olive oil on top just before serving. - Consider adding a few halved cherry tomatoes for color. This simple touch makes your dish pop and looks appetizing. Serve this bake warm with a mixed green salad. The freshness of the salad balances the rich flavors. - Pair with a light vinaigrette to brighten the meal. - A glass of chilled white wine also complements the flavors well. These ideas help create a complete and satisfying dinner experience. {{image_2}} You can swap quinoa with other grains. Try brown rice, farro, or even couscous. Each grain brings its own flavor and texture. For cheese, fresh mozzarella is great, but feta or ricotta also works well. If you want a creamier bake, use a mix of cheeses. You can change up the veggies, too. Add spinach, bell peppers, or zucchini for extra color and nutrition. To make this dish gluten-free, just use quinoa as the base. Quinoa is naturally gluten-free. If you want to make it vegan, skip the mozzarella and Parmesan. Instead, use a vegan cheese or nutritional yeast for a cheesy flavor. You can also add nuts or seeds for a protein boost. This way, everyone can enjoy the meal, no matter their diet. Want to take the flavor up a notch? Add spices like red pepper flakes for heat or smoked paprika for a smoky touch. You can also mix in fresh herbs like parsley or thyme for a fresh taste. A splash of balsamic vinegar can enhance the sweetness of the tomatoes. Consider adding olives or artichokes for a Mediterranean twist. Each addition can change the vibe of your Caprese Quinoa Bake. To keep your Caprese Quinoa Bake fresh, store leftovers in an airtight container. This helps prevent moisture loss and keeps flavors intact. You can refrigerate it for up to four days. Make sure to let it cool completely before sealing. If you want to enjoy it later, portioning it into smaller containers is a great idea. This way, you can grab just what you need for a quick meal. When reheating, I recommend using the oven for best results. Preheat the oven to 350°F (175°C). Place the quinoa bake in an oven-safe dish, cover it with foil, and heat for about 15-20 minutes. This keeps the dish moist and helps it heat evenly. If you prefer using a microwave, heat in short bursts of 1-2 minutes, stirring in between. This way, it warms up without becoming dry. To freeze your Caprese Quinoa Bake, first, let it cool completely. Then, cut it into portions. Wrap each piece tightly in plastic wrap, and place them in a freezer-safe container. This method keeps them fresh for up to three months. When you’re ready to enjoy it, thaw it in the fridge overnight. Then, reheat it using the oven or microwave. Enjoy the flavors as if it were fresh! Caprese Quinoa Bake is a healthy and tasty dish. It blends quinoa, fresh tomatoes, and mozzarella. This dish has a bright and fresh flavor. The basil adds a nice touch, while the cheese gives it a creamy texture. Think of it as a twist on the classic Caprese salad, but in a warm, cozy bake. Making Caprese Quinoa Bake takes about 50 minutes. You will spend 15 minutes prepping the ingredients. Cooking the quinoa takes around 15 minutes, and sautéing the vegetables takes about 5 to 6 minutes. Finally, baking the dish in the oven takes 25 to 30 minutes. It’s a quick meal for your weeknight dinners! Yes, you can prepare Caprese Quinoa Bake ahead of time. Cook the quinoa and sauté the veggies in advance. Mix everything and place it in the baking dish. Cover it and store it in the fridge. When ready to eat, bake it straight from the fridge. Just add a few extra minutes to the baking time. Absolutely! Caprese Quinoa Bake is great for meal prep. It stores well in the fridge for up to four days. You can enjoy it for lunch or dinner throughout the week. Just reheat it in the oven or microwave. It keeps its flavor and texture, making it a perfect choice for busy days. In this article, we explored how to make a tasty Caprese Quinoa Bake. We covered key ingredients like quinoa and vegetable broth, plus optional add-ons. I shared tips on cooking, sautéing, and baking. You also learned about storing leftovers and meal prep benefits. This dish is easy to modify for various diets, making it suitable for everyone. Enjoy making this simple, healthy meal and impress your family or friends with your cooking!

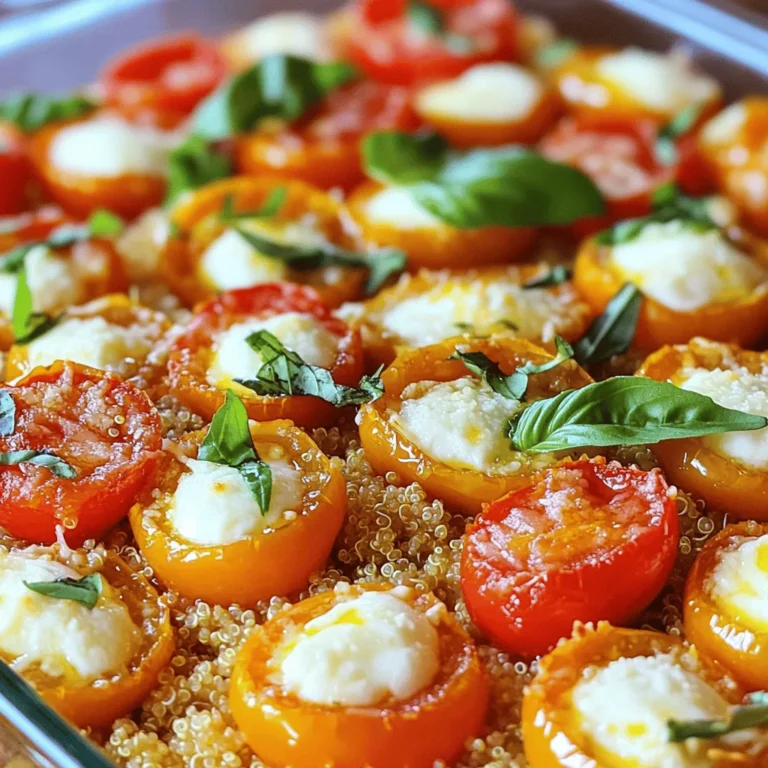
Caprese Quinoa Bake Flavorful and Easy Weeknight Meal

To make these Peanut Butter Oatmeal Breakfast Cookies, you need simple, wholesome ingredients. Here’s what you’ll need: - 1 cup natural peanut butter - 1/2 cup honey or maple syrup - 1 large ripe banana, mashed - 2 cups rolled oats - 1/2 teaspoon baking soda - 1/2 teaspoon cinnamon - 1/4 teaspoon salt - 1/2 cup chocolate chips (or dried fruit for a healthier option) - 1/4 cup chopped nuts (optional) Each ingredient plays a key role in making the cookies tasty and nutritious. Natural peanut butter gives them a rich flavor and protein boost. Honey or maple syrup adds sweetness without refined sugar. The ripe banana keeps the cookies moist and adds natural sweetness. Rolled oats provide a hearty base. They give the cookies a chewy texture and are full of fiber. Baking soda helps them rise, while cinnamon and salt enhance the flavor. You can choose chocolate chips for a treat or dried fruit for a healthier spin. If you like, toss in some nuts for crunch and extra nutrients. This mix of ingredients makes your cookies not just good for breakfast but also fun to eat! First, preheat your oven to 350°F (175°C). This step warms up your oven to bake the cookies evenly. Next, line a baking sheet with parchment paper. This keeps the cookies from sticking and makes cleanup easier. In a large bowl, combine the natural peanut butter, honey (or maple syrup), and mashed banana. Mix until smooth and well blended. This mixture gives the cookies their sweet and creamy base. In another bowl, mix the rolled oats, baking soda, cinnamon, and salt. Stir well to ensure even distribution. These dry ingredients add texture and flavor to your cookies. Gradually add the dry mixture to the wet mixture. Stir continuously until fully combined. Next, fold in the chocolate chips and any chopped nuts if you choose to use them. This adds a fun crunch and extra flavor. Scoop tablespoons of the cookie mix onto the prepared baking sheet. Space them about 2 inches apart. Flatten each cookie slightly with the back of a spoon to help them bake evenly. Bake for 10-12 minutes, or until the edges turn golden brown. After baking, let the cookies cool on the baking sheet for about 5 minutes. Then, transfer them to a wire rack to cool completely. For a fun presentation, stack the cookies on a plate or in a mason jar. Drizzle some honey on top for extra sweetness before serving. To get the right texture for your cookies, you need to follow a few steps. First, use natural peanut butter. It gives a rich flavor and smooth consistency. Second, mash the banana well. This helps keep your cookies moist. Avoid over-mixing when you combine wet and dry ingredients. Mix just until everything is blended. This keeps the cookies soft. You can make easy swaps if needed. For sweetener, use honey or maple syrup. Both work great, but maple gives a unique taste. If you want a lower sugar option, try using mashed dates. Instead of chocolate chips, you can use dried fruit like raisins or cranberries. For a nut-free version, skip the nuts altogether or use seeds like sunflower seeds. Want to add more flavor? Sprinkle in some spices! A pinch of nutmeg or ginger can make a big difference. You can also add superfoods for extra nutrition. Try adding chia seeds or flaxseeds for fiber and omega-3s. Another option is to mix in some protein powder. This boosts the protein content and keeps you full longer. {{image_2}} You can swap chocolate chips for dried fruit. Dried fruit adds natural sweetness. Options include raisins, cranberries, or chopped apricots. This change boosts fiber and nutrients. Your cookies will taste great and be healthier. Dried fruit pairs well with peanut butter and oats. This makes for a tasty breakfast or snack. Try adding different nuts or seeds for extra crunch. Chopped walnuts or almonds work well. You can also use sunflower seeds or pumpkin seeds. Each nut or seed adds unique flavor and texture. This variety keeps your cookies exciting. Plus, they enhance the nutritional value. Nuts provide healthy fats and protein. If you need a gluten-free option, use gluten-free oats. These oats taste just like regular oats. They are safe for those with gluten allergies. Make sure to check the label for certification. You can still enjoy peanut butter oatmeal cookies. It’s an easy swap that keeps the recipe delicious. Store your cookies in an air-tight container or a mason jar. Both keep cookies fresh, but air-tight containers work best for long-term storage. Mason jars look nice and are fun to use, but they may not seal as tightly. If you use a mason jar, check that the lid closes well. These cookies stay fresh for about one week at room temperature. If you want them to last longer, store them in the fridge. They can stay good for up to two weeks when chilled. Just remember to let them warm to room temperature before serving for the best taste and texture. You can freeze these cookies if you want to save some for later. Place them in a single layer on a baking sheet. Once frozen solid, transfer them to a freezer-safe bag. They can stay frozen for up to three months. When you're ready to eat, just take them out and let them thaw. You can also warm them in the oven at 350°F for about 5 to 10 minutes. Enjoy your tasty treat any time! You can use either creamy or crunchy peanut butter for these cookies. Creamy peanut butter gives a smooth texture. Crunchy peanut butter adds a nice bite. Both options keep the cookies moist and rich. You can try both to see which one you like best! To make these cookies vegan, swap the honey for maple syrup. You can also use a flax egg instead of the banana. Just mix one tablespoon of flaxseed meal with three tablespoons of water. Let it sit for a few minutes until it thickens. This will work well in place of the banana. Yes, these cookies are great for kids! They are packed with healthy oats and peanut butter. Kids will love the taste, especially with chocolate chips. You can also add dried fruits for extra nutrients. They are a fun and nutritious breakfast or snack option. These cookies are easy to make with simple ingredients like peanut butter and oats. You learned how to mix wet and dry ingredients, bake, and store them. You can even try new flavors or adjust ingredients as needed. Incorporating variations and tips keeps your cookies fun and tasty. Remember, these treats are nutritious, and perfect for kids. Follow the steps, and you will enjoy delicious cookies that are quick to make and share.

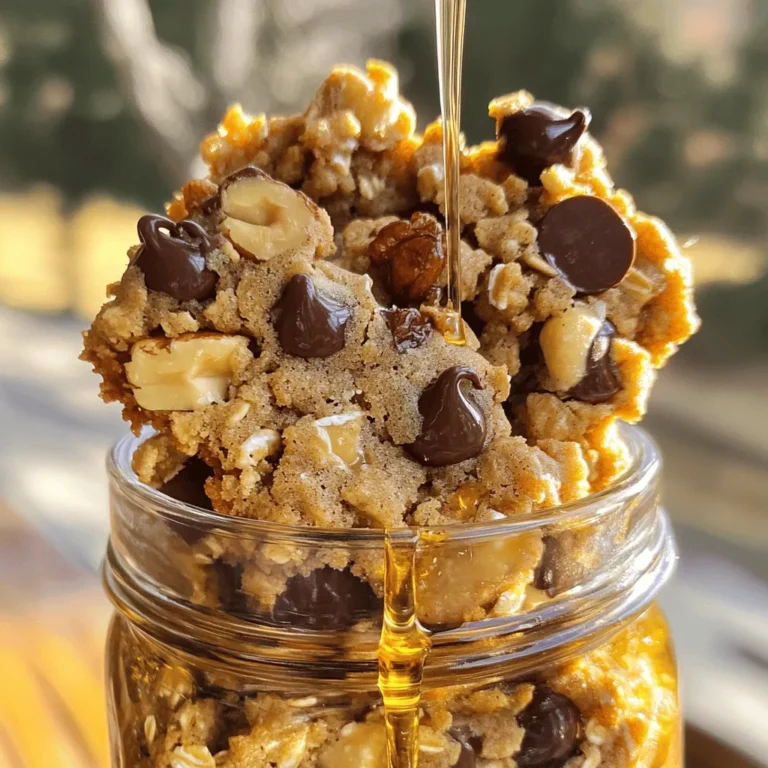
Peanut Butter Oatmeal Breakfast Cookies Easy Recipe

To make lemon poppy seed pancakes, you will need these simple ingredients: - 1 cup all-purpose flour - 2 tablespoons poppy seeds - 2 teaspoons baking powder - 1/2 teaspoon baking soda - 1/4 teaspoon salt - 1 cup buttermilk - 1 large egg - 2 tablespoons sugar - Zest of 1 lemon - 2 tablespoons fresh lemon juice - 2 tablespoons melted butter (plus extra for cooking) These ingredients come together to create light, fluffy pancakes with a bright lemon flavor. If you don’t have something on hand, here are some easy swaps: - All-purpose flour: Use whole wheat flour for a nuttier taste. - Buttermilk: Mix 1 cup of milk with 1 tablespoon of vinegar or lemon juice. - Egg: Replace with 1/4 cup of applesauce for a vegan option. - Butter: Use coconut oil or vegetable oil instead. These substitutions can help you adapt the recipe to what you have. One serving of these pancakes (about two pancakes) has: - Calories: 200 - Protein: 6g - Carbohydrates: 30g - Fat: 6g - Fiber: 1g - Sugar: 4g These pancakes are a tasty treat, but enjoy them in moderation! First, gather your dry ingredients. You will need: - 1 cup all-purpose flour - 2 tablespoons poppy seeds - 2 teaspoons baking powder - 1/2 teaspoon baking soda - 1/4 teaspoon salt In a large bowl, whisk these together. Make sure they mix well. The baking powder and soda help the pancakes rise. The poppy seeds add a nice crunch and flavor. Next, it's time for the wet ingredients. You will need: - 1 cup buttermilk - 1 large egg - 2 tablespoons sugar - Zest of 1 lemon - 2 tablespoons fresh lemon juice - 2 tablespoons melted butter In another bowl, mix these. Combine the buttermilk, egg, and sugar first. Then, add the lemon zest, lemon juice, and melted butter. Stir until everything is smooth. The lemon adds freshness and a burst of flavor. Now, let’s cook the pancakes. Preheat a non-stick skillet or griddle over medium heat. Add a small amount of butter to the pan. For each pancake, pour about 1/4 cup of batter onto the skillet. Cook until you see small bubbles form on the surface. This takes about 2-3 minutes. Flip the pancake and cook for another 2-3 minutes. Look for a golden-brown color. Repeat this with the rest of the batter. Add more butter as needed. Enjoy your fluffy lemon poppy seed pancakes! To make your pancakes fluffy, focus on mixing. Stir the wet and dry ingredients gently. Leave some lumps in the batter; they help keep the pancakes light. Use fresh baking powder. Old baking powder won’t give the right rise. Also, let the batter rest for a few minutes. This helps it thicken and rise better during cooking. Serve your pancakes warm on a nice plate. Drizzle maple syrup on top for sweetness. Add a sprinkle of poppy seeds for crunch. A slice of lemon adds a fresh touch. You can also serve them with fresh berries. Blueberries or strawberries work well. They add color and flavor to your dish. Avoid overmixing the batter. This makes pancakes tough instead of fluffy. Don’t skip the buttermilk; it adds moisture and flavor. If your skillet is too hot, pancakes can burn outside and stay raw inside. Cook on medium heat for even results. Lastly, don’t stack pancakes until they cool. They will stick together if you do. {{image_2}} You can make these pancakes gluten-free. Use a 1:1 gluten-free flour blend. Brands like Bob's Red Mill or King Arthur work well. Make sure the blend has xanthan gum. This helps give the pancakes a fluffy texture. Follow the same recipe as usual. Just swap the flour. Your pancakes will still taste great! Adding fruit or nuts brings new flavors. Blueberries or bananas are great choices. You can fold in 1/2 cup of fresh blueberries. For bananas, mash one ripe banana and mix it in. Nuts like walnuts or pecans add a nice crunch. Just add 1/4 cup to the batter. These extras make the pancakes even more delicious. Want to make these pancakes vegan? Replace the egg with a flax egg. To make a flax egg, mix 1 tablespoon of flaxseed meal with 3 tablespoons of water. Let it sit for 5 minutes until it thickens. Use almond milk or oat milk instead of buttermilk. Add 1 tablespoon of lemon juice to the milk to mimic buttermilk's tang. Substitute melted coconut oil for the butter. This keeps all the rich flavors while being plant-based. To keep leftover pancakes fresh, let them cool first. Stack them neatly on a plate. Cover the stack with plastic wrap or aluminum foil. You can also use an airtight container. Store them in the fridge for up to three days. This way, they stay soft and tasty. When you're ready to enjoy your pancakes again, you can reheat them easily. Use a microwave for quick warming. Place one pancake on a plate and heat for 30 seconds. If you want more pancakes, stack them and heat for one minute. You can also use a skillet. Heat it on low and add a little butter. Cook each pancake for about one minute on each side. Freezing pancakes is a great way to save them for later. Start by letting them cool completely. Then, place parchment paper between each pancake. This will stop them from sticking together. Put the pancakes in a freezer bag or airtight container. Label the bag with the date. They will stay good for up to two months. When you want to eat them, just reheat from frozen. Your pancakes will taste almost as fresh as the first time! You can use milk with vinegar or lemon juice. Just mix 1 cup of milk with 1 tablespoon of vinegar or lemon juice. Let it sit for about 5 minutes. This makes a quick, easy buttermilk substitute. You can also use plain yogurt or sour cream. Just thin it with a little water or milk to get the right texture. Yes, you can use lemon extract if you don’t have zest. Use about 1 teaspoon of lemon extract. It gives a strong lemon flavor, but zest adds a nice texture. If you want both, use a little of each. It will make your pancakes taste fresh and bright. To check if your pancakes are done, look for bubbles. When small bubbles form on the top, it’s time to flip them. Cook for another 2-3 minutes until they are golden brown. The edges should look set, and the center should spring back when you touch it. If they are still soft or wet, give them a bit more time. In this article, we explored pancake-making from start to finish. We covered key ingredients, easy steps, and smart tips for the best pancakes. You learned about substitutions, storage, and helpful answers to common questions. Remember, the right techniques and ingredients lead to perfect pancakes every time. Enjoy making them your way! Keep experimenting with flavors and have fun in the kitchen. Happy cooking!

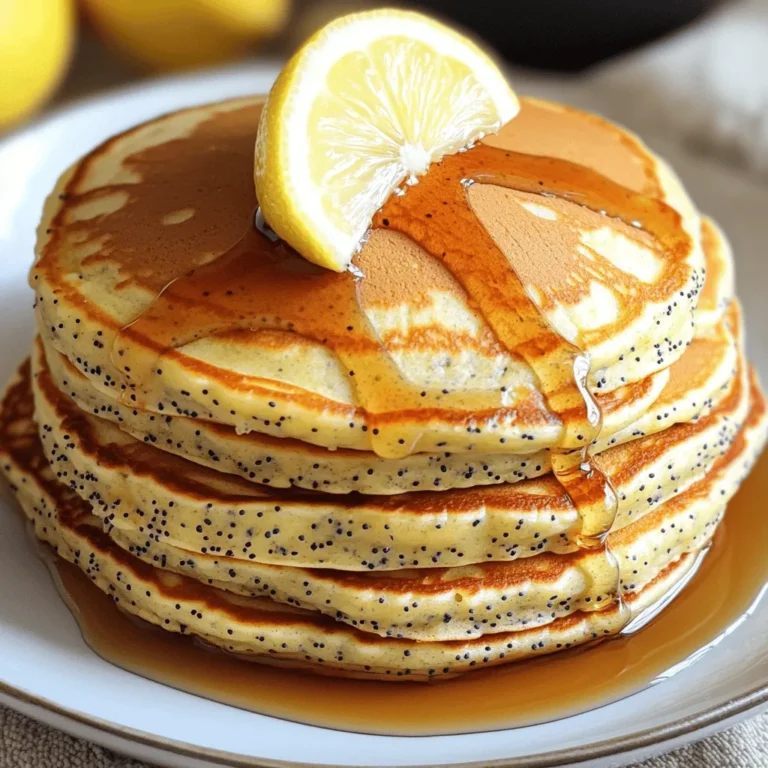
Lemon Poppy Seed Pancakes Fluffy and Delicious Recipe

PREV 1 … 38 39 40 … 57 NEXT
flavor nest kitchen

explore

DessertsDinnerAppetizersDrinks

Our Policies

  • Cookie Policy
  • Copyright Policy
  • Disclaimer
  • GDPR Policy
  • Terms Of Use
Back to Top
  • About
  • Contact Us
  • Privacy Policy
© 2025 flavor nest kitchen