FREE DINNER EBOOK! Get your copy!
  • Cookie Policy
  • GDPR Policy
  • Disclaimer
  • Terms Of Use
  • Visit my other site: Fun Cookie Recipes
flavor nest kitchen
  • Home
  • Dinner
  • Desserts
  • Drinks
  • Appetizers
  • Contact
  • About
  • Privacy Policy
  • Home
  • Dinner
  • Desserts
  • Drinks
  • Appetizers
  • Contact
  • About
  • Privacy Policy
  • Cookie Policy
  • GDPR Policy
  • Disclaimer
  • Terms Of Use
Visit my other site: Fun Cookie Recipes

HOME / CATEGORIES /

Latest

For the best chowder, I love using fresh corn kernels. They add a sweet, juicy flavor. You can use about 4 cups of corn. If fresh corn isn’t available, frozen corn works just as well. Just be sure to thaw it before adding it to the pot. The base of this chowder includes some simple veggies. You need: - 1 medium onion, diced - 2 cloves garlic, minced - 2 medium potatoes, peeled and diced - 1 small red bell pepper, diced The onion gives a nice flavor, while garlic adds depth. Potatoes help thicken the chowder. The red bell pepper brings a pop of color and sweetness. To make the chowder flavorful, add these seasonings: - 3 cups vegetable broth - 1 cup heavy cream (or coconut cream for a dairy-free option) - 1 teaspoon smoked paprika - 1 teaspoon thyme - Salt and pepper to taste - 2 tablespoons olive oil The broth serves as the soup's base. Cream makes it rich and smooth. Smoked paprika adds a hint of smokiness. Thyme brings an earthy taste, and salt and pepper enhance all the flavors. Olive oil is perfect for sautéing the veggies. Gather these ingredients, and you're ready to make a warm, creamy corn chowder that's simple and satisfying! Start by heating two tablespoons of olive oil in a large pot over medium heat. Once hot, add the diced onion. Sauté the onion for about five minutes. You want it to turn soft and translucent. Next, stir in two minced garlic cloves and one diced red bell pepper. Cook this mix for two more minutes. You will smell a lovely aroma! Now, it’s time to add the diced potatoes. Pour in three cups of vegetable broth. Bring the mix to a gentle boil. Once it boils, reduce the heat and let it simmer. Cook for about 15 minutes, until the potatoes are tender. After that, stir in four cups of corn kernels. Add one teaspoon of smoked paprika, one teaspoon of thyme, and salt and pepper to taste. Let the chowder simmer for another five minutes. The flavors will meld beautifully. To make it creamy, use an immersion blender. Blend for one to two minutes. This gives you a nice texture while keeping some corn and potato chunks. If you don’t have an immersion blender, pour some chowder into a regular blender. Blend until smooth, then return it to the pot. Finally, stir in one cup of heavy cream. Heat it through, but do not let it boil. Adjust the seasoning with more salt and pepper if needed. Enjoy your creamy corn chowder! When it comes to corn, fresh is best. I love using fresh corn kernels. They add a sweet and crisp bite. If fresh corn is not available, frozen corn works well too. It is easy to store and quick to use. Always check the label to ensure it has no added sugars or preservatives. You can adjust the thickness of your chowder easily. For a thicker chowder, blend more of the soup. Use an immersion blender and blend for a longer time. For a thinner chowder, add more vegetable broth or cream. This lets you customize it to your taste. To boost the flavor, add herbs or spices. I love using smoked paprika; it adds a nice depth. Fresh herbs like cilantro or parsley also brighten the dish. You can also try a squeeze of lime for extra zing. Taste as you go to find the perfect balance. {{image_2}} You can easily make this chowder dairy-free. Swap the heavy cream for coconut cream. It gives a lovely richness and a hint of sweetness. Use the same amount, one cup, to keep the texture. The coconut flavor blends well with corn. If you want more creaminess, add a bit of cashew cream or blended silken tofu. Want to make your chowder heartier? Add protein! Cooked bacon or diced ham brings a nice smoky flavor. For a lighter option, try shredded rotisserie chicken. If you're plant-based, add black beans or chickpeas. Stir in about one cup of your choice when you add corn. This boosts nutrition and makes your meal more filling. If you enjoy a kick, make a spicy corn chowder. Add diced jalapeños or a pinch of cayenne pepper. Sauté the jalapeños with the onions for the best flavor. You can also top your chowder with hot sauce before serving. This adds heat and flavor. Adjust spice levels to fit your taste. After making creamy corn chowder, let it cool. Store it in an airtight container. It will stay fresh for up to four days in the fridge. Always label your container with the date. This way, you know when to enjoy it. If you want to keep chowder longer, freezing is a great option. Use freezer-safe containers or bags. Make sure to leave some space for expansion. Creamy corn chowder can last up to three months in the freezer. When ready to eat, thaw it in the fridge overnight before reheating. To reheat, pour the chowder into a pot. Heat it on low to medium heat. Stir it often to avoid burning. If the chowder is too thick, add a splash of broth or water. Heat until it is warmed through. Enjoy your creamy corn chowder just like the first time! Yes, you can use frozen corn. It saves time and is easy to use. Just add it straight into the pot when the recipe calls for fresh corn. Frozen corn is sweet and tasty too, so your chowder will still be delicious! Creamy corn chowder lasts about 3 to 4 days in the fridge. Make sure to store it in an airtight container. When you want to eat it again, just reheat it on the stove or in the microwave until warm. Creamy corn chowder pairs well with many side dishes. Here are some tasty options: - Crusty bread or rolls for dipping - A simple green salad for a fresh crunch - Grilled cheese sandwiches for a classic combo - Cornbread for a sweet touch Explore these sides to make your meal even more enjoyable! This blog post covered how to make creamy corn chowder with fresh ingredients and simple steps. We discussed the all-important flavors from corn, vegetables, and broth, plus useful tips for a great dish. You can easily make it dairy-free or add protein for variety. I shared ways to store and reheat your chowder so it stays tasty. By following these steps and tips, you're set to impress with your own delicious chowder. Enjoy your cooking journey!

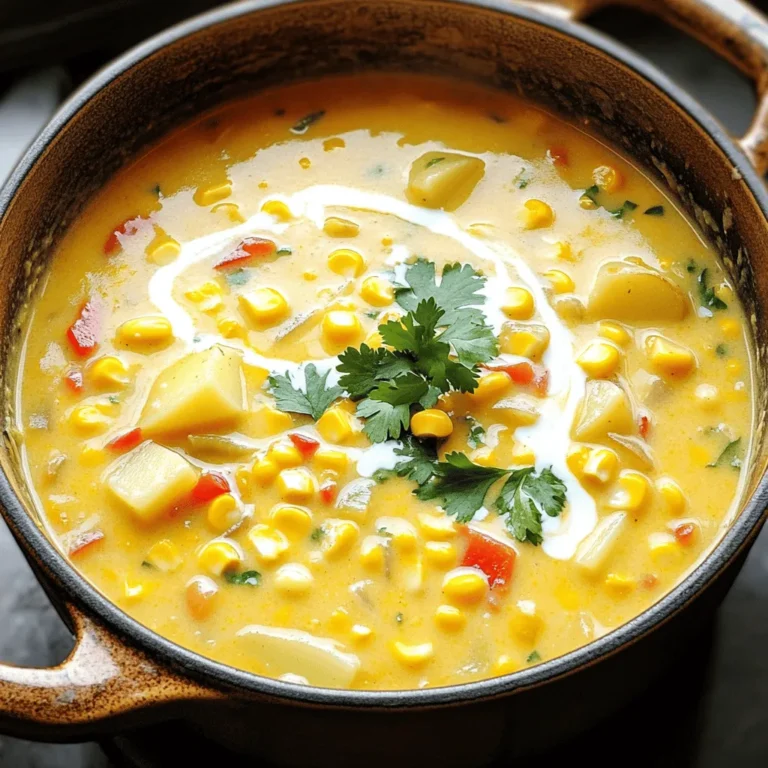
Creamy Corn Chowder Simple and Satisfying Meal

- 2 medium zucchinis (for zoodles) - 1 cup shredded carrots - 1 red bell pepper - 1 cup red cabbage - 1/2 cup shelled edamame - 1/4 cup fresh cilantro - 1/4 cup green onions - 3 tablespoons sesame oil - 2 tablespoons peanut butter - 1 tablespoon soy sauce or tamari - 1 tablespoon maple syrup - 1 tablespoon rice vinegar - 1 teaspoon grated fresh ginger - 1 teaspoon sesame seeds When making the Sesame Peanut Zoodle Salad, fresh ingredients shine. Zucchini makes a great base as zoodles. They add crunch and a nice texture. Shredded carrots give color and sweetness. The red bell pepper adds crispness and a pop of flavor. Red cabbage not only looks good but brings a slightly sweet taste. Edamame offers protein and a bright green hue. Fresh cilantro brings a burst of flavor. Green onions add a mild onion taste, perfect for balance. Next, we have the dressing. It ties everything together. Sesame oil gives a nutty base. Peanut butter adds creaminess and richness. Soy sauce or tamari brings saltiness. Maple syrup adds a hint of sweetness. Rice vinegar gives a touch of tang. Fresh ginger adds warmth and depth. Finally, sesame seeds sprinkle on top for a nice crunch. With these ingredients, you create a dish that is fresh, colorful, and packed with flavor. Each bite is a mix of textures and tastes. Start by spiralizing the zucchinis. I use a spiralizer because it makes great zoodles. You can also use a vegetable peeler if you don’t have one. Aim for long, thin strands. Next, measure and prepare the other vegetables. Shred the carrots and red cabbage. Slice the red bell pepper and green onions thinly. Chop the fresh cilantro. The mix of colors will make your salad pop. In a large bowl, combine all the salad ingredients. Add the spiralized zoodles, shredded carrots, sliced bell pepper, red cabbage, edamame, cilantro, and green onions. This mix is bright and fresh. In a separate bowl, prepare the dressing. Whisk together sesame oil, peanut butter, soy sauce, maple syrup, rice vinegar, and grated ginger. Make sure the dressing is smooth and mixed well. Pour the dressing over the zoodle mixture. Toss everything together gently. Ensure the vegetables are well coated. Let the salad sit for about 10 minutes. This helps the flavors meld and softens the zoodles a bit. Before serving, sprinkle sesame seeds over the top for a nice crunch. Give it one last gentle toss. Enjoy your fresh and tasty sesame peanut zoodle salad! To get the best zoodles, use fresh zucchinis. Look for firm ones with smooth skin. Avoid any that feel soft or have blemishes. When spiralizing, keep the zucchini steady. Use a spiralizer for easy noodles or a vegetable peeler for thin strips. If you want thicker noodles, slice the zucchini into quarters first. For fresh vegetables, choose bright colors and crisp textures. Shredded carrots should be vibrant and crunchy. Red bell peppers need to be glossy and firm. The red cabbage should be deep purple and crisp. Fresh cilantro should smell strong and green. Green onions should be bright and not wilted. For a colorful dish, layer the zoodles and veggies in a large bowl. Use a mix of colors to make it appealing. Serve it chilled for a refreshing taste. Divide into individual bowls for a fun touch. Sprinkle more sesame seeds on top for crunch. Add a few sprigs of cilantro for a pop of green. To boost flavor, try adding toppings like crushed peanuts or sesame seeds. You can also include sliced radishes for a peppery kick. If you want more spice, add red pepper flakes. A squeeze of lime juice gives brightness to the salad. Experiment with different herbs, like mint or basil, for a fresh twist. {{image_2}} For those who need gluten-free options, use tamari instead of soy sauce. Tamari tastes great and works well in this salad. If you want to make it vegan, the recipe is already plant-based. You can enjoy it without any animal products. If you don't have zucchinis, try using carrots or cucumbers instead. Both will add a nice crunch. You can also mix in other vegetables like bell peppers or sugar snap peas. These add more color and flavor. You can switch up the dressing for different tastes. Try adding lime juice for a zesty kick. A bit of sriracha can give your salad some heat. If you want a creamy touch, add more peanut butter. Each twist brings new life to this fresh dish! To store leftovers, put the salad in an airtight container. This helps keep it fresh. You can keep it in the fridge for up to three days. If the zoodles start to get soggy, they lose texture. To avoid this, store the dressing separately. Mix it in just before you eat. This keeps everything crisp. You can make this salad ahead of time. Prepare all the veggies and zoodles in advance. Store them in the fridge in separate containers. Make the dressing too, and keep it in a jar. This way, you can grab everything quickly. When you're ready to eat, just mix them together. It saves time and gives you a fresh meal! How long does the zoodle salad last in the fridge? The zoodle salad lasts about 3 days in the fridge. Store it in a sealed container. The flavors will deepen over time, but the zoodles may soften. Can I use frozen zoodles for this salad? Yes, you can use frozen zoodles. Thaw them first and drain excess water. Frozen zoodles may lose some crunch, but they still taste great. What can I do with leftover dressing? Store leftover dressing in the fridge for up to a week. Use it on other salads or as a dipping sauce for veggies. How many servings does this recipe make? This recipe makes four servings. It’s perfect for family meals or meal prep for the week. What can I serve alongside this salad? You can serve grilled chicken, tofu, or shrimp alongside the salad. Rice or quinoa also pairs well with it. Caloric content of the salad Each serving has around 200 calories. This salad is light but filling, making it a great choice. Health benefits of key ingredients - Zucchini is low in calories and high in water. - Carrots add beta-carotene, good for vision. - Edamame is rich in protein and fiber. - Peanut butter offers healthy fats and protein. - Sesame oil adds antioxidants for overall health. This zoodle salad is fresh, colorful, and packed with nutrition. You learned how to prepare zoodles and mix a tasty dressing. We discussed tips for perfecting your salad and shared serving ideas. Remember, you can customize it for your diet or swap ingredients based on your taste. Enjoy this dish as a meal prep option or a quick side. It’s healthy and satisfying, making it ideal for any occasion.

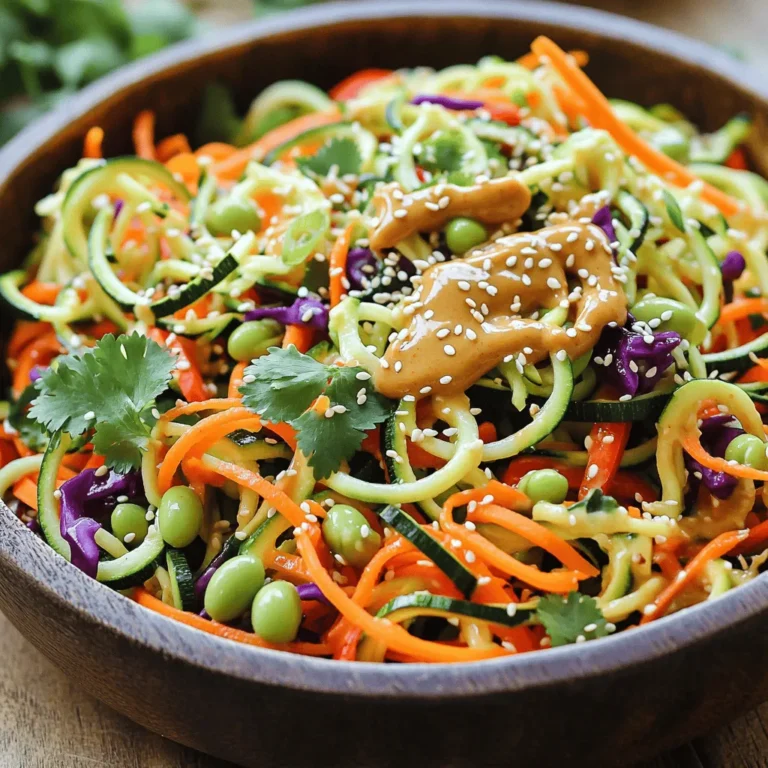
Sesame Peanut Zoodle Salad Fresh and Flavorful Dish

- 3 cups unsweetened shredded coconut - 2/3 cup sweetened condensed milk - 1 teaspoon vanilla extract - 1/4 teaspoon salt - 2 large egg whites - 1 cup semi-sweet chocolate chips - 1 teaspoon coconut oil - Mixing bowls - Baking sheet and parchment paper - Cookie scoop or hands - Electric mixer (for egg whites) - Microwave-safe bowl To make chocolate dipped coconut macaroons, gather these ingredients. The coconut gives your macaroons a chewy texture. The sweetened condensed milk adds sweetness and moisture. Vanilla extract enhances the flavor, while salt balances the sweetness. You will need two large egg whites. Whipping them makes your macaroons light and airy. Semi-sweet chocolate chips provide a rich chocolate flavor, while coconut oil helps smooth the chocolate. Having the right tools makes cooking easier. Mixing bowls help you combine ingredients. Using a baking sheet with parchment paper prevents sticking. A cookie scoop or your hands helps form the macaroons. An electric mixer will whip the egg whites quickly. A microwave-safe bowl is great for melting the chocolate. With these ingredients and tools, you are set to create a tasty treat! - Preheat your oven to 325°F (163°C). - Line a baking sheet with parchment paper. - In a large bowl, mix 3 cups of unsweetened shredded coconut, 2/3 cup of sweetened condensed milk, 1 teaspoon of vanilla extract, and 1/4 teaspoon of salt. Make sure the coconut is fully coated. - In another bowl, beat 2 large egg whites until they form stiff peaks. - Gently fold the egg whites into the coconut mixture. Be careful not to deflate them. - Use a cookie scoop or your hands to shape small mounds. Place them on the prepared baking sheet, leaving about 1 inch between each mound. - Bake for 15-20 minutes until the tops turn golden brown. - While the macaroons cool, melt 1 cup of semi-sweet chocolate chips with 1 teaspoon of coconut oil. Microwave in 30-second bursts, stirring until smooth. - Once the macaroons are cool, dip the bottoms or half into the melted chocolate. Let any excess chocolate drip off. - Set the dipped macaroons back on the wire rack. You can chill them in the fridge for 10-15 minutes to help the chocolate set faster. To get the right texture in your macaroons, use unsweetened shredded coconut. It helps control sweetness. Mix the coconut with sweetened condensed milk, vanilla, and salt. Ensure every piece of coconut is coated well. When folding in the egg whites, be gentle. Use a spatula to lift the mixture from the bottom and fold it over the top. This keeps your macaroons light and fluffy. A big mistake is overmixing the coconut with the condensed milk. This can lead to a dense texture. Mix just until combined. Also, do not skip cooling the macaroons before dipping. Cooling helps the chocolate stick better. If you dip them hot, the chocolate will melt and slide off. Serve your macaroons on a decorative platter for a nice touch. You can sprinkle extra shredded coconut on top for flair. A drizzle of melted chocolate also adds elegance. It makes your macaroons look even more tempting. For special occasions, arrange them in a pyramid shape for a fun display. {{image_2}} You can easily make vegan chocolate-dipped coconut macaroons by swapping a few ingredients. Instead of sweetened condensed milk, use a plant-based milk mixed with a thickener like cornstarch. This change keeps the rich flavor without using dairy. You can also replace the egg whites with aquafaba, the liquid from canned chickpeas. It whips up nicely and binds the macaroons well. For a gluten-free option, these macaroons are already a safe choice. The main ingredient is shredded coconut, which is naturally gluten-free. Just ensure all your ingredients, especially chocolate, are labeled gluten-free to avoid any cross-contamination. To make your macaroons extra tasty, consider adding extracts. A teaspoon of almond or extra coconut extract can boost the flavor. You could also mix in chopped nuts, like almonds or walnuts, for added crunch. Dried fruits like cranberries or apricots can add a sweet twist. Just chop them small so they blend in well with the coconut. When it comes to chocolate, you have options! If you prefer dark chocolate, use that instead of semi-sweet. It adds a rich taste and pairs well with the coconut. White chocolate is another fun choice. It brings a sweet creaminess that complements the macaroons nicely. Just melt it the same way you would with semi-sweet chocolate, and dip your cooled macaroons in for a sweet treat. To keep your chocolate-dipped coconut macaroons fresh, store them in an airtight container. You can place them at room temperature if you eat them within a few days. If you think they will last longer, put them in the fridge. The cool air helps keep them fresh and tasty. Chocolate-dipped macaroons can last about 5 to 7 days at room temperature. If stored in the fridge, they can last up to 2 weeks. Always check for any signs of spoilage before eating. If you want to save macaroons for later, freezing is a great option. Here’s how to do it: 1. Cool Completely: Make sure the macaroons are fully cool before freezing. 2. Wrap Well: Place them in a single layer on a baking sheet. Freeze for about 1 hour. 3. Store: Transfer to freezer bags or containers. Remove as much air as possible. 4. Thawing Tips: To thaw, take them out of the freezer and let them sit at room temperature for about 30 minutes before enjoying. By following these steps, you can enjoy your delicious macaroons anytime! The main ingredients are: - 3 cups unsweetened shredded coconut - 2/3 cup sweetened condensed milk - 1 teaspoon vanilla extract - 1/4 teaspoon salt - 2 large egg whites - 1 cup semi-sweet chocolate chips - 1 teaspoon coconut oil These ingredients come together to create a chewy and sweet treat. Yes, you can try different sweeteners. For a lower sugar option, use sugar substitutes like stevia or monk fruit. Keep in mind that this may change the texture. Always check the conversion rate, as different sweeteners have varying sweetness levels. You will know they are done when they turn golden brown on top. Typically, this takes about 15-20 minutes at 325°F (163°C). Keep an eye on them, as ovens can vary. If they look too pale, give them a few more minutes. Absolutely! You can make the macaroons a day or two in advance. Simply store them in an airtight container at room temperature. If you want to dip them in chocolate later, wait until you are ready to serve. A macaroon is a chewy cookie made with coconut, while a macaron is a delicate French meringue cookie made with almond flour. They look different and have very different flavors and textures. Macarons are often filled with cream, while macaroons are usually just dipped in chocolate. You learned how to make delicious chocolate-dipped macaroons with simple steps. We covered the necessary ingredients, tools, and step-by-step instructions. Tips and variations help you customize each batch. Remember to store them properly to keep them fresh for longer. Macaroons are fun to make, and you can try new flavors too. With these methods, you’ll impress friends and family. Enjoy creating tasty treats that everyone will love!

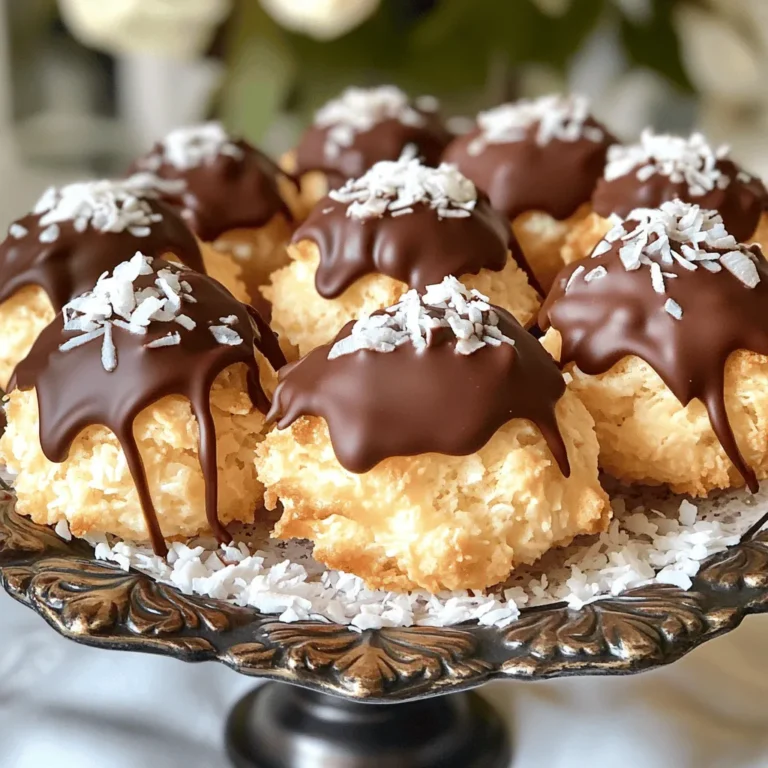
Chocolate Dipped Coconut Macaroons Easy and Tasty Treat

To make these tasty meatballs, you need a few key items: - 1 lb ground chicken - 3 cloves garlic, minced - 1/4 cup fresh parsley, chopped - 1/4 cup fresh basil, chopped - 1/4 cup grated Parmesan cheese - 1/2 cup breadcrumbs - 1 large egg - 1 teaspoon salt - 1/2 teaspoon black pepper - 1/2 teaspoon red pepper flakes (optional) - 2 tablespoons olive oil (for cooking) These ingredients give the meatballs their rich flavor and great texture. The ground chicken keeps them light, while the herbs and cheese add a burst of taste. You can add a few optional items for more flavor: - 1 tablespoon lemon zest (for a fresh twist) - 1/2 teaspoon garlic powder (for extra garlic goodness) - 1/4 teaspoon onion powder (for depth of flavor) These options can help you customize the meatballs to your liking. If you have some items at home and want to switch things up, here are some easy swaps: - Ground turkey can replace ground chicken. - Use dried herbs instead of fresh if needed; just use less. - If you don't have breadcrumbs, crushed crackers or oats work too. These substitutions can help you create delicious meatballs even with what you have on hand. To start, grab a large mixing bowl. Add the following ingredients: - 1 lb ground chicken - 3 cloves garlic, minced - 1/4 cup fresh parsley, chopped - 1/4 cup fresh basil, chopped - 1/4 cup grated Parmesan cheese - 1/2 cup breadcrumbs - 1 large egg - 1 teaspoon salt - 1/2 teaspoon black pepper - 1/2 teaspoon red pepper flakes (optional) Now, mix these ingredients together. I like to use my hands for this part. It helps combine everything well. Be gentle, though. Overmixing can lead to tough meatballs. Next, heat a large skillet over medium heat. Add 2 tablespoons of olive oil to the pan. While the oil heats, shape your chicken mixture into 1-inch meatballs. Place them on a plate once shaped. When the oil is hot, carefully place the meatballs in the skillet. Make sure to keep them in a single layer. This helps them cook evenly. Cook for about 5-6 minutes on each side. You want them golden brown and cooked through. Check the internal temperature; it should reach 165°F. If you have a meat thermometer, this is a good time to use it. To get the best texture, avoid overworking the meat. When mixing, just combine until all ingredients are incorporated. If you notice your meatballs are falling apart, add a bit more breadcrumbs. This helps bind them together. After cooking, let the meatballs drain on a paper towel. This removes excess oil and keeps them from getting soggy. Serve warm and enjoy! To make your meatballs pop with flavor, use fresh herbs. Fresh parsley and basil add a bright taste. Don't skip the garlic, as it gives a rich aroma. Also, choose good-quality Parmesan cheese. The cheese adds depth and creaminess. Mix the ingredients gently. Overmixing can make meatballs tough. Aim for a light touch. One common mistake is cooking at too high heat. This can burn the outside while leaving the inside raw. Always cook on medium heat for even browning. Another mistake is not checking the meatball's temperature. Use a meat thermometer to ensure they reach 165°F. This keeps them safe and juicy. Lastly, let them rest after cooking. This helps flavors meld and keeps them moist. These meatballs shine when paired with spaghetti and marinara sauce. Serve them over a bed of zoodles for a fresh twist. They also work great on a platter with toothpicks as an appetizer. Try them with a side salad for a light meal. For extra flavor, drizzle some pesto on top before serving. {{image_2}} You can change up the herbs in your meatballs. Try using thyme or oregano. Both herbs add great taste. You can also mix in some rosemary for a fun twist. If you want more heat, add cayenne pepper. For a fresh note, use cilantro or dill. These changes can make the dish feel new and exciting. You can cook these meatballs in different ways. Baking is a great option. Preheat your oven to 400°F. Place the meatballs on a baking sheet and cook for 20 minutes. This makes them crispy without added oil. Grilling is another fun method. Just place the meatballs on skewers and cook over medium heat. This gives a smoky flavor that is hard to beat. These meatballs fit many meals. For a casual dinner, serve them with spaghetti. Add marinara sauce for a classic touch. For parties, serve them with toothpicks and a tasty dipping sauce. They also work well in a sandwich. Place them in a bun with some sauce and cheese for a hearty meal. You can even serve them on a salad for a lighter option. To store leftover garlic herb chicken meatballs, let them cool first. Place them in an airtight container. They will stay fresh in the fridge for up to three days. This way, you can enjoy them later without losing flavor. You can freeze these meatballs for later use. After cooking, let them cool completely. Then, place them in a freezer-safe bag. Squeeze out as much air as possible. They will last in the freezer for about three months. When you want to eat them, just thaw in the fridge overnight. To reheat the meatballs, use a skillet for the best taste. Heat a little olive oil in the pan. Add the meatballs and cook on low heat. Turn them gently until warmed through. This keeps them moist and tasty. You can also microwave them, but they may not be as juicy. If using a microwave, place them on a plate and cover with a damp paper towel. Heat in short bursts, checking often to avoid drying out. Yes, you can use ground turkey. It has a similar texture and taste. Turkey is leaner than chicken. This means it may cook faster. Watch your cooking times closely. Adjust spices to suit your taste. These meatballs last about three to four days in the fridge. Store them in an airtight container. Make sure they cool down before sealing. Check for any signs of spoilage before eating. If you don’t eat them in time, consider freezing. You can pair these meatballs with many sides. Try them with spaghetti and marinara sauce. A fresh salad is also a great choice. Serve them as appetizers with a dipping sauce. For something light, serve on a bed of greens. Enjoy with crusty bread to soak up flavors. We explored how to make tasty garlic herb chicken meatballs. You learned about key ingredients and options to boost flavor. Mixing and cooking steps ensure perfect texture. We shared smart tips to avoid mistakes and suggested serving ideas. Variations showed how to experiment with herbs and cooking methods. Lastly, we discussed storing, freezing, and reheating to enjoy later. Now, you can whip up these delightful meatballs with ease! Enjoy your cooking adventure.

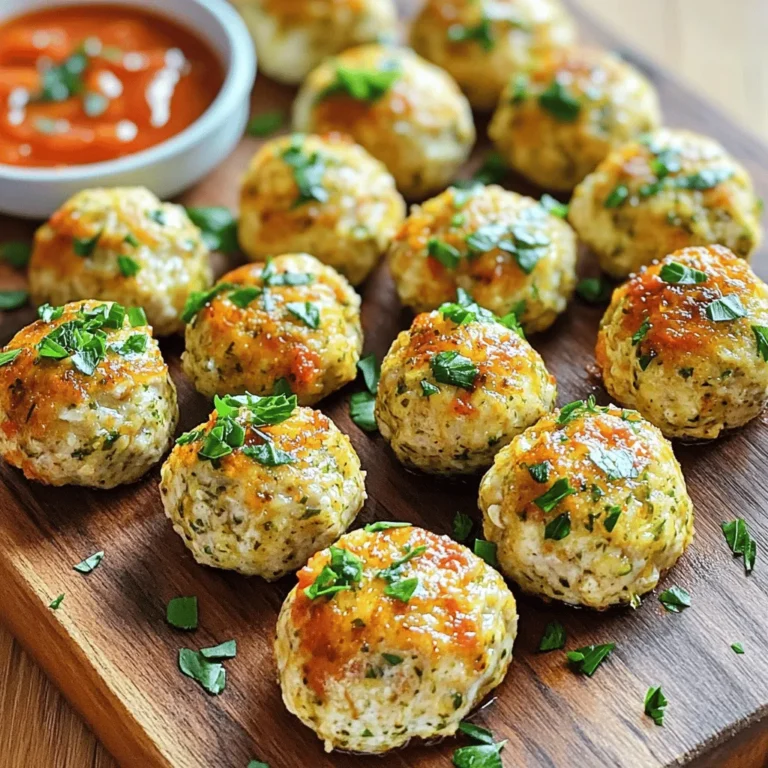
Garlic Herb Chicken Meatballs Flavorful and Easy Recipe

- 1 pound boneless, skinless chicken thighs - 2 tablespoons sesame oil - 1 tablespoon fresh ginger - 2 garlic cloves - 1 red bell pepper - 1 green bell pepper - 1 cup snap peas - 3 green onions - 3 tablespoons soy sauce - 1 tablespoon honey - 1 tablespoon rice vinegar - 1 tablespoon sesame seeds - Salt and pepper to taste - Cooked jasmine rice or quinoa To make the best sesame ginger chicken stir-fry, you need fresh and quality ingredients. Start with one pound of boneless, skinless chicken thighs. I find thighs keep the meat juicy and tender. Next, gather two tablespoons of sesame oil. This oil gives the dish its unique flavor. You will also need one tablespoon of fresh ginger and two minced garlic cloves for that aromatic touch. Add in one red bell pepper and one green bell pepper. I like to julienne them for a nice crunch. A cup of snap peas adds vibrant color and sweetness. For seasoning, use three tablespoons of soy sauce, one tablespoon of honey, and one tablespoon of rice vinegar. These blend perfectly to create a tasty sauce. Don’t forget to sprinkle one tablespoon of toasted sesame seeds on top for extra flavor. Lastly, you can season with salt and pepper to taste. Serve it all over cooked jasmine rice or quinoa for a complete meal. {{ingredient_image_1}} - Heat 2 tablespoons of sesame oil in a large skillet over medium-high heat. - Add 1 tablespoon of minced ginger and 2 minced garlic cloves. Sauté for about 30 seconds until fragrant. - Increase the heat to high. Add 1 pound of sliced boneless, skinless chicken thighs. Season with salt and pepper. Cook for 5-6 minutes until the chicken is cooked through and browned. - Once the chicken is ready, add 1 red bell pepper and 1 green bell pepper, both julienned, along with 1 cup of trimmed snap peas. - Stir-fry the mixture for 3-4 minutes until the vegetables are tender-crisp. - In a small bowl, whisk together 3 tablespoons of low-sodium soy sauce, 1 tablespoon of honey, and 1 tablespoon of rice vinegar. - Pour this sauce over the chicken and vegetables. Toss to coat everything evenly. - Cook for another minute to let the flavors meld together. Once you finish, remove the pan from heat and stir in 3 sliced green onions and 1 tablespoon of toasted sesame seeds. Enjoy your delicious stir-fry served over cooked jasmine rice or quinoa! - Importance of high heat for stir-frying: High heat cooks food fast. It helps keep the chicken juicy. It also gives your veggies a nice crunch. Start with a hot skillet or wok. This way, everything cooks evenly. - How to achieve tender chicken: To keep chicken tender, cut it into small pieces. This helps it cook quickly. Use boneless, skinless thighs for the best taste. They stay moist and flavorful. Don’t overcrowd the pan. Cook in batches if needed. - Best practices for cutting vegetables: Cut your veggies thin and uniform. This ensures they cook evenly. Julienned bell peppers add a nice texture. Snap peas should be trimmed but kept whole. This keeps them crisp and colorful. - Suggested garnishes: Top your dish with toasted sesame seeds. They add a nice crunch and flavor. Fresh green onions also make a great garnish. They give a pop of color and taste. - Recommended side dishes: Serve your stir-fry with jasmine rice or quinoa. Both soak up the sauce well. You can also add a side of steamed broccoli for extra veggies. - Pairing with rice or quinoa: Jasmine rice is soft and fluffy. It complements the stir-fry perfectly. Quinoa is a great choice if you want something with more protein. Both options are delicious and filling. Pro Tips Use Fresh Ingredients: Fresh ginger and garlic will elevate the flavor of your dish significantly compared to dried versions. Adjust the Heat: If you like your stir-fry with a bit of spice, consider adding some red pepper flakes or sriracha to the sauce mixture. Meal Prep Friendly: This stir-fry can be made in advance and stored in the refrigerator for up to 3 days, making it perfect for meal prep. Cooking Time: Ensure not to overcook the vegetables; they should remain vibrant and slightly crunchy for the best texture. {{image_2}} You can switch up the protein in this dish. Try using shrimp or tofu. Both options add unique flavor and texture. Just remember to adjust the cooking time. Shrimp cooks fast, while tofu needs a nice sear to get golden. For vegetables, feel free to get creative. Broccoli and carrots work well in this stir-fry. They add color and crunch. You can also toss in bell peppers of different colors for a vibrant look. If you like heat, add a touch of chili paste. It gives a nice kick to the dish. Start with a little and taste as you go. You can always add more if you want it spicier. Another great way to change the taste is by using flavored soy sauce. There are many varieties, like garlic or mushroom soy sauce. Each one brings a new taste to your stir-fry. Just remember to adjust the salt since these sauces can be saltier than regular soy sauce. To store leftovers, let the stir-fry cool to room temperature. Place it in an airtight container. This keeps the dish fresh. You can store it in the fridge for up to three days. The taste stays good, but it’s best to eat it sooner. If you want to freeze the stir-fry, portion it into smaller containers. This way, you can take out just what you need. Make sure to leave some space at the top of each container. The food expands when it freezes. You can freeze it for up to three months. For reheating, thaw the stir-fry overnight in the fridge. Then, heat it in a pan over low heat. Stir it often to warm it evenly. You can also microwave it, stirring every minute until hot. You can store this dish in the fridge for up to four days. Keep it in an airtight container to keep it fresh. When you are ready to eat, just reheat it in a skillet or microwave. Yes, you can use chicken breasts. They will cook faster than thighs. Be careful not to overcook them; they can become dry if cooked too long. You still get great flavor with chicken breasts. If you don’t have sesame oil, you can use vegetable oil or olive oil. These oils won’t give the same nutty flavor, but they will work in a pinch. You can also add a small amount of toasted sesame seeds to boost the flavor. The recipe is not gluten-free because of the soy sauce. To make it gluten-free, use tamari sauce instead. Tamari is a gluten-free soy sauce and works great in this stir-fry. To add spice, you can include red pepper flakes or sriracha sauce. Start with a small amount and adjust to your taste. You can also add sliced fresh chili peppers for a fresh kick. This blog post covers everything you need for sesame ginger chicken stir-fry. We looked at the list of ingredients and step-by-step cooking instructions. You learned helpful tips for cooking and serving. We explored variations and storage options for leftovers too. With these details, you can create a delicious meal everyone will enjoy. I hope you give it a try! Enjoy your cooking adventure.

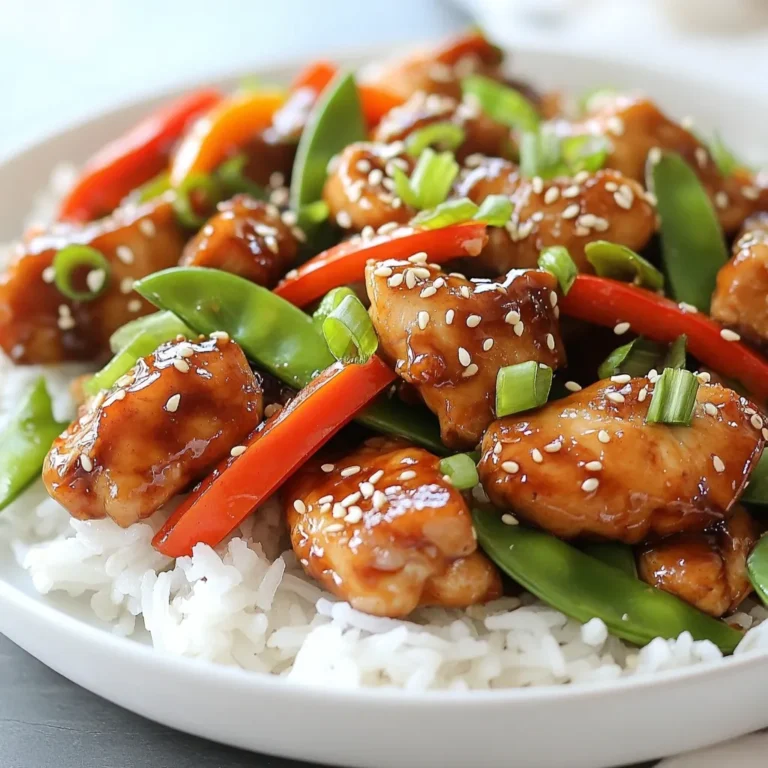
Sesame Ginger Chicken Stir-Fry Flavorful and Easy Meal

- 12 oz spaghetti or fettuccine - 2 ripe avocados, peeled and pitted - 1/2 cup fresh cilantro leaves, packed - 2 cloves garlic, minced - 1/4 cup lemon juice (about 2 lemons) - 1/3 cup extra-virgin olive oil - Salt and pepper to taste - 1/4 cup grated Parmesan cheese (optional, for a vegetarian twist) - Cherry tomatoes, halved (for garnish) - Extra cilantro leaves (for garnish) Avocados are rich in healthy fats. They help keep your heart healthy. They also provide fiber, which aids digestion. Cilantro adds a fresh taste and is full of vitamins. It can help lower blood sugar levels. Garlic boosts your immune system and adds flavor. Lemon juice is high in vitamin C and helps with hydration. Olive oil is a great source of healthy fats and antioxidants. You can add different veggies for more texture. Try bell peppers or zucchini for crunch. For protein, consider grilled chicken or chickpeas. You can swap the pasta for gluten-free options like quinoa or brown rice noodles. Want a kick? Add red pepper flakes to the avocado sauce. Experiment with different herbs, like basil or parsley, for a unique twist. {{ingredient_image_1}} Start by boiling a large pot of water. Add a good amount of salt to the water. Once it boils, add 12 ounces of spaghetti or fettuccine. Cook the pasta according to the package instructions. You want it to be al dente, which means it should be firm to the bite. This usually takes about 8 to 10 minutes. When the pasta is ready, reserve 1 cup of the pasta water. Then, drain the pasta and set it aside in a large bowl. Next, grab your food processor. Add 2 ripe avocados, peeled and pitted. Then, toss in ½ cup of fresh cilantro leaves, 2 minced garlic cloves, and ¼ cup of lemon juice. Pour in ⅓ cup of extra-virgin olive oil. Blend all these ingredients until the mixture is smooth and creamy. If it feels too thick, add some of the reserved pasta water a little at a time. Keep blending until you reach your desired consistency. Finally, season the sauce with salt and pepper to taste. If you like, mix in ¼ cup of grated Parmesan cheese for added flavor. Now, it’s time to bring everything together. In the large bowl with the drained pasta, pour in the creamy avocado sauce. Toss the pasta well to coat it evenly. If the sauce seems too thick, add a little more of the reserved pasta water. Give it a taste and adjust the seasoning if needed. For a beautiful finish, plate the pasta and top it with halved cherry tomatoes and extra cilantro leaves. Enjoy your creamy avocado cilantro pasta! To pick the best avocados, look for smooth skin. They should feel slightly soft but not mushy. Gently press your thumb on the skin. If it gives a little, it’s ripe. If it feels hard, it’s not ready yet. A dark green color often means ripeness. Avoid avocados with brown spots. They may be overripe or bad inside. To boost flavor, use fresh ingredients. Fresh cilantro adds a bright taste. Fresh garlic gives a nice kick. Use good quality olive oil for richness. Lemon juice adds acidity and balances the creaminess. Taste the sauce before mixing it with pasta. Adjust salt, pepper, or lemon juice as needed. This ensures a perfect blend. This pasta dish is great for meal prep. You can make the avocado sauce in advance. Store it in an airtight container to keep it fresh. If you want to keep the color, add a little lemon juice on top. Cooked pasta can also be made ahead. Just toss it with the sauce when ready to eat. This will keep it creamy and delicious. Pro Tips Ripe Avocados: Ensure your avocados are perfectly ripe for the creamiest sauce. They should yield slightly to gentle pressure when squeezed. Adjust Consistency: If the sauce is too thick, gradually add reserved pasta water until you achieve your desired creaminess. Flavor Boost: Add a pinch of red pepper flakes or a splash of hot sauce to the avocado sauce for an extra kick of flavor. Storage Tips: Store any leftover sauce in an airtight container with plastic wrap pressed against the surface to prevent browning. {{image_2}} To make this creamy avocado cilantro pasta vegan, skip the Parmesan cheese. The avocado gives a rich taste on its own. You can add nutritional yeast for a cheesy flavor without dairy. Another option is to use a vegan cream cheese. This keeps the dish creamy and plant-based. If you want to add protein, consider cooked chickpeas or white beans. They mix well with the sauce and keep it light. Grilled chicken or shrimp also works great. Just cook them separately and mix them in with the pasta. This adds flavor and makes the meal more filling. You can switch the spaghetti or fettuccine for different types of pasta. Try whole wheat pasta for more fiber. If you're gluten-free, look for rice or quinoa noodles. They will still taste great with the avocado sauce. Zucchini noodles are another fun option. They are low-carb and add a fresh crunch. To keep your leftover creamy avocado cilantro pasta fresh, place it in an airtight container. Make sure to cool the pasta to room temperature before sealing it. This helps prevent moisture buildup, which can spoil the dish. If you want to save space, you can divide it into smaller portions. This makes it easier to reheat later. Store the container in the fridge. When it’s time to enjoy your leftovers, reheat them gently. You can use a microwave or a stove. If using a microwave, place the pasta in a bowl and cover it with a damp paper towel. Heat for one minute at a time, stirring in between. On the stove, add a splash of water or olive oil to the pasta in a pan over low heat. Stir until warm. This will help keep it creamy. The creamy avocado sauce is best eaten fresh. However, if stored properly, you can keep it in the fridge for up to three days. The avocado and cilantro may brown a little, but it will still taste good. The cooked pasta can last about five days in the fridge. Just make sure to store it with the sauce separately if possible to maintain the best texture. Yes, you can make this pasta gluten-free. Use gluten-free spaghetti or fettuccine. Many brands offer great options made from rice or corn. Just cook them according to the package. The creamy avocado sauce works well with any pasta type. To add some heat, mix in red pepper flakes. Start with a small pinch. You can add more if you like it spicier. Another option is to add diced jalapeños to the sauce. Blend them in for a nice kick. If you want a dairy-free option, try nutritional yeast. It gives a cheesy flavor without dairy. You can also skip the cheese altogether. The sauce is still creamy and tasty without it. If you prefer, use vegan Parmesan to keep the flavor. This blog post covered tasty ingredients, step-by-step cooking, and helpful tips. You learned how to choose ripe avocados and ways to store leftovers. Exploring variations opened options for vegan diets and protein boosts. Whether you keep it simple or get creative, this dish can fit many needs. Cooking with fresh ingredients makes meals fun and healthy. Enjoy experimenting with flavors and sharing your dishes with friends.

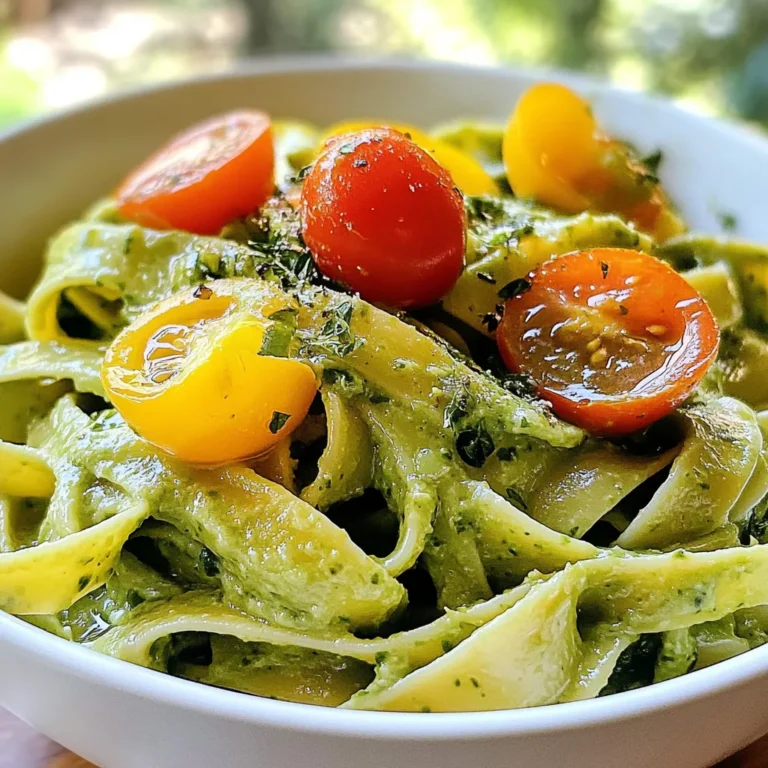
Creamy Avocado Cilantro Pasta Quick and Easy Recipe

- 1 can (15 oz) sliced peaches in light syrup, drained - 1 box yellow cake mix - 1/2 cup unsalted butter, melted - 1 teaspoon ground cinnamon - 1/2 teaspoon vanilla extract - 1 cup milk - 1/2 cup brown sugar - Whipped cream or vanilla ice cream for serving - 9x13 inch baking dish - Mixing bowl - Whisk or spoon When you make Peach Cobbler Dump Cake, gather your ingredients first. You need one can of sliced peaches. Drain the syrup well. Then, grab a box of yellow cake mix. This mix gives your cake its fluffy texture. Next, you’ll need half a cup of unsalted butter, melted. Butter adds rich flavor. Don’t forget the ground cinnamon. Just one teaspoon brings warmth to the dish. You also need half a teaspoon of vanilla extract for that sweet aroma. One cup of milk makes the batter creamy. Lastly, have half a cup of brown sugar handy. It adds sweetness and depth. For tools, a 9x13 inch baking dish works best. A mixing bowl helps you combine the batter. Use a whisk or spoon to mix your ingredients well. With these simple items, you are ready to make a delicious treat! - Preheat the oven to 350°F (175°C). - Grease the baking dish for easy release. - Combine yellow cake mix, cinnamon, brown sugar, milk, and vanilla extract. - Stir until just combined (lumpy batter is okay!). - Spread peach slices in baking dish. - Pour batter over peaches and drizzle melted butter on top. - Bake for 40-45 minutes until golden brown. - Check doneness with a toothpick. This simple process makes Peach Cobbler Dump Cake a joy to make. I love how quickly it comes together. Just remember, don’t worry about the lumps in the batter; they add to the charm! The golden top and juicy peaches will make your kitchen smell amazing. Enjoy every bite! To get a perfect golden crust, watch your oven closely. The top should turn a lovely golden brown. If you bake it for too long, it can dry out. Always check at the 40-minute mark. If you live at a high altitude, you may need to adjust the baking time. Start with an extra 5 minutes and check for doneness. Serving this cobbler is easy and fun! My favorite way is with a big scoop of vanilla ice cream or a dollop of whipped cream. It adds a creamy touch that pairs well with the warm peaches. For a nice look, use a clear dish. This lets you see the layers of peaches and cake. A sprig of mint on top adds a pop of color! You can boost the flavor by adding spices or nuts. Try mixing in chopped walnuts or pecans for a nice crunch. A dash of nutmeg can also add warmth. If you want to switch up the fruit, use cherries or apples. Just make sure to drain any extra juice to keep the cake from getting soggy. {{image_2}} You can change the fruit in this recipe easily. Canned fruits work great, like cherries or apples. Just swap the peaches with your favorite canned fruit. If you prefer fresh fruit, wash and slice your choice. You can use fresh peaches, berries, or even plums. Make sure to adjust the sugar based on fruit sweetness. Fresh fruit gives a bright taste, while canned fruit makes it easy. Need a gluten-free option? Just pick a gluten-free cake mix. Many brands offer this choice, and they taste great too. For those who want a vegan version, use plant-based milk and a vegan cake mix. You can also replace butter with coconut oil or a vegan butter substitute. These changes keep the dessert delicious for everyone. Want to jazz it up? Try adding extracts like almond or coconut. Just a teaspoon can make a big difference. You can also mix in some chocolate chips or caramel for a sweet twist. The chocolate will melt and add richness, while caramel brings a lovely sweetness. These small changes can take your peach cobbler dump cake to the next level. To keep your Peach Cobbler Dump Cake fresh, store it in an airtight container. Place it in the fridge if you plan to eat it within a few days. For longer storage, you can freeze it. Wrap it tightly in plastic wrap and then in foil. This keeps out air and moisture. To reheat, use the oven for the best texture. Preheat it to 350°F (175°C). Place the cake in a baking dish and cover it with foil. Heat for about 15-20 minutes. If you use the microwave, heat it in short bursts. Check every 30 seconds to avoid overheating. Peach Cobbler Dump Cake lasts about 3-4 days in the fridge. If frozen, it can last up to 3 months. Look for signs of spoilage like an off smell or mold. If it looks or smells strange, it’s best to toss it out. To make Peach Cobbler Dump Cake, start with one can of sliced peaches in light syrup. Drain the peaches and spread them in a greased 9x13 inch baking dish. In a bowl, mix one box of yellow cake mix with cinnamon, brown sugar, milk, and vanilla extract. Stir until just combined; it’s okay if the batter is lumpy. Pour this batter over the peaches. Finally, drizzle melted butter on top. Bake at 350°F for 40-45 minutes until golden brown. Yes, you can use fresh peaches! Just slice about four to five fresh peaches and peel them. You can add a bit of sugar to make them sweeter. Then, follow the same steps as you would with canned peaches. Fresh peaches will give your cobbler a bright, fresh taste. A cobbler usually has a biscuit or pie crust topping. A dump cake, like this one, uses cake mix. You simply dump the ingredients in layers. The cake mix forms a crust as it bakes. This makes dump cakes quick and easy, perfect for busy days. Yes, you can make it ahead! Prepare the cake and cover it with foil. Store it in the fridge for up to two days before baking. When you’re ready, bake it according to the recipe. It’s great for parties or family gatherings. Absolutely! To make a smaller batch, just halve the recipe. Use an 8x8 inch dish instead. For a larger batch, double the recipe and use a larger dish. Adjust the baking time as needed to ensure it cooks through. This Peach Cobbler Dump Cake is simple and fun. It takes just 10 minutes to prep! You will love how easy it is to make. You only need a few ingredients. The sweet peaches mix well with the cake. The result is a warm, gooey treat. Here are the steps to follow: 1. Preheat your oven to 350°F (175°C). 2. Grease a 9x13 inch baking dish. 3. Spread the drained peach slices evenly in the dish. 4. In a bowl, mix yellow cake mix, cinnamon, brown sugar, milk, and vanilla. 5. Stir until just mixed. The batter will be lumpy. That's okay! 6. Pour the batter over the peaches in the dish. 7. Drizzle the melted butter on top of the batter. 8. Bake for 40-45 minutes. Check if the top is golden brown. A toothpick should come out clean. 9. Cool for about 10 minutes before serving. For serving, scoop the warm cobbler into bowls. Top with whipped cream or ice cream. Add a mint sprig for color. Enjoy this sweet treat! For detailed cooking instructions, see the full recipe above. Mixing sweet peaches with a simple yellow cake gives you a delightful dessert. This Peach Cobbler Dump Cake is quick and delicious. From easy preparation steps to versatile variations, this recipe makes baking fun and simple. Remember to store any leftovers properly to enjoy later. With so many ways to customize this dish, your options are endless. I hope you feel inspired to create your own version and enjoy every bite!

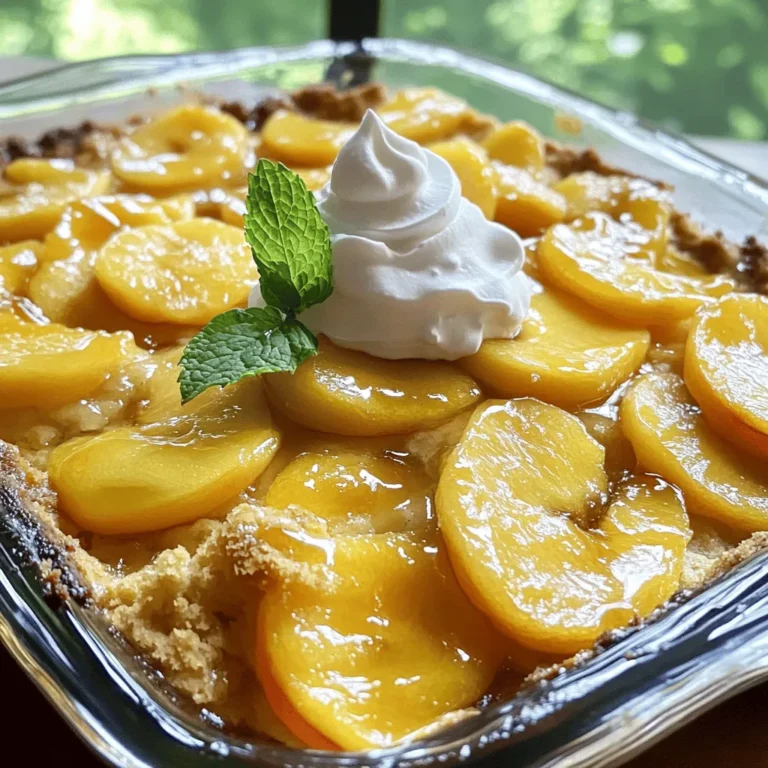
Peach Cobbler Dump Cake Simple and Delicious Treat

For the base of the salad, use: - 8 oz. whole wheat spaghetti or soba noodles These noodles give the dish its chewy texture. They soak up the dressing well and add a hearty feel. The fresh vegetables bring color and crunch. You will need: - 1 red bell pepper, julienned - 1 cucumber, julienned - 1 carrot, shredded - 3 green onions, sliced - ½ cup cooked edamame (shelled) These veggies not only add flavor but also provide nutrients and a vibrant look. The dressing ties everything together. Here’s what you need: - ¼ cup soy sauce (or tamari for gluten-free) - 2 tablespoons sesame oil - 1 tablespoon rice vinegar - 1 tablespoon chili paste (adjust to taste) - 1 teaspoon honey or maple syrup - 1 tablespoon fresh ginger, grated - 1 garlic clove, minced - Salt and pepper to taste This mix of ingredients gives the salad its spicy and savory edge. Adjust the chili paste for your spice level. Each bite bursts with flavor, making this dish a standout. Start by boiling water in a large pot. Add a good amount of salt to the water. Once it boils, add 8 oz. of spaghetti or soba noodles. Cook the noodles until they are al dente, following package directions. This usually takes about 8 to 10 minutes. Drain the noodles and rinse them under cold water. This stops the cooking process and keeps the noodles firm. While the noodles cook, wash and prepare your vegetables. Take one red bell pepper and julienne it into thin strips. Then, julienne one cucumber and shred one carrot. Slice three green onions and set them aside. These fresh veggies add color and crunch to your salad. In a small bowl, whisk together the dressing. Combine ¼ cup of soy sauce, 2 tablespoons of sesame oil, and 1 tablespoon of rice vinegar. Add 1 tablespoon of chili paste for spice, adjusting to your taste. Then, mix in 1 teaspoon of honey or maple syrup for sweetness, along with 1 tablespoon of grated fresh ginger and 1 minced garlic clove. This dressing brings all the flavors together. In a large mixing bowl, combine the cooled noodles with your prepared vegetables. Add the julienned bell pepper, cucumber, shredded carrot, ½ cup of cooked edamame, and sliced green onions. Pour your dressing over the top. Toss gently until everything is well mixed and coated in the dressing. Now, sprinkle ¼ cup of toasted sesame seeds over the salad. Give it another gentle toss to incorporate the seeds. This step adds a nutty flavor and a delightful crunch to your dish. For the best taste, let your salad chill in the fridge for 15 to 30 minutes. This allows the flavors to blend nicely. When ready to serve, scoop the salad into a large bowl or individual plates. You can garnish with extra sesame seeds and green onion slices for a vibrant look. Enjoy your fresh and colorful Spicy Sesame Noodle Salad! To control the heat, start with a small amount of chili paste. You can add more later if you want more spice. Mix the dressing and taste it. If you find it too mild, add another half teaspoon of chili paste. Remember, you can always add more, but you can’t take it out! I love serving this salad in a big bowl. It looks bright and fresh. You can also serve it in individual plates for a fancy touch. Top each serving with extra sesame seeds and green onion slices. For added crunch, sprinkle some crushed peanuts on top! Make this salad ahead of time for busy days. Cook the noodles and chop the veggies the night before. Store them in the fridge. Keep the dressing separate until you’re ready to serve. This way, the noodles and veggies stay fresh and crisp. Remember to chill the salad for at least 15 to 30 minutes before serving. This helps the flavors mix well! {{image_2}} You can boost the salad with proteins. Try adding cooked chicken or tofu. Both add great taste and texture. Shrimp also works well if you want seafood. For a plant-based option, add chickpeas or black beans. These options make the dish more filling. Feel free to swap in different veggies. Broccoli or snap peas add a nice crunch. Shredded cabbage gives a fresh taste. You can also use radishes for a peppery kick. Experiment with your favorite vegetables. They can change the flavor and look of the salad. Want to change the flavor? Try using peanut butter instead of sesame oil. This gives a nutty twist. You can also add lime juice for a citrusy zing. Fresh herbs like cilantro or mint can add brightness. Each change gives the salad a unique spin. To keep your Spicy Sesame Noodle Salad fresh, store it in an airtight container. Place it in the fridge. This salad stays good for about 3 days. Make sure to give it a quick toss before serving again. The flavors meld together nicely over time. I do not recommend freezing this salad. The noodles and veggies do not freeze well. Freezing can make the noodles mushy. It also changes the texture of the fresh vegetables. For the best taste, enjoy it fresh. If you need to reheat the salad, do it gently. Place it in a pan over low heat. Stir it often to warm it up without cooking it further. If you want, you can add a splash of soy sauce to freshen the flavors. Enjoy the salad cold for a refreshing meal! To make your salad less spicy, reduce the chili paste. Start with just half a tablespoon. You can also add more honey or maple syrup to balance the heat. If you want extra flavor, add more sesame oil or soy sauce. Taste as you go, and adjust until you get the right balance. Yes, you can use gluten-free noodles. Soba noodles are a good choice if they are 100% buckwheat. Rice noodles also work well. Just make sure to cook them according to the package instructions for best results. This salad is packed with nutrients. Whole wheat noodles offer fiber and protein. Vegetables like bell peppers and cucumbers are rich in vitamins. Edamame adds protein and healthy fats. The sesame seeds provide healthy omega-3 fatty acids. It’s a balanced dish full of flavor and health benefits. Spicy Sesame Noodle Salad lasts about 3 to 5 days in the fridge. Be sure to store it in an airtight container. The flavors will meld together as it sits, making it even tastier. Yes, you can make this salad in advance. Prepare it a day ahead for a quick meal. Just remember to keep the salad chilled in the fridge. You may want to toss it again before serving to mix the flavors. This blog post covered how to make a tasty Spicy Sesame Noodle Salad. We discussed the key ingredients, including noodles, fresh veggies, and dressing components. You learned step-by-step instructions for cooking and combining everything. We also shared tips for spice levels and meal prep. Variations let you add proteins or different flavors. Finally, we talked about storage and answered common questions. Enjoy this easy and healthy dish anytime, and feel free to get creative!

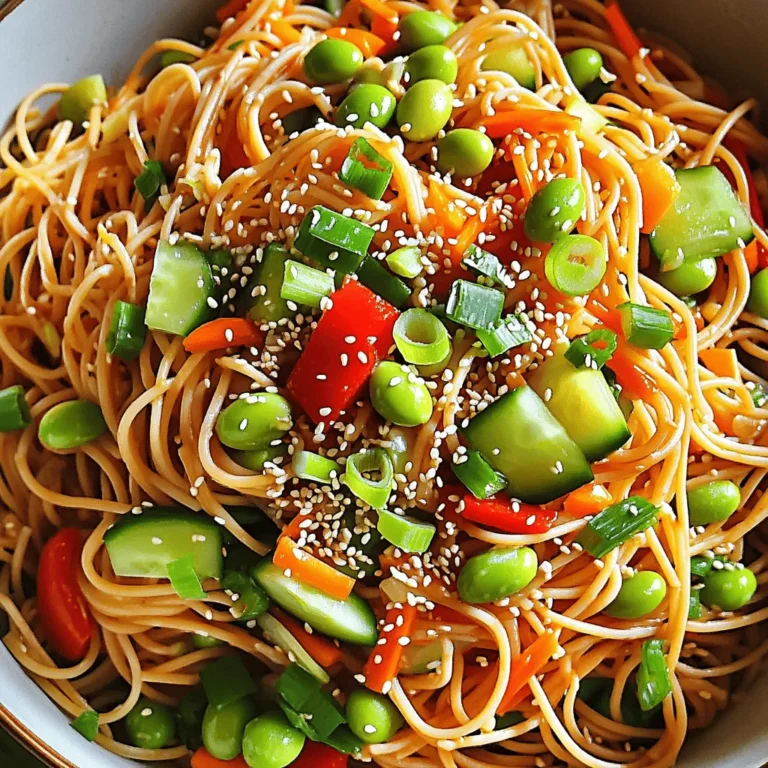
Spicy Sesame Noodle Salad Colorful and Fresh Dish

Here is the complete ingredients list for your Chocolate Chip Zucchini Muffins: - 1 cup grated zucchini (about 1 medium zucchini) - 1 cup all-purpose flour - 1/2 cup whole wheat flour - 1/2 teaspoon baking soda - 1 teaspoon baking powder - 1/2 teaspoon salt - 1 teaspoon ground cinnamon - 1/2 cup brown sugar, packed - 1/4 cup granulated sugar - 1/3 cup vegetable oil - 2 large eggs - 1 teaspoon vanilla extract - 1/2 cup semi-sweet chocolate chips - Optional: 1/4 cup chopped walnuts or pecans Each ingredient plays a vital role in making these muffins moist and tasty. Grated zucchini adds moisture without changing the flavor much. The mix of all-purpose and whole wheat flours gives a nice texture. Baking soda and baking powder help the muffins rise, while salt and cinnamon enhance the flavors. Using both brown and granulated sugars creates a rich sweetness. Vegetable oil adds moisture too. The eggs bind everything, and vanilla extract gives a lovely aroma. Finally, chocolate chips provide that sweet richness you crave. If you like, add nuts for a crunchy twist! 1. Preheat the oven: Start by setting your oven to 350°F (175°C). This ensures even baking. 2. Prepare the muffin tin: Line your muffin tin with paper liners or grease each cup with oil. This helps with easy removal later. 3. Combine wet ingredients: In a medium bowl, mix 1 cup of grated zucchini, 1/2 cup brown sugar, 1/4 cup granulated sugar, 1/3 cup vegetable oil, 2 large eggs, and 1 teaspoon vanilla extract. Stir well until everything is mixed. 4. Mix dry ingredients: In a separate large bowl, whisk together 1 cup all-purpose flour, 1/2 cup whole wheat flour, 1/2 teaspoon baking soda, 1 teaspoon baking powder, 1/2 teaspoon salt, and 1 teaspoon ground cinnamon. This step adds flavor and structure to your muffins. 5. Combine wet and dry ingredients: Pour the wet mixture into the dry mixture. Gently stir with a spatula until just combined. It’s fine if a few lumps remain. Avoid over-mixing to keep the muffins light. 6. Fold in chocolate chips and nuts: Add 1/2 cup semi-sweet chocolate chips and optional 1/4 cup chopped walnuts or pecans. Carefully fold them into the batter until evenly mixed. 1. Fill muffin cups: Spoon the batter into the prepared muffin cups, filling each about 2/3 full. Don’t overfill, or they may spill over. 2. Baking time and temperature: Place the muffin tin in the oven and bake for about 18-20 minutes. To check doneness, insert a toothpick into the center; it should come out clean. 3. Cooling period: Once baked, remove the muffins from the oven. Let them cool in the pan for about 5 minutes. Then, transfer them to a wire rack to cool completely. This helps keep them fluffy. - Zucchini preparation tips: Grate the zucchini and squeeze out excess moisture. This keeps the muffins from being too wet. Use a box grater or food processor for quick prep. - Avoiding over-mixing: When you combine wet and dry ingredients, mix gently. It’s okay if some lumps remain. Over-mixing makes muffins tough. You want a soft texture, not a dense one. - Checking for doneness: To test if your muffins are done, insert a toothpick in the center. If it comes out clean, they are ready. The tops should be golden brown and spring back when touched. - Presentation tips: Serve the muffins warm. You can dust them with powdered sugar for a sweet touch. A drizzle of melted chocolate on top adds a delicious twist. - Pairing ideas: These muffins pair well with a glass of cold milk or a hot cup of tea. Try adding fresh fruit or yogurt on the side for a balanced snack. {{image_2}} You can easily change this recipe to fit your needs. - Gluten-free options: Use a gluten-free flour blend instead of all-purpose and whole wheat flour. This keeps the muffins light and tasty. - Dairy-free alternatives: Replace eggs with flax eggs or applesauce. Use almond or coconut milk instead of regular milk for moisture. - Sweetener variations: Swap brown sugar with coconut sugar. You can also use honey or maple syrup for a different sweetness. Get creative with your muffins by adding unique flavors. - Other mix-ins: Try adding 1/2 cup of shredded carrots or mashed bananas for a fun twist. You can also fold in spices like nutmeg or ginger for extra warmth. - Savory twists: Add 1/4 cup of shredded cheese or finely chopped herbs. This gives a nice savory flavor to your muffins. - Room temperature storage: You can keep your muffins at room temperature. Place them in an airtight container. This keeps them fresh for about 2-3 days. - Refrigeration tips: If you want to store the muffins longer, put them in the fridge. Use a container that seals tightly to prevent them from drying out. They can last up to a week in the fridge. - Freezing instructions: For even longer storage, freeze the muffins. Wrap each muffin in plastic wrap and then place them in a freezer bag. They will stay good for about 2-3 months. Just remember to label the bag with the date. - Best methods to reheat muffins: To enjoy your muffins warm, you can use an oven or a microwave. If using the oven, preheat it to 350°F (175°C) and heat for about 10 minutes. For the microwave, place a muffin on a plate and heat for 15-20 seconds. Check to make sure it’s warm all the way through. How do I know when the muffins are done? The muffins are done when a toothpick inserted in the center comes out clean. This usually takes about 18 to 20 minutes. Keep an eye on them as they bake. Can I use frozen zucchini? Yes, you can use frozen zucchini. Just thaw it first and drain any excess water. This keeps your muffins from getting too wet. What can I substitute for chocolate chips? You can use chopped dark chocolate, dried fruits, or nuts. Try raisins or cranberries for a fun twist. How long do the muffins last? These muffins last about 3 days at room temperature in an airtight container. You can refrigerate them for up to a week, too. Can I make mini muffins instead? Absolutely! Just reduce the baking time to about 12 to 15 minutes. Check them often so they don't overbake. What is the nutritional information for Chocolate Chip Zucchini Muffins? Each muffin has roughly 150 calories, with about 6 grams of fat and 3 grams of protein. The zucchini adds fiber and nutrients, making these a tasty, healthy snack. - [Link to Full Recipe](#) - Suggested tools and equipment: muffin tin, mixing bowls, whisk, spatula. Making Chocolate Chip Zucchini Muffins is fun and easy. You learned about the key ingredients and the steps to make them. I shared helpful tips for perfecting your recipe and ideas for variation. You can easily adapt this recipe to fit your needs. Remember the best ways to store and reheat your muffins. With this guide, you’ll have delicious muffins ready to enjoy. Bake confidently, and let your creativity shine!

Chocolate Chip Zucchini Muffins Tasty and Healthy Snack

- 2 pounds chicken wings - 1/4 cup honey - 1/4 cup Sriracha sauce - 2 tablespoons soy sauce (low sodium) - 1 tablespoon olive oil - 1 teaspoon garlic powder - 1 teaspoon ground ginger - Salt and pepper to taste - Sesame seeds (for garnish) - Fresh cilantro (chopped, for garnish) When making Honey Sriracha Air Fryer Chicken Wings, I always start with fresh chicken wings. You want them meaty and juicy. The honey and Sriracha mix gives a sweet and spicy kick. This combo makes the wings hard to resist. I add soy sauce for depth. It brings out the flavor. Olive oil helps with cooking, ensuring the wings crisp up nicely. Garlic powder adds a warm, savory taste, while ground ginger gives a hint of spice. For garnishes, I love to sprinkle sesame seeds and fresh cilantro on top. They make the dish look vibrant and add a fresh taste. This recipe combines great flavors that everyone will enjoy. Try it out! - Rinse and pat dry the wings. Use paper towels to soak up any moisture. - To get crispy wings, ensure they are completely dry. This helps them crisp up in the air fryer. - In a large mixing bowl, combine the honey, Sriracha, soy sauce, olive oil, garlic powder, ground ginger, salt, and pepper. - Whisk all the ingredients together until they blend well. This step is key for even flavor. - Preheat your air fryer to 375°F (190°C) for about 5 minutes. This helps start the cooking process. - Place the marinated wings in a single layer in the air fryer basket. Cook for 25 to 30 minutes. - Flip the wings halfway to ensure they cook evenly. They should be golden brown and reach 165°F (74°C) inside. For crispy wings, start by drying them well. Rinse your chicken wings and pat them dry with paper towels. This step is key because moisture makes them soggy. Cook them in a single layer in the air fryer. This allows hot air to reach all sides, making them crisp. Marinating the wings for at least 30 minutes also helps. The longer they sit, the more flavor they absorb. Want to tweak the taste? You can swap out the soy sauce for coconut aminos for a gluten-free option. If you like it spicy, add more Sriracha to your marinade. You can also mix in a bit of lime juice for a zesty kick. Each change can create a new taste that excites your palate. Pair your honey Sriracha wings with classic dips like ranch or blue cheese. Their cool, creamy textures balance the spicy wings. For sides, try serving them with a fresh salad or crispy fries. These options round out your meal and keep it fun. Enjoy your wings hot, topped with sesame seeds and cilantro for an extra pop! {{image_2}} For a bolder kick, just add more Sriracha to your marinade. Start with an extra tablespoon. This small change gives the wings more heat without losing that sweet flavor. If you want it even hotter, add a dash of cayenne pepper. Adjusting the spice level is easy, and it makes your wings stand out. Swap out the Sriracha for your favorite BBQ sauce to create a sweet and smoky flavor. Use the same amount of BBQ sauce as you would Sriracha. Mix it with honey and soy sauce to keep that sweet touch. This variation is great for those who prefer a milder taste but still want juicy wings. For a keto-friendly option, we can make a few easy swaps. Replace honey with a low-carb sweetener like erythritol. Use coconut aminos instead of soy sauce to cut carbs. This version still packs a punch of flavor while keeping your meal low in carbs. Enjoy the same delicious taste without the extra carbs! To store chicken wings, place them in an airtight container. This keeps moisture out and helps maintain freshness. Make sure they cool down first. When stored properly, these wings last in the fridge for up to three days. If you want to enjoy the flavors longer, consider freezing them. To freeze cooked wings, wrap them tightly in plastic wrap. Then, place them in a freezer bag. This helps prevent freezer burn. You can freeze them for up to three months. When ready to eat, thaw them in the fridge overnight. Reheat the wings in the air fryer for about 10-15 minutes. This keeps them crispy and tasty. To get your wings crispy, start with dry wings. After washing, pat them completely dry. It helps to remove moisture. You can also toss wings in a bit of olive oil before cooking. This adds a nice crunch. Cooking them at a higher temperature, like 375°F, works well. Flip the wings halfway through cooking to ensure even crispiness. Yes, you can use frozen chicken wings! Just note that they will need a longer cooking time. Add about 5-10 extra minutes to the cooking process. Make sure to check that they reach an internal temperature of 165°F. For best results, do not thaw them before cooking. This keeps the wings juicy and tender. Honey Sriracha wings taste great with many dips. A classic ranch or blue cheese dip adds a cool touch. If you want more heat, try a spicy mayo or hot sauce. You can also serve them with a sweet chili sauce for a nice balance. Each dip adds a unique flavor to these tasty wings! In this article, we covered how to make tasty honey Sriracha air fryer chicken wings. You learned about the main and extra ingredients that add flavor. I shared easy steps for preparing, marinating, and cooking the wings to perfection. Plus, I provided tips for crispy wings and fun serving ideas. Try your hand at these wings for your next snack or party. Enjoy the flavors and share with friends!

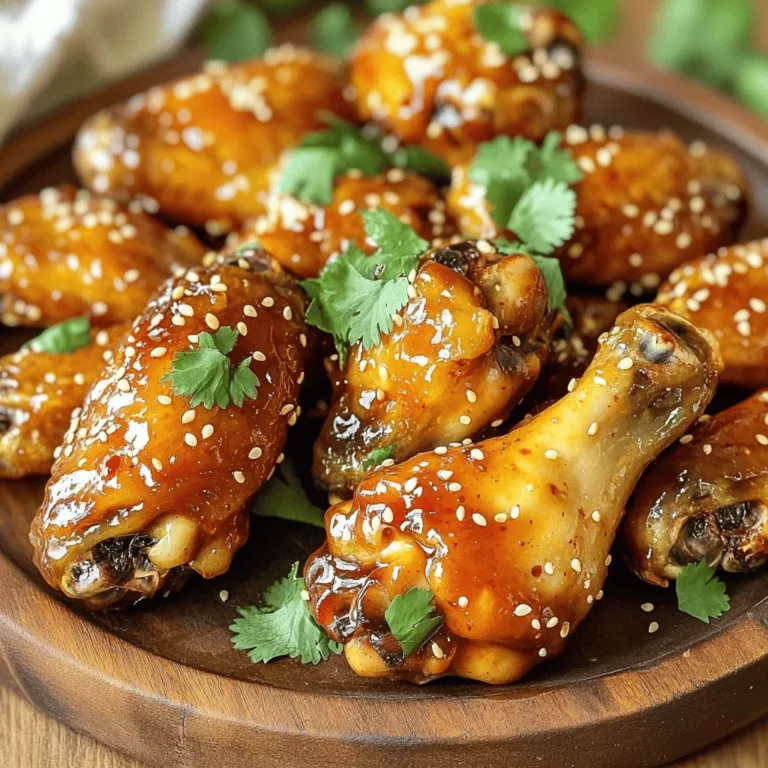
Honey Sriracha Air Fryer Chicken Wings Tasty Twist

PREV 1 … 39 40 41 … 57 NEXT
flavor nest kitchen

explore

DessertsDinnerAppetizersDrinks

Our Policies

  • Cookie Policy
  • Copyright Policy
  • Disclaimer
  • GDPR Policy
  • Terms Of Use
Back to Top
  • About
  • Contact Us
  • Privacy Policy
© 2025 flavor nest kitchen