FREE DINNER EBOOK! Get your copy!
  • Cookie Policy
  • GDPR Policy
  • Disclaimer
  • Terms Of Use
  • Visit my other site: Fun Cookie Recipes
flavor nest kitchen
  • Home
  • Dinner
  • Desserts
  • Drinks
  • Appetizers
  • Contact
  • About
  • Privacy Policy
  • Home
  • Dinner
  • Desserts
  • Drinks
  • Appetizers
  • Contact
  • About
  • Privacy Policy
  • Cookie Policy
  • GDPR Policy
  • Disclaimer
  • Terms Of Use
Visit my other site: Fun Cookie Recipes

HOME / CATEGORIES /

Latest

In this recipe, we need a mix of fresh and pantry staples. Each ingredient adds a unique flavor to the dish. Here’s what you will need: - 2 boneless, skinless chicken breasts, cut into bite-sized pieces - 1 cup pineapple chunks (fresh or canned) - 1 red bell pepper, diced - 1 green bell pepper, diced - 1 small onion, chopped - 1/2 cup sugar - 1/3 cup apple cider vinegar - 1/4 cup soy sauce (low sodium preferred) - 2 tablespoons ketchup - 1 tablespoon cornstarch mixed with 2 tablespoons water (slurry) - 2 tablespoons vegetable oil - Salt and pepper to taste - Cooked rice, for serving These ingredients work together to create that perfect sweet and tangy taste. The chicken gives protein, while the pineapple adds a fresh twist. The bell peppers bring crunch and color. The sugar, vinegar, and soy sauce create a balanced sauce that ties it all together. Using low sodium soy sauce helps to keep the dish healthier. Enjoy this colorful mix in your bowl! {{ingredient_image_1}} To start, I season the chicken pieces with salt and pepper. I make sure each piece gets a nice coating. Then, I let them rest for a few minutes. This resting time helps the seasoning soak in. Next, I mix the sauce. In a bowl, I whisk together sugar, apple cider vinegar, soy sauce, and ketchup. The sugar adds sweetness, while the vinegar gives a nice tang. I set this sauce aside for later use. Now, it’s time to cook. I heat vegetable oil in a large skillet over medium-high heat. I add the seasoned chicken and sauté it until it turns golden brown, about 5 to 7 minutes. Once cooked, I remove the chicken and set it aside. Then, I stir-fry the chopped onion and bell peppers in the same skillet. I cook them for 3 to 4 minutes until they begin to soften. They should look bright and colorful. Now, I add the pineapple chunks and the cooked chicken back into the skillet. I pour the sauce mixture over everything and stir well to combine. To thicken the sauce, I bring the mixture to a gentle boil. I stir in the cornstarch slurry to achieve the right consistency. I let it cook for an extra 2 to 3 minutes, stirring occasionally. When the sauce thickens and everything is heated through, it’s ready to serve. For the final touch, I remove the skillet from the heat. I serve the sweet and sour chicken hot over cooked rice. A colorful bowl makes it look even better. To ensure your chicken is cooked through, cut it into small pieces. This helps it cook evenly. Sauté the chicken until it is golden brown. It should take about 5 to 7 minutes. Always check that the inside is no longer pink. For the right sauce consistency, make a cornstarch slurry. Mix 1 tablespoon of cornstarch with 2 tablespoons of water. Stir it into the sauce when it boils. This will help thicken your sweet and sour sauce perfectly. Garnish your dish for a beautiful look. Use sesame seeds and fresh cilantro on top. This adds color and makes it more appealing. Serve the sweet and sour chicken over rice. You can use white or brown rice. A colorful bowl makes the dish pop and draws in your guests. If you want different flavors, try using mango instead of pineapple. You can also add ginger for a spicy kick. For diet-friendly options, replace chicken with tofu or shrimp. If you want less sugar, use a sugar substitute or reduce the amount. These swaps keep the dish tasty and enjoyable. Pro Tips Marinate for Flavor: For extra flavor, marinate the chicken pieces in a mixture of soy sauce, garlic, and ginger for at least 30 minutes before cooking. Use Fresh Ingredients: Whenever possible, opt for fresh pineapple and vegetables to enhance the flavor and texture of your dish. Adjust Sweetness: Feel free to adjust the amount of sugar in the sauce to suit your taste preference; you can reduce it for a less sweet dish. Perfect Rice: Serve your sweet and sour chicken over jasmine or basmati rice for a fragrant complement to the dish. {{image_2}} You can make sweet and sour chicken even better with spices. Adding ginger gives it a warm kick. Garlic adds a rich flavor that blends well. You can also try different vegetables. Broccoli, snap peas, or carrots add color and crunch. Each choice brings its own taste. Experiment with what you love. If chicken isn’t your favorite, try shrimp. It cooks quickly and absorbs flavors well. Tofu is a great option for a plant-based meal. It soaks up the sauce nicely. Beef works too; just cut it thin. Each protein option makes this dish unique. Switching fruits in your sauce can change the whole dish. Mango adds a tropical twist. It gives sweetness and a smooth texture. Peaches are another great choice. They provide a juicy bite that contrasts with the sauce's tang. Feel free to explore with your favorite fruits! Store your sweet and sour chicken in an airtight container. This keeps it fresh and tasty. It can last in the fridge for about 3 to 4 days. Make sure it cools down before you seal it. This helps prevent moisture build-up and sogginess. To reheat your chicken, use a skillet over low heat. This warms it gently, keeping the chicken juicy. You can also use the microwave. Just cover it with a damp paper towel. This helps retain moisture while heating. Stir halfway through to warm evenly. To freeze your sweet and sour chicken, let it cool completely. Transfer it to a freezer-safe bag or container. Remove as much air as possible to prevent freezer burn. It can stay frozen for up to 3 months. To thaw, place it in the fridge overnight before reheating. You can store Sweet and Sour Chicken in the fridge for up to three days. Make sure to place it in an airtight container. This keeps it fresh and safe to eat. If you want to keep it longer, you can freeze it. In the freezer, it can last for about three months. Just remember to thaw it in the fridge before reheating for the best taste. Yes, you can make Sweet and Sour Chicken ahead of time. It’s great for meal prep! Cook the chicken and sauce as normal. Store them separately to keep the chicken crispy. When you’re ready to eat, just heat them together. This way, you’ll enjoy fresh flavors even after a few days. Sweet and Sour Chicken pairs well with many sides. Here are some great options: - Cooked rice: White, brown, or jasmine rice work well. - Steamed broccoli: Adds a nice crunch and color. - Fried rice: A tasty twist that complements the dish. - Noodles: Lo mein or rice noodles are delicious choices. - Spring rolls: They add a fun, crispy side to your meal. Feel free to mix and match these sides to create a fun dinner! This article covered how to make delicious Sweet and Sour Chicken. You learned about key ingredients, step-by-step cooking, and storage tips. Simple tweaks can add your personal touch to the dish. Remember, you can substitute proteins and vegetables for variety. With these tips, you can impress friends and family with your cooking. Enjoy each bite of your meal and share it with loved ones. Your kitchen is now ready for a tasty adventure!

Sweet and Sour Chicken Flavorful Dinner Delight

- 1 cup rolled oats - 1/2 cup hazelnut butter (or any nut butter of choice) - 1/4 cup honey or maple syrup - 1/3 cup dark chocolate chips - 1/4 cup chopped hazelnuts - 2 tablespoons cocoa powder - 1 teaspoon vanilla extract - A pinch of salt - Rolled oats: These provide fiber, which helps with digestion and keeps you full. - Hazelnut butter: This nut butter adds healthy fats and protein to keep your energy up. - Honey or maple syrup: Both sweeteners give natural energy and great flavor. - Dark chocolate chips: These are rich in antioxidants and satisfy your sweet tooth. - Chopped hazelnuts: They add crunch and more healthy fats. - Cocoa powder: This adds chocolate flavor and is high in minerals. - Vanilla extract: It enhances the taste and brings warmth to each bite. - Salt: A pinch balances the sweetness and brings out all the flavors. - Use almond butter or sunflower seed butter instead of hazelnut butter for nut allergies. - Replace honey with agave syrup for a vegan option. - If you want to cut sugar, use unsweetened cocoa powder and dark chocolate with lower sugar. - For gluten-free needs, make sure your oats are certified gluten-free. - You can swap dark chocolate chips for carob chips for a different taste. {{ingredient_image_1}} First, gather your ingredients. You’ll need rolled oats, hazelnut butter, honey or maple syrup, cocoa powder, and vanilla extract. In a large mixing bowl, add the rolled oats, hazelnut butter, honey or maple syrup, cocoa powder, and vanilla extract. Mix these ingredients together using a spoon. Keep stirring until they form a sticky dough. This dough should hold together but still be soft. Next, fold in the dark chocolate chips and chopped hazelnuts. Make sure they spread evenly through the mixture. Now, it's time to shape the bites. Grab a small portion of the dough, about one tablespoon. Roll it between your hands to form a ball. Place each ball on a baking sheet lined with parchment paper. Keep rolling until you use all the dough. You can make about 12 to 15 bites from this recipe. Each bite is packed with flavor and energy, making them perfect for snacks. Once you’ve shaped all the energy bites, it’s time to chill them. Place the baking sheet in the fridge for at least 30 minutes. This will help the bites firm up. After chilling, they will be easier to eat and hold their shape well. Once firm, transfer the bites to an airtight container. You can store them in the fridge for up to a week. Enjoy them as a quick snack or a treat anytime! To get the right texture for your Chocolate Hazelnut Energy Bites, focus on your mixing. Combine all the wet and dry ingredients well. If the mixture feels too dry, add a bit more hazelnut butter or honey. If it’s too wet, add a few extra oats. You want the mixture to hold together but not be sticky. To keep your energy bites fresh, store them in an airtight container. Place them in the fridge after making them. They stay good for a week this way. If you want to keep them longer, consider freezing them. Just layer them between parchment paper in a freezer-safe container. Serving these bites can be fun! You can put them in a small bowl or on a decorative plate. Lightly dust them with cocoa powder for a fancy touch. Another idea is to use colorful paper cups. This makes them look cute and ready for sharing! Pro Tips Use Fresh Ingredients: Ensure your oats and hazelnut butter are fresh for the best flavor and texture in your energy bites. Chill for Firmness: Chilling the bites before storing helps them hold their shape and makes them easier to handle. Experiment with Nut Butters: Feel free to swap hazelnut butter for almond or peanut butter for a different flavor profile. Customize Your Add-ins: Add dried fruits, seeds, or protein powder to enhance the nutritional value and taste of your bites. {{image_2}} If you want a nut-free version, swap hazelnut butter. Try sun butter or soy nut butter. These options give a similar creamy texture. They also keep the bites tasty and safe for schools or nut-free zones. To boost flavor, add spices like cinnamon or nutmeg. A dash of sea salt can make the chocolate taste richer. You can also mix in instant coffee for a coffee kick. These simple tweaks can elevate your energy bites to a new level. Want to add more texture? Consider mixing in dried fruits. Chopped dates or cranberries work well. You can also toss in seeds like chia or flax. These add crunch and healthy fats. Customize based on what you enjoy most! To keep your Chocolate Hazelnut Energy Bites fresh, store them in the fridge. Use an airtight container. This method helps maintain their flavor and texture. Make sure the bites are completely cooled before you store them. They can stay fresh for up to a week. If you want to keep the bites longer, freezing is a great option. First, place the energy bites in a single layer on a baking sheet. Freeze them for about an hour. Once they are firm, transfer them to a freezer-safe bag. This method helps prevent sticking. You can enjoy them later, and they will last for about three months in the freezer. Chocolate Hazelnut Energy Bites can last up to a week in the fridge and three months in the freezer. Check for signs of spoilage before eating. Look for changes in smell, texture, or color. If they feel dry or hard, it’s best to toss them. Always trust your senses; if something seems off, don’t eat it. Yes, you can make these energy bites vegan. Simply swap the honey for maple syrup. Both work well and keep the sweet flavor. Use any nut butter you like, such as almond or peanut. These energy bites can last up to a week in the fridge. Store them in an airtight container to keep them fresh. If you want to save them longer, you can freeze them. They can last for about three months in the freezer. Energy bites offer several health benefits. They provide a good source of fiber from the oats. Hazelnuts add healthy fats and protein. The dark chocolate chips give you antioxidants. Honey or maple syrup adds natural sweetness without refined sugar. Overall, these bites give you energy and satisfy your sweet tooth. In this post, we explored the key ingredients for energy bites and their benefits. We shared how to prepare, shape, and store them for the best texture. You learned tips for making these bites perfect and how to add variations. Remember, energy bites are not just tasty; they can fit many diets. Keep them fresh and enjoy their health benefits. Start making your version today!

Chocolate Hazelnut Energy Bites Nutritious Snack Idea

- 1 pound large shrimp, peeled and deveined - 3 tablespoons olive oil - 3 cloves garlic, minced For this recipe, you will need large shrimp. Choose fresh shrimp for the best taste. If you can’t find fresh, frozen shrimp works too. Just make sure to thaw them first. Olive oil adds richness and helps the shrimp cook nicely. Use good quality olive oil for the best flavor. Garlic gives the dish a strong, tasty kick. - Zest and juice of 1 large lemon - 1 tablespoon fresh parsley, chopped - 1 teaspoon red pepper flakes (adjust to taste) Lemon zest and juice add brightness to the shrimp. The zest brings out the lemon flavor without adding too much acidity. Fresh parsley is perfect for garnish and adds a nice touch. Red pepper flakes give the dish some heat. You can adjust the amount to suit your taste. - Wooden skewers - Metal skewers You can use either wooden or metal skewers. If you choose wooden skewers, soak them in water for 30 minutes. This helps prevent burning on the grill. Metal skewers are sturdy and can be reused. They also don’t need soaking. Choose the type that works best for you! {{ingredient_image_1}} Combining Ingredients Start by grabbing a mixing bowl. Add 3 tablespoons of olive oil. Next, include 3 cloves of minced garlic. Then, zest and juice 1 large lemon. Toss in 1 tablespoon of fresh parsley, chopped. Finally, add 1 teaspoon of red pepper flakes, along with salt and pepper to taste. Whisk everything together until it's well blended. This mix will make your shrimp super tasty. Tossing the Shrimp Now, it's time for the shrimp. Take 1 pound of large shrimp, which should be peeled and deveined. Add the shrimp to the marinade. Use your hands or a spoon to toss the shrimp, ensuring they are coated evenly. Cover the bowl and let it sit in the fridge for at least 30 minutes. This step is key for flavor. Preheating the Grill While your shrimp is marinating, preheat your grill to medium-high heat. This will help cook the shrimp quickly and evenly. Threading the Skewers Once the shrimp is ready, take your skewers. If you use wooden ones, soak them in water for 30 minutes first. This keeps them from burning. Start threading the marinated shrimp onto the skewers. Place them snugly but not too tight, so they cook well. Cooking Time and Techniques Place the skewers on the hot grill. Cook them for about 2 to 3 minutes on each side. You’ll know they’re ready when they turn pink and opaque. Be careful not to overcook them, or they will get tough. Once done, take them off the grill. Serve them right away with some extra parsley and lemon wedges for a fresh touch. Optimal Marination Time For the best taste, marinate the shrimp for at least 30 minutes. This allows the flavors to soak in. If you have time, marinate for up to 2 hours. The longer shrimp sit in the marinade, the more flavor they will gain. Adjusting Spice Levels You can change the spice level to fit your taste. If you like it mild, use less red pepper flakes. For more heat, add more flakes. Always taste the marinade before adding the shrimp. This way, you can find your perfect flavor. Achieving Perfectly Cooked Shrimp Cook the shrimp for about 2-3 minutes on each side. Look for a pink and opaque color. Overcooking makes shrimp tough. Keep an eye on them, so they stay juicy and tender. Preventing Sticking on the Grill To avoid sticking, oil your grill grates before cooking. You can use a paper towel soaked in oil. Hold it with tongs and wipe down the grates. This simple step can help your skewers lift off easily. Pro Tips Marinate for Maximum Flavor: Allowing the shrimp to marinate for at least 30 minutes enhances the flavors. For even better results, marinate them for 1-2 hours. Choose the Right Skewers: If you're using wooden skewers, remember to soak them in water for at least 30 minutes to prevent burning on the grill. Don't Overcrowd the Skewers: Ensure that the shrimp are snug but not packed tightly to allow even cooking and to prevent steaming. Watch the Cooking Time: Shrimp cook quickly, so keep an eye on them. They should be pink and opaque in just 2-3 minutes per side to avoid overcooking. {{image_2}} To take your Lemon Garlic Shrimp Skewers to the next level, consider adding other herbs. Fresh basil or cilantro can add bright notes. You can also use dried herbs like oregano or thyme. Each herb brings a unique twist to the dish. Adjusting citrus elements can also enhance flavor. Try using lime juice in place of lemon juice. You can mix lemon and lime for a zesty kick. Adding a splash of orange juice can bring sweetness and depth. If you want to switch things up, try using other shellfish. Scallops or lobster pieces work great on skewers. They cook quickly and pair well with the lemon garlic mix. You can also substitute shrimp with fish. Firm fish like salmon or swordfish hold up well on the grill. Cut the fish into chunks, and follow the same steps for marinating and grilling. Each option gives you a different flavor experience. Refrigeration Tips You can keep uncooked shrimp skewers in the fridge. Place them in a sealed bag. They stay fresh for up to two days. Make sure you keep them cold. This helps maintain their flavor and texture. Freezing Instructions If you want to store them longer, freeze the skewers. Wrap them well in plastic wrap or foil. Place them in a freezer bag, and they can last up to three months. When you’re ready to cook, thaw them in the fridge overnight. Best Practices for Preservation After cooking, store leftover shrimp skewers in an airtight container. They will stay good for about three days in the fridge. To keep them fresh, let them cool before sealing. This helps avoid moisture buildup. Reheating Methods Reheat cooked skewers in several ways. You can use a microwave for quick warming. Heat on medium for about 30 seconds. For better taste, try using an oven. Preheat it to 350°F (175°C) and bake for about 10 minutes. This keeps the shrimp juicy and tasty. Yes, you can use frozen shrimp. To thaw them, place the shrimp in a bowl of cold water for about 15 to 20 minutes. Change the water if it gets warm. This keeps the shrimp from cooking. Once thawed, shrimp should feel firm and cold. Flavor can change a bit with frozen shrimp. They might lack some freshness compared to fresh shrimp. However, if you season them well, they can still taste great in this dish. You should marinate the shrimp for at least 30 minutes. This gives them good flavor. You can marinate up to 2 hours for a stronger taste. Do not exceed this time, as shrimp can become too soft. Great sides include rice, quinoa, or a fresh salad. These dishes balance the flavors of the shrimp. You can also serve them with garlic bread or grilled veggies for a complete meal. For meal pairing, consider a light white wine like Sauvignon Blanc. It matches well with the lemon and garlic in the skewers. This blog explained how to make Lemon Garlic Shrimp Skewers. We covered the main ingredients, seasonings, and skewer options. I provided step-by-step instructions for marinating and grilling the shrimp. Tips for flavor and cooking were shared, along with variations and storage advice. In closing, you can enjoy this dish in many ways. With a bit of prep, you can make a tasty meal that impresses everyone. Happy grilling!

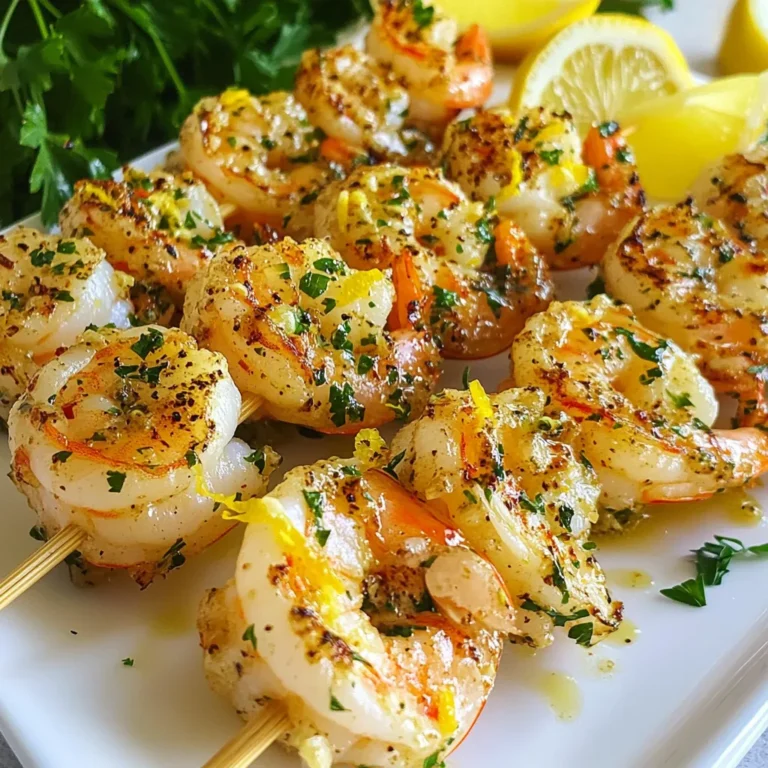
Lemon Garlic Shrimp Skewers Quick and Tasty Recipe

- 1 block (14 oz) firm tofu, pressed and cubed - 2 tablespoons cornstarch - 1 red bell pepper, sliced - 1 yellow bell pepper, sliced - 1 cup broccoli florets - 1/4 cup sweet chili sauce - 2 tablespoons soy sauce (low sodium) - 1 tablespoon sesame oil - Salt and pepper to taste - 2 green onions, chopped (for garnish) - Sesame seeds (for garnish) Gather these ingredients to make your sweet chili tofu stir fry. Each item plays a key role. The firm tofu gives this dish its protein base. Pressing it helps to remove excess water, which is key for crispiness. Cornstarch coats the tofu. It helps achieve that golden, crunchy texture when cooked. Fresh vegetables, like bell peppers and broccoli, add color, flavor, and nutrition. For the sauce, sweet chili sauce brings a nice blend of sweet and spicy. Low sodium soy sauce adds umami depth without being too salty. Lastly, sesame oil adds a nutty finish, making the dish shine. Do not forget the seasonings! Salt and pepper enhance the flavors. Green onions and sesame seeds are perfect for garnishing, adding freshness and crunch. Enjoy the vibrant mix of flavors and textures in this quick and flavorful meal! {{ingredient_image_1}} Start by pressing the tofu. This removes extra water, making it firmer. Slice the tofu into 1-inch cubes. Use paper towels to pat it dry. This step helps it get crispy. In a bowl, toss the tofu cubes with cornstarch. The cornstarch will give the tofu a nice crunch when cooked. Heat 1 tablespoon of vegetable oil in a large skillet or wok. Set the heat to medium-high. Add the tofu cubes into the hot oil. Cook the tofu for about 6 to 8 minutes. You want it golden and crispy on all sides. Once done, remove the tofu and set it aside. In the same skillet, add another tablespoon of vegetable oil. Next, toss in the minced garlic and grated ginger. Stir this for about 30 seconds. You want it fragrant but not burnt. Now, add the sliced bell peppers and broccoli florets. Cook these veggies for about 5 minutes. They should be tender-crisp when done. Reduce the heat to medium. Return the crispy tofu to the skillet. Pour in the sweet chili sauce and soy sauce. Gently toss everything to coat well. Cook for an additional 2 to 3 minutes. This lets the sauce thicken and the flavors blend. Finally, drizzle sesame oil over the stir fry. Season with salt and pepper to taste. Toss again to mix well. Enjoy your sweet chili tofu stir fry hot! Pressing tofu is key. It helps remove extra water. This makes the tofu firm and helps it fry better. To press tofu, wrap it in a clean towel. Place a heavy pan on top for about 15 minutes. This removes a lot of water. For a crispy exterior, coat the tofu cubes in cornstarch. This creates a nice crunch. Make sure the cubes are dry before coating. Fry the tofu in hot oil. Let it cook without moving for a few minutes. This helps it brown nicely. Use a large skillet or wok for stir frying. A non-stick surface works well. You want even heat and space for the food. High heat is best for stir frying. It cooks food quickly and keeps it crisp. When you heat the pan, add oil first. Let the oil get hot before adding the tofu. This helps achieve a nice sear. Don’t overcrowd the pan; cook in batches if needed. To boost flavor, add spices like black pepper or chili flakes. These add a nice kick to the dish. You can also add garlic and ginger for extra warmth. Pair the stir fry with jasmine rice or quinoa. Both complement the sweet chili sauce well. You can also serve it with a fresh salad for a crunchy contrast. Pro Tips Press Tofu Properly: Ensure you press the tofu for at least 15-20 minutes to remove excess moisture, which helps achieve a crispy texture when cooked. Use Fresh Ingredients: Fresh garlic and ginger enhance the flavor of the dish significantly, so opt for fresh over pre-minced options whenever possible. Customize Vegetables: Feel free to swap in your favorite vegetables or whatever you have on hand, such as snap peas or carrots, for variety and color. Adjust Sauce to Taste: Start with less sweet chili sauce and soy sauce, then gradually add more to suit your taste preference for sweetness and saltiness. {{image_2}} You can switch up the veggies in your stir fry. Try adding sliced carrots or snap peas. They bring color and crunch. You can also use seasonal produce. When peppers or broccoli are out of season, look for what's fresh. Zucchini or bok choy can add a nice twist too. If you want to change the protein, tempeh works great. It’s nutty and hearty. You can also use chicken if you prefer meat. This way, you can still enjoy a tasty dish. For a vegan option, stick with tofu or tempeh. Both are packed with protein. You can change the sweetness of the sauce. If you like it sweeter, add more sweet chili sauce. To spice it up, add chili flakes or sriracha. This will give your stir fry a nice kick. Play around with the sauce to find your perfect flavor! To store leftovers, let the sweet chili tofu stir fry cool down first. Place it in an airtight container. This keeps the flavors fresh. Store it in the fridge for up to three days. When reheating, use a skillet over low heat. This helps maintain texture and flavor. Stir often to heat evenly. You can also use a microwave. Heat it in short bursts and stir in between. This keeps your meal from getting soggy. Yes, you can freeze sweet chili tofu stir fry. Make sure it cools completely before freezing. Use a freezer-safe container or bag. It can last up to three months in the freezer. To safely thaw, move it to the fridge overnight. When ready to eat, reheat it in a skillet. Add a splash of water or oil if needed. This helps the stir fry regain its moisture. Remember, freezing may change the texture of the tofu slightly, but it still tastes great! To make tofu crispy in stir fry, press the tofu first. Remove excess water by placing a heavy object on it for about 15 minutes. Then, cube the tofu. Toss it with cornstarch to coat each piece. This coating helps create a crunchy texture. Heat oil in a pan until hot, then fry the tofu for 6-8 minutes. Cook it until golden brown on all sides. This method ensures a tasty, crispy tofu base for your stir fry. Yes, you can use frozen vegetables for stir fry. They are quick and easy to use. Just add them straight from the freezer into your hot pan. They may need a minute longer to cook than fresh ones. Keep in mind that frozen veggies may release more water. This can slightly change the texture of your dish. Adjust your cooking time to ensure they are tender-crisp. Sweet chili tofu stir fry pairs well with many sides. Serve it over fluffy jasmine rice or quinoa for a filling meal. You can also add a simple salad or steamed greens for extra veggies. Try serving it with crispy spring rolls for a fun touch. These sides complement the sweet and spicy flavors in the stir fry. Cooking tofu in a stir fry takes about 10-12 minutes total. First, you fry the tofu for 6-8 minutes until it is crispy. After that, you mix it with vegetables and sauces for another 2-3 minutes. This quick method keeps your dish fresh and flavorful. It’s a fast way to enjoy a healthy meal! This blog post showed you how to create a tasty sweet chili tofu stir fry. We covered key ingredients, step-by-step cooking, and tips for perfect texture. You can easily customize this dish with different vegetables and proteins. Finally, I shared storage tips so your leftovers stay fresh. Enjoy the flavors and make this recipe your own! Cooking can be fun and rewarding, so don’t hesitate to experiment!

Sweet Chili Tofu Stir Fry Quick and Flavorful Meal

To make the soft dough, you need: - 3 cups all-purpose flour - 2 tablespoons granulated sugar - 1 packet (2 ¼ teaspoons) active dry yeast - ½ cup warm milk - ¼ cup melted unsalted butter - 1 large egg - ½ teaspoon salt The dough is the base of your rolls. It should be soft and slightly sticky. Using warm milk helps activate the yeast, making your rolls fluffy. For the tasty filling, gather: - 1 large apple (peeled, cored, and diced) - ¼ cup brown sugar - 1 tablespoon cinnamon - ¼ cup chopped pecans (optional) The apple adds moisture and flavor. Brown sugar gives a nice caramel note. Cinnamon adds warmth. Pecans add crunch, but you can skip them for a simpler roll. To create the sweet caramel sauce, you will need: - ½ cup brown sugar - ¼ cup unsalted butter - ¼ cup heavy cream - ½ teaspoon vanilla extract This sauce makes your rolls extra special. It melts into the rolls as they bake, creating a gooey, sweet layer. Use fresh ingredients for the best flavor. {{ingredient_image_1}} To start, grab a mixing bowl. Pour in the warm milk, sugar, and yeast. Let this mix sit for about five minutes. You want it to get frothy. This shows that the yeast is alive. Next, add the melted butter, the egg, and the salt to the mix. Gradually stir in the flour one cup at a time. Keep mixing until a soft dough forms. Now it’s time to knead! On a floured surface, knead the dough for five to seven minutes. You want it to be smooth and elastic. After that, place the dough in a greased bowl. Cover it with a clean towel and let it rise in a warm spot. Allow it to rise for one hour, or until it doubles in size. While the dough rises, let’s prepare the filling. Take a medium bowl and mix the diced apple with brown sugar and cinnamon. If you like nuts, add the chopped pecans too. Set this mixture aside. The apple will soak up the sweet spices, making it delicious when baked. Once the dough has risen, punch it down gently. Roll it out on a floured surface into a rectangle, about 12 by 18 inches. Spread the apple mixture evenly over the dough. Now, roll the dough tightly from the long side to form a log. It’s important to roll it tight for fluffy rolls. Cut the log into twelve equal slices. Next, grease a 9 by 13-inch baking dish and arrange the rolls inside. Leave some space between each one. Cover them and let them rise for another 30 minutes. Preheat your oven to 350°F (175°C) while the rolls rise. While waiting, let’s make the caramel sauce. In a saucepan, combine butter, brown sugar, heavy cream, and vanilla extract. Stir it over medium heat until the mix is smooth. After the rolls rise, pour the caramel sauce over them. Bake for 25 to 30 minutes. Look for a golden brown color on top. Once done, let them cool slightly before serving. Drizzle any leftover caramel from the dish over the rolls for extra sweetness. To get soft and fluffy dough, start with warm milk. This helps the yeast wake up. Mix the warm milk, sugar, and yeast. Let it sit for about five minutes. You will see bubbles forming. This means the yeast is active. When mixing, gradually add flour. Do this one cup at a time. If the dough feels sticky, add a bit more flour. Knead it for five to seven minutes. This builds gluten, which gives the rolls structure. After kneading, let the dough rise in a warm spot. Cover it with a towel. Wait until it doubles in size, about one hour. Using the right apple makes a big difference in flavor. I recommend using tart apples like Granny Smith. They balance perfectly with the sweet caramel and brown sugar. Honeycrisp apples also work well. They add a sweet crunch. Avoid soft apples, as they can turn mushy when baked. Remember to peel and core your apples before dicing them. This ensures a nice bite in every roll. To drizzle caramel perfectly, start with a smooth sauce. Make it by mixing butter, brown sugar, and heavy cream. Heat it gently until it melts together. Let it cool slightly before drizzling. Use a spoon or squeeze bottle for control. If you want a fancy look, move your hand in a circular motion while drizzling. This adds a beautiful touch to your rolls. For extra caramel, pour any leftover sauce from the baking dish over the top. It makes the rolls even more delicious! Pro Tips Use Fresh Apples: For the best flavor and texture, choose a firm, tart apple variety such as Granny Smith or Honeycrisp. Fresh apples will hold their shape during baking and provide a nice balance with the sweetness of the caramel. Perfect Dough Consistency: The dough should be soft and slightly sticky. If it feels too dry, add a little more milk, a tablespoon at a time, until the desired consistency is reached. This will ensure your rolls are fluffy and tender. Caramel Sauce Timing: For a richer flavor, make the caramel sauce ahead of time and let it cool slightly before pouring it over the rolls. This will allow the sauce to thicken a bit, creating a gooier texture when baked. Storage Tips: To keep your caramel apple cinnamon rolls fresh, store them in an airtight container at room temperature for up to 2 days. For longer storage, refrigerate them and reheat in the microwave before serving. {{image_2}} You can enhance your caramel apple cinnamon rolls by adding nuts or dried fruits. Chopped pecans add a nice crunch. Walnuts work well too. If you prefer dried fruits, try raisins or cranberries. Just mix them into your apple filling. This adds flavor and texture. Nuts and dried fruits can make each bite more exciting. If you need a gluten-free option, you can still enjoy these rolls! Use a gluten-free flour blend instead of all-purpose flour. Make sure the blend has xanthan gum for better texture. You may need to adjust the liquid slightly. Keep an eye on the dough as you mix. It should feel soft and easy to handle. Short on time? No problem! You can use store-bought dough for your rolls. Look for ready-made pizza or crescent dough. Follow the same steps for filling and baking. This option saves time and effort. You still get to enjoy those warm, gooey cinnamon rolls with caramel and apples. You can store leftover rolls in an airtight container. Let them cool first. Keep them at room temperature for up to three days. If you want them fresh longer, place them in the fridge. They can last about a week in the fridge. Just make sure they are sealed well to keep moisture in. To reheat the rolls, preheat your oven to 350°F (175°C). Place the rolls on a baking sheet. Cover them with aluminum foil to keep them soft. Heat for about 10-15 minutes. You can also use a microwave. Heat one roll at a time for about 20-30 seconds. Check to see if they are warm enough for you. You can freeze these rolls too. After baking, let them cool completely. Place them in a freezer-safe bag or container. They can last for up to three months in the freezer. When ready to eat, let them thaw in the fridge overnight. Reheat them in the oven or microwave as mentioned above. This keeps them tasting fresh and delicious! Yes, you can make these rolls ahead of time. Prepare the dough and filling, then assemble the rolls. Place them in the baking dish and cover. You can refrigerate them overnight. Bake them the next day. This saves time and works well for brunch. A tart apple works best for these rolls. I recommend using Granny Smith apples. They hold their shape and add a nice balance of sweetness and tartness. You can also use Honeycrisp for a sweeter option if you prefer. To thicken your caramel sauce, cook it longer over medium heat. Stir it often to prevent burning. You can also add a bit more brown sugar. A touch of cornstarch mixed with water can help thicken it as well. Yes, you can make substitutions. Use almond milk instead of regular milk. You can swap butter for coconut oil if you want a dairy-free option. For the apples, feel free to mix in pears or berries. Just keep the same quantity to maintain the texture and flavor. This blog post covered everything you need for delicious caramel apple cinnamon rolls. We explored the key ingredients, from dough and filling to the sweet caramel sauce. I shared step-by-step instructions to simplify the baking process. Plus, I offered valuable tips for your rolls’ success. Don't forget the fun variations to make it your own. Store leftovers properly and enjoy them later. With these insights, you’re ready to create a treat that your family will love! Happy baking!

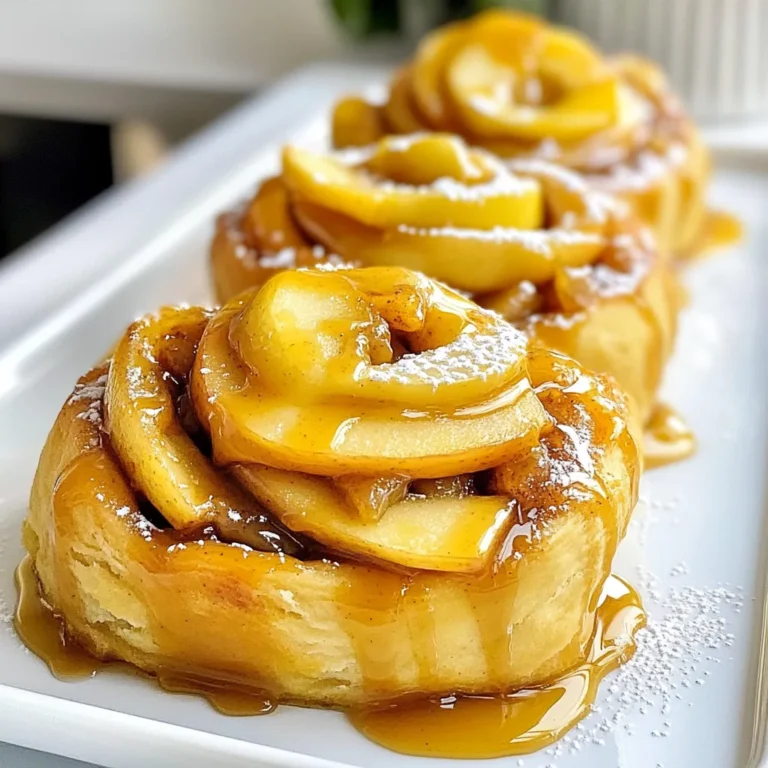
Caramel Apple Cinnamon Rolls Sweet and Easy Recipe

- 1 lb ground chicken - 2 tablespoons sesame oil - 2 cloves garlic, minced - 1-inch piece ginger, grated - 1/4 cup soy sauce (or tamari for gluten-free) - 1 tablespoon rice vinegar - 1 tablespoon honey - 1/2 cup bell peppers, finely diced (red and yellow for color) - 1/2 cup carrots, shredded - 1/4 cup green onions, sliced - 1/4 cup water chestnuts, chopped - 1 tablespoon sesame seeds - Salt and pepper to taste - 1 head of butter or romaine lettuce, leaves separated To make tasty sesame chicken lettuce wraps, gather these ingredients. Each one adds flavor and texture. Ground chicken forms the base. Sesame oil brings a nutty taste. Garlic and ginger offer freshness. Soy sauce or tamari gives depth. Rice vinegar adds a bit of tang. Honey balances the flavors. Bell peppers and carrots add color and crunch. Green onions provide a mild onion taste. Water chestnuts add a nice crunch. Don’t forget the sesame seeds! They add a lovely finish. Finally, choose butter or romaine lettuce for the wraps. These leaves hold the filling well. They also add a refreshing crunch. Having all these ingredients ready makes cooking much easier! {{ingredient_image_1}} 1. Start by heating 2 tablespoons of sesame oil in a large skillet over medium heat. 2. Mince 2 cloves of garlic and grate a 1-inch piece of ginger. Add them to the hot oil. 3. Sauté the garlic and ginger for about 30 seconds until you smell their great aroma. 4. Next, add 1 pound of ground chicken to the skillet. Break it apart as it cooks. 5. Cook until the chicken is browned and no longer pink. This should take about 5 to 7 minutes. 1. In a small bowl, whisk together the sauce ingredients: 1/4 cup of soy sauce, 1 tablespoon of rice vinegar, and 1 tablespoon of honey. 2. Once the chicken is ready, pour this sauce over the cooked chicken. Stir well to mix everything together. 1. Now it's time to add some color and crunch. Incorporate 1/2 cup of finely diced bell peppers, 1/2 cup of shredded carrots, 1/4 cup of chopped water chestnuts, and 1/4 cup of sliced green onions into the chicken mixture. 2. Cook for another 2 to 3 minutes until the veggies are slightly tender yet still crisp. 3. Season the mixture with salt and pepper to taste. Finally, sprinkle 1 tablespoon of sesame seeds over the top. Stir well to combine everything. - Use fresh ingredients to get the best flavor. Fresh chicken and veggies taste better. - For the right texture, chop veggies finely. This allows them to cook evenly. - Serve the wraps on a colorful platter. This makes them look more inviting. - Garnish with sesame seeds and sliced green onions. They add a nice touch and flavor. - Avoid overcooking the chicken. It should be browned but still juicy. - Don't use wilted lettuce leaves. Fresh, crisp leaves are key for good wraps. Pro Tips Use Fresh Ingredients: Fresh vegetables and herbs enhance the flavor of the dish, making your wraps vibrant and delicious. Adjust Spice Level: For extra heat, consider adding chili flakes or sriracha to the chicken mixture before serving. Perfect Lettuce Leaves: Choose leaves that are sturdy yet flexible, like butter or romaine, to hold the filling without tearing. Make Ahead: Prepare the chicken mixture in advance and store it in the refrigerator for a quick and easy meal later. {{image_2}} You can switch things up by using different proteins. Ground turkey works well instead of chicken. It has a mild taste and cooks just like chicken. Tofu is another great choice for a plant-based option. Just crumble it and cook until golden. If you want a seafood twist, try adding shrimp. Cook the shrimp until pink and tender for a fresh flavor. You can make these wraps vegetarian or vegan easily. Instead of chicken, use plant-based meat alternatives. These can mimic the texture and flavor of chicken well. For a veggie-packed filling, try adding mushrooms, zucchini, or even chopped spinach. These add great taste and color to your wraps. To make your wraps spicy, add chili sauce or sriracha to the filling. This will give your wraps a nice kick. You can also mix in extra seasonings like five-spice powder or garlic powder for unique tastes. Fresh herbs like cilantro or basil can enhance the flavor, too. To keep your sesame chicken lettuce wraps fresh, refrigerate them quickly. Place the filling in an airtight container. Wrap the lettuce leaves separately to prevent wilting. Store in the fridge for up to three days. When you want to eat them again, reheat the filling in a skillet over low heat. This helps keep the chicken moist. Avoid microwaving, as it can make the filling dry. You can freeze the filling for later use. This is better than freezing the entire wraps. The lettuce will get soggy when thawed. Use a freezer-safe container or bag. Squeeze out as much air as possible to prevent freezer burn. The filling can last up to three months in the freezer. When you're ready to eat, thaw it in the fridge overnight before reheating. Leftover sesame chicken wraps last about three days in the fridge. Look for changes in color or smell as signs they are no longer good. If the chicken looks dull or smells sour, it’s best to toss it. Always trust your senses when it comes to food safety. Yes, you can prepare the filling ahead of time. Cook the chicken mixture and cool it. Store it in the fridge for up to two days. When you are ready to eat, just spoon it into the lettuce leaves. This makes a quick meal! These wraps pair well with rice or noodles. You can also serve them with a side of fresh veggies. A light dipping sauce, like soy sauce or a spicy chili sauce, adds extra flavor. To make this dish gluten-free, use tamari instead of soy sauce. Tamari has a similar taste but is safe for those avoiding gluten. Always check labels to ensure all ingredients are gluten-free. Absolutely! You can adjust the sauce to fit your taste. Add more honey for sweetness or more vinegar for tang. A dash of hot sauce can spice things up too! Feel free to experiment with flavors. Butter lettuce is a great choice for wraps. Its leaves are soft and flexible, making them easy to fold. Romaine lettuce works well too, as it has a nice crunch. Choose the type you enjoy the most! You learned how to make tasty sesame chicken lettuce wraps. We covered the essential ingredients and step-by-step instructions. Cooking tips helped you avoid common mistakes while ensuring great flavor. We also explored variations to suit different diets and preferences. Now, you have the tools to create delicious wraps at home. Enjoy experimenting with different flavors and ingredients. Happy cooking!

Savory Sesame Chicken Lettuce Wraps for Easy Meal

You will need 2 cups of fresh raspberries. These berries bring a bright red color and sweet-tart flavor. They add a lovely taste to your popsicles. Look for ripe berries, as they will be sweeter. You can wash them gently under cool water before using. Use 1 cup of freshly squeezed lemon juice, which is about 5 to 6 lemons. Fresh juice gives a bright and zesty flavor. It balances the sweetness of the raspberries. Always taste your juice before mixing; it should be tart but not bitter. For sweetness, add 1/2 cup of honey or agave syrup. You can adjust this based on your taste. If you like it sweeter, add more honey. You will also need 1 cup of water to blend everything smoothly. A teaspoon of lemon zest adds extra citrus flavor. Don’t forget a pinch of salt; it enhances the overall taste. If you want a fizzy twist, add 1 cup of sparkling water after blending. {{ingredient_image_1}} Start by placing the fresh raspberries, lemon juice, water, honey, lemon zest, and a pinch of salt into your blender. Blend everything until smooth. This step is crucial because it combines all the flavors. If you want it smooth, consider straining the mixture through a fine mesh sieve. This will remove the seeds and give you a lovely texture. After blending, taste the mixture. If it’s too tart for your liking, add more honey or agave syrup. Blend again briefly to mix in the extra sweetness. You can adjust it as per your taste. This step ensures you enjoy a perfectly sweet treat. Now it’s time to pour the mixture into popsicle molds. Leave a little space at the top for expansion as it freezes. This prevents spills and ensures a nice shape. If you want a fizzy twist, gently stir in some sparkling water before pouring. Insert the popsicle sticks and place them in your freezer. Let them freeze for at least six hours or until they are solid. Enjoy the wait; your treat will be worth it! To get a smooth texture in your popsicles, blend the ingredients well. I like to use a high-speed blender. This helps break down the raspberries completely. If you don’t mind some seeds, you can skip the straining step. However, if you want it super smooth, strain it through a fine mesh sieve. This will catch those pesky seeds. If you want a fizzy twist, add sparkling water. After blending, gently stir in one cup of sparkling water. This gives your popsicles a light, bubbly feel. The fizz makes them more fun and refreshing on hot days. Just be careful not to stir too hard; you don’t want to lose all the bubbles! Proper freezing is key for great popsicles. Pour the mixture into molds, leaving space at the top for expansion. This prevents your popsicles from overflowing. Freeze them for at least six hours. To remove the popsicles, run warm water over the mold for a few seconds. This helps loosen them up without breaking. Enjoy your cool summer treat! Pro Tips Fresh Raspberries: Using fresh raspberries will give your popsicles a vibrant flavor and color. Avoid frozen raspberries for the best results. Lemon Zest Importance: Don't skip the lemon zest! It adds a fragrant and zesty depth to the flavor that enhances the overall taste of the popsicles. Adjust Sweetness: Taste the mixture before freezing! You can always adjust the sweetness by adding more honey or agave syrup based on your preference. Fizzy Variation: If you want a fun twist, try adding sparkling water just before pouring into molds for a refreshing fizzy popsicle experience! {{image_2}} You can mix other fruits into your raspberry lemonade popsicles. Strawberries or blueberries work well. Just blend them with the raspberries for a new taste. You can also try mango for a tropical twist. Each fruit adds its own flavor and color. This makes your popsicles more fun and exciting! Adding herbs can give your popsicles a fresh kick. Mint is a great choice; it pairs nicely with raspberries. Simply blend a few mint leaves with the other ingredients. Basil is another option; it adds an earthy taste. Be careful not to add too much. A little goes a long way! If you want to change the sweetness, there are many options. Maple syrup is a great substitute for honey. You can also use agave syrup if you prefer it. For a low-calorie choice, try stevia or monk fruit sweetener. Each sweetener gives a different flavor, so feel free to experiment! To keep your raspberry lemonade popsicles fresh, follow these steps. First, pour your mixture into popsicle molds. Leave a small gap at the top. This space allows for expansion when freezing. Cover the molds tightly with plastic wrap. This prevents ice crystals from forming. If you have extra popsicle mixture, store it in an airtight container in the fridge for up to 2 days. These popsicles can last in the freezer for about 2 months. After that, their flavor and texture may change. To enjoy the best taste, eat them within this time. If you notice freezer burn, toss them out. Always check for any off smells or flavors before serving. When you’re ready to eat, run warm water over the mold for a few seconds. This helps them slide out easily. You can also let them sit at room temperature for about 5 minutes. Avoid using a microwave, as it can melt them unevenly. Enjoy your refreshing treat after thawing! Yes, you can use frozen raspberries! They work well in this recipe. Just let them thaw slightly before blending. This helps them blend smoothly. Frozen raspberries can also make your popsicles extra cold and refreshing. If you use frozen ones, you might need to adjust the sweetness. Taste the mixture and add more honey or agave if needed. To make these popsicles vegan, simply swap honey for agave syrup. Agave syrup is a great plant-based sweetener. It gives the same sweetness without using animal products. You can also use maple syrup if you prefer that flavor. Just remember to adjust the amount based on your taste. If you want to substitute honey, there are several options. Agave syrup is the most common choice. It has a mild taste and is vegan. Maple syrup is another great option. It adds a unique flavor. You can also use stevia or coconut sugar, but adjust the amount since they are sweeter. This article showed you how to make tasty raspberry popsicles. We covered the best ingredients like fresh raspberries and lemon juice. You learned simple steps to blend, sweeten, and pour your pops into molds. I shared tips for a smooth texture and how to freeze them right. We also explored fun variations with other fruits and herbs. Remember, you can easily store your pops and enjoy them later. With this guide, you can make delicious popsicles that everyone will love. Now, get creative in your kitchen!

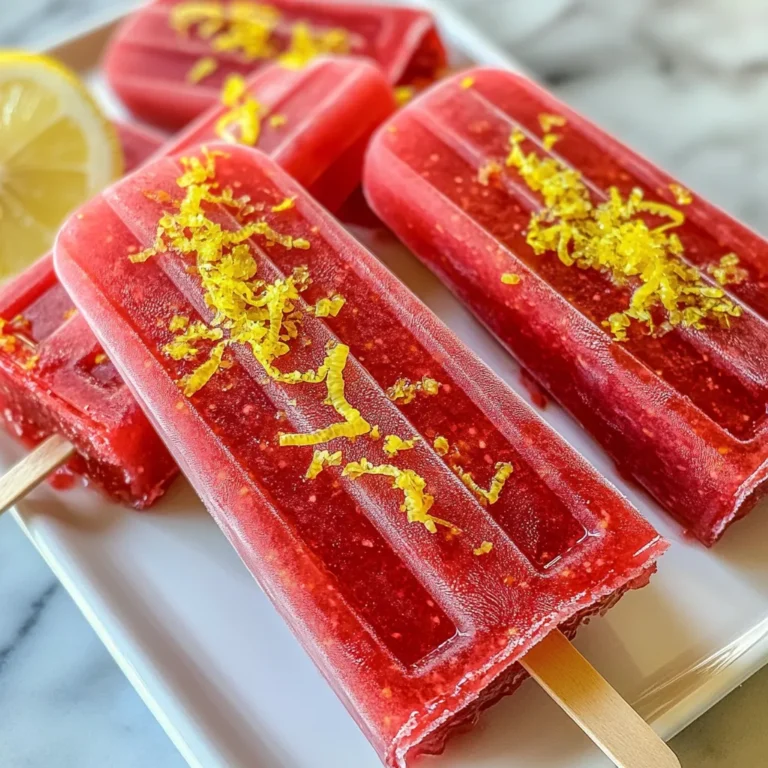
Raspberry Lemonade Popsicles Refreshing Summer Treat

- 1 can (15 oz) chickpeas, drained and rinsed - 1 cup cherry tomatoes, halved - 1 cucumber, diced - 1 bell pepper (any color), diced - 1/2 red onion, finely chopped - 1/4 cup Kalamata olives, pitted and sliced - 1/4 cup feta cheese, crumbled (optional) - 1/4 cup fresh parsley, chopped Chickpeas are the star of this dish. They are packed with protein and fiber. Fresh vegetables add crunch and color. Cherry tomatoes bring sweetness, while cucumbers cool the mix. Bell peppers add a sweet bite. Red onion gives a sharp taste. Kalamata olives add a salty kick. Feta cheese, if used, adds creaminess. Fresh parsley brightens the salad. - 3 tablespoons olive oil - 2 tablespoons lemon juice - 1 teaspoon dried oregano - Salt and pepper to taste The dressing is simple yet tasty. Olive oil provides a rich base. Lemon juice adds zing and freshness. Dried oregano gives a classic Mediterranean flavor. Use salt and pepper to enhance the taste. - Serve the salad chilled or at room temperature. - Pair it with pita bread or grilled chicken for a full meal. - Enjoy it as a light lunch or a side dish at dinner. This salad looks great in a bowl. The colors pop, making it inviting. You can add extra olives or cheese for a twist. {{ingredient_image_1}} Combining the ingredients Start by rinsing and draining one can of chickpeas. Place the chickpeas in a large mixing bowl. Next, add one cup of halved cherry tomatoes, one diced cucumber, and one diced bell pepper. Toss in half a finely chopped red onion and a quarter cup of sliced Kalamata olives. If you like, fold in a quarter cup of crumbled feta cheese and a quarter cup of chopped fresh parsley. Mix everything gently to combine. Making the dressing In a small bowl, whisk together three tablespoons of olive oil, two tablespoons of lemon juice, and one teaspoon of dried oregano. Add salt and pepper to taste. This dressing will brighten up the salad and bring all the flavors together. Tossing the salad Pour the dressing over the salad ingredients. Use a spatula to toss everything gently. Make sure every piece is coated in that tasty dressing. This step is key to ensure every bite is full of flavor. Allowing to rest After tossing, let the salad sit for about ten minutes. This resting time helps the flavors meld together. It also allows the vegetables to soak up the dressing, making each bite even more delicious. Presentation tips When ready to serve, you can plate the salad in a large bowl. For a nice touch, sprinkle some extra feta and parsley on top. You can also serve it in individual bowls for a more personal feel. Recommended serving size This recipe serves four people. It makes a great side dish or a light main meal. Enjoy it with some crusty bread or as part of a picnic spread. Fresh ingredients make a big difference. Use ripe cherry tomatoes and crisp cucumbers. Look for bright bell peppers and fresh parsley. Rinse your chickpeas well to remove extra salt. This keeps your salad light and tasty. When mixing, use a large bowl. Gently fold in the ingredients. This helps keep the veggies whole. You want nice bites, not mush. Feel free to add or swap ingredients. You can use other beans like black beans or kidney beans. Add some avocado for creaminess. If you like heat, toss in jalapeños. They give a nice kick! Adjust your seasonings to match your taste. Add more lemon juice for tang. Or sprinkle in extra dried oregano for more flavor. You can make this salad ahead of time. It tastes even better after sitting for a while. Let the flavors meld together in the fridge. Store your salad in an airtight container. It lasts about 3 days. If you want to keep it longer, store dressings separately. This keeps your salad fresh and crunchy. Pro Tips Use Fresh Ingredients: Whenever possible, opt for fresh vegetables and herbs to enhance the flavor and nutritional value of your salad. Chill Before Serving: For an even more refreshing taste, refrigerate the salad for 30 minutes before serving. This allows the flavors to blend beautifully. Customize Your Salad: Feel free to add other ingredients like avocado, arugula, or even grilled chicken for additional flavor and protein. Keep it Vegan: If you're vegan, simply omit the feta cheese or replace it with a plant-based alternative to keep the dish dairy-free. {{image_2}} You can change the base of your Mediterranean chickpea salad. Quinoa or couscous works great. They bring a nice texture and flavor. If you want a different twist, try using other beans. Black beans or kidney beans add a unique taste. Just make sure to drain and rinse them, too. To boost the flavor, add spices or herbs. Try cumin or fresh basil for a twist. You can also mix in different cheeses. Goat cheese or mozzarella can make this salad even tastier. Just remember to crumble or slice them small for even distribution. You can adapt this salad for each season. In summer, add fresh corn or ripe peaches. These ingredients make it light and refreshing. For fall, consider roasted sweet potatoes or butternut squash. They add warmth and richness to the dish. Embrace what’s fresh and in season for the best flavors! To keep your Mediterranean chickpea salad fresh, use the right storage methods. Place the salad in an airtight container. This helps keep air out and flavors in. Glass containers work best, but BPA-free plastic ones are fine too. Make sure the container is clean and dry before adding your salad. How long can it stay in the fridge? When stored well, your salad can last up to three days. After that, it may lose its crunch and taste. Look for signs of spoilage. If the salad smells sour or the veggies look mushy, it's time to toss it. Always trust your nose and eyes! Can you freeze chickpea salad? Freezing is not the best choice for this salad. It can change the texture of the veggies and make them mushy. However, you can freeze the components. For example, freeze the chickpeas and the dressing separately. To freeze, place them in freezer-safe bags. Squeeze out air and seal tightly. When ready to use, thaw in the fridge overnight. Mix everything fresh when you're ready to enjoy! To make a vegan version, simply leave out the feta cheese. This salad still tastes great without it. You can add extra olives or avocado for creaminess. For dressings, try using tahini or a mix of olive oil and lemon juice. Both options keep the salad fresh and tasty. Yes, you can make this salad ahead of time! For best results, prepare the salad and store it in the fridge. This keeps it cool and crisp. The flavors mix well when it sits. I recommend letting it chill for at least an hour before serving. This allows the taste to deepen. Chickpeas pack a punch with protein and fiber. They help keep you full and satisfied. One cup offers about 15 grams of protein and 12 grams of fiber. They also provide vitamins and minerals, like iron and folate. Eating chickpeas can support heart health and digestion too. This blog post guided you through making a tasty Mediterranean chickpea salad. We explored the main ingredients, from chickpeas to fresh veggies. You learned how to prepare the dressing and assemble the salad. Tips helped you enhance flavors and keep it fresh for longer. Incorporating variations can add excitement to your meals. Remember, meal prep makes life easier. Enjoy creating your own versions, and don't be afraid to experiment. With these steps, you’ll serve a delicious dish that can impress anyone!

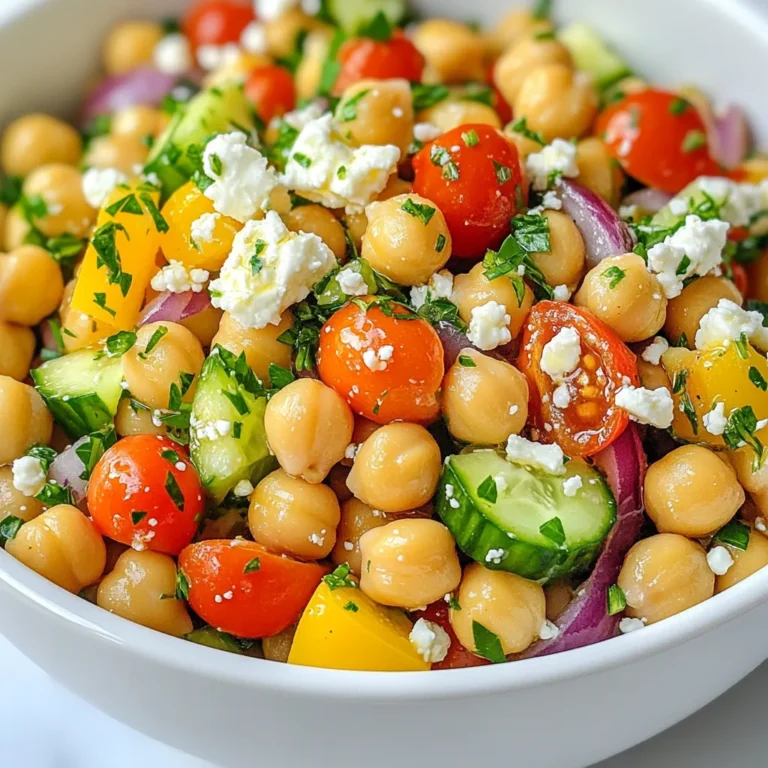
Mediterranean Chickpea Salad Tasty and Nutritious Dish

- 1 lb large shrimp, peeled and deveined - 1 cup long-grain white rice - 2 cups chicken or vegetable broth - 1 red bell pepper, diced - 1 green bell pepper, diced - 1 small onion, finely chopped - 3 cloves garlic, minced - 2 tablespoons Cajun seasoning - 1 tablespoon olive oil - 1 tablespoon lemon juice - 2 green onions, sliced - Fresh parsley, chopped - Salt and pepper to taste In this recipe, the main ingredients come together to create bold flavors. The shrimp, which are the star, should be large and fresh. Use long-grain white rice for the best texture. The broth makes the rice rich and tasty. Diced bell peppers add color and crunch. I prefer a mix of red and green for a fun look. Onions and garlic bring depth to the dish. Cajun seasoning gives it a nice kick. Olive oil keeps the shrimp and veggies from sticking. Lemon juice brightens the flavor. Garnishing with green onions and parsley makes it look fresh and inviting. Salt and pepper help bring all the flavors together. Each ingredient plays a role, making this dish tasty and enjoyable. {{ingredient_image_1}} 1. Bring the chicken broth to a boil in a medium saucepan. 2. Add the long-grain white rice, then reduce the heat to low. 3. Cover and simmer for 18 to 20 minutes until fluffy. 4. Let the rice sit, covered, for 5 minutes to enhance fluffiness. 1. While the rice cooks, heat olive oil in a large skillet. 2. Add the finely chopped onion and minced garlic. 3. Sauté until the onion turns translucent, about 2 to 3 minutes. 4. Toss in the diced red and green bell peppers. 5. Cook for another 3 to 4 minutes, until they soften. 1. Sprinkle the Cajun seasoning over the shrimp. 2. Add the shrimp to the skillet and cook for 3 to 4 minutes. 3. Stir until the shrimp turn pink and opaque. 4. Drizzle in lemon juice, and add salt and pepper to taste. 1. Fluff the cooked rice using a fork. 2. Divide the rice evenly into serving bowls. 3. Top each bowl with the sautéed shrimp and vegetables. 1. Sprinkle sliced green onions and chopped parsley on top. 2. Serve each bowl with a lemon wedge for extra flavor. To make fluffy rice, start by measuring your rice and broth. For every cup of rice, use two cups of broth. Bring the broth to a boil before adding the rice. Lower the heat and cover it tightly. Cook for 18 to 20 minutes. After that, let it sit for 5 minutes. This resting time helps the rice absorb any leftover liquid. Fluff it gently with a fork before serving. You can make your own Cajun seasoning at home. Mix one tablespoon of paprika, garlic powder, and onion powder. Add half a tablespoon of cayenne pepper, dried thyme, and oregano. This blend gives your dish a tasty kick. Adjust the spice level to suit your taste. Store any extra seasoning in a jar for later use. To know when shrimp are cooked, watch for their color. They should turn bright pink and opaque. This usually takes about 3 to 4 minutes. Avoid overcooking, as shrimp can become tough. If you’re unsure, cut one in half to check. It should be white and firm inside. Cooking shrimp perfectly makes your meal shine. Pro Tips Fresh Shrimp is Key: For the best flavor and texture, use fresh shrimp instead of frozen. If using frozen, ensure they are fully thawed and patted dry before cooking. Adjust the Spice Level: If you prefer a milder dish, reduce the amount of Cajun seasoning or use a milder blend. You can always add more to taste! Rinse the Rice: Rinsing the rice before cooking helps remove excess starch, resulting in fluffier grains that don’t stick together. Customize Your Veggies: Feel free to add other vegetables like zucchini or corn to the mix for extra color and nutrition. Just adjust cooking times accordingly. {{image_2}} You can switch the shrimp for chicken or tofu. Chicken is a great choice if you want a heartier dish. Just cut it into bite-sized pieces. Sauté it the same way you cook the shrimp. Tofu is perfect for a plant-based meal. Use firm tofu and press it to remove water. Cut it into cubes and cook until golden. Feel free to add more vegetables for extra nutrition. Zucchini works well in this dish. Slice it into half-moons and toss it in with the bell peppers. Corn is also a great option. Use fresh, frozen, or canned corn. This adds sweetness and crunch to your bowl. You can try different rice options for variety. Brown rice is a healthier choice, packed with fiber. It takes a little longer to cook, so adjust the broth and timing. Quinoa is another great swap. It cooks quickly and boosts protein. Just rinse it before cooking, then follow the same steps for rice. To store leftovers, let the dish cool first. Place the shrimp and rice in an airtight container. This keeps them fresh for up to three days. Do not mix everything together yet. This helps to maintain the flavors and textures. When you’re ready to eat, the best way to reheat is on the stove. Use a non-stick skillet over low heat. Add a splash of water or broth to keep it moist. Stir gently until everything is heated through. Avoid the microwave, as it may overcook the shrimp. You can freeze Cajun shrimp rice bowls if you want to save some for later. First, let them cool completely. Place the shrimp and rice in a freezer-safe bag or container. Make sure to remove as much air as possible. They can stay frozen for up to three months. To thaw, move them to the fridge overnight before reheating. Yes, you can prepare Cajun Shrimp Rice Bowls ahead. Cook the rice and shrimp separately. Store them in airtight containers. Keep them in the fridge for up to three days. Reheat the rice and shrimp when ready to serve. This method keeps everything fresh. You can serve Cajun Shrimp Rice Bowls with a side salad or crusty bread. A fresh green salad balances the dish well. You can also add a lemon wedge for a zesty touch. Another option is to serve it with corn on the cob or coleslaw. The recipe has a mild to medium heat, depending on the Cajun seasoning. If you prefer less spice, use less seasoning. You can also skip the cayenne pepper if it’s in your blend. The dish still tastes good without the heat. To make Cajun Shrimp Rice Bowls gluten-free, ensure your Cajun seasoning is gluten-free. Most blends are safe, but check the label. Use vegetable broth instead of chicken broth if you want. The rice is naturally gluten-free, so you're all set! Yes, you can use frozen shrimp for Cajun Shrimp Rice Bowls. Just thaw them first. Place the shrimp in cold water for about 15 minutes. Pat them dry before cooking. This method makes it easy to enjoy this dish anytime. Cajun shrimp rice bowls are simple and delicious. You learned how to cook shrimp, rice, and veggies. Remember to adjust the seasoning to fit your taste. You can switch proteins or add more veggies as you like. Store leftovers properly and reheat correctly for the best flavor. This dish is easy to prepare ahead of time. Enjoy your tasty meal with friends or family. Make it today and savor every bite!

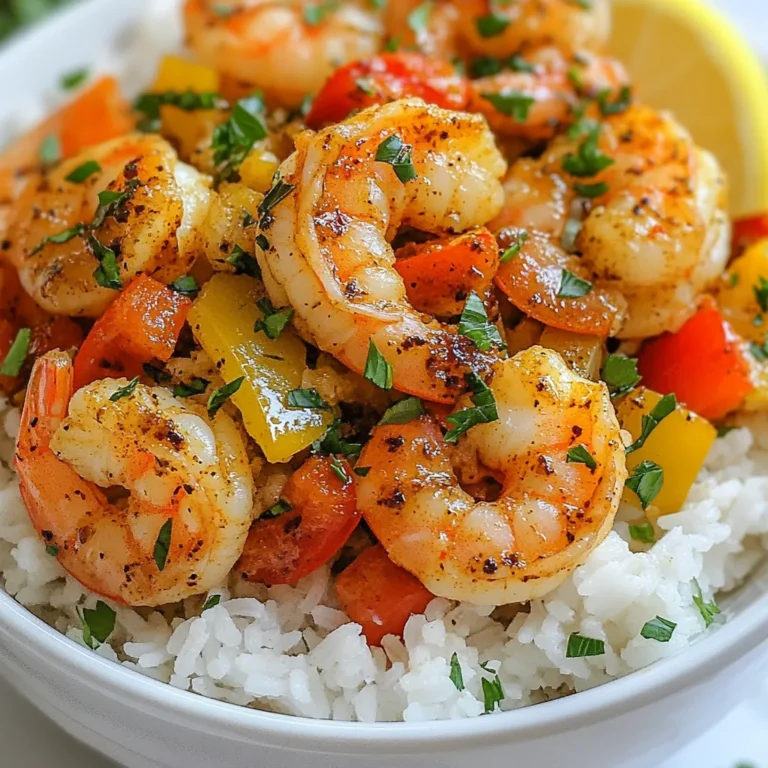
Cajun Shrimp Rice Bowls Flavorful and Easy Recipe

- 1 package (16 oz) gnocchi - 1 cup sun dried tomatoes, chopped (in oil) - 2 tablespoons olive oil (from sun dried tomatoes) - 3 cloves garlic, minced - 1 cup heavy cream - 1 cup vegetable broth - 1 cup fresh spinach, roughly chopped - 1 teaspoon dried basil - 1 teaspoon Italian seasoning - Salt and pepper to taste - Grated Parmesan cheese for serving - Fresh basil leaves for garnish Using high-quality ingredients makes a big difference. Choose fresh gnocchi for the best taste. Look for sun dried tomatoes packed in oil; they add great flavor. Fresh spinach adds a nice texture and color to the dish. Use fresh garlic for a stronger taste. When picking your heavy cream, go for one without additives for a richer sauce. If you can't find gnocchi, you can use pasta like penne or fettuccine. For a lighter version, swap heavy cream with half-and-half or coconut milk. If you want a vegan option, use a plant-based cream and skip the cheese. You can also replace sun dried tomatoes with roasted red peppers for a different flavor. If you want a protein boost, try adding cooked chicken or shrimp. {{ingredient_image_1}} Start by boiling water in a large pot. Add a pinch of salt to the water for flavor. Once it boils, add the gnocchi. Cook them as per the package guide. Watch closely; the gnocchi will float when they are done. This takes about 2-3 minutes. After they float, drain them and set aside. This step makes the base for our creamy dish. In the same pot or a large skillet, heat olive oil over medium heat. Use the oil from the sun-dried tomatoes for extra flavor. Add minced garlic and chopped sun-dried tomatoes. Sauté for about 2 minutes until you smell the garlic. Next, pour in the vegetable broth. Bring it to a simmer and let it reduce for about 3-4 minutes. This thickens the sauce. Now, lower the heat and stir in heavy cream. Mix well until combined. Add the roughly chopped spinach, dried basil, and Italian seasoning. Sprinkle in some salt and pepper to taste. Cook until the spinach wilts, which takes about 2 minutes. This adds color and nutrition to the sauce. Gently fold in the cooked gnocchi. Make sure each piece is coated with the creamy sauce. Cook everything on low heat for an additional 2-3 minutes. This warms it through. Once ready, serve it immediately. Top with grated Parmesan cheese and fresh basil leaves for a beautiful touch. Enjoy every creamy bite of this delightful dish! To get the best gnocchi, start with fresh ones. Cook them in boiling water until they float. This shows they are ready. Avoid overcooking, as they can get mushy. If you make your own gnocchi, use a light hand. Too much flour makes them dense. You can add more flavor by using fresh herbs. Try parsley or thyme for a nice touch. Adding a squeeze of lemon juice brightens the dish. A pinch of red pepper flakes gives it a nice kick. You can also mix in cooked chicken or shrimp for protein. One common mistake is undercooking the garlic. If it’s not cooked long enough, it can taste raw. Another error is not seasoning the sauce properly. Taste as you go and adjust salt and pepper. Lastly, don’t forget to coat the gnocchi well in the sauce. This ensures every bite is creamy and flavorful. Pro Tips Use Fresh Ingredients: Whenever possible, opt for fresh spinach and high-quality sun dried tomatoes to enhance the flavor and texture of the dish. Adjust Creaminess: For a lighter version, substitute half of the heavy cream with additional vegetable broth or use a plant-based cream alternative. Customize Seasoning: Feel free to experiment with different herbs and spices, such as oregano or crushed red pepper, to tailor the flavor to your liking. Serving Suggestions: This dish pairs beautifully with a side of garlic bread or a fresh green salad for a complete meal. {{image_2}} You can easily make this dish vegan. Start by swapping the heavy cream for coconut cream or cashew cream. Use vegetable broth instead of any dairy-based liquids. For the cheese, use a vegan Parmesan or nutritional yeast to add a cheesy taste. This way, you keep all the creamy goodness without any animal products. If you want to add protein, chicken and shrimp work great. For chicken, use boneless pieces. Cook them in the pot before adding garlic and sun dried tomatoes. For shrimp, add them after the broth, as they cook quickly. Both options add flavor and make your meal more filling. Feel free to mix in your favorite veggies. Zucchini, bell peppers, or mushrooms add great taste and texture. Just chop them up and sauté them with garlic and sun dried tomatoes. You can also add peas or broccoli at the end for a pop of color and nutrition. These variations keep the dish exciting and fresh. Store any leftover creamy sun dried tomato gnocchi in an airtight container. Let the dish cool to room temperature first. Then, place it in the fridge. It stays fresh for up to three days. If you know you won’t eat it soon, consider freezing it. To reheat, place the gnocchi in a skillet over low heat. Add a splash of vegetable broth or cream to keep it moist. Stir often until heated through. You can also use a microwave. Heat in short intervals, stirring in between, until warm. For freezing, make sure the gnocchi cools completely. Transfer it to a freezer bag or container. Remove as much air as possible. This helps prevent freezer burn. The gnocchi can last up to three months in the freezer. To enjoy it later, thaw it overnight in the fridge before reheating. Yes, you can make creamy sun-dried tomato gnocchi ahead of time. Cook the gnocchi and prepare the sauce as directed. Once done, mix the gnocchi with the sauce. Store it in the fridge for up to three days. When you are ready to eat, reheat it on low heat. Add a splash of broth or cream to loosen the sauce. If you don’t have gnocchi, you can use other pasta. Small shapes like penne or fusilli work well. You can also use homemade dumplings or even cooked potatoes. Just adjust the cooking time based on what you choose. The creamy sauce will still taste great with these options. Yes, creamy sun-dried tomato gnocchi is great for meal prep. It keeps well in the fridge. Portion it into containers for easy lunches or dinners. Just remember to reheat gently to keep the sauce creamy. This way, you can enjoy a delicious meal all week long! This article covered all you need to make creamy sun-dried tomato gnocchi. You learned about key ingredients and how their quality matters. We discussed clear steps for making the dish and tips for perfect texture. You can even explore variations with proteins or vegetables. Lastly, proper storage tips ensure your leftovers stay fresh. With this knowledge, you're ready to impress with a delicious meal!

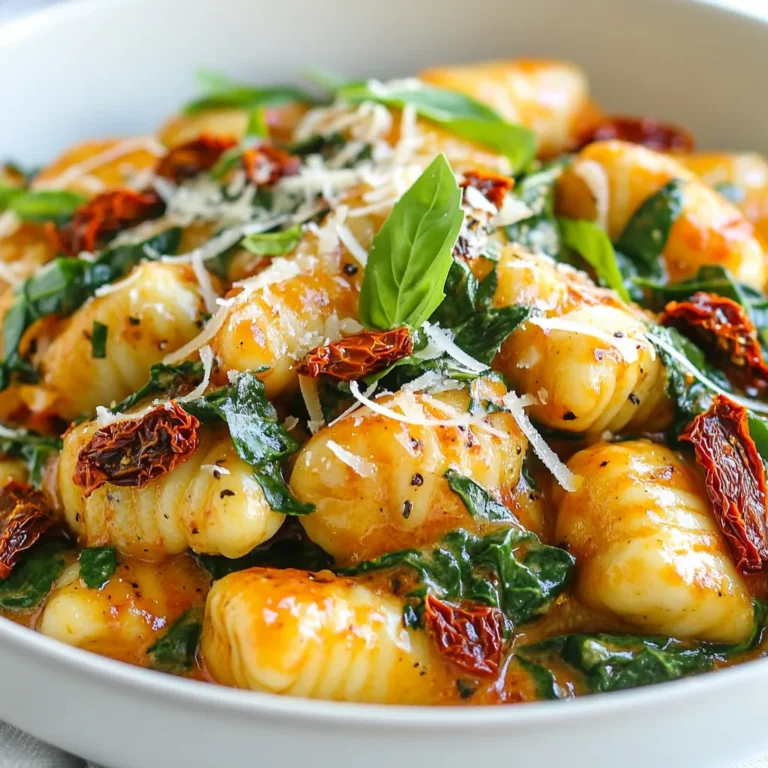
Creamy Sun Dried Tomato Gnocchi Delicious Dinner Idea

PREV 1 … 42 43 44 … 57 NEXT
flavor nest kitchen

explore

DessertsDinnerAppetizersDrinks

Our Policies

  • Cookie Policy
  • Copyright Policy
  • Disclaimer
  • GDPR Policy
  • Terms Of Use
Back to Top
  • About
  • Contact Us
  • Privacy Policy
© 2025 flavor nest kitchen