FREE DINNER EBOOK! Get your copy!
  • Cookie Policy
  • GDPR Policy
  • Disclaimer
  • Terms Of Use
  • Visit my other site: Fun Cookie Recipes
flavor nest kitchen
  • Home
  • Dinner
  • Desserts
  • Drinks
  • Appetizers
  • Contact
  • About
  • Privacy Policy
  • Home
  • Dinner
  • Desserts
  • Drinks
  • Appetizers
  • Contact
  • About
  • Privacy Policy
  • Cookie Policy
  • GDPR Policy
  • Disclaimer
  • Terms Of Use
Visit my other site: Fun Cookie Recipes

HOME / CATEGORIES /

Latest

To make Garlic Lemon Asparagus Orzo, you will need the following items: - 1 cup orzo pasta - 1 bunch asparagus, trimmed and cut into 1-inch pieces - 3 tablespoons olive oil - 4 cloves garlic, minced - Zest of 1 lemon - Juice of 1 lemon - 1/4 cup grated Parmesan cheese (or nutritional yeast for a vegan option) - Salt and pepper to taste - Fresh parsley, chopped (for garnish) These ingredients come together to create a bright and tasty dish. The orzo serves as a great base, while the asparagus adds color and crunch. If you want to make this dish vegan, swap out the cheese. Use nutritional yeast instead of Parmesan. This switch gives a similar flavor without any dairy. If you don’t have orzo, you can use any small pasta. Quinoa or rice can also work well. This dish pairs well with many proteins. Try it with grilled chicken or shrimp for a hearty meal. If you want a plant-based option, serve it with chickpeas or tofu. For sides, a simple green salad fits perfectly. You could also serve crusty bread to soak up every bit of the lemony goodness. Enjoy crafting this healthy and flavorful dish! {{ingredient_image_1}} To make Garlic Lemon Asparagus Orzo, start by cooking your orzo. Boil a large pot of salted water. Add 1 cup of orzo pasta. Cook it for about 8-10 minutes until it is al dente. Once done, drain it and set it aside. Next, blanch your asparagus. In the same pot of boiling water, add 1 bunch of trimmed asparagus. Cut them into 1-inch pieces. Blanch the asparagus for about 2-3 minutes. You want them to be bright green and tender-crisp. After that, drain and rinse them under cold water. This stops the cooking process. Now, sauté the garlic. In a large skillet, heat 3 tablespoons of olive oil over medium heat. Add 4 cloves of minced garlic. Sauté for 1-2 minutes until the garlic is fragrant but not browned. Combine the ingredients. Add the blanched asparagus to the skillet. Then, add the drained orzo. Stir everything together until well mixed. Next, add the zest and juice. Sprinkle the zest of 1 lemon over the mix. Drizzle the juice of 1 lemon on top. Stir it all until the orzo and asparagus are coated well. Finish by adding cheese. Remove the skillet from heat. Stir in 1/4 cup of grated Parmesan cheese or nutritional yeast for a vegan option. Mix until it is melted and creamy. Season with salt and pepper to taste. Finally, garnish and serve. Transfer the dish to a serving bowl. Top with chopped fresh parsley for color and flavor. - Use a large pot to give the orzo space to cook evenly. - Salt your water well. It helps flavor the pasta. - Stir the orzo a few times while it cooks to prevent sticking. - Test the orzo a minute before the package time ends. It should be firm yet tender. Blanching asparagus is quick. After adding them to boiling water, count to 2-3 minutes. You want the asparagus to be bright green. If you cook too long, they lose their crunch and color. Rinse them immediately in cold water to keep them fresh. This step is key for a vibrant dish. To make your Garlic Lemon Asparagus Orzo even better, add fresh herbs. Basil, thyme, or dill make great choices. You can also mix in some red pepper flakes for a little heat. This will give your dish an extra layer of flavor. One mistake is overcooking the asparagus. You want it tender but still crisp. Blanch it for just 2-3 minutes. Another mistake is not draining the orzo well. Too much water will make your dish soggy. Make sure to drain it properly before mixing. For a lovely presentation, serve the orzo in a large bowl. Top it with fresh parsley and some lemon slices. This adds color and a nice touch. You can pair this dish with grilled chicken or fish for a full meal. Enjoy it warm or chill it for a refreshing salad. Pro Tips Cook Orzo Al Dente: Make sure to cook the orzo until it is al dente for the best texture. This will ensure it remains firm and doesn’t become mushy when mixed with other ingredients. Rinse Asparagus: After blanching, rinse the asparagus under cold water to stop the cooking process. This helps maintain its vibrant green color and crunchy texture. Adjust Lemon Flavor: Feel free to adjust the amount of lemon juice and zest according to your preference. Adding more can enhance the freshness of the dish, while less can create a milder flavor. Garnish for Presentation: Use fresh parsley as a garnish not only for flavor but also for a pop of color. A well-garnished dish looks more appetizing and inviting. {{image_2}} You can change the veggies based on the season. In spring, add peas or radishes. In summer, try zucchini or bell peppers. These veggies will add color and taste. They also keep the dish fresh and exciting. Want to make this dish heartier? Add some protein! Grilled chicken or shrimp works great. Just cook them in the skillet before adding the garlic. For a plant-based option, toss in chickpeas or lentils. They will boost the nutrition and flavor. If you need a gluten-free option, use rice or quinoa instead of orzo. Both grains will soak up the lemon and garlic flavors well. For a grain-free choice, try cauliflower rice. It adds a nice texture and keeps it light. To keep your Garlic Lemon Asparagus Orzo fresh, let it cool down first. Place it in an airtight container. Store it in the fridge. It will last about 3 to 4 days. Make sure to label the container with the date. This helps you track how long it has been stored. When you're ready to eat your leftovers, you can reheat them easily. Place the orzo in a microwave-safe bowl. Add a splash of water or olive oil to keep it moist. Cover the bowl with a microwave-safe lid. Heat it for about 1 to 2 minutes. Stir halfway through to heat evenly. If you prefer, you can reheat it on the stove. Just add it to a skillet over low heat. Stir until warmed through. If you want to save some for later, you can freeze it. First, let the orzo cool completely. Then, divide it into portions. Use freezer-safe bags or containers. Remove as much air as possible to prevent freezer burn. It can last for up to 2 months in the freezer. When you are ready to eat it, thaw it overnight in the fridge. Reheat it as mentioned above. This makes meal prep easy and tasty! To add heat to your Garlic Lemon Asparagus Orzo, try adding red pepper flakes. Start with a pinch and adjust to your taste. You can also add chopped fresh chili peppers. Sauté them with garlic for a nice kick. If you love spicy flavors, consider using a spicy oil for cooking. This will infuse your dish with heat and flavor. Yes, you can use whole grain orzo in this recipe. Whole grain orzo adds more fiber and nutrients. The cooking time may differ slightly, so check the package instructions. It may take a minute longer to cook. Whole grain orzo has a nuttier flavor that pairs well with the lemon and garlic. Asparagus is a great vegetable for your health. It is low in calories but high in vitamins. It is rich in vitamin K, which helps with bone health. Asparagus also contains folate, which is good for cell health. It has antioxidants that can protect your body from damage. Plus, asparagus is a natural diuretic, which helps with digestion. Eating asparagus can also support heart health due to its fiber content. In this post, we explored making Garlic Lemon Asparagus Orzo. We discussed key ingredients, including substitutions and pairings. You learned step-by-step instructions on cooking orzo, blanching asparagus, and timing tips. Our tips helped you avoid common mistakes and enhance flavor. We also shared variations and storage info to keep meals fresh. Cooking orzo is easy and fun. With the right ingredients and techniques, you’ll create a dish that impresses. Enjoy experimenting with flavors and variations to find your favorite. Happy cooking!

Garlic Lemon Asparagus Orzo Healthy and Flavorful Dish

- 1 lb (450g) boneless, skinless chicken breasts, diced - 1 ripe mango, diced - 1 red bell pepper, finely chopped - 2 green onions, sliced - 2 garlic cloves, minced - 1 tablespoon ginger, grated - 2 tablespoons soy sauce - 1 tablespoon honey - 1 tablespoon sriracha sauce - 1 tablespoon sesame oil - 1 tablespoon lime juice - Chopped cilantro for garnish - Salt and pepper The main ingredients in this dish create a balance of sweet and spicy. I love using boneless, skinless chicken breasts for their tenderness. Dicing the chicken allows it to cook quickly and soak up all the flavors from the marinade. The ripe mango adds a fruity touch, making each bite delightful. The red bell pepper brings crunch, and the green onions add a fresh kick. Garlic and ginger round out the flavor profile. Together, these ingredients create a fresh, vibrant dish. For the marinade, the soy sauce gives depth, while honey adds sweetness. Sriracha provides heat, and sesame oil adds a nutty flavor. Lime juice brightens everything up. This mix is key to making the chicken flavorful and juicy. If you want to elevate your wraps, consider adding chopped cilantro. This optional garnish adds freshness. Don’t forget to season with salt and pepper to taste. It’s simple, but it makes a big difference in flavor. {{ingredient_image_1}} To start, we need to marinate the chicken. In a medium bowl, combine the diced chicken with soy sauce, honey, sriracha, sesame oil, garlic, and ginger. Mix everything well so the chicken gets a nice coat. It's best to let this marinate for at least 30 minutes in the fridge. This time allows the flavors to soak into the chicken, making it tasty. Next, heat a non-stick skillet over medium-high heat. Add the marinated chicken to the skillet. Cook the chicken for about 6 to 8 minutes. You'll know it's done when it turns golden brown and is fully cooked. Stir it often to ensure even cooking and a nice caramelization. This step is key for that sweet and spicy flavor. Once the chicken is cooked, it’s time to add some color and crunch. Toss in the chopped red bell pepper and sauté for about 2 to 3 minutes. This makes the bell pepper tender but still crisp. After that, remove the skillet from the heat. Gently fold in the diced mango and sliced green onions. This adds a fresh taste and brightens up the dish. Adjust the seasoning with salt and pepper to your liking. Now, you're ready to prepare the lettuce wraps! To get the right spice level, start with sriracha. Add a little at first. Taste your mix before adding more. This way, you control the heat. Spice can be strong, so adjust slowly. Mango brings sweetness, balancing the heat. The mix of sweet and spicy makes the dish shine. To keep chicken moist, avoid overcooking. Use a timer to check cooking time. Cook the chicken in a hot skillet. This helps it brown nicely. You can also bake it in the oven. If you choose the oven, set it to 375°F. Bake the chicken for about 20-25 minutes. To make this dish even better, add more spices. Consider cumin or paprika for depth. Cooking with fresh herbs, like cilantro, boosts flavor too. Also, try marinating longer for richer taste. Letting the chicken sit in the marinade overnight works wonders. The longer you let the flavors blend, the tastier your meal will be. Pro Tips Marinate Longer for Flavor: For an even more flavorful chicken, consider marinating for 1-2 hours or overnight if time allows. This will enhance the taste and tenderness. Fresh Ingredients Matter: Use fresh, ripe mango for the best flavor. A perfectly ripe mango will add a natural sweetness that complements the spice of the chicken. Spice Level Adjustments: Feel free to adjust the amount of sriracha to suit your personal heat preference. You can also add chopped jalapeños for an extra kick! Crisp Lettuce Leaves: For the best texture, choose crisp lettuce leaves and rinse them in cold water before serving. This will help keep them fresh and crunchy. {{image_2}} You can swap chicken for other proteins. Tofu works well for a vegetarian option. Shrimp adds a nice seafood twist. Both choices keep the dish tasty and fun. For gluten-free diets, look for gluten-free soy sauce. This simple switch ensures everyone can enjoy the meal. Mixing in tropical fruits can enhance flavors. Pineapple adds sweetness, while papaya brings a fresh taste. Try different sauce mixes too. A sweet chili sauce can add a great kick. You can also play with spices like cumin or coriander for a unique twist. If you want to change the wraps, try collard greens or rice paper. These options give new textures and flavors. You can also serve the wraps with side dishes. Rice or a simple salad complements the meal well. This way, you can create a full meal experience. To keep your spicy mango chicken fresh, use airtight containers. Glass containers work well since they don't stain. You can also use plastic containers, but ensure they seal tightly. Store the leftovers in the fridge for up to three days. It’s best to keep the chicken mixture separate from the lettuce. This helps prevent sogginess. When reheating chicken, the best method is the stovetop. Heat a pan over medium heat. Add a splash of water or broth to keep it moist. Stir it gently until warmed through. Avoid the microwave if you can. Microwaving can dry out the chicken and make it tough. You can freeze the chicken mixture if you have extra. Place it in a freezer-safe bag. Squeeze out the air before sealing. It can last up to three months in the freezer. When you’re ready to eat, thaw it overnight in the fridge. Reheat using the stovetop method for the best texture. Butter lettuce and romaine are both great choices. Butter lettuce has soft, tender leaves. It holds fillings well and adds a light crunch. Romaine offers a sturdier texture, making it less likely to tear. If you want a more crisp bite, choose romaine. For a softer wrap, butter lettuce is the way to go. You can even mix them for fun textures! Yes, you can prepare parts of this dish ahead of time. I suggest marinating the chicken the day before. This allows the flavors to blend well. You can also chop veggies in advance and store them in the fridge. When you are ready to eat, cook the chicken and mix in the veggies. This keeps everything fresh and tasty. Scaling up is easy! Just multiply each ingredient by the number of servings you need. For example, if you want to serve eight, use two pounds of chicken and two mangoes. Keep the sauce ratios the same to maintain flavor. Make sure to use a larger skillet for cooking, so everything cooks evenly. Enjoy the fun of cooking for a crowd! This blog post covers a delicious recipe featuring chicken, mango, and vibrant veggies. You learned how to marinate the chicken for maximum flavor and cook it perfectly. We explored tips for adjusting spice levels, variations for dietary needs, and storage methods. You can enjoy this dish in many ways, making it versatile for any meal. Try different fruit or sauce combos to suit your taste. With simple steps and fresh ingredients, this recipe will make your dinner exciting and tasty. Enjoy your cooking journey!

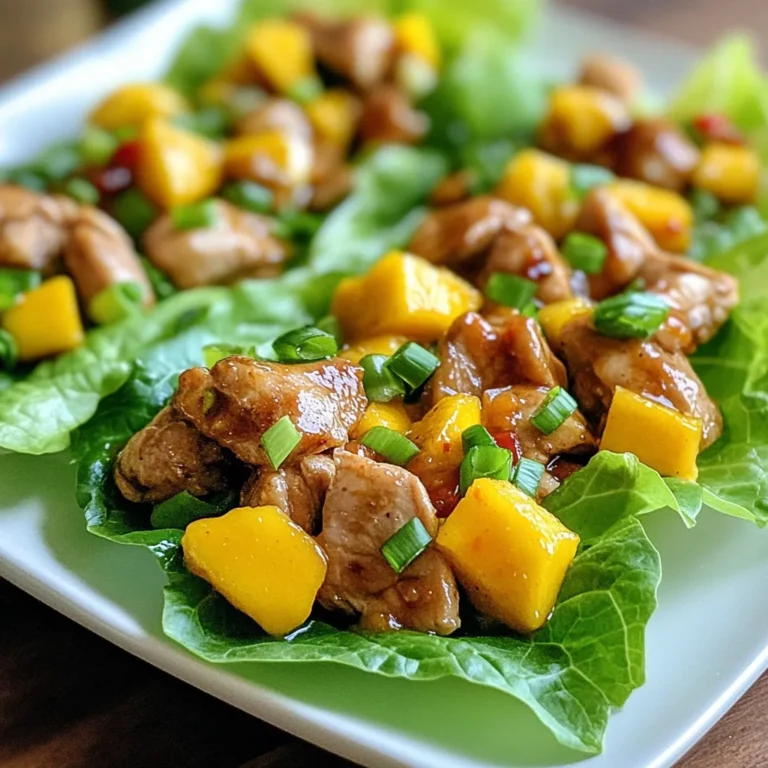
Spicy Mango Chicken Lettuce Wraps Flavorful Delight

- 2 boneless, skinless chicken breasts - 1 ripe mango, diced - 8 small corn or flour tortillas - 1 tablespoon olive oil - 1 teaspoon chili powder - 1 teaspoon smoked paprika - 1/2 teaspoon ground cumin - 1/2 teaspoon garlic powder - Salt and pepper to taste - 1/2 red onion, finely chopped - 1/4 cup fresh cilantro, chopped - 1 lime, cut into wedges - Optional: Sliced jalapeño for extra heat When I make Spicy Mango Chicken Tacos, I start with fresh, vibrant ingredients. I choose boneless chicken breasts for a tender bite. The ripe mango adds sweetness that balances the spices. Tortillas are a must for holding all the goodness. I prefer corn for a classic taste, but flour works too. Next, I gather my spices. Olive oil keeps the chicken moist. Chili powder adds heat, while smoked paprika gives a rich flavor. Ground cumin and garlic powder deepen the taste. I always add salt and pepper for the perfect seasoning. Fresh additions take this dish to the next level. Red onion adds a crunch and bite. Bright cilantro brings freshness. I squeeze lime juice on top for a zesty finish. If you like heat, sliced jalapeños are a great option. They give an extra kick that spices things up! {{ingredient_image_1}} First, you need to mix the marinade. In a bowl, combine one tablespoon of olive oil, one teaspoon of chili powder, one teaspoon of smoked paprika, half a teaspoon of ground cumin, and half a teaspoon of garlic powder. Add salt and pepper to taste. Then, add the two chicken breasts and coat them well with the marinade. Let the chicken sit for at least 20 minutes. This helps the flavors soak in. Now it’s time to cook the chicken. Heat a grill or a skillet over medium-high heat. Place the marinated chicken on the grill. Cook for about 6-7 minutes on each side. You want the chicken to turn golden brown and be fully cooked. To check, cut into the thickest part. If the juices run clear, it’s ready. Once done, remove the chicken from heat and let it rest for a few minutes. Then slice it into strips. While the chicken rests, warm the tortillas. You can use a dry skillet or a grill. Place the tortillas in for about 30 seconds on each side until they are soft and pliable. This will make them easy to fold around your fillings. Keep them warm by wrapping them in a clean kitchen towel. Now comes the fun part: assembling the tacos! Take a warm tortilla. On it, layer slices of the grilled chicken, diced mango, chopped red onion, and fresh cilantro. If you like a spicy kick, add sliced jalapeño on top. This adds flavor and heat. Each bite will be a burst of taste! For the best flavor, marinate the chicken for at least 20 minutes. This lets the spices soak in deeply. If you're short on time, even 10 minutes will help. However, marinating longer, up to two hours, can enhance the taste even more. If you want to skip marinating, try seasoning the chicken right before cooking. You can also use a dry rub if you prefer. To achieve perfect grill marks, preheat your grill or skillet well before cooking. This helps sear the chicken quickly. Cook each side for about 6-7 minutes. The chicken is done when it reaches an internal temperature of 165°F (75°C). Use a meat thermometer to check. Let the chicken rest for a few minutes after cooking. This keeps it juicy and tender. These tacos shine when served with fresh sides. Try pairing them with a light salad or grilled corn. You can also serve rice or beans for a more filling meal. For garnishing, sprinkle fresh cilantro on top for color and taste. You can add sliced jalapeños for more heat or lime wedges for a zesty kick. Get creative with your toppings! Pro Tips Marinate for Flavor: Let the chicken marinate for at least 20 minutes, but for even better flavor, consider marinating it for a few hours or overnight. Adjust the Heat: If you prefer a milder taco, omit the jalapeños or use them sparingly. For more heat, add extra chili powder or fresh jalapeño slices. Fresh Ingredients Matter: Use ripe mango and fresh cilantro for the best taste. The freshness will elevate the overall flavor of your tacos. Perfect Tortilla Technique: Warm the tortillas just until soft; do not overcook them. This keeps them pliable and prevents tearing when filling. {{image_2}} You can switch the chicken for shrimp or firm tofu. Both options work great. For a vegan meal, use jackfruit or mushrooms. These choices offer a nice texture and soak up the flavors well. Want to boost the taste? Add diced pineapple or bell peppers for extra sweetness and crunch. You can also try different spices. Use cayenne for heat or coriander for a unique twist. Each addition changes the flavor while keeping the dish fresh. You can choose between soft corn or flour tortillas. Soft tortillas are easier to fold. Hard shells give you a satisfying crunch. Want something different? Try an Asian fusion. Use hoisin sauce and sesame seeds to give your tacos a bold, new flavor. To store your spicy mango chicken tacos, follow these tips: - Place leftovers in an airtight container. - Keep them in the fridge for up to three days. - Store the chicken separate from tortillas and toppings. You can store assembled tacos for about a day. After that, the tortillas may become soggy. It’s best to keep the ingredients separate for longer freshness. For reheating chicken, use these methods: - Warm the chicken in a skillet over low heat. - Microwave for about one minute, checking often. - Heat tortillas in a dry skillet for about 30 seconds. - Avoid microwaving tortillas, as they can become chewy. - If they do get chewy, a quick warm-up on a skillet can help. Yes, you can use frozen chicken. First, thaw it in the fridge overnight. If you're short on time, place it in a sealed bag and submerge it in cold water for about 1-2 hours. Once thawed, follow the recipe as usual. Make sure to cook the chicken until it reaches an internal temperature of 165°F. This keeps it safe and tasty. To add heat, consider these ideas: - Include sliced jalapeños inside the tacos. - Use a spicier chili powder or add cayenne pepper to the marinade. - Serve with a spicy salsa or hot sauce on the side. - Try adding fresh chopped serrano peppers for a fresh kick. Experiment with these options to find your favorite level of spice! These tacos pair well with: - Mexican rice for a filling side. - Black beans for added protein. - A fresh corn salad for crunch. - Guacamole and chips for a classic touch. These sides enhance the meal and offer a balance to the flavors. Enjoy mixing and matching! You’ve now learned how to make Spicy Mango Chicken Tacos from scratch. We covered the key ingredients, from juicy chicken to fresh mango. I shared tips on marinating, cooking techniques, and assembling the perfect taco. Don't forget the variations and storage tips for a great meal later. Enjoying these tacos is fun and simple, and they’re sure to impress your friends and family. Try customizing them to your taste, and let your creativity shine!

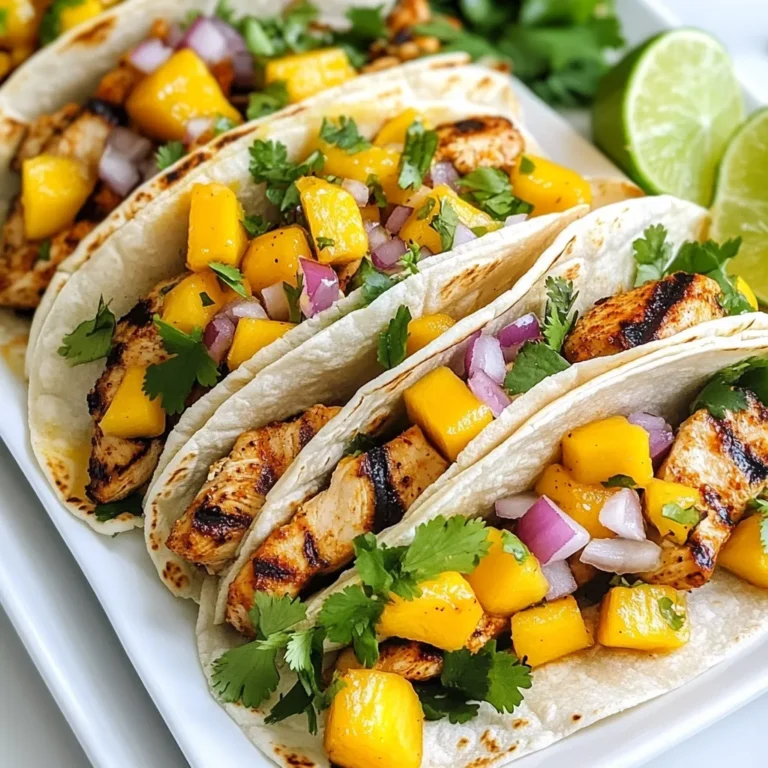
Spicy Mango Chicken Tacos Festive and Flavorful Meal

- 1 cup quinoa, rinsed - 2 cups vegetable broth or water - 1 cup cherry tomatoes, halved - 1 cucumber, diced - 1 bell pepper (red or yellow), diced - 1 cup Kalamata olives, pitted and halved - 1/2 red onion, thinly sliced - 1 avocado, sliced - 1/4 cup feta cheese, crumbled - 2 tablespoons olive oil - 2 tablespoons lemon juice - 1 teaspoon dried oregano - Salt and pepper to taste - Fresh parsley, chopped for garnish You can change this dish to fit your taste. Here are some ideas: - Add chickpeas for protein. - Use spinach or kale for more greens. - Try different olives for unique flavors. - Swap feta for goat cheese or leave it out. - Toss in roasted vegetables for added sweetness. Quinoa is a great source of protein. It also has fiber, which helps with digestion. Cherry tomatoes are rich in vitamins A and C. They provide antioxidants for good health. Cucumbers are low in calories and high in water. They keep you hydrated. Olives add healthy fats and flavor. They can help heart health. Avocado is full of healthy fats. It also has potassium, which is great for your body. Feta cheese brings calcium and protein. It adds a nice tangy taste to your bowl. {{ingredient_image_1}} To start, grab a medium saucepan. Add 1 cup of rinsed quinoa and 2 cups of vegetable broth or water. Turn the heat to high and bring it to a boil. Once it bubbles, lower the heat to a gentle simmer. Cover the pot with a lid and let it cook for about 15 minutes. You want the liquid absorbed and the quinoa tender. When it's done, fluff it with a fork and let it cool a bit. While your quinoa cooks, it's time to prep the veggies. In a large mixing bowl, toss together 1 cup of halved cherry tomatoes, 1 diced cucumber, and 1 diced bell pepper. You can choose red or yellow bell pepper based on your taste. Add 1 cup of pitted and halved Kalamata olives and 1/2 thinly sliced red onion. This mix adds flavor and crunch to your bowl. Now, let's whip up a zesty dressing. In a small bowl, mix 2 tablespoons of olive oil, 2 tablespoons of lemon juice, and 1 teaspoon of dried oregano. Add salt and pepper to taste. Whisk it together until it’s well combined. This dressing will bring all the flavors together beautifully. Once your quinoa has cooled, add it to the bowl with the vegetables. Pour the dressing over this mix and stir well. It’s important to make sure everything is coated evenly. This creates a tasty blend of flavors in every bite. To serve, spoon generous amounts of the quinoa and vegetable mix into individual bowls. Top each serving with sliced avocado and crumbled feta cheese. For a fresh finish, sprinkle chopped parsley on top. This not only adds color but also brightens the dish. Enjoy your nutritious and flavorful Mediterranean quinoa bowls! Rinsing quinoa is key to removing its bitter coating. Place the quinoa in a fine mesh strainer. Run cold water over it for about one minute. Gently shake the strainer to help wash off the saponins. This step makes your dish taste better. Trust me, it’s worth the extra minute. When cutting vegetables, use a sharp knife. A dull knife can be dangerous. Start with a stable cutting board. Cut the cherry tomatoes in half carefully. For the cucumber and bell pepper, slice them into even pieces. This helps with cooking and looks great in the bowl. Aim for bites that are easy to eat. Seasoning can make or break a dish. Start with olive oil and lemon juice for a bright flavor. Add salt and pepper to taste. Don’t forget the dried oregano; it adds warmth. Taste your mixture before serving. If it feels flat, add more lemon or salt. You can always adjust to your liking. Prep can be a breeze with a bit of planning. Cook the quinoa in advance and store it in the fridge. Chop your vegetables ahead of time and keep them in containers. This way, you can assemble your bowls quickly. You can make this dish in under 30 minutes when you prep smart. Enjoy more time savoring your meal! Pro Tips Rinse Your Quinoa: Rinsing quinoa before cooking removes its natural coating, called saponin, which can give it a bitter flavor. Use Vegetable Broth: For an extra flavor boost, cook your quinoa in vegetable broth instead of water. Cool Quinoa Well: Allowing the quinoa to cool slightly before mixing with vegetables helps prevent sogginess. Customize Your Veggies: Feel free to swap or add any seasonal vegetables you love for a personalized touch. {{image_2}} You can easily add protein to your Mediterranean quinoa bowls. Chicken, grilled or roasted, adds great flavor. Simply cube it and mix it in after cooking. Chickpeas are a perfect choice too. They bring a nice crunch and extra fiber. Just drain and rinse canned chickpeas, then toss them in. This dish is flexible for vegan and vegetarian diets. For a vegan twist, skip the feta cheese. Instead, try using nutritional yeast for a cheesy flavor. You can also add extra veggies, like spinach or artichokes, to enhance the taste. Both options keep the meal light and fresh. The dressing transforms the dish. A lemon-olive oil mix is classic, but you can try others. A tahini dressing gives a rich, nutty taste. Just blend tahini with water, lemon juice, salt, and garlic. For a spicy kick, add some harissa or sriracha to your dressing. This way, you can change the flavor with ease and keep things exciting! To store leftovers, let the quinoa bowls cool fully. Place them in an airtight container. Make sure to separate the avocado. It can turn brown quickly. You can store the bowls in the fridge for up to three days. If you want to keep them fresh longer, you can freeze the quinoa mix without the toppings. For meal prep, I recommend using glass containers. They are safe for heating and keep food fresh. Look for containers with tight lids to avoid spills. Also, choose containers that are easy to stack. This saves space in your fridge. When reheating, use a microwave or stovetop. If using the microwave, heat in short bursts. Stir the bowl to ensure even heating. If you prefer the stovetop, add a splash of water. This keeps the quinoa moist. After reheating, add fresh toppings like avocado and parsley. This keeps your Mediterranean Quinoa Bowls looking and tasting great! If you do not have quinoa, you can use rice or couscous. Both options work well. Rice has a nice texture, while couscous cooks quickly. You can also try farro or bulgur for a chewy bite. Each choice offers a different taste and feel. Mediterranean Quinoa Bowls can last about 3 to 5 days in the fridge. Store them in an airtight container to keep them fresh. Make sure to let the quinoa cool before putting it away. This helps prevent moisture buildup. Yes, you can freeze Mediterranean Quinoa Bowls. However, the vegetables may lose some crunch. Pack the bowls in freezer-safe containers. They can last for about 2 to 3 months in the freezer. Thaw them overnight in the fridge before reheating. Yes, Mediterranean Quinoa Bowls are gluten-free. Quinoa itself does not contain gluten. Just be sure to use certified gluten-free ingredients if you have a strict gluten allergy. This way, you can enjoy a safe and tasty meal. You can add many different vegetables to your Mediterranean Quinoa Bowls. Consider adding roasted zucchini, spinach, or artichokes. Grated carrots or diced radishes can add color and crunch. The options are endless, so feel free to get creative! In this blog post, we explored the tasty world of Mediterranean quinoa bowls. We covered key ingredients, cooking steps, and nutritional benefits. You learned tips like rinsing quinoa and cutting veggies. We also discussed fun variations and storage tips. Mediterranean quinoa bowls are easy to make and full of flavor. They are perfect for any meal and keep well. Enjoy your cooking and get creative with your bowls!

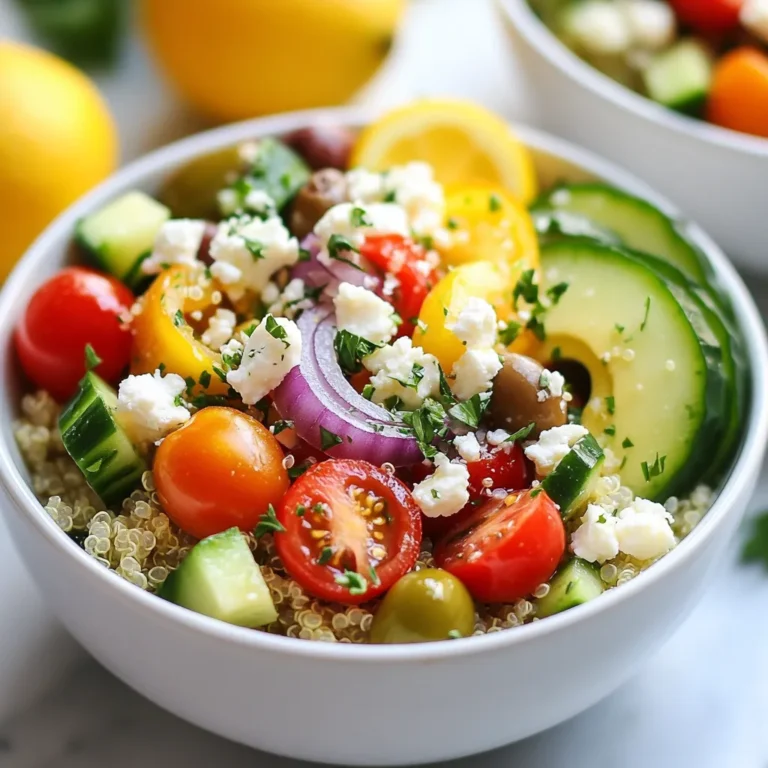
Mediterranean Quinoa Bowls Flavorful and Nutritious Dish

This dish shines with simple yet bold flavors. Here are the must-have ingredients: - 2 packs instant ramen noodles (discard flavor packets) - 1 tablespoon sesame oil - 3 cloves garlic, minced - 1 inch piece ginger, grated - 1 bell pepper, sliced (any color) - 1 cup broccoli florets - 1 carrot, julienned - 1 cup snap peas - 2-3 tablespoons soy sauce - 1 tablespoon sriracha (adjust to taste) - 1 tablespoon rice vinegar - 2 green onions, chopped - Toasted sesame seeds, for garnish Each ingredient brings its own magic. The garlic and ginger form a fragrant base. The veggies add crunch and color. Ramen noodles soak in all the tasty sauce, making every bite a delight. You can take this dish to the next level with some fun add-ins: - Extra green onions for crunch - A sprinkle of chili flakes for heat - A dash of lime juice for brightness - Chopped cilantro for freshness Feel free to mix and match. These toppings can make your ramen feel special and unique. Choose fresh and vibrant veggies for the best taste. Here's how: - Look for bright colors in bell peppers and snap peas. - Pick broccoli with tight florets and no yellowing. - Use firm carrots with smooth skin. Fresh ingredients make all the difference. They provide better flavor and texture. By selecting the best, you ensure each bite of your ramen stir-fry is a treat! {{ingredient_image_1}} Start by boiling water in a pot. Once it's boiling, add the instant ramen noodles. Cook them for 2-3 minutes less than the package says. This keeps them firm and chewy. After cooking, drain the noodles. Set them aside for later. In a large skillet or wok, heat sesame oil over medium-high heat. Once hot, add minced garlic and grated ginger. Sauté for 1-2 minutes. You want to smell the garlic and ginger but not burn them. Next, add your sliced bell pepper, broccoli florets, julienned carrot, and snap peas. Stir-fry these veggies for about 4-5 minutes. They should be tender yet still crisp. Now, push the veggies to one side of the pan. Add the cooked ramen noodles to the center. Pour soy sauce, sriracha, and rice vinegar over the noodles. Toss everything together with tongs or chopsticks. Make sure the noodles and vegetables are well coated. Stir-fry for another 2-3 minutes. This helps the noodles soak up all those great flavors. When done, remove the pan from heat. Sprinkle chopped green onions and toasted sesame seeds on top. Toss gently to mix. To get the best stir-fry, you need high heat. Use a large skillet or wok. This helps the food cook fast and stay crisp. Start with the oil and aromatics like garlic and ginger. These should sizzle right away. Toss the vegetables quickly to keep them bright and fresh. If you crowd the pan, the veggies will steam instead of fry. This can make them soggy. So, work in batches if needed. Spice can make or break your dish. Start with one tablespoon of sriracha. Taste the stir-fry as you go. If you want more heat, add a bit more sriracha. You can also try red pepper flakes or chili oil for different flavors. Always remember, it’s easier to add spice than to take it away. So, go slow and taste often. To take your ramen stir-fry to the next level, play with extra seasonings. A splash of rice vinegar adds tang. You can also try a dash of soy sauce for depth. For a sweet touch, a bit of honey or sugar works well. Toasted sesame seeds add nutty flavor and crunch. Fresh herbs like cilantro or basil can also brighten your dish. Just sprinkle them on top before serving for a fresh kick. Pro Tips Choose Your Noodles: For a chewier texture, consider using fresh ramen noodles instead of instant ones. They will provide a more authentic taste and enhance the overall dish. Adjust the Spice Level: If you prefer a milder dish, start with less sriracha and gradually add more to your liking. This way, you can control the heat without overwhelming the flavors. Vegetable Variations: Feel free to mix and match vegetables based on what you have on hand. Adding bok choy, mushrooms, or zucchini can introduce new flavors and textures to your stir-fry. Make It a Protein-Packed Meal: For added protein, toss in some cooked chicken, shrimp, or tofu during the stir-frying process. This will make your dish more filling and nutritious. {{image_2}} You can easily make this dish vegetarian. Just skip the meat and add more veggies. Try adding mushrooms for a meaty texture or spinach for some green. You can mix in extra bell peppers or even some zucchini. These choices keep the meal light and tasty. If you want more protein, chicken, tofu, or shrimp work well. For chicken, use bite-sized pieces and cook them until golden. Tofu can be cubed and sautéed for a crispy edge. Shrimp cooks quickly and adds a nice flavor. Just toss them in with the veggies until they turn pink. Feel free to change up the veggies based on what you have. Bok choy gives a nice crunch and flavor. Snow peas add sweetness. You can also use baby corn or even eggplant for something different. The key is to keep them colorful and crunchy for the best taste. To store your spicy garlic ramen stir-fry, let it cool first. Place it in an airtight container. You can keep it in the fridge for up to three days. When you store it right, the flavors stay fresh and tasty. To reheat, use a skillet over medium heat. Add a splash of water or oil to help steam the noodles. Stir often for even heating. You can also microwave it in a bowl, covered with a damp paper towel. Heat in one-minute intervals, stirring until warm. You can freeze this stir-fry if you want to save it for later. Place it in a freezer-safe container or bag. Make sure to remove as much air as possible. It will keep well for up to two months. When you're ready to eat, thaw it overnight in the fridge before reheating. Yes, you can use different noodles! Options like udon, soba, or even rice noodles work well. Just adjust cooking times based on the noodle type. For example, udon noodles need a bit longer to cook. This allows you to explore flavors from different cuisines. To make it gluten-free, choose gluten-free ramen noodles or rice noodles. Check labels on soy sauce and sriracha to ensure they are gluten-free. You can also use tamari sauce instead of regular soy sauce. This way, you can enjoy the dish without gluten. To prevent soggy noodles, cook them for less time than the package suggests. Drain them right after cooking and rinse under cold water. This helps stop the cooking process. Toss them quickly with a little oil to keep them from sticking together. Yes, you can make this dish ahead of time! Cook the noodles and stir-fry the veggies. Store them separately in airtight containers. When ready to eat, reheat the noodles and vegetables together in a pan. Add some extra sauce to refresh the flavors. This blog post covered how to make a spicy garlic ramen stir-fry. We talked about key ingredients and fresh picks. You learned step-by-step cooking methods and learned tricks to perfect your dish. We explored tasty variations and proper storage tips. Remember, you can easily adjust the spice and add your favorite proteins. Make it your own, and enjoy every bite!

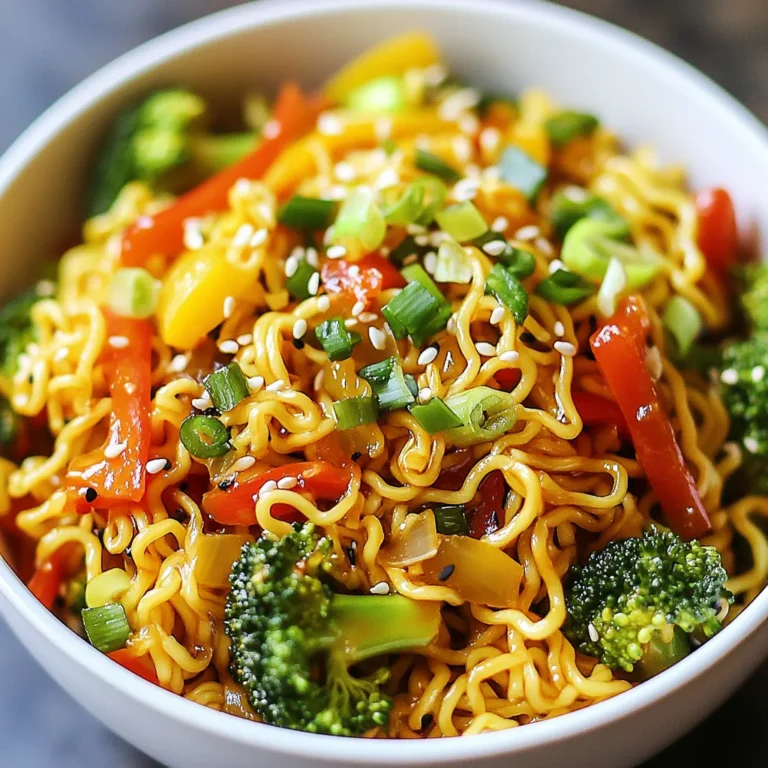
Spicy Garlic Ramen Stir-Fry Flavors That Wow

- 2 grilled chicken breasts, sliced - 4 cups mixed salad greens (romaine, spinach, arugula) - 1 cup cherry tomatoes, halved - 1 cup corn kernels (fresh, frozen, or canned) - 1/2 cup black beans, rinsed and drained - 1/2 red bell pepper, diced - 1/4 red onion, thinly sliced - 1/2 cup shredded cheddar cheese - 1 avocado, sliced - 1/3 cup BBQ sauce - 1/3 cup ranch dressing - Salt and black pepper to taste - Fresh cilantro, for garnish The ingredients for my BBQ Ranch Chicken Salad are simple yet packed with flavor. You need two grilled chicken breasts, sliced for easy eating. The salad greens mix includes romaine, spinach, and arugula. I love adding cherry tomatoes, corn, and black beans for a pop of color and taste. The red bell pepper and red onion give the salad a nice crunch. I also like to toss in some shredded cheddar cheese and creamy avocado for richness. To finish, I drizzle BBQ sauce and ranch dressing on top. A dash of salt and pepper brings everything together. Finally, a sprinkle of fresh cilantro adds a lovely touch. Each ingredient plays a part in making this salad fresh and satisfying. {{ingredient_image_1}} To start, grill the chicken breasts. First, season them with salt and black pepper. This simple step adds great flavor. Grill over medium heat for about 6-7 minutes on each side. You want the chicken to be cooked through, so check the temperature. Once done, remove it from the heat. Let it rest for a few minutes before slicing. This helps keep the juices inside. Now, let's assemble the salad. In a large bowl, combine your salad greens. I like to use romaine, spinach, and arugula for a fresh mix. Add the halved cherry tomatoes, corn, black beans, diced red bell pepper, and thinly sliced red onion. Mix these ingredients well. Next, it's time to add the sliced grilled chicken. Drizzle the BBQ sauce and ranch dressing on top. Toss the salad gently to coat everything evenly. For the final touches, fold in the sliced avocado. This adds creaminess to the salad. Then, sprinkle the shredded cheddar cheese on top. Taste your salad and adjust the seasoning with more salt and black pepper if needed. Serve the salad right away. Garnish each plate with fresh cilantro for a pop of color and flavor. Enjoy your meal! Grilling chicken can be tricky. Here are some common mistakes to avoid: - Too much heat: High heat can burn the outside while leaving the inside raw. - Not resting: Always let the chicken rest after grilling. It helps keep it juicy. For grilling times, aim for about 6-7 minutes per side. Use a meat thermometer to check for doneness. The chicken should reach 165°F. Marinades add great flavor. A simple mix of olive oil, lemon juice, and spices will work wonders. Let your chicken soak for at least 30 minutes before grilling. Fresh herbs can make your salad pop. Try adding cilantro or parsley for brightness. Balancing flavors is key. The BBQ sauce adds sweetness, while ranch dressing brings creaminess. Adjust the ratios to fit your taste. For crunch, consider adding nuts or seeds. Toasted pumpkin seeds or walnuts can elevate your salad. Prepping ingredients in advance saves time. Chop veggies like bell peppers and onions the day before. Store them in airtight containers. Keep salad components separate to maintain freshness. Mixed greens can wilt quickly if dressed too early. For best practices, store dressings in small jars. This keeps flavors fresh until you're ready to eat. Pro Tips Perfectly Grilled Chicken: To ensure juicy chicken breasts, let them rest for at least 5 minutes after grilling before slicing. This allows the juices to redistribute, keeping the meat moist. Mixing Dressings: For a unique flavor, consider mixing your BBQ sauce and ranch dressing in a separate bowl before adding it to the salad. This helps achieve a more balanced taste. Fresh Ingredients: Use fresh ingredients whenever possible, especially for the salad greens and vegetables. This enhances the flavor and nutritional value of your salad. Customize Your Salad: Feel free to customize the salad by adding other proteins like shrimp or tofu, or additional toppings like crispy bacon or crunchy tortilla strips for extra texture. {{image_2}} You can swap grilled chicken for turkey or shrimp. This change adds a new taste. Turkey has a mild flavor, while shrimp gives a nice bite. If you want a vegetarian option, try adding tofu or chickpeas. Tofu absorbs flavors well, making it a tasty choice. Chickpeas are hearty and add protein, too. You can also explore other proteins like beef or fish. Each option brings a unique flavor to your BBQ ranch chicken salad. Using seasonal vegetables keeps your salad fresh and exciting. In the summer, add ripe peaches or cucumbers for a crisp touch. In the fall, try roasted sweet potatoes or squash. These ingredients blend well with BBQ flavors. You can also highlight fruits that pair nicely. Pineapple and mango add a sweet twist. Adapting with different types of beans, like kidney or pinto beans, can change the texture and taste. This variety lets you enjoy the salad year-round. Customizing with homemade BBQ sauce can elevate your salad. You can mix ketchup, brown sugar, and a dash of vinegar for a quick sauce. Trying different ranch dressing flavors can also be fun. Consider spicy ranch or garlic ranch for a kick. If you want something lighter, explore vinaigrettes. A simple lemon vinaigrette adds brightness. These options let you create your perfect BBQ ranch chicken salad. To keep your BBQ Ranch Chicken Salad fresh, follow these tips: - Use airtight containers: Place leftovers in a sealed container. This helps prevent spoilage. - Separate chicken and greens: Store chicken and salad greens apart. This keeps everything crisp. - Dressings on the side: Keep BBQ sauce and ranch dressing in separate containers. This stops sogginess. Grilled chicken can be reheated, but keep it simple: - Use low heat: Warm the chicken slowly in a pan or microwave. High heat can dry it out. - Avoid reheating salad: Salads are best fresh. If you must, just warm the chicken. - Add fresh toppings: After reheating, add fresh greens or avocado for crunch and flavor. Knowing how long your salad stays fresh is key: - Refrigerate promptly: Store the salad in the fridge right after eating. It lasts about 3 days. - Check for spoilage: Look for wilting greens, odd smells, or discoloration. Toss if you see these signs. - Label your containers: Write the date on your storage containers. This helps you keep track of freshness. You can prep this salad a day before. Start by grilling the chicken. Slice it up and store it in an airtight container. Mix the salad greens, tomatoes, corn, beans, pepper, and onion in another container. Keep the dressings separate until you’re ready to eat. This keeps everything fresh and tasty. For best storage, use glass or plastic containers with tight lids. Keep salads in the fridge, but avoid freezing them. The textures can change. When you’re ready to serve, combine the chicken and veggies, then add the dressings. You can swap ranch dressing for many tasty options. Try blue cheese dressing for a bold flavor. Yogurt dressing adds creaminess while being lighter. For a kick, use spicy ranch or a vinaigrette. Each option brings a different flavor to the salad. If you want a fresh twist, try avocado dressing. It’s creamy and healthy. Keep in mind that each dressing will change the taste of your BBQ Ranch Chicken Salad. This salad is packed with healthy ingredients. Grilled chicken provides lean protein. Mixed greens add vitamins and minerals. Tomatoes, corn, and beans offer fiber and antioxidants. Avocado adds healthy fats, making it a balanced meal. To make it even healthier, use low-fat ranch or BBQ sauce. You can also add more veggies and cut back on cheese. This way, you still enjoy great flavor while boosting nutrition. BBQ Ranch Chicken Salad brings together fresh flavors and hearty ingredients. We covered how to prepare the chicken, assemble the salad, and select dressings. I shared tips for perfecting your grilling and storing leftovers. You can even switch proteins or dressings for new twists. This salad is simple, tasty, and a great meal choice. Enjoy creating your own version and experiment with flavors that delight!

BBQ Ranch Chicken Salad Flavorful and Fresh Meal

- 20 jumbo pasta shells - 2 cups fresh spinach, chopped - 1 cup ricotta cheese - 1 cup shredded mozzarella cheese, plus extra for topping - 1/2 cup grated Parmesan cheese - 1 egg, beaten - 1 teaspoon minced garlic - 1 tablespoon olive oil - 2 cups marinara sauce - Salt and pepper to taste - Fresh basil for garnish (optional) You can swap ricotta cheese for cottage cheese. This change gives a similar creamy texture. If you want a lighter option, use low-fat ricotta. You can also replace the mozzarella with provolone for a different flavor. For the marinara, homemade sauce works well too. If you need it dairy-free, try cashew cream instead of cheese. Choose spinach that is bright green and crisp. Avoid any leaves that are wilted or yellow. When picking cheeses, look for creamy textures and fresh smells. Buy mozzarella and ricotta from a trusted brand. For the marinara, choose a sauce with simple ingredients. Always check the expiration dates to ensure freshness. {{ingredient_image_1}} First, gather all your ingredients. You need 20 jumbo pasta shells, 2 cups of chopped spinach, and 1 cup each of ricotta and shredded mozzarella cheese. Don’t forget 1/2 cup of grated Parmesan cheese, 1 beaten egg, and some minced garlic. You also need olive oil, marinara sauce, salt, and pepper. Next, preheat your oven to 375°F (190°C). This helps your dish cook evenly. Bring a large pot of salted water to a boil. Add the pasta shells and cook according to the package instructions. Aim for al dente, so they hold their shape. Drain the shells and set them aside. Now, heat olive oil in a skillet over medium heat. Add the minced garlic and let it cook for about 1 minute. The garlic should smell great. Then, add the chopped spinach to the skillet and cook until it wilts. Remove it from heat and let it cool a bit. In a large bowl, mix the ricotta, 1 cup of mozzarella, grated Parmesan, beaten egg, wilted spinach, salt, and pepper. Make sure everything is well combined. Stuffing the shells is next. Take each shell and fill it with the spinach-ricotta mixture. Place each filled shell in a greased baking dish. Repeat this step until all shells are filled. Pour marinara sauce evenly over the stuffed shells. Make sure each shell is well covered. Then, sprinkle the remaining mozzarella cheese on top. This will give a nice cheesy crust. Cover the baking dish with foil to keep moisture in. If you spray the foil with cooking spray, it won't stick. Bake for 25 minutes. After that, remove the foil and bake for another 10 minutes. You want the cheese to be bubbly and golden. Prep time for this dish is about 20 minutes, and total cooking time is around 1 hour. To save time, chop the spinach and garlic while the pasta cooks. Mixing the filling can happen while the pasta cools. If you prep ahead, this dish will come together quickly. Enjoy the process and the delicious results! When making creamy spinach ricotta stuffed shells, avoid overcooking the pasta. Cook it al dente, or firm to the bite. If you overcook, the shells will break. Next, don’t skip cooling the spinach before mixing. Hot spinach can cook the egg in the filling. Lastly, cover your dish with foil while baking. This helps the cheese melt evenly without burning. To boost the flavor, add more spices. A pinch of nutmeg gives a warm taste. Fresh herbs like thyme or parsley brighten the dish. If you prefer a kick, sprinkle in some red pepper flakes. Experiment with different cheeses too. A bit of goat cheese or feta can add a tangy twist. Mixing in sautéed onions or mushrooms can also create a richer flavor. These stuffed shells shine with a fresh salad on the side. A simple green salad with lemon vinaigrette balances the creaminess. Garlic bread pairs well too, perfect for soaking up extra sauce. You can also add a sprinkle of fresh basil on top before serving. This adds color and a fresh taste. For a hearty meal, serve with a side of roasted vegetables, like zucchini or bell peppers. Pro Tips Use Fresh Spinach: Fresh spinach provides a vibrant flavor and better texture compared to frozen spinach. Make sure to wash and chop it just before cooking. Egg for Binding: The beaten egg in the filling helps bind the ingredients together, making it easier to stuff the shells and preventing them from falling apart during baking. Extra Cheese Topping: Don’t skip the extra mozzarella on top! It creates a delightful golden crust and adds more cheesy goodness to each bite. Let it Rest: Allow the stuffed shells to cool for a few minutes before serving. This helps the filling set and makes them easier to serve without spilling. {{image_2}} You can change the filling for stuffed shells easily. Try adding cooked ground meat, like beef or turkey. This adds protein and flavor. You can also use sautéed mushrooms for an earthy taste. Artichokes or sun-dried tomatoes provide a tasty twist. For a spicy kick, add some red pepper flakes. Mix and match your favorite ingredients to make it your own. If you need gluten-free stuffed shells, look for gluten-free pasta shells. Many stores offer these now. You can also make your own shells using almond flour or rice flour. This way, you enjoy the same creamy goodness without gluten. Just be sure to check the labels to avoid hidden gluten in sauces. To make this dish vegan, replace ricotta cheese with a tofu blend. You can mash firm tofu and mix it with nutritional yeast for a cheesy flavor. Use a plant-based mozzarella made from cashews or almonds. For the egg, use a flaxseed meal slurry as a binder. This keeps your dish creamy and delicious while being kind to animals. To store leftover creamy spinach ricotta stuffed shells, first let them cool. Place them in an airtight container. Make sure to cover the shells with marinara sauce to keep them moist. They will stay fresh in the fridge for up to three days. You can freeze these stuffed shells for later. After assembling, but before baking, wrap the dish tightly in plastic wrap. Then, cover it with foil to protect it from freezer burn. Label it with the date. These shells can last in the freezer for up to three months. Reheat your stuffed shells in the oven for the best results. Preheat the oven to 350°F (175°C). Place the shells in a baking dish and add a splash of marinara sauce. Cover the dish with foil to keep moisture in. Bake for about 25 minutes until heated through. You can also microwave individual shells for a quick meal, but they may not be as creamy. You can prepare stuffed shells a day in advance. First, cook the pasta and make the filling. Once you stuff the shells, place them in a baking dish. Pour the marinara sauce over them. Cover the dish with plastic wrap or foil and store it in the fridge. When ready to bake, just remove the cover and bake as directed. This method allows flavors to meld and saves you time on busy days. Yes, you can swap or add different cheeses. Cream cheese gives a rich texture. Feta adds a salty kick. Goat cheese offers a tangy flavor. Feel free to mix and match based on your taste. Each cheese brings its own twist to the dish, making it unique every time. These stuffed shells pair well with a fresh salad. A simple green salad with vinaigrette works nicely. Garlic bread also complements the meal. You can serve roasted vegetables for a healthy side. If you want something light, consider a side of steamed broccoli or green beans. Each option adds balance to the meal and makes it more enjoyable. In this article, we explored the key ingredients for your dish, including substitutions and tips for selecting fresh options. We walked through the step-by-step instructions, focusing on preparation, cooking techniques, and smart time management. I shared tips to avoid mistakes and enhance flavors. You also learned about variations, storage methods, and answered common FAQs. Overall, with these insights, you can make delicious stuffed shells easily and confidently. Enjoy your cooking journey!

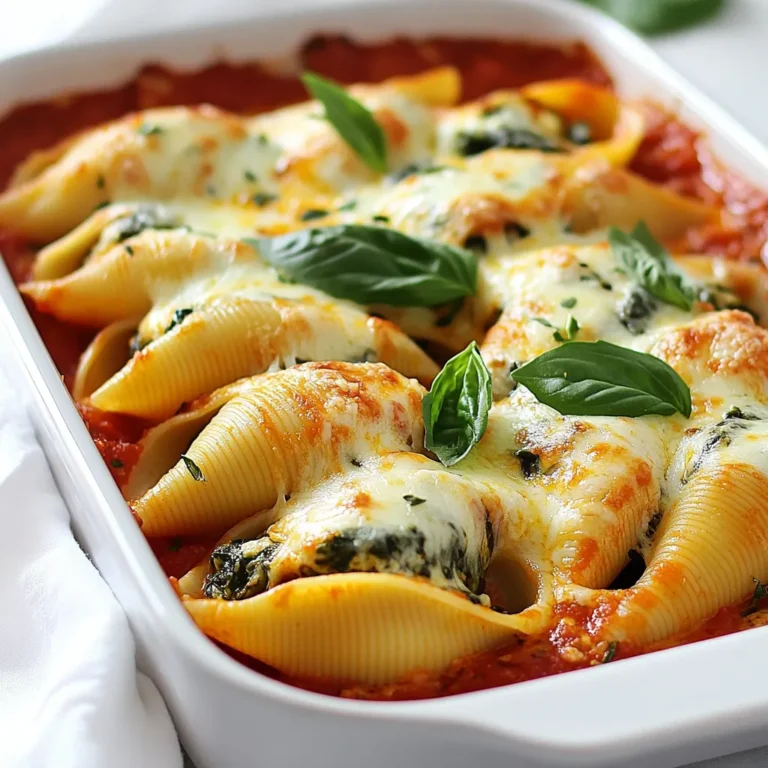
Creamy Spinach Ricotta Stuffed Shells Delight

To make a delightful Grilled Peach Burrata Salad, you will need the following fresh ingredients: - 3 ripe peaches, halved and pitted - 2 tablespoons olive oil - Salt and pepper - 4 cups mixed greens (arugula, spinach, and baby kale) - 8 oz burrata cheese - 1/4 cup toasted walnuts, roughly chopped - 1/4 cup fresh basil leaves - 2 tablespoons balsamic reduction These ingredients work together to create a mix of flavors and textures. The peaches add sweetness, while the burrata brings a creamy touch. The walnuts give a nice crunch, and the greens add freshness. Don't forget the balsamic reduction—it ties everything together with a tangy kick! {{ingredient_image_1}} First, you need to preheat your grill to medium-high heat. This helps create those perfect grill marks on the peaches. Next, take your ripe peaches. Brush the cut sides with olive oil. Sprinkle them with salt and pepper. Place the peaches cut-side down on the grill. Grill them for about 3-4 minutes. You want to see nice grill marks and a bit of softening. After that, flip the peaches over. Grill them for another 1-2 minutes. Once done, remove them from the grill and let them cool slightly. Now, grab a large salad bowl. Combine your mixed greens with a drizzle of olive oil, salt, and pepper. Toss the greens well. Tear the grilled peaches into bite-sized pieces. Add them to the bowl. Next, take the burrata cheese and tear it into pieces to give a rustic look. Add that to the salad, too. Sprinkle the toasted walnuts and fresh basil leaves on top. Finally, drizzle balsamic reduction over the salad just before serving. To get the best grilled peaches, start by choosing ripe fruit. Look for peaches that feel slightly soft when you press them. They should have a sweet smell, too. If they're too hard, they won't grill well. When grilling peaches, use medium-high heat. Brush the cut sides with olive oil and sprinkle on salt and pepper. Place the peaches cut-side down on the grill. Grill them for about 3-4 minutes until you see nice grill marks. Flip them and grill for another 1-2 minutes. This method brings out their sweetness and adds a lovely char. For a stunning presentation, serve the salad on a large platter. Place the burrata in the center. Arrange the grilled peaches and mixed greens around it. This creates a colorful and inviting dish. You can also add extra toppings. Try crumbled feta or goat cheese for a tangy kick. Sliced almonds or pecans can add crunch too. Drizzle more balsamic reduction over the salad just before serving for extra flavor. If you want to switch up the cheese, there are many tasty options. Try using fresh mozzarella for a milder flavor. Ricotta can also work well, giving a creamy texture. For a stronger taste, look at blue cheese or aged cheddar. Each choice will change the salad's flavor, so have fun experimenting! Pro Tips Choose Perfect Peaches: Look for peaches that are slightly soft to the touch and have a fragrant aroma. This ensures they are ripe and flavorful for grilling. Grill with Care: Keep an eye on the peaches while grilling to avoid charring. The goal is to achieve nice grill marks and soft fruit without burning. Use Fresh Ingredients: Fresh basil and high-quality burrata will elevate the flavors of your salad. Opt for locally sourced ingredients whenever possible. Texture Matters: For added crunch, consider using different types of nuts or seeds. This will introduce a variety of textures that complement the creaminess of the burrata. {{image_2}} You can switch peaches for other fruits. Try nectarines or plums instead. They add a different flavor but keep the salad fresh. You can also use seasonal greens. Think about adding arugula, spinach, or baby kale. Each season brings new tastes and textures. To make a vegan version, skip the burrata. Instead, use avocado or a nut-based cheese. Both options are creamy and satisfying. For toppings, add sunflower seeds or chickpeas for protein. You can also drizzle with tahini instead of balsamic reduction for a nutty twist. Adding protein makes this dish heartier. Grilled chicken or shrimp work well. They add a nice grilled flavor. You can also use beans like chickpeas or black beans for a vegetarian boost. Mixing in protein makes the salad filling and nutritious. To store leftover salad, place it in an airtight container. Keep it in the fridge. Use it within two days for the best taste. Make sure to store the dressing separately. This helps keep the greens crisp and fresh. If you mix the salad with dressing, it will become soggy. Can you freeze grilled peaches? Yes, you can freeze them! Just slice the grilled peaches and place them in a freezer bag. Remove as much air as possible before sealing. They will keep well for up to three months. However, I do not recommend freezing the whole salad. The greens and burrata do not freeze well. If you need to reheat the grilled peaches, use the stovetop or microwave. For the stovetop, warm them in a pan over low heat. If using a microwave, heat them in short bursts of 10 seconds. This keeps them from getting mushy. Avoid reheating the salad with mixed greens. They taste best fresh. You can use canned peaches, but fresh is best. Canned peaches lack the crunch and flavor fresh peaches offer. If you choose canned, drain and rinse them well. Then, grill them for a few minutes to enhance their taste. You can use many greens in this salad. Try arugula for a peppery kick. Spinach adds a nice softness. Baby kale offers a hearty texture. You can mix and match to find what you like best. You can store this salad for about one day. Keep it in an airtight container in the fridge. The longer it sits, the soggier the greens become. Fresh is always best for flavor and texture. You can prepare some parts ahead of time. Grill the peaches and store them separately. You can also wash and dry the greens. However, wait to assemble the salad until just before serving. This keeps everything fresh. Grill peaches when they are ripe but still firm. This ensures they hold their shape on the grill. Summer is ideal since peaches are in season then. Look for peaches that yield slightly when pressed. This blog post guides you through a delicious grilled peach and burrata salad. You learned about the key ingredients, step-by-step grilling and assembly, and tips for perfect results. I shared options for variations, storage, and common questions. I hope you feel inspired to try this refreshing dish. Enjoying this salad gives you a taste of summer, no matter the season. Happy cooking!

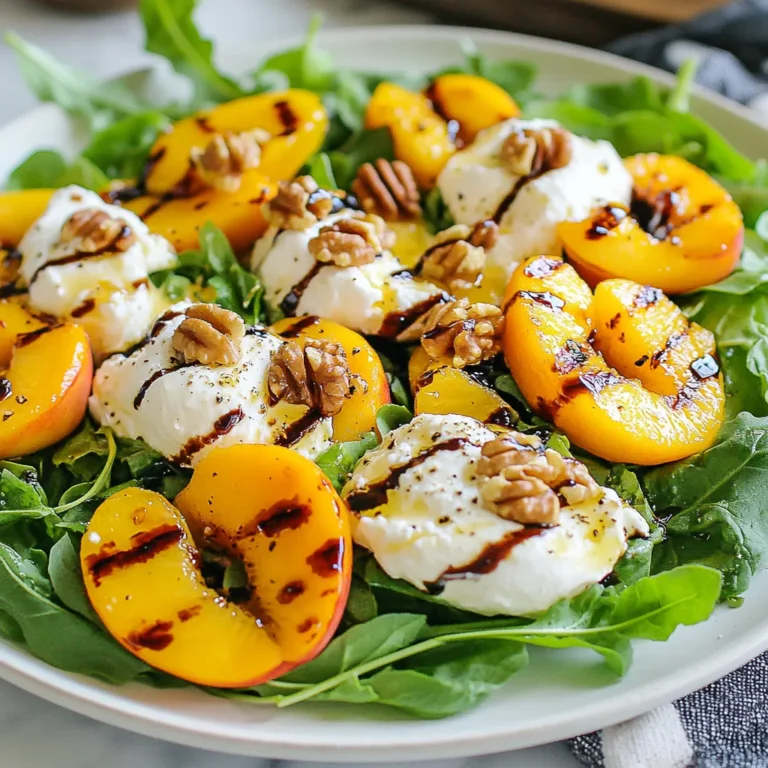
Grilled Peach Burrata Salad Fresh and Flavorful Treat

To make Garlic Herb Shrimp Skewers, gather these main ingredients: - 1 pound large shrimp, peeled and deveined - 4 tablespoons olive oil - 4 cloves garlic, minced - 1 teaspoon smoked paprika - 1 teaspoon dried oregano - 1 teaspoon dried thyme - 1 teaspoon lemon zest - Salt and pepper to taste - Fresh parsley, chopped (for garnish) - 10-12 wooden or metal skewers These ingredients create a tasty marinade that brings out the shrimp's natural flavor. The combination of olive oil and garlic makes the shrimp juicy. The spices add depth and warmth. You can add more flavors to your skewers. Here are some optional ingredients: - Red pepper flakes for heat - Fresh lemon juice for added tang - Baby tomatoes for color and sweetness - Bell peppers for crunch These extras enhance the dish. They make the skewers even more appealing and delicious. To make this dish, you will need a few kitchen tools: - A large mixing bowl for the marinade - Whisk for mixing - Skewers (wooden or metal) for grilling - Grill or grill pan for cooking - Tongs for flipping the skewers These tools help with preparation and cooking. They ensure you can easily assemble and grill the shrimp skewers. {{ingredient_image_1}} If you use wooden skewers, soak them in water. This step keeps them from burning. Soak them for at least 30 minutes. If you forget to soak, you can use metal skewers instead. In a large bowl, combine the olive oil and minced garlic. Add smoked paprika, oregano, thyme, and lemon zest. Mix in salt and pepper to taste. Whisk everything together until it blends well. This marinade gives the shrimp great flavor. Add the peeled and deveined shrimp to the bowl. Toss them gently in the marinade. Make sure all shrimp are well-coated. Let the shrimp sit for 15 to 20 minutes. This time allows the flavors to soak in. Preheat your grill to medium-high heat. Thread the marinated shrimp onto the skewers. Leave some space between each shrimp. Place the skewers on the hot grill. Cook for about 2 to 3 minutes on each side. The shrimp should turn pink and opaque. Once done, take the skewers off the grill. Let them rest for a few minutes before serving. To cook shrimp just right, keep an eye on the time. Shrimp cook fast. They need only 2-3 minutes on each side. When they turn pink and opaque, they are done. Overcooking makes them tough. Always use fresh shrimp when you can. Fresh shrimp taste better and have a firmer texture. To boost the taste, let the shrimp marinate. A soak in the garlic herb marinade for 15-20 minutes works wonders. The olive oil adds richness, while garlic brings depth. Smoked paprika gives a nice smoky kick. Don't forget the lemon zest! It adds brightness to the dish. You can also toss in a pinch of red pepper flakes for heat. Preheat the grill to medium-high heat for the best results. This helps the shrimp cook evenly. If using wooden skewers, soak them in water for 30 minutes. This keeps them from burning. When grilling, space the shrimp evenly on the skewers. This allows for even cooking. Flip the skewers carefully to avoid losing any shrimp. Let the skewers rest for a few minutes after grilling. This helps the juices settle back into the shrimp. Pro Tips Marinate Longer for Better Flavor: If you have time, let the shrimp marinate for up to 30 minutes. This allows the flavors to penetrate deeper, resulting in a more flavorful dish. Use Fresh Herbs: Whenever possible, opt for fresh herbs instead of dried. They will elevate the dish with a brighter and more vibrant flavor profile. Check for Doneness: Shrimp cook quickly; they are done when they turn pink and opaque. Overcooking can lead to a rubbery texture, so keep a close eye on them. Pair with a Dipping Sauce: Enhance your skewers by serving them with a complementary dipping sauce, such as a garlic aioli or a zesty lemon vinaigrette. {{image_2}} You can use other proteins for these skewers. Chicken works great. Cut it into bite-sized pieces. Beef or pork can also fit well. Just adjust the cooking time. Fish like salmon or tilapia adds a nice flavor. Make sure to marinate them just like shrimp. Feel free to mix up the herbs. Fresh basil or cilantro can brighten the dish. Try adding a pinch of red pepper flakes for heat. You might love the taste of fresh dill or chives too. Lemon thyme can add a nice twist. Each herb brings its charm, so experiment! Serve these skewers with a fresh salad. A simple green salad adds crunch. Grilled vegetables like bell peppers and zucchini pair well. You can also offer rice or couscous on the side. A light dipping sauce can enhance the dish too. Try a garlic aioli for a creamy touch. Enjoy your meal with a glass of chilled white wine for a complete experience! After enjoying your garlic herb shrimp skewers, you might have some left. Store them in an airtight container. Make sure to let them cool first. Place a paper towel inside to absorb extra moisture. This helps keep the shrimp fresh. Store in the fridge for up to three days. When it's time to eat your leftovers, reheating is key. The best way to reheat shrimp skewers is in a skillet. Heat the skillet on medium. Add a little olive oil and place the skewers in the pan. Cook for about 2-3 minutes on each side. This method keeps the shrimp juicy and tasty. You can also use the microwave, but be careful. Heat for only 30 seconds at a time. Check often to avoid overcooking. If you want to save shrimp skewers for later, freezing is a great option. First, let the skewers cool completely. Wrap them tightly in plastic wrap. Then, place them in a freezer bag. Remove as much air as possible to prevent freezer burn. You can freeze them for up to three months. When ready to enjoy, thaw in the fridge overnight. Reheat using the skillet method for the best flavor. You should marinate shrimp for 15 to 20 minutes. This time lets the shrimp soak up the flavors. If you marinate too long, the shrimp may become tough. Keep an eye on the time for the best taste. Yes, you can use frozen shrimp. Just make sure to thaw them first. Place the shrimp in the fridge overnight or run them under cold water. Once thawed, peel and devein them if needed. This will keep your shrimp fresh and tasty. Some great sides include: - Rice or quinoa for a hearty base - Grilled vegetables for a colorful plate - A fresh salad for crunch - Garlic bread for a fun twist These sides will balance the flavors of the shrimp and make your meal complete. To make this recipe gluten-free, simply check all your ingredients. Olive oil, garlic, and spices are gluten-free. Just ensure the skewers are safe too. If you use store-bought options, read labels to avoid gluten. Enjoy this dish without worry! In this blog post, we explored delicious garlic herb shrimp skewers. We covered key ingredients, including options for flavor. You learned how to prepare the skewers, make a tasty marinade, and grill them. I shared tips for perfect cooking and flavor tricks. We also discussed variations, storage, and common questions. Remember, these skewers are simple to make and super tasty. Enjoy experimenting with flavors and sharing them with others! Cooking should be fun and creative, so don't be afraid to try new things.

Garlic Herb Shrimp Skewers Tasty Grilled Delight

To make a tasty Spicy Chipotle Black Bean Soup, gather these key ingredients: - 2 cans (15 oz each) black beans, rinsed and drained - 1 medium onion, diced - 3 cloves garlic, minced - 1 bell pepper (red or yellow), diced - 1-2 chipotle peppers in adobo sauce, minced (adjust for spice level) - 1 carrot, diced - 1 celery stalk, diced - 4 cups vegetable broth - 1 teaspoon ground cumin - 1 teaspoon smoked paprika - 1 tablespoon olive oil - Salt and pepper to taste - Fresh cilantro, for garnish - Sliced avocado, for serving - Lime wedges, for serving These ingredients combine to create a rich and flavorful soup. The black beans provide protein and fiber. The fresh veggies add crunch and color. Chipotle peppers bring the heat, while spices like cumin and smoked paprika deepen the taste. The broth ties it all together, making this soup both filling and satisfying. When you gather these ingredients, you set yourself up for success. Each item plays a role in creating a delicious dish. Don't skip the garnishes, either! Fresh cilantro, creamy avocado, and zesty lime make every bowl pop with flavor. {{ingredient_image_1}} - Sautéing the vegetables: Start by heating olive oil in a large pot over medium heat. Add diced onion, minced garlic, diced carrot, and diced celery. Cook for 5 to 7 minutes. You want the onion to be soft and clear. - Adding spices and chipotle peppers: Next, toss in the diced bell pepper. Continue cooking for another 3 minutes. Then, stir in minced chipotle peppers, ground cumin, and smoked paprika. Sauté for 1 more minute to bloom those spices. - Blending the soup for desired texture: Once your veggies are ready, add the rinsed black beans and vegetable broth. Bring it all to a boil. Lower the heat and let it simmer for 20 to 25 minutes. Use an immersion blender to blend the soup until smooth. Leave some chunks for texture. - Combining ingredients and simmering: After blending, season with salt and pepper to taste. If you want more heat, add extra minced chipotle peppers. Let the soup simmer for a few more minutes to meld the flavors. - Adjusting spice levels: Taste your soup. If it needs more spice, add more chipotle peppers. Always taste as you go. This helps you find the perfect balance for your palate. - How to garnish: Serve the soup hot. Top it with fresh cilantro and slices of avocado. A squeeze of lime adds brightness. - Best accompaniments: This soup pairs well with crusty bread or a fresh salad. You can also serve it with tortilla chips for added crunch. Enjoy the flavors! Adjusting the spice level You can control the heat in your soup. Start with one chipotle pepper. Taste the soup after blending. If you want more heat, add another pepper. This way, you can find your perfect spice level. Substitutions for ingredients You can swap out some ingredients easily. Use canned kidney beans instead of black beans. If you don’t have bell peppers, use zucchini or corn. You can also use chicken broth instead of vegetable broth for a different taste. Using an immersion blender vs. regular blender I love using an immersion blender for this soup. It’s easy and quick. You can blend right in the pot. If you use a regular blender, blend only half the soup. Return it to the pot to keep some texture. Sauté times for optimal flavor Sauté your veggies for the right amount of time. Cook the onion, garlic, carrot, and celery for 5-7 minutes. This softens them and brings out their flavors. Add the bell pepper for just 3 more minutes. This makes sure every bite is full of taste. Complimentary side dishes Serve your soup with warm bread. A crusty baguette or cornbread works well. You can also add a fresh salad. A simple green salad with lime vinaigrette pairs nicely. Drinks that pair well with the soup I recommend a light beer or a crisp white wine. Sparkling water with lime is also refreshing. These drinks balance the soup's spice and enhance its flavors. Pro Tips Adjust Spice Level: If you prefer a milder soup, start with one chipotle pepper and taste before adding more to avoid overpowering heat. Enhance Flavor: For deeper flavor, consider adding a splash of lime juice to the soup while simmering and adjust to taste before serving. Texture Variation: Blend the soup to your desired consistency; leave some chunks for a heartier texture or make it completely smooth for a creamy finish. Storage Tips: This soup stores well in the fridge for up to 5 days or can be frozen for up to 3 months. Reheat gently on the stove. {{image_2}} You can easily make this soup vegan. Swap chicken broth for vegetable broth. Use tofu instead of chicken for a protein boost. Tofu adds a nice texture and absorbs flavors well. If you prefer beans, add more black beans or even pinto beans. Want to kick up the flavor? Add more veggies! Try corn, zucchini, or spinach for added nutrition. You can also use spices like cayenne pepper for extra heat. For a creamy version, blend in some coconut milk or sour cream. This adds richness and balances the spice. You can serve this soup in many ways. It works great as a main dish or an appetizer. If you're feeling creative, serve it in bread bowls. This makes it fun and tasty. You can also top it with cheese, sour cream, or jalapeños for added flavor. After you make this spicy chipotle black bean soup, let it cool. Use a large pot or bowl to cool it down quickly. Once it reaches room temperature, transfer it to an airtight container. Seal it well to keep out air and moisture. For freezing, use freezer-safe containers. Leave some space at the top, as the soup expands when frozen. Label each container with the date to track freshness. In the fridge, your soup will last about 3 to 5 days. To enjoy it longer, freeze it, where it can last up to 3 months. When reheating leftover soup, warm it on the stove over low heat. Stir it often to heat evenly. You can also use the microwave, but stir halfway through cooking. You can transform leftover soup into a dip. Just mix it with cream cheese or sour cream and serve with chips. It's a great party snack! You can also add the soup to other recipes. Use it in burritos, tacos, or on top of rice. It adds a spicy kick and extra flavor to any dish. Don't let any leftovers go to waste! Can I make this soup in advance? Yes, you can make this soup ahead of time. Just store it in the fridge. It tastes even better the next day. What can I use if I don’t have chipotle peppers? If you lack chipotle peppers, try smoked paprika. It gives a nice smoky flavor. You can also use regular chili powder for some heat. How to make this soup gluten-free? This soup is already gluten-free since it uses vegetable broth and no wheat products. Just check your broth label to ensure it's gluten-free. Caloric content per serving This soup has about 250 calories per serving. It’s filling and packed with nutrients. Breakdown of macronutrients - Protein: 12 grams - Carbohydrates: 40 grams - Fats: 5 grams Vegan, vegetarian, and allergen-friendly options This soup is vegan and vegetarian. It contains no animal products. For allergen-friendly options, ensure you use certified gluten-free broth. You can add toppings like avocado or cilantro for extra flavor. Enjoy this soup with a side salad or corn tortillas for a complete meal. This blog covered how to make a tasty soup with black beans and fresh veggies. You learned how to prepare, cook, and serve it. We explored tips for spice levels and ingredient swaps. You now have ideas for serving it in creative ways, plus storage tips. In the end, this soup is flexible and easy to make. Try new flavors or techniques. Enjoy sharing this dish with your friends and family!

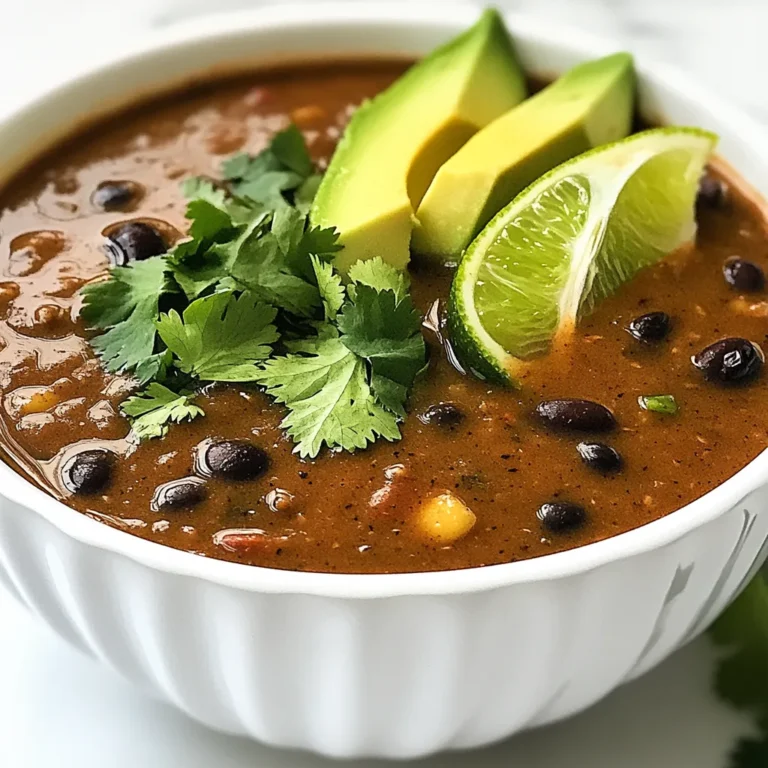
Spicy Chipotle Black Bean Soup Flavorful and Easy Recipe

PREV 1 … 43 44 45 … 57 NEXT
flavor nest kitchen

explore

DessertsDinnerAppetizersDrinks

Our Policies

  • Cookie Policy
  • Copyright Policy
  • Disclaimer
  • GDPR Policy
  • Terms Of Use
Back to Top
  • About
  • Contact Us
  • Privacy Policy
© 2025 flavor nest kitchen