FREE DINNER EBOOK! Get your copy!
  • Cookie Policy
  • GDPR Policy
  • Disclaimer
  • Terms Of Use
  • Visit my other site: Fun Cookie Recipes
flavor nest kitchen
  • Home
  • Dinner
  • Desserts
  • Drinks
  • Appetizers
  • Contact
  • About
  • Privacy Policy
  • Home
  • Dinner
  • Desserts
  • Drinks
  • Appetizers
  • Contact
  • About
  • Privacy Policy
  • Cookie Policy
  • GDPR Policy
  • Disclaimer
  • Terms Of Use
Visit my other site: Fun Cookie Recipes

HOME / CATEGORIES /

Latest

- Ravioli types: You can choose between fresh or frozen ravioli. Fresh ravioli cooks quickly and has a soft texture. Frozen ravioli is handy for quick meals. Both types work well with this dish. - Essential seasonings and condiments: - 2 tablespoons olive oil - 3 cloves garlic, minced - 1 can (14 oz) diced tomatoes (with juices) - 1 teaspoon Italian seasoning - Salt and pepper to taste - 1 cup heavy cream - Optional garnishes: - ½ cup grated Parmesan cheese - Fresh basil leaves These ingredients blend together to create a rich, creamy sauce. The garlic and Italian seasoning add a warm flavor. The diced tomatoes bring a nice acidity and sweetness. Don't forget the fresh spinach! It adds color and nutrition to your dish. You can switch up the garnishes, too. Adding a sprinkle of Parmesan gives a salty kick. Basil leaves add a fresh touch. Adjust these ingredients to fit your taste. {{ingredient_image_1}} Start by bringing a large pot of salted water to a boil. For fresh ravioli, cook them for about 3 to 5 minutes. If you use frozen ravioli, give them 7 to 10 minutes. Always check the package for the best timing. Once cooked, drain the ravioli in a colander and set them aside. Make sure they do not stick together. In a large skillet, heat 2 tablespoons of olive oil over medium heat. Add 3 cloves of minced garlic. Sauté for about 30 seconds until it smells great. Be careful not to burn the garlic. Next, pour in a can of diced tomatoes with their juices. Stir well and let it simmer for about 5 minutes. This will help the sauce thicken a bit. Now, stir in 1 cup of roughly chopped spinach. Cook for another 2 to 3 minutes until the spinach wilts. Pour in 1 cup of heavy cream, then add 1 teaspoon of Italian seasoning, salt, and pepper to taste. Mix everything well. Let the sauce simmer for another 3 to 4 minutes to thicken nicely. Add the drained ravioli to the skillet. Gently toss them to coat with the creamy sauce. Finally, remove the skillet from heat and stir in ½ cup of grated Parmesan cheese until it melts. Serve your creamy tomato spinach ravioli hot and enjoy! To keep your ravioli from sticking, follow these steps: - Use plenty of salted water. This helps prevent sticking. - Stir gently when adding the ravioli to the pot. - Avoid overcrowding the pot. Cook in batches if needed. To thicken your sauce, try these methods: - Simmer longer to reduce the sauce. - Add a bit of grated cheese for richness. - Use a cornstarch slurry. Just mix cornstarch with water and stir it in. You can boost flavor by adding herbs or spices. Here are some ideas: - Fresh basil or parsley brightens the dish. - A pinch of red pepper flakes adds a nice kick. - A sprinkle of oregano can deepen the flavor. For pairing, consider these ingredients: - Serve with garlic bread for a hearty meal. - A simple salad can balance the richness. - Pair with a light white wine like Pinot Grigio for a complete dining experience. Pro Tips Use Fresh Ingredients: Whenever possible, opt for fresh spinach and high-quality diced tomatoes for a more vibrant flavor and texture. Customize Your Ravioli: Feel free to experiment with different types of ravioli such as mushroom or butternut squash for a unique twist on this dish. Adjust the Creaminess: If you prefer a lighter sauce, substitute half of the heavy cream with vegetable or chicken broth. Garnish for Flavor: Don't skip the fresh basil garnish; it adds a wonderful aroma and enhances the overall taste of the dish. {{image_2}} You can change the filling in your ravioli to keep things fresh. Here are some ideas: - Mushroom Ravioli: Use mushrooms for a rich, earthy taste. Cook them well before filling. - Lobster Ravioli: This adds a touch of luxury. Use fresh lobster meat for the best flavor. - Vegan Ravioli: For a plant-based option, fill with cashew cheese or spinach and tofu. These fillings bring unique flavors and textures. They can make your dish feel new each time. You can also play with the sauce to suit your taste. - Lightening the Sauce: If you want a lighter version, use half-and-half instead of heavy cream. You can also swap in vegetable broth to reduce calories. - Spicy Variations: If you love heat, add red pepper flakes to the sauce. You can also use spicy diced tomatoes for an extra kick. These sauce tweaks can elevate your creamy tomato spinach ravioli. Try different options to find your favorite! To keep your creamy tomato spinach ravioli fresh, store it in an airtight container. Place it in the fridge right after it cools down. It stays good for about 3-4 days. If you want to keep it longer, try freezing it. It can last for up to 2 months in the freezer. Just make sure to use a freezer-safe container or bag. When it's time to enjoy your leftovers, avoid using the microwave if you can. Instead, reheat it on the stove. Add a splash of water or broth to keep it moist. Heat it on low, stirring gently. This helps prevent soggy ravioli. If you do use a microwave, heat in short bursts. Stir in between to ensure even warming. Enjoy your delicious meal again! Can I use other types of pasta? Yes, you can use other pasta types. Penne or farfalle work well. Just adjust cooking time based on the pasta shape. Always check the package for timing. How to know when the ravioli is cooked? The ravioli is cooked when it floats to the top. Fresh ravioli usually takes 3-5 minutes, while frozen may take 7-10 minutes. Taste one to check if it's tender. Can this recipe be made ahead of time? Yes, you can make this recipe ahead. Cook the ravioli and sauce, then store them separately. When ready to eat, reheat the sauce and combine with ravioli. Caloric content and serving sizes This recipe serves four. Each serving has about 500 calories. This can vary based on the ravioli filling and cheese used. Potential allergens in the recipe This dish contains dairy and gluten. Ravioli may include wheat, and heavy cream has lactose. Always check labels for specific allergens if needed. Cooking ravioli is fun and easy. You learned about ingredients, cooking steps, and tips. Remember to choose fresh or frozen ravioli based on your needs. Sauces can be simple or bold with spices. As you try different fillings and sauces, you can customize the dish. Store leftovers well and reheat them right to keep them tasty. Enjoy making this dish with your own twist. You can share your new favorite ravioli recipe with friends, too. Your kitchen adventure starts now!

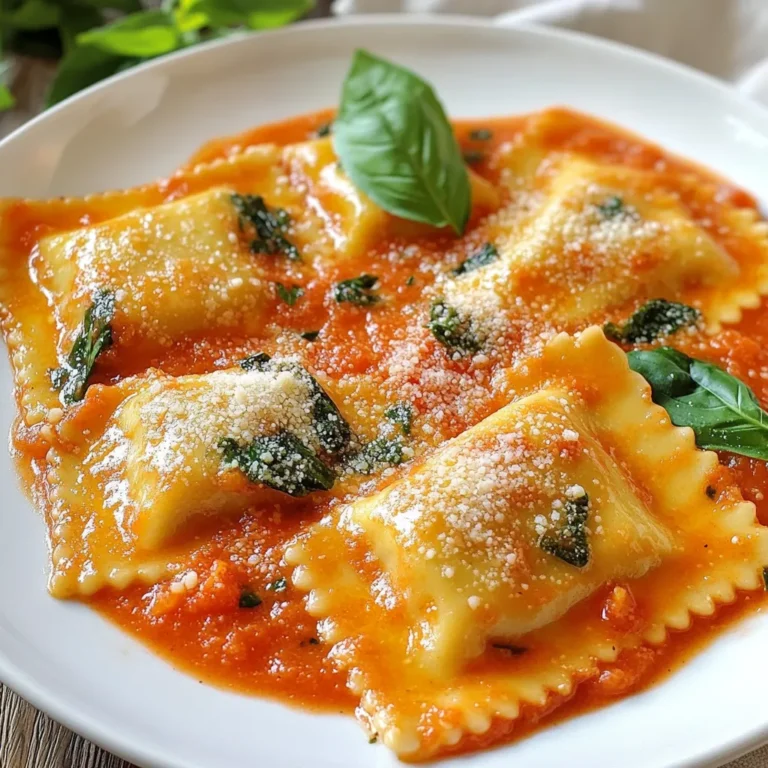
Creamy Tomato Spinach Ravioli Flavorful and Easy Recipe

To make Lemon Garlic Shrimp Pasta, you need these simple ingredients: - 8 oz linguine or spaghetti - 1 lb large shrimp, peeled and deveined - 3 tablespoons olive oil - 4 cloves garlic, minced - 1 teaspoon red pepper flakes (adjust to taste) - Zest of 1 lemon - 1/4 cup fresh lemon juice (about 2 lemons) - 1/2 cup cherry tomatoes, halved - 1/4 cup fresh parsley, chopped - Salt and pepper to taste - Grated Parmesan cheese (optional) If you don’t have all the ingredients, here are some easy swaps: - Use any pasta you like, such as fettuccine or penne. - Swap shrimp for scallops or chicken. - Use garlic powder if you run out of fresh garlic. - For a spicy kick, try using fresh chili peppers instead of red pepper flakes. - If you want a twist, add spinach or arugula for extra greens. These swaps keep the dish tasty while fitting your pantry. Here’s a quick look at the nutrition for some of the main ingredients: - Shrimp: High in protein and low in calories. Good source of omega-3 fats. - Olive Oil: Contains healthy fats. It’s good for heart health. - Garlic: Has many health benefits, including boosting your immune system. - Lemon Juice: Rich in vitamin C. Helps with digestion and adds flavor. - Pasta: Provides carbohydrates for energy. Choose whole grain for added fiber. This dish balances flavor and nutrition, making it a smart meal choice. {{ingredient_image_1}} 1. Start by bringing a large pot of salted water to a boil. 2. Add 8 ounces of linguine or spaghetti. Cook it according to the package instructions until it is al dente. 3. Reserve one cup of pasta water before draining the pasta. Set the pasta aside. 4. While the pasta cooks, heat 2 tablespoons of olive oil in a large skillet over medium heat. 5. Add 4 cloves of minced garlic and 1 teaspoon of red pepper flakes. Sauté for about one minute, but don’t let the garlic burn! 6. Turn up the heat to medium-high. Add 1 pound of large shrimp, peeled and deveined. Season with salt and pepper. 7. Cook the shrimp for about 2 to 3 minutes on each side. They should turn pink and opaque. 8. Once the shrimp are cooked, add the zest of one lemon and 1/4 cup of fresh lemon juice. 9. Toss in 1/2 cup of halved cherry tomatoes. Stir everything together and cook for 2 more minutes until the tomatoes soften. 10. Add the drained pasta to the skillet. If needed, use the reserved pasta water to loosen the sauce. 11. Remove the skillet from heat and stir in 1/4 cup of chopped fresh parsley. 12. Taste and adjust seasoning if necessary. Serve immediately, adding grated Parmesan cheese if you like. - Use fresh shrimp for the best flavor. - Make sure the skillet is hot enough before adding the shrimp. This helps them cook quickly. - Don’t overcrowd the skillet. Cook in batches if needed. This keeps the shrimp juicy. - Always check for doneness. The shrimp should be pink and opaque. - Follow the package instructions on cooking time closely. - Start checking the pasta a minute or two before the time is up. - Take a piece and bite into it; it should be firm but not hard. - If it’s too soft, you’ve overcooked it. Aim for a slight bite in the center. When making lemon garlic shrimp pasta, avoid overcooking the shrimp. Shrimp cooks fast. If you cook it too long, it gets tough. Watch for the pink color. Remove it as soon as it turns opaque. Another mistake is not saving pasta water. This water helps the sauce stick. If your pasta seems dry, add a bit of the reserved water. It will make the dish creamy and rich. Sautéing shrimp in olive oil is key. Use medium to medium-high heat. This helps to get a nice sear on the shrimp. Add minced garlic after the oil heats up. This way, the garlic won’t burn. Cook shrimp in a single layer. This allows even cooking. Flip them only once for the best texture. If you crowd the pan, they will steam instead of sauté. Want to boost flavor? Add fresh herbs like basil or thyme. You can also toss in some spinach or arugula. These greens add color and nutrients. For spice lovers, increase red pepper flakes. You can also add a dash of hot sauce for a kick. If you like tang, try a splash of white wine. It adds depth and pairs well with lemon. You can also swap cherry tomatoes for sun-dried tomatoes for a different taste. Experiment with these tips to find your favorite version! Pro Tips Use Fresh Shrimp: For the best flavor, opt for fresh shrimp instead of frozen. If using frozen, make sure to fully thaw them before cooking. Adjust Spice Level: The red pepper flakes can be adjusted based on your heat preference. Start with a smaller amount and add more if you like it spicier. Reserve Pasta Water: Always reserve some pasta water before draining. It’s a great way to adjust the sauce's consistency and adds a bit of starch for better adherence to the pasta. Garnish for Freshness: Adding fresh herbs like parsley at the end brightens the dish and enhances flavor. Consider adding a sprinkle of lemon zest as a final touch! {{image_2}} You can boost your dish with veggies. Try adding peas, bell peppers, or spinach. These add color and nutrition. Simply sauté them with the garlic before adding shrimp. The flavors blend well, and the meal becomes even more vibrant. For a gluten-free meal, swap out regular pasta. Use gluten-free pasta made from rice or chickpeas. If you prefer low-carb, use zucchini noodles or spaghetti squash. Both options keep the dish light and fresh without losing taste. If shrimp isn’t your favorite, other proteins work great too. Chicken breast, scallops, or firm tofu can substitute. Cook them the same way as the shrimp. Each option adds a different twist, making the dish your own. Enjoy experimenting! To store leftover lemon garlic shrimp pasta, let it cool first. Place it in an airtight container. Make sure to seal it well. You can keep it in the fridge for up to three days. If you want to keep it longer, consider freezing it. When you’re ready to eat, reheat the pasta in a skillet. Add a splash of water or olive oil to help it warm evenly. Heat it over low to medium heat. Stir gently until it’s hot. This method helps to keep the shrimp juicy and the pasta from drying out. If you freeze your lemon garlic shrimp pasta, it can last for two months. To thaw, move it to the fridge overnight. You can also use the microwave for quick thawing. Just make sure to stir it well while reheating. This ensures even warming and keeps the flavors fresh. Linguine or spaghetti works best for this dish. Both types hold the sauce well. They also complement the shrimp nicely. You can use other pasta types if you prefer. Just make sure it cooks to al dente for the best texture. You can prepare some parts ahead. Cook the pasta and shrimp separately. Mix them just before serving. This keeps everything fresh and tasty. The sauce may soak into the pasta if made too early. Cook shrimp until they turn pink and opaque. This usually takes about 2-3 minutes per side. Don't overcook them; they can become rubbery. When they curl into a C shape, they are done. You now have a complete guide to making Lemon Garlic Shrimp Pasta. We covered the ingredients, cooking steps, and common mistakes to avoid. You can customize the dish to fit dietary needs or preferences. Proper storage and reheating tips will keep your leftovers tasty. Remember to watch the shrimp while cooking to get the best results. With these steps, you can create a delicious meal that everyone will love. Enjoy your cooking journey and share this dish with friends and family!

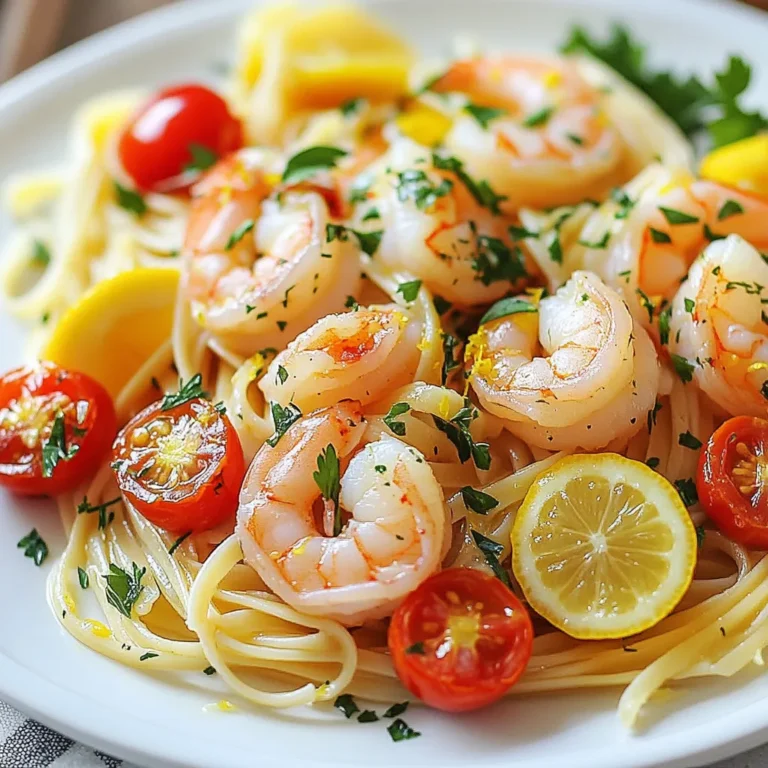
Lemon Garlic Shrimp Pasta Quick and Flavorful Meal

- 1 pound ground beef (or turkey) - 1/2 cup breadcrumbs - 1/4 cup grated Parmesan cheese - 1/4 cup chopped fresh parsley - 1 large egg - 3 cloves garlic, minced - 1 teaspoon salt - 1/2 teaspoon black pepper - 1/4 teaspoon red pepper flakes (optional) - 1/2 cup sweet chili sauce - 2 tablespoons soy sauce (or tamari for gluten-free) - 1 tablespoon honey - 1 tablespoon rice vinegar - 1 tablespoon sesame oil - Additional parsley for garnish - Sesame seeds and chopped green onions Gather these ingredients to create your sweet chili garlic glazed meatballs. The main ingredients like ground beef and breadcrumbs form the base. Fresh parsley adds a nice touch. Each seasoning enhances the flavor. Sweet chili sauce brings sweetness, while soy sauce adds depth. Honey, rice vinegar, and sesame oil round out the glaze perfectly. For presentation, top with sesame seeds and green onions. This makes your dish pop visually and adds extra flavor. Use the freshest ingredients for the best results. Enjoy the cooking process! {{ingredient_image_1}} - Preheat the oven to 400°F (200°C) and line a baking sheet with parchment paper. - In a large bowl, combine: - 1 pound ground beef (or turkey) - 1/2 cup breadcrumbs - 1/4 cup grated Parmesan cheese - 1/4 cup chopped fresh parsley - 1 large egg - 3 cloves garlic, minced - 1 teaspoon salt - 1/2 teaspoon black pepper - 1/4 teaspoon red pepper flakes (optional) Mix these ingredients well until they come together smoothly. - Shape the mixture into meatballs about 1 inch wide. - Place the meatballs on the prepared baking sheet. Bake them for 20-25 minutes. They should turn golden brown and be cooked through. - In a small saucepan, combine: - 1/2 cup sweet chili sauce - 2 tablespoons soy sauce (or tamari for gluten-free) - 1 tablespoon honey - 1 tablespoon rice vinegar - 1 tablespoon sesame oil - Heat over medium heat. Stir until it starts to simmer. Lower the heat and let it cook for about 5 minutes. - Once the meatballs are done, take them out of the oven. - Transfer them to a large bowl. Pour the sweet chili garlic glaze over them. - Toss gently to coat each meatball evenly. - Serve hot and enjoy! - Ensure even cooking by spacing meatballs properly. This helps them brown well. - Check for doneness with a meat thermometer. Meatballs should reach 160°F (71°C). - Adjust sweetness with more or less honey. This lets you control the taste. - Experiment with different herbs or spices. Try basil, cilantro, or paprika for variety. - Pair with rice or noodles for a complete meal. This adds great texture and flavor. - Serve as an appetizer with toothpicks. They are easy to eat and fun for guests. Pro Tips Use Fresh Ingredients: Fresh garlic and parsley enhance the flavor of the meatballs significantly. Avoid using pre-minced garlic for the best taste. Adjust Spice Levels: If you prefer a milder flavor, omit the red pepper flakes. For more heat, add extra flakes or a dash of hot sauce to the glaze. Meatball Size Matters: Ensure that all meatballs are uniform in size (about 1 inch) for even cooking. This prevents some from being overcooked while others remain undercooked. Glaze Variation: Experiment with different sauces; teriyaki can replace sweet chili sauce for a different flavor profile. Adjust sweetness with honey to taste. {{image_2}} You can swap beef for turkey or chicken. Both options create leaner meatballs. They remain juicy and flavorful. If you prefer a meat-free option, try lentils or mushrooms. Lentils pack protein and fiber. Mushrooms add a rich umami taste. Both are great for veggie lovers. Want more heat? Add chili paste to the glaze. This gives the meatballs a spicy kick. If you want a different flavor, try teriyaki sauce. It adds a sweet and savory twist. Both options change the vibe of the dish. Serving matters! For a fresh touch, serve meatballs over greens. This adds color and crunch. You can also create sliders. Use small rolls to make tasty sandwiches. This way, everyone can enjoy them as finger food. After making these meatballs, store them in an airtight container. They stay fresh for up to 4 days. This makes them great for meal prep. Just grab a meatball when you're hungry! You can freeze these meatballs for later. Freeze them uncooked or cooked. Place them in a freezer bag or container. They last for up to 3 months. When you're ready, just thaw and cook or reheat. This saves time on busy days! To reheat, use the oven or stovetop for the best results. Preheat your oven to 350°F (175°C). Place the meatballs on a baking sheet and heat for about 10-15 minutes. This keeps them juicy. If using the stovetop, add a splash of water to a pan. Cover and heat on low until warm. This helps maintain their texture and flavor. Enjoy your meatballs as if they were just made! You can use oats or crushed crackers. Both work well in meatballs. Oats add a nice texture. They also provide a healthy touch. Crushed crackers bring a bit of crunch. You can choose any flavor of cracker you like. Just keep the ratio the same. Yes, you can prepare these meatballs ahead of time. Mix the meatball ingredients and shape them. Place them on a baking sheet and freeze. Once frozen, transfer them to a bag. They can stay in the freezer for a few months. When ready to cook, bake them straight from the freezer. You can also refrigerate cooked meatballs. They will stay fresh for up to four days. To spice up your meatballs, add red pepper flakes. You can also mix in some hot sauce. Another option is to add diced jalapeños. If you want more heat, try using spicy sausage instead of beef or turkey. Always taste your mixture before baking. This way, you can adjust the heat to your liking. This blog post covered how to make tasty meatballs with an easy sweet chili glaze. We discussed key ingredients, step-by-step instructions, and helpful tips for cooking and serving. You can also try different meat options and sauces for variety. Remember, these meatballs are fun for meals or snacks. Enjoy making them your own! Cooking is about trying new things, so don't be afraid to experiment. Your kitchen adventures can bring great flavors to your table.

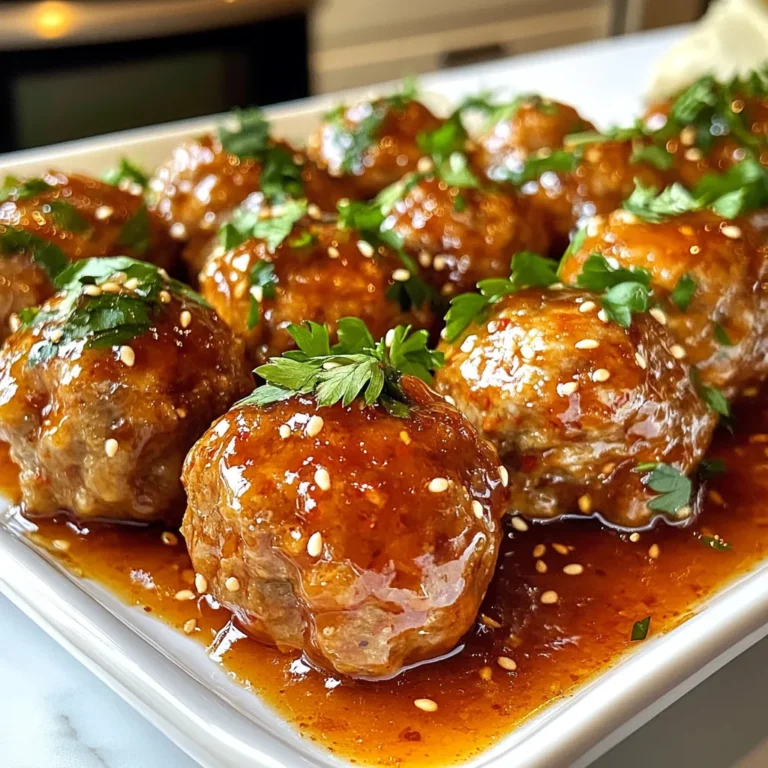
Sweet Chili Garlic Glazed Meatballs Savory and Easy Meal

- 12 jumbo pasta shells - 2 cups cooked chicken, shredded - 1 cup ricotta cheese - 1 cup shredded mozzarella cheese - 1 cup grated Parmesan cheese - 2 cups Alfredo sauce (store-bought or homemade) - 1 teaspoon garlic powder - 1 teaspoon Italian seasoning - Salt and pepper to taste - Fresh parsley, chopped (for garnish) You can swap the chicken for cooked turkey if you like. For a vegetarian option, use spinach or mushrooms instead of chicken. If you want a lighter dish, try using low-fat cheeses. You can also use a dairy-free Alfredo sauce for a vegan version. Feel free to mix in some cooked vegetables, like broccoli or bell peppers, to add more color and taste. Gather these tools to make your cooking easier: - A large pot for boiling pasta - A baking dish, 9x13 inches - A mixing bowl for combining the filling - A spoon or spatula for mixing - Aluminum foil to cover the dish while baking - A measuring cup for accurate amounts These ingredients and tools will help you create creamy Chicken Alfredo stuffed shells that everyone will love! {{ingredient_image_1}} First, gather all your ingredients. You will need jumbo pasta shells, cooked chicken, ricotta, mozzarella, Parmesan, Alfredo sauce, garlic powder, Italian seasoning, salt, and pepper. This will help your cooking flow smoothly. Start by boiling water in a large pot. Add the jumbo pasta shells and cook them according to the package directions until they are al dente. This usually takes about 8 to 10 minutes. After that, drain the shells and set them aside to cool. In a large mixing bowl, combine the shredded chicken, ricotta cheese, half of the mozzarella, and half of the Parmesan. Add the garlic powder, Italian seasoning, salt, and pepper. Mix everything well until it is creamy and smooth. This filling is the heart of your dish. Pour half of the Alfredo sauce into a 9x13 inch baking dish. Spread it evenly on the bottom. Next, take each cooked pasta shell and stuff it with the chicken mixture. Place the stuffed shells in the baking dish. Once they are arranged, pour the remaining Alfredo sauce over them. Make sure every shell is covered. Now, sprinkle the remaining mozzarella and Parmesan cheese on top of the shells. Cover the baking dish with aluminum foil. Bake in your preheated oven at 375°F (190°C) for 20 minutes. After that, remove the foil and bake for another 10 to 15 minutes until the cheese is bubbly and golden. Let it cool for a few minutes, then garnish with chopped parsley before serving. Enjoy your creamy Chicken Alfredo stuffed shells! To make Alfredo sauce at home, you need just a few simple ingredients. Start with: - 1 cup heavy cream - 1/2 cup unsalted butter - 1 cup grated Parmesan cheese - 2 cloves garlic, minced - Salt and pepper to taste In a saucepan, melt the butter over low heat. Add minced garlic and cook for about a minute. Pour in the heavy cream and stir. Let it simmer gently. Gradually whisk in the Parmesan cheese until it melts. Season with salt and pepper. This sauce will be rich and creamy, perfect for your stuffed shells. When it comes to cheese, balance is key. I like to use a mix of three cheeses for flavor. Here’s my go-to blend: - Ricotta cheese for creaminess - Mozzarella cheese for meltiness - Parmesan cheese for sharpness Combine half of your mozzarella and half of your Parmesan into the chicken filling. This mix gives each bite a creamy yet flavorful profile. You can also add a little extra mozzarella on top for a gooey finish. Avoiding mistakes makes cooking more enjoyable. Here are some tips to keep in mind: - Overcooking the pasta: Cook the shells only until al dente. They will cook more in the oven. - Not cooling the shells: Let the shells cool slightly after cooking. This makes stuffing them easier. - Skipping the seasoning: Don’t forget salt and pepper! They bring out the flavors in your filling and sauce. - Covering too tightly: When baking, cover the dish loosely to prevent the cheese from getting too soggy. Following these tips will help you create amazing Chicken Alfredo Stuffed Shells that everyone will love! Pro Tips Use Fresh Herbs: Fresh parsley or basil can elevate the flavor profile of your stuffed shells. Add them both to the filling and as a garnish for a burst of freshness. Experiment with Cheeses: Try mixing different types of cheese, such as goat cheese or fontina, into the filling for a unique twist on this classic dish. Make Ahead: These stuffed shells can be prepared in advance and stored in the refrigerator. Simply bake them when you're ready for a delicious meal. Serve with a Side Salad: Pair your stuffed shells with a crisp green salad to complement the creamy richness of the dish and balance the flavors. {{image_2}} You can easily switch to a vegetarian version of chicken Alfredo stuffed shells. Replace the shredded chicken with spinach or mushrooms. You could also use a mix of both for extra flavor. Add diced bell peppers or zucchini for more texture. This keeps your dish hearty and colorful. While Alfredo sauce is classic, you can try other sauces. A marinara sauce gives a bright and tangy twist. If you like spice, use a spicy arrabbiata sauce. You can even mix Alfredo with pesto for a creamy and herby flavor. Each sauce brings its own unique taste to the stuffed shells. Want more flavor? Add some cooked bacon or sausage to the filling. This adds a nice crunch and savory taste. You can also mix in sun-dried tomatoes or black olives for a Mediterranean touch. Fresh herbs like basil or oregano can brighten your dish too. Each of these add-ins enhances the overall experience. To keep your Chicken Alfredo Stuffed Shells fresh, place them in an airtight container. This helps seal in moisture and flavor. Make sure to let the dish cool before covering it. Store it in the fridge for up to three days. When you are ready to eat, simply take out the portion you want. To reheat your stuffed shells, I suggest using the oven. Preheat it to 350°F (175°C). Place the stuffed shells in a baking dish and cover with foil. Bake for about 20 minutes, or until heated through. You can also use the microwave for a quicker option. Just heat in short bursts, around one minute at a time. Check to see if it's warm enough. If you want to save some for later, freezing is a great option. After cooking, let the stuffed shells cool completely. Then, place them in a freezer-safe container or bag. It is best to use a layer of parchment paper to separate layers. You can freeze them for up to three months. When you’re ready to eat, thaw overnight in the fridge, then reheat as mentioned above. Yes, you can use regular pasta, but it will change the look and feel. Regular pasta will not hold the filling like jumbo shells do. I recommend using large or medium shells for best results. You can also try manicotti if you have it. To make this recipe gluten-free, swap the pasta. Look for gluten-free jumbo shells made from rice or corn. You can also make a gluten-free Alfredo sauce. Just check the labels on all your ingredients. The best way to reheat stuffed shells is in the oven. Preheat the oven to 350°F (175°C). Cover the dish with foil to keep it moist. Heat for about 20 minutes or until warm. You can also microwave them but they may dry out. Yes, you can prepare this dish ahead of time! Assemble the stuffed shells and cover them with foil. Store them in the fridge for up to 24 hours. When ready to bake, just add a few extra minutes to the cooking time. This blog covered the key steps to make stuffed shells. We explored ingredients, tools, and step-by-step instructions. I shared tips for sauces, cheese blends, and common mistakes. You can try different variations for more fun. Store leftovers properly to enjoy later. To sum up, making stuffed shells is easy and fun. With some practice, you’ll create a dish your friends will love. Enjoy your cooking journey!

Chicken Alfredo Stuffed Shells Easy and Creamy Recipe

To make this tasty Greek quinoa salad, you will need: - 1 cup quinoa, rinsed - 2 cups water - 1 cucumber, diced - 1 cup cherry tomatoes, halved - 1 red bell pepper, diced - 1/2 red onion, finely chopped - 1 cup Kalamata olives, pitted and halved - 1/2 cup feta cheese, crumbled - 1/4 cup fresh parsley, chopped - 3 tablespoons olive oil - 2 tablespoons lemon juice - 1 teaspoon dried oregano - Salt and pepper to taste You can make this salad your own by changing some ingredients. Here are some ideas: - Swap quinoa for bulgur or farro for a different grain. - Use any type of olives you like, such as green olives. - If you don’t like feta, try goat cheese or skip the cheese. - Add a splash of red wine vinegar for extra flavor. - Use fresh herbs like dill or mint instead of parsley. Each serving of this salad packs a nutritious punch. Here’s what you get: - Calories: 250 - Protein: 8g - Carbohydrates: 30g - Dietary Fiber: 5g - Total Fat: 12g - Saturated Fat: 3g - Calcium: 100mg - Iron: 2mg This Greek quinoa salad is fresh and filling. It’s perfect for lunch or dinner. You can feel good about what you eat! {{ingredient_image_1}} To cook the quinoa, start with one cup of rinsed quinoa. Place it in a medium saucepan with two cups of water. Bring the water to a boil over medium-high heat. Once it boils, turn the heat down low. Cover the pan and let it simmer for about 15 minutes. The quinoa is done when the water is absorbed and the grains look fluffy. Use a fork to fluff the quinoa gently. Let it cool slightly before mixing with the veggies. While the quinoa cools, you can prepare the vegetables. Dice one cucumber and a red bell pepper. Cut one cup of cherry tomatoes in half. Finely chop half a red onion. Take one cup of Kalamata olives, pit them, and halve them. These colorful veggies add crunch and flavor to the salad. Place all the chopped veggies in a large mixing bowl. Now it’s time to combine the quinoa and veggies. Add the cooled quinoa to the bowl with the vegetables. Crumble half a cup of feta cheese and add it to the mix. In a small bowl, whisk together three tablespoons of olive oil, two tablespoons of lemon juice, one teaspoon of dried oregano, and some salt and pepper. Pour this dressing over the quinoa salad. Mix everything gently until well combined. Just before serving, stir in a quarter cup of fresh chopped parsley for a burst of flavor. Cooking quinoa is easy if you follow a few steps. First, always rinse your quinoa before cooking. Rinsing removes the bitter coating called saponin. Use a fine mesh strainer to rinse it well. Next, use a 2:1 water-to-quinoa ratio. For 1 cup of quinoa, add 2 cups of water. Bring the water to a boil over medium-high heat. Once boiling, lower the heat and cover the pot. Let it simmer for about 15 minutes. After that, check if the water is absorbed. If it is, fluff the quinoa with a fork. This helps separate the grains and makes it light. To make your Greek quinoa salad burst with flavor, focus on the dressing. A simple mix of olive oil, lemon juice, oregano, salt, and pepper adds a zesty touch. Whisk these ingredients together until smooth. Pour the dressing over your salad just before serving. This keeps the veggies fresh and crispy. You can also try adding fresh herbs like mint or dill. They add a lovely twist. If you like spice, a pinch of red pepper flakes works well too. Mixing in some chopped garlic gives a strong flavor kick. Presentation makes your dish more inviting. Serve the salad in a large, shallow bowl. This allows the colors to shine. Garnish with extra parsley on top for a fresh look. Adding lemon wedges on the side brightens the dish and offers a pop of color. For an added touch, consider using a colorful platter. A bright blue or white platter enhances the salad's colors. Arrange the ingredients in groups for a fun effect. This not only looks good but also makes it easy for guests to scoop their portions. Pro Tips Rinse the Quinoa: Rinsing quinoa before cooking helps remove its natural coating, called saponin, which can give a bitter taste. Let It Cool: Allowing the quinoa to cool slightly before mixing it with the vegetables prevents wilting and maintains the crispness of the salad. Customize the Veggies: Feel free to add or substitute your favorite vegetables like bell peppers, zucchini, or even avocados to make the salad your own. Serve Fresh: This salad is best served fresh, but can be stored in the fridge for up to 3 days. Just give it a good stir before serving again! {{image_2}} This Greek quinoa salad is naturally vegetarian. To make it vegan, simply skip the feta cheese. You can use avocado instead for creaminess. It adds good fats and a fresh taste. Another option is to toss in some nuts or seeds. Sunflower seeds or pumpkin seeds work well. They give a nice crunch and extra nutrition. Want to boost the protein? Try adding chickpeas or black beans. They blend well and add texture. You can also use grilled chicken or shrimp for a meatier version. Just cook your protein choice and mix it in with the salad. This makes it a filling meal for lunch or dinner. Feel free to swap in seasonal vegetables. In summer, add zucchini or bell peppers. In fall, try roasted sweet potatoes or butternut squash. These swaps keep the salad fresh and exciting. You can even mix up the herbs! Basil or mint can add a new twist to your salad. This way, you can enjoy new flavors all year long. To keep your Greek quinoa salad fresh, store it in an airtight container. Place it in the fridge. It will stay good for up to three days. Make sure to seal it well to avoid extra moisture. If you notice any liquid forming, drain it before serving. You can freeze the salad, but it may change texture. To freeze, pack it in a freezer-safe container. Leave some space for expansion. It can last up to two months in the freezer. When ready to eat, thaw it in the fridge overnight. Mix it well before serving. Each ingredient has a different shelf life. Quinoa can last for years if stored dry. Fresh vegetables should be used within a week. Feta cheese stays good for about a week after opening. Kalamata olives can last a few weeks, but check for any signs of spoilage. Always store ingredients separately for the best taste and texture. I recommend using tri-color quinoa. It adds a nice crunch and color. You can also use white quinoa. It has a mild taste and cooks easily. Both types are good choices for a Greek quinoa salad. Just remember to rinse the quinoa before cooking. This helps remove the bitter coating called saponin. Yes, you can make this salad ahead. It tastes even better after sitting for a few hours. The flavors mix well as it chills in the fridge. Just keep the dressing separate until you are ready to serve. This way, the veggies stay crisp and fresh. You can store it in an airtight container for up to three days. Quinoa is a superfood packed with nutrients. It is high in protein, which helps build muscles. It has fiber, which aids digestion and keeps you full. Quinoa is gluten-free, making it safe for those with gluten allergies. It also contains vitamins and minerals like magnesium and iron. Eating quinoa can support heart health and help maintain a healthy weight. This blog post covered how to make a tasty quinoa salad. We talked about key ingredients and helpful substitutes. I shared step-by-step cooking instructions and tips to enhance flavor. You learned different variations to keep it exciting and easy ways to store leftovers. Quinoa is good for your health and flexible for meals. With these tips, you can build your own salads that are both fun and nutritious. Enjoy experimenting with flavors and ingredients!

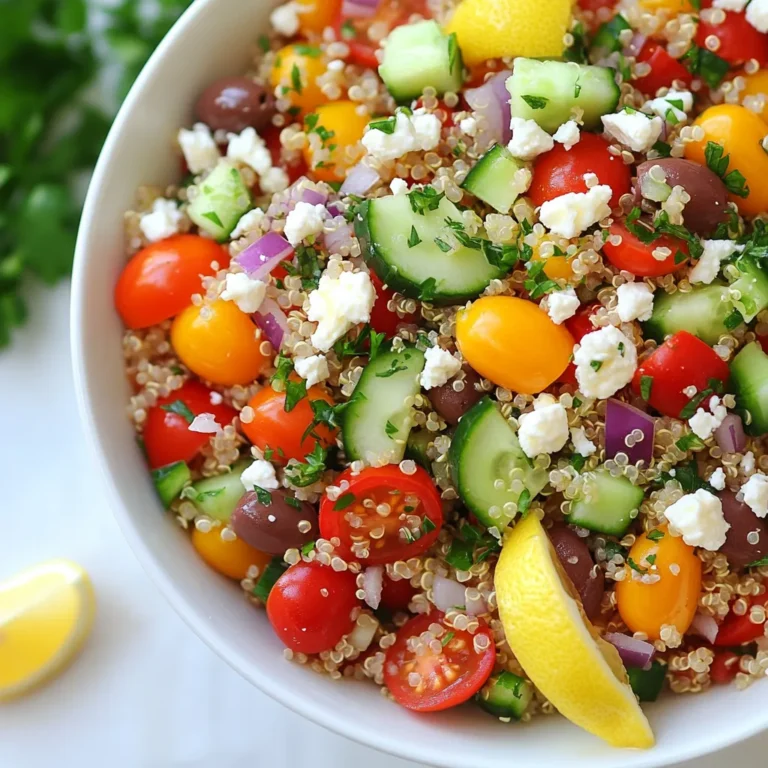
Greek Quinoa Salad Fresh and Flavorful Experience

- 2 medium sweet potatoes, peeled and diced - 1 can (15 oz) black beans, drained and rinsed - 1 can (14.5 oz) diced tomatoes, with juices - 1 medium onion, chopped - 3 cloves garlic, minced - 1 bell pepper (red or green), chopped - 2 cups vegetable broth - 2 tablespoons chili powder - 1 teaspoon cumin - 1 teaspoon smoked paprika - Salt and pepper to taste - 2 tablespoons olive oil - Fresh cilantro for garnish - Optional: avocado slices and lime wedges for serving Sweet potatoes are rich in fiber, vitamins A and C. They help boost your immune system. Black beans offer protein and are high in fiber too. They aid digestion and keep you full. Diced tomatoes are low in calories and packed with vitamins. They add flavor and nutrients. Onions and garlic have antioxidants. They support heart health and add depth to flavors. Bell peppers are full of vitamins and add a nice crunch. If you cannot find sweet potatoes, try using regular potatoes. They will change the flavor slightly but still taste good. You can replace black beans with kidney beans or pinto beans. If you want a spicy kick, add jalapeños or hot sauce. Use vegetable broth or chicken broth, depending on your diet. For a creamier texture, stir in some coconut milk towards the end. {{ingredient_image_1}} 1. Start by peeling and dicing the sweet potatoes. You need two medium sweet potatoes for this recipe. 2. Chop one medium onion and one bell pepper. You can use either red or green. 3. Mince three cloves of garlic. This adds a nice flavor to the chili. 4. Open the cans of black beans and diced tomatoes. Drain and rinse the black beans. 1. In a large pot, heat two tablespoons of olive oil over medium heat. 2. Add the chopped onion and bell pepper. Cook them until the onion turns translucent, about five minutes. 3. Stir in the minced garlic, two tablespoons of chili powder, one teaspoon of cumin, and one teaspoon of smoked paprika. Cook this for one to two minutes until you smell the spices. 4. Add the diced sweet potatoes to the pot. Stir everything well and sauté for three to four minutes. 5. Pour in the can of diced tomatoes with their juices and two cups of vegetable broth. Bring this mixture to a boil. 6. Once boiling, reduce the heat to low and cover the pot. Let it simmer for 20 to 25 minutes. Check if the sweet potatoes are tender by piercing them with a fork. 7. Stir in the black beans and cook uncovered for an additional five to ten minutes until the beans are heated. 8. Taste the chili and adjust the seasonings if needed. Remove the pot from the heat. - Keep an eye on the sweet potatoes. You want them tender but not mushy. - If the chili seems too thick, add a bit more vegetable broth. - For best flavor, let the chili sit for a few minutes before serving. This allows the flavors to mingle. To make your sweet potato black bean chili even better, use fresh spices. Fresh spices add a lot of taste. Toast your spices in the pot before adding other ingredients. This brings out their flavor. Also, let the chili simmer longer. The flavors blend well over time. You can adjust the heat by adding more chili powder or a dash of hot sauce. One common mistake is not cooking the onions long enough. They should turn soft and clear. If you skip this step, your chili may taste harsh. Another mistake is rushing the simmer time. Don’t skip the 20-25 minutes of simmering. This is key to softening the sweet potatoes and blending flavors. Finally, avoid adding too much salt at once. Taste as you go to find the right balance. Garnishes make your chili look and taste great. I love adding fresh cilantro on top for color and flavor. Avocado slices give a creamy touch and cool down the heat. A squeeze of lime juice adds brightness. You can also serve with tortilla chips for a crunchy side. These simple additions make your meal feel special and inviting. Pro Tips Use Fresh Spices: Fresh spices can significantly enhance the flavor of your chili. If possible, buy whole spices and grind them just before use for maximum aroma. Adjust the Heat: If you prefer a spicier chili, consider adding diced jalapeños or a pinch of cayenne pepper. Adjust the spice level to your liking throughout the cooking process. Let It Sit: Chili often tastes better the next day. If you have time, let it sit in the refrigerator overnight and reheat it the next day to allow the flavors to meld. Top It Off: Enhance your serving with toppings such as shredded cheese, sour cream, or diced green onions for an added layer of texture and flavor. {{image_2}} You can boost the protein in your chili easily. Try adding cooked quinoa or lentils. Both blend well with sweet potatoes and black beans. You can also add shredded chicken or ground turkey for a meatier dish. These options make the chili heartier and filling. This chili is already vegan and vegetarian-friendly. To keep it that way, focus on the beans and veggies. You can swap the vegetable broth for a homemade version for more flavor. Add in some corn for a sweet crunch. You can also toss in some extra bell peppers or zucchini for more texture. You can change the flavor by adding local spices. For a southwestern twist, try adding chipotle or jalapeños. For a Caribbean vibe, mix in some coconut milk and curry powder. If you enjoy Italian flavors, add some Italian herbs like basil or oregano. These small tweaks can turn your chili into a unique dish! To store leftovers, let the chili cool down. Once cooled, pour it into an airtight container. Seal the container tightly and place it in the fridge. The chili will last for about 4 to 5 days. You can also divide it into smaller portions for easy meals later. If you want to freeze this chili, use freezer-safe bags or containers. Make sure to leave some space at the top. This space allows the chili to expand as it freezes. Label the bags with the date for easy tracking. The chili can stay good in the freezer for up to 3 months. When you’re ready to eat, take the chili out of the fridge or freezer. For fridge leftovers, heat it in a pot over medium heat. Stir often until it’s hot. If frozen, let it thaw in the fridge overnight before reheating. You can also use the microwave. Heat in short bursts, stirring in between. Enjoy it warm! To boost the heat, add more chili powder. You can also include diced jalapeños. Fresh or dried red pepper flakes work well too. Start with a little, then taste and adjust. You want it hot but not overwhelming. If you prefer, serve hot sauce on the side for extra spice. Yes, you can use fresh beans! Soak dried beans overnight. Then, cook them until tender before adding to the chili. This might take longer than using canned beans. Canned beans save time, but fresh beans add great flavor. Just make sure to adjust the cooking time in the recipe. Absolutely! This chili is perfect for meal prep. It stores well and tastes great after a day or two. Just keep it in an airtight container in the fridge. You can easily make a big batch and portion it out. It also freezes nicely, so you can save some for later. This article shared key ingredients, their benefits, and smart substitutes. You learned step-by-step how to prepare and cook the dish, along with handy tips to avoid mistakes. I also covered creative variations to suit your taste and how to store leftovers for later. Remember, cooking is about fun and creativity. Use these insights to make your chili unique. Enjoy every bite and be proud of your cooking skills!

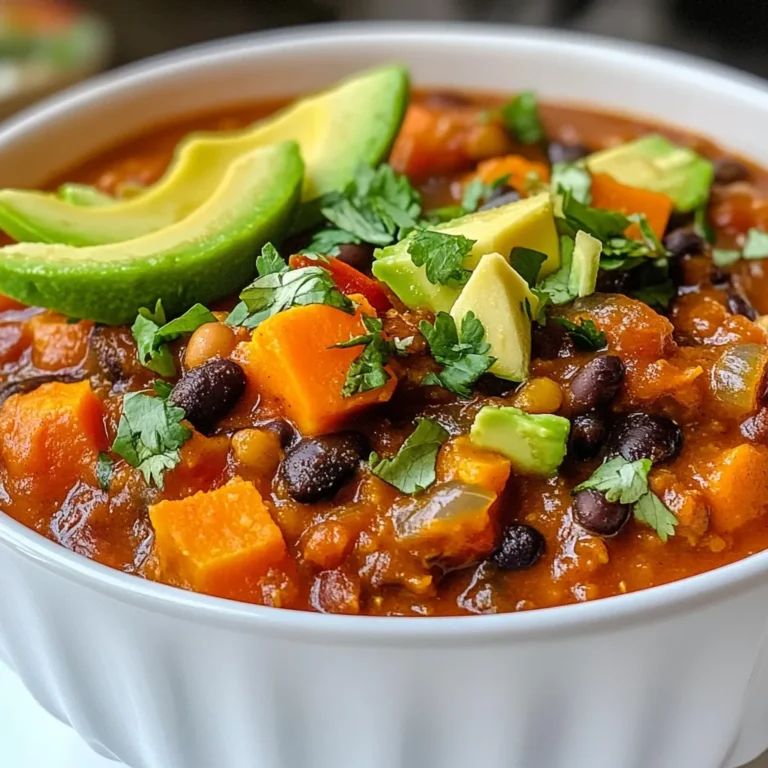
Sweet Potato Black Bean Chili Flavorful and Hearty Dish

To make avocado chocolate mousse, you will need: - 2 ripe avocados, pitted and peeled - 1/3 cup unsweetened cocoa powder - 1/4 cup maple syrup or honey - 1/4 cup almond milk (or any milk of choice) - 1 teaspoon vanilla extract - A pinch of sea salt - Fresh berries and mint leaves for garnish Using ripe avocados is key. They should feel soft but not mushy. Fresh cocoa powder adds rich flavor. If you use maple syrup, choose pure, not imitation. For milk, unsweetened almond milk keeps the mousse light. Always use high-quality vanilla extract for the best taste. A pinch of sea salt enhances the chocolate flavor. If you want a vegan option, use maple syrup instead of honey. You can swap almond milk for oat or coconut milk if preferred. For a nut-free version, choose soy or rice milk. If you’re avoiding sugar, use a sugar-free sweetener that measures like sugar. For a creamier texture, add a bit of silken tofu. {{ingredient_image_1}} Start by gathering all your ingredients. You need ripe avocados, cocoa powder, maple syrup or honey, almond milk, vanilla extract, and salt. This dish is quick to prepare. It takes about 10 minutes. 1. In a blender or food processor, add the avocados. 2. Next, add the cocoa powder. 3. Pour in the maple syrup or honey. 4. Add the almond milk and vanilla extract. 5. Sprinkle in a pinch of salt. 6. Blend everything on high speed. 7. Stop to scrape the sides as needed. 8. Blend until creamy and smooth. Taste the mousse. You can add more sweetener if you want it sweeter. Once it's silky, move it to serving cups or bowls. Cover the mousse with plastic wrap. Place it in the fridge for at least 30 minutes. This helps it set and chill. The mousse will be cool and rich. Before you serve it, top it with fresh berries and mint. Enjoy this creamy dessert! To get that creamy mousse, you must blend well. Use a high-speed blender or food processor. Start with ripe avocados. They should be soft but not brown. Blend the avocados with cocoa powder and milk. Keep blending until the mix is smooth. If it feels too thick, add a bit more milk. This will help you reach the perfect texture. Taste your mousse before serving. If you want it sweeter, add more maple syrup or honey. Mix well after each addition. Remember, you can always add more, but you can't take it out. Start with a small amount and keep tasting. You want just the right balance of chocolate and sweetness. Serve your mousse in clear glass cups. This shows off its dark, rich color. Add a sprinkle of cocoa powder on top for flair. Fresh berries and mint leaves make great garnishes too. They add color and freshness. This will make your dessert look as good as it tastes! Pro Tips Choose Ripe Avocados: Ensure your avocados are perfectly ripe for the best flavor and creaminess; they should yield slightly to gentle pressure. Blend Thoroughly: To achieve the smoothest texture, blend the ingredients on high speed and scrape down the sides of the blender to incorporate all ingredients evenly. Adjust Sweetness: Always taste the mousse before chilling; feel free to adjust the sweetness by adding more maple syrup or honey according to your preference. Garnish Creatively: Use a variety of fresh berries and mint leaves to elevate the presentation and add a burst of color and flavor to the mousse. {{image_2}} You can change the sweetener in this recipe. Maple syrup works well, but honey is also great. If you want a sugar-free option, try using a sugar substitute like stevia or agave nectar. Each choice changes the flavor a bit, so feel free to experiment. Adding spices or extracts can boost the flavor. A dash of cinnamon adds warmth. Some people love a hint of coffee for a deeper taste. You can also try adding a splash of almond or peppermint extract to give it a unique twist. Just remember to start with a small amount and taste as you go. Toppings make the mousse look pretty and add flavor. Fresh berries like strawberries or raspberries are perfect. They add a nice tartness. Mint leaves give a lovely green touch and freshness. You can also sprinkle some cocoa powder on top for extra chocolatey goodness. This makes your dessert not just tasty but also beautiful! To keep your avocado chocolate mousse fresh, store it in airtight containers. This helps prevent oxidation, which can change its color and taste. If you plan to enjoy it later, cover the mousse tightly with plastic wrap. Make sure the wrap touches the surface of the mousse to limit air exposure. You don’t need to reheat this mousse since it tastes best chilled. If it looks a bit thick after chilling, simply stir it gently. You can add a splash of almond milk to make it smooth again. Blend the mixture for a few seconds if needed. This keeps the mousse creamy and delightful. Your avocado chocolate mousse stays fresh in the fridge for about 3 to 5 days. After this time, it may lose its creamy texture and flavor. Always check for any off smells or changes in color before eating. If it looks or smells strange, it’s best to toss it out for safety. Enjoy your delicious treat while it’s fresh! Yes, this recipe is vegan. It uses ripe avocados for creaminess and maple syrup for sweetness. Both ingredients come from plants. You can enjoy this mousse without animal products. It is rich in healthy fats and nutrients. Yes, you can use alternatives like carob powder. Carob has a sweet taste and works well in desserts. You can also try dark chocolate if you prefer. Just melt it and mix it in. Adjust the sweetener since chocolate can be sweeter than cocoa powder. You know the mousse is ready when it is smooth and creamy. Blend until there are no lumps left. Taste it to check the sweetness. If it’s to your liking, transfer it to serving cups. Chill it in the fridge for at least 30 minutes before serving. This blog post covered important parts of making a great mousse. We looked at key ingredients, preparation steps, and helpful tips. I shared ideas for variations and storage. You can adjust sweetness and try different flavors for your preference. Remember, quality ingredients make a big difference. Enjoy the process, and don’t rush! A little patience goes a long way. With these steps, you'll create a dessert that impresses everyone. Go ahead and get started on your next mousse adventure!

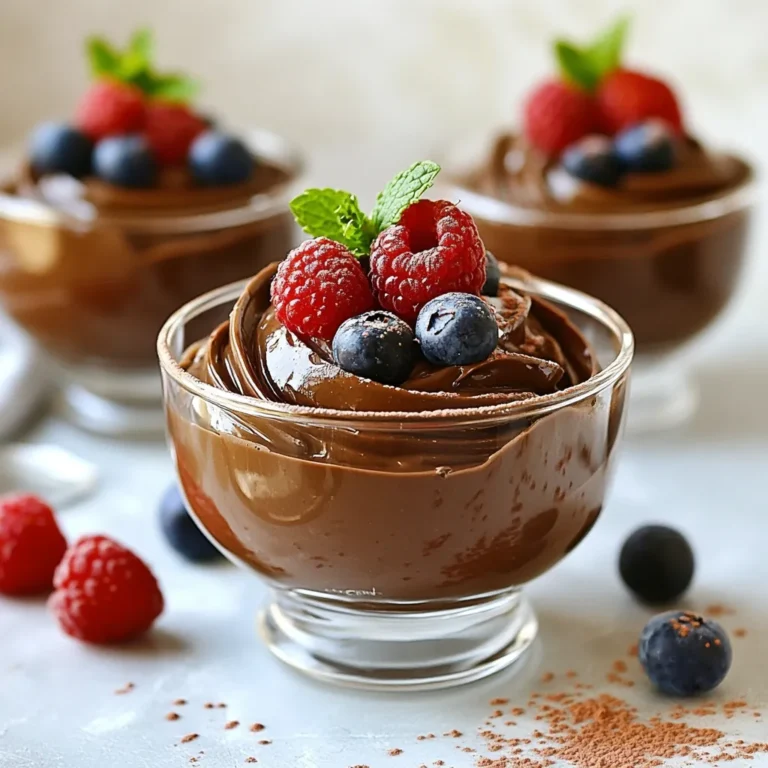
Avocado Chocolate Mousse Creamy and Rich Delight

- 1 lb chicken thighs, boneless and skinless - 2 tablespoons Jamaican jerk seasoning - 1/2 cup pineapple, diced - 1 tablespoon olive oil - 1/2 red onion, thinly sliced - 1/2 cup red bell pepper, thinly sliced - 1/4 cup fresh cilantro, chopped - Juice of 1 lime - 8 small corn tortillas - Salt and pepper to taste - Garnish with extra cilantro and lime wedges. - Serve with a small bowl of pineapple salsa on the side. The main ingredients bring a burst of flavor. Chicken thighs are juicy and tender, making them perfect for grilling. Jamaican jerk seasoning is spicy, savory, and rich in herbs. Pineapple adds a sweet touch that balances the heat. For the additional ingredients, olive oil helps the jerk seasoning stick to the chicken. Red onion and red bell pepper add crunch and color. Fresh cilantro gives a nice herbal note. Lime juice brightens the flavors, making each bite refreshing. Corn tortillas are the perfect vessel for this tasty filling. When serving, a colorful platter is key. Add lime wedges for extra zing. A small bowl of pineapple salsa makes it easy for guests to add more flavor. These little touches really enhance the dish and make it fun to eat. {{ingredient_image_1}} First, take your chicken thighs. Place them in a large bowl. Add two tablespoons of jerk seasoning and one tablespoon of olive oil. Mix the chicken well to coat it evenly. This step is key. Let the chicken marinate for at least 30 minutes in the fridge. This time helps the flavors soak in deeply. Next, preheat your grill or grill pan to medium-high heat. Once it’s hot, carefully place the marinated chicken thighs on it. Grill them for about 6-7 minutes per side. You want the internal temperature to reach 165°F (75°C). After grilling, remove the chicken and let it rest for a few minutes. This keeps it juicy. While the chicken rests, let’s make the salsa. In a separate bowl, mix together ½ cup of diced pineapple, ½ red onion (thinly sliced), and ½ cup of red bell pepper (also thinly sliced). Add ¼ cup of chopped cilantro too. Squeeze the juice of one lime over this mix. Season with salt and pepper to taste. Toss everything well. This salsa adds a sweet and tangy touch. Now it’s time to assemble your tacos. Warm your corn tortillas on the grill for about 30 seconds on each side. This makes them soft and easy to fold. Slice the grilled chicken into thin strips. Place a few strips of jerk chicken on each tortilla. Top with the fresh pineapple salsa. If you want, add more cilantro and a squeeze of lime juice on top. Enjoy your tasty creation! To ensure your chicken is juicy and tender, use boneless, skinless thighs. They have more fat, making them moist. Always marinate the chicken for at least 30 minutes. This helps the flavors soak in deep. Avoid common grilling mistakes by preheating your grill. A hot grill sears the meat quickly. This keeps juices inside. Cook each side for about 6-7 minutes until the chicken reaches 165°F. After cooking, let the chicken rest for a few minutes before slicing. This keeps it juicy. Using lime juice effectively brightens the dish. Squeeze fresh lime juice over the chicken and salsa. This adds a zesty kick. You can also sprinkle some additional spices like paprika or chili powder for extra warmth. For toppings, consider adding sliced avocado or crumbled feta. These add creaminess and balance the spicy jerk seasoning. Creating an appealing serving style makes your tacos pop. Use a colorful platter to serve. Arrange the tacos neatly, and add lime wedges for brightness. For garnishes, sprinkle fresh cilantro on top. You can also use sliced radishes for a crunchy texture. This not only looks good but adds flavor, too. Consider serving a small bowl of extra pineapple salsa on the side for a fun, interactive meal. Pro Tips Marinating Time: Allow the chicken to marinate for at least 1 to 2 hours for deeper flavor. If possible, marinate overnight for the best results. Pineapple Salsa Freshness: Use fresh pineapple for the salsa to enhance sweetness and acidity. Canned pineapple can work in a pinch, but it lacks the same vibrant flavor. Grilling Technique: Ensure your grill is properly preheated before adding the chicken. This helps achieve a nice sear and prevents sticking. Tortilla Heating: Warm the tortillas on the grill or in a dry skillet to make them more pliable and enhance their flavor. This step is crucial for a better taco experience. {{image_2}} You can switch the chicken for shrimp or tofu. Both options add great flavor. For shrimp, cook it for about 3-4 minutes per side. It cooks fast, so watch it closely. If you choose tofu, use firm tofu for the best texture. Cube it and pan-fry for about 5-7 minutes until golden. Try mango or avocado instead of pineapple for the salsa. Mango gives a sweet twist, while avocado adds creaminess. You can also explore using different herbs like mint or basil. They can really enhance the salsa's freshness. Just mix them in with the other salsa ingredients for a unique flavor. For a gluten-free option, use corn or rice tortillas. They hold up well and add great taste. You can also try lettuce wraps if you want a lighter choice. They are fresh and crunchy. Just make sure to choose sturdy leaves that won’t tear easily. To keep your Jamaican jerk chicken tacos fresh, store them in the fridge. Place the chicken and salsa in separate airtight containers. This helps keep flavors fresh. Use the tacos within three days. For best taste, eat them sooner. To reheat grilled chicken, use a microwave or skillet. Heat on low until warm. Check that the chicken reaches 165°F (75°C) for safety. For tortillas, warm them in a dry skillet. Heat each side for about 15 seconds. This keeps them soft and tasty. Yes, you can freeze tacos! For best results, freeze the chicken and salsa separately. Wrap the chicken well in foil or use a freezer bag. Salsa can go in a container or a bag. Use them within three months for best taste. You should marinate the chicken for at least 30 minutes. This time allows the jerk seasoning to soak in. If you have more time, try marinating for up to 4 hours. This enhances the flavor even more. Jamaican jerk seasoning includes spices like allspice, thyme, and Scotch bonnet peppers. It has a unique mix of sweet and spicy. People use it in many Jamaican dishes, especially grilled meats. This seasoning adds a rich flavor, making it a popular choice. Yes, these tacos can be spicy due to the jerk seasoning. If you want less heat, reduce the amount of seasoning. You can also add more pineapple to balance the spice. This sweetness helps cool down the heat. You can prepare parts of the recipe in advance. Marinate the chicken a day ahead and store it in the fridge. You can also mix the salsa early. Just assemble the tacos right before serving for the best taste. In this blog post, we covered a flavorful jerk chicken taco recipe. You learned about main and additional ingredients, marinating techniques, and how to grill chicken perfectly. We also shared tips for enhancing flavor and suggested alternative proteins and salsas. Lastly, we discussed storage options, reheating methods, and answered common questions. I hope you feel inspired to make these tacos at home. Enjoy exploring and making this dish your own!

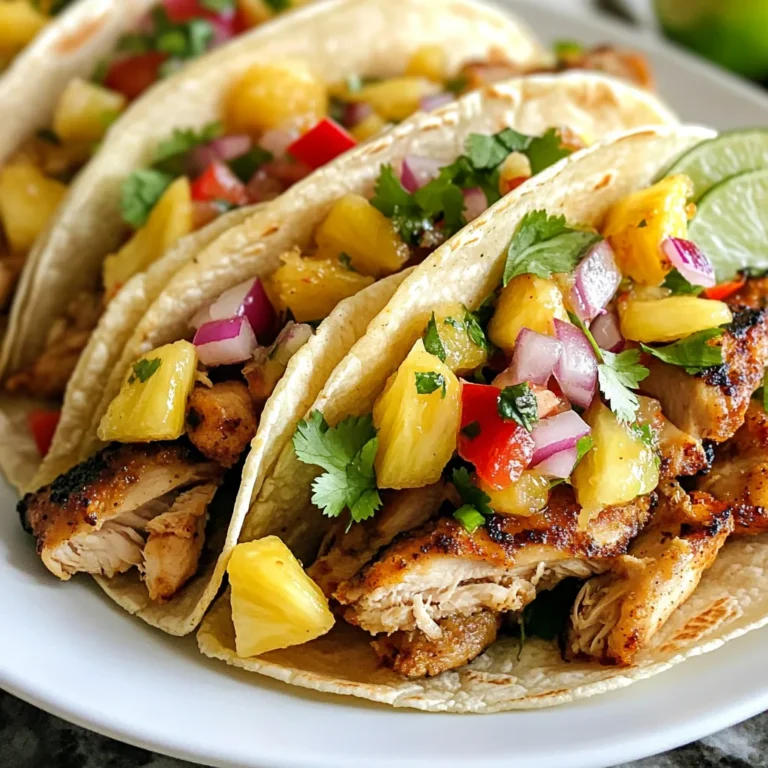
Jamaican Jerk Chicken Tacos Flavorful and Simple Dish

To make this creamy pumpkin Alfredo, you'll need: - 12 oz fettuccine pasta - 1 cup pumpkin puree (canned or fresh) - 1 cup heavy cream - 1/2 cup grated Parmesan cheese - 2 tablespoons unsalted butter - 2 cloves garlic, minced - 1/2 teaspoon nutmeg - Salt and black pepper to taste - Fresh parsley, chopped (for garnish) These ingredients combine to create a rich, velvety sauce. The pumpkin puree gives a smooth texture and a warm color. The heavy cream enhances the creaminess, making each bite comforting. You can add a few things to make your dish even better: - Extra grated Parmesan cheese - Crushed red pepper flakes for heat - A sprinkle of toasted pumpkin seeds for crunch These garnishes add flavor and a nice look to your dish. Don't have something on hand? No problem! Here are some swaps you can use: - Use whole milk instead of heavy cream for a lighter version. - Swap fettuccine for any pasta you like, such as penne or spaghetti. - Try nutritional yeast instead of Parmesan for a dairy-free option. - Use fresh garlic powder if you run out of fresh garlic. These substitutions can help you create a dish that suits your needs while keeping the essence of creamy pumpkin Alfredo. {{ingredient_image_1}} Start by boiling a large pot of salted water. It should be bubbling hot. Once it boils, add the 12 oz of fettuccine pasta. Cook it according to the package instructions until it is al dente. This usually takes about 8 to 10 minutes. After cooking, reserve 1 cup of the starchy pasta water. Then, drain the rest of the water and set the fettuccine aside. In a large skillet over medium heat, add 2 tablespoons of unsalted butter. Let it melt completely. Then, add 2 cloves of minced garlic and sauté for about 1 minute. The garlic should smell great but not burn. Next, stir in 1 cup of pumpkin puree. Then, pour in 1 cup of heavy cream. Mix everything well and bring it to a gentle simmer. Now, it’s time to add flavor. Gradually whisk in 1/2 cup of grated Parmesan cheese until it melts. Add 1/2 teaspoon of nutmeg, along with salt and black pepper to taste. Mix well to ensure the sauce is smooth and creamy. Taste it, and adjust the seasoning if needed. Once your sauce is ready, it's time to combine it with the pasta. Add the cooked fettuccine to the skillet. Toss the noodles gently in the creamy pumpkin sauce, making sure each piece is coated. If your sauce feels too thick, add a little reserved pasta water. Do this slowly until you reach your desired sauce thickness. After tossing, remove the skillet from the heat. Plate the creamy pumpkin Alfredo on serving dishes. For a lovely touch, garnish with chopped fresh parsley. Enjoy your rich and velvety dish! To achieve a creamy texture, use heavy cream. It blends well with pumpkin. The Parmesan cheese adds richness. Whisk it in slowly to avoid lumps. If the sauce is too thick, use reserved pasta water. This will help thin it without losing flavor. To boost flavor, add fresh herbs like thyme or sage. Both pair well with pumpkin. A pinch of cayenne pepper gives heat. Nutmeg brings warmth, but use it sparingly. You can also add roasted garlic for a deeper taste. To avoid overcooked pasta, watch the timer closely. Cook fettuccine until just al dente. This means it should still have a slight bite. Drain it quickly and toss it with the sauce right away. The heat from the sauce will finish cooking the pasta perfectly. Pro Tips Use Fresh Pumpkin: For a more vibrant flavor, consider using fresh pumpkin instead of canned. Roast it until tender, then puree it for the sauce. Adjust Creaminess: Feel free to adjust the amount of heavy cream based on your preference. For a lighter version, substitute half and half or whole milk. Add Protein: To make this dish more filling, consider adding grilled chicken or sautéed shrimp for a protein boost. Garnish Wisely: Fresh herbs like sage or thyme can elevate the dish's flavor profile. Experiment with different garnishes to find your favorite. {{image_2}} You can make a vegan version of creamy pumpkin Alfredo. Replace heavy cream with full-fat coconut milk. Use nutritional yeast instead of Parmesan cheese. This keeps the rich flavor while making it plant-based. Adding protein to your dish makes it heartier. Grilled chicken or sautéed sausage works well. Cook the protein separately, then mix it into the creamy sauce. This adds flavor and makes the dish more filling. Incorporating seasonal veggies can brighten your meal. Spinach adds color and nutrition. Sauté mushrooms for a savory touch. Add these ingredients when you mix in the pasta. This makes the dish even more delicious and fun! After enjoying your creamy pumpkin Alfredo, store any leftovers in an airtight container. Make sure to let the dish cool to room temperature first. This keeps it fresh. You can keep it in the fridge for up to three days. If you want to enjoy it later, freezing is a great option. To freeze creamy pumpkin Alfredo, place it in a freezer-safe container. Leave some space at the top, as the sauce may expand when frozen. You can freeze it for up to three months. Label the container with the date. This helps you keep track of how long it's been in the freezer. When you're ready to enjoy your leftovers, reheating is key. The best method is to use the stove. Place the creamy pumpkin Alfredo in a skillet over low heat. Stir often to prevent sticking. If the sauce seems thick, add a splash of reserved pasta water or a bit of cream. This helps restore its creamy texture. You can also use a microwave. Heat it in short bursts, stirring in between. Enjoy your delicious dish again! You can use half-and-half or whole milk for a lighter option. Coconut cream is a great dairy-free choice. Both options keep the dish creamy. If you're looking for a vegan version, use soaked cashews blended with water. This gives a rich texture and flavor. Yes, Creamy Pumpkin Alfredo is great for meal prep. You can store it in the fridge for up to three days. Just keep the pasta and sauce separate until you're ready to eat. This keeps the pasta from getting soggy. When you want to enjoy it, reheat gently on the stove. Absolutely! You can use any pasta you like. Penne or rotini work well with the sauce. Gluten-free pasta is also a good choice if you need it. Just be sure to cook it according to the package instructions. The creamy sauce will coat any pasta beautifully. In this blog post, we covered how to make a creamy pumpkin Alfredo. We explored key ingredients, cooking steps, and tips for a perfect dish. You learned about variations, like vegan options and adding proteins. Proper storage and reheating tips help you enjoy leftovers. Now that you have all this knowledge, you can create a satisfying meal. Use your creativity to change it up based on your tastes. Enjoy making this dish for yourself or others!

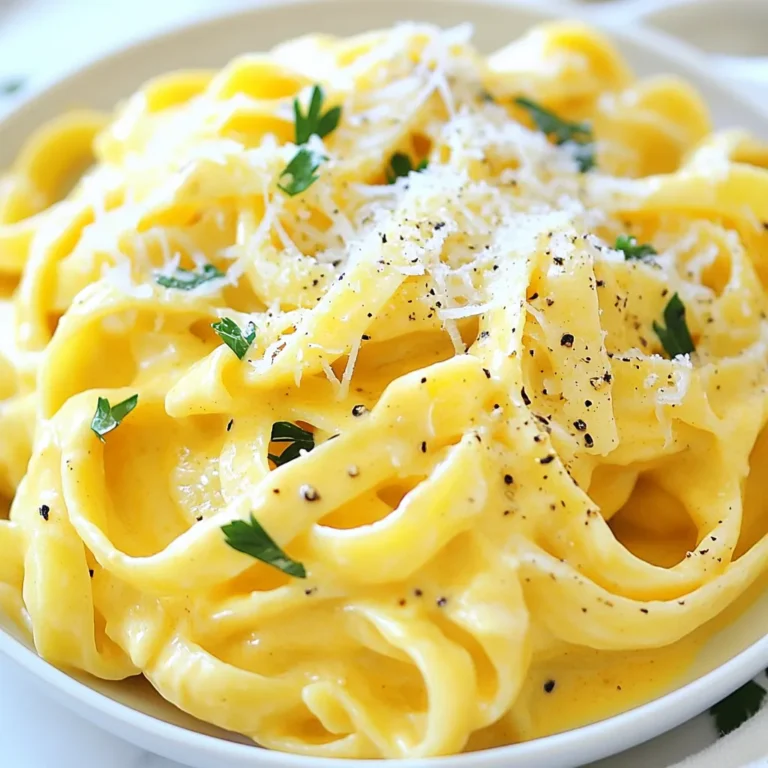
Creamy Pumpkin Alfredo Rich and Velvety Dish

To make creamy avocado pasta, gather these simple ingredients: - 2 ripe avocados, pitted and peeled - 2 cloves garlic, minced - 1/4 cup fresh basil leaves, packed - 1/4 cup grated Parmesan cheese (or nutritional yeast for a vegan option) - 2 tablespoons lemon juice - 1/4 cup olive oil - 12 oz pasta of choice (spaghetti, fettuccine, or gluten-free) - Salt and pepper to taste - Cherry tomatoes, halved (for garnish) - Extra basil leaves (for garnish) These ingredients work together to create a creamy and rich sauce. The ripe avocados give a smooth texture, while the garlic adds a nice kick. Fresh basil brings a burst of flavor, and the lemon juice adds brightness. You can use Parmesan cheese or nutritional yeast, depending on your preference. The olive oil helps blend everything together and adds richness. Choose any pasta you like; they all work well with this creamy sauce. Don't forget the salt and pepper to enhance the taste! This recipe is quick and easy, making it perfect for a weeknight dinner. Each ingredient plays an important role in making your meal simple and flavorful. {{ingredient_image_1}} 1. Start by filling a large pot with water. Add a generous pinch of salt. 2. Heat the pot until the water boils. This step helps the pasta taste great. 3. Add your chosen pasta, like spaghetti or fettuccine. 4. Cook the pasta according to the package instructions. It usually takes about 8-10 minutes. 5. Before draining, remember to reserve 1/2 cup of the pasta water. This water helps to adjust the sauce later. 1. While the pasta cooks, grab a food processor. 2. Add the two ripe avocados, minced garlic, fresh basil leaves, grated Parmesan cheese, lemon juice, and olive oil. 3. Sprinkle in some salt and pepper for flavor. 4. Blend all the ingredients until smooth and creamy. 5. If the sauce is too thick, slowly add some reserved pasta water. Blend again until you reach your desired consistency. 1. Once the pasta is cooked and drained, return it to the pot or a large bowl. 2. Pour the creamy avocado sauce over the pasta. 3. Gently toss the pasta with the sauce until it is fully coated. 4. Taste your dish and adjust seasoning if needed. Add more salt, pepper, or lemon juice for extra flavor. 5. Serve immediately, and top with halved cherry tomatoes and extra basil leaves for a fresh touch. To make your sauce silky and smooth, adjust it with pasta water. After cooking the pasta, save half a cup of that starchy water. If your sauce is thick, add a little pasta water and blend again. This will help create the right creaminess. If you have leftover sauce, store it in an airtight container. It can last in the fridge for up to two days. Just remember, the sauce may thicken over time. You can boost the flavor by adding more herbs. Fresh parsley, cilantro, or even dill can add a nice twist. Try mixing in different cheese options too. Feta cheese adds a salty punch, while goat cheese brings creaminess. For a vegan option, use nutritional yeast instead of cheese. It gives a cheesy taste without dairy. Pair your creamy avocado pasta with a fresh side salad. A simple mix of greens, cucumbers, and a light vinaigrette works well. You can also serve some crusty bread on the side for dipping. If you enjoy wine, a crisp white wine like Pinot Grigio is a great match. For a non-alcoholic option, try sparkling water with lemon. It refreshes the palate nicely. Pro Tips Choose Ripe Avocados: Use avocados that are slightly soft to the touch but not mushy. This ensures a creamy texture in your sauce. Adjust the Consistency: If your avocado sauce is too thick, gradually add reserved pasta water until you reach the desired creaminess. It should coat the pasta smoothly. Fresh Herbs Matter: Fresh basil adds a vibrant flavor. If you can, avoid dried herbs for this recipe to maintain the fresh taste. Garnish for Color: Adding cherry tomatoes and extra basil not only enhances the presentation but also adds a burst of freshness to each bite. {{image_2}} To make this dish vegan, you can swap out the cheese. Use nutritional yeast instead of Parmesan. Nutritional yeast gives a nice cheesy flavor without dairy. You can also add more fresh herbs. Try using cilantro or parsley for a fresh twist. Consider adding nuts or seeds for extra texture. Toasted pine nuts or sunflower seeds work great. They add crunch and healthy fats to your meal. If you need gluten-free pasta, many choices exist. Look for pasta made from rice, quinoa, or chickpeas. These options are tasty and easy to find in stores. Always check the label to ensure they are gluten-free. Gluten-free pasta cooks differently than regular pasta. So, watch the cooking time closely. This way, it won't get mushy and will hold its shape well. Enhance the creamy avocado pasta with spices. A pinch of red pepper flakes adds heat. If you want a smokier flavor, try smoked paprika. You can also mix in vegetables. Sautéed spinach, zucchini, or bell peppers add color and nutrition. Toss them in with the pasta and sauce for a complete dish. Feel free to experiment. The creamy avocado sauce is a great base for your ideas. To keep your creamy avocado pasta fresh, place it in a sealed container. Store it in the fridge for up to three days. If you want to save the sauce only, pour it into an airtight container. You can freeze the sauce for up to a month. When you’re ready to eat it, let the sauce thaw overnight in the fridge. When reheating, you have two main options: the microwave or stovetop. For the microwave, place the pasta in a bowl and cover it. Heat in short bursts, stirring in between to avoid hot spots. If you prefer the stovetop, warm it gently in a pan over low heat. Add a splash of reserved pasta water to keep it creamy. This helps restore the smooth texture. No, unripe avocados won't work well for this recipe. They are hard and lack flavor. Ripe avocados are creamy and rich, which makes the sauce smooth. Look for avocados that yield slightly when you press them gently. This means they are ripe and ready to use. To keep your avocado sauce green, add lemon juice right away. The acidity in lemon juice slows down browning. You can also store the sauce in an airtight container. Press plastic wrap directly onto the surface. This limits air exposure and helps keep it fresh longer. I recommend using spaghetti, fettuccine, or any pasta you enjoy. These shapes hold the creamy sauce well. Gluten-free pasta is also a great option if you need it. Cook it according to the package instructions for the best results. Yes, you can prepare the avocado sauce in advance. Store it in the fridge for up to one day. When ready to serve, mix it with freshly cooked pasta. This keeps the dish fresh and delicious. Just remember, cook the pasta right before serving for the best taste. This blog post explored making creamy avocado pasta. We covered key ingredients like avocados, garlic, and fresh herbs. I shared simple steps to cook pasta and prepare sauce. Tips included adjusting texture and enhancing flavors. You learned about vegan adaptations and gluten-free pasta options, plus storage tips to keep your dish fresh. In summary, you can create a delicious meal that fits your needs. Enjoy this healthy and tasty recipe anytime with variations to suit your taste!

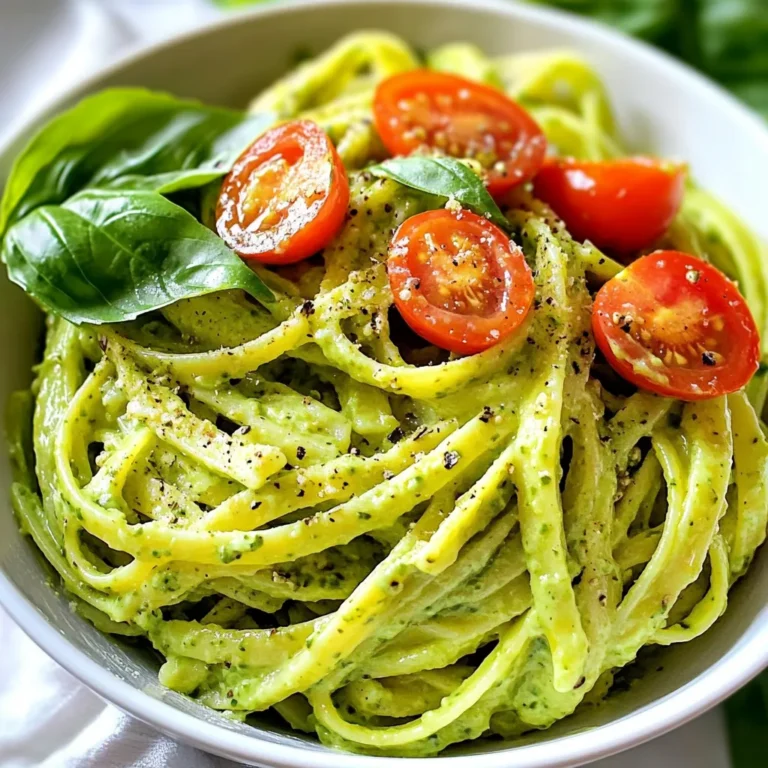
Creamy Avocado Pasta Simple and Flavorful Meal

PREV 1 … 44 45 46 … 57 NEXT
flavor nest kitchen

explore

DessertsDinnerAppetizersDrinks

Our Policies

  • Cookie Policy
  • Copyright Policy
  • Disclaimer
  • GDPR Policy
  • Terms Of Use
Back to Top
  • About
  • Contact Us
  • Privacy Policy
© 2025 flavor nest kitchen