FREE DINNER EBOOK! Get your copy!
  • Cookie Policy
  • GDPR Policy
  • Disclaimer
  • Terms Of Use
  • Visit my other site: Fun Cookie Recipes
flavor nest kitchen
  • Home
  • Dinner
  • Desserts
  • Drinks
  • Appetizers
  • Contact
  • About
  • Privacy Policy
  • Home
  • Dinner
  • Desserts
  • Drinks
  • Appetizers
  • Contact
  • About
  • Privacy Policy
  • Cookie Policy
  • GDPR Policy
  • Disclaimer
  • Terms Of Use
Visit my other site: Fun Cookie Recipes

HOME / CATEGORIES /

Latest

- 4 tilapia fillets - 4 tablespoons unsalted butter - 4 cloves garlic, minced - 1 tablespoon fresh parsley, chopped - Juice of 1 lemon - Salt and pepper to taste - 1/2 teaspoon paprika - Lemon wedges for serving When cooking, it's key to measure right. Here’s how to do it: - Tilapia fillets: Use four 6-ounce fillets. If you get larger fillets, adjust the cooking time. - Unsalted butter: This keeps the dish from being too salty. You can use salted butter if you prefer, but use less salt. - Garlic: Fresh garlic gives the best taste. You can use garlic powder, but the flavor won't be as strong. - Fresh parsley: Use fresh for the best look and taste. Dried parsley is okay but use less. - Lemon juice: Fresh lemon juice is best. If you don't have fresh, bottled juice works too. - Salt and pepper: These add flavor. Use sea salt for a nicer taste. - Paprika: This adds color and a mild flavor. You can skip it, but it enhances the look. Choosing fresh fish is important for great taste. Here are my tips: - Look for clear eyes: Fresh tilapia should have bright, clear eyes. Cloudy eyes mean it's not fresh. - Check the smell: Fresh fish should smell mild. If it smells strong or fishy, do not buy it. - Feel the flesh: Press the fillet. It should spring back. If it stays dented, it may not be fresh. - Color matters: Fresh tilapia should have a pink or white color. Avoid any fillets that look dull or have brown spots. - Buy from trusted sources: Get your fish from a clean market or store. Ask the seller when it was caught for extra assurance. {{ingredient_image_1}} Start by gathering all your ingredients. You will need 4 tilapia fillets, 4 tablespoons of unsalted butter, and 4 cloves of minced garlic. Also, get 1 tablespoon of chopped fresh parsley, the juice of 1 lemon, salt, pepper, and 1/2 teaspoon of paprika. This setup will make your cooking process smooth and fun. 1. Preheat your oven to 400°F (200°C). This step is key for even cooking. 2. Prepare the baking dish. Lightly grease it with cooking spray or a little butter to keep the fish from sticking. 3. Make the garlic butter. In a small saucepan, melt the butter over medium heat. Add the minced garlic and cook for about 1-2 minutes. You want it fragrant, not browned. 4. Season the tilapia. Place the fillets in your greased dish. Sprinkle salt, pepper, and paprika on both sides to add flavor. 5. Add lemon and butter. Pour the garlic butter over the tilapia. Make sure each fillet is well coated. Squeeze the fresh lemon juice on top and add the chopped parsley. 6. Bake the fish. Put the dish in the oven and bake for 12-15 minutes. The fish should flake easily with a fork when done. 7. Garnish and serve. After baking, let the tilapia rest for a minute. Serve it with lemon wedges for an extra burst of flavor. The total cooking time for Garlic Butter Tilapia is about 25 minutes, including 10 minutes of prep and 12-15 minutes of baking. Always check that the fish is cooked through and flakes easily. This ensures a perfect meal every time. To make the best garlic butter, use fresh garlic. Fresh garlic gives a bright and bold taste. Melt your butter over medium heat. Add the garlic and stir for 1-2 minutes. Watch it closely! You want it fragrant, not browned. Browned garlic can taste bitter. Once the garlic is ready, pour it over the tilapia. The fish will soak up that lovely flavor. Overcooked tilapia can become dry. To avoid this, use a timer. Bake your fish for 12-15 minutes at 400°F. Check it after 12 minutes. The fish is done when it flakes easily with a fork. If it’s still too firm, give it a minute or two more. Just don’t walk away; you want to catch it at the right time. Using the right tools can make cooking easier. Here are some tools I recommend: - Baking dish: A good-sized dish helps the fish cook evenly. - Small saucepan: You need this for melting the butter and garlic. - Fork: Use it to check if the fish flakes easily. - Measuring spoons: Accurate measurements ensure the best flavor balance. With these tips, you can create a delicious garlic butter tilapia that everyone will love! Pro Tips Choose Fresh Tilapia: Always select fresh or properly frozen tilapia for the best flavor and texture. Don’t Overcook: Keep an eye on the fish while baking; it should flake easily but not be dry. Check at the 12-minute mark. Variations with Herbs: Feel free to experiment with other herbs like dill or basil for a different flavor profile. Lemon Zest for Extra Flavor: Add some lemon zest to the garlic butter for an even brighter citrus flavor. {{image_2}} Grilling gives tilapia a nice smoky flavor. To make grilled garlic butter tilapia, start by marinating the fish. Use the garlic butter mixture from the recipe. Coat each tilapia fillet well. Let it sit for 15 minutes. Preheat your grill to medium heat. Place the fillets directly on the grill grates. Grill for about 4-5 minutes on each side. The fish will be done when it flakes easily. Serve with fresh lemon wedges for a zesty kick. Pan-searing tilapia is quick and easy. To start, heat a skillet over medium-high heat. Add a tablespoon of oil to the pan. Season your tilapia fillets with salt and pepper. Place them in the hot skillet. Sear them for about 3-4 minutes on each side. Once the fish is golden, add the garlic butter mix. Let it melt and soak into the fish. This method gives a crispy edge and rich flavor. Baking tilapia with veggies is a great way to make a meal. You can add vegetables like asparagus, bell peppers, or zucchini. Before baking, spread the veggies around the tilapia in your baking dish. Drizzle olive oil over the vegetables and season them. Pour the garlic butter mixture over the fish and veggies. Bake everything together for about 15 minutes. This dish is colorful and full of flavor. It’s a complete meal in one pan! To keep your garlic butter tilapia fresh, place it in an airtight container. Make sure to cool the fish to room temperature first. Then, seal it tightly. Store it in the fridge for up to three days. If you want to save it longer, consider freezing it. When you are ready to enjoy leftovers, reheat the tilapia carefully. You can use the microwave for quick heating. Place the fish on a plate and cover it loosely with a damp paper towel. Heat it in short bursts of 30 seconds. Check if it’s warm enough. Alternatively, you can reheat in the oven. Preheat your oven to 350°F (175°C) and bake it for about 10 minutes. This method helps keep the fish moist. If you want to freeze your garlic butter tilapia, wrap each fillet tightly in plastic wrap. Then, place the wrapped fish in a freezer bag. Label the bag with the date. You can freeze it for up to three months. When you’re ready to eat, thaw it in the fridge overnight before reheating. This keeps the flavor and texture nice. Enjoy your meal even after some time! You can serve Garlic Butter Tilapia with many sides. Some great options include: - Steamed broccoli - Rice or quinoa - Mashed potatoes - A fresh green salad - Roasted vegetables These sides balance the richness of the garlic butter. They also add color and nutrition to your plate. Feel free to mix and match based on what you like! Yes, you can use frozen tilapia! Just make sure to thaw it first. You can thaw it overnight in the fridge or use the quick method. Put the sealed tilapia in cold water for about 30 minutes. This helps the fish cook evenly. Once thawed, follow the same steps in the recipe. Tilapia is done when it flakes easily with a fork. The fish should be opaque and no longer translucent. You can also check the internal temperature. It should reach 145°F (63°C). This ensures it is safe to eat. If you are unsure, it’s better to cook it a little longer than to undercook it. In this blog post, we explored the world of garlic butter tilapia. We covered ingredients, cooking steps, and tips to avoid issues. Fresh tilapia is key, and I shared techniques to perfect flavor and texture. You can try variations like grilled or baked tilapia to suit your taste. Remember proper storage to keep fish fresh. With these tools and tips, you can make a delicious meal. Dive in, and enjoy your cooking journey!

Garlic Butter Tilapia Flavorful and Easy Recipe

- Noodles: 8 oz spaghetti or linguine noodles - Aromatics and flavorings: - 4 tablespoons sesame oil - 6 cloves garlic, minced - 1 teaspoon red chili flakes (adjust for spice level) - Sauces and sweeteners: - 3 tablespoons soy sauce - 2 tablespoons rice vinegar - 1 tablespoon honey or maple syrup - 1 tablespoon tahini (optional for creaminess) - Garnishes: - 2 green onions, sliced - 2 tablespoons sesame seeds (toasted for extra flavor) - Fresh cilantro leaves for garnish The right ingredients make all the difference in Spicy Garlic Sesame Noodles. For the noodles, I love using spaghetti or linguine. They hold the sauce well. You need 8 oz of your chosen noodles for a good serving. Aromatics are key to flavor. I use 4 tablespoons of sesame oil. It adds depth and richness. Next, I add 6 cloves of minced garlic. This gives a nice kick. Red chili flakes spice things up. Start with 1 teaspoon, and adjust based on how spicy you want it. For sauces, I combine 3 tablespoons of soy sauce and 2 tablespoons of rice vinegar. This mix adds salty and tangy notes. I sweeten it slightly with 1 tablespoon of honey or maple syrup. If you want a creamier sauce, add 1 tablespoon of tahini. Garnishing is vital for presentation and taste. I slice 2 green onions for color and crunch. Toasted sesame seeds (2 tablespoons) enhance the flavor further. Lastly, fresh cilantro leaves add a burst of freshness. These ingredients come together to create a bold and flavorful dish that you will love. {{ingredient_image_1}} To start, fill a large pot with water. Add a big pinch of salt. Heat the water until it boils. Once boiling, add 8 oz of spaghetti or linguine noodles. Cook them for 8 to 10 minutes. You want them to be al dente, not too soft. When done, drain the noodles in a colander. Rinse them with cold water to stop cooking. This helps keep the noodles firm. Next, grab a large skillet and heat it over medium heat. Add 4 tablespoons of sesame oil into the skillet. Once the oil is warm, add 6 minced garlic cloves and 1 teaspoon of red chili flakes. Sauté the garlic for 1 to 2 minutes. You want it fragrant, but not brown. Now, whisk in 3 tablespoons of soy sauce, 2 tablespoons of rice vinegar, and 1 tablespoon of honey or maple syrup. If you like creaminess, add 1 tablespoon of tahini. Stir everything well and let it simmer for a minute. The sauce should smell amazing! Now, it’s time to toss the noodles. Carefully add the drained noodles into the skillet with the sauce. Use tongs to mix them gently. Make sure every noodle gets coated in that spicy garlic sauce. This is key for great flavor. Taste the noodles and feel free to add more chili flakes or soy sauce if you want. This dish is all about your taste, so adjust it as you like! Want to control the heat? Use red chili flakes. They add a kick, but you can adjust them easily. For less heat, use fewer flakes. You can also skip them if you prefer mild noodles. Consider using a dash of black pepper for a different flavor without the heat. Want a creamier sauce? Add tahini. It brings a rich flavor and smooth texture. If you don’t have tahini, you can use peanut butter instead. For extra taste, try garnishing with crushed peanuts or a sprinkle of lime juice. You will love how these small tweaks can change the dish. Make your dish pop! Serve the noodles in a large bowl. Top with green onions and sesame seeds. A sprinkle of fresh cilantro adds color and freshness. For a full meal, pair the noodles with a side of steamed broccoli or a simple cucumber salad. These sides balance the flavors and add nutrients. Pro Tips Perfectly Cooked Noodles: Make sure to cook the noodles until they are al dente for the best texture. This will prevent them from becoming mushy once mixed with the sauce. Customize Your Spice Level: Feel free to adjust the amount of red chili flakes based on your tolerance for heat. Start with less if you’re unsure and add more to taste. Fresh Garlic is Key: Using fresh minced garlic enhances the flavor significantly compared to jarred or powdered garlic. Make sure to sauté it just until fragrant to avoid bitterness. Garnish for Flavor: Don’t skip the garnishes! The green onions, toasted sesame seeds, and fresh cilantro add not only a pop of color but also layers of flavor to the dish. {{image_2}} You can easily make this dish vegetarian. Add colorful vegetables like bell peppers or fresh spinach. Both options add flavor and nutrients. For strict vegans, swap honey for agave syrup. This keeps the dish sweet without using animal products. You can mix and match veggies to your liking. This makes the dish even more fun and tasty! Want to add some protein? Chicken, tofu, or shrimp are great choices. For chicken, cook it in the skillet before adding the sauce. You can chop it into bite-sized pieces for even cooking. If you prefer tofu, press it to remove extra water. Then, sauté it until golden. If shrimp is your pick, add them to the skillet when the sauce is ready. They cook quickly and add a nice touch. If you need gluten-free noodles, you have choices! Use rice noodles or gluten-free spaghetti. Make sure to read labels to avoid gluten. You may also need to adjust the soy sauce. Look for gluten-free soy sauce or tamari. This way, everyone can enjoy this delicious dish! To keep your Spicy Garlic Sesame Noodles fresh, store them in the fridge. Place the noodles in an airtight container. This helps prevent moisture loss and keeps them tasty. Make sure to cool the noodles before sealing. You can keep them for about 3 days. When it's time to enjoy your leftovers, reheating is key. You want to keep the great flavor. The best way is to use a skillet. Heat it over medium-low heat, add a splash of water, and toss the noodles. This method keeps them moist and prevents sticking. If you use spaghetti or linguine, this works well. For other noodles, like soba or rice noodles, adjust the heat. You can also use a microwave, but be careful. Heat them in short bursts and stir in between. This way, they warm evenly. Enjoy your delicious noodles again! To make Spicy Garlic Sesame Noodles vegan, you can swap a few ingredients. - Use maple syrup instead of honey. - Replace traditional soy sauce with tamari for gluten-free options. - Omit tahini if you prefer a lighter sauce. - Add more veggies like bell peppers or broccoli for texture and taste. These changes keep the dish tasty and satisfying while staying true to a vegan diet. Yes, you can prepare this dish ahead. - Cook the noodles and store them in the fridge. - Make the sauce and store it separately. - Reheat the sauce in a skillet before adding the cold noodles. - Toss everything together and serve. This method keeps the flavors fresh and the noodles firm. Several dishes complement Spicy Garlic Sesame Noodles well. - Serve with steamed vegetables like broccoli or snap peas. - Fried tofu or grilled chicken can add protein. - A light cucumber salad brings a refreshing crunch. - Pair it with green tea or a light beer for drinks. These options create a balanced meal and enhance your dining experience. The recipe for Spicy Garlic Sesame Noodles shows how easy cooking can be. You learned about essential ingredients, step-by-step cooking methods, and fun tips to enhance your dish. Remember, you can adjust the spice and swap ingredients for your tastes. Don’t hesitate to try different proteins or veggies. Whether you make it for a quick meal or impress friends, enjoy every bite. Keep experimenting and make this dish your own!

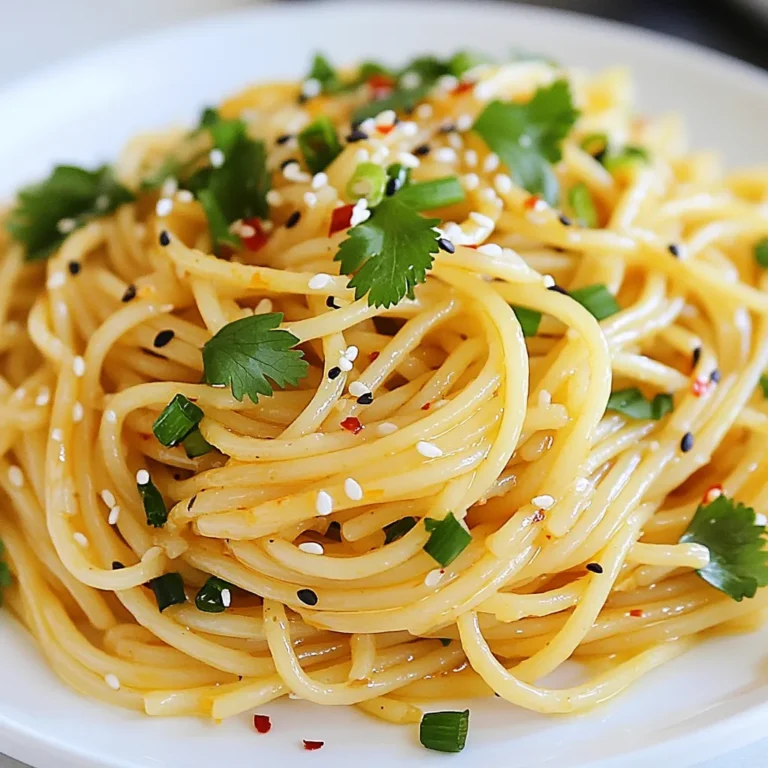
Spicy Garlic Sesame Noodles Bold and Flavorful Dish

To make Chocolate Strawberry Yogurt Bark, gather these simple ingredients: - 2 cups Greek yogurt (plain or vanilla) - 1/2 cup dark chocolate chips - 1 cup fresh strawberries, hulled and sliced - 1 tablespoon honey or maple syrup (optional, for sweetness) - 1/4 cup chopped nuts (almonds, walnuts, or pistachios) - Sea salt flakes for garnish These ingredients come together to create a tasty and healthy treat. The Greek yogurt gives a creamy base, while the chocolate and strawberries add rich flavors. You can add honey or maple syrup for extra sweetness. If you prefer less sugar, skip this step. Taste your yogurt first. If it needs a little sweetness, go ahead and add a bit. For added crunch and flavor, consider these toppings: - Chopped nuts (almonds, walnuts, or pistachios) - Extra sliced strawberries - A sprinkle of sea salt flakes These toppings not only enhance taste but also make your bark look beautiful. Use your favorite nuts or fruits to make it your own! {{ingredient_image_1}} First, grab a baking sheet that is about 12x16 inches. Line it with parchment paper. This helps you remove the bark easily once it’s frozen. Make sure the paper covers the entire sheet. This step is key to a smooth finish. In a mixing bowl, add 2 cups of Greek yogurt. You can use plain or vanilla yogurt. If you like it sweeter, add 1 tablespoon of honey or maple syrup. Stir well until the mixture is smooth. This will be the base of your bark. Now, take 1/2 cup of dark chocolate chips. Place them in a microwave-safe bowl. Heat in the microwave for 30 seconds at a time. Stir after each round until the chocolate is smooth. This drizzling step adds a rich taste and a pretty look. Spread the yogurt mixture evenly on your prepared sheet. Make it about 1/2 inch thick. Next, drizzle the melted chocolate over the yogurt. Use a spatula or a toothpick to swirl it around. Now, add 1 cup of sliced strawberries and 1/4 cup of chopped nuts. Gently press them down with a spoon. Finish with a sprinkle of sea salt flakes for extra flavor. Place the baking sheet in the freezer. Let it freeze for about 4-6 hours. You want it to be completely solid. Once frozen, take it out and let it sit for a few minutes. This makes it easier to break. Then, cut it into pieces or break it apart. Serve it on a nice platter and enjoy your tasty treat! You can make this treat your own. Try using different fruits like bananas or blueberries. You can also swap out the chocolate. White chocolate or milk chocolate works well too. If you want more crunch, add seeds like pumpkin or sunflower. For a tropical twist, use coconut flakes instead of nuts. Just have fun with your choices! To make your bark look fancy, serve it on a colorful platter. Add fresh strawberry slices around it for a pop of color. A drizzle of melted chocolate on top makes it extra special. You can also cut the bark into fun shapes using cookie cutters. This way, it looks great and tastes even better! Greek yogurt is packed with protein. It helps keep you full and satisfied. Strawberries are low in calories but high in vitamins. They are great for your skin and heart. Dark chocolate has antioxidants, which are good for your health too. Nuts add healthy fats and can boost brain power. This treat is not just tasty; it’s good for you! Pro Tips Use High-Quality Chocolate: The flavor of your yogurt bark relies heavily on the quality of chocolate used. Opt for high-quality dark chocolate for a richer taste. Fruit Variations: Experiment with different fruits such as blueberries, raspberries, or bananas to customize your yogurt bark to your taste. Storage Tips: Store the bark in an airtight container in the freezer for up to a month. Layer pieces with parchment paper to prevent sticking. Swirl Technique: Use a toothpick or knife to create beautiful swirls with the melted chocolate, making your bark visually appealing. {{image_2}} You can switch strawberries with other fruits. Try bananas, blueberries, or raspberries. Each fruit gives a new taste. For a tropical twist, use mango or pineapple. Just ensure the fruit is fresh and ripe. This makes every bite juicy and sweet. While dark chocolate is popular, you can use milk or white chocolate. Milk chocolate adds a creamier taste. White chocolate gives a sweeter touch. You can also try flavored chocolate, like mint or orange. Each choice will change the bark’s flavor and style. To boost taste, add a splash of vanilla or almond extract. These flavors mix well with yogurt. You can also sprinkle in spices like cinnamon or nutmeg. For a crunch, try crushed graham crackers or granola. These extras make your bark unique and fun. To keep your chocolate strawberry yogurt bark fresh, follow these simple steps. First, ensure the bark is fully frozen before storing. Use an airtight container or wrap it tightly in plastic wrap. This helps prevent freezer burn and keeps your bark tasty. If you have pieces, separate layers with parchment paper. This way, they won’t stick together. You can store your chocolate strawberry yogurt bark in the freezer for up to three months. It keeps well, so you can enjoy this treat whenever you want. After three months, the taste may fade, but it will still be safe to eat. When you’re ready to enjoy your bark, take it out of the freezer. Let it sit at room temperature for about 5-10 minutes. This makes it easier to break or cut into pieces. If you’re in a hurry, you can also place it in the fridge for about 30 minutes to thaw. Enjoy your delicious treat! Yes, you can use regular yogurt. It will make the bark less thick. Greek yogurt gives a creamier texture. If you use regular yogurt, adjust the sweetness. You might need to add a bit more honey or maple syrup. To make it vegan, use plant-based yogurt. Cashew or coconut yogurt works well. Replace honey with maple syrup or agave syrup. Choose dairy-free chocolate chips for the topping. This way, you keep all the yummy taste. You can use cacao nibs for a healthier option. Dark chocolate is great but choose dairy-free. White chocolate chips can also work. You can even try carob chips for a unique flavor. Absolutely! Skip the honey or maple syrup. Use ripe bananas or applesauce for natural sweetness. You can also pick sweet fruits like berries. This way, you enjoy a tasty treat without added sugars. You learned how to make a tasty yogurt bark from scratch. We covered ingredients, step-by-step instructions, and helpful tips. You can customize your bark with fruits and choose your favorite chocolate. Remember the best storage methods to keep it fresh. Whether you share it or enjoy it alone, this treat is easy and fun. I hope you try it and enjoy it as much as I do.

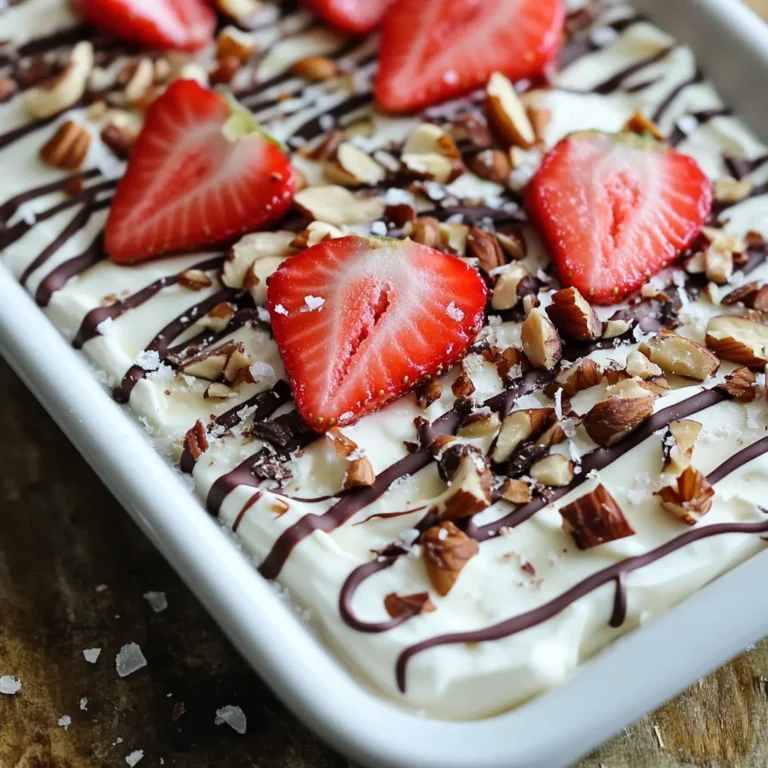
Chocolate Strawberry Yogurt Bark Tasty and Easy Treat

- 4 boneless, skinless chicken breasts - 2 cups fresh spinach, chopped - 1 cup feta cheese, crumbled - 2 cloves garlic, minced - 1/4 cup cream cheese, softened - 1 tablespoon olive oil - 1 teaspoon dried oregano - 1/2 teaspoon black pepper - 1/2 teaspoon salt - Toothpicks or kitchen twine In this dish, each ingredient plays an important role. The chicken breasts serve as the main star, providing a juicy base. Fresh spinach brings a bright color and nutrients to the party. Feta cheese adds a tangy flavor that pairs well with the creamy texture. Garlic gives the filling a lovely aroma and warmth. Cream cheese creates a rich and smooth filling that binds everything together. Using olive oil helps sauté the garlic and spinach, enhancing their taste. Dried oregano adds an earthy note, while salt and pepper bring out the flavors. Toothpicks or kitchen twine will secure the chicken, keeping the filling inside during cooking. Each element combines to create a flavorful delight that will impress anyone who tries it. {{ingredient_image_1}} - Preheat your oven to 375°F (190°C). This ensures even cooking for your chicken. - Carefully slice each chicken breast horizontally. Create a pocket for the filling. Be sure not to cut all the way through. - In a skillet, heat olive oil over medium heat. Add minced garlic and sauté for about 1 minute. This releases a lovely aroma. - Add the chopped spinach to the skillet. Cook until wilted, about 2-3 minutes. Remove from heat. - In a mixing bowl, combine the cooked spinach, feta cheese, cream cheese, dried oregano, salt, and pepper. Mix until well combined. This filling is rich and flavorful. - Stuff each chicken breast with the spinach feta mixture. Disperse it evenly among the breasts. - Use toothpicks or kitchen twine to secure the openings. This keeps the filling inside while baking. - Place the stuffed chicken breasts in a greased baking dish. Season the tops with a pinch of salt and pepper. - Bake in the preheated oven for 25-30 minutes. Check that the chicken reaches an internal temperature of 165°F (75°C). This step is crucial for safety. To ensure even stuffing, first, slice the chicken breast carefully. Make a pocket, but don’t cut all the way through. This keeps the filling inside. Use a spoon to fill the pocket. Press the mixture down gently. This helps it fit better. To avoid leaks during baking, secure the openings well. Use toothpicks or kitchen twine to hold the chicken closed. This keeps the filling from spilling out. To check for doneness, use a meat thermometer. The chicken should reach 165°F (75°C) inside. This ensures it is safe to eat. For juicy chicken, let it rest after baking. Resting allows the juices to spread throughout. This makes each bite moist and tasty. Serve the stuffed chicken breasts on a colorful platter. Add a side of roasted vegetables or a fresh garden salad. This creates a beautiful meal. For garnishing, sprinkle fresh herbs like parsley or basil on top. This adds color and flavor. You can also add lemon wedges for a zesty touch. Pro Tips Use Fresh Spinach: Fresh spinach will yield a brighter flavor and better texture than frozen spinach, ensuring your stuffing is vibrant and delicious. Secure Properly: Make sure to securely fasten the openings of the chicken breasts with toothpicks or kitchen twine to prevent the filling from leaking out while baking. Check Internal Temperature: Always use a meat thermometer to ensure your chicken reaches an internal temperature of 165°F (75°C) for safe consumption. Let It Rest: Allow the stuffed chicken breasts to rest for at least 5 minutes after baking. This helps redistribute the juices and makes for a juicier bite. {{image_2}} You can switch up the cheese in this dish. Try mozzarella for a milder taste. Goat cheese adds tang and creaminess. You could also use ricotta for a rich texture. If you want more veggies, consider adding roasted red peppers or artichokes. These will enhance the flavor and add color to your meal. You can grill or bake the chicken. Baking gives you juicy meat, while grilling adds a nice char. For a quick option, use an air fryer. It cooks the chicken fast and keeps it tender. An Instant Pot is great too. It locks in moisture and cooks the chicken evenly. To boost flavor, add spices like paprika or cumin. Fresh herbs like basil or parsley can brighten the dish. A squeeze of lemon juice adds a nice zing. Pair the chicken with a creamy sauce or a tangy yogurt dip. This will elevate the meal and add depth to each bite. - Store leftover stuffed chicken in an airtight container. - Refrigerate within two hours of cooking. - Use the leftovers within three days for best taste. - For freezing, wrap each chicken breast tightly in plastic wrap. - Place wrapped chicken in a freezer-safe bag or container. - Freeze for up to three months for optimal flavor. - To reheat, preheat your oven to 350°F (175°C). - Place chicken in a baking dish and cover with foil. - Heat for about 15-20 minutes until warm. - You can also reheat in the microwave. - Use a lower power setting to keep the chicken moist. - Add a splash of broth or water to prevent drying out. - For best results, enjoy your leftovers within a few days. You can pair this dish with many tasty sides. Here are some ideas: - Roasted vegetables like carrots, zucchini, or bell peppers - A fresh garden salad with a light vinaigrette - Quinoa or rice for a hearty grain option - Garlic bread or a nice crusty loaf for dipping Each of these sides adds flavor and balance to your meal. Yes, you can make this dish ahead of time. Here are some tips: - Stuff the chicken breasts the night before. - Store them in the fridge until you are ready to bake. - You can also bake them and reheat later. Just make sure they are covered to keep them moist. Meal prep makes dinner easy on busy nights. You can easily make this dish dairy-free with simple swaps. Consider these options: - Use dairy-free cream cheese or cashew cheese instead of regular cream cheese. - Replace feta cheese with a dairy-free feta alternative or nutritional yeast for flavor. These changes keep the dish tasty and suitable for dairy-free diets. This blog post shared how to make delicious Spinach Feta Stuffed Chicken Breasts. We covered the key ingredients like chicken, spinach, and feta. The step-by-step instructions showed you how to prepare, stuff, and bake the chicken perfectly. I included tips to avoid leaks and ensure juicy meat. Variations let you try different fillings and cooking methods. Finally, storage tips help keep leftovers fresh. With these ideas, you can enjoy a tasty meal now and later. Enjoy making this dish!

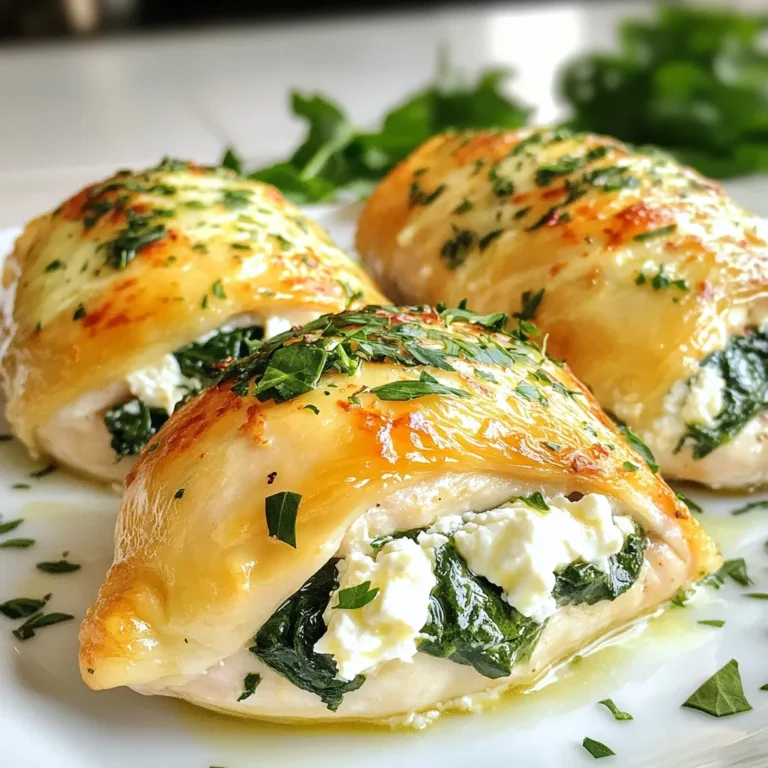
Spinach Feta Stuffed Chicken Breast Flavorful Delight

For a tasty Sticky Orange Chicken, gather these main items: - 1 lb (450g) boneless, skinless chicken thighs, cut into bite-sized pieces - 1/2 cup orange juice (preferably fresh) - Zest of 1 orange - 1/4 cup honey - 2 tablespoons low-sodium soy sauce - 1 tablespoon rice vinegar - 1 tablespoon grated fresh ginger - 2 cloves garlic, minced These ingredients provide the core flavor and texture for the dish. The chicken thighs stay juicy, while the orange juice adds a bright, zesty flavor. You will need these dry items for the coating: - 1/2 cup all-purpose flour - 1/4 cup cornstarch - 1 teaspoon baking powder - 1/2 teaspoon salt - 1/4 teaspoon black pepper This mix creates a crispy, crunchy texture when fried. It helps lock in the moisture of the chicken. The sticky sauce combines sweet and tangy tastes. Collect these items: - 1/2 cup orange juice (from earlier) - Zest of 1 orange (you already have this) - 1/4 cup honey - 2 tablespoons low-sodium soy sauce - 1 tablespoon rice vinegar - 1 tablespoon grated fresh ginger - 2 cloves garlic, minced These sauce ingredients will transform your chicken into a sticky and flavorful dish. The honey adds sweetness, while the ginger and garlic bring warmth and depth. {{ingredient_image_1}} Start by gathering your chicken thighs. You want them cut into bite-sized pieces. In a large bowl, mix flour, cornstarch, baking powder, salt, and black pepper. This mix will help create a crispy coating. Take your chicken pieces and dip them in the beaten eggs. Let any extra egg drip off. Now, coat each piece in the flour mixture. Ensure they are fully covered for the best texture. Heat about half an inch of vegetable oil in a frying pan over medium-high heat. When the oil is hot, carefully add the chicken pieces. Fry them in batches to avoid crowding the pan. Cook for about four to five minutes on each side. Once golden brown, remove the chicken with a slotted spoon. Place them on a paper towel-lined plate to drain excess oil. This step keeps your chicken crispy and not greasy. In a separate saucepan, combine orange juice, orange zest, honey, soy sauce, rice vinegar, ginger, and minced garlic. Stir these ingredients together well. Heat it over medium heat until it simmers. Let the sauce cook for about five to seven minutes. It should slightly thicken. This thick sauce is what makes the chicken sticky and flavorful. Once your sauce has thickened, add the fried chicken pieces to the saucepan. Gently toss the chicken in the sauce. Make sure every piece is well-coated in the sticky orange goodness. Remove from heat and let it sit for a minute. This allows the chicken to soak up more sauce. Now, you’re ready to serve! Enjoy your meal and garnish with sesame seeds and sliced green onions. To get a great coat on the chicken, start with the right mix. Use 1/2 cup of flour and 1/4 cup of cornstarch. The cornstarch gives a nice crunch. Mix in 1 teaspoon of baking powder for extra lift. Add 1/2 teaspoon of salt and a pinch of black pepper for flavor. Coat each chicken piece well. Dip it in beaten eggs first. Let the extra drip off, then roll it in the flour mix. This double coating makes the chicken crispy. For the sauce, you want it thick but still pourable. Combine 1/2 cup of orange juice with orange zest, honey, soy sauce, rice vinegar, ginger, and garlic in a pan. Cook on medium heat. Stir often to keep it from burning. Let it simmer for 5-7 minutes. The sauce will thicken as it cooks. If it gets too thick, add a splash of water or more orange juice. You want a sticky coating for the chicken, not a syrup! To avoid greasy chicken, don't overcrowd the pan when frying. Fry in batches of 4-5 pieces. This keeps the oil hot and helps the chicken cook evenly. Use a slotted spoon to remove the chicken. Place it on a paper towel-lined plate. This allows the extra oil to drain off. If you notice a lot of oil in the pan, remove some. This keeps your meal light and tasty. Pro Tips Use Fresh Orange Juice: Freshly squeezed orange juice enhances the flavor of the sauce and provides a vibrant taste that bottled juice can't match. Control Frying Temperature: Ensure the oil is hot enough before adding chicken. If the oil is too cool, the chicken will absorb more oil and become greasy. Let Sauce Thicken: Allow the sauce to simmer and thicken properly before adding the chicken for a stickier, more flavorful coating. Garnish Wisely: Add garnishes just before serving to keep them fresh and vibrant. Sliced green onions add a nice crunch and color contrast. {{image_2}} You can easily add some heat to your sticky orange chicken. To make it spicy, just add red pepper flakes or sriracha to the sauce. Start with a small amount, then taste as you go. This way, you control the spice level. For extra flavor, you can mix in chopped fresh chili peppers. This variation gives you a sweet and spicy kick that enhances the dish. If you want a lighter meal, try baking the chicken instead of frying it. First, coat the chicken pieces in the flour mixture as usual. Then, place them on a baking sheet lined with parchment paper. Spray them lightly with cooking oil. Bake in a preheated oven at 400°F (200°C) for about 20-25 minutes or until golden. This method cuts down on oil and makes the dish healthier, while still keeping it tasty. You can swap ingredients to fit your diet or taste. If you want a gluten-free option, use gluten-free flour and cornstarch for coating. For a sugar-free version, try using a sugar substitute in place of honey. You can also replace soy sauce with coconut aminos for a soy-free alternative. These substitutions keep the flavors intact while catering to different dietary needs. To store leftovers, let the sticky orange chicken cool first. Then, place it in an airtight container. Make sure the container is sealed well to keep moisture in. You can store it in the fridge for up to three days. Label the container with the date to help you remember. When you're ready to eat the leftovers, reheating is easy. You can use a microwave or a skillet. If you use a microwave, place the chicken on a plate. Heat it for one minute, then check if it's warm. If not, heat it in 30-second bursts until hot. For a skillet, add a splash of water to avoid dryness. Heat it over medium heat, stirring gently until warmed through. If you want to freeze sticky orange chicken, follow these steps. First, let it cool completely. Then, place it in a freezer-safe container or a heavy-duty freezer bag. Squeeze out excess air to prevent freezer burn. It can stay in the freezer for up to three months. When you're ready to eat, thaw it in the fridge overnight before reheating. Sticky orange chicken is a sweet and tangy dish. It features crispy chicken coated in a rich orange sauce. The sauce blends orange juice, honey, and soy sauce. This dish is popular in many Chinese restaurants. It is loved for its bold flavor and crunchy texture. To get crispy sticky orange chicken, coat the chicken well. Use a mix of flour and cornstarch for the best crunch. Fry the chicken in hot vegetable oil. Do not overcrowd the pan. Cook the chicken in batches for even frying. Let it drain on a paper towel after frying. This helps keep it crispy. Yes, you can use chicken breasts instead of thighs. Chicken breasts are leaner and cook faster. However, thighs offer more flavor and stay juicy. If you prefer breasts, cut them into similar bite-sized pieces. Adjust the cooking time if needed to ensure they are fully cooked. Sticky orange chicken pairs well with rice or noodles. You can serve it over steamed jasmine rice for a classic touch. Consider adding some stir-fried veggies for color and nutrition. Broccoli, bell peppers, or snap peas work great. Garnish with sesame seeds and green onions for extra flair. Sticky orange chicken is not gluten-free due to soy sauce and all-purpose flour. You can use gluten-free soy sauce to make it safe for gluten-free diets. Replace all-purpose flour with a gluten-free flour blend. Always check labels to ensure all ingredients are gluten-free. You learned how to make Sticky Orange Chicken from start to finish. We covered the key ingredients, simple steps, and tips for a perfect dish. Remember, you can make it spicy or healthier by baking. Store leftovers properly for later. With this guide, you'll impress family and friends with a tasty meal. Enjoy your cooking journey and get creative with flavors!

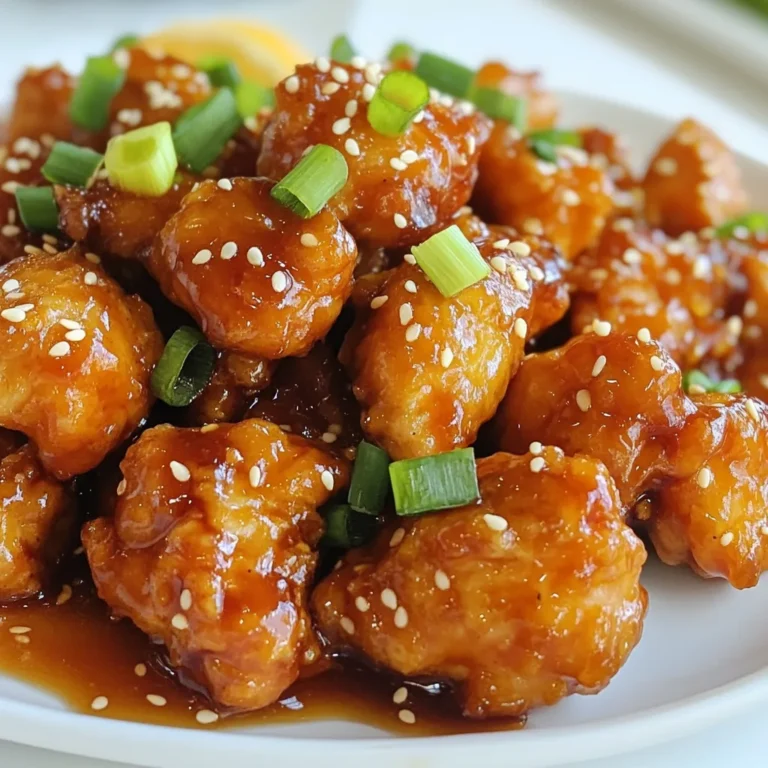
Sticky Orange Chicken Tasty and Simple Recipe Guide

For a tasty Greek chicken pasta, you need fresh and vibrant ingredients. Here’s what you'll use: - Chicken and Pasta Components - 2 boneless, skinless chicken breasts, diced - 8 oz penne pasta - Vegetables and Seasonings - 1 cup cherry tomatoes, halved - 1 cup spinach, roughly chopped - 1/2 cup Kalamata olives, pitted and sliced - 2 cloves garlic, minced - 2 tablespoons olive oil - 1 tablespoon lemon juice - 1 teaspoon dried oregano - 1/2 teaspoon salt - 1/4 teaspoon black pepper - Toppings and Garnishes - 1/2 cup feta cheese, crumbled - Fresh parsley for garnish These ingredients bring bright flavors and textures. The chicken gives protein, while the pasta adds heartiness. Fresh veggies keep it healthy. The olives and feta add a salty punch. Each bite is a taste of the Mediterranean! {{ingredient_image_1}} Start by boiling water in a large pot. Add a pinch of salt to the water. Once it boils, add the penne pasta. Cook it according to the package's instructions. You want it to be al dente. This usually takes around 8 to 10 minutes. After cooking, drain the pasta and set it aside. In a large skillet, heat 2 tablespoons of olive oil over medium heat. Once hot, add 2 diced chicken breasts. Sprinkle in 1/2 teaspoon of salt and 1/4 teaspoon of black pepper. Cook the chicken for about 5 to 7 minutes. It should turn golden brown and cook all the way through. Next, add 2 cloves of minced garlic to the skillet. Cook it for 1 more minute until you smell the garlic. Now, toss in 1 cup of halved cherry tomatoes and 1 cup of chopped spinach. Cook everything together until the spinach wilts and the tomatoes soften. This should take about 2 to 3 minutes. Now it’s time to bring everything together. Add the cooked pasta to the skillet with the chicken and vegetables. Then, mix in 1/2 cup of sliced Kalamata olives and 1/2 cup of crumbled feta cheese. Sprinkle in 1 teaspoon of dried oregano and add 1 tablespoon of lemon juice. Toss everything well for about 2 minutes. This allows all the flavors to meld together. Once done, remove the skillet from heat. Serve it hot, garnished with fresh parsley. Enjoy your vibrant Greek chicken pasta! To get the best out of your Greek chicken pasta, timing is key. Cook the penne pasta in boiling salted water for about 10-12 minutes. Aim for al dente, which means slightly firm. For the chicken, cook it for 5-7 minutes in a hot skillet. You want it golden and fully cooked. Stir often to avoid burning. When you add the garlic and vegetables, keep cooking for just a few minutes. This brings out their flavors. This dish is great for lunch or dinner. You can serve it warm or at room temperature. I love adding extra Kalamata olives for a briny kick. Fresh lemon wedges on the side make it even better. You can pair it with a light salad for a balanced meal. A glass of white wine complements the flavors nicely too. To make your dish look fancy, use bowls instead of plates. First, add the pasta. Then, sprinkle extra feta cheese and parsley on top. A drizzle of olive oil adds shine. For a pop of color, place lemon wedges around the dish. This not only looks nice but also gives your guests a fresh burst of flavor when they squeeze the lemon juice over their serving. Pro Tips Marinate the Chicken: For extra flavor, marinate the diced chicken in olive oil, lemon juice, and oregano for at least 30 minutes before cooking. Use Fresh Ingredients: Opt for fresh spinach and ripe cherry tomatoes to enhance the overall taste and texture of the dish. Cook Pasta Al Dente: Ensure the penne pasta is cooked al dente, as it will continue to cook slightly when mixed with the hot chicken and vegetables. Garnish Creatively: Experiment with garnishes like toasted pine nuts or a sprinkle of red pepper flakes for an added crunch and kick. {{image_2}} If you want a meat-free meal, try swapping chicken with chickpeas. Use one can, drained and rinsed. This adds protein and keeps the dish hearty. You can also add more veggies like zucchini or bell peppers. They will give your pasta more color and taste. Just sauté them with garlic before adding the other ingredients. For a gluten-free version, choose gluten-free penne pasta. Many brands offer great options that taste good, too. You can also use spiralized veggies like zucchini or carrots. They are fun and healthy. Just cook them briefly before adding them to the mix. Feel free to mix in your favorite flavors. Try adding sun-dried tomatoes for a sweet touch. You can also toss in artichoke hearts or capers for a salty kick. For heat, add red pepper flakes or fresh chili. Don't forget to adjust the lemon juice to balance the flavors. The key is to make it your own! To store leftover Greek Chicken Pasta, first let it cool. Place it in an airtight container. Make sure to cover it tightly. This will help keep it fresh. Store it in the fridge for up to three days. You can also separate the chicken from the pasta if you like. When you're ready to eat the leftovers, reheating is easy. You can use a microwave or a stovetop. For the microwave, place the pasta in a bowl. Cover it with a damp paper towel to keep moisture. Heat for about 1-2 minutes. Stir halfway through to warm evenly. If using the stovetop, add a splash of water to the pan. Heat over low heat until warm, stirring often. Freezing Greek Chicken Pasta is also simple. First, let the dish cool completely. Then, portion it into freezer-safe containers. Leave some space at the top, as the pasta will expand. Seal the containers tightly and label them with the date. You can freeze it for up to two months. To defrost, place it in the fridge overnight before reheating. You can serve Greek Chicken Pasta with a fresh salad. A simple Greek salad works great. Just mix cucumbers, tomatoes, and olives. You can also add a side of garlic bread. This adds crunch and flavor. Another option is to serve with lemon wedges. They give a bright taste that balances the dish. Yes, you can use many types of pasta. Penne is great, but try rotini or fusilli too. These shapes hold sauce well. For a lighter option, use zucchini noodles or spaghetti squash. They add a nice twist to the dish. Just adjust cooking times as needed for fresh veggies. To spice it up, add red pepper flakes. Start with a pinch and taste it. You can also include diced jalapeños for heat. If you like sauces, try adding a spicy marinara. Another idea is to mix in some hot sauce. This gives a kick without changing much of the dish. This blog post covered everything you need for Greek Chicken Pasta. We listed key ingredients and shared simple steps for cooking. I offered tips for perfecting your dish and ideas for variations. You also learned how to store and reheat leftovers. Cooking can be fun and rewarding. With these insights, you can create a meal that impresses. Enjoy your cooking journey!

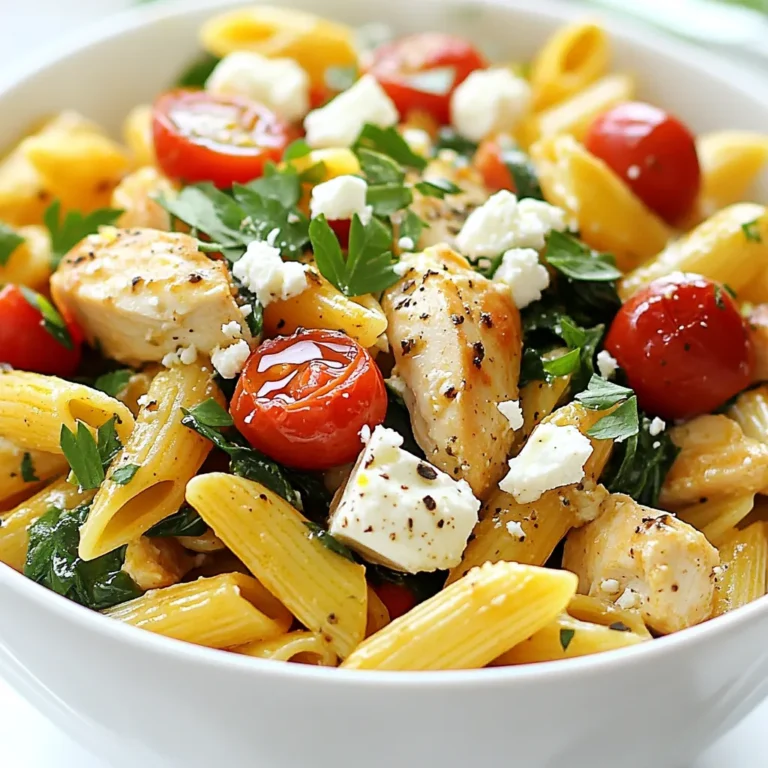
Greek Chicken Pasta Flavorful and Easy Recipe

- 4 large bell peppers (any color) - 1 cup quinoa, rinsed - 2 cups vegetable broth - 1 can (15 oz) black beans, rinsed and drained - 1 cup corn (fresh, frozen, or canned) - 1 cup diced tomatoes (fresh or canned) - 1 small red onion, finely chopped - 2 cloves garlic, minced - 1 teaspoon cumin - 1 teaspoon chili powder - Salt and pepper to taste - 1 cup shredded cheese (cheddar or Mexican blend) - Fresh cilantro, for garnish - Lime wedges, for serving When making Fiesta Quinoa Stuffed Peppers, you need fresh ingredients. Start with bell peppers. Any color works well. They add crunch and color. Next, quinoa is key. It cooks fluffy and adds protein. Rinse it well before cooking to remove bitterness. Black beans offer richness and are packed with fiber. They pair well with quinoa. Corn adds sweetness and a nice texture. You can use fresh, frozen, or canned corn. Diced tomatoes bring juiciness. They make the filling moist and flavorful. Red onion provides a sharp taste. Finely chop it for even distribution. Garlic is a must for aroma. Fresh garlic adds a punch. Spices like cumin and chili powder give warmth to the dish. Adjust salt and pepper to fit your taste. For topping, use shredded cheese. Cheddar or a Mexican blend melts beautifully. Finally, fresh cilantro and lime wedges brighten the dish. They add a fresh kick when served. Gather all these ingredients to create a colorful, tasty, and healthy meal. {{ingredient_image_1}} First, preheat your oven to 375°F (190°C). Choose four large bell peppers. You can pick any color you like. Cut off the tops gently. Remove the seeds and membranes inside. This helps the peppers cook evenly and hold the filling well. In a medium saucepan, add one cup of rinsed quinoa. Pour in two cups of vegetable broth. Bring the mixture to a boil. Once it boils, reduce the heat to low. Cover the pot and let it simmer for about 15 minutes. The quinoa will absorb the broth and become fluffy. In a large mixing bowl, combine the cooked quinoa with the following ingredients: - 1 can (15 oz) black beans, rinsed and drained - 1 cup corn (fresh, frozen, or canned) - 1 cup diced tomatoes (fresh or canned) - 1 small red onion, finely chopped - 2 cloves garlic, minced - 1 teaspoon cumin - 1 teaspoon chili powder - Salt and pepper to taste Mix everything well. Make sure all the ingredients blend together nicely. Now, take each bell pepper and stuff it with the quinoa mixture. Pack it down lightly to make sure each pepper is full. Place the stuffed peppers upright in a baking dish. This helps them stay together while baking. Sprinkle one cup of shredded cheese over the top of each stuffed pepper. Cover the dish with aluminum foil. Bake the peppers for 25 minutes. Remove the foil and bake for an additional 10-15 minutes. You want the cheese to be melted and bubbly. Once done, let the peppers cool for a few minutes. Garnish them with fresh cilantro. Serve with lime wedges on the side for a zesty kick. Enjoy your colorful and healthy Fiesta Quinoa Stuffed Peppers! To make great quinoa, rinse it well before cooking. This step removes the bitter coating called saponin. Use a ratio of 1 cup quinoa to 2 cups vegetable broth. This gives the quinoa flavor and moisture. Bring it to a boil, then lower the heat. Let it simmer for about 15 minutes until fluffy. Stir it gently with a fork to separate the grains. This makes the texture light and airy. Seasoning is key to flavor. I like to use cumin and chili powder for a warm, spicy taste. You can also add smoked paprika for a hint of smokiness. If you want heat, add a pinch of cayenne pepper. Taste the mixture before stuffing the peppers. Adjust salt and pepper to make it perfect. Fresh lime juice can brighten the flavors too. For the cheese on top, I recommend cheddar or a Mexican blend. Both melt well and add creaminess. If you want a twist, try pepper jack for some spice. Vegan cheese works for a dairy-free option. Sprinkle the cheese generously on top before baking. This creates a delicious, bubbly crust that everyone loves. Pro Tips Choose Colorful Peppers: Using a mix of bell pepper colors not only enhances the visual appeal but also adds a subtle variation in flavor. Rinse Quinoa Thoroughly: Rinsing quinoa before cooking removes its natural coating, called saponin, which can impart a bitter taste. Customize Your Filling: Feel free to add other ingredients like diced zucchini, spinach, or even cooked ground meat for extra protein and flavor. Let Them Rest: Allowing the stuffed peppers to rest for a few minutes after baking helps the filling set, making them easier to serve. {{image_2}} You can use many types of peppers for this dish. Bell peppers are sweet and colorful. They hold the filling well. You can also try poblano peppers for a mild kick. These peppers add a smoky flavor. If you want a bit more heat, jalapeños are a great option. Just remember to remove the seeds to lessen the spice! If you want to change the protein, there are many options. Instead of black beans, try chickpeas for a different taste. You could also add cooked ground turkey or chicken for extra protein. If you like fish, shredded cooked salmon works too. Just make sure to mix it well with the quinoa. This dish is easy to make vegetarian or vegan. For vegans, simply skip the cheese or use a plant-based alternative. Nutritional yeast can add a cheesy flavor without dairy. You can also add more veggies, like spinach or zucchini, for extra nutrients. This makes the dish colorful and healthy! After enjoying Fiesta Quinoa Stuffed Peppers, save any leftovers. Place them in an airtight container. This keeps the flavors fresh and prevents drying out. Store the peppers in the fridge for up to four days. If you don’t finish them, don’t worry! To reheat your stuffed peppers, use the oven. Preheat it to 350°F (175°C). Place the peppers in a baking dish. Cover them with foil to keep them moist. Bake for about 15 minutes or until they are hot. You can also use a microwave. Heat for 2-3 minutes, checking often. Freezing is a great option too! Allow the stuffed peppers to cool completely first. Wrap each pepper tightly in plastic wrap, then foil. This will prevent freezer burn. Store them in the freezer for up to three months. To enjoy them later, thaw them in the fridge overnight before reheating. You can serve many sides with these stuffed peppers. A simple green salad adds freshness. Pair them with avocado slices or guacamole for creaminess. Mexican rice or a corn salad also works well. For a fun twist, serve with tortilla chips and salsa. Yes, this recipe is naturally gluten-free! Quinoa is a gluten-free grain. Just ensure that any canned items, like beans or tomatoes, are labeled gluten-free. This recipe is safe for anyone who avoids gluten. The total cooking time is about 50 minutes. Prepping the peppers and cooking quinoa takes around 15 minutes. Once you stuff the peppers, baking them takes about 35 minutes. Absolutely! You can make the quinoa filling a day ahead. Store it in the fridge until you're ready to stuff the peppers. This makes the assembly quick and easy, saving you time on a busy day. Fiesta Quinoa Stuffed Peppers is a fun dish packed with flavor and nutrition. We explored the key ingredients like bell peppers, quinoa, and black beans. I shared simple steps for prepping, cooking, and baking. Tips helped you master quinoa and choose the right cheese. We also looked at tasty variations to suit your taste. Lastly, I covered storage tips for leftovers. Enjoy making this dish your own, and share it with friends!

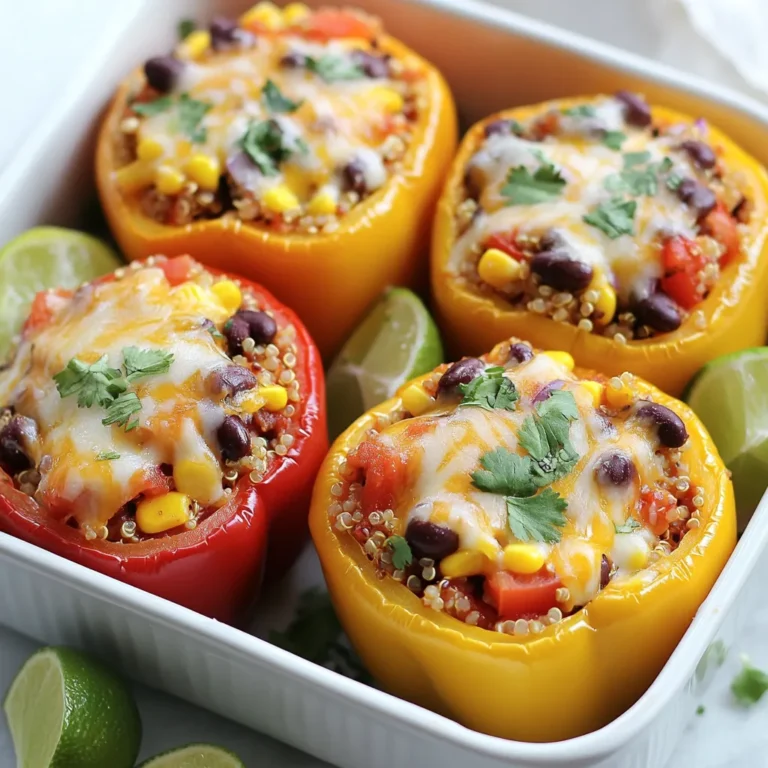
Fiesta Quinoa Stuffed Peppers Flavorful and Healthy Dish

To make Creamy Mushroom Spinach Orzo, gather these simple ingredients: - 1 cup orzo pasta - 2 cups vegetable broth - 1 tablespoon olive oil - 1 medium onion, finely chopped - 3 cloves garlic, minced - 8 ounces cremini mushrooms, sliced - 3 cups fresh spinach - ¾ cup heavy cream - ½ cup grated Parmesan cheese (or nutritional yeast for a vegan option) - Salt and pepper to taste - Fresh parsley, chopped (for garnish) These ingredients work together to create a rich and creamy dish. The orzo pasta absorbs the flavors well, while the mushrooms add depth. Fresh spinach gives a nice color and nutrition. You can easily adapt this recipe for dietary needs: - Vegan: Use nutritional yeast instead of Parmesan and coconut cream instead of heavy cream. - Gluten-Free: Swap orzo with gluten-free pasta. - Low-Carb: Replace orzo with spiralized zucchini or cauliflower rice. These swaps keep the dish tasty while meeting different diets. For the best flavor and quality, I recommend these brands: - Orzo Pasta: Barilla or DeLallo for great texture. - Vegetable Broth: Swanson or Pacific Foods for rich taste. - Olive Oil: California Olive Ranch for smooth flavor. - Parmesan Cheese: BelGioioso for a sharp, authentic taste. Using quality ingredients makes a big difference in your dish. {{ingredient_image_1}} First, bring 2 cups of vegetable broth to a boil in a medium pot. Add 1 cup of orzo pasta to the boiling broth. Cook it according to the package instructions. This usually takes about 8-10 minutes. Once it is al dente, drain the orzo and set it aside. Make sure to save a little broth for later. Next, let’s sauté the veggies. In a large skillet, heat 1 tablespoon of olive oil over medium heat. Add a finely chopped medium onion. Sauté it for about 3-4 minutes until it turns translucent. Now, stir in 3 cloves of minced garlic and 8 ounces of sliced cremini mushrooms. Cook them for about 5-7 minutes. You want the mushrooms to be tender and browned. After that, add 3 cups of fresh spinach to the skillet. Cook it until it wilts, stirring occasionally. Now it's time to bring it all together. Pour in ¾ cup of heavy cream and mix well. Let it simmer for 2-3 minutes until it thickens a bit. Add the cooked orzo to the skillet. Stir everything until the pasta is well-coated with the creamy sauce. If it looks too thick, add a bit of the reserved broth to adjust the texture. Then, mix in ½ cup of grated Parmesan cheese. Season with salt and pepper to taste. Finally, remove it from heat and let it sit for a minute. Garnish with chopped fresh parsley before serving. Enjoy your creamy mushroom spinach orzo! To make this dish creamy, you need heavy cream. It gives a rich texture. If you want a lighter option, use plant-based cream. Nutritional yeast also adds a cheesy taste. Mix it in with the broth and orzo for smoothness. Remember to adjust the liquid. Start with a little broth, then add more if needed. Stir well to coat everything evenly. This will help you get that perfect creamy sauce. Cooking mushrooms well is key to this dish. Start with a hot skillet and olive oil. Make sure the mushrooms are in a single layer. This helps them brown nicely. Don’t overcrowd the pan; this can cause them to steam instead of brown. Stir occasionally for even cooking. Cook them until they are tender and golden. This brings out their deep, rich flavor that pairs well with spinach. To make this orzo vegan, swap out the heavy cream for coconut cream or a nut-based option. Nutritional yeast replaces Parmesan cheese nicely. It gives a cheesy flavor without dairy. Use vegetable broth to keep it plant-based. Be sure to check labels for any hidden dairy in your broth. This way, you can enjoy a creamy mushroom spinach orzo that fits your diet. Pro Tips Use Fresh Ingredients: Fresh spinach and cremini mushrooms will enhance the flavor and texture of your dish significantly. Customize Your Creaminess: Adjust the amount of heavy cream to your liking; for a lighter version, reduce the cream or substitute with a plant-based alternative. Reserve Some Broth: Keeping a bit of vegetable broth on hand allows you to adjust the creaminess of the dish as needed. Enhance Flavor with Herbs: Experiment with additional herbs like thyme or basil for an extra layer of flavor in your creamy orzo. {{image_2}} You can easily boost the protein in creamy mushroom spinach orzo. Chicken or tofu works great. For chicken, cook bite-sized pieces in the skillet before adding the onion. This adds flavor to the dish. If you choose tofu, press it first to remove extra water. Then, cut it into cubes and sauté until golden before adding other veggies. This way, you make the dish heartier and more filling. Adding herbs or spices can elevate the taste. Fresh herbs like thyme or basil bring freshness. You can add them while cooking the mushrooms. If you like a bit of heat, sprinkle in some red pepper flakes. For a smoky flavor, try adding smoked paprika. Just a pinch can change the whole dish. These simple changes make your meal exciting and new. If you need a gluten-free option, swap the orzo with gluten-free pasta. Many brands offer gluten-free orzo made from rice or lentils. Cook it just like regular orzo, using the same broth. This keeps the creamy texture while meeting dietary needs. Always check the labels to ensure they fit your diet. With these swaps, everyone can enjoy this comforting dish! After enjoying your Creamy Mushroom Spinach Orzo, let any leftovers cool down. Place them in an airtight container. Store in the fridge for up to three days. This keeps the flavors fresh and tasty. Be sure to avoid leaving it out at room temperature for too long. If you want to save some for later, freezing is a great option. First, let the orzo cool completely. Then, scoop it into a freezer-safe container or bag. Press out as much air as possible before sealing. You can freeze it for up to two months. This way, you can enjoy it on a busy day. To reheat, take the orzo out of the fridge or freezer. If frozen, let it thaw in the fridge overnight. For reheating, use a skillet over medium heat. Add a splash of vegetable broth or a bit of cream to keep it moist. Stir often until it’s heated through. This helps keep the orzo creamy and delicious. Avoid using the microwave if you can, as it may dry it out. Yes, you can use other pasta types! Shells, penne, or fusilli work well. Each will change the shape and texture. Just adjust the cooking time based on the pasta you choose. Follow the package instructions for the best results. To make this dish gluten-free, use gluten-free orzo or any gluten-free pasta. Check the label for gluten-free options. You will still enjoy the same creamy flavor and texture. Just make sure to cook it according to instructions on the package. Creamy Mushroom Spinach Orzo pairs well with many sides. A crisp green salad adds freshness. Garlic bread or a crusty baguette complements the dish nicely. You can also serve it alongside grilled chicken or fish for protein. Enjoy experimenting with your favorites! This blog post covered key ingredients, step-by-step cooking instructions, and helpful tips for making creamy mushroom spinach orzo. I shared smart ways to customize the dish based on your needs, like adding protein or making it vegan. Proper storage and reheating tips ensure you enjoy every bite later. Remember, cooking should be fun and simple. Use this guide to create a tasty meal anytime. Enjoy your orzo adventure!

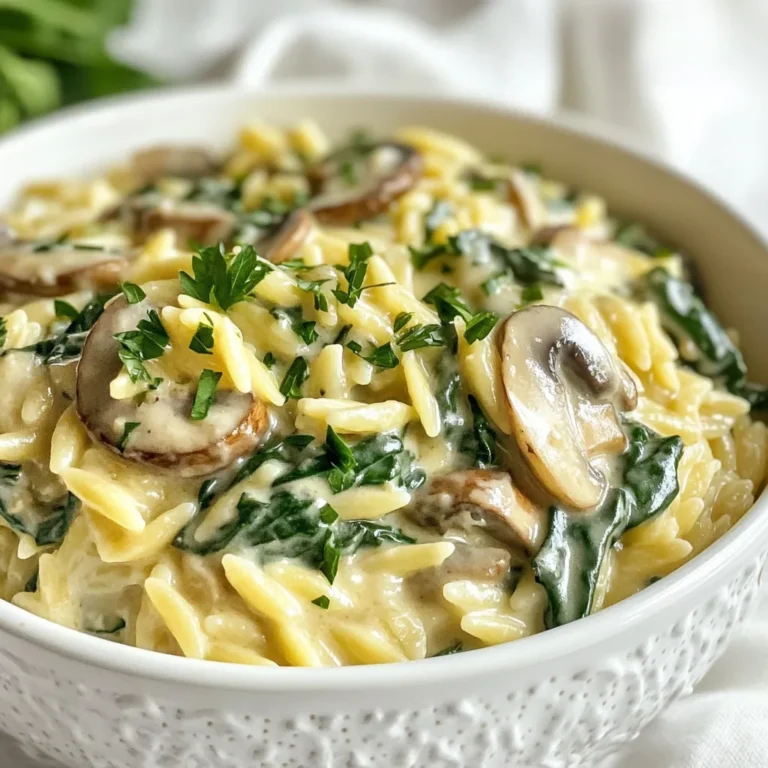
Creamy Mushroom Spinach Orzo Simple Comfort Dish

To make delicious baked cinnamon apple chips, you'll need a few simple ingredients. Here's the list to get you started: - 3 medium-sized apples (Honeycrisp or Fuji recommended) - 2 teaspoons ground cinnamon - 1 tablespoon sugar (optional) - Pinch of salt These ingredients create a sweet and spicy flavor that enhances the natural taste of the apples. The Honeycrisp and Fuji apples are best because they are sweet and hold up well during baking. You can adjust the sugar based on how sweet your apples are. If you want to skip the sugar, that’s perfectly fine! The cinnamon and salt will still give you great flavor. Using fresh ingredients makes a big difference. Always pick apples that look shiny and firm. This ensures your chips are tasty and crunchy. Remember, the key to great apple chips is even slicing, so take your time when cutting. Enjoy the process of making this healthy snack! {{ingredient_image_1}} - Preheat the oven to 200°F (93°C). - Line a baking sheet with parchment paper. Start by getting your oven ready. Preheating is key to making sure your apple chips cook evenly. Parchment paper helps the chips not stick. It also makes cleanup easy. - Wash and dry the apples. - Slice apples into thin rounds (1/8 inch thick). Next, wash your apples well. Make sure they are dry before slicing. Use a sharp knife or a mandoline for thin slices. The thinner, the better! Remove any seeds you see. This helps the chips stay safe to eat. - Mix cinnamon, sugar (if using), and salt. - Toss apple slices in the cinnamon mixture. In a bowl, mix the ground cinnamon and sugar together. This adds sweetness if you choose to use sugar. Add a pinch of salt for flavor. Toss your apple slices well in this mix. Each slice should be coated nicely. - Lay apple slices flat on the baking sheet. - Bake for 1 hour, then flip and continue baking. Place the apple slices in a single layer on the baking sheet. Avoid overlapping to ensure even cooking. Bake in the preheated oven for 1 hour. After an hour, flip the slices over. Bake for another hour until they are crisp and slightly curled. - Turn off the oven and leave apple chips inside for 30 minutes. - Cool apples completely before serving. Once they are done baking, turn off your oven. Leave the chips inside for 30 minutes. This step helps them get even crispier. After that, let the apple chips cool completely. They will be ready to enjoy! For the best apple chips, choose Honeycrisp or Fuji apples. These apples have great sweetness and crispness. Their flavor shines through when baked. It is also key to slice the apples evenly. Aim for 1/8 inch thick slices. This way, they will cook at the same time. An uneven slice can lead to some chips being soft while others are crispy. To get the crispiest chips, set your oven to 200°F (93°C). Low heat helps to remove moisture without burning the apples. Halfway through baking, flip the apple slices. This ensures that both sides cook evenly. If you skip this step, one side may become too soft. Not all apples are equally sweet. If your apples are sweet, you may want less sugar. Start with just a pinch. You can also use alternative sweeteners like honey or maple syrup. Just remember, these may change the final texture. Test small amounts first to find what you like best. Pro Tips Choose the Right Apples: Opt for sweet and crisp apple varieties like Honeycrisp or Fuji for the best flavor and texture in your chips. Slice Evenly: Use a mandoline for uniform thickness to ensure even baking. Thinner slices will yield crunchier chips. Experiment with Flavors: Feel free to add other spices like nutmeg or ginger to the cinnamon mixture for a unique twist on flavor. Storage Tip: Keep your apple chips in an airtight container at room temperature to maintain their crispness. They can also be refrigerated for longer shelf life. {{image_2}} You can make your apple chips even tastier. Try adding nutmeg or allspice. Just a pinch can bring warmth and depth to the flavor. You can also add some vanilla or maple syrup. These ingredients add a nice sweet touch. Mix them in with the cinnamon for a new twist. If you want a sugar-free option, skip the sugar. The natural sweetness of the apples shines through. For those who need gluten-free snacks, this recipe is perfect. Apples, cinnamon, and salt contain no gluten. Enjoy these chips without worry. You can mix apples with other fruits for fun flavors. Try adding pears or peaches to the mix. They bake well and add unique tastes. You could also create a mixed-fruit chip recipe. Slice your favorite fruits thinly and bake them together. This way, you enjoy a variety of flavors in each bite. To keep your baked cinnamon apple chips fresh, use airtight containers. This will help prevent moisture from ruining their crispiness. Glass jars or plastic containers with tight lids work well. You can also use resealable plastic bags. Just make sure to remove as much air as possible before sealing. Store your apple chips in a cool, dry place away from direct sunlight. They will stay fresh for up to two weeks. If your apple chips lose their crunch, you can reheat them. For the oven, set it to 200°F (93°C). Place the chips on a baking sheet for about 5-10 minutes. This will help restore their crispiness. You can also use an air fryer. Set it at a low temperature and heat for a few minutes. This method gives you quick results. Remember to check often so they do not burn. Enjoy your tasty snack! Baked cinnamon apple chips last about one week if stored properly. Keep them in an airtight container at room temperature. The chips may lose some crispness over time, but they will still taste good. Yes, you can make these chips without sugar. The sweetness from the apples often shines through on their own. Just skip the sugar in the recipe. You might enjoy a more natural flavor. For the best results, use Honeycrisp or Fuji apples. They have a great balance of sweetness and tartness. Other good options include Granny Smith and Gala apples. Baked apple chips are a healthy snack. They are low in calories and high in fiber. You can enjoy them guilt-free while still satisfying your snack cravings. Yes, a dehydrator works well for making apple chips. Slice the apples as you would for the oven. Set the dehydrator to 135°F (57°C) and let them dry for about 6 to 8 hours. Your chips will be crispy and delicious. This blog post covered how to make baked cinnamon apple chips from scratch. We discussed the ingredients, step-by-step instructions, and tips for great results. You learned how to choose the best apples, achieve crispiness, and explore fun flavor variations. Enjoy your healthy snacks and share them with others. Experiment with ingredients to make the recipe your own. Happy baking!

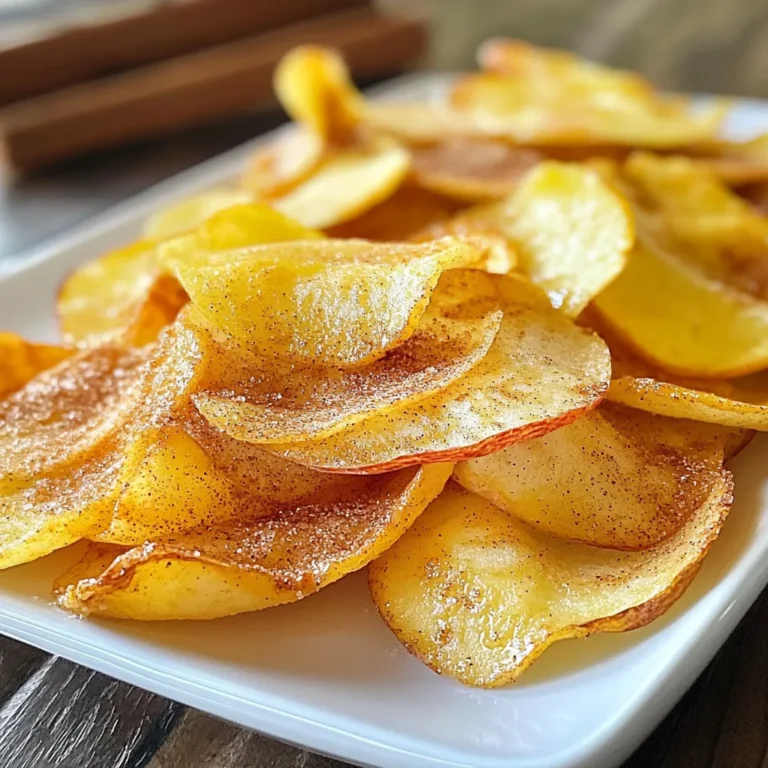
Baked Cinnamon Apple Chips Crispy and Healthy Snack

- 1 cup sushi rice - 1 1/4 cups water - 1 tablespoon rice vinegar - 1 tablespoon sugar - 1/2 teaspoon salt - 200g fresh sushi-grade tuna, diced - 1 tablespoon mayonnaise (preferably Kewpie) - 1 teaspoon sriracha (adjust to taste) - 1 tablespoon soy sauce - 1 small cucumber, thinly sliced - 1 small avocado, sliced - 1/4 cup edamame beans (shelled) - 1 teaspoon sesame seeds (for garnish) - 1 green onion, chopped (for garnish) - Seaweed sheets (nori), cut into strips (optional) Choose sushi-grade tuna for the best flavor. Look for bright red, fresh fish. Check that your fish is firm and has no off smell. Use short-grain sushi rice for a sticky texture. Always rinse the rice until the water runs clear. This helps remove excess starch. Fresh vegetables enhance the taste and crunch. Select cucumbers and avocados that are ripe, but not overripe. If you can't find sushi-grade tuna, try using cooked shrimp or crab. For a vegetarian option, use marinated tofu or tempeh. Instead of sushi rice, you can use jasmine rice, though the texture will differ. If you don’t have rice vinegar, lemon juice works as a substitute. For a spicy kick, use wasabi instead of sriracha. {{ingredient_image_1}} Start by rinsing the sushi rice. Use cold water until it runs clear. This step helps remove excess starch. After rinsing, drain the rice well. Next, combine the rinsed rice and water in a medium saucepan. Bring it to a boil over medium heat. Once it boils, cover the pan and lower the heat. Cook it for 18 to 20 minutes. The rice should be tender, and all the water should be absorbed. While the rice cooks, prepare the sushi vinegar mixture. In a small bowl, mix rice vinegar, sugar, and salt. Microwave the mixture for about 30 seconds. This helps the sugar dissolve well. Once the rice is ready, transfer it to a large bowl. Gently fold in the sushi vinegar mixture. Let the rice cool at room temperature while you prepare the tuna. In another bowl, combine the diced tuna, mayonnaise, sriracha, and soy sauce. Mix everything well until the tuna is evenly coated. You can adjust the sriracha based on how spicy you like it. Set this mixture aside while you assemble your bowls. To get the best sushi rice, always rinse the rice well. Rinsing removes extra starch. This helps the rice become sticky, not mushy. Use equal parts rice and water for cooking. Once it boils, cover and lower the heat. Cook for about 20 minutes. Let the rice sit off the heat for 10 minutes. This step makes it fluffy and perfect for your bowls. When serving your spicy tuna sushi bowls, consider the order of toppings. Start with a base of sushi rice. Then, add the spicy tuna mix. Next, layer the cucumber and avocado. Finally, sprinkle the edamame on top. Serve with extra sriracha on the side for those who want more heat. This setup ensures every bite is full of flavor. Make your sushi bowls look great by arranging the toppings neatly. Use a wide, shallow bowl for a lovely display. Place the tuna in the center, then fan out the avocado and cucumber around it. Sprinkle sesame seeds and green onions on top for color. If you like, add seaweed strips for texture. A visually appealing bowl makes the meal more enjoyable. Pro Tips Use Fresh Tuna: Always choose high-quality, sushi-grade tuna for the best flavor and texture. Freshness is key to achieving that melt-in-your-mouth experience. Customize Your Spice: Adjust the amount of sriracha in the spicy tuna mixture according to your heat preference. You can also mix in other sauces like wasabi for extra kick. Perfectly Cooked Rice: For perfectly sticky sushi rice, ensure you rinse the rice thoroughly to remove excess starch before cooking. This step is crucial for achieving the right texture. Artful Presentation: Arrange your toppings in a visually appealing way. Use contrasting colors and shapes to make your sushi bowls look as good as they taste! {{image_2}} You can easily make a vegetarian version of spicy tuna sushi bowls. Instead of tuna, use marinated tofu or tempeh. Both options are great for adding protein. Dice them into small cubes and toss them with a similar mix of mayonnaise, sriracha, and soy sauce. For an extra kick, add diced pickled radish or spicy kimchi. This keeps the flavor bold while catering to vegetarian diets. Adding extra toppings can elevate your sushi bowl. Consider including: - Shredded carrots for crunch - Mango slices for sweetness - Radish for spice - Seaweed strips for texture These toppings provide different flavors and colors, making your dish even more appealing. You can also use microgreens or cilantro for a fresh finish. Each topping brings a unique taste that complements the spicy tuna base. Adjusting the spice level is easy. If you prefer a milder flavor, reduce the sriracha in the tuna mixture. You can also substitute it with a less spicy sauce, like sweet chili sauce. For those who love heat, add more sriracha or include sliced jalapeños. You can also drizzle some chili oil on top before serving. This way, everyone can enjoy their bowl just the way they like it! Store leftovers in an airtight container. This keeps the food fresh and safe. Place the sushi rice and toppings in separate containers. You want to keep the rice from getting soggy. Leftovers stay good for up to two days in the fridge. When ready to eat, check the tuna for freshness. To reheat sushi rice, add a splash of water. This helps it regain moisture. Place the rice in a microwave-safe bowl. Cover it with a damp paper towel. Heat it for about 30 seconds. Stir and check the temperature. Repeat if needed until warm. The rice should be fluffy, not dry. You can freeze sushi rice, but it may lose some texture. Let the rice cool completely before freezing. Place it in a freezer bag and remove air. It lasts for about a month in the freezer. To use, thaw overnight in the fridge. Reheat it gently with water to restore moisture. The best tuna for sushi bowls is sushi-grade tuna. This type of tuna is fresh and safe to eat raw. Look for yellowfin or bluefin tuna at your local fish market. Always check if it comes from a reliable source. Freshness is key to the best flavor and texture. Yes, you can use brown rice instead of sushi rice. Brown rice is healthier and has more fiber. However, it has a different texture and flavor than sushi rice. Cook it longer to make it soft. This gives a nice base for your toppings. To make the dish less spicy, reduce the amount of sriracha in the tuna mix. You can also use regular mayonnaise instead of spicy mayonnaise. Adding more cucumber and avocado helps cool the heat too. If you want extra flavor without spice, try adding sesame oil instead. In this blog post, we explored the key ingredients for sushi bowls. We discussed the complete ingredient list, quality tips, and substitutions. You learned step-by-step instructions, from preparing sushi rice to combining all flavors. We also covered tips for perfect texture, serving ideas, and presentation. You found variations for vegetarian options and spice adjustments. Finally, we touched on storage advice for leftovers. Sushi bowls are fun and easy to make. With these insights, you can enjoy delicious sushi at home anytime.

Spicy Tuna Sushi Bowls Fresh and Flavorful Delight

PREV 1 … 45 46 47 … 57 NEXT
flavor nest kitchen

explore

DessertsDinnerAppetizersDrinks

Our Policies

  • Cookie Policy
  • Copyright Policy
  • Disclaimer
  • GDPR Policy
  • Terms Of Use
Back to Top
  • About
  • Contact Us
  • Privacy Policy
© 2025 flavor nest kitchen