FREE DINNER EBOOK! Get your copy!
  • Cookie Policy
  • GDPR Policy
  • Disclaimer
  • Terms Of Use
  • Visit my other site: Fun Cookie Recipes
flavor nest kitchen
  • Home
  • Dinner
  • Desserts
  • Drinks
  • Appetizers
  • Contact
  • About
  • Privacy Policy
  • Home
  • Dinner
  • Desserts
  • Drinks
  • Appetizers
  • Contact
  • About
  • Privacy Policy
  • Cookie Policy
  • GDPR Policy
  • Disclaimer
  • Terms Of Use
Visit my other site: Fun Cookie Recipes

HOME / CATEGORIES /

Latest

To make Lemon Garlic Shrimp Orzo, you will need: - 1 pound large shrimp, peeled and deveined - 1 cup orzo pasta - 3 tablespoons olive oil - 4 cloves garlic, minced - Zest and juice of 1 large lemon - 1/2 teaspoon red pepper flakes (optional) - 1 cup vegetable broth - 1/4 cup fresh parsley, chopped - Salt and pepper to taste - Grated Parmesan cheese (for serving, optional) The key to great flavor lies in the right seasonings. Here’s what to use: - Olive oil: This adds richness and helps cook the shrimp perfectly. - Garlic: Fresh garlic gives the dish a nice kick. Don't skip this! - Lemon zest and juice: These brighten up the dish. They add a fresh, zesty taste. - Red pepper flakes: Optional, but they bring a little heat. Adjust to your taste. - Salt and pepper: These enhance all the flavors. Use them to taste. Garnishing makes your dish look nice and adds flavor. Here are some ideas: - Fresh parsley: Adds color and a fresh taste. - Grated Parmesan cheese: Adds a creamy touch. It’s optional but tasty. - Extra lemon wedges: Serve on the side for those who love more lemon. This simple list of ingredients and garnishes will help you create a delicious Lemon Garlic Shrimp Orzo that impresses everyone at the table! {{ingredient_image_1}} Start by boiling water in a large pot. Add salt to the water. Once it boils, toss in 1 cup of orzo pasta. Cook it according to the package instructions until it's al dente. This usually takes around 8 to 10 minutes. When it's done, drain it well and set it aside. You want the orzo to be firm but not hard. Next, grab a large skillet and heat 3 tablespoons of olive oil over medium-high heat. Wait until the oil is hot. Then, add 4 cloves of minced garlic. Sauté the garlic for about 30 seconds until it smells great. Be careful not to burn it! After that, add 1 pound of shrimp to the skillet. Cook the shrimp for about 2 to 3 minutes per side. They should turn pink and opaque when done. Season the shrimp with salt, pepper, and, if you like it spicy, 1/2 teaspoon of red pepper flakes. Now it’s time to mix everything. Pour in 1 cup of vegetable broth, the zest, and juice of 1 large lemon. Bring this mixture to a gentle simmer. Let it cook for 2 to 3 minutes. This step helps the flavors blend. After that, add your cooked orzo back into the skillet. Gently toss everything together so the orzo soaks up that lemony sauce. Cook for one more minute. Finally, remove the skillet from the heat and stir in 1/4 cup of fresh chopped parsley. Taste your dish and add more salt or pepper if needed. To make the shrimp shine, choose large, fresh shrimp. They should be peeled and deveined for the best taste. Heat your skillet and add olive oil. When it’s hot, toss in minced garlic first. This step brings out the garlic's full flavor. Then, add the shrimp. Cook them until they turn pink, about 2-3 minutes per side. Don’t overcook; they can become tough. Season with salt and pepper to enhance the taste. If you like heat, add red pepper flakes for a spicy kick. Cooking orzo is simple if you follow a few steps. First, boil salted water in a large pot. The salt adds flavor to the pasta. Once boiling, add the orzo. Cook it according to the package instructions until it’s al dente. This means it should be firm yet tender. Drain the pasta and set it aside. It will soak up all the lemony goodness later. To boost flavors, use fresh ingredients. Fresh lemon juice and zest add brightness. They make the dish come alive. Fresh parsley adds a nice touch too. If you want more depth, consider adding a splash of white wine when cooking the shrimp. This adds a layer of flavor that enhances the overall dish. Parmesan cheese on top is a great finishing touch. It adds creaminess and richness that pairs well with the zesty shrimp. Enjoy experimenting to find your perfect balance! Pro Tips Fresh Shrimp is Best: Whenever possible, use fresh shrimp for the best flavor and texture. Frozen shrimp can work in a pinch, but be sure to thaw them completely before cooking. Adjust the Spice Level: If you prefer a milder dish, reduce or omit the red pepper flakes. Conversely, add more for an extra kick! Perfectly Cooked Orzo: To prevent the orzo from becoming mushy, be sure to cook it just until al dente and drain immediately. Garnish for Flavor: Fresh parsley adds a pop of color and freshness. Don't skip this step for a more vibrant dish! {{image_2}} You can easily swap out some ingredients in this dish. For the shrimp, use chicken or scallops. If you don’t have orzo, try small pasta shapes like ditalini or couscous. For the broth, vegetable broth works well, but chicken broth adds a deeper flavor. If you want more heat, consider using cayenne pepper instead of red pepper flakes. You can make Lemon Garlic Shrimp Orzo in different ways. Instead of a skillet, use a grill for the shrimp. Just toss them on skewers and grill until done. You can also bake everything in the oven. Mix the cooked orzo, shrimp, and sauce in a baking dish. Top with cheese, then bake until bubbly. This adds a nice crust to the top. Serve the dish with a side salad for a fresh touch. A simple green salad with lemon vinaigrette fits well. You can also pair it with crusty bread to soak up the sauce. For a fun twist, serve it in lettuce wraps. This adds crunch and freshness, making it a great finger food option. After making Lemon Garlic Shrimp Orzo, let it cool down. Transfer the dish to an airtight container. Store it in the fridge. It will stay fresh for 3 to 4 days. To reheat, simply warm it on the stove or in the microwave until hot. You can freeze Lemon Garlic Shrimp Orzo for up to 2 months. Use a freezer-safe container to keep it well-sealed. When ready to eat, thaw it in the fridge overnight. Reheat on the stove with a splash of broth or water to regain moisture. In the fridge, this dish lasts about 3 to 4 days. In the freezer, it can last for about 2 months. Always check for any off smells or changes in texture before eating. Proper storage keeps your meal tasty and safe. Yes, you can use frozen shrimp. Just make sure to thaw them first. Place them in cold water for about 15-20 minutes. This keeps them from becoming rubbery. Once thawed, you can follow the recipe as usual. The shrimp will still soak up the lemon and garlic flavors well. If you don't have orzo, you can use other small pasta. Options include ditalini, or even rice. Quinoa is also a great choice for a healthy twist. Each option adds a nice texture, so pick what you like best. Adjust cooking times as needed for different grains. To make this dish gluten-free, choose gluten-free pasta. There are many brands that offer gluten-free orzo. You can also use rice or quinoa as an alternative. Just be sure to check the labels. They should be free from gluten ingredients. This way, everyone can enjoy the dish! This blog post covers the key ingredients for a tasty dish, including seasonings and garnishes. I shared step-by-step cooking instructions, from orzo to perfectly cooked shrimp. We explored helpful tips for flavor and cooking methods, along with ingredient variations. I also provided storage info and answered common questions about substitutions. Cooking should be fun and easy. With these insights, you can create a delicious meal. Enjoy experimenting with different flavors and techniques!

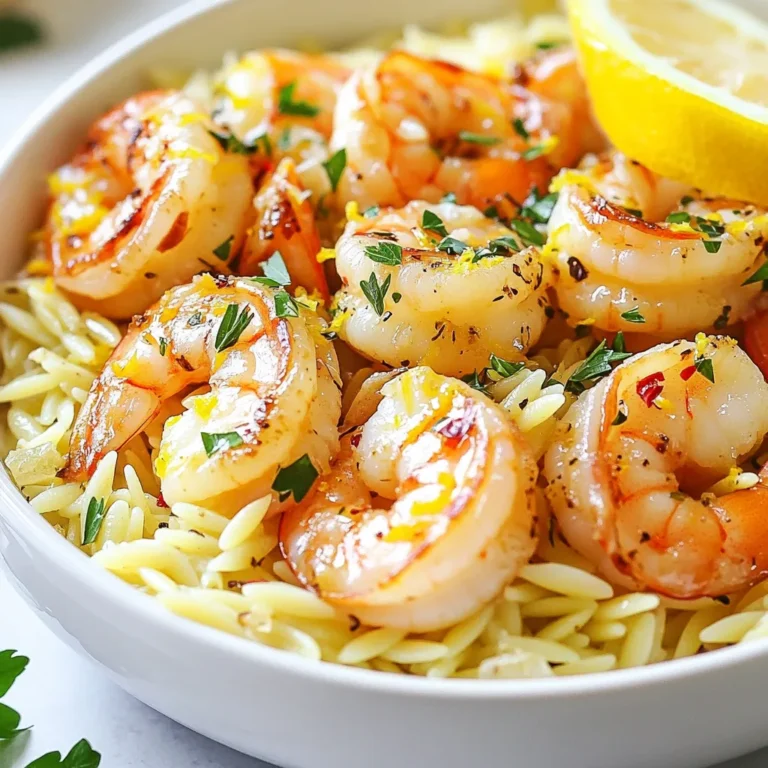
Lemon Garlic Shrimp Orzo Flavorful and Simple Recipe

- 2 boneless, skinless chicken breasts - 1 red bell pepper - 1 green bell pepper - 1 medium onion - 2 tablespoons olive oil - 1 tablespoon fajita seasoning (or 1 tsp cumin, 1 tsp chili powder, 1 tsp garlic powder) - Salt and pepper to taste - 4 large flour tortillas - 1 ½ cups shredded cheese (cheddar or Mexican blend) - Fresh cilantro leaves for garnish - Sour cream and salsa for serving When I make chicken fajita quesadillas, I start with fresh ingredients. The chicken breasts should be boneless and skinless. I slice them into thin strips for even cooking. Next, I add colorful bell peppers. One red and one green bell pepper bring great taste and color. I also slice a medium onion for some sweetness. For seasoning, I use olive oil and a good fajita mix. You can also make your own with spices like cumin, chili powder, and garlic powder. Salt and pepper are key too, enhancing all the flavors. For the quesadillas, I choose large flour tortillas. They hold the filling well and make for a nice bite. I like to use a blend of shredded cheese, usually cheddar or a Mexican mix. This cheese melts beautifully and ties all the flavors together. Don’t forget the garnishes! Fresh cilantro adds a nice touch, and sour cream and salsa are perfect for dipping. This mix of ingredients makes for a tasty and quick meal idea that everyone will love. {{ingredient_image_1}} - Heat a large skillet over medium-high heat. Add 1 tablespoon of olive oil. - Once hot, add the sliced chicken. Season with salt, pepper, and fajita seasoning. - Cook the chicken for about 5 to 7 minutes. Look for a golden brown color. - When done, remove the chicken from the skillet and set it aside. - In the same skillet, add another tablespoon of olive oil. - Next, toss in the sliced red and green bell peppers and onion. - Sauté the veggies for about 5 to 6 minutes. They should be tender and slightly charred. - Take one tortilla and lay it flat on a clean surface. - Sprinkle half of the tortilla with shredded cheese. - Then, add a good amount of the chicken and veggie mixture on top of the cheese. - Top with a bit more cheese and fold the tortilla in half. Repeat this for all tortillas. - Wipe out the skillet and return it to medium heat. - Place one folded quesadilla into the skillet. Cook for about 3 to 4 minutes per side. - Look for a golden brown and crispy texture to know it’s ready. - Remove the quesadilla from the skillet and let it cool for a moment. - Slice into wedges for easy serving. - Serve warm, garnished with fresh cilantro, sour cream, and salsa. To get juicy chicken, cook it at medium-high heat. This keeps it tender. Aim for about 5-7 minutes. You want the chicken golden brown and cooked through. Season with salt, pepper, and fajita spice. This adds great flavor. Want more flavor? Try adding a splash of lime juice or a dash of smoked paprika. You can also marinate the chicken for a few hours. This adds depth. For cooking, I love sautéing. It gives you that nice, charred taste. Grilling is another great option. Both methods work well! For the best melt, use a mix of cheeses. Cheddar and a Mexican blend work great. Layer the cheese inside the quesadilla. This helps it melt evenly. Cook over medium heat. This prevents burning while allowing the cheese to get gooey. Pro Tips Choose the Right Tortillas: For the best texture, opt for large flour tortillas. They provide a soft yet sturdy base that holds the filling well and crisps up nicely. Don’t Overcrowd the Skillet: When cooking the chicken and veggies, make sure not to overcrowd the skillet. This ensures even cooking and allows the ingredients to get a nice char. Experiment with Cheese: Try using different types of cheese or a blend for added flavor. Options like pepper jack or mozzarella can give your quesadillas a unique twist. Let Them Rest: After cooking, let the quesadillas rest for a minute before slicing. This helps the cheese set slightly, making it easier to cut and preventing the filling from spilling out. {{image_2}} You can make a great vegetarian version of chicken fajita quesadillas. Try using plant-based protein instead of chicken. Options like tofu, tempeh, or even beans work well. You can also add more veggies. Try mushrooms, zucchini, or corn for extra flavor and texture. These choices keep the dish tasty and filling while being meat-free. Cheese adds a lot to your quesadillas. While cheddar or a Mexican blend is common, you can try other types. Monterey Jack melts well and has a mild taste. Pepper Jack adds a spicy kick. You can even use mozzarella for a stretchy, gooey texture. Mixing cheeses can create a unique flavor that suits your taste. Sauces can elevate your chicken fajita quesadillas. Try adding chipotle mayo for a smoky flavor. Avocado dressing adds creaminess and freshness. You can also use salsa or sour cream as dips on the side. Experimenting with sauces lets you find the perfect balance for your meal. To store leftovers, let the quesadillas cool first. Wrap each one in plastic wrap or foil. You can also place them in an airtight container. This keeps them fresh and tasty. Store them in the fridge for up to three days. If you want to enjoy them later, make sure to label the container with the date. To freeze quesadillas, follow the same steps as refrigeration. Wrap each one tightly in plastic wrap. Then, place them in a freezer-safe bag. They can stay in the freezer for up to three months. To reheat, take a quesadilla from the freezer and let it thaw in the fridge overnight. You can then warm it in a skillet over medium heat for about five minutes per side. This keeps them crispy and delicious. Enjoy your meal again in no time! You can serve many tasty sides with Chicken Fajita Quesadillas. Some great options are: - Mexican rice: Fluffy rice adds a nice touch. - Refried beans: Creamy beans offer a hearty side. - Guacamole: This fresh dip pairs well with the quesadillas. - Pico de gallo: Fresh salsa adds crunch and flavor. - Corn salad: Sweet corn salad gives a refreshing bite. - Chips and salsa: Crispy chips with salsa are always a hit. Yes, you can make Chicken Fajita Quesadillas ahead of time. Here’s how: - Prep the filling: Cook the chicken and veggies in advance. - Cool completely: Let the filling cool before storing. - Store in the fridge: Keep the filling in an airtight container. It lasts 2-3 days. - Assemble later: When ready to eat, assemble the quesadillas and cook. You can easily adjust the spice level in your Chicken Fajita Quesadillas. Here’s how: - Mild: Use less fajita seasoning or no spice. - Medium: Stick to the recipe but add a pinch of cayenne. - Hot: Add diced jalapeños or a splash of hot sauce. - Taste as you go: Always taste your filling before cooking the quesadillas. To wrap up, we covered how to make Chicken Fajita Quesadillas. You learned about the key ingredients, like chicken, peppers, and cheese. The step-by-step guide made cooking easy and fun. I shared useful tips to ensure your chicken stays tender and the cheese melts perfectly. You can even try veggie options or different cheeses for a twist. Remember, leftovers can be stored and enjoyed later. Cooking at home can be satisfying and delicious. Enjoy your culinary journey and happy cooking!

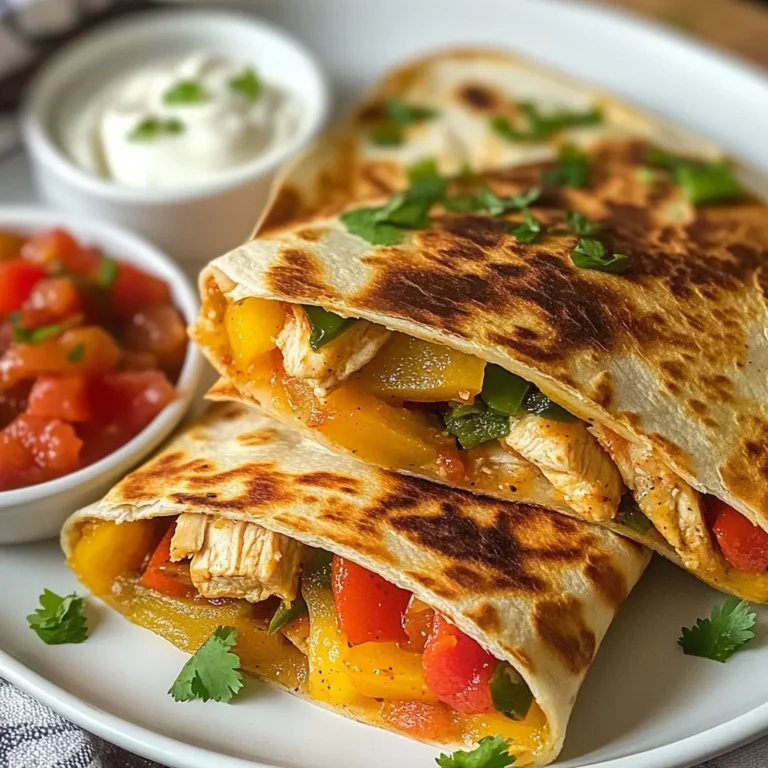
Chicken Fajita Quesadillas Tasty and Quick Meal Idea

To make a rich avocado chocolate mousse, you need: - 2 ripe avocados - 1/2 cup unsweetened cocoa powder - 1/3 cup maple syrup (adjust for sweetness) - 1/4 cup almond milk (or any milk of your choice) - 1 teaspoon vanilla extract - A pinch of sea salt These main ingredients create a creamy and smooth texture. The avocados provide healthy fats, while cocoa powder gives a deep chocolate flavor. To enhance the mousse, consider these toppings: - Cacao nibs - Fresh berries - Shredded coconut These toppings add texture and visual appeal. They also bring extra flavor to each bite. Cacao nibs give a slight crunch, while berries add freshness. If you have dietary needs, try these swaps: - Use coconut milk instead of almond milk for a richer taste. - Replace maple syrup with agave nectar or honey for sweetness. - For nut allergies, choose oat milk or soy milk. These alternatives let everyone enjoy the mousse. You can adjust the recipe to fit your diet while keeping the taste delicious. {{ingredient_image_1}} Start by picking ripe avocados. A ripe avocado feels soft but not mushy. Cut each avocado in half and take out the pit. Use a spoon to scoop the green flesh into your blender or food processor. Make sure you get all the good stuff! Now, add the unsweetened cocoa powder, maple syrup, and almond milk into the blender. Pour in the vanilla extract and sprinkle a pinch of sea salt. Blend on high until everything is smooth and creamy. You might need to stop and scrape the sides. Taste the mousse to see if it’s sweet enough. If not, add more maple syrup and blend again briefly. Once you're happy with the taste and texture, transfer the mousse into small bowls or cups. Cover them and place them in the fridge for at least 30 minutes. This step helps the mousse set up nicely. When ready to serve, top with cacao nibs, fresh berries, or shredded coconut. Enjoy your rich and creamy avocado chocolate mousse! To get the best texture, start with ripe avocados. They should feel soft but not mushy. When you blend, ensure that the mixture is smooth and creamy. If it seems thick, add a bit more almond milk. Blend again until it’s silky. This step is key for a delightful mousse. Taste is important! After blending, try a small spoonful. If it’s not sweet enough for you, add more maple syrup. Blend again for just a few seconds. Remember, everyone has a different sweet tooth. Adjust to what you like best. Presentation makes your mousse stand out. Use clear cups to show off that rich color. Add toppings like cacao nibs or fresh berries. A sprinkle of shredded coconut adds a nice touch, too. Serve chilled for the best experience. These little details make your mousse look and taste amazing. Pro Tips Choose Ripe Avocados: Make sure your avocados are ripe for the creamiest texture. They should yield slightly when pressed gently. Adjust Sweetness: Taste the mousse before refrigerating; you can easily adjust the sweetness by adding more maple syrup if desired. Chill for Best Flavor: Allow the mousse to chill for at least 30 minutes. This helps the flavors meld together and enhances the overall taste. Experiment with Toppings: Get creative with toppings! Fresh berries, cacao nibs, or shredded coconut can add texture and flavor. {{image_2}} You can easily make this mousse vegan. The recipe is already dairy-free. Use almond milk or any plant milk. This keeps it creamy and rich without dairy. You still get that smooth texture. If you want to add more creaminess, try coconut milk. It adds a nice flavor. If you want a sugar-free option, use a sugar substitute. Erythritol or stevia works well. They can replace maple syrup without the added sugar. Start with a small amount and taste as you go. Adjust until it feels right. This way, you can enjoy your mousse without guilt. Want to spice things up? Add a pinch of cinnamon or cayenne pepper. This gives the mousse a unique twist. You can also blend in a few drops of peppermint or almond extract. These flavors add depth and can surprise your taste buds. For a fun twist, try adding a splash of espresso. It enhances the chocolate flavor, making it even richer. To keep your avocado chocolate mousse fresh, cover it tightly. Use plastic wrap or a lid. Store it in the fridge for the best results. This helps maintain its creamy texture and rich flavor. Avoid letting air touch the mousse, as it can brown quickly. You can freeze the mousse if you have leftovers. Scoop the mousse into an airtight container. Leave some space at the top for expansion. Thaw it in the fridge when you're ready to eat. This keeps its taste and texture intact. Just blend it again if it seems too thick after thawing. In the fridge, the mousse lasts about 3 days. After that, it may lose its flavor and texture. If you freeze it, it can last for about a month. Just remember to check for any changes in smell or color before enjoying it. Yes, you can use different sweeteners. Maple syrup works great, but you can try honey or agave. Each sweetener adds its own taste. Adjust the amount based on your liking. Start with less and add more if needed. Yes, this mousse is vegan! It uses avocados and plant-based milk. The sweetener, like maple syrup, is also vegan. Enjoy this treat without any animal products. It’s a rich dessert that fits into a vegan lifestyle. To make the mousse thicker, add more avocado. You can also use less milk. Blending longer can help, too. If you want it creamier, try adding a bit of coconut cream. This will give it a nice texture and richness. Avocados are full of healthy fats, fiber, and vitamins. They help keep your heart healthy. The fats in avocados also help absorb nutrients from other foods. Using avocados in desserts makes them richer and more nutritious. It's a smart way to enjoy sweets! This article covered how to make delicious avocado chocolate mousse. We looked at key ingredients and added options like toppings and alternatives. I shared simple steps for preparation and tips for the best texture. Variations like vegan choices and flavor boosts were also explored. Finally, we discussed storage tips to keep your mousse fresh. You can enjoy this treat tailored to your taste. Making it is easy, and it’s healthy too! Dive into your kitchen and try it today.

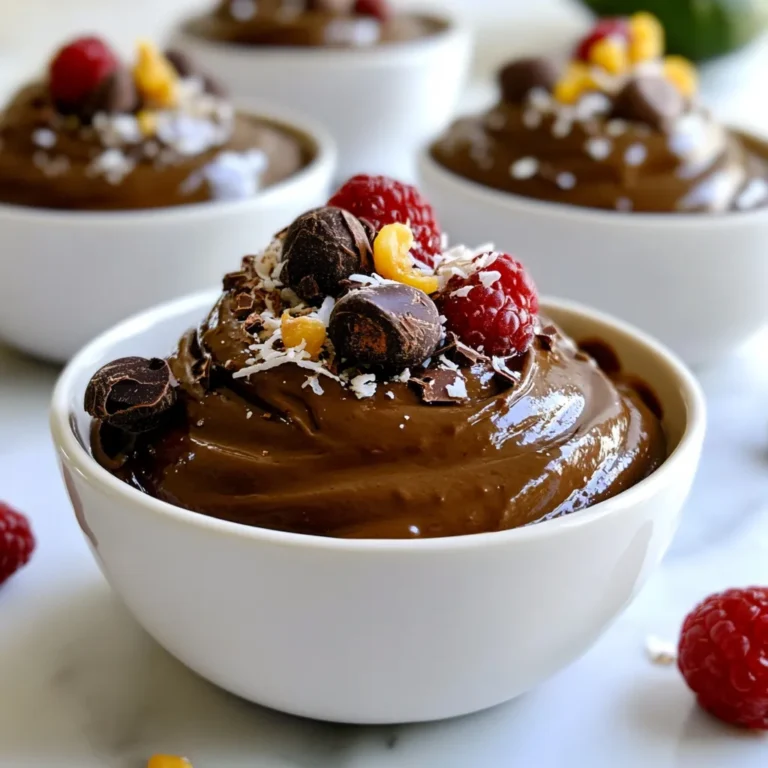
Avocado Chocolate Mousse Rich and Creamy Delight

- 1 lb ground beef - 1 small onion, diced - 2 cloves garlic, minced - 1 red bell pepper, diced - 1 can (15 oz) black beans, drained and rinsed - 1 can (10 oz) enchilada sauce - 1 cup cream cheese, softened - 1 cup shredded cheddar cheese - 1 teaspoon chili powder - 1 teaspoon cumin - Salt and pepper to taste - Fresh cilantro, for garnish - Tortilla chips, for serving Gather these ingredients before you start cooking. The ground beef gives this dish its heartiness. The diced onion and minced garlic add great flavor. The red bell pepper and black beans bring in some healthy textures. For the creamy part, enchilada sauce and cream cheese work together in a tasty way. The shredded cheddar cheese adds melty goodness on top. Don't forget the chili powder and cumin to spice things up. Fresh cilantro and tortilla chips are perfect for serving. You can use the chips to scoop up the creamy mix. Enjoy every bite! {{ingredient_image_1}} 1. Start by heating a large skillet over medium heat. 2. Add 1 pound of ground beef. Break it apart with a wooden spoon. 3. Cook until the beef is browned and no longer pink. 4. If there is excess fat, drain it off carefully. 1. Next, add 1 small diced onion and 2 minced garlic cloves to the skillet. 2. Sauté them for about 2 minutes until the onion turns soft and clear. 3. Then, mix in 1 diced red bell pepper and cook for another 2-3 minutes. 4. Stir in 1 can of drained and rinsed black beans. 1. Pour in 1 can of enchilada sauce and mix well with the other ingredients. 2. Lower the heat and add 1 cup of softened cream cheese. Stir until it melts and becomes creamy. 3. Next, add 1 teaspoon of chili powder, 1 teaspoon of cumin, salt, and pepper to taste. 4. Once everything is heated and creamy, sprinkle 1 cup of shredded cheddar cheese on top. 5. Cover the skillet with a lid for a few minutes to let the cheese melt. 6. Finally, garnish with fresh cilantro before serving. Enjoy hot with tortilla chips! To make your creamy beef enchilada skillet smooth, start with softened cream cheese. Cold cream cheese won’t mix in well. Leave it out for at least 30 minutes before cooking. When you add cream cheese to the skillet, keep the heat low. This helps it melt slowly and evenly. If the heat is too high, it can clump or burn. Don’t be afraid to adjust the seasonings. Taste is key! You might want more chili powder or cumin. If you like heat, add a pinch of cayenne pepper or some diced jalapeños. Fresh lime juice can also brighten up the dish. Garnish your dish with fresh cilantro. It adds color and flavor. Serve it with tortilla chips on the side for dipping. You can also add a dollop of sour cream or sliced avocado for extra creaminess. This makes your meal look great and taste even better! Pro Tips Use Lean Ground Beef: Opt for lean ground beef (90% lean or higher) to reduce excess fat and calories, making your dish healthier without sacrificing flavor. Customize Your Cheese: Feel free to mix different types of cheese such as Monterey Jack or Pepper Jack for added flavor and creaminess to your skillet. Add More Veggies: Enhance the nutritional value by adding more vegetables like zucchini, corn, or spinach to the mix for added texture and color. Make It Spicy: If you enjoy heat, add diced jalapeños or a pinch of cayenne pepper to the skillet for an extra kick in flavor. {{image_2}} You can switch the ground beef for ground turkey or chicken. These meats are leaner but still tasty. If you prefer a meatless meal, use beans or lentils. Black beans work great for protein and add fiber. Lentils can also add a nice texture. Want some heat? Add jalapeños for a spicy kick. You can mix in fresh or pickled jalapeños based on your taste. For cheese lovers, try using Monterey Jack or Pepper Jack instead of cheddar. These cheeses can give your dish a new twist. Get creative with how you serve this dish! You can layer it in a bowl for a fun enchilada bowl. Just stack the beef mixture, cheese, and toppings. Speaking of toppings, avocado and sour cream can add creaminess and flavor. Fresh cilantro on top makes it look nice, too! To store leftovers, let the dish cool first. Place it in an airtight container. This keeps it fresh for up to three days. When reheating, use a skillet over low heat. Stir often to prevent sticking and burning. You can also use the microwave. Heat in short bursts, stirring in between. To freeze the dish, let it cool completely. Scoop it into a freezer-safe container. Make sure to leave some space at the top, as it may expand. You can freeze it for up to three months. To thaw, move it to the fridge overnight. Reheat it in a skillet or microwave until hot. The creamy beef enchilada skillet lasts about three days in the fridge. If you freeze it, it lasts for up to three months. Watch for signs of spoilage, like a bad smell or mold. If you see any, do not eat it. Always trust your senses when it comes to food safety. Yes, you can make this dish ahead. Prepare the beef and veggies earlier in the day. Store them in the fridge until you're ready to add the cream cheese and cheese. You can also cook the whole dish and keep it for later. Just reheat it on the stove when you want to eat. This saves time on busy nights. If you want a dairy-free option, use cashew cream or coconut cream. These create a creamy texture without the dairy. For lower calories, you can try Greek yogurt. It adds a tangy flavor and is healthier. Just mix it in at the end for the best result. To add more heat, try jalapeños or red pepper flakes. You can also use hot enchilada sauce instead of mild. If you want a smoky flavor, add smoked paprika. Experiment with different spices to find your perfect balance. In this post, we explored the key ingredients for a creamy beef enchilada skillet, including spices, veggies, and cheese. You learned step-by-step instructions to cook and create a delicious dish. Remember, softening cream cheese helps achieve the perfect texture. You can also make this unique by using other proteins or adjusting the spices. Enjoy making this dish and share your own variations. With these tips, you’ll impress anyone who gets to taste it. Happy cooking!

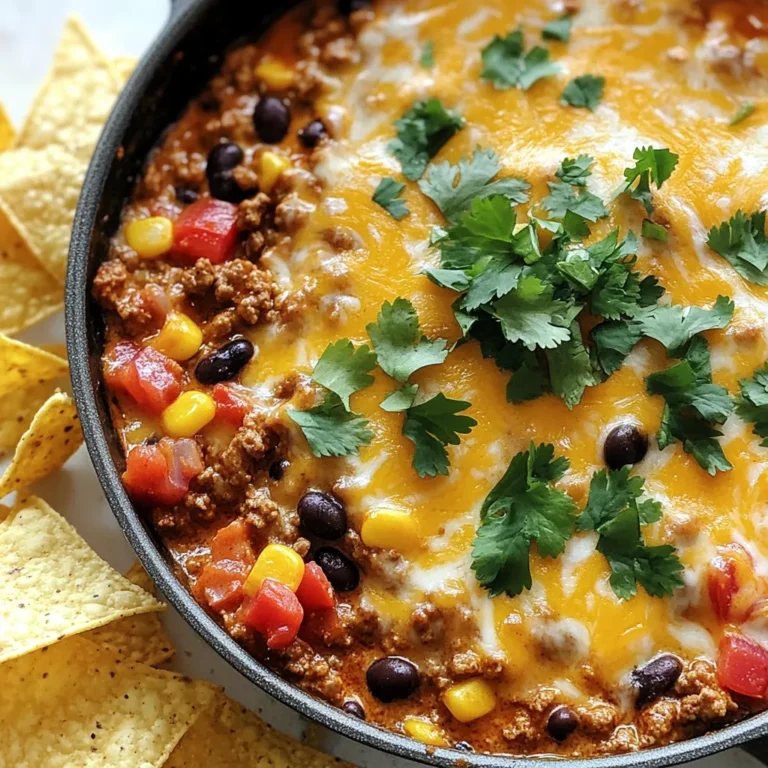
Creamy Beef Enchilada Skillet Quick and Easy Dinner

To make garlic butter tilapia, you will need: - 4 tilapia fillets - 4 tablespoons unsalted butter - 4 cloves garlic, minced - 1 lemon, juiced and zested - 1 tablespoon fresh parsley, finely chopped - Salt and pepper to taste - 1/2 teaspoon paprika - 1/4 teaspoon red pepper flakes (optional for heat) - Lemon slices for garnish You can easily swap some ingredients based on what you have. Here are some ideas: - Tilapia: Cod or haddock works well if you can't find tilapia. - Butter: Olive oil or ghee can replace unsalted butter for a dairy-free option. - Garlic: You can use garlic powder if you don’t have fresh garlic. - Parsley: Cilantro can add a fresh twist if you prefer it. - Lemon: Lime juice can substitute lemon juice for a different flavor. - Paprika: Smoked paprika gives a nice touch, or you can skip it altogether. Each serving of garlic butter tilapia offers: - Calories: 310 - Protein: 34g - Fat: 17g - Carbohydrates: 1g - Fiber: 0g - Sodium: 300mg This dish is not just tasty, but it also has a good balance of protein and healthy fats. Enjoy this meal without worrying too much about calories! {{ingredient_image_1}} First, preheat your oven to 375°F (190°C). This step is key for even cooking. While the oven heats, grab a baking dish. Lightly grease it with some butter or oil. This will keep the fish from sticking. Next, let’s make the garlic butter sauce. Take a small saucepan and place it on medium heat. Add 4 tablespoons of unsalted butter. Once the butter melts, add 4 cloves of minced garlic. Stir and cook for about 1-2 minutes. You want the garlic to smell nice but not brown. Now, take the saucepan off the heat. Squeeze the juice from one lemon into the butter. Don’t forget the zest! Add salt, pepper, paprika, and red pepper flakes if you like some heat. Mix it well. Now, let’s get to the fish. Pat dry 4 tilapia fillets with paper towels. This helps the seasonings stick better. Season both sides with salt and pepper. Place the fillets in the greased baking dish. Pour the garlic butter sauce evenly over the tilapia. Make sure each piece is well coated. Now, bake the tilapia in your preheated oven for 15-20 minutes. You know it’s done when the fish flakes easily with a fork. It should look opaque and tender. Remove the dish from the oven and sprinkle with fresh parsley. Serve warm with lemon slices for a fresh touch. Enjoy this simple yet tasty meal! To get the best garlic butter flavor, use fresh garlic. Fresh garlic packs a punch that dried garlic can't match. Sauté the minced garlic just until fragrant. This makes the butter rich without burning the garlic. Adding lemon juice and zest brightens the dish. The lemon balances the richness of the butter. If you like heat, add red pepper flakes for a kick. One common mistake is overcooking the tilapia. Fish cooks quickly, so keep an eye on it. Check for doneness at 15 minutes. The fish should flake easily with a fork. Another mistake is not seasoning enough. Always season both sides with salt and pepper. This step makes a big difference in taste. Lastly, don’t skip the parsley. It adds a fresh touch and color. For a beautiful plate, serve the tilapia over rice or with veggies. A bed of steamed rice is perfect for soaking up the garlic butter. Roasted vegetables add color and nutrition. Garnish with fresh parsley and lemon slices for a pop. This makes the dish look and taste even better. You can also serve it with a simple green salad for balance. Pro Tips Fresh Ingredients: Always use fresh garlic and parsley for the best flavor. Fresh ingredients enhance the overall taste of the dish. Check for Doneness: Tilapia cooks quickly, so keep an eye on it. It’s done when it flakes easily with a fork and is opaque throughout. Customize the Heat: Adjust the amount of red pepper flakes according to your spice preference. You can also experiment with other spices for unique flavors. Perfect Pairings: This dish pairs wonderfully with a side of steamed vegetables or a light salad. Consider serving it over a bed of quinoa for added nutrition. {{image_2}} For a kick, add heat to your dish. Mix in 1/4 teaspoon of cayenne pepper. This spice pairs well with garlic and butter. You can also use red pepper flakes for a milder heat. Adjust the spice level to your taste. Serve with a side of rice to balance the flavors. If you love creaminess, try this twist. Add 1/4 cup of heavy cream to the garlic butter. Stir it in after melting the butter. This change makes the sauce richer and smoother. It coats the fish well and adds a nice texture. Serve it over pasta for a complete meal. For a fresh taste, use herbs. Add 1 tablespoon of fresh dill or basil to the garlic butter. This gives a bright flavor that pairs great with tilapia. You could also mix in lemon zest for extra zing. It’s a light and refreshing option, perfect for warm nights. After you enjoy your garlic butter tilapia, store the leftovers properly. Place the fillets in an airtight container. Keep the container in the fridge. They will stay fresh for up to three days. Be sure to let the fish cool down before sealing it. This helps prevent moisture buildup. To reheat your tilapia, use the oven for the best results. Preheat your oven to 350°F (175°C). Place the fillets on a baking sheet. Cover them with foil to keep moisture in. Heat for about 10-15 minutes. If you prefer, you can also microwave the fish. Use a microwave-safe plate and cover it with a damp paper towel. Heat it on low for 1-2 minutes. If you want to freeze garlic butter tilapia, wrap each fillet tightly in plastic wrap. Then, place them in a freezer bag. Make sure to remove as much air as possible. Frozen tilapia can last for up to two months. When you're ready to eat it, thaw it overnight in the fridge before reheating. This keeps the texture nice! Yes, you can use frozen tilapia fillets. Just ensure you fully thaw them first. You can leave them in the fridge overnight or use cold water to speed this up. Once thawed, pat them dry. This helps the garlic butter stick better. If you want to avoid butter, you can use olive oil or coconut oil. Both options provide a rich flavor. If you prefer a dairy-free option, try vegan butter. It mimics the taste of butter well and works great in this recipe. The tilapia is cooked when it flakes easily with a fork. It should look opaque and have a white color. If you're unsure, a food thermometer can help. The internal temperature should reach 145°F (63°C). Checking this ensures your dish is safe to eat. This article covered how to prepare delicious garlic butter tilapia with helpful tips. We explored ingredient lists, subs, and nutritional facts. I shared step-by-step instructions, from preheating to baking, to ensure perfect results. Remember to avoid common mistakes and try the tasty variations. Store leftovers properly and use the reheating tips for the best quality. With this guide, you can cook a great meal that everyone will love. Enjoy your cooking adventure!

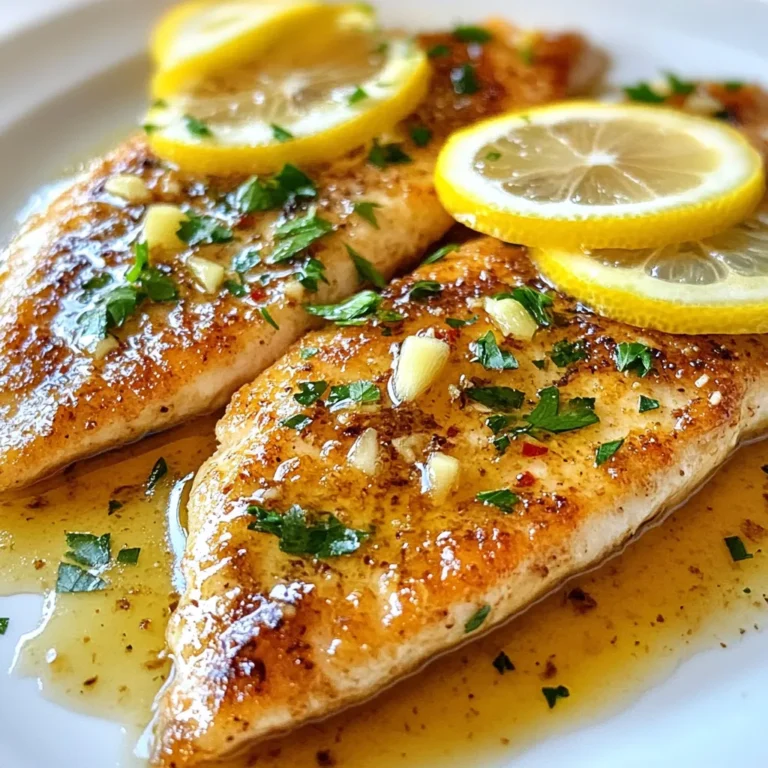
Garlic Butter Tilapia Savory and Easy Weeknight Meal

- 2 cups all-purpose flour - 1 teaspoon baking soda - 1 teaspoon baking powder - 1 teaspoon ground cinnamon - 1/2 teaspoon ground nutmeg - 1/2 teaspoon salt - 1 cup canned pumpkin puree - 1/2 cup granulated sugar - 1/4 cup brown sugar - 1/2 cup vegetable oil - 2 large eggs - 1 teaspoon vanilla extract - 4 ounces cream cheese, softened - 1/4 cup powdered sugar - 1 teaspoon lemon juice For this recipe, I use basic ingredients that you probably have at home. The all-purpose flour gives the bread a nice texture. Baking soda and baking powder help it rise. Cinnamon and nutmeg add warm, cozy flavors. I use both granulated and brown sugar for sweetness. The pumpkin puree makes the bread moist and adds flavor. Vegetable oil keeps the bread soft. The eggs help bind everything together. The cream cheese mixture is the star here. Cream cheese adds richness and tang. The lemon juice brightens the flavor of the cream cheese. Together, they create a swirl that makes each slice delightful. Gather all these ingredients before you start. This will help you stay organized and make cooking easier. Happy baking! {{ingredient_image_1}} 1. Oven preheating and pan preparation Start by preheating your oven to 350°F (175°C). Next, grease a 9x5-inch loaf pan. This helps the bread slide out easily after baking. 2. Mixing dry ingredients In a medium bowl, whisk together 2 cups of all-purpose flour, 1 teaspoon of baking soda, 1 teaspoon of baking powder, 1 teaspoon of ground cinnamon, 1/2 teaspoon of ground nutmeg, and 1/2 teaspoon of salt. Set this mixture aside for later. 3. Combining wet ingredients In a large bowl, mix 1 cup of canned pumpkin puree, 1/2 cup of granulated sugar, 1/4 cup of brown sugar, 1/2 cup of vegetable oil, 2 large eggs, and 1 teaspoon of vanilla extract. Stir until everything is well combined. 1. Gradually adding dry to wet ingredients Now, slowly add the dry mixture to the wet ingredients. Stir gently until everything is just combined. Avoid overmixing, as this can make your bread tough. 2. Preparing the cream cheese mixture In a separate bowl, beat 4 ounces of softened cream cheese with 1/4 cup of powdered sugar and 1 teaspoon of lemon juice. Mix until smooth and creamy. 1. Layering pumpkin batter and cream cheese Spoon half of the pumpkin batter into your prepared loaf pan. Next, dollop half of the cream cheese mixture on top of the pumpkin batter. 2. Swirling for marbled effect Use a butter knife to swirl the cream cheese gently into the pumpkin batter. This creates a lovely marbled effect. 3. Baking time and testing for doneness Add the rest of the pumpkin batter over the cream cheese layer. Then, spoon the remaining cream cheese mixture on top. Swirl again for more marbling. Bake in the preheated oven for 55-65 minutes. Use a toothpick to check if it’s done; it should come out clean when inserted into the center. - How to prevent overmixing To avoid tough bread, mix the dry and wet ingredients gently. Stir until combined but don’t worry about lumps. This keeps your bread soft and moist. - Tips for a perfect swirl effect Use a butter knife to swirl the cream cheese mixture into the pumpkin batter. Don’t mix too much; you want distinct swirls. This makes each slice look beautiful. - Using the right baking pan A 9x5-inch loaf pan works best for this recipe. It helps the bread bake evenly. Greasing the pan thoroughly prevents sticking. - Presentation ideas Slice the bread and dust it with powdered sugar. This adds a touch of sweetness. A nice serving plate makes it look fancy. - Pairing with whipped cream or ice cream Serve with a dollop of whipped cream on the side. A scoop of vanilla ice cream also adds a creamy touch. Both make this bread a delicious dessert. - Overbaking or underbaking Keep an eye on baking time. Check with a toothpick in the center. It should come out clean. Overbaking can dry out the bread. - Substituting ingredients correctly If you swap ingredients, flavors may change. For example, using a different oil can alter the taste. Stick to the recipe for the best results. Pro Tips Use Fresh Spices: Ensure your ground spices, especially cinnamon and nutmeg, are fresh for the best flavor. Old spices can lose potency and affect the taste of your bread. Don’t Overmix: When combining the wet and dry ingredients, mix just until combined. Overmixing can lead to a dense texture rather than a light and fluffy bread. Room Temperature Ingredients: For a smoother cream cheese swirl, make sure the cream cheese is at room temperature before mixing. This will prevent lumps and ensure a creamy consistency. Check for Doneness: Ovens can vary, so start checking your bread a few minutes before the recommended baking time. A toothpick inserted into the center should come out clean or with a few moist crumbs. {{image_2}} You can make Pumpkin Cream Cheese Swirl Bread even better with a few fun twists. - Adding nuts: Chopped walnuts or pecans give a nice crunch. They also add rich flavor. Just fold in about half a cup when mixing the batter. You can use one type or mix both for more texture. - Incorporating chocolate chips: For a sweet touch, add chocolate chips. They melt and create pockets of gooey goodness. Use about a half cup of semi-sweet or dark chocolate chips. Mix them into the pumpkin batter for a delightful treat. Want to make this bread fit your diet? Here are some easy swaps. - Gluten-free options: If you need gluten-free bread, swap all-purpose flour for a gluten-free blend. Many blends work well in baking. Just make sure it’s a one-to-one replacement. This way, you still get that fluffy texture. - Vegan substitutions: To make this bread vegan, you can replace the eggs. Use a flax egg instead. Mix one tablespoon of ground flaxseed with three tablespoons of water. Let it sit for five minutes before adding it to the mix. Also, swap the cream cheese with a plant-based cream cheese for a tasty vegan version. To store your Pumpkin Cream Cheese Swirl Bread at room temperature, keep it in an airtight container. This helps keep the bread soft and moist. You can also wrap it in plastic wrap for added protection. Avoid placing it in the fridge, as that can dry it out. For long-term storage, freezing is a great option. Slice the bread and wrap each piece tightly in plastic wrap. Then, place the slices in a freezer bag. This way, you can enjoy a slice any time you want! When you're ready to eat it, take out a slice and let it thaw at room temperature. To reheat thawed bread, preheat your oven to 350°F (175°C). Place the slice on a baking sheet and warm it for about 10 minutes. This brings back its fresh-baked taste and texture. Enjoy your delicious bread whenever you want! Can I use fresh pumpkin instead of canned? Yes, you can use fresh pumpkin. Make sure to cook and puree it first. Fresh pumpkin has a different moisture level, so adjust your recipe as needed. How long does Pumpkin Cream Cheese Swirl Bread last? This bread lasts about 3 to 5 days at room temperature. Store it in an airtight container to keep it fresh. You can also refrigerate it for about a week. Can I make mini loaves instead of a single loaf? Absolutely! You can use mini loaf pans. Bake them for about 25 to 30 minutes. Check with a toothpick for doneness. What should I do if my bread is too dense? If your bread is dense, it may be due to overmixing. Mix just until combined. Also, check your baking soda and powder for freshness. You now have all the steps to bake delicious Pumpkin Cream Cheese Swirl Bread. Start by gathering your ingredients, mixing them, and following the tips for a perfect loaf. Remember, practice makes perfect, so don’t worry if it’s not right the first time. With these guidelines, you can impress your friends and family. Enjoy the process and the tasty results. Baking is fun, and you'll love sharing your creation!

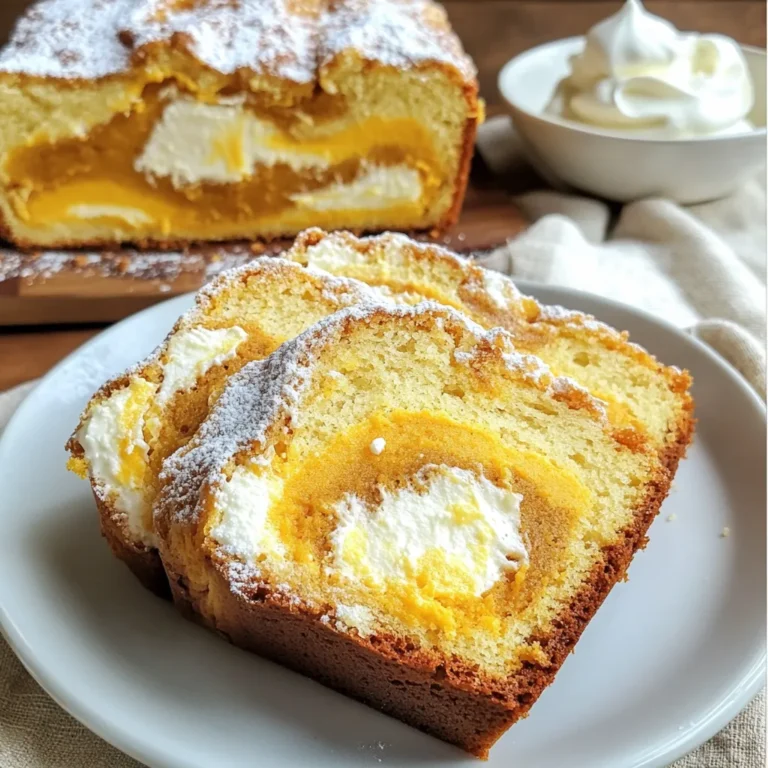
Pumpkin Cream Cheese Swirl Bread Delightful and Easy

To make Buffalo Chicken Stuffed Sweet Potatoes, gather these simple items: - 2 medium sweet potatoes - 1 cup cooked chicken, shredded - 1/3 cup hot buffalo sauce - 1/4 cup Greek yogurt - 1/4 cup shredded cheddar cheese - 2 green onions, chopped - Salt and pepper to taste - Olive oil These ingredients come together to create a dish full of flavor and comfort. You can add more fun to your stuffed sweet potatoes with these toppings: - Crumbled blue cheese for a tangy kick - Fresh cilantro for a burst of herbal flavor - Diced tomatoes for freshness and color - Avocado slices for creaminess These toppings can make each bite even more exciting. If you don’t have some ingredients, don’t worry! Here are some easy swaps: - Use rotisserie chicken instead of cooking your own chicken. - Swap Greek yogurt with sour cream for a creamier texture. - Try Monterey Jack cheese instead of cheddar for a different taste. - Use a different hot sauce for varying spice levels. These substitutions help you adapt the recipe to your pantry and taste preferences. {{ingredient_image_1}} First, you need to preheat your oven to 400°F (200°C). Next, wash and dry two medium sweet potatoes. Use a fork to pierce each potato several times. This step helps steam escape while they cook. After that, rub a bit of olive oil over each potato. Sprinkle some salt on them to enhance the flavor. Place the sweet potatoes directly on the oven rack or on a baking sheet. Bake them for 45 to 60 minutes. You know they're done when they feel tender. While the potatoes bake, grab a bowl. Combine one cup of shredded, cooked chicken with 1/3 cup of hot buffalo sauce. Mix until the chicken is well-coated. This mixture brings the heat and flavor. You can adjust how much sauce you use based on your taste. If you like it spicy, add more sauce. Remember, it’s all about finding that perfect balance between heat and flavor. Once the sweet potatoes are done, take them out of the oven. Let them cool for a few minutes. Carefully slice each potato open lengthwise. Use a fork to fluff the insides gently. Now it’s time to fill them! Add a spoonful of your buffalo chicken mixture into each sweet potato. Next, add a dollop of Greek yogurt on top. This adds creaminess and balances the heat. Finally, sprinkle some cheddar cheese over the top. Return the stuffed sweet potatoes to the oven for 5 to 10 minutes. You want the cheese to melt and become bubbly. When they are ready, take them out and top with chopped green onions for that final touch. Enjoy your delicious buffalo chicken stuffed sweet potatoes! To find the best sweet potatoes, look for smooth skin. They should feel firm and heavy. Avoid potatoes with dark spots or soft areas. The size matters too; medium sweet potatoes work best for this dish. They cook evenly and hold the filling well. When you pick them, check for a rich orange color. This means they are sweet and flavorful. To get the best buffalo chicken flavor, use good-quality hot sauce. I recommend a sauce with a balance of heat and tang. Mix the sauce well with shredded chicken. The chicken should be fully coated for even flavor. Adding Greek yogurt gives a creamy taste and cools down the heat. You can adjust the sauce amount to your liking. For extra kick, add a dash of garlic powder or onion powder. This will enhance the taste even more. Store leftover stuffed sweet potatoes in an airtight container. Place them in the fridge for up to three days. When you reheat them, use the oven for the best results. Preheat the oven to 350°F (175°C) and bake for about 15 minutes. This keeps the sweet potatoes soft and the filling warm. If you’re in a hurry, use a microwave, but the oven is best. Enjoy your tasty leftovers! Pro Tips Choose the Right Sweet Potatoes: Look for firm, smooth sweet potatoes without any blemishes or soft spots for the best flavor and texture. Buffalo Sauce Balance: Adjust the amount of buffalo sauce to your taste; if you prefer it milder, mix in some additional Greek yogurt. Cheese Options: Feel free to experiment with different cheeses like mozzarella or blue cheese for a unique twist on flavor. Meal Prep Friendly: You can prepare the buffalo chicken mixture in advance and store it in the fridge for quick assembly on busy days. {{image_2}} You can easily make this dish for vegetarians or vegans. Swap out the chicken for a plant-based protein, like chickpeas or lentils. Use a vegan buffalo sauce to keep the kick without the animal products. Instead of Greek yogurt, try a plant-based yogurt. This way, you still get that creamy texture. Buffalo sauce is great, but feel free to switch it up. Try a barbecue sauce for a sweeter taste. You can also use teriyaki sauce for a savory twist. Each sauce brings its own flair. Mix and match to find your favorite flavor. You can even try a spicy ranch sauce if you want a creamy kick. Get creative with the fillings! You can add black beans for extra protein and fiber. Sautéed vegetables like bell peppers and onions can also add a nice crunch. For a cheesy delight, sprinkle some feta cheese or mozzarella. Experiment with ingredients you love. This dish can be your canvas. To store leftovers, let the stuffed sweet potatoes cool to room temp. Place them in an airtight container. This keeps them fresh. You can store them in the fridge for up to four days. Make sure to cover them well. This prevents any odors from other foods in the fridge. You can freeze these stuffed sweet potatoes for later. First, let them cool completely. Wrap each potato tightly in plastic wrap. Then place them in a freezer bag. Label the bags with the date. They will stay good for up to three months. When you want to eat them, just thaw them in the fridge overnight. Reheating needs care for the best taste. If you use an oven, preheat it to 350°F (175°C). Place the stuffed potatoes on a baking sheet. Bake for about 15-20 minutes. This keeps the potatoes soft. You can also use a microwave. Just place them on a microwave-safe plate. Heat for 2-3 minutes, checking often. Enjoy your tasty leftovers! Yes, you can! Feel free to swap chicken for turkey or beef. Shredded pork also works well. Just keep the buffalo sauce for that spicy kick. You can also try shredded rotisserie chicken for a quick option. These stuffed sweet potatoes are great on their own. You can add a side salad or some roasted veggies. A cool dip, like ranch or blue cheese, pairs nicely too. Serve with tortilla chips for a crunchy side. Stuffed sweet potatoes last about 3 to 5 days in the fridge. Just store them in an airtight container. Make sure they cool down before you put them away. This helps keep them fresh longer. This article covered how to make buffalo chicken stuffed sweet potatoes. I listed all the ingredients, optional toppings, and substitutions. I shared clear steps for preparing, assembling, and baking them. We discussed tips for choosing sweet potatoes and perfecting the flavor. I also provided storage info and answered common questions. You can enjoy this dish in many ways. Be creative with toppings and fillings. Have fun cooking, and enjoy the tasty results!

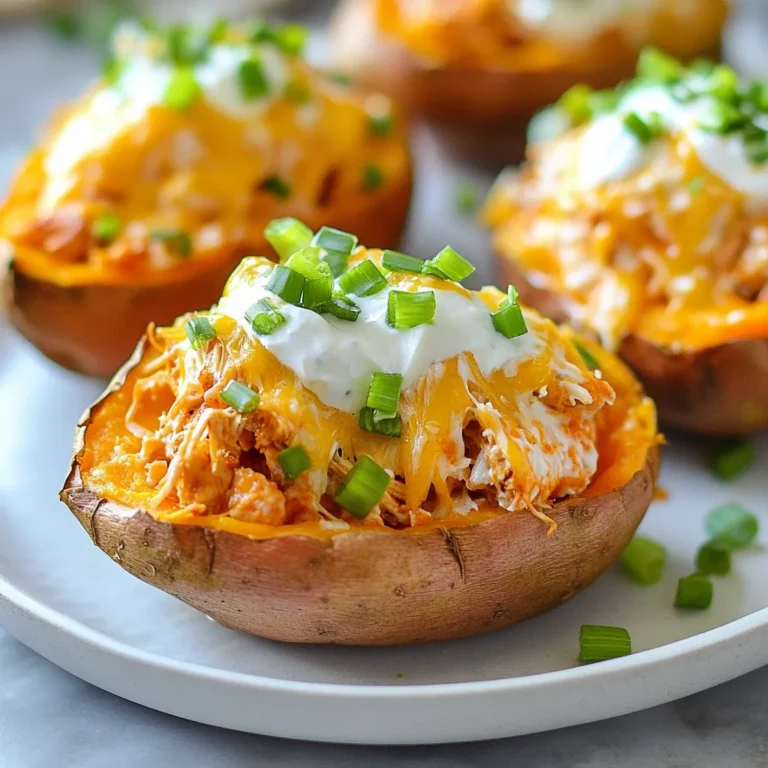
Buffalo Chicken Stuffed Sweet Potatoes Flavor Explosion

- 2 cups basmati rice - 4 cups vegetable broth - 1 medium onion, finely chopped - 3 cloves garlic, minced The base of this dish is basmati rice. It cooks up fluffy and has a nice aroma. Vegetable broth adds depth and flavor. I like to use a good quality broth for the best taste. The onion and garlic bring sweetness and a savory punch. Chop the onion finely, and mince the garlic for the best results. - 1 medium carrot, diced - 1 red bell pepper, diced - 1 cup green peas (fresh or frozen) - 1/4 cup fresh parsley, chopped Adding vegetables boosts nutrition and color. Carrots add sweetness and a bright orange hue. Red bell peppers bring crunch and a touch of sweetness. Green peas add a pop of green and a little earthiness. Fresh parsley gives a lovely herb taste and makes the dish look fresh. - Zest and juice of 1 large lemon - 1 teaspoon dried oregano - 1 teaspoon dried thyme - 2 tablespoons olive oil - Salt and pepper, to taste The lemon zest and juice give this dish its bright flavor. I love how it lifts the whole meal. Dried oregano and thyme add warmth and earthiness. Olive oil helps all the flavors blend together. Remember to season with salt and pepper to make everything shine. {{ingredient_image_1}} To start, heat olive oil in a large pot over medium heat. Add the finely chopped onion. Sauté until it turns translucent, which takes about 4 to 5 minutes. Next, mix in the minced garlic, diced carrot, and red bell pepper. Cook this blend for 3 to 4 minutes. You want the vegetables to soften but not lose their crunch. Now, it’s time to toast the rice. Add the basmati rice to the pot. Stir it often for about 2 to 3 minutes. This step adds a nice flavor. After toasting, pour in the vegetable broth. Then, add the lemon zest, lemon juice, dried oregano, and thyme. Mix everything well. Bring the pot to a boil. Once boiling, reduce the heat to low and cover the pot. Let it simmer for 15 to 20 minutes. The rice should absorb all the broth. When the rice is cooked, remove the pot from the heat. Use a fork to fluff the rice gently. This keeps the grains light and airy. Stir in the green peas and fresh parsley next. Season with salt and pepper to taste. Adjust the seasoning as needed for the best flavor. To ensure even cooking, start with a large pot. This helps heat spread well. Use medium heat when sautéing. This way, the onion and garlic soften nicely without burning. When you add the rice, toast it for 2-3 minutes. This adds a nice nutty flavor. Always stir the rice to prevent it from sticking. To boost flavor, consider adding more herbs. You can mix in fresh thyme or dill. A splash of white wine can also deepen the taste. If you have time, marinate the vegetables in lemon juice before cooking. This adds a burst of freshness. One common mistake is overcooking the rice. This can make it mushy. Always follow the cooking time on the package. Another mistake is not using enough broth. The broth gives the rice its flavor. Ensure you measure the broth correctly for best results. Pro Tips Use Quality Broth: The flavor of your broth significantly impacts the dish. Opt for a high-quality vegetable broth or homemade for the best results. Toast the Rice: Toasting the rice before adding the liquid enhances its nutty flavor and adds depth to the overall dish. Adjust Lemon to Taste: Depending on your preference, feel free to adjust the amount of lemon juice and zest for a more pronounced citrus flavor. Let It Rest: After cooking, let the rice sit covered for a few minutes before fluffing. This helps the flavors meld together beautifully. {{image_2}} You can change the grains in this dish. Try quinoa or farro for a new twist. If you want a different taste, consider brown rice. You can also switch up the veggies. Use corn, zucchini, or spinach if you like. Each choice adds unique flavors. To change the flavor, think about adding spices. A pinch of cumin or paprika brings warmth. You can also use fresh herbs like basil or mint for a fresh taste. Instead of lemon, try lime or orange for a sweet citrus kick. Each option brightens the dish in its own way. This recipe can easily fit many diets. To make it vegan, just use vegetable broth. You can remove the peas if you want fewer ingredients. For gluten-free needs, ensure your broth is free from gluten. These small tweaks let everyone enjoy this tasty meal. To store leftovers, let the rice cool. Use an airtight container. This keeps the rice fresh. It will last in the fridge for up to four days. Make sure to label the container with the date. This helps you track freshness. When you reheat the rice, use the microwave or a pan. If using the microwave, add a splash of water. Cover the bowl with a damp paper towel. This keeps the rice moist. Heat in short bursts, stirring often. If using a pan, add a little olive oil. Heat on low, stirring to keep it from sticking. This method helps maintain flavor. You can freeze One-Pot Greek Lemon Rice for up to three months. Divide it into portions before freezing. Use freezer-safe bags or containers. Remove as much air as possible. When you're ready to eat, thaw it in the fridge overnight. You can also use the microwave on the defrost setting. This way, you keep the taste and texture nice. One-Pot Greek Lemon Rice lasts about 4 to 5 days in the fridge. Store it in an airtight container. For the freezer, it can last up to 2 months. Just ensure you cool it fully before freezing. When ready to eat, thaw it overnight in the fridge. Yes, you can make One-Pot Greek Lemon Rice ahead of time. It's great for meal prep. Cook it and let it cool. Store it in the fridge for quick meals. You can reheat it easily in the microwave or on the stove. Just add a splash of broth or water to keep it moist. You can serve One-Pot Greek Lemon Rice with many dishes. Here are some ideas: - Grilled chicken or fish for protein - A fresh Greek salad for crunch - Roasted vegetables for color and nutrition - Tzatziki sauce for a creamy touch - Pita bread to scoop up the rice These pairings enhance the meal and add variety to your plate. One-Pot Greek Lemon Rice blends tasty veggies, herbs, and spices into a delightful meal. You learned how to prepare the ingredients, cook the rice, and finish with fresh flavors. Remember to avoid overcooking and experiment with ingredients to match your taste. This dish stores well and can be reheated easily for busy days. Enjoy creating your perfect version of this flavorful rice. Let it bring joy and warmth to your table!

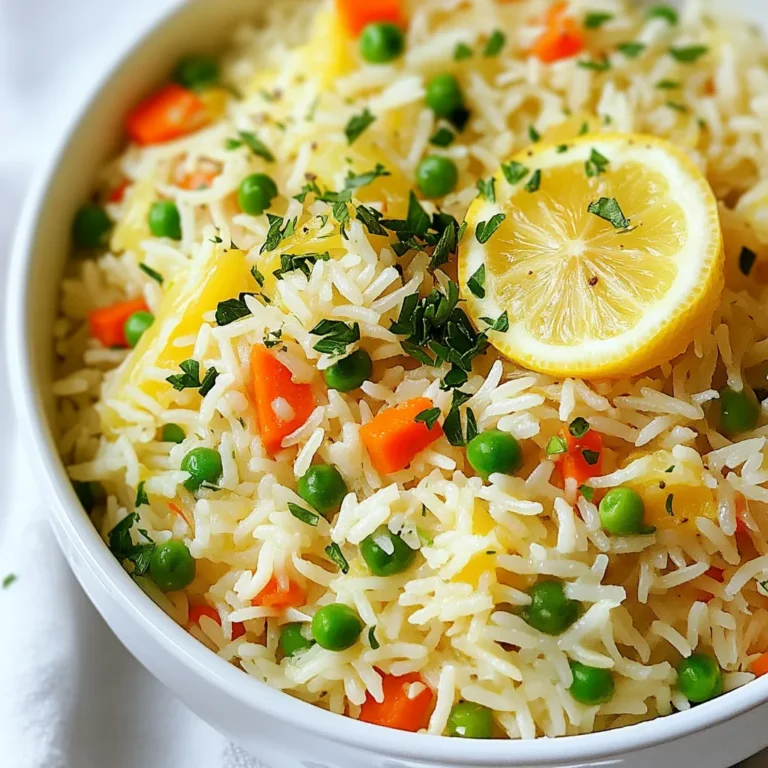
One-Pot Greek Lemon Rice Flavorful and Simple Dish

- 1 ½ cups graham cracker crumbs - 2 cups cream cheese, softened - 1 cup fresh or frozen cranberries, roughly chopped The graham cracker crumbs form the base of these cheesecake bars. They give a sweet crunch that pairs well with the creamy filling. Cream cheese creates a smooth and rich texture. You can use fresh or frozen cranberries, depending on what you have. Both options add a bright, tangy flavor that works perfectly with the sweetness. - ½ cup unsalted butter, melted - 1 cup granulated sugar - 2 tablespoons all-purpose flour Unsalted butter binds the crust and adds richness. Granulated sugar sweetens your filling and crust. The flour helps set the cheesecake, giving it a nice structure when baked. This balance of ingredients creates a perfect blend of flavors and textures. - 1 tablespoon vanilla extract - Zest of 1 large orange - ¼ teaspoon salt Vanilla extract brings warmth and depth to the bars. The zest of the orange adds a bright, citrusy note that enhances the overall flavor. Salt balances the sweetness, making each bite more enjoyable. These flavor enhancers are key to making your cheesecake bars stand out. {{ingredient_image_1}} - Grease and line the baking pan with parchment paper. This makes it easy to lift out the bars later. - Preheat the oven to 325°F (160°C). A warm oven helps the bars bake evenly. - In a medium bowl, mix 1 ½ cups of graham cracker crumbs with ½ cup of melted butter. Add 2 tablespoons of sugar for sweetness. - Press this mixture firmly into the bottom of the baking pan. Make sure it is even and compact. - Bake the crust for about 10 minutes. It should be lightly golden. Let it cool slightly. - In a large bowl, beat 2 cups of softened cream cheese until smooth. This step takes about 2-3 minutes. - Gradually add 1 cup of granulated sugar and mix well. Scrape the bowl's sides to get all the sugar mixed in. - Add 3 large eggs one at a time, mixing well after each. Then, stir in 1 tablespoon of vanilla extract and the zest of 1 large orange. - Gently fold in 2 tablespoons of all-purpose flour and ¼ teaspoon of salt. Be careful not to overmix. - Add 1 cup of roughly chopped cranberries and mix gently. This adds a burst of flavor to each bite. - Pour the cheesecake mixture over the pre-baked crust. Spread it evenly with a spatula. - Bake for 40-45 minutes. Check if the center is set but still jiggles a little. This means it’s done. - Take the cheesecake bars out of the oven and let them cool at room temperature for about 1 hour. - After cooling, refrigerate for at least 3 hours, or overnight for the best taste. - Once chilled, lift the bars out using the parchment paper. Cut them into squares and enjoy! - Mix the cheesecake filling gently. Overmixing makes it dense. - Bake at a steady temperature. This helps the bars rise evenly. - Dust the bars with powdered sugar before serving. This makes them look fancy. - Add orange slices and cranberries on top. They add color and flavor. - Swap cranberries for other fruits like blueberries or cherries. This creates new tastes. - Change the sugar amount based on your taste. A little less can be great. Pro Tips Chill for Better Texture: Allow the cheesecake bars to chill overnight for a firmer texture and enhanced flavors. Use Fresh Ingredients: Fresh cranberries will give a brighter flavor compared to frozen. If using frozen, ensure they are thawed and drained well. Don’t Overmix: Overmixing can lead to cracks. Mix just until ingredients are combined, especially after adding eggs. Perfect Cuts: Use a sharp knife dipped in warm water to make clean cuts when slicing the bars for a neat presentation. {{image_2}} You can easily change some of the ingredients for your needs. For a gluten-free treat, use gluten-free graham crackers instead of regular ones. This swap keeps the flavor while making it safe for those with gluten allergies. If you want a different texture, try using ricotta or mascarpone instead of cream cheese. Both will give a creamy feel but with a unique taste. You can add fun spices to change the flavor. Nutmeg and cinnamon add warmth and depth, making each bite a little cozier. If you love chocolate, mix in some chocolate chips. This twist gives a rich contrast to the tart cranberries and bright orange zest. It’s a simple way to switch things up and impress your guests. Pair these bars with a scoop of ice cream or a dollop of whipped cream. The cold creaminess complements the tangy cheesecake perfectly. You can also serve them with a side of cranberry sauce. This adds a fresh burst of flavor and looks great on the plate. Your guests will enjoy the extra touch and the chance to customize their dessert! To keep your cranberry orange cheesecake bars fresh, store them in an airtight container in the refrigerator. This helps maintain their creamy texture. If you want to save some for later, you can freeze them. Wrap each bar in plastic wrap, then place them in a freezer-safe bag. This method prevents freezer burn. In the refrigerator, these cheesecake bars last up to five days. If you freeze them, they can stay good for about three months. When you’re ready to enjoy frozen bars, take them out and let them thaw in the refrigerator overnight. This slow process helps keep the texture nice. To warm leftover cheesecake bars, you can use the microwave. Heat them for about 10-15 seconds. Be careful not to overheat, or they may become too soft. For the best texture, consider letting them sit at room temperature for a bit before serving. Enjoy the sweet flavors again! Yes, you can make these bars a day in advance. Prepare them and let them cool completely. Once cool, cover the pan with plastic wrap. Store it in the fridge overnight. This helps the flavors meld together. It also makes serving them easy for parties or gatherings. These bars pair well with various items. You can serve them with whipped cream on top. A scoop of vanilla ice cream is a great choice too. For drinks, try a cup of coffee or tea. You can even serve them with a sparkling beverage for a fun twist! You can use dried cranberries, but the taste will change. Dried cranberries are sweeter and chewier. This can affect the texture of your bars. If you choose dried ones, chop them into smaller pieces. This way, they mix well into the cheesecake filling. Look for a few signs to check doneness. The edges should look set and firm. The center may still jiggle slightly when shaken. It should not be too wobbly. You can also insert a toothpick in the center. If it comes out clean, your bars are ready! You now have a clear guide on making delicious Cranberry Orange Cheesecake Bars. We covered key ingredients, step-by-step instructions, and helpful tips for perfect results. Remember, using fresh cranberries adds a unique touch. Experiment with flavors and toppings to make them your own. Store them properly to enjoy later. These bars can be a hit for any gathering or as a tasty treat at home. Enjoy the baking and the tasty reward!

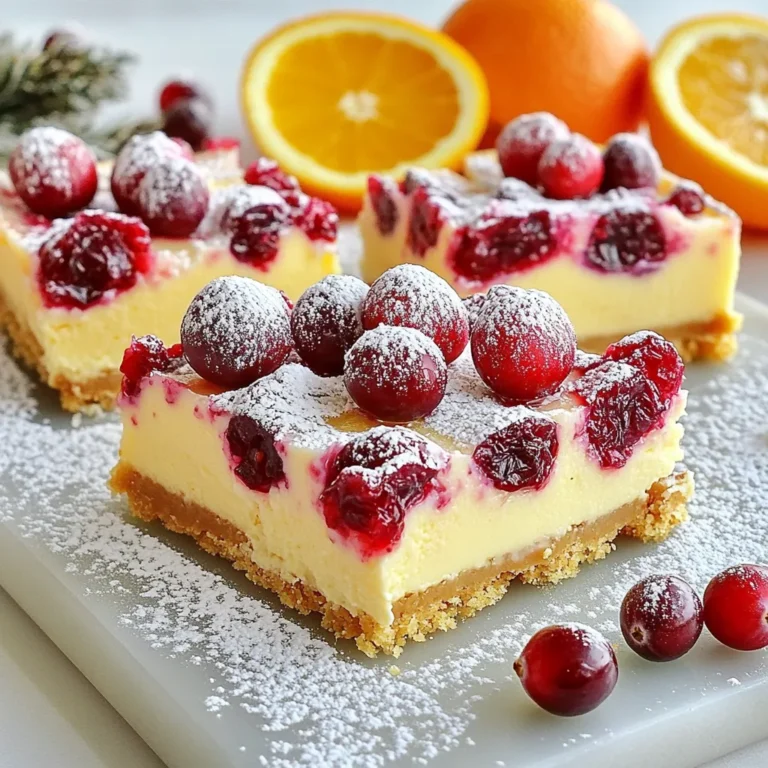
Cranberry Orange Cheesecake Bars Delightful Dessert Treat

To make the best Roasted Red Pepper Hummus Wraps, you need: - 1 cup roasted red peppers (jarred or homemade) - 1 can (15 ounces) chickpeas, drained and rinsed - 1/4 cup tahini - 2 tablespoons lemon juice - 1 garlic clove, minced - 1 teaspoon ground cumin - 1/4 teaspoon smoked paprika - Salt and pepper to taste - 4 large whole wheat tortillas - 1 cucumber, thinly sliced - 1 cup baby spinach These ingredients come together to create a smooth, tasty hummus that’s perfect for wraps. You can add more flavor with these optional ingredients: - 1/2 cup feta cheese, crumbled - Olive oil (for drizzling) Feta adds a creamy texture, while olive oil enhances the taste of the veggies. If you need to swap items, here are some ideas: - Use Greek yogurt instead of tahini for creaminess. - Try any fresh herbs, like parsley or dill, for extra taste. - Switch whole wheat tortillas for spinach or gluten-free wraps. These swaps can help tailor the wraps to your taste or dietary needs. {{ingredient_image_1}} To start, gather all your ingredients. This includes roasted red peppers, chickpeas, tahini, lemon juice, garlic, cumin, smoked paprika, salt, and pepper. 1. Place the roasted red peppers, chickpeas, tahini, lemon juice, minced garlic, ground cumin, smoked paprika, salt, and pepper into a food processor. 2. Blend until the mixture is smooth and creamy. If it’s too thick, add a tablespoon of water to thin it out. 3. Taste the hummus and adjust the seasoning if needed. Set it aside while you prepare the wraps. Now, it’s time to make your wraps. 1. Lay out the whole wheat tortillas on a clean surface. 2. Spread a generous layer of roasted red pepper hummus on each tortilla. Leave about an inch around the edges. 3. Top the hummus with thin slices of cucumber and a handful of baby spinach. 4. If you like feta cheese, sprinkle it over the veggies. 5. Drizzle a little olive oil on top for added flavor. 6. Carefully roll the tortilla tightly. Fold in the sides as you roll to keep the filling inside. 7. Cut each wrap in half to make them easier to eat. To serve, arrange the wraps on a platter. - For a nice touch, sprinkle fresh herbs on top. - Serve with extra hummus on the side for dipping. - You can also wrap them in parchment paper for a fun, portable lunch. These wraps are quick, tasty, and perfect for any lunch! To get a smooth hummus, blend it well. Start with roasted red peppers, chickpeas, and tahini. Add lemon juice, garlic, cumin, and paprika. If your hummus is too thick, add water a little at a time. Blend until it becomes creamy. Aim for a texture that spreads easily on your tortilla. You can always scrape down the sides to mix everything well. Want to jazz up your hummus? Try adding some zest. A bit of lemon zest brightens the flavor. You could also mix in fresh herbs like parsley or cilantro. For heat, add a pinch of cayenne or red pepper flakes. A hint of olive oil drizzled on top adds richness. If you like nuts, blend in some toasted pine nuts or walnuts for a crunchy twist. Make your wraps even faster to prepare. Use jarred roasted red peppers to save time. You can also prep the hummus ahead of time. Store it in the fridge for up to three days. When ready to eat, just spread it on the tortillas. Slice your veggies in advance and keep them in the fridge. This way, you can grab your ingredients and make wraps in minutes. Pro Tips Choose Quality Peppers: For the best flavor, opt for high-quality roasted red peppers. If using jarred, check for those packed in olive oil for added richness. Customize Your Hummus: Feel free to experiment with the spices in your hummus. Adding a pinch of cayenne pepper or a splash of balsamic vinegar can elevate the flavor. Freshness is Key: Use fresh vegetables for filling your wraps. Crisp cucumbers and fresh spinach not only add crunch but also enhance the overall taste. Make Ahead: Prepare the hummus in advance and store it in the refrigerator. It keeps well for up to a week, making meal prep easier! {{image_2}} When making roasted red pepper hummus wraps, you have choices for the tortillas. You can use whole wheat, which adds fiber. Spinach tortillas bring a nice color and flavor. If you prefer gluten-free, try corn tortillas or lettuce leaves. Each option changes the taste and texture. You can mix up the fillings in your wraps. Add sliced bell peppers for crunch or shredded carrots for sweetness. Avocado gives a creamy texture. You can also use herbs like cilantro or parsley for freshness. For protein, try adding grilled chicken or chickpeas, if you want more. Making these wraps vegan is simple. Just skip the feta cheese, or use a vegan alternative. To make them gluten-free, choose gluten-free tortillas or lettuce wraps. Always check labels to ensure your ingredients fit your dietary needs. This flexibility lets everyone enjoy these tasty wraps. To store leftover wraps, wrap them tightly in plastic wrap or foil. This keeps them fresh. You can also place them in an airtight container. Store the wraps in the fridge. They will last up to three days. If you want to keep them longer, consider freezing them. To freeze the wraps, wrap each one in plastic wrap. Place them in a freezer bag. They can stay in the freezer for up to three months. When you are ready to eat, remove the wrap from the freezer. Let it thaw in the fridge overnight. Reheat in a skillet over medium heat for five minutes on each side. This warms them nicely and brings back freshness. The ingredients in your wraps have different shelf lives. Here’s a quick guide: - Roasted red peppers: Last about 1 week in the fridge after opening. - Chickpeas: Canned chickpeas can last for years if unopened. Once opened, store in the fridge for 3 to 4 days. - Tahini: Can last for 6 months in the fridge. - Lemon juice: Fresh lemon juice lasts about 1 week in the fridge. Bottled lemon juice lasts much longer. - Garlic: Fresh garlic lasts a few weeks at room temp. - Whole wheat tortillas: Typically last about 1 week in the fridge or 6 months in the freezer. - Cucumber: Lasts about 1 week in the fridge. - Baby spinach: Lasts about 5 to 7 days in the fridge. - Feta cheese: Lasts for about 5 days once opened. Knowing how to store these ingredients helps reduce waste. It also keeps your meals tasty. You can prepare these wraps ahead of time. Make the hummus first and store it in the fridge. You can keep it fresh for up to five days. When ready to eat, spread the hummus on the tortillas. Add your cucumber, spinach, and feta just before serving. This keeps the veggies crisp. Wrap them tightly in plastic wrap or parchment paper for easy transport. Yes, using store-bought hummus is a great option. It saves time and still tastes good. Look for roasted red pepper hummus for extra flavor. You can customize your wrap with any store-bought hummus you like. Just spread it on the tortilla and add your toppings. This makes for a quick meal when you are short on time. These wraps are tasty alone, but sides can enhance your meal. Consider serving fresh fruit like apple slices or grapes. A simple side salad also pairs well. For a crunch, add some veggie sticks with extra hummus. If you want something warm, try baked sweet potato fries. These sides add color and flavor to your plate! This blog post explores how to make delicious roasted red pepper hummus wraps. We discussed essential and optional ingredients to make them tasty. I shared step-by-step instructions, tips for the perfect hummus, and ideas for variations. Storing leftovers and reheating tips ensure your wraps stay fresh. You can enjoy these wraps anytime, whether for lunch or a snack. They are simple, healthy, and customizable. I hope you feel ready to try these ideas in your kitchen!

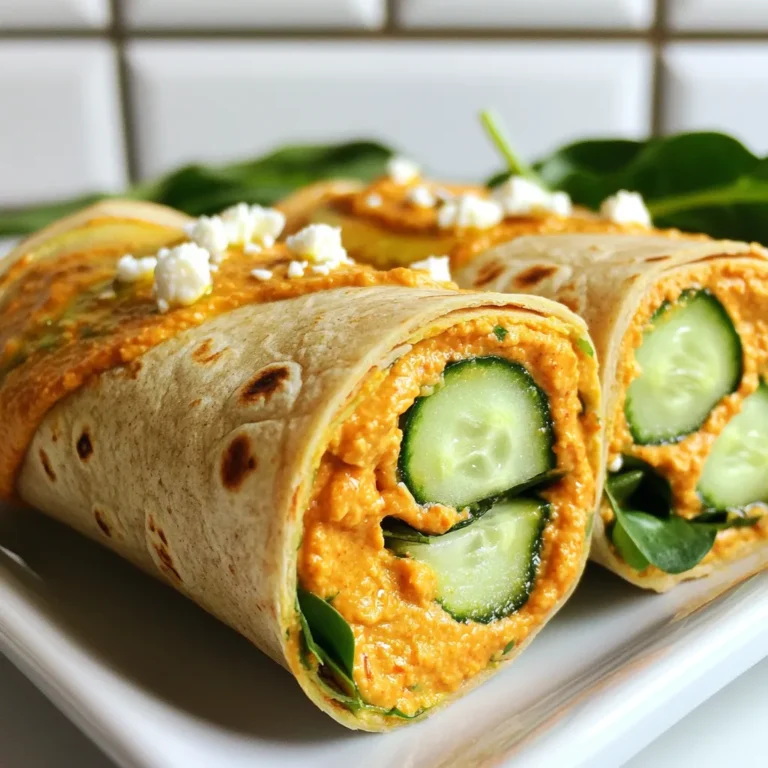
Roasted Red Pepper Hummus Wraps for Quick Lunch

PREV 1 … 46 47 48 … 57 NEXT
flavor nest kitchen

explore

DessertsDinnerAppetizersDrinks

Our Policies

  • Cookie Policy
  • Copyright Policy
  • Disclaimer
  • GDPR Policy
  • Terms Of Use
Back to Top
  • About
  • Contact Us
  • Privacy Policy
© 2025 flavor nest kitchen