FREE DINNER EBOOK! Get your copy!
  • Cookie Policy
  • GDPR Policy
  • Disclaimer
  • Terms Of Use
  • Visit my other site: Fun Cookie Recipes
flavor nest kitchen
  • Home
  • Dinner
  • Desserts
  • Drinks
  • Appetizers
  • Contact
  • About
  • Privacy Policy
  • Home
  • Dinner
  • Desserts
  • Drinks
  • Appetizers
  • Contact
  • About
  • Privacy Policy
  • Cookie Policy
  • GDPR Policy
  • Disclaimer
  • Terms Of Use
Visit my other site: Fun Cookie Recipes

HOME / CATEGORIES /

Latest

- 4 boneless, skinless chicken breasts - Salt and pepper to taste - 2 tablespoons olive oil - 3 cloves garlic, minced - 1 can (14 oz) diced tomatoes, drained - 1 cup heavy cream - 1 cup fresh spinach, roughly chopped - 1/2 cup grated Parmesan cheese - 1 teaspoon dried Italian herbs (oregano, thyme, basil) - Fresh basil leaves for garnish For the chicken breasts, use about 6 ounces each. This size ensures they cook evenly. The salt and pepper should coat both sides of the chicken, about 1 teaspoon of salt and a half teaspoon of pepper will do. Olive oil should be just enough to coat the skillet, which is about 2 tablespoons. You will need 3 cloves of garlic, minced finely for rich flavor. The heavy cream adds a creamy texture; use one full cup. The fresh spinach should be roughly chopped, about one cup. For cheese, half a cup of grated Parmesan adds depth. The dried Italian herbs should be a mix, totaling 1 teaspoon. If you want to swap chicken for something else, try turkey or tofu for a meatless option. You can use vegetable broth instead of olive oil for a lighter flavor. If you want a lighter dish, consider using half-and-half instead of heavy cream. Any fresh greens can work instead of spinach; kale or arugula are great choices. For cheese, you can replace Parmesan with pecorino or nutritional yeast for a vegan option. If you don’t have fresh basil, dried basil works too. Just use half the amount since dried herbs are stronger. {{ingredient_image_1}} First, take your chicken breasts. Season both sides with salt and pepper. This step adds flavor to each bite. Use about a teaspoon of salt and pepper for even seasoning. Set the chicken aside while you get the skillet ready. Heat 2 tablespoons of olive oil in a large skillet over medium heat. Once hot, add the seasoned chicken breasts. Cook each side for about 5 to 6 minutes. You want them golden brown and cooked through. Check for doneness by cutting into the thickest part. Remove the chicken and set it aside on a plate. In the same skillet, lower the heat to medium-low. Add 3 cloves of minced garlic. Sauté for about 1 minute until you smell that rich aroma. Next, add a 14 oz can of drained diced tomatoes. Stir well and let it cook for 2 to 3 minutes. Now, pour in 1 cup of heavy cream. Stir until everything blends together. Bring this mixture to a gentle simmer. Add in 1 cup of roughly chopped spinach and 1/2 cup of grated Parmesan cheese. Stir until the spinach wilts and cheese melts, which takes about 2 to 3 minutes. Finally, mix in 1 teaspoon of dried Italian herbs. Return the cooked chicken to the skillet. Let it simmer for an extra 5 minutes. This helps the chicken soak up those amazing flavors. Taste the sauce and adjust seasoning if needed. Add more salt or pepper for your liking. To cook the chicken just right, start with room temperature breasts. This helps them cook evenly. Season both sides well with salt and pepper. When you heat the olive oil, make sure it’s hot before adding chicken. Cook for about 5-6 minutes on each side. Look for a golden color. Always check the internal temperature; it should reach 165°F. Rest the chicken for a few minutes before serving. This keeps them juicy. For a thicker sauce, let it simmer longer. You can also add a little more Parmesan cheese. If the sauce is too thick, add a splash of chicken broth or water. This helps balance flavors and keeps it creamy. Adjust the cream as needed. A bit more cream will make the sauce richer. To boost flavor, add some crushed red pepper flakes. They give a nice kick. A splash of lemon juice at the end brightens the dish. Fresh herbs, like basil, can really lift the flavors. Don’t skip the garnish; fresh basil makes it look nice and adds aroma. If you like garlic, add more minced garlic when cooking the sauce. This brings out a deep flavor. Pro Tips Perfectly Cooked Chicken: Ensure the chicken is at room temperature before cooking for even cooking and juiciness. Flavor Boost: Add a splash of white wine after sautéing the garlic to deglaze the pan and enhance the flavor. Freshness Matters: Use fresh spinach instead of frozen for better texture and flavor in the dish. Customize Your Cream: For a lighter version, substitute half of the heavy cream with chicken broth for a delicious twist. {{image_2}} You can make Creamy Tomato Tuscan Chicken healthier. Substitute heavy cream with Greek yogurt. This swap cuts fat and adds protein. Use low-fat cheese instead of regular Parmesan. You can also use chicken thighs for more flavor without extra calories. Adding veggies boosts nutrition and taste. Try adding zucchini or bell peppers. You can also mix in mushrooms for earthiness. Broccoli florets add crunch and color. Just chop them small, so they cook fast. Toss them in when you add the spinach. If you want to change the protein, use shrimp or tofu. Shrimp cooks quickly and absorbs flavors well. Tofu is great for a plant-based option. Cube it and sauté until golden. You can even use turkey or pork if you like. Just adjust the cooking time for different meats. You can store leftover creamy tomato Tuscan chicken in the fridge. Place it in an airtight container. It will stay fresh for up to 3 days. When you are ready to eat, just remember to check for any signs of spoilage. Always trust your senses. If it smells off or looks strange, throw it out. Freezing is a great option for this dish. First, let it cool completely. Then, place the chicken in a freezer-safe bag or container. Make sure to remove as much air as possible. This helps prevent freezer burn. You can freeze it for up to 3 months. When you're ready, just thaw it in the fridge overnight before reheating. Reheating creamy tomato Tuscan chicken is easy. You can use the microwave or the stovetop. If using the microwave, heat in short bursts. Stir in between to heat evenly. If using the stovetop, place it in a pan over low heat. Add a splash of cream or water to keep it moist. Stir until hot. Enjoy your delicious meal again! To add some heat to your dish, try these ideas: - Add red pepper flakes to the sauce. Start with a pinch. - Use diced jalapeños or serrano peppers for fresh heat. - Mix in a splash of hot sauce. Taste and adjust as needed. These additions will give your creamy tomato Tuscan chicken a nice kick. Spice levels can vary, so adjust to your taste. You have many tasty options to pair with this dish: - Serve it over pasta, like fettuccine or penne. - Pair with crusty bread to soak up the sauce. - A fresh salad with greens and a light vinaigrette works well. - Roasted vegetables add a nice touch and color. These sides will complement the dish and create a full meal. Yes, you can prepare this dish in advance. Here’s how: - Cook the chicken and sauce as directed. - Allow it to cool completely, then store in an airtight container. - Refrigerate for up to three days. When you’re ready to eat, gently reheat on the stove over low heat. Add a splash of cream to restore creaminess. Enjoy your meal! In this post, you learned about making Creamy Tomato Tuscan Chicken. We covered the key ingredients, how to prep and cook the chicken, and tips for perfect results. I also shared variations to keep meals exciting, plus storage and reheating tips. Remember, you can customize this dish with different proteins or veggies. Enjoy your cooking adventure and make it your own!

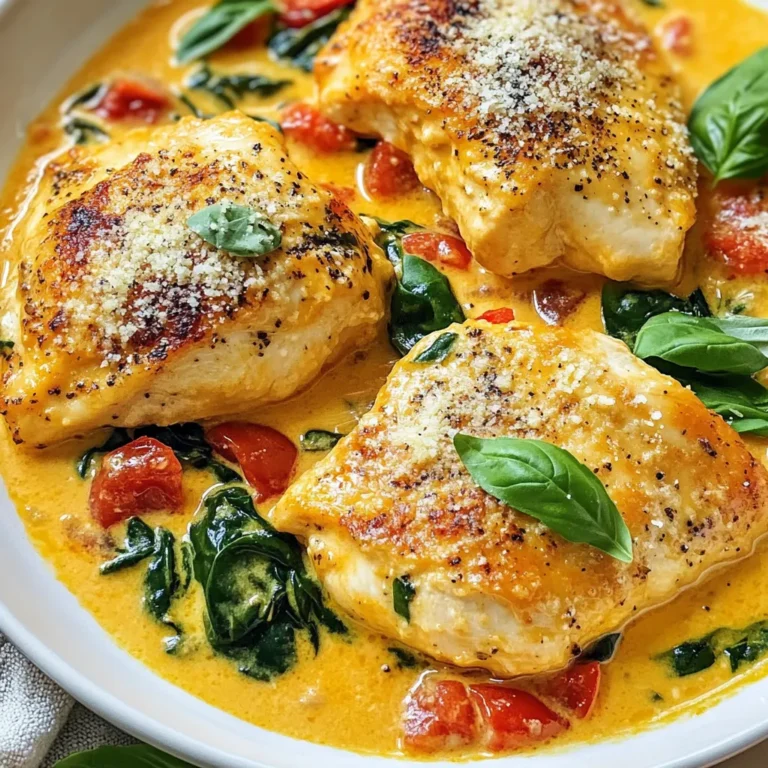
Creamy Tomato Tuscan Chicken Savory Dinner Delight

- 2 pounds ripe tomatoes - 1 medium onion - 4 cloves garlic - 2 tablespoons olive oil - 1 teaspoon sugar - Salt and pepper - 1 cup vegetable broth - 1 cup fresh basil leaves - ½ cup heavy cream (optional) - 1 tablespoon balsamic vinegar The main ingredients for roasted tomato basil soup are simple yet powerful. Ripe tomatoes bring a sweet, rich flavor. I love using 2 pounds of them for a robust base. A medium onion adds depth, while 4 cloves of garlic give it a lovely aroma. Drizzling 2 tablespoons of olive oil enhances the taste and helps in roasting. A teaspoon of sugar balances acidity, and salt and pepper add essential seasoning. You’ll also need 1 cup of vegetable broth to create a smooth texture. Fresh basil gives the soup its signature flavor, so I always pack in a cup. For those who enjoy creaminess, ½ cup of heavy cream can be added. Lastly, a tablespoon of balsamic vinegar adds a tangy twist. - Other herbs (thyme, oregano) - Dairy alternatives (coconut milk, almond milk) - Spices (crushed red pepper, paprika) For variations, you can use other herbs like thyme or oregano for extra flavor. If you're looking for dairy alternatives, coconut milk or almond milk works well. If you like some heat, crushed red pepper or paprika can spice things up. These options allow you to customize the soup to your taste! {{ingredient_image_1}} 1. Preheat your oven to 400°F (200°C). This heat will help caramelize the tomatoes. 2. Gather your ingredients. Chop the onion and halve the ripe tomatoes. Peel the garlic cloves. 1. On a large baking sheet, arrange the halved tomatoes, chopped onion, and garlic cloves. 2. Drizzle 2 tablespoons of olive oil over the veggies. Sprinkle with 1 teaspoon of sugar, plus salt and pepper to taste. Toss everything until coated well. 3. Roast in the preheated oven for about 30-35 minutes. Watch for the tomatoes to caramelize and juices to bubble. 1. Once roasted, let the mixture cool slightly. 2. In a large pot over medium heat, add the roasted veggies with 1 cup of vegetable broth. Bring to a simmer. 3. Incorporate 1 cup of fresh basil leaves and 1 tablespoon of balsamic vinegar. Cook for an additional 5-10 minutes to meld flavors. 4. Using an immersion blender, puree the soup until smooth. If you prefer, transfer the soup to a blender in batches. 5. For a richer texture, stir in ½ cup of heavy cream, if desired. Warm the soup on low heat if needed. 6. Taste the soup and adjust seasoning with salt and pepper if necessary. To make a great soup, choose ripe tomatoes. Their natural sweetness shines through in the dish. Look for tomatoes that feel heavy and smell sweet. You can balance sweetness with a bit of acidity. Adding a teaspoon of sugar helps enhance the natural flavors. Balsamic vinegar adds a nice tang. It brightens the soup while complementing the tomatoes. For a creamy soup, consider stirring in heavy cream. It gives a rich texture that feels luxurious. If you prefer a lighter option, you can skip the cream. An immersion blender makes pureeing easy. If you don’t have one, you can use a regular blender. Just blend in small batches to avoid spills. This soup pairs well with crusty bread. You can also serve it with grilled cheese sandwiches. For garnishing, drizzle olive oil on top. A few fresh basil leaves add color and flavor. You can even sprinkle some cheese for extra richness. Enjoy your comforting soup with these simple sides! Pro Tips Use Ripe Tomatoes: The flavor of your soup greatly depends on the quality of the tomatoes. Choose ripe, in-season tomatoes for the best taste. Add Depth with Herbs: Fresh basil is essential, but feel free to experiment with other herbs like thyme or oregano for added complexity. Blend for Texture: For a smoother soup, use an immersion blender. If you prefer a chunkier texture, blend only half the soup and leave the rest as is. Enhance with Acidity: A splash of lemon juice or additional balsamic vinegar can brighten the flavors of the soup, balancing the sweetness of the tomatoes. {{image_2}} To make this soup creamy, add heavy cream after blending. Start with half a cup. This gives the soup a rich texture. You can adjust the amount to your taste. If you want other creamy options, try coconut milk or cashew cream. These are great for a different taste. For a vegan version, you can skip the heavy cream. Use coconut milk instead. It adds creaminess and a hint of sweetness. You can also add extra vegetables like carrots or bell peppers for more flavor. Cashews can be soaked and blended to create a rich base. If you like some heat, add crushed red pepper flakes. Start with a pinch and taste as you go. You can also chop jalapeños and add them to the roasting pan. This will give the soup a nice kick. Always balance the heat with a little extra sweetness or acidity. A splash of balsamic vinegar can help with this. To store leftovers, let the soup cool completely. Pour it into an airtight container. Seal it tightly. This keeps the flavors fresh. You can store it in the fridge for up to five days. Just remember to label it with the date. If you want to save it for later, freezing is a great option. Use freezer-safe containers or bags. Leave some space for expansion. This soup can last for about three months in the freezer. When you're ready to eat, take it out and thaw it in the fridge overnight. To reheat, pour it into a pot over medium heat. Stir often until it's hot. If you like it creamier, add a splash of heavy cream while reheating. Enjoy your comforting soup again! Yes, you can use canned tomatoes. They save time and still taste great. Make sure to choose whole, peeled tomatoes for the best flavor. Drain the excess liquid before adding them to the recipe. This change will still give you a tasty soup. You can store this soup in the fridge for up to five days. Make sure to keep it in an airtight container. If you want to keep it longer, freeze it for up to three months. Just thaw and reheat before serving. This soup pairs well with many sides. I love serving it with crusty bread or grilled cheese sandwiches. You can also try a fresh salad or a cheese platter for a complete meal. Absolutely! Doubling the recipe is easy. Just double each ingredient and use a larger pot for cooking. This way, you can share the soup with more friends and family. This soup is already gluten-free as written. Just ensure that any broth you use is gluten-free. You can use vegetable or chicken broth, depending on your taste. Enjoy a delicious and safe meal! You can create a delicious roasted tomato basil soup using simple, fresh ingredients. We discussed the main ingredients, preparation steps, and various flavorful options. I shared tips to enhance flavor and texture, plus storage advice to keep your soup fresh. Cooking should be fun and rewarding. Whether you choose a creamy version or a spicy twist, enjoy experimenting! This recipe is a great way to nourish yourself and impress friends and family.

Roasted Tomato Basil Soup Comforting and Flavorful Meal

- 1.5 pounds turkey tenderloin - 1/4 cup honey - 1/4 cup low sodium soy sauce - 4 cloves garlic, minced - 1 tablespoon fresh ginger, grated - 1 tablespoon apple cider vinegar - 1 tablespoon olive oil - 1 teaspoon black pepper - 1 teaspoon salt - 2 green onions, sliced (for garnish) - Sesame seeds (for garnish) The main ingredients create the base for the honey garlic turkey tenderloin. I love using turkey tenderloin because it is lean and tender. The honey adds sweetness, while the soy sauce gives it a savory touch. Garlic and ginger bring a nice kick to the dish. The additional ingredients enhance the flavor. Apple cider vinegar adds a tangy twist. Olive oil helps brown the turkey and keeps it moist. Black pepper and salt bring out all the flavors. The sliced green onions and sesame seeds make for beautiful garnishes. You can mix and match these ingredients to suit your taste. For instance, try different types of honey or soy sauce. Each choice will change the flavor profile slightly, making it fun to experiment! {{ingredient_image_1}} First, gather your ingredients. In a medium bowl, add the following: - 1/4 cup honey - 1/4 cup low sodium soy sauce - 4 cloves garlic, minced - 1 tablespoon fresh ginger, grated - 1 tablespoon apple cider vinegar - 1 tablespoon olive oil - 1 teaspoon black pepper - 1 teaspoon salt Whisk these ingredients together until they blend well. This marinade will give your turkey a sweet and savory flavor. Next, take your 1.5 pounds of turkey tenderloin. Place it in a large resealable bag or a shallow dish. Pour the marinade over the turkey. Make sure every part is coated well. Seal the bag or cover the dish. Refrigerate it for at least 1 hour. For the best taste, marinate overnight if you can. When you're ready to cook, preheat your oven to 375°F (190°C). Take the turkey out of the fridge. Remove it from the marinade, but keep the marinade for later. Now, heat a large oven-safe skillet over medium-high heat. Add a little olive oil. Once the skillet is hot, sear the turkey tenderloin for about 4-5 minutes on each side until it's browned. This step adds a nice layer of flavor. Pour the reserved marinade over the turkey in the skillet. Transfer the skillet to your preheated oven. Roast the turkey for 25-30 minutes. Use a meat thermometer to check that it reaches 165°F (74°C) inside. After cooking, take the skillet out of the oven. Let the turkey rest for 5-10 minutes. This helps keep the meat juicy. Finally, slice the turkey and arrange it on a platter. Drizzle any leftover sauce from the skillet over the sliced turkey. Garnish with sliced green onions and sesame seeds. Enjoy your delicious meal! For the best flavor, let the turkey sit in the marinade longer. I suggest marinating for at least an hour. If you can, try overnight. This gives the turkey more time to soak in all those tasty honey and garlic notes. The longer it sits, the more flavor it gains. To get that beautiful golden brown crust, heat your skillet well. Use medium-high heat and add just a bit of olive oil. When you place the turkey in the pan, avoid moving it around. Let it cook for about 4-5 minutes on each side. This helps lock in moisture and flavor before roasting. After cooking, always let the turkey rest for 5-10 minutes. This step is key for juicy meat. Resting allows the juices to redistribute throughout the turkey. If you slice it too soon, those tasty juices will escape. Patience is vital for a tender, flavorful meal. Pro Tips Marinate Longer for Flavor: For the best flavor, try to marinate the turkey tenderloin overnight. This allows the flavors to penetrate deeply, making the meat more delicious. Use a Meat Thermometer: To ensure the turkey is perfectly cooked without being dry, use a meat thermometer to check for an internal temperature of 165°F (74°C). Rest Before Slicing: Always let the turkey rest for 5-10 minutes after cooking. This helps the juices redistribute, making the meat juicier and more tender. Customize the Marinade: Feel free to customize the marinade by adding your favorite herbs or spices, such as thyme or chili flakes, for an extra kick! {{image_2}} You can spice up your honey garlic turkey tenderloin easily. Just add chili flakes or a splash of sriracha to your marinade. This will give your dish a nice kick. The heat balances well with the sweet honey. It adds depth and excitement to each bite. If you want a change, use chicken or tofu instead of turkey. Chicken tenderloin works well and cooks similarly. Tofu is a great option for a plant-based meal. Just remember to press the tofu to remove excess water. Both options soak up the marinade's flavors beautifully. Garnishes can elevate your dish. Try adding chopped cilantro or crushed peanuts for extra texture and taste. Cilantro brings a fresh note, while peanuts add crunch. Both choices enhance the look and flavor of your turkey tenderloin. Feel free to mix and match garnishes to find what you love best. To store leftovers safely, let the turkey cool first. Place it in an airtight container. Make sure to cover it well. You can keep it in the fridge for up to three days. When you want to eat it again, check for any signs of spoilage. If it smells off or looks strange, it's best to throw it away. If you want to save some for later, freezing is a great option. Start by slicing the turkey into portions. Wrap each piece in plastic wrap tightly. Then, place the wrapped turkey in a freezer bag. Make sure to remove as much air as possible. Label the bag with the date. You can freeze it for up to three months. This way, you can enjoy it long after making it. When you are ready to eat, reheating properly is key. Start by thawing the turkey in the fridge overnight. For best results, use an oven to reheat. Preheat your oven to 350°F (175°C). Place the turkey in a baking dish and cover it with foil. Heat for about 15 to 20 minutes, or until it's warm. This method keeps the turkey moist and tasty. Enjoy your delicious meal! I recommend marinating the turkey for at least one hour. For best results, try to marinate it overnight. This allows the flavors to soak in deeply. If you're in a hurry, even 30 minutes will give you some good taste. You can serve this dish with steamed rice or quinoa for a filling meal. Roasted vegetables add color and nutrition, making your plate look nice. A fresh salad can also balance the meal. Try adding some green beans or broccoli for a healthy side. Yes, you can use maple syrup or agave nectar instead of honey. These options will still give you a sweet flavor. Each will add its unique twist to the dish. If you're avoiding sugar, you might consider using a sugar substitute like stevia. This blog post covered all you need for honey garlic turkey tenderloin. We discussed ingredients, step-by-step instructions, and key tips to enhance flavor. You learned how to store leftovers and what to serve with your dish. Experiment with variations for a personal touch. The right marinade and cooking methods make the difference. Enjoy your meal with confidence, knowing you made something delicious and healthy. Now, gather your ingredients and start cooking!

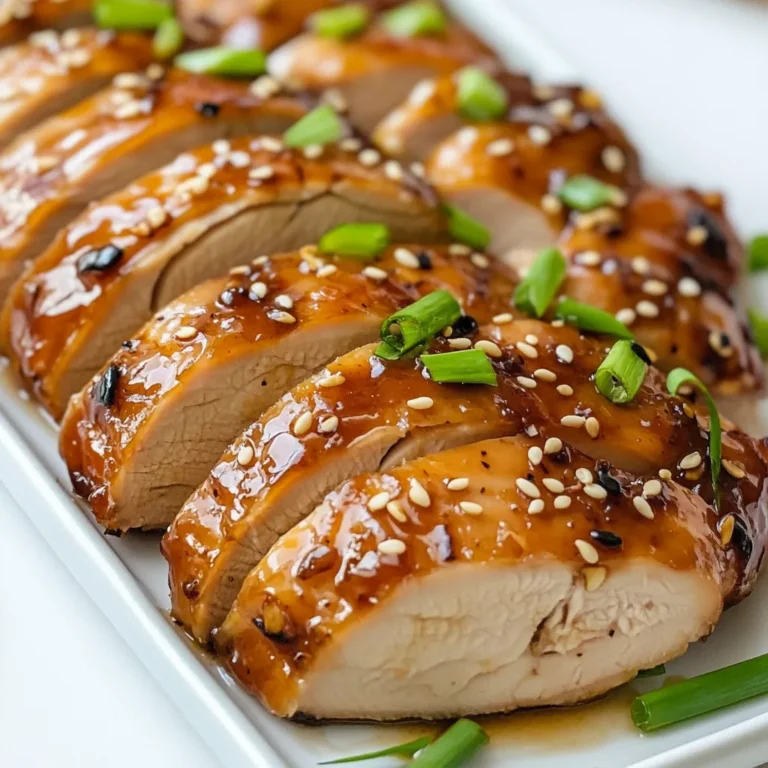
Honey Garlic Turkey Tenderloin Flavorful Dinner Recipe

- 1 medium head of cauliflower, cut into florets - 1 whole head of garlic - 3 tablespoons olive oil - 1/4 cup cream cheese (or sour cream for a lighter option) - 1/4 cup grated Parmesan cheese - Salt and pepper to taste - Fresh chives, chopped (for garnish) Roasted Garlic Mashed Cauliflower is a simple yet delicious side dish. The key flavors come from fresh cauliflower and roasted garlic. The garlic adds a sweet, rich taste that makes this dish special. You will need a medium head of cauliflower, cut into florets. This will give you a light and fluffy texture. A whole head of garlic is also essential. Roasting it brings out its sweet and mellow flavor. For the creamy texture, I use cream cheese. If you want a lighter option, sour cream works well too. Adding grated Parmesan adds a lovely salty bite. Don’t forget the seasoning! Salt and pepper are must-haves to enhance the flavors. Finally, fresh chives add a nice touch. They bring a mild onion flavor and bright color to your dish. Gather these ingredients to create a comforting, creamy side. It’s perfect for any meal and sure to impress your guests! {{ingredient_image_1}} To roast garlic, start by preheating your oven to 400°F (200°C). Cut the top off the whole head of garlic. This exposes the cloves, allowing them to get soft. Drizzle one tablespoon of olive oil over the cut side. Next, wrap the garlic head in aluminum foil to keep it moist. Place it on a baking sheet and roast for about 30 to 35 minutes. The garlic should be soft and fragrant when done. While the garlic roasts, bring a large pot of salted water to a boil. Add the cauliflower florets to the pot. Cook them for about 10 to 12 minutes. You want the cauliflower to be fork-tender. This means it should break apart easily when you poke it with a fork. Once cooked, drain the cauliflower well to remove excess water. In a large mixing bowl, it’s time to combine flavors. Squeeze the roasted garlic cloves out of their skins into the bowl. You will have a creamy garlic paste. Add the cooked cauliflower next. Then, mix in the cream cheese, the remaining olive oil, and the grated Parmesan cheese. This combination will create a rich and creamy base. Now comes the fun part! Use a potato masher or an immersion blender to mash everything together. Mash until it is smooth and creamy. If you want it a bit thinner, add a splash of water or more cream cheese. Adjust the texture to your liking, making sure it’s not too thick or too runny. Once the mashing is done, taste your mixture. Season it with salt and pepper according to your preference. This step makes a big difference in flavor, so don’t skip it! Transfer the mashed cauliflower to a serving bowl. To make it look pretty, garnish with freshly chopped chives. This adds a nice pop of color and flavor. Enjoy this creamy side dish with your favorite meals! To get the best flavor, roast your garlic well. First, preheat your oven to 400°F (200°C). Cut off the top of the whole head of garlic. Drizzle it with olive oil and wrap it in aluminum foil. This keeps it soft and sweet. Roast it for about 30 to 35 minutes. You’ll know it’s ready when the cloves feel soft. For even roasting, place the garlic in the center of the oven. This helps it cook consistently. If you have multiple items in the oven, avoid overcrowding. This way, heat can flow freely. You can make mashed cauliflower lighter by using sour cream. It gives a nice tang without the extra calories from cream cheese. You can also add fresh herbs to boost the flavor. Chives or thyme work well. Mix them in after mashing for a fresh touch. Feel free to experiment with flavors. Adding herbs not only enhances taste but also makes the dish look pretty. To achieve the right creaminess, use a potato masher or an immersion blender. Mash until it reaches your desired smoothness. If it feels too thick, add a little water or more cream cheese. This helps make it silky and smooth. To avoid lumps, ensure your cauliflower is cooked well. Cook it until fork-tender, about 10 to 12 minutes. Drain it well to remove excess water, which can make it mushy. Pro Tips Roasting Garlic: For an even richer flavor, try adding a sprinkle of herbs like thyme or rosemary to the garlic before wrapping it in foil. Texture Options: If you prefer a chunkier texture, mash the cauliflower less and leave some small pieces for added bite. Flavor Variations: Experiment with different cheeses, such as feta or goat cheese, for a unique twist on the flavor profile. Storage Tips: Store any leftovers in an airtight container in the fridge for up to 3 days, and reheat gently in the microwave or on the stove with a splash of cream. {{image_2}} You can boost the taste of roasted garlic mashed cauliflower with herbs and spices. Try adding rosemary or thyme for a fresh, aromatic touch. These herbs bring out the flavor of the garlic and cauliflower. If you like some heat, sprinkle in a pinch of cayenne pepper or smoked paprika. Both spices can add a nice kick to your dish. Make this dish lighter by swapping cream cheese for Greek yogurt. Greek yogurt adds creaminess and a tangy flavor without all the fat. If you're looking for vegan options, replace dairy with plant-based cream cheese or cashew cream. These swaps keep the taste rich and satisfying while being healthier. Roasted garlic mashed cauliflower pairs well with meats like chicken or steak. Serve it as a tasty side dish to balance rich flavors. You can also transform this dish into a baked version. Just spread it in a baking dish, top it with cheese, and bake until bubbly. This way, you can enjoy a comforting twist on a classic favorite. To store leftovers, let them cool first. Place the mashed cauliflower in an airtight container. This keeps it fresh and tasty. You can enjoy it for about 3 to 5 days in the fridge. Remember to label it with the date, so you know when to finish it. You can freeze mashed cauliflower for longer storage. Use a freezer-safe container or a heavy-duty freezer bag. Make sure to leave some space for expansion. It stays good for about 2 to 3 months. When you’re ready to eat, thaw it in the fridge overnight. Reheating is key to keeping the texture nice. Use a pot over low heat or the microwave. Add a splash of cream or water to make it creamy again. Stir often to heat evenly. Serve it warm, and garnish with fresh chives for extra flavor. Roasted garlic mashed cauliflower is a creamy side dish. It blends roasted garlic and tender cauliflower. This dish is a flavorful alternative to mashed potatoes. It offers a rich taste with fewer carbs. I love it for its smooth texture and depth of flavor. You can serve it with meats or enjoy it on its own. Yes, this recipe is gluten-free. All the ingredients, like cauliflower and olive oil, do not contain gluten. You can enjoy this dish without worry. It fits well for those with gluten sensitivities. Just ensure any added toppings are also gluten-free. Yes, you can easily make this vegan. Replace cream cheese and Parmesan with plant-based options. Use vegan cream cheese or cashew cream instead. Nutritional yeast can add a cheesy flavor without dairy. This way, you keep the dish creamy and delicious. Cauliflower is cooked when it is fork-tender. You can check this by piercing a floret with a fork. If it goes through easily, it’s done. Overcooking can make it mushy, so watch the time closely. A perfect cook keeps the cauliflower light and fluffy. If you want to avoid garlic, try onion powder or shallots. Both can add a nice flavor without the garlic taste. You can also use herbs like rosemary for a fresh twist. Experimenting helps you find what suits your taste best. In this post, you learned how to make roasted garlic mashed cauliflower. We covered the key ingredients like cauliflower, garlic, and dairy. Each step, from roasting garlic to mixing flavors, was explained clearly. I shared tips for achieving the perfect texture and explored fun variations. Remember, you can customize this dish to fit your taste. By storing leftovers properly, you extend their shelf life and maintain flavor. Enjoy this creamy, guilt-free dish that’s packed with taste and nutrition.

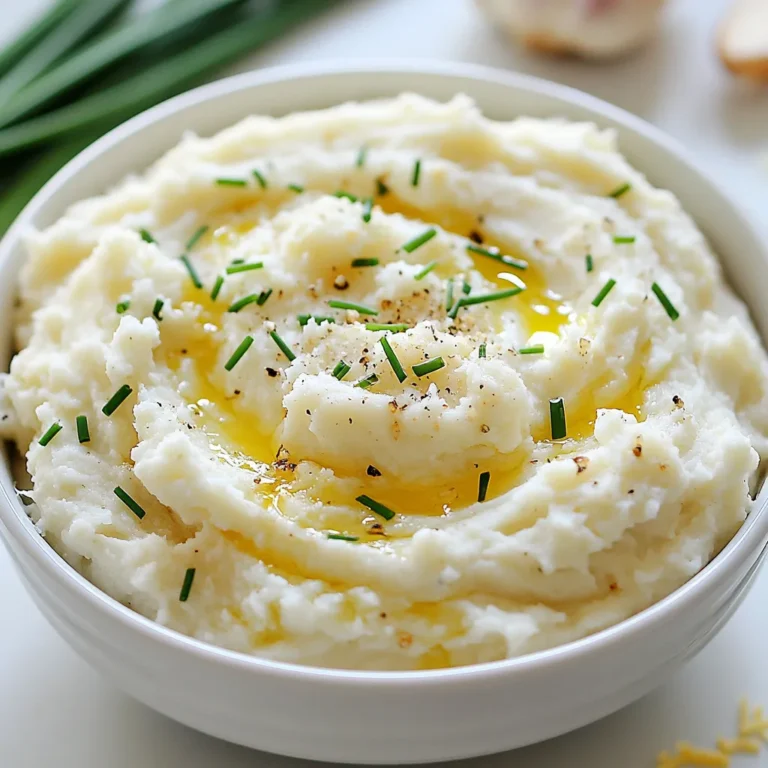
Roasted Garlic Mashed Cauliflower Creamy Side Dish

- 200g soba noodles - 1 red bell pepper, thinly sliced - 1 carrot, julienned - 1 cup snap peas, trimmed - 1 cup edamame beans, shelled - 2 green onions, chopped - 2 tablespoons sesame oil - 2 tablespoons soy sauce - 1 tablespoon chili paste (adjust for heat preference) - 1 tablespoon ginger, grated - 2 cloves garlic, minced - 1 tablespoon rice vinegar - Sesame seeds - Fresh cilantro - Lime wedges This dish is rich in protein and fiber. Soba noodles are a good source of whole grains. The veggies add vitamins and minerals. Each serving has about 350 calories. It also includes healthy fats from sesame oil. This meal is great for a quick lunch or dinner. {{ingredient_image_1}} Start by bringing a large pot of salted water to a boil. Once it’s bubbling, add 200g of soba noodles. Cook them for about 4-5 minutes. Be sure to check the package for exact timing. When done, drain the noodles in a colander. Rinse them under cold water. This stops the cooking and keeps them firm. Set the noodles aside while you prepare the veggies. Take a large skillet or a wok and heat 2 tablespoons of sesame oil over medium heat. Add 2 cloves of minced garlic and 1 tablespoon of grated ginger. Sauté until you smell its great aroma, which takes about 1 minute. Next, toss in 1 thinly sliced red bell pepper, 1 julienned carrot, and 1 cup of snap peas. Stir them for about 3-4 minutes. You want them tender yet still crisp. Then, add 1 cup of shelled edamame beans and cook for another minute. In a small bowl, mix 2 tablespoons of soy sauce, 1 tablespoon of chili paste, and 1 tablespoon of rice vinegar. Pour this mixture over the veggies in the skillet. Toss everything well to coat the veggies with the sauce. Now, add the cooked soba noodles to the skillet. Stir gently to blend all the ingredients. Warm everything through for about 2-3 minutes. Finally, remove from heat and sprinkle 2 chopped green onions over the top. Your Spicy Soba Noodle Bowl is ready to enjoy! To cook soba noodles just right, use plenty of salted water. Bring it to a boil first. Add the noodles and cook for about 4-5 minutes. Check them often. You want them soft but not mushy. After cooking, drain and rinse these noodles with cold water. This stops them from cooking more. It also helps them stay firm in your bowl. If you like heat, add more chili paste. Start with one tablespoon, then taste. You can always add more if needed. If you want less spice, use less chili paste. Mixing in a little sugar can also balance the heat. This way, you can enjoy the flavor without too much burn. To make your bowl look great, use shallow bowls. Layer the noodles first, then the veggies. Add a sprinkle of sesame seeds on top. Fresh cilantro adds color and flavor too. Place lime wedges on the side for extra zing. This makes your dish not only tasty but also pleasing to the eyes! Pro Tips Adjust the Spice Level: Feel free to modify the amount of chili paste according to your heat preference. Start with a smaller amount and gradually increase for a spicier dish. Fresh Ingredients: Using fresh vegetables will enhance the flavor and nutrition of your dish. Look for vibrant, crisp produce at your local market. Perfectly Cooked Noodles: Make sure to rinse the soba noodles under cold water after cooking to stop the cooking process and prevent them from becoming mushy. Garnishing Matters: Don’t skip the garnishes! Sesame seeds, fresh cilantro, and lime wedges add a burst of flavor and visual appeal to your bowl. {{image_2}} You can swap out some ingredients if you want. For a lighter dish, use zucchini noodles instead of soba. If you don't have sesame oil, olive oil works well. Try using different veggies, like broccoli or mushrooms, based on your taste. You can also replace soy sauce with tamari for a gluten-free option. To keep this dish vegan, just ensure your chili paste has no animal products. For gluten-free needs, opt for 100% buckwheat soba noodles. Check labels to find the right brand. You can also use coconut aminos in place of soy sauce for a tasty twist. Want more protein? Add grilled chicken or shrimp. Tofu is a great choice for a vegan option. Just pan-fry it until golden. You can also toss in chickpeas for an extra protein boost. These options make the meal more filling and satisfying. To store your spicy soba noodle bowl, let it cool completely. Place the noodles and veggies in an airtight container. This helps keep everything fresh. Store it in the fridge for up to three days. Make sure to label the container with the date. When you’re ready to enjoy leftovers, take them out of the fridge. You can reheat them in a skillet over medium heat. Stir often for even warming. If the noodles seem dry, add a splash of water or a little sesame oil. You can also microwave it in a bowl. Cover the bowl with a damp paper towel. Heat for about 1-2 minutes, checking halfway. If you want to freeze the dish, it’s best to do this before adding any toppings. Pack the cooled noodles and veggies in a freezer-safe container. You can freeze it for up to two months. To enjoy later, thaw it overnight in the fridge. Reheat as mentioned above for a quick meal. Soba noodles are made from buckwheat. They are a great source of protein and fiber. They help you feel full and support digestion. Soba noodles are also low in calories. They have vitamins and minerals like manganese and magnesium. This makes them a healthy choice for meals. Yes, you can prepare this recipe ahead of time. Cook the soba noodles and veggies, then store them in the fridge. Keep the sauce separate to mix in later. When you are ready to eat, just warm everything together. This saves time and makes meals easy. You can find soba noodles at most grocery stores. Look in the pasta or Asian foods aisle. If you can't find them, check health food stores. You can also buy them online. Other ingredients, like vegetables and sauces, are easy to find at local markets. This post covered how to make delicious soba noodles from start to finish. We talked about the key ingredients, cooking steps, and tips for great taste. We also explored different variations and how to store your dish. Remember, you can customize your meal to fit your taste or diet. Enjoy making these simple, healthy noodles at home. You’ll impress your family and friends with your skills in the kitchen. Happy cooking!

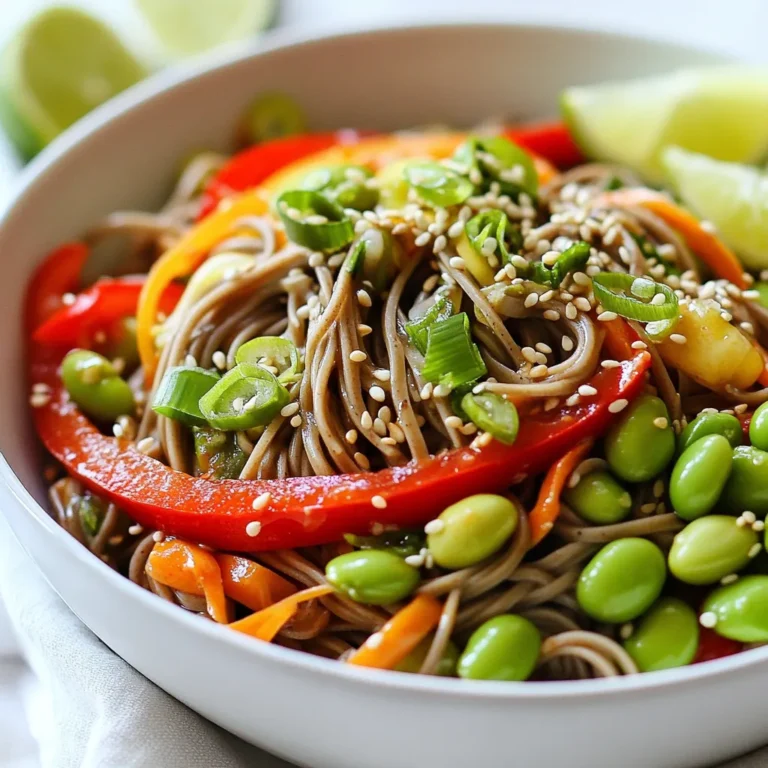
Spicy Soba Noodle Bowl Quick and Tasty Meal Idea

- 1 lb chicken breast, thinly sliced - 3 tablespoons vegetable oil - 4 cloves garlic, minced - 2-3 Thai bird's eye chilies, finely chopped (adjust to taste) - 1 red bell pepper, sliced - 1 cup green beans, trimmed and cut into 2-inch pieces - 1 cup fresh Thai basil leaves - 2 tablespoons soy sauce - 1 tablespoon oyster sauce - 1 tablespoon fish sauce - 1 teaspoon sugar - Cooked jasmine rice, for serving When making Spicy Thai Basil Chicken, I like to gather all my ingredients first. You need fresh chicken breast for the best texture. I choose thin slices because they cook fast and soak up flavors well. Next, I prepare my vegetables. The garlic adds a great aroma, while the Thai bird's eye chilies bring heat. You can adjust how many chilies you use based on your spice level. The red bell pepper adds color and sweetness. Green beans give a nice crunch and balance the dish. Fresh Thai basil is key for that authentic taste. For sauces, I use soy sauce, oyster sauce, and fish sauce. These deepen the flavor. A hint of sugar adds a touch of sweetness, which balances the heat. Don’t forget the jasmine rice. It’s perfect to soak up all that tasty sauce. This simple ingredient list makes a dish that is both flavorful and easy to prepare. {{ingredient_image_1}} - Mince 4 cloves of garlic. - Chop 2-3 Thai bird's eye chilies finely. - Slice 1 lb of chicken breast thinly. - Slice 1 red bell pepper. - Trim and cut 1 cup of green beans into 2-inch pieces. - Measure out 2 tablespoons of soy sauce. - Measure 1 tablespoon of oyster sauce. - Measure 1 tablespoon of fish sauce. - Measure 1 teaspoon of sugar. 1. Heat 3 tablespoons of vegetable oil in a large skillet or wok over medium-high heat. 2. Add the minced garlic and chopped chilies to the hot oil. Stir for about 30 seconds until fragrant. 3. Increase heat to high. Add the sliced chicken breast to the skillet. Stir-fry for 5-7 minutes until the chicken is fully cooked and slightly golden. 4. Toss in the sliced red bell pepper and green beans. Stir-fry for an additional 3-4 minutes until the vegetables are tender-crisp. 5. In a small bowl, mix the soy sauce, oyster sauce, fish sauce, and sugar. Pour this sauce over the chicken and vegetables. Toss well to coat. 1. Add 1 cup of fresh Thai basil leaves. Stir gently until they wilt, about 1 minute. 2. Remove from heat. Serve immediately over jasmine rice. Enjoy your meal! Choosing the right chilies To get the best heat, use Thai bird's eye chilies. They pack a punch! You can adjust the number based on your spice level. If you prefer milder heat, start with one chili. You can always add more later. Importance of fresh basil Fresh Thai basil is key to this dish. It brings a unique flavor that dried basil can’t match. Look for bright green leaves with a purple stem. The fragrance should be strong and sweet. Add it at the end of cooking to keep its taste vibrant. Stir-frying tips Use a large skillet or wok for even cooking. Heat the oil until it shimmers before adding garlic and chilies. Stir quickly to avoid burning. Once you add chicken, keep it moving! This helps it cook evenly and stay tender. Adjusting heat levels If the dish becomes too spicy, add more vegetables to balance the heat. You can also serve it with jasmine rice. The rice will soak up the spice and provide a cooling effect. For a richer flavor, add a bit more oyster sauce. Pro Tips Adjust the Spice Level: If you prefer a milder dish, reduce the number of bird's eye chilies or deseed them before chopping. Use Fresh Ingredients: Fresh Thai basil and crisp vegetables really elevate the dish's flavor and texture, so use the freshest you can find. Marinate the Chicken: For enhanced flavor, marinate the chicken in a bit of soy sauce and minced garlic for 15-30 minutes before cooking. Serve with Extra Lime: A squeeze of fresh lime juice just before serving can add a bright, zesty flavor that complements the spices beautifully. {{image_2}} You can swap chicken for other proteins. Tofu works great for a plant-based meal. Just press it to remove water. Then, cut it into small cubes and stir-fry until golden. Shrimp is another tasty choice. Use peeled, deveined shrimp. Cook them for about 2-3 minutes until pink. You can also use different cuts of chicken. Chicken thighs are juicier and add great flavor. Cut them into bite-sized pieces and cook as usual. You can even use ground chicken for a different texture. Just make sure it's cooked well. Feel free to mix in seasonal vegetables. Broccoli, snap peas, or zucchini can work well. These veggies add color and crunch. You can also choose spicy or mild options. If you want more heat, add more chilies. For a milder dish, use sweet bell peppers or carrots. Try adding baby corn or snow peas for a fun twist. The key is to keep the textures vibrant. Choose what you enjoy or what’s fresh at the market. This dish is all about balance and flavor, so get creative! To keep your Spicy Thai Basil Chicken fresh, let it cool first. Place it in an airtight container. Store it in the fridge for up to three days. This keeps the flavors intact and ready for your next meal. For reheating, use a skillet over medium heat. Add a splash of water or broth to keep it moist. Stir often for about five minutes until heated through. You can also microwave it in short bursts. Stir between each burst to avoid hot spots. To freeze leftovers, wait until the dish cools completely. Use a freezer-safe container, leaving some space for expansion. You can store it for up to three months. Thaw in the fridge overnight before reheating. This helps maintain the taste and texture. Serve Spicy Thai Basil Chicken with jasmine rice. The rice soaks up the sauce well. You can also add fresh cucumber slices for a crunchy side. Try serving it with a simple salad too. This will add a nice freshness to the meal. If you like, a drizzle of lime juice can brighten the dish. Yes, you can easily make this dish vegetarian. Swap the chicken for firm tofu. Cut the tofu into small cubes and fry until golden. You can also use mushrooms for a meaty texture. Make sure to use vegetarian oyster sauce or soy sauce. This keeps the flavors rich without meat. The heat can vary based on your taste. The bird's eye chilies add a strong kick. For a milder dish, use fewer chilies. You can also remove the seeds to lower heat. If you love spice, add more chilies or a dash of chili paste. Always taste as you cook to find your perfect heat level. This blog post covered how to make Spicy Thai Basil Chicken. We looked at the ingredients, preparation steps, and tips for great taste. You learned simple cooking methods and ways to switch up ingredients. You can try different proteins and veggies to suit your taste. Storing and reheating are easy with our guidelines. Enjoying this dish is not just tasty but also fun. Make it your own!

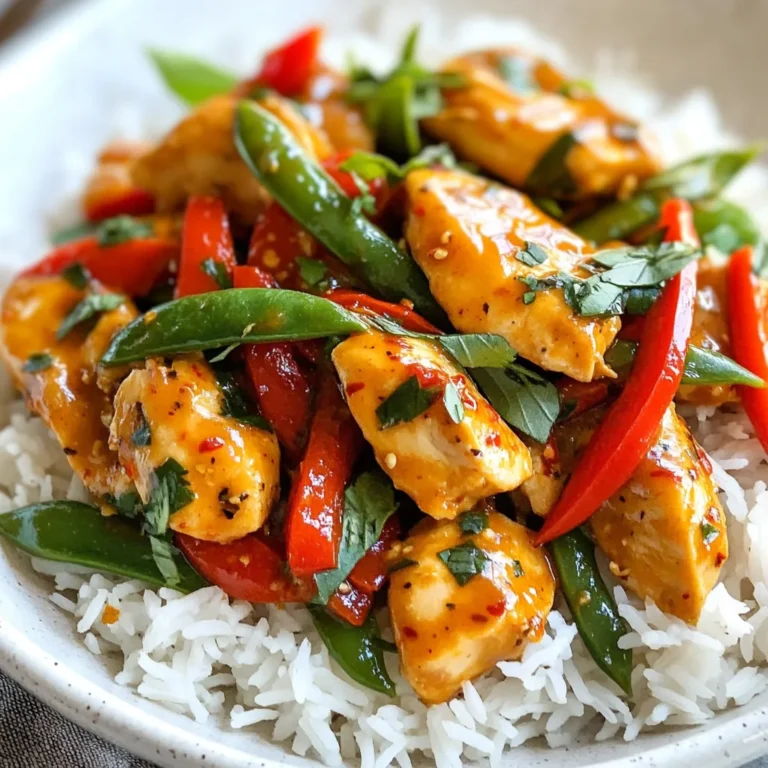
Spicy Thai Basil Chicken Flavorful and Easy Recipe

- 2 salmon fillets (6 oz each) - 1 cup jasmine rice - 1 ½ cups water - 1 tablespoon vegetable oil - ½ cup soy sauce - ¼ cup honey - 2 tablespoons rice vinegar - 1 teaspoon grated ginger - 2 garlic cloves, minced - 1 cup steamed broccoli florets - 1 red bell pepper, thinly sliced - 1 carrot, julienned - 2 green onions, sliced - Sesame seeds for garnish - Optional: pickled ginger for serving You can change up the veggies in your teriyaki salmon bowl. Try using snap peas, zucchini, or bok choy. You can also swap the salmon for chicken or tofu for different flavors. If you want a spicy kick, add sriracha or red pepper flakes to the glaze. Each serving of teriyaki salmon bowls packs a punch of protein and healthy fats. Salmon is rich in omega-3s, which are great for heart health. One bowl has about 600 calories, 35 grams of protein, and 30 grams of carbs. You also get fiber and vitamins from the vegetables. This meal is both filling and nourishing, making it a smart choice for lunch or dinner. {{ingredient_image_1}} Start by rinsing the jasmine rice. Use a fine-mesh strainer and cold water. Keep rinsing until the water runs clear. In a medium pot, mix the rinsed rice with 1 ½ cups of water. Bring it to a boil. Once boiling, lower the heat to low. Cover the pot and let it simmer for 15 minutes. After that, remove it from heat and let it sit, still covered, for 10 minutes. This helps the rice become fluffy. While the rice cooks, let’s focus on the teriyaki glaze. In a small saucepan, combine soy sauce, honey, rice vinegar, grated ginger, and minced garlic. Turn the heat to medium. Stir the mixture until it begins to simmer. Cook for 5-7 minutes until it thickens a bit. Once done, remove it from heat and set it aside. Now, it’s time to cook the salmon. Heat vegetable oil in a skillet over medium-high heat. Season the salmon fillets with salt and pepper. Place them in the skillet skin-side down. Cook for about 4-5 minutes. Carefully flip the salmon over. Brush it generously with the teriyaki glaze. Cook for another 4-5 minutes until the salmon is cooked through and flakes easily. After the salmon, let’s prepare the veggies. In the same skillet, add sliced red bell pepper and julienned carrot. Sauté for about 3-4 minutes until tender. Then, add the steamed broccoli. Toss everything gently to combine. Now we can assemble our bowls. Fluff the cooked jasmine rice with a fork. Divide the rice evenly among serving bowls. Place a salmon fillet on top of the rice. Add a portion of the sautéed vegetables next to the salmon. To finish, drizzle any leftover teriyaki glaze over the salmon and vegetables. Top with sliced green onions and a sprinkle of sesame seeds. If you like, add a small pinch of pickled ginger on the side. Enjoy your delicious teriyaki salmon bowls! When picking salmon, look for bright color. The flesh should be firm and moist. Avoid any fish with brown spots or a strong fishy smell. Freshness is key. If you can, buy wild-caught salmon. It often has better flavor than farmed salmon. A great teriyaki sauce is sweet and salty. Use quality soy sauce for a rich taste. Honey adds sweetness, but feel free to adjust the amount. If you like more tang, add a bit more rice vinegar. Grated ginger gives a fresh kick. Don't skip the garlic; it adds depth. Cook the sauce until it thickens a bit. This helps it cling to the salmon better. Rinse jasmine rice well before cooking. This removes excess starch and prevents stickiness. Use a 1:1.5 ratio of rice to water. Bring the water to a boil, then lower the heat. Cover and simmer for 15 minutes for fluffy rice. Once cooked, let it sit covered for 10 minutes. This step allows the rice to finish cooking and become tender. Fluff it with a fork before serving for the best texture. Pro Tips Fresh Salmon is Key: Use fresh salmon fillets for the best flavor and texture. Check for firm, bright pink flesh for optimal results. Perfectly Cooked Rice: Ensure your jasmine rice is rinsed well to remove excess starch. This will result in fluffier rice that doesn’t clump together. Glaze It Up: For an extra burst of flavor, brush the salmon with additional teriyaki glaze just before serving. Customize Your Veggies: Feel free to substitute or add other vegetables like snap peas or zucchini based on your preference or seasonal availability. {{image_2}} You can swap salmon for other proteins. Chicken works great. Use boneless, skinless chicken thighs for juicy bites. Cook them the same way as salmon. You can also use tofu for a plant-based option. Firm tofu holds up well. Press it to remove excess water, then cube it. Sauté it until golden and crispy. These swaps add variety and keep the meal fun. Feel free to mix up the veggies. Broccoli, bell pepper, and carrot are tasty, but you can add others too. Try snap peas or zucchini for a fresh twist. You can also use bok choy or mushrooms for more depth. Just sauté them until tender. This way, you can use whatever you have on hand. Garnishing your bowl makes it pop! Add sliced avocado for creaminess. You can sprinkle some seaweed flakes for an extra umami kick. Serve with a side of pickled ginger to cleanse your palate. These simple touches elevate the dish and make it special. You can store any leftover teriyaki salmon bowls in an airtight container. Keep them in the fridge for up to three days. Make sure to separate the rice, salmon, and veggies if you prefer. This way, they stay fresh longer. To reheat, place the salmon, rice, and veggies on a microwave-safe plate. Cover it with a damp paper towel to keep moisture. Heat them for about 1-2 minutes. Check if it's warm throughout. You can also use a skillet over medium heat. Add a splash of water to the pan to help steam the salmon and veggies, warming them without drying out. If you want to freeze your bowls, it's best to freeze the salmon and veggies separately. Wrap them tightly in plastic wrap, then place them in a freezer bag. They can last up to three months. When you're ready to eat, thaw them overnight in the fridge. Reheat as mentioned above for the best taste. Yes, you can use brown rice. Brown rice has more fiber and a nuttier flavor. Just remember it takes longer to cook. Use a 2:1 water ratio when cooking brown rice. It will take about 40-45 minutes to become tender. Making teriyaki sauce is easy! Here’s how: - Mix together: - ½ cup soy sauce - ¼ cup honey - 2 tablespoons rice vinegar - 1 teaspoon grated ginger - 2 minced garlic cloves - Heat the mixture in a small pot on medium. Cook until it thickens a bit, about 5-7 minutes. That's it! Yes, teriyaki salmon is healthy! Salmon is rich in omega-3 fatty acids. These fats support heart health and brain function. Plus, the veggies provide vitamins and minerals. Just be mindful of the soy sauce if you're watching salt intake. You can serve teriyaki salmon with: - Steamed vegetables like broccoli or snap peas - Pickled ginger for a tangy kick - Slices of avocado for creaminess - A sprinkle of sesame seeds for crunch These additions boost flavor and nutrition! You learned about delicious teriyaki salmon bowls and how to make them. We covered ingredients, step-by-step instructions, and helpful tips. You also explored fun variations and storage info. In the end, this dish is not only tasty but also versatile. Enjoy trying different proteins and veggies. You can easily make a meal that fits your taste. Now, get cooking and enjoy your own teriyaki salmon bowl!

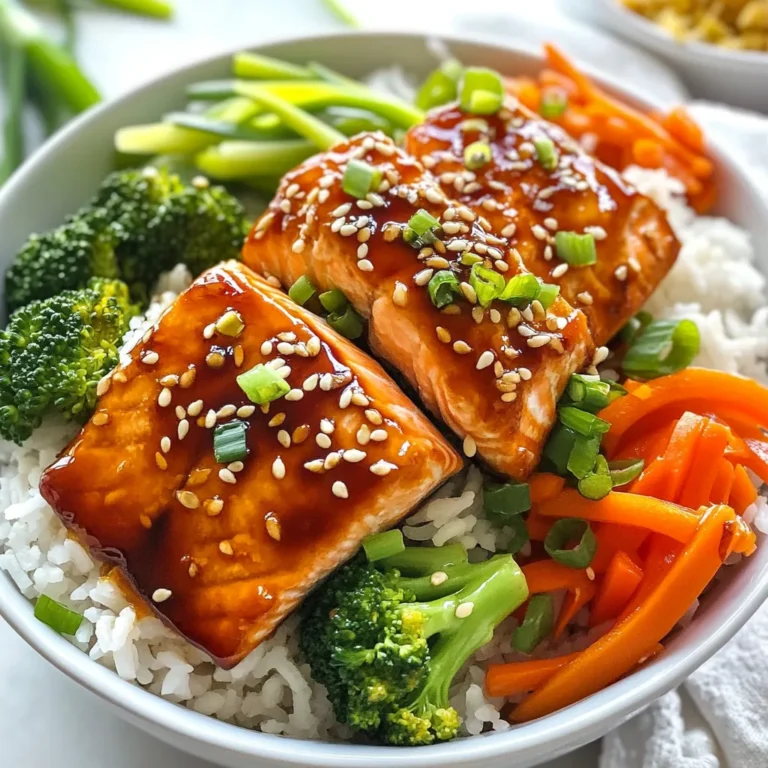
Teriyaki Salmon Bowls Flavorful and Quick Meal Guide

For a tasty Sweet and Sour Chicken Stir Fry, you need these simple ingredients: - 1 lb (450g) boneless, skinless chicken breast - 1 red bell pepper, sliced - 1 green bell pepper, sliced - 1 cup pineapple chunks (fresh or canned) - 1 medium onion, sliced - 2 cloves garlic, minced - 1-inch piece of ginger, minced - 1/4 cup soy sauce - 1/4 cup sweet and sour sauce - 2 tablespoons cornstarch - 2 tablespoons vegetable oil - Salt and pepper to taste - Cooked rice or noodles for serving These ingredients blend well to create a dish that is both sweet and tangy. The chicken offers protein, while the colorful bell peppers and pineapple add crunch and flavor. You can choose fresh or canned pineapple based on what you have on hand. The sauces bring everything together, making each bite a delight. The cornstarch ensures that the chicken has a nice crisp texture. Don't forget the cooked rice or noodles to complete your meal! {{ingredient_image_1}} First, take your chicken breast and slice it into bite-sized pieces. In a bowl, mix the chicken with salt, pepper, and cornstarch until each piece is well coated. The cornstarch helps the chicken become crispy when cooked. This step is key for that perfect crunch, which makes the dish so tasty. Now, heat one tablespoon of vegetable oil in a large skillet or wok over medium-high heat. Add the chicken pieces and cook for about 5-7 minutes. You want them browned and fully cooked. Keep an eye on the time; overcooking can make the chicken dry. Once done, remove the chicken from the skillet and set it aside. In the same skillet, add another tablespoon of oil. Toss in the sliced onion and bell peppers. Also, add minced garlic and ginger. Stir-fry these for about 3-4 minutes. You want the veggies to be tender-crisp. This means they should still have a bit of bite, not mushy. Next, add the pineapple chunks to the skillet. Pour in the soy sauce and sweet and sour sauce. Stir everything together and bring it to a simmer for about 2 minutes. This step helps all the flavors blend together beautifully. Return the cooked chicken to the skillet and mix well. This allows the chicken to soak up the sauce. Cook everything for another 2-3 minutes until it’s heated through. Serve the stir fry over cooked rice or noodles. This meal is quick, easy, and full of flavor! To get that nice, crispy texture, cornstarch is key. It coats the chicken well, creating a crunchy bite when cooked. Make sure to toss the chicken pieces well with salt, pepper, and cornstarch. This step is vital for the best results. When you cook the chicken, aim for a medium-high heat. This helps seal in the juices and keep the meat tender. For the veggies, cook them just enough to stay crunchy. Stir-fry the onion and bell peppers for about 3-4 minutes. They should be tender but still crisp. This will give your dish a great texture balance. To make your stir fry even better, consider using extra seasonings. A dash of sesame oil can add a nice nutty flavor. You can also add some red pepper flakes for a bit of heat. Balancing sweet and sour is important too. The sweet and sour sauce provides a good base. Taste as you mix, and adjust with more soy sauce or sugar if needed. This way, you can find the perfect mix for your palate. A great-looking dish makes meals more enjoyable. Serve your sweet and sour chicken in a bright, colorful bowl. This adds visual appeal. To make it pop even more, add garnishes like sesame seeds and chopped green onions. These small touches add both color and flavor to your meal. You’ll impress everyone at the table! Pro Tips Prep Ahead: Chop all your vegetables and chicken in advance to save time during cooking. Use Fresh Ingredients: Opt for fresh pineapple for a burst of flavor, but canned works in a pinch! Adjust the Sauce: Tweak the amount of sweet and sour sauce to suit your taste preference—more for sweetness, less for tanginess. High Heat Cooking: Ensure your skillet or wok is hot before adding ingredients to achieve the perfect stir-fry texture. {{image_2}} You can switch the chicken for shrimp, tofu, or beef. Each protein adds its own twist to the dish. For shrimp, cook it for just 3-4 minutes until it turns pink. Tofu needs a bit more time to brown, around 5-6 minutes. If you choose beef, slice it thinly and cook it about 4-5 minutes. Adjust the cooking time based on your protein choice. If you want a vegetarian or vegan meal, replace the chicken with tofu or tempeh. Both options soak up flavors well. For a boost of taste, try using a mix of soy sauce and hoisin sauce instead of sweet and sour sauce. This keeps the dish flavorful without the meat. Feel free to mix up the veggies. Snap peas, broccoli, or carrots work great. For a different flavor, use teriyaki sauce instead of sweet and sour sauce. This swap gives the dish a nice, rich taste. You can also add cashews or peanuts for extra crunch. After making Sweet and Sour Chicken Stir Fry, you might have some left. Store it in the fridge to keep it fresh. Use airtight containers for the best results. This helps keep the flavors locked in. The stir fry lasts for about 3 to 4 days in the fridge. Make sure it cools before you seal it up. When you want to eat the leftovers, reheating is key. You can use a skillet or microwave. If using a skillet, heat it on medium. Add a splash of water or soy sauce to keep it moist. Stir until it’s hot throughout. The ideal serving temperature is around 165°F. This keeps the dish safe and tasty. You can also freeze your stir fry for later. Let it cool completely before freezing. Use freezer-safe containers or bags. Squeeze out as much air as possible to avoid freezer burn. The stir fry can last for up to 3 months in the freezer. When you're ready to eat, thaw it in the fridge overnight. For quick thawing, use the microwave but be careful not to cook it. Reheat in a skillet for the best texture. Enjoy your delicious meal again! To enhance the flavor, you can add a few simple ingredients. Try using: - A splash of rice vinegar for acidity. - A teaspoon of sesame oil for richness. - Red pepper flakes for heat. - Fresh herbs like cilantro for freshness. These small changes can really boost the taste and make your stir fry pop! Yes, you can prepare this stir fry in advance. Here’s how: 1. Cook the chicken and veggies as directed. 2. Let them cool completely. 3. Store in an airtight container in the fridge for up to three days. When you are ready to eat, just reheat it in a skillet over medium heat. This saves time on busy nights! If you need a soy sauce substitute, try these options: - Tamari for a gluten-free alternative. - Coconut aminos for a sweeter taste. - Homemade blend of water, vinegar, and a pinch of salt. These will still give you that savory flavor without soy sauce. Sweet and Sour Chicken Stir Fry can be a healthy choice. It has lean protein, colorful veggies, and pineapple. Here are some tips for a lighter option: - Use less sweet and sour sauce to cut sugar. - Add more vegetables to increase fiber. - Serve it over brown rice for extra nutrients. These tweaks can help you enjoy a tasty meal that’s also good for you! In this post, we walked through making a tasty Sweet and Sour Chicken Stir Fry. You learned about the key ingredients and how to prepare them. We highlighted tips to achieve the perfect texture and flavor. You can also explore variations with different proteins and vegetables. Finally, we covered storage and reheating methods. Enjoy creating your own delightful stir fry. Experiment with flavors, and make it yours!

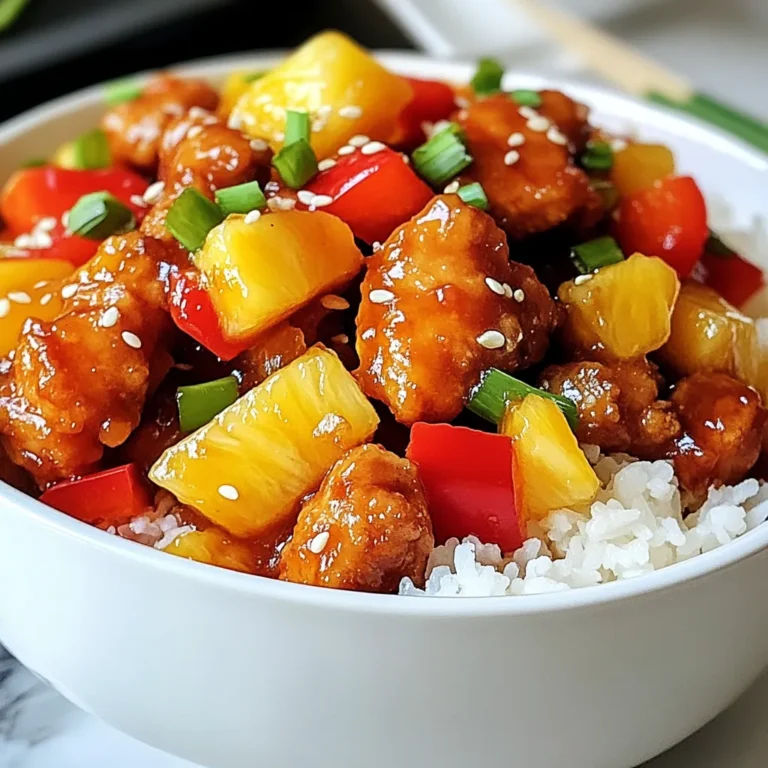
Sweet and Sour Chicken Stir Fry Quick and Tasty Meal

- 4 bone-in, skin-on chicken thighs - 1/4 cup honey - 1/4 cup Dijon mustard - 2 tablespoons olive oil - 2 cloves garlic, minced - 1 tablespoon apple cider vinegar - 1 teaspoon dried thyme - Salt and pepper to taste - Fresh parsley, chopped (for garnish) You will need four chicken thighs, with skin and bone. The honey and Dijon mustard each require a quarter cup. For oil, take two tablespoons of olive oil. Use two cloves of minced garlic. One tablespoon of apple cider vinegar gives a nice tang. One teaspoon of dried thyme adds flavor. Lastly, add salt and pepper to your liking. If you do not have bone-in chicken thighs, boneless thighs work too. Honey can be swapped with maple syrup for a different taste. Instead of Dijon mustard, you can use yellow mustard. If you dislike garlic, you can leave it out. Fresh thyme can replace dried thyme if you have it. For a twist, you can add a splash of soy sauce for more depth. {{ingredient_image_1}} First, preheat your oven to 425°F (220°C). This helps the chicken cook evenly. Next, take the chicken thighs and pat them dry with paper towels. This step is key for getting crispy skin. Season them with salt and pepper to taste. In a medium bowl, mix together the honey and Dijon mustard. Add the olive oil, minced garlic, apple cider vinegar, and dried thyme. Whisk everything until smooth. This sauce gives the chicken a sweet and tangy flavor. Make sure all the ingredients blend well. Place the chicken thighs in a baking dish. Pour the honey mustard sauce over the chicken. Make sure they are well coated. Arrange the thighs skin-side up in the dish. Bake for 35-40 minutes. The chicken should be golden brown and cooked through. Use a meat thermometer to check; it should read 165°F (75°C). For a nice finish, broil the chicken for 2-3 minutes at the end. Keep an eye on it to avoid burning. Once done, let the chicken rest for 5 minutes. Garnish with chopped fresh parsley before serving. Enjoy your meal! To get crispy skin on your chicken thighs, start by patting them dry. Use paper towels to remove any moisture. This step helps the skin crisp up nicely in the oven. Next, make sure your oven is hot enough. Preheat to 425°F (220°C) before baking. Finally, arrange the chicken skin-side up in the baking dish. This lets the heat circulate and crisp the skin perfectly. You can boost the flavor of your honey mustard sauce with some simple tweaks. Add a splash of lemon juice for a bright kick. If you like spice, mix in some cayenne pepper or red pepper flakes. For a deeper taste, try using smoked paprika. Fresh herbs like rosemary or basil also add a nice touch. Feel free to mix and match to find your perfect flavor! Honey mustard chicken thighs are great on their own or with sides. Serve them with roasted veggies or a fresh salad. Mashed potatoes or rice are nice choices too. Don’t forget to use the sauce left in the baking dish! Drizzle it over your chicken and sides for extra flavor. For a touch of color, garnish with chopped fresh parsley before serving. Enjoy your meal! Pro Tips Pat the Chicken Dry: Ensure the chicken thighs are thoroughly patted dry with paper towels before cooking. This helps achieve a crispy skin during baking. Use Fresh Ingredients: For the best flavor, use fresh garlic and herbs. Fresh ingredients can significantly enhance the taste of your dish. Monitor the Cooking Time: Every oven is different. Check the chicken a few minutes before the suggested cooking time to ensure it doesn’t overcook. Rest Before Serving: Allow the chicken to rest for at least 5 minutes after removing it from the oven. This helps the juices redistribute, making the chicken more tender and juicy. {{image_2}} You can switch chicken thighs for other meats. Try using chicken breasts for a leaner option. Pork chops also work well with honey mustard sauce. If you want to go meatless, use firm tofu. Just press the tofu to remove extra water and marinate it in the sauce. You can play with the sauce to change the taste. Add some hot sauce for a spicy kick. For a citrus twist, mix in orange juice instead of vinegar. If you love herbs, try adding rosemary or basil. This will give a fresh, fragrant flavor to your dish. Pair your honey mustard chicken with tasty sides. Roasted vegetables like carrots and broccoli make a great match. You can also serve it with creamy mashed potatoes or fluffy rice. For a light option, try a green salad with a lemon vinaigrette. These sides will round out your meal nicely and please everyone at the table. After your meal, let the chicken cool down. Place the chicken thighs in an airtight container. You can store them in the fridge for up to four days. If you want to keep them longer, freezing is a great option. To reheat, preheat your oven to 350°F (175°C). Place the chicken in an oven-safe dish. Cover it with foil to keep moisture in. Heat for about 15-20 minutes, or until warm. You can also use a microwave. Heat it on medium power for 2-3 minutes, checking to avoid overcooking. If you want to freeze your chicken, wrap each thigh tightly in plastic wrap. Then, place them in a freezer bag. Remove as much air as possible. Label the bag with the date. They will stay good for up to three months. When ready to use, thaw them in the fridge overnight before reheating. Yes, you can use boneless chicken thighs. They cook faster than bone-in thighs. If you choose boneless thighs, reduce your baking time to about 25-30 minutes. Always check that the internal temperature reaches 165°F to ensure they are safe to eat. Boneless thighs will absorb the honey mustard sauce well and stay juicy. You should bake chicken thighs at 425°F for 35-40 minutes. This time allows the skin to turn golden brown and crispy. Always check the internal temperature with a meat thermometer. It should reach 165°F for safe consumption. If using boneless thighs, reduce the time to 25-30 minutes. Several sides go well with honey mustard chicken thighs. Here are some ideas: - Steamed broccoli - Roasted potatoes - Rice pilaf - Green salad - Mashed sweet potatoes These options will complement the sweet and tangy flavors of the chicken. You can mix and match according to your taste. In this post, we covered key ingredients for the Honey Mustard Chicken Thighs, how to prep chicken, and make the sauce. We shared tips for achieving crispy skin and flavor boosts, along with serving ideas. We also explored variations for proteins and sides and detailed storage methods and reheating tips. Cooking can be fun and easy with this guide. Try these steps for a tasty meal. Enjoy experimenting with flavors and sharing your dish!

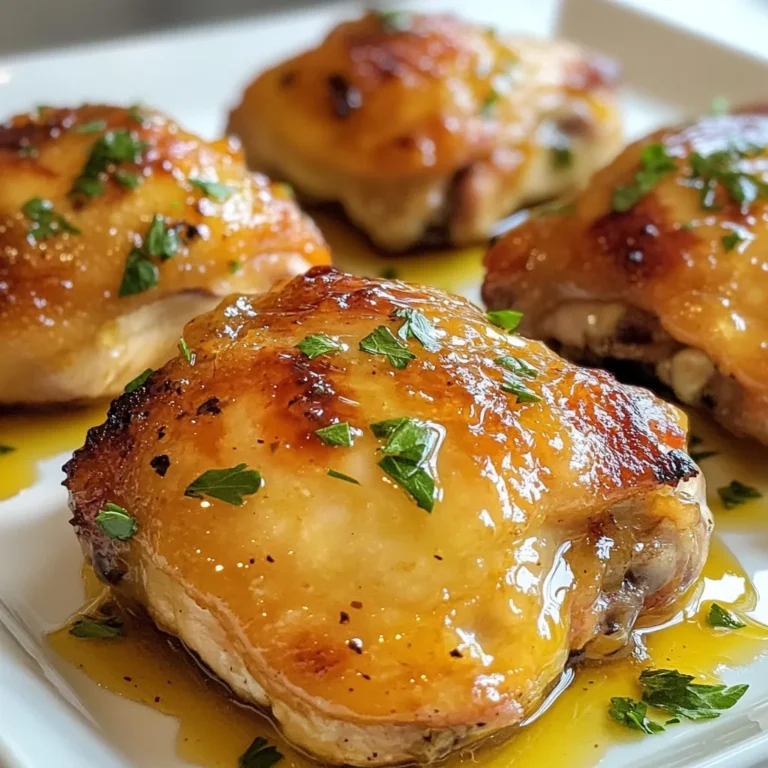
Honey Mustard Chicken Thighs Easy Dinner Recipe

To make a Quinoa Berry Breakfast Bowl, you'll need simple and healthy ingredients. Here's the list: - 1 cup cooked quinoa - 1/2 cup mixed berries (blueberries, strawberries, raspberries) - 1/4 cup almond milk (or any milk of choice) - 1 tablespoon honey or maple syrup - 1 tablespoon chia seeds - 1/4 teaspoon vanilla extract - 2 tablespoons sliced almonds - Fresh mint leaves for garnish Each ingredient plays a key role. The quinoa serves as a protein-rich base. Berries add natural sweetness and antioxidants. Almond milk keeps the bowl creamy. Honey or maple syrup gives a touch of sweetness. Chia seeds add fiber and help thicken the bowl. Vanilla extract brings a warm flavor. Sliced almonds add crunch, and mint provides a fresh finish. By choosing quality ingredients, you enhance the flavor and health benefits of your breakfast bowl. Enjoy mixing and matching your favorites! {{ingredient_image_1}} First, take a small saucepan. Pour in the almond milk. Heat the almond milk over low heat. You want it warm, not hot. This will help mix the flavors well later. In a bowl, take your cooked quinoa. Add the sweetener of your choice, either honey or maple syrup. Then, mix in the chia seeds and the vanilla extract. Now, pour the warm almond milk over this mixture. Stir everything well. Make sure it is nicely combined. Let this sit for about five minutes. The chia seeds will soak up the liquid and thicken the mix. After the mix has thickened, gently fold in the mixed berries. Save a few berries for topping. Spoon the quinoa berry mix into serving bowls. Sprinkle sliced almonds on top. Finally, add the reserved berries for a colorful touch. You can garnish with fresh mint leaves for extra flair. Enjoy your vibrant and tasty breakfast bowl! To get the best texture, let the chia seeds absorb the almond milk. After mixing them into your bowl, wait about five minutes. This allows the seeds to swell and thicken the mixture. It turns your breakfast bowl into a creamy delight. You can add yogurt or a dollop of nut butter for extra creaminess. Greek yogurt gives a nice tang, while nut butter adds a rich flavor. Both options boost the protein, making your meal even more filling. Feel free to experiment with your favorite flavors. Garnish with fresh mint leaves for a pop of color. Arrange the berries on top in a fun way. You can make a pattern or even create a smiley face. A well-presented bowl makes your meal more inviting and enjoyable. It turns breakfast into a feast for the eyes! Pro Tips Use Fresh Ingredients: Always opt for fresh berries and mint leaves to enhance the flavor and nutritional value of your breakfast bowl. Customize Your Sweetener: Feel free to adjust the amount of honey or maple syrup according to your taste preferences or dietary needs. Add More Texture: Consider adding other toppings like granola or coconut flakes for an extra crunch in your breakfast bowl. Meal Prep Friendly: Prepare a larger batch of quinoa in advance and store it in the fridge for quick and easy breakfasts throughout the week. {{image_2}} You can switch up the milk in your quinoa berry breakfast bowl. Almond milk is great, but you can try coconut milk for a creamy taste. Oat milk is another good choice. It has a mild flavor and pairs well with the berries. Each milk brings its own twist, so feel free to experiment! While I love mixed berries, you can use any fruit you like. Fresh strawberries or blackberries work well too. If you can't find fresh fruit, frozen berries are perfect. They are just as tasty and save you time. Use what’s in season for the best flavor. Honey and maple syrup add sweetness, but there are other options. Agave syrup gives a nice touch and is easy to mix in. Date syrup is another choice if you want a richer taste. Experiment with these sweeteners to find what you enjoy most. To keep your quinoa berry breakfast bowl fresh, store it in the fridge. Use an airtight container. This way, it stays good for about three days. Make sure it has cooled down before sealing. This helps avoid extra moisture, which can spoil your dish. When you want to enjoy leftovers, reheat them gently. Use a microwave-safe bowl. Warm it up in short bursts of 30 seconds. Stir in between to heat evenly. If it seems dry, add a splash of almond milk. This keeps the bowl creamy and tasty. You can freeze this breakfast bowl for longer storage. First, let it cool completely. Then, place it in a freezer-safe container. It can last up to two months in the freezer. To thaw, move it to the fridge overnight. Reheat as usual, adding some almond milk if needed. This way, you can have a quick, healthy breakfast anytime! Yes, you can prepare this bowl ahead of time. To save time, cook the quinoa the night before. Store it in the fridge in an airtight container. You can also mix the dry ingredients, like chia seeds and nuts, in advance. When you’re ready to eat, just warm the almond milk and mix everything together. This way, you enjoy a quick, tasty breakfast. Yes, quinoa is naturally gluten-free. It comes from a seed, not a grain, making it safe for those with gluten allergies. Quinoa is a great choice for people who need gluten-free meals. It also packs protein and fiber, which are good for your health. This makes it a smart option for breakfast or any meal. Absolutely! You can use pre-cooked quinoa. Many stores sell it in bags or containers. This saves you time and effort. Just warm it up before you mix it with the other ingredients. Using pre-cooked quinoa can make your breakfast bowl even quicker to prepare, letting you enjoy a healthy meal with ease. This blog post covered a tasty breakfast bowl made with quinoa and berries. You learned how to prepare and combine the ingredients, as well as helpful tips for the best texture and presentation. We explored variations, storage options, and answered common questions. By making this bowl, you get a healthy start to your day. Enjoy experimenting with different flavors and ingredients. Your breakfast can be both fun and nutritious, so give it a try!

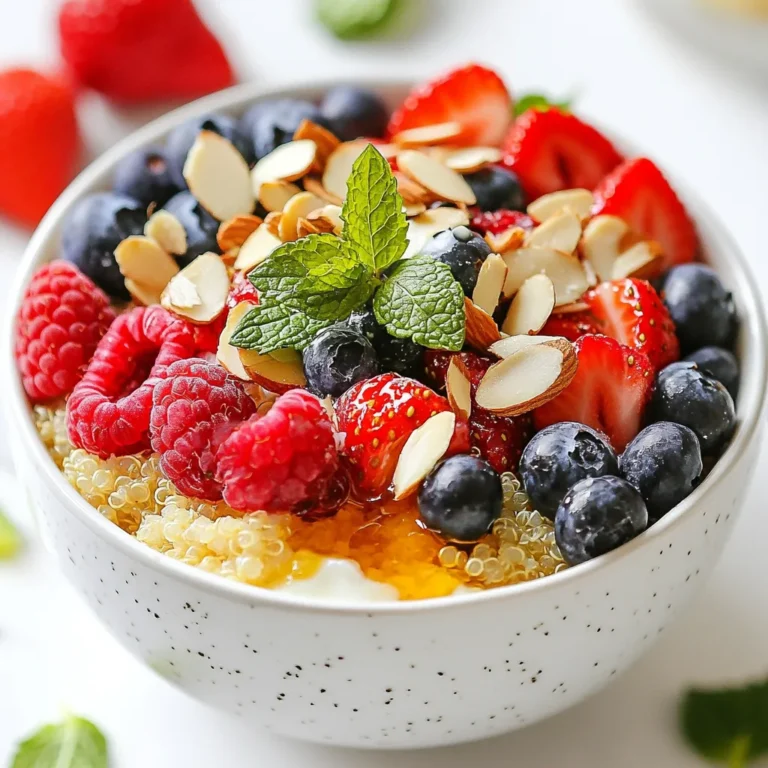
Quinoa Berry Breakfast Bowl Energizing Morning Meal

PREV 1 … 47 48 49 … 57 NEXT
flavor nest kitchen

explore

DessertsDinnerAppetizersDrinks

Our Policies

  • Cookie Policy
  • Copyright Policy
  • Disclaimer
  • GDPR Policy
  • Terms Of Use
Back to Top
  • About
  • Contact Us
  • Privacy Policy
© 2025 flavor nest kitchen