FREE DINNER EBOOK! Get your copy!
  • Cookie Policy
  • GDPR Policy
  • Disclaimer
  • Terms Of Use
  • Visit my other site: Fun Cookie Recipes
flavor nest kitchen
  • Home
  • Dinner
  • Desserts
  • Drinks
  • Appetizers
  • Contact
  • About
  • Privacy Policy
  • Home
  • Dinner
  • Desserts
  • Drinks
  • Appetizers
  • Contact
  • About
  • Privacy Policy
  • Cookie Policy
  • GDPR Policy
  • Disclaimer
  • Terms Of Use
Visit my other site: Fun Cookie Recipes

HOME / CATEGORIES /

Latest

For these popsicles, use 2 cups of fresh strawberries. Make sure to hull and slice them first. Fresh berries give the best flavor and bright color. You can blend them until smooth or leave some chunks for texture. Next, you need 1 cup of coconut milk. I recommend using full-fat coconut milk for a creamy taste. This will make your popsicles rich and smooth. If you want a lighter version, you can use low-fat coconut milk. You will need 2 tablespoons of honey or maple syrup. This adds a nice sweetness. Feel free to adjust based on your taste. You can also add 1 teaspoon of vanilla extract for extra flavor. Lastly, add a pinch of sea salt to balance all the flavors. For some fun texture, include 1/2 cup of shredded coconut. You can choose sweetened or unsweetened, depending on your preference. {{ingredient_image_1}} Start by taking your fresh strawberries. Make sure they are hulled and sliced. Place them in your blender. Blend until smooth. If you like some bits of fruit, pulse the strawberries instead. This will give a nice texture to your popsicles. Next, grab a mixing bowl. Combine your blended strawberries with coconut milk. Add two tablespoons of honey or maple syrup. You can change this based on how sweet you want it. Don’t forget one teaspoon of vanilla extract. Toss in half a cup of shredded coconut and a pinch of sea salt. Mix everything well. Taste it! If it needs more sweetness, add more honey or maple syrup. Now, it’s time to pour the mixture into popsicle molds. Fill them about three-quarters full. This allows space for the pops to expand as they freeze. Carefully insert the popsicle sticks. Place the molds in the freezer for at least six hours. You want them completely solid. To remove the popsicles, run warm water over the molds. Do this for a few seconds. Then gently pull the popsicles out. Enjoy your tasty treat! To get that creamy texture, use full-fat coconut milk. This makes the popsicles rich and smooth. If you want some strawberry chunks, blend the strawberries but don’t overdo it. Pulse them just a few times for a nice mix of smooth and chunky. Taste your mixture before you freeze it. Start with two tablespoons of honey or maple syrup. If you like it sweeter, add more. Each sweetener can taste different, so adjust based on your preference. You can even add a pinch of sugar if needed. When it’s time to enjoy your popsicles, run warm water over the outside of the molds. This helps loosen them. Then, gently pull the popsicles out. If they stick, try twisting the mold a bit. This should help them slide right out. Enjoy your treat! Pro Tips Choose Ripe Strawberries: Select strawberries that are bright red and slightly firm for the best flavor. Overripe or mushy strawberries may result in a less desirable texture and taste. Adjust Sweetness to Taste: Depending on the natural sweetness of your strawberries, you might want to adjust the amount of honey or maple syrup. Always taste the mixture before pouring it into molds. Experiment with Coconut Milk: For a creamier texture, use full-fat coconut milk. If you prefer a lighter popsicle, you can substitute with light coconut milk or even almond milk for a different flavor profile. Use Warm Water for Easy Release: When removing the popsicles from molds, running warm water over the outside for a few seconds helps them release easily without breaking. {{image_2}} You can change the flavor by using other fruits. Try mango, pineapple, or blueberries. Each fruit brings its own taste. Mixing strawberries with bananas gives a creamy texture. You can blend any fruit you love. Just keep the same amount of fruit. This way, your popsicles stay balanced and tasty. If you want less sugar, use agave or stevia. You can also try coconut sugar for a caramel flavor. Honey works too, but remember to taste as you go. Each sweetener changes the flavor a bit. Adjust the amount based on your sweetness level. Find what makes your taste buds happy. Want to get creative? Add chocolate chips or nuts for crunch. Chopped almonds or hazelnuts add a nice bite. You can even swirl in some melted chocolate for a fun look. Just make sure to mix them in gently. This way, you get a surprise in every bite. Enjoy experimenting to make your popsicles unique! To keep your strawberry coconut popsicles fresh, store them in an airtight container. This helps prevent freezer burn. You can also wrap each popsicle in plastic wrap for extra protection. Make sure to label your container with the date. That way, you’ll know when you made them. For the best taste and texture, enjoy these popsicles within three months. After that, they may lose flavor and texture. If you freeze them longer, they can still be safe to eat, but they won’t taste as fresh. Watch for signs of spoilage. If your popsicles have ice crystals or an off smell, it’s time to toss them. A change in color can also mean they are past their prime. Always trust your senses to decide if they are good to eat. Yes, you can use frozen strawberries. They work well in this recipe. Just blend them straight from the freezer. You may need to adjust the mixing time since they are frozen. This can make your popsicles just as tasty. Frozen strawberries can also make your popsicles extra cold and refreshing. To make these popsicles dairy-free, simply use coconut milk. Coconut milk is a great base. It gives a creamy texture without any dairy. Make sure you buy the full-fat version for the best results. This keeps the popsicles rich and smooth. You can also replace the honey with maple syrup for a vegan option. These popsicles have many health benefits. Fresh strawberries are high in vitamin C and antioxidants. They help boost your immune system and support heart health. Coconut milk provides healthy fats. These fats can help you feel full longer. Shredded coconut adds fiber to your diet. This can aid digestion and keep your tummy happy. Honey or maple syrup adds natural sweetness without added chemicals. This blog covered key points on making tasty strawberry popsicles. We explored fresh strawberries, coconut milk, and sweeteners. The step-by-step guide showed how to blend, mix, and freeze your treats. Tips included perfect texture and adjusting sweetness. We also shared fun variations, storage tips, and answers to common questions. Making popsicles is easy and fun. So, grab your ingredients and start creating! Enjoy your refreshing treats.

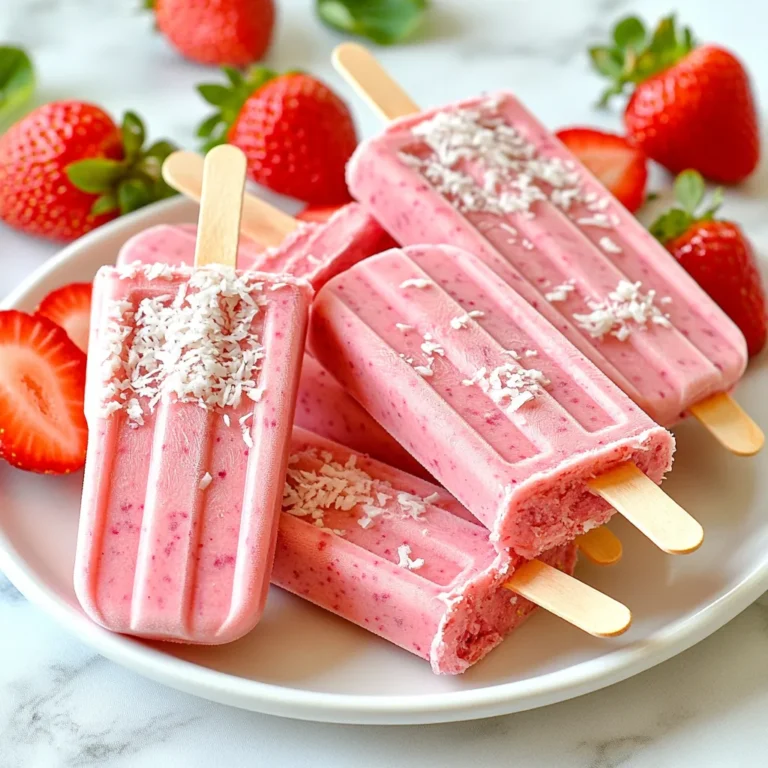
Strawberry Coconut Popsicles Easy and Refreshing Treat

For this tasty dish, you need these main ingredients: - 1 lb (450g) boneless, skinless chicken breasts, cubed - 1 tablespoon olive oil - 1 medium onion, diced - 1 red bell pepper, diced - 1 yellow bell pepper, diced - 2 cloves garlic, minced - 1 can (14 oz) black beans, drained and rinsed - 1 cup corn kernels (fresh or frozen) - 1 cup diced tomatoes (fresh or canned) These ingredients create a hearty base for your skillet. The chicken adds protein, while the beans and corn bring fiber and sweetness. The bell peppers and onion add color and crunch. Flavor is key in Tex Mex cooking. Here are the spices and seasonings you’ll use: - 1 tablespoon taco seasoning - 1 teaspoon cumin - 1 teaspoon smoked paprika - Salt and pepper to taste The taco seasoning is a mix of spices that gives the dish its Tex Mex flair. Cumin adds warmth, and smoked paprika gives a nice smoky taste. Salt and pepper help balance all the flavors. To finish your dish, consider these tasty toppings: - 1 cup shredded cheddar cheese - Fresh cilantro, chopped (for garnish) - Avocado slices (for serving) Cheddar cheese melts beautifully over the chicken and veggies. Fresh cilantro adds a bright note. Avocado slices provide creaminess and make the meal more filling. Enjoy customizing your plate! {{ingredient_image_1}} Start by cubing the chicken breasts. Make sure the pieces are even. This helps them cook well. Heat one tablespoon of olive oil in a large skillet over medium heat. Once the oil is hot, add the chicken. Season it with salt, pepper, taco seasoning, cumin, and smoked paprika. Stir well to coat the chicken in the spices. Cook the chicken for 5-7 minutes. You want it to turn golden brown and be cooked through. Now, add the diced onion and bell peppers to the skillet. Sauté these for 3-4 minutes. You want the veggies to soften. This adds flavor and color to your dish. Next, stir in the minced garlic. Cook it for about one minute. You’ll love the aroma that fills your kitchen. Add the black beans, corn, and diced tomatoes to the skillet. Mix everything well. Bring the mixture to a gentle simmer. Let it cook for another 5 minutes. This allows the flavors to blend together nicely. Once everything is heated through, sprinkle the shredded cheddar cheese over the top. Cover the skillet and let it cook for 2-3 minutes. You want the cheese to melt and bubble. Finally, remove the skillet from heat and garnish with chopped cilantro. Serve hot with avocado slices on the side. Enjoy your delicious Tex Mex Chicken Skillet! To cook chicken perfectly, start with even-sized pieces. Cut the chicken breasts into small cubes. This helps them cook evenly. Use medium heat to avoid burning. Cook the chicken until it is no longer pink inside. This takes about 5-7 minutes. Use a meat thermometer for best results; it should read 165°F (75°C). Let the chicken rest for a few minutes before serving. This keeps it juicy and tender. Add fresh lime juice right before serving. This gives a bright, zesty kick. You can also mix in some fresh herbs like cilantro. If you want more heat, add diced jalapeños to the skillet. A splash of hot sauce can also add depth. Consider marinating the chicken in taco seasoning overnight. This allows the spices to soak in. You can even use smoked salt for an extra flavor boost. For gluten-free needs, ensure your taco seasoning is certified gluten-free. You can skip the cheese or use a dairy-free cheese alternative. If you want more plant-based options, swap chicken for tofu or jackfruit. These options work well with the spices and flavors. Always check labels on canned goods to ensure they fit your diet. Don't hesitate to get creative and adjust the recipe to fit your needs! Pro Tips Use Fresh Ingredients: Whenever possible, opt for fresh vegetables and herbs to enhance the flavor of your dish. Customize the Spice Level: Adjust the amount of taco seasoning and spices according to your heat preference for a personalized kick. Cheese Variations: Experiment with different types of cheese such as pepper jack or Monterey jack for a unique twist on flavor. Meal Prep Friendly: This skillet meal can be made ahead of time and stored in the fridge for quick reheating during busy weeknights. {{image_2}} You can swap chicken for turkey, beef, or shrimp. Ground turkey works well in this dish. It cooks quickly and stays juicy. For beef, choose lean ground beef or strips. Cook it until browned. Shrimp is another great option. Add shrimp in the last few minutes of cooking. This allows them to stay tender and not overcook. For a vegetarian twist, skip the chicken. Use extra beans or lentils instead. You can also add more veggies. Try zucchini, mushrooms, or spinach. These add flavor and texture. Use vegetable broth to enhance the taste. You can still enjoy the same spices and cheese for a hearty meal. You can easily change ingredients for a new flavor. Use quinoa or rice instead of beans for a different base. Swap corn for diced zucchini or carrots for sweetness. Change the cheese to pepper jack for some spice. You can also use fresh herbs like parsley or oregano instead of cilantro. Each swap can give your Tex Mex Chicken Skillet a unique flair. After enjoying your Tex Mex Chicken Skillet, let it cool down. Once cooled, transfer the leftovers to an airtight container. It's best to use a glass or BPA-free plastic container. Make sure to seal it tightly. Store it in the fridge for up to three days. This way, you keep the taste fresh. When you're ready to eat your leftovers, you can reheat them easily. Use a skillet over medium heat. Add a splash of water or broth to keep it moist. Stir occasionally until hot. You can also use the microwave. Place your portion in a microwave-safe dish. Heat it for about 2-3 minutes, stirring halfway through. This keeps it warm and tasty. You can freeze Tex Mex Chicken Skillet for later meals. Place cooled portions in freezer-safe bags or containers. Remove as much air as possible to avoid freezer burn. Label the bags with the date. You can freeze it for up to three months. To defrost, move it to the fridge overnight. Reheat it as mentioned above for a quick and delicious meal. I love serving Tex Mex Chicken Skillet hot. It pairs well with avocado slices. You can also add fresh cilantro on top for a burst of flavor. If you want a complete meal, serve it over rice or with warm tortillas. This dish is colorful and fun, making it great for gatherings. Yes, you can make this dish in advance! Cook the skillet and let it cool. Store it in an airtight container in the fridge. It stays fresh for up to three days. When you are ready to eat, just reheat it on the stove or in the microwave. This can save you time on busy nights. To spice up your Tex Mex Chicken Skillet, add one or two sliced jalapeños during cooking. You can also use spicy taco seasoning for more heat. Another option is to mix in some hot sauce before serving. Adjust the spice level to suit your taste, and enjoy the kick! The Tex Mex Chicken Skillet is easy and tasty. We covered the main ingredients, spices, and toppings that add flavor. I shared step-by-step cooking tips to help you prepare this meal. You can adjust it for many diets or swap proteins for variety. Storing leftovers is simple, and you’ll find reheating tips too. With these ideas, you can create a delicious dish every time. Enjoy your cooking journey!

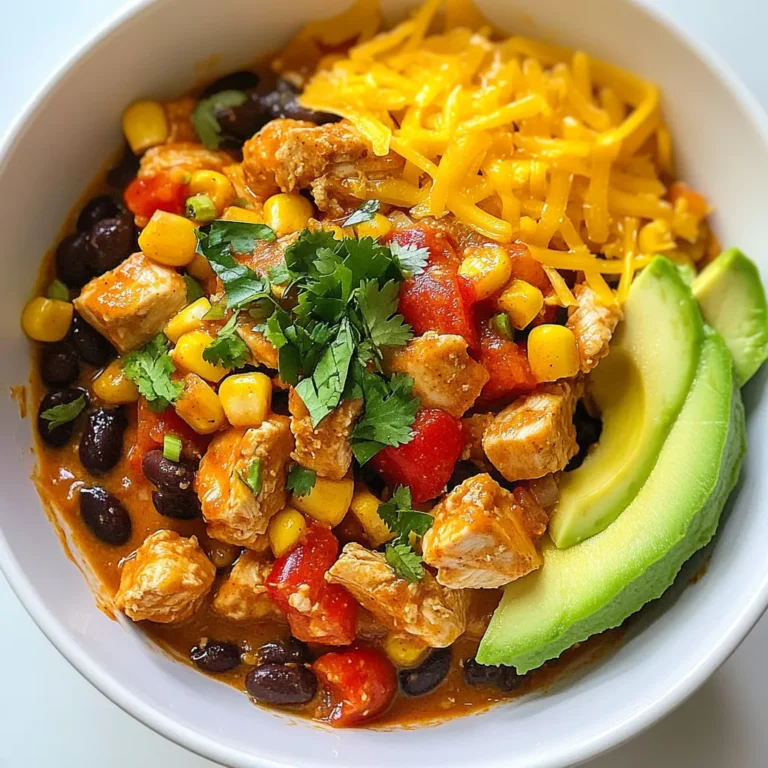
Tex Mex Chicken Skillet Flavorful and Easy Recipe

To make this tasty meatloaf, gather these main ingredients: - 1 lb ground beef - 1/2 lb ground turkey - 1 cup breadcrumbs - 1/2 cup onion, finely chopped - 2 cloves garlic, minced - 1/4 cup milk - 1/4 cup ketchup - 2 tablespoons Worcestershire sauce - 1 large egg - 1 tablespoon fresh parsley, chopped - Salt and pepper to taste These ingredients create a hearty and flavorful base. The mix of beef and turkey gives a nice balance of taste and texture. Now, let’s talk about the glaze. It adds a sweet and savory kick. For the honey garlic glaze, you will need: - 1/3 cup honey - 2 tablespoons soy sauce - 1 clove garlic, minced - 1 teaspoon fresh ginger, grated This glaze makes the meatloaf shine with sweet flavor. The honey and soy sauce blend perfectly with garlic and ginger. You can customize your meatloaf for extra flavor or health. Here are some optional ingredients you might consider: - Chopped bell peppers for crunch - Grated carrots for sweetness - Oats instead of breadcrumbs for a healthier option - Different herbs like thyme or oregano These additions can make your meatloaf unique and cater to your taste buds. Feel free to experiment! {{ingredient_image_1}} Start by preheating your oven to 350°F (175°C). Grease a loaf pan to keep the meatloaf from sticking. In a large bowl, mix 1 pound of ground beef and 1/2 pound of ground turkey together. Add 1 cup of breadcrumbs, 1/2 cup of finely chopped onion, and 2 cloves of minced garlic. Pour in 1/4 cup of milk and 1/4 cup of ketchup. Then, add 2 tablespoons of Worcestershire sauce, 1 large egg, and 1 tablespoon of chopped parsley. Season with salt and pepper to taste. Mix until combined but don't overmix. Shape the mixture into a loaf and place it in the prepared pan. In a small bowl, combine 1/3 cup of honey, 2 tablespoons of soy sauce, 1 clove of minced garlic, and 1 teaspoon of grated fresh ginger. This glaze adds a sweet and savory touch. Stir until well mixed. Brush half of the glaze over the meatloaf before baking. This will add flavor and moisture during cooking. Bake the meatloaf in the preheated oven for 45 minutes. After 45 minutes, take it out and brush the remaining glaze on top. Return it to the oven for another 15 minutes. The meatloaf is ready when the internal temperature reaches 165°F (74°C). Once done, let it rest for 10 minutes before slicing. This step helps the juices settle, keeping the meatloaf moist. Serve it sliced, garnished with fresh parsley for a beautiful presentation. Enjoy with mashed potatoes and veggies for a full meal! To keep your meatloaf moist, use a mix of meats. I like to combine ground beef and ground turkey. This blend adds flavor and moisture. Adding milk and breadcrumbs helps too. The milk keeps the meat soft, while breadcrumbs soak up juices. Don’t overmix your ingredients. Mixing too much can make your meatloaf tough. Gently combine everything until just mixed. Glazing adds flavor and a nice shine. Brush half of the honey garlic glaze on before baking. This step lets the glaze soak in. After 45 minutes, add the rest of the glaze. This makes the top sticky and sweet. Make sure you cover the whole loaf evenly. Use a brush for a smooth, even layer. One big mistake is not checking the meatloaf's temperature. Use a meat thermometer to check the inside. It should be 165°F (74°C). Another mistake is skipping the resting time. Let your meatloaf rest for 10 minutes. This helps the juices settle. Finally, don’t forget to season. A little salt and pepper go a long way in flavor. Pro Tips Use Lean Meat: Combining ground beef with ground turkey helps reduce the fat content while still maintaining a juicy texture. Don’t Overmix: Mix the meatloaf ingredients just until combined to keep it tender. Overmixing can lead to a dense texture. Let it Rest: Allow the meatloaf to rest for 10 minutes after baking. This helps the juices redistribute, making it easier to slice. Glaze Variations: Feel free to experiment with the glaze by adding sriracha for heat or orange juice for a citrusy twist. {{image_2}} You can mix things up with different meats for your meatloaf. Try using ground pork for a richer flavor. Ground chicken or turkey is a leaner choice that keeps it light. If you want a bold twist, go for lamb. Each meat brings its own taste and texture to your dish. If you want to make the meatloaf healthier, consider these swaps. Use whole wheat breadcrumbs instead of regular ones. This adds fiber and nutrients. You can replace ground beef with ground turkey or chicken for lower fat. Almond milk works great instead of regular milk. You can also cut down on ketchup, using tomato paste for less sugar. Boost the flavor of your meatloaf with some fun additions. Add chopped bell peppers for a sweet crunch. Herbs like thyme or oregano add depth. If you like spice, mix in some diced jalapeños. You can even include grated cheese for a gooey center. These little tweaks make a big difference in taste! To store your leftover meatloaf, first let it cool. Once it is cool, wrap the meatloaf tightly in plastic wrap or aluminum foil. You can also use an airtight container. This keeps it fresh for up to three days in the fridge. If you want to enjoy it later, freezing is a great option. When you are ready to eat the leftover meatloaf, preheat your oven to 350°F (175°C). Place the meatloaf in an oven-safe dish and cover it with foil. Heat for about 20-25 minutes. If you prefer, you can microwave individual slices. Just place them on a microwave-safe plate and heat for 1-2 minutes. Make sure it is heated all the way through. For long-term storage, you can freeze meatloaf. Slice it first for easy cooking later. Wrap each slice in plastic wrap, then place them in a freezer bag. Make sure to remove as much air as possible. Label the bag with the date. Frozen meatloaf lasts up to three months. When you are ready to eat, thaw it in the fridge overnight before reheating. The secret lies in the mix of meats and spices. I use both ground beef and ground turkey. This blend brings richness and moisture. Adding onions and garlic enhances the taste. The breadcrumbs keep it from being too dense. Worcestershire sauce adds depth, while salt and pepper bring balance. Yes, you can prep meatloaf ahead of time. Simply mix your ingredients and shape the loaf. Wrap it tightly in plastic wrap. Store it in the fridge for up to 24 hours. You can also freeze it. Just make sure to thaw it in the fridge before baking. To check if your meatloaf is done, use a meat thermometer. It should read 165°F (74°C) in the center. If you don’t have a thermometer, cut into the meatloaf. The juices should run clear, not pink. Let it rest for 10 minutes before slicing. This helps keep it juicy. This article covered how to make a tasty honey garlic glazed meatloaf. We discussed the main ingredients and how to customize them. You learned step-by-step instructions, tips for moist meatloaf, and how to avoid common mistakes. We also explored variations and storage tips to keep leftovers fresh. In the end, with a little effort and the right ingredients, you can create a meal the whole family will enjoy. Happy cooking!

Honey Garlic Glazed Meatloaf Flavorful Dinner Dish

- 1 cup ricotta cheese - 2 large eggs - 1/4 cup granulated sugar - Zest of 1 lemon - 1/4 cup fresh lemon juice - 1 teaspoon vanilla extract These ingredients make the base of the pancakes. Ricotta cheese adds moisture and creaminess. The eggs bind everything and add fluffiness. Sugar gives a touch of sweetness. Lemon zest and juice bring in that bright, fresh flavor. The vanilla extract adds a nice depth to the taste. - 1 cup all-purpose flour - 2 teaspoons baking powder - 1/4 teaspoon salt - 1/2 teaspoon baking soda - 1/2 cup milk (or a non-dairy alternative) - Butter or oil for cooking Flour gives structure to the pancakes. Baking powder and baking soda help them rise, making them fluffy. Salt enhances all the flavors. Milk adds moisture, and you can use non-dairy options too. Butter or oil helps cook the pancakes to a golden brown. - Maple syrup and fresh berries - Optional garnishes like powdered sugar and extra lemon zest I love serving these pancakes with warm maple syrup and fresh berries. They add sweetness and a pop of color. You can also sprinkle some powdered sugar on top. A bit of extra lemon zest makes them look and taste even better. {{ingredient_image_1}} Start with a large bowl. Add 1 cup of ricotta cheese, 2 large eggs, and 1/4 cup of granulated sugar. Whisk these together until smooth. The texture should be creamy. Next, add the zest of 1 lemon and 1/4 cup of fresh lemon juice. This mix brings a bright flavor. Whisk again until everything is well combined. In a separate bowl, mix 1 cup of all-purpose flour, 2 teaspoons of baking powder, 1/4 teaspoon of salt, and 1/2 teaspoon of baking soda. Stir these dry ingredients well. This helps the pancakes rise and stay fluffy. Now, we will combine the mixtures. Gradually add the dry mix to the ricotta mixture. Alternate this with 1/2 cup of milk, adding a little at a time. Gently fold the batter together. Be careful not to overmix. A few lumps are okay. This keeps your pancakes light and airy. Preheat a non-stick skillet over medium heat. Lightly grease it with butter or oil. Pour about 1/4 cup of batter for each pancake. Cook until bubbles form on the surface, which should take about 3-4 minutes. Flip the pancakes carefully and cook for an additional 2-3 minutes, until golden brown. Repeat this with the remaining batter. Serve warm, topped with maple syrup and fresh berries. To make great lemon ricotta pancakes, avoid overmixing the batter. Overmixing can lead to tough pancakes. Mix just until you combine the ingredients. If your batter seems too thick, add a splash of milk. This helps keep the pancakes fluffy and light. Adding vanilla extract gives depth to your pancakes. Just one teaspoon can elevate the taste. You can also experiment with different types of zest. Try orange or lime for a fun twist. Each zest brings a new flavor dimension to the dish. For the best results, use a non-stick skillet. It helps prevent sticking and makes flipping easier. Heat your skillet over medium heat. This ensures even cooking. If you use a traditional pan, add more butter or oil to avoid sticking. Cook the pancakes until bubbles form, then flip them for a golden finish. Pro Tips Use Fresh Ingredients: Always opt for fresh lemons and high-quality ricotta for the best flavor in your pancakes. Don’t Overmix the Batter: Gently fold the ingredients together to keep the pancakes light and fluffy. Adjust the Cooking Temperature: If pancakes are browning too quickly, lower the heat to ensure they cook through without burning. Experiment with Add-ins: Consider adding blueberries or poppy seeds to the batter for a delightful twist on classic lemon ricotta pancakes. {{image_2}} You can easily swap ingredients in this recipe. For a non-dairy version, use almond or soy ricotta. For milk, try oat or coconut milk. Both options keep the pancakes creamy and delicious. If you need gluten-free pancakes, use almond flour or a gluten-free flour blend. The taste and texture will still shine through. Get creative with your pancakes! Add fresh berries like blueberries or strawberries right into the batter. They bring a burst of flavor. You can also mix in chocolate chips for a sweet treat. If you want something different, try adding herbs like basil or mint. These herbs give a fresh twist to the classic lemon taste. How you serve these pancakes can change the whole vibe. Stack them high for a fun breakfast tower. You can also serve them as individual pancakes for a lighter feel. For a savory touch, try toppings like avocado or smoked salmon. This gives an exciting contrast to the sweet lemon flavor. Enjoy experimenting with these variations! To keep leftover pancakes fresh, store them in the fridge. Use an airtight container. Place parchment paper between layers to avoid sticking. They can last up to three days in the fridge. If you want to save them for longer, freezing works great. Wrap each pancake in plastic wrap, then place them in a freezer bag. This way, they stay tasty for up to two months. When it's time to enjoy your pancakes again, reheating is easy. You can use a skillet or the microwave. For a skillet, heat it on low, add a bit of butter, and place the pancake in. Cook until warm, about one to two minutes on each side. In the microwave, use a microwave-safe plate. Heat for about 20-30 seconds. To keep them fluffy, cover with a damp paper towel. Pancakes can stay fresh in the fridge for three days. If you notice any off-smell or a change in texture, it's best to toss them. Mold is another clear sign they’re no longer good. Always check your leftovers to ensure they are safe to eat. Keeping an eye on these signs helps you enjoy your pancakes longer! Lemon ricotta pancakes are soft, fluffy pancakes made with ricotta cheese and fresh lemon juice. The ricotta adds creaminess and a rich flavor. The lemon zest brightens the taste and gives it a fresh kick. These pancakes are perfect for breakfast or brunch. They are light, airy, and feel special, making them a great choice for family or friends. The balance of sweet and tangy makes each bite delightful. You can easily make these pancakes dairy-free. Substitute the ricotta cheese with a dairy-free ricotta or silken tofu. Use almond milk, oat milk, or coconut milk instead of regular milk. Look for dairy-free yogurt, too, which can add creaminess. These swaps keep the flavor and texture close to the original recipe while catering to dietary needs. Yes, you can prep the batter ahead of time. Mix the wet ingredients and dry ingredients separately first. Store them in the fridge for up to 24 hours. When ready to cook, combine them gently. This method saves time on busy mornings. Just remember, don’t overmix to keep the pancakes fluffy. These pancakes pair well with many sides. Maple syrup adds sweetness and complements the lemon. Fresh berries like strawberries or blueberries add color and flavor. You could also serve them with yogurt for a creamy touch. A sprinkle of powdered sugar or extra lemon zest on top makes them look fancy. Enjoy a side of crispy bacon or sausage for a hearty meal. Lemon ricotta pancakes are a tasty treat you'll love. We've covered the key ingredients, how to mix the batter, and ways to serve them. Remember to not overmix for perfect pancakes every time. Feel free to try different flavors or toppings to make them your own. Whether you refrigerate or freeze leftovers, you'll enjoy these pancakes for days. Now, grab your ingredients and get cooking! Your breakfast will be delicious and fun!

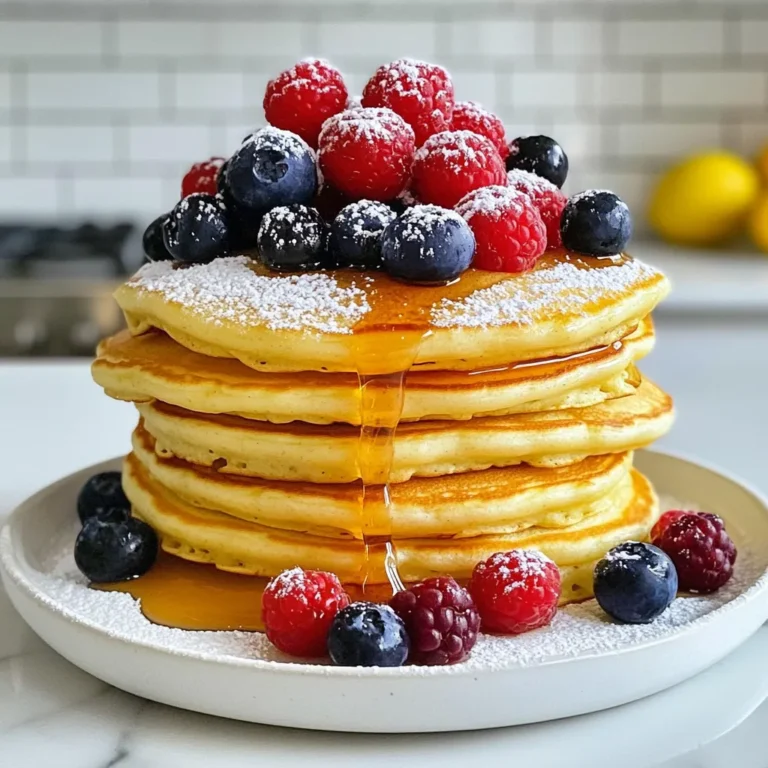
Lemon Ricotta Pancakes Fluffy and Flavorful Start

To make Lemon Garlic Butter Cod, gather these simple ingredients: - 4 cod fillets (about 6 oz each) - 1/4 cup unsalted butter - 3 cloves garlic, minced - Juice of 1 large lemon - Zest of 1 lemon - 1 teaspoon fresh thyme leaves (or 1/2 teaspoon dried thyme) - 1 teaspoon fresh parsley, chopped (for garnish) - Salt and black pepper to taste - Lemon wedges (for serving) These ingredients create a bright and tasty dish that is easy to prepare. You will need a few basic tools for this recipe: - A baking dish - A small saucepan - A cutting board - A sharp knife - A measuring cup and spoons - A spatula or spoon for serving Having these tools on hand makes cooking smooth and fun! If you don’t have all the ingredients, here are some swaps: - Use olive oil instead of butter for a lighter dish. - Swap fresh thyme for dried herbs like oregano or rosemary. - If you don't have parsley, try fresh cilantro or chives for a different flavor. - Substitute cod with another firm fish like haddock or tilapia. These easy swaps can help you make the dish your own! {{ingredient_image_1}} Start by preheating your oven to 400°F (200°C). This makes sure the cod cooks evenly. Next, take four cod fillets and pat them dry with a paper towel. This step helps the seasoning stick better. Season both sides of the fillets with salt and black pepper. You want to add flavor right from the start. In a small saucepan, melt 1/4 cup of unsalted butter over medium heat. Once the butter melts, add three minced garlic cloves. Sauté the garlic for just 1-2 minutes until it smells great. Be careful not to burn it. After that, remove the pan from heat. Stir in the juice and zest of one large lemon, plus one teaspoon of fresh thyme leaves. This mix brings a bright flavor to the cod. Now, grab a baking dish and place the seasoned cod fillets inside. Pour the lemon garlic butter sauce evenly over each fillet. Make sure each piece gets enough sauce. Bake the cod in your preheated oven for 12-15 minutes. You’ll know it’s done when the fish flakes easily with a fork. Once baked, take it out and sprinkle some chopped parsley on top. This adds a nice pop of color. Serve the cod right away with lemon wedges for extra zest. To get the best texture for your cod, start with fresh fillets. Look for cod that is firm and shiny. When you season the fish, use salt and pepper evenly on both sides. Drying the fillets with a paper towel helps them bake nicely. Bake at 400°F for 12-15 minutes. The fish is done when it flakes easily with a fork. This method keeps the cod moist and tender, just how we want it. Adding fresh herbs boosts the taste of your cod. I like using thyme and parsley. Thyme gives a nice earthy note, while parsley adds a fresh touch. You can also add a pinch of red pepper flakes for heat. For a twist, try adding capers or sun-dried tomatoes. These ingredients pair well with the lemon garlic butter. They add new layers of flavor, making the dish even more exciting. When it comes to serving, presentation is key. Use a clean, white plate to make the colors pop. Place the cod in the center and drizzle some of the lemon garlic butter on top. Garnish with fresh parsley for a splash of color. Serve with lemon wedges on the side for extra zing. You can also add steamed veggies or fluffy rice to round out the meal. This not only looks great but also makes for a balanced dish. Pro Tips Use Fresh Ingredients: Fresh cod and herbs will enhance the flavor of the dish significantly. Whenever possible, choose fresh over frozen for the best results. Avoid Overcooking: Cod can dry out quickly if overcooked. Keep an eye on it and remove it from the oven as soon as it flakes easily with a fork. Customize Your Herbs: Feel free to experiment with different herbs such as dill or basil. They can bring a new twist to the traditional lemon garlic butter flavor. Serve with Sides: Pair the cod with a light salad or steamed vegetables to create a balanced meal. Rice or quinoa also works well to soak up the delicious sauce. {{image_2}} You can change the taste of your cod by adding new flavors. Capers add a briny kick. Just sprinkle some on top before baking. Sun-dried tomatoes give a sweet and tangy touch. Chop them up and mix them with the garlic butter. This simple change makes the dish exciting and new. While baking is great, you can grill or pan-sear the cod too. For grilling, brush the cod with the lemon garlic butter and place it on a hot grill. Cook for about 4-5 minutes on each side. If you choose pan-searing, heat a skillet and add some butter. Cook each fillet for 3-4 minutes on both sides. Both methods give a nice crust and keep the fish moist. You can serve Lemon Garlic Butter Cod with many sides. Steamed veggies like broccoli or green beans work well. They add color and a healthy touch. You can also pair it with rice or a light salad. A fresh lemon wedge on the side adds a zesty burst. This makes your meal look and taste great! To store leftover lemon garlic butter cod, place it in an airtight container. Make sure to let it cool down first. You can keep it in the fridge for up to three days. If you want to store it longer, freezing is a great option. When you are ready to eat the leftovers, preheat your oven to 350°F (175°C). Place the cod in a baking dish and cover it with foil. Bake it for about 10 minutes until it is warmed through. You can also reheat it in the microwave for 1-2 minutes, but it may not keep the same texture. If you want to freeze the cod, wrap each fillet in plastic wrap tightly. Then, place them in a freezer bag or container. Be sure to remove as much air as possible. You can freeze it for up to three months. When you're ready to eat, thaw it in the fridge overnight before reheating. I love to pair Lemon Garlic Butter Cod with fresh sides. Here are some great options: - Steamed broccoli - Garlic mashed potatoes - Roasted asparagus - Light salad with lemon vinaigrette These sides add flavor and balance to the dish. They also make your meal colorful and fun. You can mix and match to find your favorite combo! Cod is done when it flakes easily with a fork. It should look opaque and white. Use a fork to check the thickest part of the fish. If it breaks apart, it's ready to eat. Cooking time is usually 12-15 minutes at 400°F (200°C). Just keep an eye on it! Yes, you can use frozen cod! Just make sure to thaw it first. Place it in the fridge overnight or run it under cold water. Once thawed, pat the cod dry and season it as you would with fresh. The cooking time may be a bit longer, so check for flakiness! This blog post covered making Lemon Garlic Butter Cod. We looked at the key ingredients and tools you'll need. You learned how to prep the cod, make the sauce, and bake it perfectly. We shared tips to enhance flavor and achieve the right texture. Consider trying variations like adding capers or using different cooking methods. Storing leftovers is easy too! Fresh cod can shine in many meals. With these steps, you'll create a tasty dish that impresses. Happy cooking!

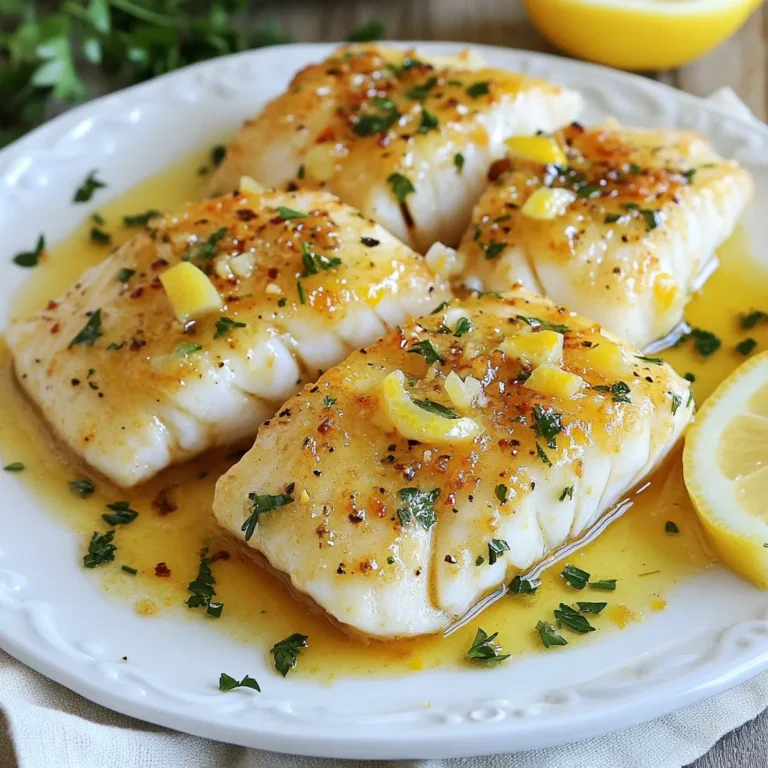
Lemon Garlic Butter Cod Flavorful and Easy Dish

- 8 oz. rice noodles - 2 tablespoons sesame oil - 1 red bell pepper, thinly sliced - 1 cup broccoli florets - 1 carrot, julienned - 3 cloves garlic, minced - 1 tablespoon ginger, grated - 3 tablespoons soy sauce - 2 tablespoons Sriracha (adjust to taste) - 1 tablespoon honey or maple syrup - 2 green onions, chopped - Sesame seeds, for garnish The rice noodles are the base of the dish. They soak up the sauce well. Sesame oil gives a nice, nutty flavor. It adds depth to the dish. Red bell pepper adds sweetness and bright color. Broccoli florets bring crunch and nutrients. Carrots add a sweet taste and chewy texture. Garlic and ginger give warmth and spice. Soy sauce adds saltiness and umami. Sriracha is key for heat and flavor. Honey or maple syrup balance the spice. Green onions add freshness on top. Sesame seeds are a lovely garnish that adds a crunch. You can swap rice noodles for whole wheat noodles if preferred. Use olive oil instead of sesame oil for a different flavor. If you do not have red bell pepper, try yellow or orange peppers. Zucchini or snap peas can replace broccoli. If you don't have fresh ginger, use ground ginger, but use less. For a gluten-free option, use tamari instead of soy sauce. If you like it sweeter, try agave nectar in place of honey or maple syrup. {{ingredient_image_1}} First, you need to cook the rice noodles. Follow the package instructions carefully. Usually, this takes about 4 to 6 minutes. Check for the "al dente" texture. When done, drain the noodles in a colander. Rinse them with cold water to stop the cooking process. Set them aside for later. This step keeps the noodles from being too soft. Next, let’s prepare the vegetables. Start by slicing the red bell pepper into thin strips. Then, cut the broccoli into small florets. For the carrot, julienne it into long, thin pieces. You want everything to cook evenly. Mince the garlic and grate the ginger. These add great flavor to your dish. Keep everything ready to go. This makes cooking faster and easier. Now, let’s make the spicy Sriracha sauce. In a small bowl, mix together soy sauce, Sriracha, and honey or maple syrup. Adjust the Sriracha to your taste if you like it spicier. Stir everything well until combined. This sauce will bring all the flavors together. Once mixed, your sauce is ready for the next step! To cook rice noodles just right, follow these steps: - Boil water in a large pot. - Add the noodles and stir gently. - Cook until they are al dente, about 4-6 minutes. - Drain and rinse the noodles with cold water. - This stops the cooking and keeps them firm. These noodles can get sticky fast, so keep them moving. You can toss them with a bit of sesame oil after rinsing. Sriracha packs a punch. To adjust the heat: - Start with 1 tablespoon of Sriracha in your sauce. - Taste and then add more if you want it hotter. - You can also balance the heat with honey or maple syrup. These sweeteners help tone down the spice while adding flavor. If you want less heat, skip the Sriracha or use a milder sauce. Presentation matters! Here are some fun ideas: - Serve your noodles in deep bowls for a cozy feel. - Sprinkle extra sesame seeds on top for crunch. - Drizzle more Sriracha for a vibrant look. - Add lime wedges on the side for a zesty kick. This not only looks great but also adds to the taste. Your guests will love the visual appeal! Pro Tips Adjust the Spice Level: If you prefer a milder dish, start with 1 tablespoon of Sriracha and gradually add more to your taste. Use Fresh Vegetables: Fresh vegetables not only enhance flavor but also add a vibrant color to your dish, making it more visually appealing. Garnish Creatively: Experiment with garnishes like chopped cilantro, crushed peanuts, or a squeeze of fresh lime for additional flavor and texture. Make it a Meal: Add protein like shrimp, chicken, or tofu to turn this dish into a complete meal that’s both satisfying and nutritious. {{image_2}} You can easily make Spicy Sriracha Noodles vegetarian or vegan. Start with rice noodles, which are plant-based. For a vegan sauce, simply use maple syrup instead of honey. You can also add more vegetables, like snap peas or mushrooms. They bring great texture and flavor. This way, you keep it healthy and colorful. If you want extra protein, chicken, tofu, or shrimp work well. For chicken, cut it into bite-sized pieces. Cook it in sesame oil before adding garlic and ginger. For tofu, use firm tofu, cut into cubes. Sauté it until golden before adding veggies. Shrimp cooks fast; just add it after the garlic and ginger. Cook it until it turns pink. Each option adds a different flavor and makes the dish more filling. You can change the flavor to fit your taste. If you like sweet, add more honey or maple syrup. For a tangy twist, squeeze fresh lime juice over the noodles before serving. You could also mix in a bit of peanut butter for a creamy texture. Try adding crushed peanuts for crunch. This keeps the dish fun and exciting every time you make it. To keep your Spicy Sriracha Noodles fresh, place them in an airtight container. Make sure to cool the noodles to room temperature first. Store them in the fridge for up to three days. This way, they stay tasty and ready for your next meal. When reheating, you want to keep the noodles soft. Use a microwave-safe dish. Add a splash of water to prevent drying. Cover it with a lid or a damp paper towel. Heat for one to two minutes. Stir halfway to warm evenly. You can also reheat in a skillet. Just add a bit of oil and toss until hot. If you want to save your noodles for later, freezing works well. First, let them cool completely. Then, place the noodles in a freezer-safe bag. Remove any air before sealing. They can last up to three months in the freezer. When ready to eat, thaw in the fridge overnight. Reheat using the tips above for best results. You can serve Spicy Sriracha Noodles with many tasty sides. Try spring rolls for a crunchy bite. A side salad adds freshness and color. Grilled chicken or shrimp makes it a hearty meal. You can also pair it with steamed dumplings. These sides create a fun and complete dining experience. To reduce the spice in your noodles, lower the Sriracha. Start with one teaspoon instead of two tablespoons. You can also add more honey or maple syrup. This will balance the heat with sweetness. Adding creamy ingredients, like peanut butter or coconut milk, can help cool it down. Serve it with a side of yogurt for extra relief. Yes, you can prepare Spicy Sriracha Noodles ahead of time. Cook the noodles and veggies, then store them in the fridge. Keep the sauce separate to avoid mushy noodles. When ready to serve, combine everything in a pan and heat. This dish tastes great even after a day in the fridge, making it a perfect meal prep option. This blog post covered everything you need for Spicy Sriracha Noodles. We looked at key ingredients, cooking steps, and tips for the best results. You can adjust the spice and try different proteins or flavors. I also shared how to store leftovers and answered common questions. Enjoy creating your own spicy noodles! With this guide, you can make a tasty, customizable dish that everyone will love. Happy cooking!

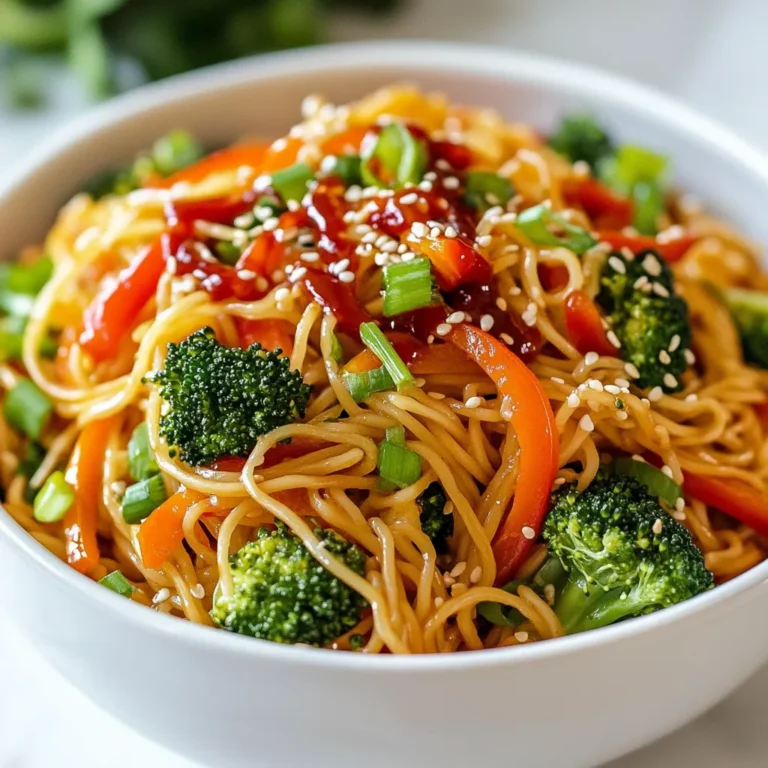
Spicy Sriracha Noodles Flavorful and Easy Recipe

- 1 lb. boneless, skinless chicken breasts, diced - 1 can (15 oz) white beans, drained and rinsed - 1 cup frozen corn The main ingredients create a hearty base for the chili. Chicken breasts give it protein and flavor. White beans add creaminess and fiber. Frozen corn brings sweetness and color to the dish. - 1 teaspoon cumin - 1 teaspoon oregano - ½ teaspoon smoked paprika - Salt and pepper to taste The spices and seasonings bring depth to the chili. Cumin adds warmth. Oregano offers a fresh taste. Smoked paprika gives a light smokiness. Salt and pepper enhance all the flavors. - Fresh cilantro - Sliced jalapeños Garnishes can make your chili shine. Fresh cilantro adds a bright touch. Sliced jalapeños give heat for those who like a kick. Adding these on top makes each bowl look inviting and tasty. {{ingredient_image_1}} 1. Start by heating 1 tablespoon of olive oil in a large pot over medium heat. 2. Add 1 diced onion and sauté for about 5 minutes. You want it to be soft and translucent. 3. Next, toss in 2 minced garlic cloves. Sauté for another minute until it smells great. 4. Now, add 1 pound of diced boneless, skinless chicken breasts. Stir it often for 5 to 7 minutes. You want the chicken to brown nicely. 1. After the chicken is browned, sprinkle in 1 teaspoon of cumin, 1 teaspoon of oregano, and ½ teaspoon of smoked paprika. Add salt and pepper to taste. Stir well to coat the chicken with spices. 2. Pour in 2 cups of chicken broth. Then add 1 can (4 oz) of diced green chilies, 1 can (15 oz) of drained and rinsed white beans, and 1 cup of frozen corn. Bring this mixture to a boil. 3. Once it boils, reduce the heat to low. Let it simmer for 20 minutes. This helps the flavors blend well. 1. Stir in 1 cup of sour cream and ½ cup of cream cheese. Mix until everything is creamy and well combined. 2. Taste your chili and adjust the seasonings if you need more flavor. Let it simmer for another 5 minutes. 3. Serve it hot, and top with fresh cilantro and sliced jalapeños if you want some heat. Enjoy your delicious white chicken chili! To make your white chicken chili creamy, use sour cream and cream cheese well. Start by adding the sour cream after simmering. It gives a nice tang. Mix it thoroughly until smooth. Then, add cream cheese for a rich texture. Stir until it melts into the chili. This combo makes your chili velvety and delicious. Sautéing and spice timing are key for deep flavor. Start by cooking onions until they turn soft. This takes about five minutes. Then, add minced garlic for just a minute. This brings out its flavor. Next, add spices like cumin and smoked paprika. Toast them for a minute before adding liquid. This step boosts the chili’s taste. Simmering your chili at the right temperature matters. After boiling, lower the heat to a gentle simmer. Let it cook for about 20 minutes. This time helps the flavors blend well. Stir occasionally to prevent sticking. If you want a thicker chili, let it simmer a bit longer. This ensures a hearty and satisfying dish. Pro Tips Use Rotisserie Chicken: For an even quicker meal, use pre-cooked rotisserie chicken. Just shred it and add it to the pot in step 5. Adjust Creaminess: For a lighter version, use Greek yogurt instead of sour cream, or reduce the amount of cream cheese. Spice It Up: If you like a bit of heat, add some cayenne pepper or increase the amount of diced green chilies. Garnish Smart: Fresh avocado slices or a squeeze of lime can elevate the flavors and add a refreshing touch to each serving. {{image_2}} To make your white chicken chili spicy, add extra jalapeños and spices. You can slice fresh jalapeños and mix them in during cooking. If you want more heat, try serrano peppers or a dash of cayenne pepper. Adjust the amount based on your spice level. This adds a fun kick that many love! If you prefer a vegetarian option, substitute the chicken with plant-based protein. You can use tofu, tempeh, or even chickpeas. These options will soak up the flavors well. Make sure to sauté them just like the chicken. This way, you still get a tasty and creamy chili. White chicken chili can be made with different beans. While cannellini and great northern beans are common, feel free to experiment. Black beans or pinto beans also work well. Each type of bean adds its own unique taste and texture. Mix and match to find your favorite combo! To store your white chicken chili, let it cool first. Use airtight containers to keep it fresh. Divide the chili into smaller portions. This way, you can enjoy it later without waste. When stored properly, it can last in the fridge for up to four days. Freezing is a great option if you want to save some for later. First, let it cool completely. Then, pour it into freezer-safe bags or containers. Label them with the date. When you want to enjoy it again, thaw it in the fridge overnight. Reheat on the stove over low heat. Stir it often to ensure even warming. - Cooked chicken: Lasts about 3-4 days in the fridge. - White beans: If canned, they last well past their expiration date when unopened. Once opened, use them within 3-4 days. - Frozen corn: Can last in the freezer for 8-12 months. - Onion and garlic: Last about a week in the fridge. - Chicken broth: Unopened, it lasts a long time. Once opened, use it within 3-4 days. - Sour cream and cream cheese: Last about 1-2 weeks once opened. If you follow these tips, your white chicken chili will stay delicious and safe to eat! To thicken your White Chicken Chili, you have a few options. First, you can mash some of the white beans with a fork. This will help create a creamy texture. Another option is to add a cornstarch slurry. Mix one tablespoon of cornstarch with two tablespoons of cold water, then stir it into the chili. Cook for a few more minutes to see the change. Lastly, simmering the chili longer can also help reduce the liquid. Yes, you can use canned chicken in this recipe. The main pro is that it saves time. Canned chicken is already cooked, so you skip the browning step. This is great for quick meals. However, the cons include texture and flavor. Canned chicken may not have the same fresh taste as raw chicken. If you choose this option, drain the chicken well and break it into chunks before adding it to the pot. White Chicken Chili pairs well with several sides. Here are some tasty options: - Cornbread: A classic side that adds sweetness. - Rice: Plain or seasoned rice soaks up the chili well. - Tortilla chips: Crunchy chips add a nice contrast. - Salad: A fresh green salad balances the dish. - Avocado: Sliced or diced avocado brings creaminess. Try these sides to enhance your chili experience! In this article, we covered the main ingredients for white chicken chili and how to prepare it. We explored spices, optional garnishes, and tips for perfect creaminess. Variations, like a spicy version or vegetarian option, offer great flexibility. We also discussed storage tips to keep your chili fresh. White chicken chili is a tasty dish, perfect for sharing. Enjoy experimenting with flavors and making it your own. Test different ingredients, and find what you love!

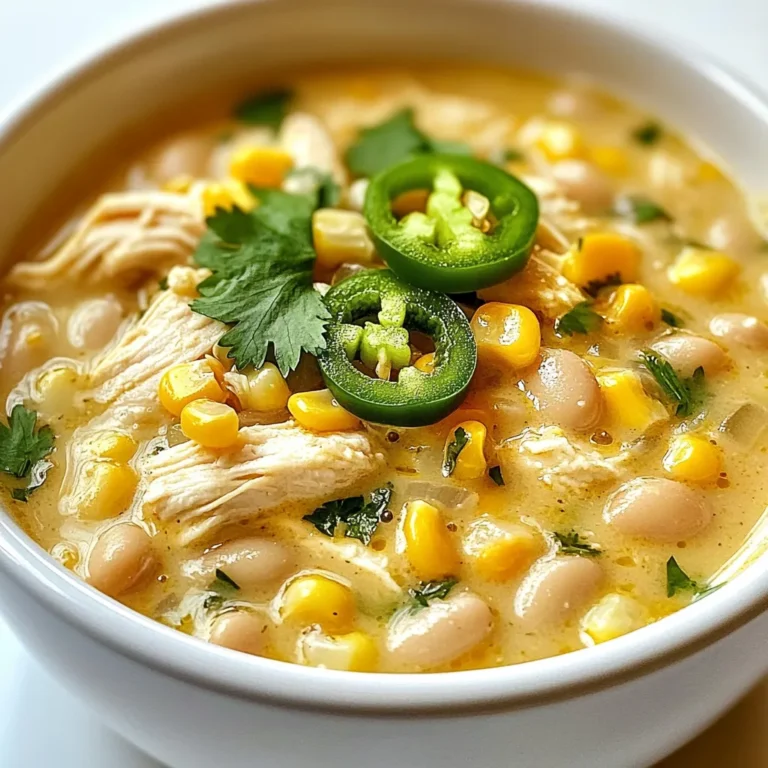
White Chicken Chili Flavorful Comfort Food Recipe

- 12 oz cheese tortellini - 1 cup cherry tomatoes, halved - 1 cup fresh spinach, roughly chopped - 1/2 cup bell peppers (red, yellow, or orange), diced - 1/4 cup black olives, sliced - 1/2 cup pesto sauce (store-bought or homemade) Cheese tortellini brings a rich, creamy taste to this dish. You can find it in most grocery stores. The fresh vegetables add crunch and color. Cherry tomatoes burst with sweetness. Spinach gives a healthy touch. Bell peppers add a nice crunch and vibrant hues. Black olives offer a salty bite that enhances the flavor. - 2 tablespoons olive oil - Salt and pepper to taste - Fresh basil leaves for garnish Adding olive oil gives the salad a silky feel. Salt and pepper help bring out the flavors in the dish. Fresh basil leaves at the end add a fragrant touch and a pop of green. This mix of ingredients creates a fresh and flavorful dish that you can enjoy anytime. {{ingredient_image_1}} Start by boiling a large pot of salted water. Use enough water to allow the tortellini to move freely. Once the water boils, add 12 ounces of cheese tortellini. Cook the tortellini according to the package instructions. This usually takes about 3 to 4 minutes for al dente. You want them to be tender but still firm. Drain the tortellini and set them aside to cool. While the tortellini cooks, chop your vegetables. Use a sharp knife for easy cutting. Start with 1 cup of cherry tomatoes. Cut them in half. Next, grab 1 cup of fresh spinach and roughly chop it. Then, take 1/2 cup of bell peppers. You can use red, yellow, or orange. Dice them into small pieces. Finally, slice 1/4 cup of black olives. Set all these sliced ingredients aside. In a large mixing bowl, combine the cooled tortellini with the chopped vegetables. Add the cherry tomatoes, spinach, bell peppers, and black olives. Next, drizzle 1/2 cup of pesto sauce over the salad. To enhance the flavor, add 2 tablespoons of olive oil. Gently toss the salad to mix everything well. Make sure the tortellini and veggies are nicely coated in pesto. Season with salt and pepper to taste. For the best flavor, cover the salad and let it chill in the fridge for at least 30 minutes. This allows the flavors to blend. Before serving, toss the salad again. Garnish with fresh basil leaves on top for a lovely finish. Chilling your pasta salad is key. It lets all the flavors mingle. I recommend letting it chill for at least 30 minutes. This step makes a big difference. Balancing flavors is also important. Use salt and pepper to taste. A little salt can brighten the dish. But don’t overdo it. Taste as you go to find your perfect balance. To avoid mushy tortellini, cook them just until al dente. This usually takes about 3-4 minutes. Always follow the package instructions. Drain them right after cooking, and let them cool. When chopping vegetables, keep your cuts even. This helps them cook uniformly. A sharp knife makes the job easier. Always chop your veggies right before mixing to keep them fresh and vibrant. For serving, use a large bowl to show off the colors. A bright bowl can make your salad pop. Creative plating can add flair. Try layering the ingredients instead of mixing them. Use a ring mold for a fun shape. Top with fresh basil leaves for that finishing touch. This not only adds to the look but also enhances the flavor. Pro Tips Perfect Pasta Texture: Make sure to cook the tortellini al dente for the best texture. This ensures they hold up well in the salad and don’t become mushy. Customize Your Veggies: Feel free to swap in your favorite vegetables or whatever you have on hand! Zucchini, arugula, or even artichokes can add a nice twist. Pesto Variations: Experiment with different types of pesto, such as sun-dried tomato or arugula pesto, to change the flavor profile of your salad. Serving Suggestions: Serve this salad as a side dish or a main course. It pairs wonderfully with grilled chicken or shrimp for a complete meal. {{image_2}} You can have fun by changing the tortellini type. Try spinach or mushroom tortellini for new flavors. You can also use gluten-free tortellini if needed. For fresh veggies, swap out bell peppers for cucumbers or zucchini. These add crunch and freshness. In spring, use fresh peas and asparagus. They add a nice, crisp texture. In summer, add corn or diced avocado. These ingredients bring a sweet, creamy touch to your salad. For protein, consider cooked chicken or shrimp. These options make the salad heartier. You can also add chickpeas for a plant-based protein. For a creamy twist, mix in mozzarella balls or feta cheese. This will enhance the richness of your salad. To keep your pesto tortellini pasta salad fresh, store it in an airtight container. Place it in the fridge right after serving. This helps keep the flavors bright and the veggies crisp. Your salad will stay tasty for about three days. If you notice any browning on the vegetables, that’s a sign to eat it soon! You can freeze this salad, but it’s best to store the tortellini and veggies separately from the pesto. Freeze the tortellini and veggies in a freezer-safe bag. This way, they won’t get mushy. To reheat, simply boil water and cook the tortellini for a few minutes. Once heated, mix everything together with fresh pesto. This keeps the flavors fresh and bright. Yes, you can use homemade pesto! Homemade pesto tastes fresh and bright, enhancing your salad's flavor. It lets you control the ingredients. You can choose high-quality olive oil and fresh herbs. Store-bought pesto may save time, but it often lacks the vibrant taste of homemade. Try making a batch using basil, garlic, nuts, and cheese. Blend them with olive oil for a simple and delicious sauce. You can store leftovers in the fridge for 3 to 5 days. Keep them in an airtight container to maintain freshness. Always check for any signs of spoilage before eating. If the salad smells off or the colors dull, it’s best to discard it. For safety, make sure to refrigerate the salad within two hours of serving. This helps prevent harmful bacteria. Yes, you can make this salad ahead of time! Prepare it a day in advance for the best flavor. Just remember to chill it in the fridge for at least 30 minutes before serving. If you make it early, the flavors will blend nicely. However, if you add fresh ingredients like spinach, do so right before serving. This keeps the salad crisp and colorful. This blog post covered how to make a tasty tortellini salad. We discussed key ingredients, like cheese tortellini, fresh veggies, and pesto sauce. The step-by-step instructions showed how to cook, mix, and chill your salad for the best flavor. Remember to try the tips for presentation and ingredient swaps. As you explore variations and storage options, you’ll find ways to make this salad your own. With these ideas, you can enjoy fresh, delicious meals every time. Happy cooking!

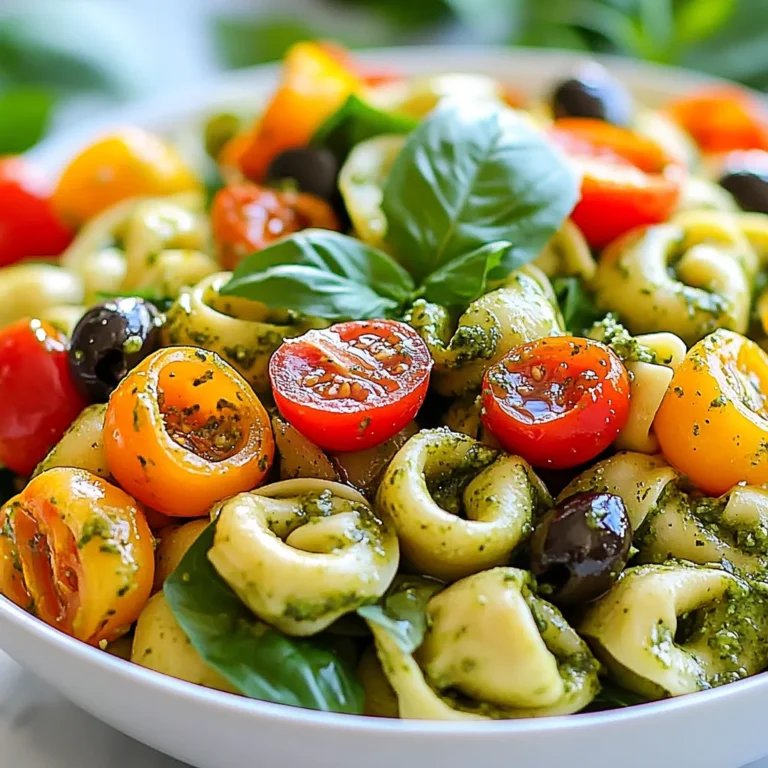
Pesto Tortellini Pasta Salad Fresh and Flavorful Dish

You will need these ingredients to make Buffalo Chicken Stuffed Peppers: - 4 large bell peppers (any color) - 2 cups cooked shredded chicken - 1/2 cup buffalo sauce (adjust based on heat preference) - 1 cup cream cheese, softened - 1/2 cup shredded mozzarella cheese - 1/4 cup ranch dressing - 1/2 teaspoon garlic powder - 1/2 teaspoon onion powder - Salt and pepper to taste - Chopped green onions for garnish Choosing good ingredients is key. Fresh bell peppers add crunch and flavor. Use high-quality buffalo sauce for the best heat. Cream cheese should be soft, making mixing easier. I recommend full-fat mozzarella for a rich melt. Look for ranch dressing with natural ingredients for a fresh taste. Quality ingredients make a big difference in your dish. You can swap some ingredients if needed. For chicken, use shredded rotisserie chicken or canned chicken. If you want less heat, try using a mild wing sauce. Greek yogurt can replace cream cheese for a lighter option. If you want a dairy-free dish, use vegan cheese. Finally, you can skip the ranch and use a splash of lemon juice for tang. {{ingredient_image_1}} Start by preheating your oven to 375°F (190°C). This makes sure your peppers cook evenly. Next, take the large bell peppers and cut the tops off. Remove all the seeds and membranes inside. This step helps the peppers hold the filling well. Place the cleaned peppers upright in a baking dish. They need to stand tall to hold all that tasty filling. In a big mixing bowl, add the cooked shredded chicken. Pour in the buffalo sauce. You can adjust this based on how spicy you like it. Next, add the softened cream cheese and shredded mozzarella cheese. Then, include the ranch dressing, garlic powder, onion powder, salt, and pepper. Mix everything well until it is smooth and blended. This filling is creamy and packed with flavor. Now, it's time to stuff the peppers. Take the buffalo chicken mixture and fill each pepper. Press down gently to pack it in tight. Cover the baking dish with aluminum foil. Bake in the preheated oven for 25 minutes. After that, remove the foil and bake for another 10-15 minutes. This helps the tops turn golden and the peppers become tender. Once done, take them out and let cool for a few minutes. Garnish with chopped green onions for a fresh touch. Enjoy your savory buffalo chicken stuffed peppers! To make the perfect stuffed peppers, choose fresh, firm bell peppers. Cut off the tops and remove the seeds inside. This gives you a nice bowl to fill. Mix the chicken and sauce until smooth. Use a spoon to fill the peppers well. Press the filling down to pack it tight. Bake them covered first to keep them moist. Remove the foil later to get a nice golden top. If you like heat, add more buffalo sauce. Start with half a cup, then taste it. You can always add more, but you can't take it out. For less spice, use a milder sauce. Mixing in ranch dressing helps cool the heat too. It adds creaminess that balances the flavors. Serve these stuffed peppers with a fresh salad. A simple green salad adds a nice crunch. You can also pair them with rice or quinoa for a healthy side. For a fun twist, try serving with tortilla chips. They add a nice crunch and are great for dipping in extra sauce. Pro Tips Choosing the Right Peppers: Opt for large, firm bell peppers to ensure they hold their shape while baking and provide enough space for the stuffing. Adjusting Heat Levels: Feel free to adjust the amount of buffalo sauce according to your heat tolerance. You can also mix in some mild sauce for a lesser kick. Cream Cheese Tip: Make sure your cream cheese is fully softened to blend smoothly with the other ingredients. This will help prevent any lumps in your filling. Garnishing Ideas: For an extra layer of flavor, consider adding crumbled blue cheese or a drizzle of extra ranch dressing on top before serving. {{image_2}} You can switch up the protein in Buffalo chicken stuffed peppers. If you prefer turkey, use shredded turkey instead of chicken. Ground chicken or turkey also works well. For a fun twist, try using pulled pork. It adds a rich flavor that pairs nicely with the buffalo sauce. Keep the buffalo sauce the same, but feel free to adjust the spices. If you want a meat-free option, you can still enjoy these stuffed peppers. Use cooked quinoa or brown rice as a base. Mix in black beans or chickpeas for protein. You can also add diced vegetables like zucchini, corn, or mushrooms. Just remember to keep the buffalo sauce to give it that spicy kick. Cream cheese can be replaced with a vegan cream cheese if needed. Want to enhance the flavor? Add extra spices like smoked paprika or cayenne for more heat. You can mix in diced celery for a crunchy texture. Try adding chopped cilantro or parsley for a fresh taste. A sprinkle of blue cheese or feta on top adds a creamy touch. If you love tang, a splash of lime juice brightens the dish. These small changes can make your stuffed peppers unique and exciting. To store your buffalo chicken stuffed peppers, let them cool first. Place them in an airtight container. They will last in the fridge for 3 to 4 days. If you want to keep them longer, consider freezing them. To reheat, take the peppers out of the fridge. Preheat your oven to 350°F (175°C). Place the peppers in a baking dish. Cover them with foil to keep moisture in. Bake for about 20 minutes or until heated through. You can also use a microwave. Heat on medium for 2 to 3 minutes, checking often. You can freeze buffalo chicken stuffed peppers before or after baking. If freezing before baking, wrap each pepper in plastic wrap. Place them in a freezer-safe bag. They can last up to 3 months. When ready to eat, bake them straight from the freezer. Just add 10 to 15 minutes to the baking time. If you freeze them after baking, let them cool first. Then, wrap and store them the same way. No, using raw chicken is not safe for this recipe. I recommend cooked shredded chicken. It cuts down cooking time and ensures the chicken is safe to eat. You can use leftover chicken or rotisserie chicken. This saves time and adds great flavor. You can tell the peppers are cooked when they are tender. They should be soft but not mushy. You can test this by gently poking them with a fork. If the fork goes in easily, they are ready. The tops should also be slightly golden. Yes, you can prepare the filling and stuff the peppers ahead of time. Just keep them in the fridge until you are ready to bake. This makes for an easy weeknight meal. You can also freeze them before baking for a quick dinner later. Just remember to adjust cooking times if baking from frozen. Buffalo chicken stuffed peppers are a tasty treat that anyone can enjoy. This post covered key ingredients, how to prepare them, and various smart tips. You learned about possible substitutes and how to store leftovers. Remember, you can switch up proteins or make veggie versions too. Whether hosting a party or enjoying a family meal, these stuffed peppers are sure to impress. Get cooking, and savor every bite!

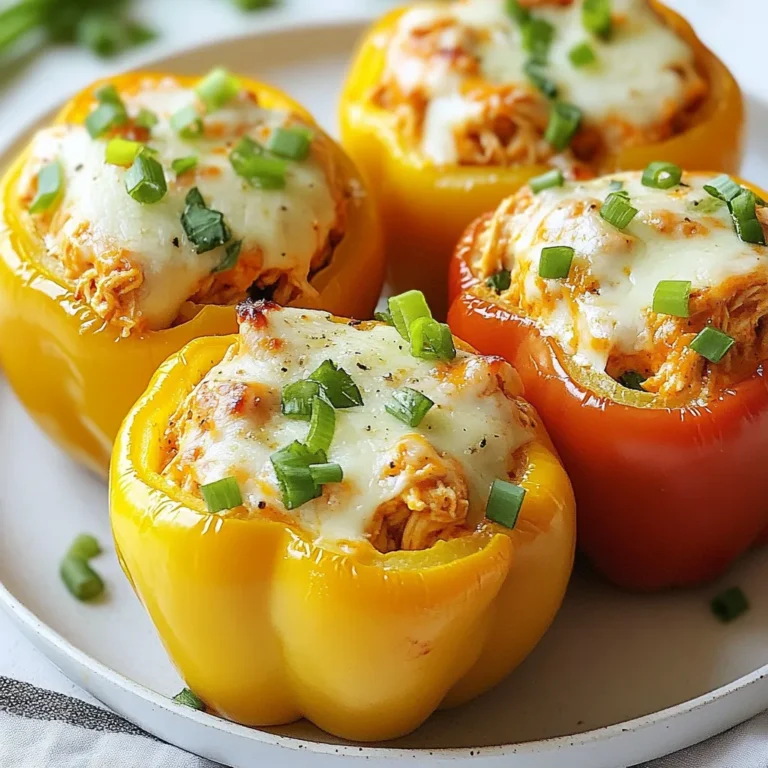
Savory Buffalo Chicken Stuffed Peppers Delight

To make Jalapeño Cheddar Cornbread Casserole, you need: - 2 cups cornmeal - 1 cup all-purpose flour - 2 tablespoons baking powder - 1 teaspoon salt - 1 cup shredded sharp cheddar cheese - 1 cup corn kernels (fresh, frozen, or canned) - 2 jalapeños, seeded and finely chopped - 1/4 cup sugar - 2 large eggs - 2 cups buttermilk (or milk + 1 tablespoon vinegar) - 1/2 cup unsalted butter, melted - 1 teaspoon garlic powder - 1 teaspoon onion powder These ingredients create a tasty base with a nice kick from the jalapeños. Want to make this dish even better? Consider adding: - 1/2 cup diced bell peppers for sweetness - 1/4 cup chopped green onions for freshness - A dash of cayenne pepper for extra heat - 1/2 cup cooked bacon bits for a savory touch These options add depth and flavor to your cornbread casserole. If you have dietary needs, here are some easy swaps: - Use gluten-free flour instead of all-purpose flour. - For dairy-free, substitute buttermilk with almond milk or oat milk. - You can also use egg replacers if you are vegan. These substitutions keep the recipe friendly for various diets while maintaining great taste. {{ingredient_image_1}} 1. First, preheat your oven to 375°F (190°C). Grease a 9x13 inch baking dish with cooking spray or butter. This helps your casserole not stick. 2. In a large bowl, mix 2 cups cornmeal, 1 cup flour, 2 tablespoons baking powder, and 1 teaspoon salt. Whisk them together until they blend well. 3. Next, add 1 cup shredded cheddar cheese, 1 cup corn kernels, and 2 chopped jalapeños. Mix these until they spread evenly in the dry mix. 4. In another bowl, whisk together 1/4 cup sugar, 2 large eggs, 2 cups buttermilk, and 1/2 cup melted butter. Add 1 teaspoon garlic powder and 1 teaspoon onion powder for flavor. 5. Pour the wet mix into the dry mix. Stir gently until just combined. Avoid overmixing; it's okay if some lumps remain. 6. Transfer the batter into the greased baking dish. Smooth the top with a spatula. 7. Bake in the preheated oven for 30-35 minutes. Look for a golden brown top. Insert a toothpick in the center; it should come out clean. - Check the color of the top; it should be golden brown. - Use a toothpick to check the center. If it comes out clean, it’s done. - Let the casserole cool for about 10 minutes before slicing. This helps it set and makes serving easier. To get the best texture in your casserole, focus on mixing. Combine dry and wet ingredients gently. Overmixing makes it dense. You want some lumps in the batter. They help keep it light and fluffy. Using buttermilk adds moisture and flavor. The cornmeal gives it a nice, grainy texture. If you want it extra soft, let the batter rest for 5-10 minutes before baking. This helps the cornmeal absorb the liquid. Store leftover casserole in an airtight container. It keeps well in the fridge for about 3-4 days. To reheat, place it in the oven at 350°F (175°C) for 15-20 minutes. You can also microwave it for 1-2 minutes. Just add a splash of water to keep it moist. If you freeze it, cut it into squares first. Wrap each piece in plastic wrap. Then, place them in a freezer bag. It lasts for about 2-3 months in the freezer. For a fun twist, top each slice with sour cream or spicy salsa. Chopped cilantro or chives adds a fresh touch. This casserole pairs well with chili or grilled meats. You can also serve it alongside a crisp salad for a complete meal. Consider adding avocado or jalapeño slices for extra flavor. Enjoy it warm for the best taste! Pro Tips Use Fresh Jalapeños: For a more vibrant flavor and a bit of crunch, opt for fresh jalapeños instead of jarred ones. Experiment with Cheese: While sharp cheddar is delicious, trying different types of cheese like pepper jack or Mexican blend can add unique flavors. Texture Variations: For a heartier texture, consider adding cooked bacon bits or crumbled sausage to the batter. Make Ahead: This casserole can be prepared the night before; just cover and refrigerate, then bake in the morning for an easy breakfast or brunch. {{image_2}} You can easily make this dish vegetarian by skipping the eggs. Use flax eggs instead. Mix 1 tablespoon of ground flaxseed with 2.5 tablespoons of water. Let it sit for about 5 minutes to thicken. For a vegan version, replace buttermilk with almond milk and add a splash of vinegar. You can also use vegan cheese for that cheesy flavor. If you like your food spicy, add more jalapeños. Use whole jalapeños instead of just two. You can also add a pinch of cayenne pepper to the mix. For less heat, use mild peppers or remove the seeds from the jalapeños. This lets you control the spice to fit your taste. Cheddar cheese brings great flavor, but you can switch it up. Try pepper jack cheese for a spicy twist. Monterey Jack adds creaminess without overpowering the taste. You can also mix different cheeses for a unique flavor profile. Blend mozzarella and cheddar for a fun combination. Each serving of Jalapeño Cheddar Cornbread Casserole has about 300 calories. This number may change based on the ingredients you use. In one serving, you get roughly: - 10 grams of protein - 12 grams of fat - 45 grams of carbs These numbers help you see what you get from this tasty dish. This casserole has many good ingredients. Cornmeal is rich in fiber and helps with digestion. Cheddar cheese adds protein and calcium, which are great for bones. Jalapeños give a kick and have vitamins A and C. They also may boost your metabolism. Using buttermilk makes it creamy and adds probiotics for gut health. Overall, this dish is not just tasty; it also offers some good nutrients! To make Jalapeño Cheddar Cornbread Casserole gluten-free, swap the all-purpose flour. Use a gluten-free flour blend instead. Ensure that it is a 1:1 blend for best results. Check your baking powder for gluten-free labeling. This change keeps the texture and taste similar. Yes, you can freeze this casserole. After baking, let it cool completely. Cut it into squares and wrap each piece in plastic wrap. Place the wrapped pieces in a freezer bag. This way, you can enjoy them later. Just reheat in the oven when you're ready to eat. Toppings can enhance your casserole. I recommend a sprinkle of fresh cilantro or chives. A dollop of sour cream adds creaminess. You can also serve it with spicy salsa for a kick. Another option is to add sliced jalapeños on top for extra heat. In this post, we covered all you need to know about making a delicious casserole. We discussed ingredients, preparation steps, and baking tips. You learned how to enhance flavors and make substitutions for different diets. Remember, you can adjust spices and cheeses to fit your taste. Using these tips, you can enjoy a tasty dish that everyone loves. Happy cooking!

Jalapeño Cheddar Cornbread Casserole Tasty and Simple

PREV 1 … 49 50 51 … 57 NEXT
flavor nest kitchen

explore

DessertsDinnerAppetizersDrinks

Our Policies

  • Cookie Policy
  • Copyright Policy
  • Disclaimer
  • GDPR Policy
  • Terms Of Use
Back to Top
  • About
  • Contact Us
  • Privacy Policy
© 2025 flavor nest kitchen