FREE DINNER EBOOK! Get your copy!
  • Cookie Policy
  • GDPR Policy
  • Disclaimer
  • Terms Of Use
  • Visit my other site: Fun Cookie Recipes
flavor nest kitchen
  • Home
  • Dinner
  • Desserts
  • Drinks
  • Appetizers
  • Contact
  • About
  • Privacy Policy
  • Home
  • Dinner
  • Desserts
  • Drinks
  • Appetizers
  • Contact
  • About
  • Privacy Policy
  • Cookie Policy
  • GDPR Policy
  • Disclaimer
  • Terms Of Use
Visit my other site: Fun Cookie Recipes

HOME / CATEGORIES /

Latest

- 1 cup rolled oats - 2 cups almond milk (or any milk of choice) - 2 tablespoons pure maple syrup - 1/2 teaspoon vanilla extract - 1/4 teaspoon ground cinnamon - 1/2 cup pecans, roughly chopped - 1/2 banana, sliced (optional, for serving) - Fresh berries (strawberries, blueberries) for garnish - Pinch of salt You can easily change some ingredients to fit your taste. Use any milk you like, such as cow's milk or soy milk. If you want a different sweet taste, honey or agave syrup work well too. For a nut-free option, try sunflower seeds instead of pecans. You can also skip the banana if you prefer. Rolled oats are a great source of fiber. They help keep you full and support digestion. Almond milk is low in calories and has healthy fats. Maple syrup offers natural sweetness with some minerals. Pecans are high in healthy fats and antioxidants, making them great for heart health. Berries add vitamins and antioxidants, boosting your morning meal. {{ingredient_image_1}} To start, grab a medium mixing bowl. Add 1 cup of rolled oats to the bowl. Next, pour in 2 cups of almond milk. You can also use any milk you prefer. Then, add 2 tablespoons of pure maple syrup for sweetness. Don’t forget 1/2 teaspoon of vanilla extract. For a warm touch, sprinkle 1/4 teaspoon of ground cinnamon. Finally, add a pinch of salt. Stir the mixture well until everything blends. Now, fold in 1/2 cup of roughly chopped pecans. Make sure to save a few for topping later. Take two jars or airtight containers and divide the oat mixture evenly. Cover each jar tightly. This step keeps the oats fresh and flavorful. Place the jars in the fridge for at least 4 hours or overnight. This soaking time helps the oats absorb the milk and flavors. When you’re ready to eat, stir the oats again. Top with sliced banana and the reserved pecans. Don’t forget to add fresh berries for color and taste. Enjoy your delicious Maple Pecan Overnight Oats! To get the best texture, use rolled oats. They soak up liquid well, giving a creamy feel. Avoid instant oats; they can turn mushy. Use enough liquid too. The ratio of oats to milk should be 1:2. If you like it thicker, add less milk. If you prefer it creamier, add a splash more. You can boost the flavor with fun mix-ins. Try adding a spoonful of nut butter for richness. Dried fruits like raisins or cranberries add sweet bites. A sprinkle of cocoa powder gives a chocolate kick. If you love spice, add a dash of nutmeg or cardamom. Mix it up to keep each bite exciting! Store leftover oats in jars or airtight containers. Keep them in the fridge for up to three days. If they get too thick, stir in a bit of milk before eating. You can also freeze them in portions. Just thaw overnight in the fridge for an easy breakfast. Pro Tips Soak for Extra Creaminess: Allow the oats to soak for at least 8 hours for a creamier texture and better flavor absorption. Mix Up Your Nuts: Experiment with different nuts such as walnuts or almonds for a unique twist on flavor and texture. Sweeten to Taste: Adjust the amount of maple syrup based on your sweetness preference; you can also add a splash of agave or honey. Add a Protein Boost: Stir in a scoop of your favorite protein powder for an extra nutritional kick. {{image_2}} You can switch up the sweetener in your overnight oats. If you want less sugar, try using honey or agave syrup. You can also use stevia or monk fruit. These options add sweetness without too many calories. Each sweetener gives a unique flavor profile. Experiment to find what you like best. Pecans are great, but feel free to mix it up. Almonds, walnuts, or cashews can add different tastes and textures. Slice or chop them for easy mixing. Each nut gives a different crunch and flavor. You can also use nut butter for a creamier texture. Try peanut or almond butter for a tasty twist. Fruit can change the whole dish! In summer, use fresh berries like strawberries or blueberries. In the fall, try adding sliced apples or pears. Bananas work year-round and add great creaminess. You can also mix dried fruits, like raisins or cranberries. Each fruit adds its own flavor and nutrition. You can serve Maple Pecan Overnight Oats in many ways. For breakfast, a full jar works great. If you want a snack, half a jar is perfect. You can also make smaller portions for kids. This way, you keep it fun and easy. These oats are filling, so they give you a great start to your day. Think outside the box when choosing containers. Use mason jars for a rustic look. Clear cups let you show off the layers. Small bowls can work too. If you want to impress, try layering the oats with toppings. This makes it more fun to eat. You can even use a bento box for on-the-go meals. Pair your oats with tasty drinks. A hot cup of tea or coffee works well. For a refreshing option, try cold juice or almond milk. You can also add fresh fruit on the side. Sliced apples or oranges add a nice touch. If you want extra protein, serve them with Greek yogurt. This will keep you full and happy! Overnight oats can last in the fridge for about 3 to 5 days. I like to make a few jars at once. This way, I have a tasty breakfast ready to go. Just remember to keep them sealed tight. This keeps them fresh and flavorful. Yes, you can use quick oats. They cook faster and soak up liquid more quickly. However, they may become mushy. I recommend using rolled oats for a chewy texture. Rolled oats give that perfect bite, making your breakfast more enjoyable. For gluten-free oats, look for certified gluten-free rolled oats. You can also try quinoa flakes or chia seeds for a different texture. These options are great for adding variety to your breakfast. Always check labels to ensure they meet your dietary needs. This post covered the key ingredients for overnight oats and their health benefits. You learned how to prepare, assemble, and store your oats for the best texture. We explored fun flavors, variations, and serving ideas to spice things up. Remember, overnight oats are versatile and can fit any taste or diet. Try different nuts, sweeteners, or fruits for your perfect mix. Enjoy your tasty, healthy breakfast anytime!

Maple Pecan Overnight Oats Perfect Breakfast Boost

- 1 pound large shrimp, peeled and deveined - 1/4 cup soy sauce - 1/4 cup honey The main ingredients are key to this dish. Large shrimp give a nice bite. Soy sauce adds saltiness, while honey brings sweetness. Together, they create a balanced flavor. - 2 tablespoons sesame oil - 2 cloves garlic, minced - 1 tablespoon fresh ginger, grated These flavorings take the dish to another level. Sesame oil adds a rich, nutty taste. Garlic gives a strong aroma, and ginger adds warmth. This trio makes your shrimp pop with taste. - 1 tablespoon rice vinegar - 1 teaspoon cornstarch mixed with 1 tablespoon water Rice vinegar gives a slight tang. It balances the sweetness of honey. Cornstarch helps thicken the sauce. This makes the glaze stick perfectly to the shrimp. - 2 green onions, chopped (for garnish) - Sesame seeds (for garnish) Green onions add crunch and color. Sesame seeds give a nice look and extra flavor. These garnishes make your dish shine on the plate. {{ingredient_image_1}} In a medium bowl, I whisk together soy sauce, honey, sesame oil, minced garlic, grated ginger, and rice vinegar. This mix brings a sweet and savory flavor. Make sure all the ingredients blend well. A good marinade sets the stage for amazing shrimp. In a small bowl, I mix cornstarch with water until smooth. Then, I add this mix to the marinade. This step helps thicken the sauce later. Next, I coat the shrimp in the marinade, ensuring every piece gets covered. I let them marinate for about 15-20 minutes. This time allows the flavors to soak in. I heat a large skillet over medium-high heat. I add a splash of sesame oil to prevent sticking. When the skillet is hot, I place the marinated shrimp in a single layer. I cook them for about 2-3 minutes. I flip the shrimp when they turn pink. Then, I pour in the reserved marinade. I cook for another 2-3 minutes. The sauce thickens, and the shrimp become fully cooked. After cooking, I remove the skillet from heat. I garnish the dish with chopped green onions and sesame seeds. This adds color and crunch. I serve the shrimp over steamed rice or alongside stir-fried vegetables. Both options make a complete meal that's full of flavor. For the best flavor, I recommend using large shrimp. Fresh shrimp is ideal, but frozen shrimp works too. If using frozen, thaw them overnight in the fridge. When cooking, aim for 2-3 minutes on each side. The shrimp should turn pink and opaque when done. Overcooking makes them tough, so keep an eye on them! Want to boost that flavor? Try adding red pepper flakes for heat. A splash of lime juice adds brightness too. You can mix in some chopped cilantro for freshness. If you love sesame, consider adding toasted sesame seeds for crunch. These small tweaks can make a big difference. You have options when cooking shrimp. Stovetop is quick and easy. Just use a hot skillet with sesame oil. If you want a smoky taste, grilling is great too. Just make sure to skewer the shrimp to keep them from falling through. Both methods give you tasty results. Choose what suits your style! Pro Tips Marinate Longer for More Flavor: If time permits, marinate the shrimp for up to an hour to allow the flavors to penetrate deeper. Adjust Sweetness: Feel free to adjust the amount of honey based on your preference for sweetness. You can also use maple syrup for a different flavor profile. Perfectly Cooked Shrimp: Watch the shrimp closely while cooking; they should turn pink and opaque without becoming rubbery. Remove them from heat as soon as they are cooked through. Serving Suggestions: Serve the shrimp over jasmine rice or in lettuce wraps for a fresh, crunchy touch. Add steamed vegetables for a complete meal! {{image_2}} If you want to change up the flavors, you can swap soy sauce and honey. For soy sauce, try tamari for a gluten-free option or coconut aminos for a sweeter taste. If you seek a sugar-free alternative, agave syrup works great instead of honey. You can easily make this recipe gluten-free. Just use tamari instead of soy sauce. For a low-calorie version, reduce the amount of honey or use a sugar substitute. This keeps the dish tasty while helping you stick to your goals. Want to spice it up? Add a pinch of red pepper flakes or some fresh chili for heat. If you prefer a sweeter dish, add more honey or even a splash of orange juice. You can also toss in some lime juice for a bright, zesty twist. Enjoy experimenting! To keep your Honey Soy Glazed Shrimp fresh, cool it down first. Place it in an airtight container. Store it in the fridge for up to three days. For longer storage, freeze the shrimp. Use a freezer-safe bag, and squeeze out the air. It will last for about two months in the freezer. When it’s time to eat, reheat the shrimp gently. You can use a skillet over low heat. Add a splash of water or broth to keep it moist. Heat until warmed through, about five minutes. You can also use a microwave. Heat in short bursts of 30 seconds. Stir between each round to avoid overcooking. In the fridge, your Honey Soy Glazed Shrimp stays good for three days. In the freezer, it keeps well for two months. Always check for any off smells or changes in texture before eating. If it looks or smells bad, it’s best to toss it out. Yes, you can use frozen shrimp. It’s easy to thaw them before cooking. To thaw, place the shrimp in a bowl of cold water for about 15-20 minutes. Change the water halfway to speed up the process. Once thawed, pat them dry with a paper towel. This helps the shrimp absorb the marinade better. You can pair this dish with a variety of sides. Here are some ideas: - Steamed white rice - Jasmine rice - Stir-fried vegetables - Quinoa - Noodles These options balance the flavors of the shrimp and make a complete meal. If you like heat, there are simple ways to spice it up. Here are a few ideas: - Add red pepper flakes to the marinade. - Stir in sriracha or chili paste for a kick. - Mix in fresh chopped chili peppers. These additions bring warmth and depth to the dish. Yes, you can prep Honey Soy Glazed Shrimp ahead of time. Here’s how: - Marinate the shrimp up to 2 hours in advance. - Store the marinated shrimp in the fridge. - Cook the shrimp just before serving for the best taste. This makes it easy to enjoy a quick, flavorful meal. In this blog post, we reviewed the key ingredients for honey soy glazed shrimp. We walked through making the marinade, cooking the shrimp, and serving suggestions. You learned tips for perfect shrimp cooking and flavoring. Remember, you can easily customize this dish. With various substitutes and dietary adjustments, everyone can enjoy it. Whether you choose to store leftovers or prep ahead, this recipe fits your needs. Now, you can make a flavorful dish that impresses and satisfies!

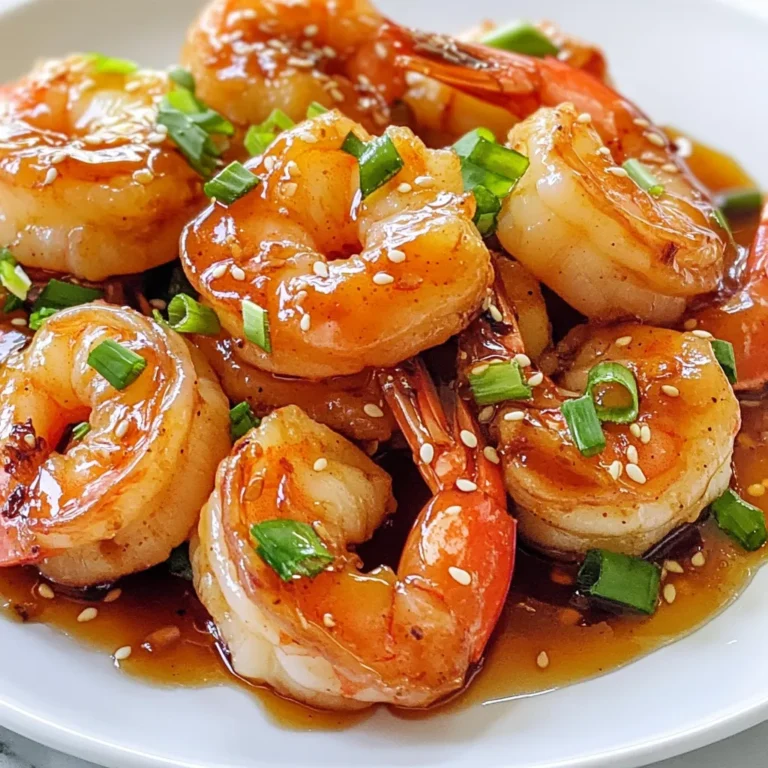
Honey Soy Glazed Shrimp Flavorful Dinner Delight

To make honey garlic shrimp skewers, you will need the following ingredients: - 1 pound large shrimp, peeled and deveined - 1/4 cup honey - 3 tablespoons soy sauce (or tamari for gluten-free) - 2 tablespoons fresh lemon juice - 4 cloves garlic, minced - 1/2 teaspoon ginger, grated - 1 tablespoon sesame oil - 1/4 teaspoon red pepper flakes (optional, for spice) - Salt and pepper to taste - 2 green onions, finely chopped (for garnish) - Skewers (wooden or metal) Each ingredient plays a key role in creating the perfect balance of sweet and savory. The shrimp brings a delicate flavor that pairs well with the honey and garlic. Honey adds a rich sweetness, while soy sauce gives depth. Fresh lemon juice brightens the dish. Garlic and ginger add warmth and a hint of spice. Sesame oil rounds out the flavors with a nutty touch. Don’t forget the red pepper flakes if you enjoy a bit of heat! The green onions not only add flavor but also a pop of color for garnish. When you gather these ingredients, you set the stage for a delicious meal that’s easy to make and impressive to serve. {{ingredient_image_1}} - In a mixing bowl, I combine the honey, soy sauce, lemon juice, minced garlic, grated ginger, sesame oil, and red pepper flakes. - I whisk these ingredients until they blend well. - Next, I add the peeled and deveined shrimp into the bowl. - I toss the shrimp to coat them thoroughly in the marinade. - I cover the bowl with plastic wrap and let it sit in the fridge for 30 minutes. - While the shrimp marinates, I preheat my grill to medium-high heat, around 375°F (190°C). - If I use wooden skewers, I soak them in water for about 20 minutes. This step helps prevent burning during cooking. - After marinating, I thread the shrimp onto the skewers. - I make sure to space them evenly and leave a little gap between each shrimp. - Then, I place the skewers on the hot grill. - I grill the shrimp for 2-3 minutes on each side. They turn pink and opaque when done. - To boost flavor, I baste the shrimp with leftover marinade as they cook. - Optimal grilling time: Grill the shrimp for 2-3 minutes on each side. They turn pink and opaque when done. - How to avoid overcooking: Watch closely while grilling. Remove shrimp as soon as they are done. - Suggestions for additional flavors: Add lime juice for a zestier kick. Try adding a splash of pineapple juice for sweetness. - Make-ahead tips: You can marinate shrimp up to 2 hours ahead of grilling. Just keep it in the fridge until ready to cook. - Best garnishes for presentation: Use finely chopped green onions for a fresh touch. Add sesame seeds for extra crunch and style. - Serving ideas: Pair the skewers with rice or a fresh salad. Serve with lemon wedges to enhance the flavor. Pro Tips Use Fresh Shrimp: For the best flavor and texture, opt for fresh shrimp over frozen. If using frozen, ensure they are completely thawed and patted dry before marinating. Customize Marinade: Feel free to adjust the marinade by adding herbs like cilantro or parsley for a fresh twist, or try different citrus juices like lime or orange. Perfectly Skewered: Alternate shrimp with vegetables such as bell peppers or zucchini on the skewers for added flavor and color. Just ensure everything cooks evenly. Watch the Grill: Keep a close eye on the shrimp while grilling; they cook quickly. Remove them from the grill as soon as they turn pink to avoid overcooking. {{image_2}} You can swap out shrimp for many proteins. Chicken pieces work great. They soak up the flavors well. You can also try beef or pork. Just cut them into bite-sized chunks. For a vegetarian twist, use firm tofu or mushrooms. Both absorb marinades nicely. Adjust the sweetness by adding more or less honey. If you want less sweet, use soy sauce. You can also add brown sugar for a deeper taste. To kick up the heat, increase the red pepper flakes. You can even add sriracha or chili sauce for more spice. If you don’t have a grill, you can bake these skewers. Set your oven to 400°F (200°C). Place the skewers on a baking sheet. Bake for about 10-12 minutes. For skillet cooking, use a non-stick pan. Heat it over medium heat. Cook the skewers for about 4-5 minutes on each side. This method gives you a nice sear. To keep your honey garlic shrimp skewers fresh, store them in an airtight container. This helps avoid moisture loss and keeps the flavors intact. You can keep them in the fridge for up to three days. If you know you won't eat them soon, consider freezing instead. You can freeze both cooked and uncooked skewers. For cooked skewers, let them cool completely. Place them in a freezer bag, removing as much air as possible. They can stay fresh for up to three months. For uncooked skewers, marinate the shrimp first, then freeze them. To thaw, place the bag in the fridge overnight. When you're ready to enjoy your skewers again, reheat them safely. The best way is to use a skillet on low heat. This method keeps the shrimp juicy. If you prefer the grill, do it on low heat for just a few minutes. This warms them through without drying them out. Always check to ensure they are hot all the way through. Marinate the shrimp for about 30 minutes. This time allows the flavors to soak in. If you have time, you can marinate longer. Just don’t go over two hours to keep the shrimp firm. Yes, you can use frozen shrimp. Just be sure to thaw them first. Place them in cold water for quick thawing. Once thawed, peel and devein if needed before marinating. Serve these skewers with rice or quinoa. They pair well with steamed veggies or a fresh salad. You can also enjoy them with a light dipping sauce for extra flavor. Yes, this recipe can be gluten-free. Use tamari instead of regular soy sauce. All other ingredients are naturally gluten-free, making it safe for those with gluten sensitivities. To spice things up, add more red pepper flakes to the marinade. You can also mix in a dash of hot sauce or chili paste. Adjust the spice level to your taste for a perfect kick. You learned how to make delicious honey garlic shrimp skewers. We covered all the key steps, from marinating the shrimp to grilling them perfectly. Tips on storage and variations let you get creative. Whether you're grilling for friends or family, these skewers will impress. Enjoy the juicy flavors, try new ideas, and savor each bite. Happy cooking!

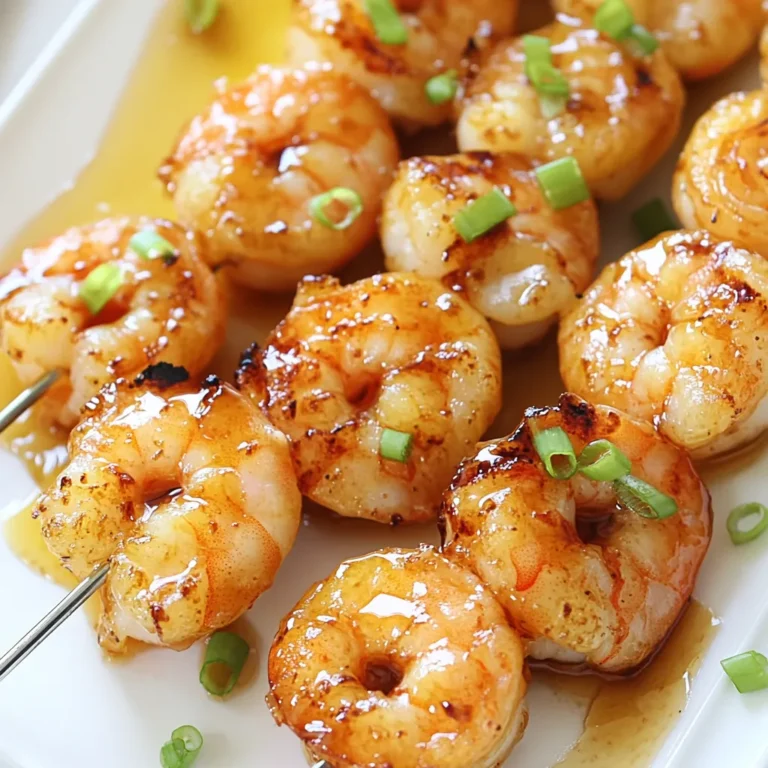
Honey Garlic Shrimp Skewers Flavorful Grilled Delight

- 4 medium zucchinis - 1 cup cooked quinoa - 1 cup canned black beans, drained and rinsed Zucchini is the star of this dish. I love using medium zucchinis for their perfect size. They hold the stuffing well and have a mild taste. Cooked quinoa adds a nice nutty flavor. Plus, it gives the boats a healthy boost. Canned black beans are convenient and packed with protein. They make the stuffing hearty and filling. - 1 teaspoon ground cumin - 1 teaspoon chili powder - 1/2 teaspoon garlic powder Spices bring life to the filling. Ground cumin adds warmth and depth. Chili powder gives a little kick, which I enjoy. Garlic powder makes everything better with its savory flavor. These spices work well together and make the dish truly Tex Mex. - 1 cup shredded cheddar cheese - 1/4 cup fresh cilantro, chopped - Juice of 1 lime Shredded cheddar cheese is a must for that melty goodness. It adds creaminess and richness. Fresh cilantro brightens the dish with its fresh taste. A squeeze of lime juice adds a tangy finish. These toppings take the stuffed zucchini boats to another level. {{ingredient_image_1}} - Preheat your oven to 375°F (190°C). - Slice the zucchinis in half lengthwise. - Use a spoon to scoop out the center. - Save the scooped zucchini flesh for later. - In a large bowl, combine the cooked quinoa, black beans, corn, and halved tomatoes. - Add the reserved zucchini flesh, cumin, chili powder, garlic powder, lime juice, and half of the cheddar cheese. - Mix everything well and season with salt and pepper. - Place the zucchini boats in a baking dish. - Drizzle them with olive oil and sprinkle with salt. - Stuff each zucchini half with the filling until they overflow. - Top with the remaining cheddar cheese. - Cover the dish with foil and bake for 25 minutes. - Remove the foil and bake for another 10 minutes. - Look for tender zucchini and melted, golden cheese. - Let the dish cool for a few minutes before serving. - Garnish with chopped cilantro for a fresh touch. Choosing the right zucchini Select medium-sized zucchinis for this dish. They hold their shape well and are easy to stuff. Look for zucchinis that are firm, smooth, and without blemishes. The skin should be shiny and bright. Avoid large zucchinis, as they can be watery and tough. Tips for scooping To scoop out the zucchini, use a small spoon or a melon baller. Be gentle to avoid tearing the skin. Scoop until you leave about a quarter-inch border. This thickness helps the zucchini hold its shape while baking. Save the scooped-out flesh to add to your filling for extra flavor. Ensuring even cooking To ensure even cooking, place the zucchini boats in a baking dish. Drizzle with olive oil, and sprinkle with salt. This helps them cook evenly and enhances the flavor. Covering the dish with foil for the first part of baking keeps moisture in, which helps the zucchini cook through. How to know when they are done Your zucchini boats are done when they are tender and the cheese is golden brown. You can test the doneness by inserting a fork into the zucchini. If it goes in easily, they are ready. Baking times may vary, so keep an eye on them during the last few minutes. Presentation ideas Serve your stuffed zucchini boats on a colorful platter for a vibrant look. Add a wedge of lime on the side for a fresh touch. You can also sprinkle extra cilantro on top for a pop of color. This makes the dish not only tasty but also visually appealing. Pairing with sides These zucchini boats pair well with a simple green salad or Mexican rice. You can also serve them with tortilla chips and salsa for a fun twist. The combination of flavors will make your meal a hit with family and friends. Pro Tips Use Fresh Ingredients: Whenever possible, opt for fresh corn and tomatoes for enhanced flavor and texture in your stuffed zucchini boats. Experiment with Spices: Feel free to adjust the spices to your taste. Adding smoked paprika or cayenne can give it a smoky or spicy kick! Make it Ahead: You can prepare the filling in advance and store it in the refrigerator. Just stuff the zucchini and bake when you're ready to serve. Try Different Cheeses: Mix up the cheese by using pepper jack for extra heat or a vegan cheese for a dairy-free option. {{image_2}} Replacing cheese For a cheesy kick without dairy, try nutritional yeast. It adds a nutty flavor. You can also use vegan cheese. Look for brands that melt well. Adding other vegetables Feel free to swap in your favorite veggies. Bell peppers, spinach, or mushrooms work great. Just chop them finely and mix them in with your filling. This adds color and nutrients. Ground turkey or beef alternatives If you want meat, use ground turkey or lean beef. Brown the meat before mixing it into your filling. This adds flavor and protein. Using lentils or chickpeas For a plant-based twist, use lentils or chickpeas. They give you protein and fiber. Cooked lentils mix well with quinoa. Chickpeas add a nice texture. Adding hot sauce or salsa To spice things up, add hot sauce or salsa to your filling. This gives it a zesty kick. You can also drizzle some on top before baking for extra flavor. Exploring other spices Experiment with spices like paprika or oregano. They can change the dish's flavor profile. A dash of cayenne can bring heat, while smoked paprika adds depth. Try different combinations to find your favorite! After you enjoy your Tex Mex stuffed zucchini boats, store any leftovers in the fridge. Place them in an airtight container. They will stay fresh for about 3 to 4 days. Make sure to let them cool down before sealing. This prevents moisture buildup, which can make them soggy. You can also freeze stuffed zucchinis for longer storage. First, let them cool completely. Wrap each boat in plastic wrap and then place them in a freezer bag. This keeps them safe from freezer burn. They can last up to 3 months in the freezer. When you're ready to eat, thaw them overnight in the fridge before reheating. You have a couple of options for reheating. If you want that fresh-from-the-oven taste, use the oven. Preheat it to 375°F (190°C). Place the zucchini boats on a baking sheet and cover them with foil. Bake for about 20 minutes until heated through. If you're short on time, the microwave works too. Just place one or two boats on a microwave-safe plate. Heat them for 2 to 3 minutes, checking every minute to avoid overheating. Enjoy your tasty meal again! If you need a substitute for quinoa, try these options: - Brown rice: This grain adds a chewy texture. - Farro: A hearty grain with a nutty taste. - Couscous: Quick to cook and light in flavor. - Barley: Chewy and full of fiber. - Cauliflower rice: A low-carb option that blends well. Each of these grains brings its own flavor and texture. They work great in stuffed zucchini boats. To keep zucchini firm, follow these tips: - Salt the zucchini: After scooping, sprinkle salt. Let it sit for 10 minutes. This draws out moisture. - Bake at a high temperature: 375°F (190°C) helps cook the zucchini without making it mushy. - Do not overstuff: Fill the boats, but don’t pack them too tight. This helps with even cooking. - Use fresh zucchini: Choose firm, small zucchinis for the best texture. These steps help maintain a nice bite in your zucchini boats. Yes, you can prepare these zucchini boats in advance. Here’s how: - Prepare the filling: Mix the quinoa, beans, and spices a day ahead. Store it in the fridge. - Stuff the zucchini: You can stuff them and cover them with foil. Keep in the fridge for up to 24 hours. - Bake when ready: Just remember to add a few extra minutes in the oven if they are cold. This way, you can enjoy a tasty meal without much fuss on the day you serve. In this post, we explored making delicious stuffed zucchini boats. We covered the main ingredients, like zucchini, quinoa, and black beans, along with spices and tasty toppings. I shared easy instructions for perfecting your dish and valuable tips for cooking and serving. You can also try various protein options and even freeze leftovers for later. These zucchini boats are simple, fun, and delicious. Enjoy experimenting with flavors and make this dish your own!

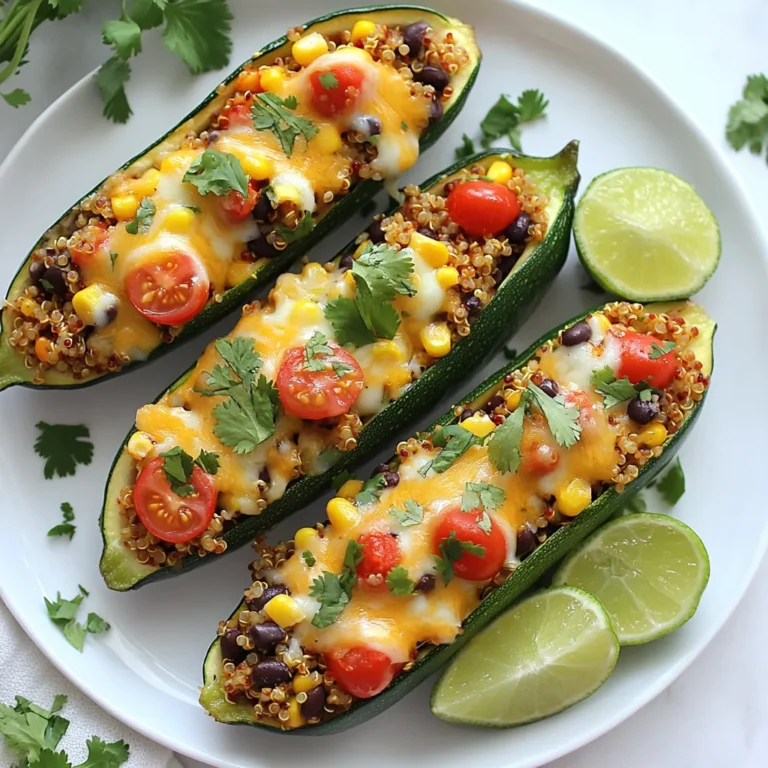
Tex Mex Stuffed Zucchini Boats Flavorful and Healthy Dish

To make Southwest quinoa stuffed peppers, gather these ingredients: - 4 large bell peppers (any color) - 1 cup quinoa, rinsed - 2 cups vegetable broth - 1 can (15 oz) black beans, rinsed and drained - 1 cup corn kernels (fresh or frozen) - 1 medium onion, diced - 2 cloves garlic, minced - 1 teaspoon cumin - 1 teaspoon chili powder - ½ teaspoon smoked paprika - Salt and pepper to taste - 1 cup diced tomatoes (canned or fresh) - 1 cup shredded cheese (cheddar or pepper jack) - Fresh cilantro, for garnish You can add more flavor with these: - Avocado crema for drizzling - Sour cream for a creamy touch - Jalapeños for a spicy kick - Lime juice for brightness - Additional spices like oregano or cayenne If you have special diets, try these swaps: - Use quinoa or brown rice for gluten-free needs. - Replace black beans with pinto beans or lentils. - Use dairy-free cheese for a vegan option. - For lower sodium, choose low-sodium broth and beans. These choices keep your meal tasty and fit your needs! {{ingredient_image_1}} To make Southwest quinoa stuffed peppers, you need to prepare the peppers and the filling. You will cook the quinoa first. Next, you will mix it with tasty ingredients. Then, you will stuff the peppers and bake them. This process takes about 50 minutes. 1. Preheat your oven. Set it to 375°F (190°C). 2. Cook the quinoa. In a medium pot, boil 2 cups of vegetable broth. Add 1 cup of rinsed quinoa. Turn the heat low, cover, and simmer for 15 minutes. The quinoa will soak up all the broth. 3. Prep the peppers. Cut the tops off 4 large bell peppers. Remove the seeds and membranes. Place them cut side up in a baking dish. 4. Sauté the onion. Heat a tablespoon of olive oil in a large skillet. Add 1 diced onion. Cook for about 5 minutes until it is clear. 5. Add garlic. Stir in 2 minced cloves of garlic. Cook for 1 more minute until you smell the garlic. 6. Mix the filling. Add 1 can of black beans, 1 cup of corn, the cooked quinoa, and 1 cup of diced tomatoes. Also add 1 teaspoon of cumin, 1 teaspoon of chili powder, ½ teaspoon of smoked paprika, salt, and pepper. Stir everything well. 7. Stuff the peppers. Use a spoon to fill each pepper with the quinoa mix. Pack it in gently. 8. Top with cheese. Sprinkle 1 cup of shredded cheese on each stuffed pepper. 9. Bake the peppers. Cover the dish with foil. Bake for 25 minutes. Then, take off the foil and bake for 10 more minutes. The cheese should be bubbly and golden. 10. Garnish and serve. Take them out of the oven. Let them cool for a few minutes. Add fresh cilantro on top before you serve. Bake your stuffed peppers at 375°F (190°C). The total baking time is 35 minutes. First, cover with foil for 25 minutes. Then, uncover and bake for 10 more minutes. This ensures the peppers cook well and the cheese melts nicely. To cook quinoa well, start by rinsing it under cold water. This step removes the bitter coating called saponin. Next, use two cups of vegetable broth for one cup of quinoa. Bring the broth to a boil in a medium pot. Once boiling, add the quinoa, lower the heat, and cover the pot. Let it simmer for about 15 minutes or until the liquid absorbs. After cooking, remove it from heat and let it sit for five minutes. Fluff it with a fork for a light and airy texture. For stuffed peppers, cheese adds creaminess and flavor. I recommend using cheddar or pepper jack cheese. Cheddar gives a sharp taste, while pepper jack adds a spicy kick. You can also try Monterey Jack for a milder option. If you prefer a healthier choice, use reduced-fat cheese. For a dairy-free version, consider vegan cheese or nutritional yeast. Sprinkle the cheese on top of the stuffed peppers before baking for a golden and bubbly finish. When you serve these stuffed peppers, consider pairing them with a salad or rice. A fresh green salad with lime vinaigrette complements the flavors well. You can also serve it with avocado crema or a dollop of sour cream for added richness. If you want a heartier meal, consider adding a side of black beans or corn. This extra touch makes the meal feel more filling and balanced. Enjoy your colorful and tasty feast! Pro Tips Choose Colorful Peppers: Using a mix of red, yellow, and green bell peppers not only enhances the visual appeal but also provides a variety of flavors. Enhance Flavor with Spices: Feel free to adjust the spices according to your taste or add a pinch of cayenne pepper for an extra kick! Meal Prep Friendly: These stuffed peppers can be made ahead of time and stored in the fridge for up to 3 days, making them perfect for meal prep. Experiment with Toppings: Try adding avocado slices, jalapeños, or a sprinkle of lime juice on top before serving for an extra burst of flavor. {{image_2}} You can easily make these peppers vegetarian or vegan. For a vegan version, skip the cheese or use a plant-based cheese. You can also top the peppers with avocado instead. This keeps the dish creamy and delicious while sticking to vegan rules. Use vegetable broth for cooking quinoa to keep it plant-based. Want a kick? Add more spice! Use jalapeños or diced green chiles in the filling. You can sprinkle hot sauce on top before baking. For an extra kick, add cayenne pepper to the quinoa mix. This will make your stuffed peppers fiery and exciting! If you like meat, try adding ground turkey or chicken to the filling. Cook the meat in the skillet before mixing in the other ingredients. You can also use beef for a heartier meal. Just brown the meat first and mix it with quinoa and beans. This adds protein and flavor to your dish. After enjoying your Southwest quinoa stuffed peppers, let them cool. Place leftovers in an airtight container. You can store them in the fridge for up to three days. This keeps the flavors fresh and the peppers crisp. To reheat, take the peppers out of the fridge. Place them in a microwave-safe dish. Cover with a damp paper towel to keep moisture. Heat on medium for about two to three minutes. You can also reheat them in the oven. Preheat your oven to 350°F (175°C). Bake for about 15 minutes until hot throughout. Want to save some for later? You can freeze these stuffed peppers! First, let them cool completely. Wrap each pepper tightly in plastic wrap. Then, place them in a freezer bag. They can stay good for up to three months. When you're ready to eat, thaw them overnight in the fridge before reheating. Quinoa is a superfood packed with nutrients. It is high in protein, making it great for muscle health. It contains all nine essential amino acids, which many grains lack. Quinoa is also high in fiber, aiding digestion and promoting a healthy gut. It has minerals like magnesium, iron, and potassium. These help keep your heart and bones strong. Plus, quinoa is gluten-free, making it safe for those with gluten allergies. Yes, you can! While I love using bell peppers, you can try different types. Poblano peppers add a smoky flavor. Jalapeños can bring some heat, perfect for spice lovers. Mini sweet peppers work well for bite-sized snacks. Just remember to adjust cooking times if you choose thicker peppers. Each type will give a unique taste to your dish. You can tell when the stuffed peppers are done by checking the cheese. It should be bubbly and golden. The peppers should also look tender but not mushy. You can poke them with a fork to test for softness. If they are still firm, give them a few more minutes. The filling should be hot throughout. Let them cool slightly before serving. Enjoy the tasty results! In this post, we explored the key ingredients for stuffed peppers and how to prepare them. I shared tips for perfect quinoa cooking and cheese choices. You learned variations for different diets and ideas for tasty fillings. Remember to store leftovers properly and follow reheating advice. Stuffed peppers are healthy and versatile. Experiment and make this dish your own. Enjoy your cooking adventure with stuffed peppers!

Southwest Quinoa Stuffed Peppers Tasty and Healthy Meal

To make honey mustard chicken thighs, gather these simple ingredients: - 4 bone-in, skin-on chicken thighs - 1/4 cup honey - 1/4 cup Dijon mustard - 2 cloves garlic, minced - 1 tablespoon apple cider vinegar - 1 teaspoon dried thyme - 1 teaspoon paprika - Salt and pepper to taste - Fresh parsley, chopped (for garnish) Each ingredient plays a key role. The chicken thighs provide rich flavor and moisture. Honey adds sweetness, while Dijon mustard brings a sharp bite. Garlic adds depth, and apple cider vinegar balances the mix. Thyme and paprika enhance the taste and color. Salt and pepper are crucial for seasoning. Finally, fresh parsley brightens the dish. With these ingredients, you can create a meal that is both simple and delicious. {{ingredient_image_1}} - Preheat the oven to 400°F (200°C). - In a small bowl, whisk together: - 1/4 cup honey - 1/4 cup Dijon mustard - 2 cloves garlic, minced - 1 tablespoon apple cider vinegar - 1 teaspoon dried thyme - 1 teaspoon paprika - Salt and pepper to taste This mix gives the chicken a sweet and tangy flavor. - Pat the chicken thighs dry with paper towels. - Place them in a baking dish, skin side up. - Generously brush the honey mustard mixture over the chicken thighs. Make sure each piece is covered well. Set aside some sauce for later basting. - Bake the chicken in the preheated oven for 30 minutes. - After 30 minutes, remove the dish and baste the chicken with the reserved sauce. - Return to the oven and bake for another 15-20 minutes. - Check for doneness by using a meat thermometer. The internal temperature should reach 165°F (74°C). The chicken should be golden brown and juicy. Let it rest for 5 minutes before serving. This helps keep it moist. Enjoy your meal! To get crispy skin, pat the chicken thighs dry with paper towels. This step helps the skin crisp up in the oven. You can season the skin with salt and pepper for added flavor. If you want to switch things up, try using different herbs like rosemary or oregano. They add a nice touch to the dish. Basting is key for juicy chicken. It keeps the meat moist and enhances the taste. Use the reserved honey mustard sauce to baste the chicken halfway through cooking. This way, the flavors soak in while the chicken roasts. Basting at the right time makes a big difference. Pair your honey mustard chicken thighs with sides like roasted vegetables or mashed potatoes. A fresh salad also works well. For drinks, consider a crisp white wine or sparkling water with lemon. These options balance the rich flavors of the dish. Pro Tips Use Fresh Ingredients: Fresh herbs and quality honey make a significant difference in flavor. Whenever possible, opt for fresh thyme instead of dried for a more aromatic dish. Marinate for More Flavor: For an even deeper flavor, marinate the chicken thighs in the honey mustard mixture for a few hours or overnight before baking. Check for Doneness: Always use a meat thermometer to check the internal temperature of the chicken. It should reach 165°F (74°C) for safe consumption. Pair with Sides: This dish pairs wonderfully with roasted vegetables or a fresh salad to balance the sweetness of the honey mustard sauce. {{image_2}} You can change up this dish in fun ways! Start by using boneless chicken thighs. They cook faster and stay juicy. You can also swap out the Dijon mustard. Try yellow mustard for a milder taste or spicy brown mustard for a kick. Each mustard gives a different flavor, so feel free to experiment! You have options for cooking! Grilling gives the chicken a nice smoky flavor. Just brush the honey mustard mix on and grill until cooked through. Baking is easy and keeps the chicken moist. It’s perfect for busy days. You can even use a slow cooker. Coat the chicken with the honey mustard, then cook on low for 4-6 hours. This method makes the chicken super tender and flavorful. Want some heat? Add spices like cayenne pepper or crushed red pepper flakes. Start with a little and taste as you go. You can also mix in some hot sauce for extra zing. These spicy elements pair well with the sweet honey and tangy mustard, making a great flavor combo! To store your leftover honey mustard chicken thighs, first let them cool. Place them in an airtight container. They will keep in the fridge for up to four days. You can also freeze them for longer storage. Wrap the chicken tightly in foil or plastic wrap. Then, place it in a freezer-safe bag. Frozen chicken thighs last up to three months. When you're ready to enjoy the leftovers, the best way to reheat them is in the oven. Preheat your oven to 350°F (175°C). Place the chicken in a baking dish with a splash of water or broth. Cover it with foil to keep it moist. Heat for about 20 minutes or until hot. You can also use a microwave. Just be sure to cover the chicken. Heat it in short bursts to avoid drying it out. Keep an eye on it and stir if needed. This way, you’ll have juicy chicken just like the first time! Bake chicken thighs at 400°F for about 30 minutes. After this time, take them out to baste. Then, return them to the oven for another 15-20 minutes. The goal is to make the skin crispy and the meat juicy. The chicken is done when it reaches 165°F inside. Yes, you can use boneless chicken thighs or chicken breasts. Boneless thighs will cook faster, so check them at about 25 minutes. Breasts may dry out more, so be careful with cooking time. Drumsticks are also a fun choice. They’ll add a different flavor and texture. If you need a honey substitute, use maple syrup or agave nectar. These options will still add sweetness. You can also use brown sugar mixed with a little water for a similar effect. Adjust according to your taste. This blog post outlined a tasty honey mustard chicken thigh recipe. You learned the key ingredients and step-by-step cooking methods to make it perfect. We discussed tips for crispy skin, flavor boosts, and storage options. You can experiment with variations like spicy additions or alternative cooking methods. In the end, this dish is easy and delicious. Enjoy your cooking and savor each bite of your flavorful chicken!

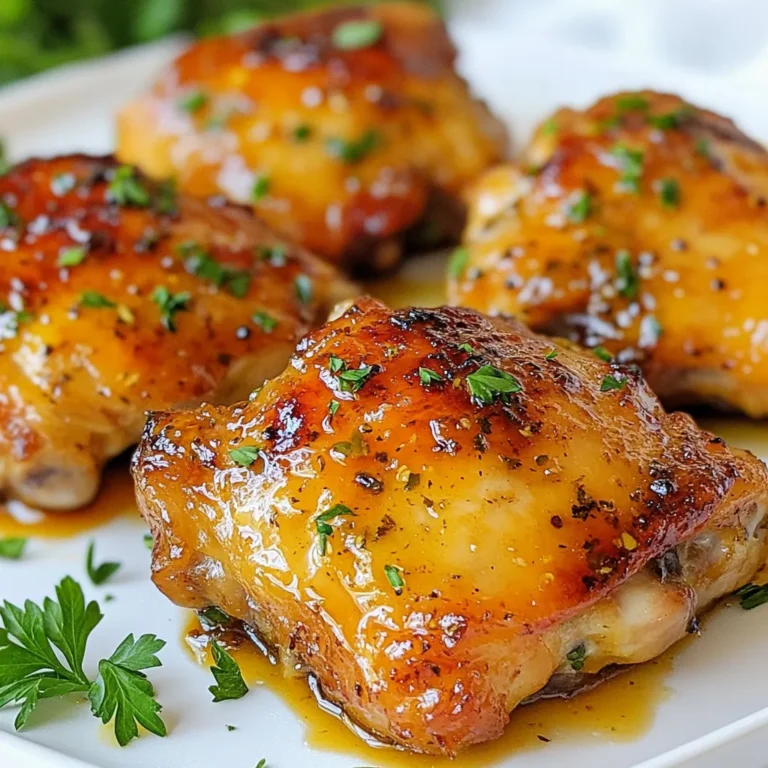
Honey Mustard Chicken Thighs Simple and Delicious Meal

- 1 ½ cups all-purpose flour - 1 cup granulated sugar - ½ cup unsalted butter, softened - 2 large eggs - ½ cup buttermilk These ingredients form the base of our strawberry lemonade cupcakes. All-purpose flour gives structure. Granulated sugar adds sweetness. Unsalted butter makes the batter rich and moist. Eggs help bind everything together, while buttermilk adds a slight tang that balances the sweetness. - Zest of 1 lemon - 1 tablespoon fresh lemon juice - 1 cup fresh strawberries, diced The lemon zest and juice provide a fresh, bright flavor. They make these cupcakes taste like summer in every bite. Diced strawberries add sweetness and a lovely texture. You can use ripe strawberries for the best flavor. - 4 oz cream cheese, softened - ½ cup powdered sugar - 2 tablespoons lemon juice For the frosting, we use cream cheese for its creamy texture and tangy flavor. Powdered sugar sweetens the frosting and gives it a smooth finish. More lemon juice in the frosting keeps the flavor bright and fresh. This combination creates a perfect topping for our cupcakes. {{ingredient_image_1}} 1. Preheating the oven: Start by heating your oven to 350°F (175°C). This step is key for even baking. 2. Mixing dry ingredients: In a large bowl, whisk together 1 ½ cups of all-purpose flour, 1 teaspoon of baking powder, ½ teaspoon of baking soda, and ¼ teaspoon of salt. This mix creates a light base for your cupcakes. 3. Creaming butter and sugar: In a separate bowl, beat ½ cup of softened unsalted butter with 1 cup of granulated sugar. Use an electric mixer for about 3-4 minutes. This process adds air and makes your batter fluffy. 4. Adding eggs and flavor: Add 2 large eggs, one at a time, to the butter and sugar mix. After each egg, mix well. Next, stir in ½ cup of buttermilk, the zest of 1 lemon, and 1 tablespoon of fresh lemon juice until everything blends smoothly. 5. Merging wet and dry mixtures: Gradually add the dry ingredient mix into the wet mix. Stir gently until just combined. Avoid overmixing to keep the cupcakes light. 6. Folding in strawberries: Gently fold in 1 cup of diced fresh strawberries into the batter. This adds bursts of flavor in every bite. 7. Filling cupcake liners: Line a 12-cup muffin pan with cupcake liners. Fill each liner about 2/3 full with the batter. This gives them room to rise. 8. Baking time and testing for doneness: Bake the cupcakes for 18-20 minutes. Check their doneness by inserting a toothpick. If it comes out clean, they are ready. 9. Cooling process before frosting: Let the cupcakes cool in the pan for 5 minutes. After that, transfer them to a wire rack to cool completely before frosting. This step ensures the frosting won’t melt. To get the best cupcakes, you need the right batter consistency. Your batter should be thick yet smooth. Mix until just combined; overmixing makes cupcakes dense. Room temperature ingredients help a lot. They blend well and make a fluffier batter. Take out the butter and eggs ahead of time. This simple step makes a big difference. For frosting, the texture is key. It should be creamy but not runny. Beat the cream cheese until it is very smooth. Gradually add powdered sugar to avoid lumps. Use a piping bag to make your cupcakes look lovely. It helps you control the frosting better and create fun designs. Presentation matters, so serve your cupcakes on a nice platter. Add fresh strawberries and lemon slices on top for color. They look great and taste even better. Pair these cupcakes with iced tea or lemonade for a refreshing treat. You can also serve them with a scoop of vanilla ice cream for extra delight. Pro Tips Use Fresh Strawberries: Fresh strawberries will enhance the flavor and texture of your cupcakes. Avoid using frozen strawberries as they can make the batter too wet. Room Temperature Ingredients: Ensure your butter and cream cheese are at room temperature. This will help them blend smoothly and create a fluffier frosting. Don’t Overmix: When combining the wet and dry ingredients, mix just until combined. Overmixing can lead to dense cupcakes. Cool Completely Before Frosting: Make sure your cupcakes are completely cooled before frosting. This prevents the frosting from melting and maintains its shape. {{image_2}} You can switch up the fruit in your cupcakes. Try blueberries or raspberries for a twist. Both fruits bring a fresh taste to the mix. You can also use a mix of strawberries and another berry for added flavor. Explore other citrus flavors too. Lime or orange can add a bright taste. Lime gives a more tropical feel, while orange adds sweetness. Each change makes the cupcakes unique and fun. Frosting can change the whole cupcake vibe. Cream cheese frosting is rich and tangy, which pairs well with lemon. Buttercream is lighter and sweeter, making it a good option too. Choose what you like best! You can add flavors to your frosting. Try adding more lemon juice for a zesty kick. Or mix in vanilla extract for a smooth taste. These little changes can elevate your cupcakes even more. If you're gluten-free, use a gluten-free flour blend. This swap works well, and your cupcakes will still taste great. Just make sure to check the blend for best results. For a vegan option, swap the eggs for applesauce or flaxseed meal. Use plant-based butter and dairy-free cream cheese for the frosting. These swaps keep the cupcakes tasty while meeting dietary needs. To keep your strawberry lemonade cupcakes fresh, store them in an airtight container. Place them at room temperature away from direct sunlight. This method works best for about two days. If you want to keep them longer, you can refrigerate them. Just be sure to cover them well to prevent drying out. Room temperature keeps the cupcakes soft and tasty. To freeze your cupcakes, wait until they are completely cool. Then, wrap each cupcake in plastic wrap. Place them in a freezer-safe bag or container. This helps prevent freezer burn. When you want to eat them, take out the cupcakes and let them thaw in the fridge overnight. For a quick thaw, you can leave them out at room temperature for a few hours. At room temperature, strawberry lemonade cupcakes stay fresh for about two days. If you refrigerate them, they can last up to a week. Just remember to check for any signs of spoilage. If they feel hard or smell off, it's best to toss them. Keeping them in a sealed container helps maintain their flavor and texture for longer. How to make strawberry lemonade cupcakes from scratch? To make these cupcakes, start by preheating your oven to 350°F (175°C). Line a muffin pan with cupcake liners. In a bowl, whisk together flour, baking powder, baking soda, and salt. In another bowl, cream softened butter and granulated sugar until fluffy. Then, add eggs, buttermilk, lemon zest, and lemon juice. Mix well. Gradually combine the dry ingredients with the wet. Finally, fold in diced strawberries. Fill the liners and bake for 18-20 minutes. Let them cool before frosting. Can I use frozen strawberries in this recipe? Yes, you can use frozen strawberries. Just thaw and drain them first. This helps prevent excess moisture in your batter. Chop them into small pieces before adding to the mix. Keep in mind that the flavor may be slightly different, but they still work well. What to do if cupcakes are too dense? If your cupcakes are dense, check if you overmixed the batter. Mixing too much can create tough cupcakes. Make sure to mix until just combined. Also, ensure your baking powder and baking soda are fresh. Old leavening agents may not help the cupcakes rise properly. How to prevent overfilling cupcake liners? To avoid overfilling, use an ice cream scoop for even portions. Fill each liner about two-thirds full. This gives the cupcakes room to rise without spilling over. A good tip is to practice with a small amount of batter first. Can I add additional flavors or spices? Absolutely! You can add a pinch of cinnamon or nutmeg for warmth. For extra zing, try adding lime juice or zest. You can also mix in other fruits like raspberries or blueberries for a twist on flavor. How to adjust the recipe for different serving sizes? To adjust serving sizes, simply scale the ingredients up or down. For example, if you want 24 cupcakes, double the ingredients. Use a scale for accuracy. Remember to adjust baking time slightly if you change the size of the cupcakes. This guide covers everything you need to make perfect strawberry lemonade cupcakes. You learned about key ingredients like flour, butter, and eggs. I shared step-by-step instructions for mixing and baking. There's also helpful advice on frosting and serving. Experiment with flavors and dietary options to make them your own. Proper storage keeps them fresh longer. With this knowledge, you can create delicious treats everyone loves. Enjoy baking these cupcakes, and have fun sharing your sweet creations!

Strawberry Lemonade Cupcakes Delightful Summer Treat

To make a tasty Lemon Herb Couscous Salad, you need fresh and simple ingredients. Each one adds flavor and texture. Here’s what you need: - 1 cup couscous - 1 1/4 cups vegetable broth - 1/2 cup cherry tomatoes, halved - 1/2 cucumber, diced - 1/4 red onion, finely chopped - 1/4 cup parsley, finely chopped - 1/4 cup mint leaves, finely chopped - 1/4 cup feta cheese, crumbled (optional) - Juice and zest of 1 lemon - 3 tablespoons olive oil - Salt and pepper to taste These ingredients create a fresh and zesty salad. Couscous serves as the base. It cooks quickly and absorbs all the flavors. The vegetable broth adds a rich taste. Cherry tomatoes and cucumber give a crisp bite. Red onion adds a little zing. Fresh parsley and mint bring bright notes. They make the salad feel light and refreshing. Feta cheese is optional, but it adds creaminess. The lemon juice and zest provide a tangy kick. Olive oil helps blend the flavors together. Finally, season with salt and pepper to taste. Gather these items, and you’re ready to create a delightful dish! {{ingredient_image_1}} Start by boiling the vegetable broth in a medium saucepan. Bring it to a rolling boil. This step is key. Once it boils, remove the saucepan from the heat. Stir in the couscous and cover it with a lid. Let it sit for five minutes. This helps the couscous absorb all the flavor. While the couscous sits, prepare the vegetables. Halve the cherry tomatoes and place them in a large bowl. Next, take the cucumber and dice it into small pieces. Add that to the bowl too. Now, finely chop the red onion, parsley, and mint. Don’t rush this step; fresh herbs really make the salad pop! In a small bowl, mix the lemon juice and zest. This adds a bright flavor. Next, whisk in the olive oil. Season with salt and pepper to taste. This dressing brings everything together and adds a burst of freshness. After five minutes, fluff the couscous with a fork. Then transfer it to your bowl with the veggies. Pour the dressing over everything. Toss gently to combine all the ingredients evenly. If you like, sprinkle crumbled feta cheese on top. This adds a creamy touch that balances the salad. Selecting fresh vegetables is key. Look for bright colors and firm textures. For cherry tomatoes, choose ones that feel plump. Pick cucumbers that are smooth and firm. Red onions should have a shiny skin. Fresh herbs make a big difference. I always prefer fresh parsley and mint over dried. Fresh herbs add more flavor and aroma. If you must use dried herbs, use less. Dried herbs are stronger than fresh. Fluffing couscous correctly is important. After letting it sit, use a fork to gently break it up. This keeps the grains separate and light. To balance flavors, the dressing is key. Use fresh lemon juice and zest for brightness. Olive oil adds richness. Salt and pepper enhance the taste and bring everything together. Taste the salad before serving. Adjust the seasoning to your liking. Couscous can be made gluten-free. Look for gluten-free couscous made from corn or rice. For a vegan option, skip the feta cheese. You can replace it with avocado or leave it out completely. This salad remains tasty without it. Always check labels if you're unsure about ingredients. Pro Tips Use Fresh Herbs: Fresh herbs like parsley and mint can elevate the flavor of your salad significantly. Make sure to chop them just before adding to retain their vibrant taste. Let It Chill: For best results, let the salad chill in the refrigerator for at least 30 minutes before serving. This allows the flavors to meld beautifully. Customize Your Veggies: Feel free to add other vegetables like bell peppers or radishes for extra crunch and color. This salad is versatile and can be tailored to your preferences. Perfecting the Dressing: Adjust the lemon juice and olive oil in the dressing to balance tanginess and richness according to your taste. A bit of honey can also add a sweet touch if desired. {{image_2}} When it comes to Lemon Herb Couscous Salad, you can get creative! Adding different ingredients can enhance the flavor and texture. You can mix in other vegetables. Bell peppers add crunch and color. Radishes give a peppery bite. They make the salad more colorful and tasty. You can also change the herbs. Fresh basil brings sweetness, and cilantro adds a fresh note. Experiment with these to find your favorite mix! Want to make this salad heartier? Grilled chicken or shrimp works well. The smoky flavor pairs nicely with the lemon. For a vegetarian option, add chickpeas. They are filling and add protein without meat. This salad shines as a side dish. It complements grilled meats perfectly. You can also enjoy it as a main meal. Just add your choice of protein and some extra veggies. It’s a great way to mix flavors and textures! To keep your lemon herb couscous salad fresh, store it in an airtight container. This helps lock in flavors and moisture. I recommend putting the salad in the fridge right after serving. It stays good for about 3 to 5 days. Make sure to check for any signs of spoilage before eating. If the salad looks or smells off, it's best to toss it. Freezing couscous salad is easy but not always ideal. If you need to freeze it, place the salad in a freezer-safe container. Leave some space at the top for expansion. This salad can last up to 2 months in the freezer. When you want to eat it, thaw it overnight in the fridge. After thawing, give it a good stir. The salad may need a little extra lemon juice or olive oil to refresh the flavors before serving. Your lemon herb couscous salad can last for about 3 to 5 days in the fridge. Keep it in an airtight container to keep it fresh. If you see any signs of spoilage, toss it out. Yes, you can make this salad ahead of time. It tastes even better after sitting for a few hours. Just store it in the fridge until you are ready to serve. No, couscous is not gluten-free. It is made from wheat, so it contains gluten. If you need a gluten-free option, try quinoa or rice instead. You can use a simple vinaigrette or a yogurt dressing. A balsamic vinaigrette adds a nice twist. Experiment with flavors to find what you like best. Add more lemon juice and zest for extra zing. You can also mix in some chopped jalapeños or a dash of hot sauce for heat. Fresh herbs like cilantro can boost the flavor too. This blog post showed you how to make a tasty couscous salad. We covered the key ingredients and the steps to create a colorful dish. You learned tips for choosing fresh items and ways to customize the salad. Remember, you can add proteins or switch up herbs based on your taste. This salad is great as a meal or a side. Enjoy experimenting with it and making it your own.

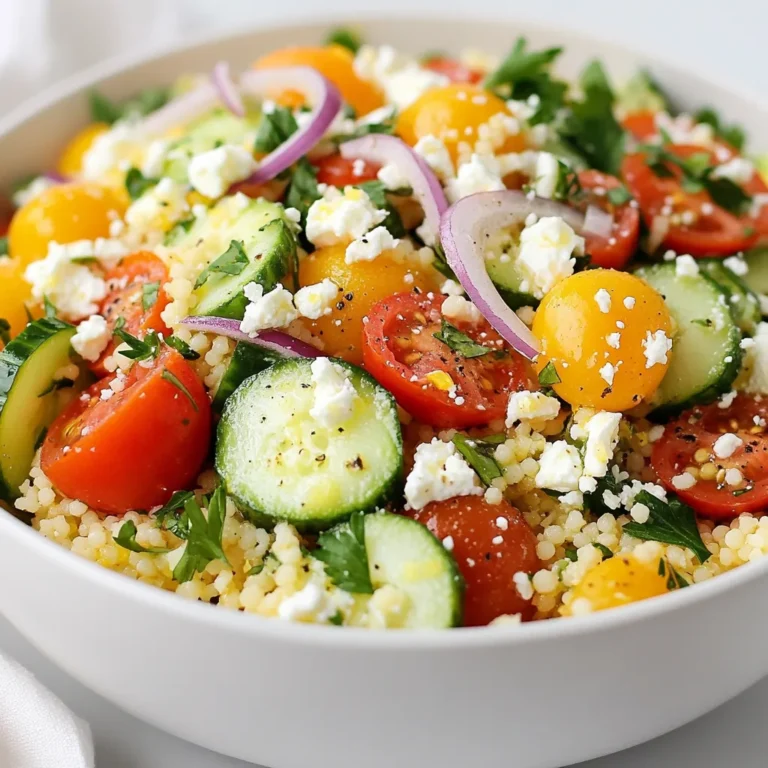
Lemon Herb Couscous Salad Fresh and Tasty Delight

To make creamy lemon spinach orzo, you will need: - 1 cup orzo pasta - 2 cups fresh spinach, chopped - 1 cup heavy cream - 1 tablespoon olive oil - 2 cloves garlic, minced - Zest of 1 lemon - Juice of 1 lemon - 1/2 cup grated Parmesan cheese - Salt and pepper to taste - Fresh parsley, chopped (for garnish) These ingredients blend together to create a rich, creamy dish with a bright lemon kick. You can add these ingredients to boost the taste: - Red pepper flakes for heat - Sun-dried tomatoes for sweetness - Fresh basil or thyme for herbal notes These options let you customize the dish to your liking. If you need swaps, here are some ideas: - Use whole wheat orzo for a healthier pasta option. - Swap heavy cream with half-and-half or coconut milk for a lighter sauce. - Try nutritional yeast instead of Parmesan for a vegan version. These substitutions can help you adapt the recipe to fit your diet or preferences. {{ingredient_image_1}} First, fill a large pot with water and add salt. Bring it to a boil. Add 1 cup of orzo pasta and stir. Cook for about 8 to 10 minutes. You want it al dente, meaning it should be firm but not hard. Once done, drain the orzo and set it aside. In the same pot, heat 1 tablespoon of olive oil over medium heat. Add 2 minced garlic cloves and cook for about 30 seconds. Stir to avoid burning the garlic. Next, add 2 cups of chopped spinach. Cook it for about 2 to 3 minutes until it wilts down. The garlic and spinach will fill your kitchen with a lovely smell. Now it's time to make the sauce. Pour in 1 cup of heavy cream, along with the zest and juice of 1 lemon. Stir everything well. Bring the mixture to a gentle simmer, watching closely so it doesn’t boil over. The cream will start to thicken, forming a rich sauce. Add the cooked orzo back into the pot. Mix it well with the creamy spinach sauce. Stir in 1/2 cup of grated Parmesan cheese until it melts into the dish. Taste your creation and add salt and pepper to your liking. Let it cook for another 2 to 3 minutes. This will help the flavors blend well. Finally, spoon the creamy lemon spinach orzo into bowls. Garnish with fresh chopped parsley for a nice touch. Enjoy your delicious meal! To cook orzo well, follow these steps: - Use a large pot for even cooking. - Boil plenty of salted water. - Stir occasionally to prevent sticking. - Cook orzo until al dente, about 8-10 minutes. - Drain it, but do not rinse. This keeps the starch that helps sauce stick. This method gives you the best texture. Overcooked orzo turns mushy, so keep an eye on it. To boost the flavor, think about adding these: - Fresh basil or thyme can bring bright notes. - A pinch of red pepper flakes adds a nice kick. - Try a bit of nutmeg for warmth. Don't hesitate to experiment! Fresh herbs add layers of taste. Use what you love to make this dish yours. Serve your creamy lemon spinach orzo like a pro. Here’s how: - Use a deep bowl to hold the creamy sauce. - Garnish with freshly chopped parsley for color. - Add extra lemon zest on top for a pop of brightness. A beautiful dish makes every bite more enjoyable. Make it look as good as it tastes! Pro Tips Perfectly Cooked Orzo: Make sure to cook the orzo in plenty of salted water to enhance its flavor. Check for al dente texture to avoid mushiness. Fresh Spinach: Using fresh spinach adds a vibrant color and flavor. If using frozen, make sure to thaw and drain it well before adding. Adjusting Creaminess: If you prefer a lighter dish, substitute half of the heavy cream with vegetable broth or chicken broth for added flavor without the extra calories. Garnish Wisely: Fresh parsley not only adds color, but it also enhances the dish's flavor. Consider adding a squeeze of fresh lemon juice right before serving for an extra zing! {{image_2}} You can easily boost the protein in Creamy Lemon Spinach Orzo. Adding chicken or shrimp makes it heartier. For chicken, cook diced breast in the pot before adding garlic. Sauté it until golden, then follow the rest of the recipe. If you prefer shrimp, add peeled shrimp right after the spinach wilts. Cook until they turn pink, then proceed with the creamy sauce. Both options enhance the dish and provide a filling meal. If you want a vegetarian twist, try adding chickpeas or white beans. They provide protein and a nice texture. Stir them in when adding spinach. You can also use tofu for a different flavor. Cook cubed tofu in olive oil until golden before adding it to the dish. These options keep it light while still being satisfying. For a gluten-free version, swap the orzo with gluten-free pasta. Many brands offer fun shapes that work well in this dish. Cook it according to the package instructions. Ensure the rest of the ingredients are gluten-free, especially any sauces or seasonings. This way, everyone can enjoy this creamy lemon spinach orzo without worry. To store leftovers of creamy lemon spinach orzo, let the dish cool to room temperature. Transfer it to an airtight container. Make sure to seal it well to keep out air. You can store it in the fridge for up to three days. This dish tastes great even after a day or two! When you are ready to eat the leftovers, take them out of the fridge. Place the orzo in a saucepan over low heat. Add a splash of milk or cream to keep it creamy. Stir often until it warms through. You can also use a microwave. Heat in short bursts, stirring in between, until hot. If you want to freeze it, follow these steps. First, let the dish cool completely. Then, place it in a freezer-safe container. Leave some space at the top for expansion. You can freeze creamy lemon spinach orzo for up to three months. When you are ready to eat it, thaw it in the fridge overnight before reheating. Yes, you can use other pasta. If you want to switch it up, try penne, fusilli, or farfalle. Each type will change the dish’s texture a bit, but it will still taste great. Just remember to adjust the cooking time based on the type of pasta you choose. Follow the package instructions for best results. To make this dish dairy-free, replace heavy cream with coconut milk or almond milk. You can also use dairy-free cheese to keep the flavor. Look for a vegan Parmesan to add that cheesy touch without dairy. This way, you enjoy the creamy texture without any dairy. Creamy Lemon Spinach Orzo pairs well with grilled chicken or fish. You can also serve it with a fresh salad for a light meal. For a heartier option, add roasted vegetables. These sides complement the flavors and make your meal more filling. Reheating can dry out the orzo. To avoid this, add a splash of water or broth when reheating. Use a pan on low heat or the microwave. Stir often, and heat just until warm. This keeps the dish creamy and delicious. This blog post covered how to make Creamy Lemon Spinach Orzo. We went over key ingredients and simple steps for preparation. You learned ways to enhance flavor and add protein. I shared storage tips for leftovers too. This dish is flexible and easy to customize. Remember, cooking should be fun! Explore different options and make it your own. Enjoy your creamy orzo dish and impress your friends and family.

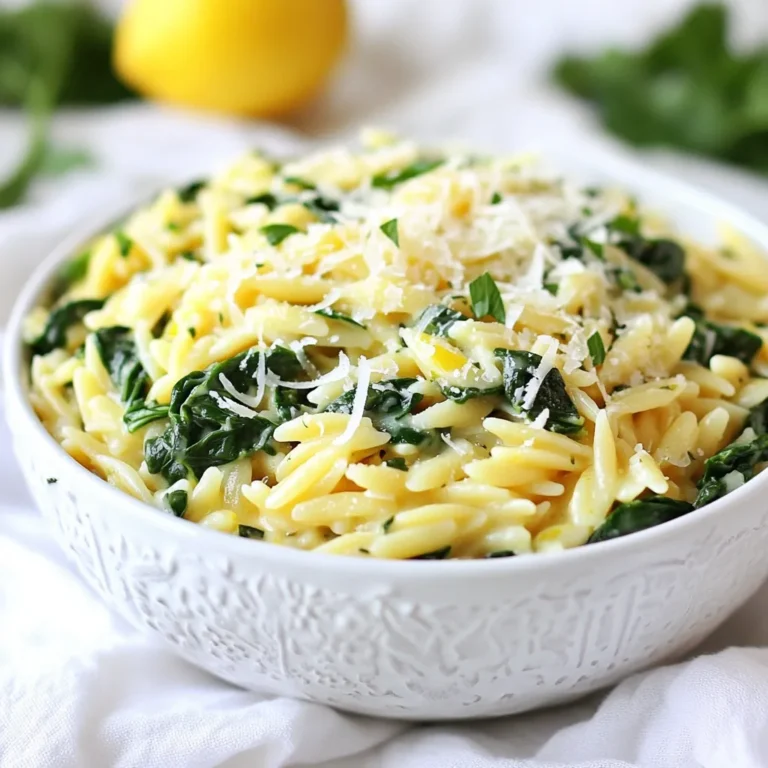
Creamy Lemon Spinach Orzo Flavorful and Simple Dish

- 4 salmon fillets - 2 lemons (zested and juiced) - 1/4 cup fresh basil leaves, chopped - 2 tablespoons olive oil - 3 garlic cloves, minced - Salt and pepper to taste - Lemon slices for garnish - Fresh basil sprigs for garnish You can add some extra flavor to your Lemon Basil Salmon. Here are a few ideas: - A pinch of red pepper flakes for heat. - A tablespoon of honey for sweetness. - A splash of white wine for depth. - Capers for a briny touch. These options can bring new layers to your dish. Feel free to mix and match! Using fresh ingredients makes a big difference. Here are tips to keep them fresh: - Keep salmon fillets in the coldest part of your fridge. Use within two days. - Store lemons at room temperature for easy access. If cut, wrap in plastic. - Basil leaves last longer in a glass of water, like a bouquet. - Check garlic for firmness and avoid sprouted cloves. These simple steps help your dish shine with flavor and freshness! {{ingredient_image_1}} 1. Start by preheating your oven to 400°F (200°C). 2. Grab a mixing bowl and add the juice and zest of two lemons. 3. Chop up a quarter cup of fresh basil leaves. 4. Mince three garlic cloves, then add them to the bowl. 5. Pour in two tablespoons of olive oil. 6. Season the mix with salt and pepper to taste. 7. Stir all the ingredients well to make a marinade. 8. Place four salmon fillets in a shallow baking dish. 9. Pour the marinade over the salmon, coating each piece well. 10. Allow the salmon to marinate for at least 15 minutes. 1. After marinating, place the salmon fillets in the oven. 2. Bake them for 12 to 15 minutes. 3. Look for the fish to flake easily with a fork. 4. Once done, carefully take the salmon out of the oven. 5. Let it rest for a couple of minutes to keep moisture. To check if your salmon is done, use a fork. Gently poke the thickest part of the fillet. If it flakes easily, it is ready to eat. The salmon should appear opaque and slightly pink in the center. If it still looks raw, bake it for another minute or two. Always trust your fork for the best results! To get the best flavor from your Lemon Basil Salmon, marinating is key. Start by mixing lemon juice, zest, chopped basil, olive oil, minced garlic, salt, and pepper in a bowl. This mix creates a tasty marinade. Make sure you coat the salmon well. Let it sit for at least 15 minutes. For even more flavor, marinate the salmon in the fridge for an hour. This allows the salmon to soak up all those bright lemon and basil tastes. Pair your Lemon Basil Salmon with fresh and light sides. Here are some great options: - Steamed asparagus - Roasted broccoli - Quinoa salad - Garlic mashed potatoes - A crisp green salad These sides add color and texture to your meal. They also balance the flavors of the salmon. When making Lemon Basil Salmon, some common mistakes can ruin the dish. Avoid these pitfalls: - Skipping the marinade: This step is crucial for flavor. - Overcooking the salmon: Cook it until it flakes easily with a fork. - Not using fresh ingredients: Fresh basil and lemons make a big difference. - Ignoring resting time: Let the salmon rest before serving. This helps keep it juicy. By following these tips, you’ll create a delicious and memorable meal! Pro Tips Marinate Longer for Extra Flavor: If you have time, let the salmon marinate for up to 2 hours in the refrigerator. This allows the flavors to penetrate the fish more deeply. Check for Doneness: To ensure your salmon is perfectly cooked, use a fork to gently flake the thickest part. It should flake easily and appear opaque. Use Fresh Ingredients: Fresh basil and lemons will enhance the dish’s flavor significantly. Avoid using dried basil for this recipe. Experiment with Herbs: Try adding other fresh herbs like dill or parsley along with the basil for a different flavor profile. {{image_2}} Grilling Lemon Basil Salmon adds a smoky flavor. Start by marinating your salmon as usual. Then, heat your grill to medium-high. Place the salmon fillets on the grill skin-side down. Cook for about 6 to 8 minutes. Flip the salmon gently and grill for another 6 minutes. The salmon should be flaky and tender. Serve with lemon slices for a bright touch. You can swap basil for other herbs. Try dill or parsley for a fresh taste. Oregano works well if you want a bolder flavor. For a spicy kick, add some red pepper flakes to the marinade. These changes can help you find your favorite twist on the dish. This recipe is naturally gluten-free and dairy-free. Use fresh ingredients to keep it healthy. If you want to add creaminess, consider using avocado or a dairy-free alternative. This keeps the dish light but still delicious. Make sure your seasonings are gluten-free, especially if you use pre-made sauces or marinades. To store leftover salmon, wait for it to cool. Place it in an airtight container. Cover it tightly. You can keep it in the fridge for up to three days. If you want to keep it longer, freeze it. When you reheat salmon, do it gently. Preheat your oven to 275°F (135°C). Place the salmon on a baking sheet. Cover it with foil to keep it moist. Heat it for about 15 minutes. This keeps the flavor fresh and the texture nice. To freeze your salmon, wrap it tightly in plastic wrap. Then, put it in a freezer bag. Remove as much air as you can. Label the bag with the date. Frozen salmon is best used within three months. When ready to use, thaw it in the fridge overnight. The best way to season salmon is simple. Use salt, pepper, and lemon juice. These flavors bring out the fish's natural taste. Fresh herbs like basil also add a great touch. For Lemon Basil Salmon, the marinade mixes lemon zest, garlic, and chopped basil. This blend enhances the salmon's flavor while keeping it light and fresh. You can use dried basil, but fresh is better. Fresh basil has a bright flavor and aroma. Dried basil can taste more muted. If you must use dried, use less. About one teaspoon of dried basil equals one tablespoon of fresh. Keep in mind that the taste will change slightly. To know if salmon is fully cooked, look for color and texture. The fish should turn from a deep pink to a lighter shade. It should also flake easily with a fork. You can use a food thermometer. The ideal internal temperature is 145°F (63°C). Checking these signs helps ensure a perfect meal. Yes, Lemon Basil Salmon is healthy! Salmon is rich in omega-3 fatty acids, which are great for your heart. The lemon and basil add vitamins and antioxidants. Olive oil is also a healthy fat that supports good health. This dish is a balanced option for any meal. Enjoy it without guilt! In this article, we explored the best ingredients for Lemon Basil Salmon and how to prepare it. I shared tips on marinating and suggested side dishes to complement your meal. Remember to check for doneness to ensure perfect cooking. Variations can add fun, like grilling or using different herbs. Proper storage and reheating help you enjoy leftovers. Lemon Basil Salmon is tasty and healthy, making it a great choice for any meal. Embrace these tips to create a delightful dish that impresses everyone.

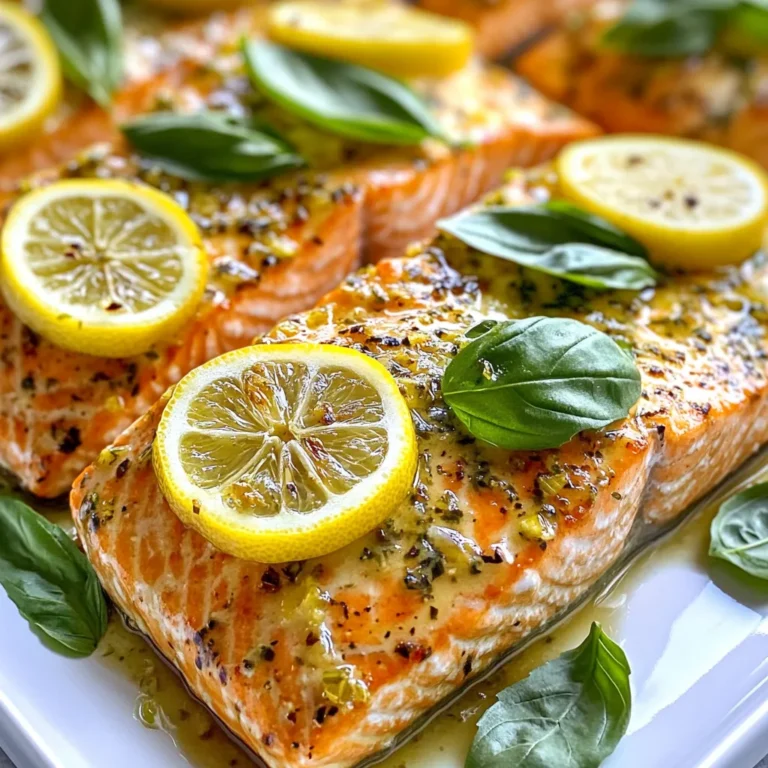
Lemon Basil Salmon Flavorful and Simple Recipe

PREV 1 … 54 55 56 57 NEXT
flavor nest kitchen

explore

DessertsDinnerAppetizersDrinks

Our Policies

  • Cookie Policy
  • Copyright Policy
  • Disclaimer
  • GDPR Policy
  • Terms Of Use
Back to Top
  • About
  • Contact Us
  • Privacy Policy
© 2025 flavor nest kitchen