FREE DINNER EBOOK! Get your copy!
  • Cookie Policy
  • GDPR Policy
  • Disclaimer
  • Terms Of Use
  • Visit my other site: Fun Cookie Recipes
flavor nest kitchen
  • Home
  • Dinner
  • Desserts
  • Drinks
  • Appetizers
  • Contact
  • About
  • Privacy Policy
  • Home
  • Dinner
  • Desserts
  • Drinks
  • Appetizers
  • Contact
  • About
  • Privacy Policy
  • Cookie Policy
  • GDPR Policy
  • Disclaimer
  • Terms Of Use
Visit my other site: Fun Cookie Recipes

HOME / CATEGORIES /

Latest

- 1 cup rolled oats - 1/2 cup natural almond butter - 1/4 cup honey or maple syrup The main ingredients create a solid base for your protein balls. Rolled oats give them a chewy texture. Natural almond butter adds creaminess and healthy fats. Honey or maple syrup sweetens the mix and helps it stick together. - 1/2 cup chocolate protein powder - 1/4 cup unsweetened shredded coconut - 1/4 cup dark chocolate chips - 1/2 teaspoon vanilla extract - Pinch of salt You can customize your protein balls with optional add-ins. The chocolate protein powder boosts the protein content. Unsweetened shredded coconut enhances the flavor and texture. Dark chocolate chips bring a rich taste, while vanilla extract adds warmth. A pinch of salt balances the sweetness. - 1 cup rolled oats = 90 grams - 1/2 cup natural almond butter = 128 grams - 1/4 cup honey = 85 grams - 1/2 cup chocolate protein powder = 60 grams - 1/4 cup unsweetened shredded coconut = 20 grams - 1/4 cup dark chocolate chips = 45 grams If you need different measurements, here are some conversions. Use these to ensure your protein balls turn out perfect every time. {{ingredient_image_1}} 1. Mixing dry ingredients In a large bowl, combine 1 cup of rolled oats, 1/2 cup of chocolate protein powder, and 1/4 cup of unsweetened shredded coconut. Stir well until all the dry ingredients blend evenly. 2. Creating the almond butter mixture In a separate bowl, mix 1/2 cup of natural almond butter, 1/4 cup of honey (or maple syrup), 1/2 teaspoon of vanilla extract, and a pinch of salt. Stir until the mixture is smooth and creamy. 1. Integrating dry and wet ingredients Pour the almond butter mixture into the bowl with the dry ingredients. Add 1/4 cup of dark chocolate chips. Use a spatula or your hands to mix everything until it combines well. The texture should be sticky but hold its shape. 2. Adjusting consistency if necessary If the mixture feels too dry, add a teaspoon of water or more almond butter. Keep mixing until you reach a good consistency that you can form into balls. 1. Forming the protein balls Use your hands to shape the mixture into small balls, about 1 inch in diameter. Place them on a parchment-lined baking sheet or plate. 2. Proper chilling techniques Once you shape all the balls, refrigerate them for at least 30 minutes. This helps them set and hold their shape better. After chilling, they are ready to enjoy! To keep your chocolate coconut protein balls fresh, store them in the fridge. Use an airtight container to prevent any odors from other foods. They can last up to one week in the fridge. If you want to save them for longer, freeze them. Place the balls in a single layer on a baking sheet until they freeze solid. After that, transfer them to a freezer-safe bag or container. They can last up to three months in the freezer. Using the right tools can make mixing easier. A large mixing bowl works well for combining dry ingredients. A spatula or your hands helps mix the wet and dry ingredients together. This ensures that the almond butter and honey blend well with the oats and protein powder. If you want a smoother mix, consider using a food processor. Just pulse the dry ingredients first, then add the wet mix and blend again. For special occasions, present your protein balls on a decorative plate. Sprinkle extra shredded coconut around them for a nice touch. You can also place them in small jars tied with a ribbon. This makes a great gift! For meal prep, pack them in small containers for easy snacking. They work well for on-the-go energy or post-workout treats. Pro Tips Storage Solution: Keep your protein balls in an airtight container in the refrigerator for up to a week to maintain freshness. Flavor Variations: Experiment with different nut butters or add-ins like chia seeds, flaxseeds, or dried fruits for unique flavor combinations. Perfect Consistency: If the mixture feels too sticky, add a bit more oats or shredded coconut to help achieve the desired texture. Kid-Friendly Treat: Involve kids in the mixing and rolling process for an engaging cooking activity that encourages healthy snacking. {{image_2}} You can switch up the flavors of these protein balls to keep them fun. One tasty option is to make peanut butter chocolate protein balls. Just swap the almond butter for natural peanut butter. This gives a rich, nutty taste that pairs well with chocolate. Another great choice is coconut almond joy protein balls. For this, mix in almond extract and use chopped almonds instead of chocolate chips. This will give you that classic Almond Joy flavor in each bite. If you want vegan options, you can use maple syrup instead of honey. For nut butter, try sunflower seed butter or another plant-based option. These swaps keep the snack vegan while still being tasty. If you're gluten-free, stick to certified gluten-free oats. Most protein powders are gluten-free too, but always check the label. This way, you can enjoy these protein balls without worry. You can also play around with the protein powder. Use plant-based protein or even collagen powder if you prefer. Each type will change the flavor and texture a bit. To customize the texture, add nuts or seeds. Chopped walnuts or pumpkin seeds add a nice crunch. You can adjust the mix to suit your taste. To keep your chocolate coconut protein balls fresh, store them in the fridge. The ideal temperature is around 35°F to 40°F. Keep the humidity low. High humidity can make them soggy and spoil faster. These tasty treats can last about one week in the fridge. After that, they may lose flavor or texture. Watch for signs of spoilage, like a bad smell or mold. If they feel sticky or slimy, it’s best to toss them. Use airtight containers to store your protein balls. Glass jars or plastic containers work well. Make sure they are clean and dry before use. Label the containers with the date you made them. This will help you keep track of their freshness. Chocolate coconut protein balls can last up to a week at room temperature. Keep them in a cool, dark place. When stored in the fridge, they can last up to two weeks. Just place them in an airtight container to keep them fresh. Yes, you can use different protein powders based on your taste. Plant-based protein powders like pea or hemp work well. If you prefer whey protein, that’s fine too. Just remember that flavors may change slightly. Adjust the sweetness if needed, depending on your choice. You can change the flavors and textures to fit your taste. Try adding nuts for crunch. Chopped dates can add extra sweetness. You can also mix in spices like cinnamon or cocoa powder for variety. If you want a tropical twist, add pineapple or mango bits. This blog post covered how to make delicious protein balls using simple ingredients. You learned about the main components like rolled oats and almond butter, as well as fun add-ins. We discussed step-by-step instructions for mixing, shaping, and chilling. Don’t forget the tips on storage and optional variations to try. You can adapt recipes to fit your taste or diet. Enjoy your tasty snacks and feel great knowing they are easy to make and healthy.

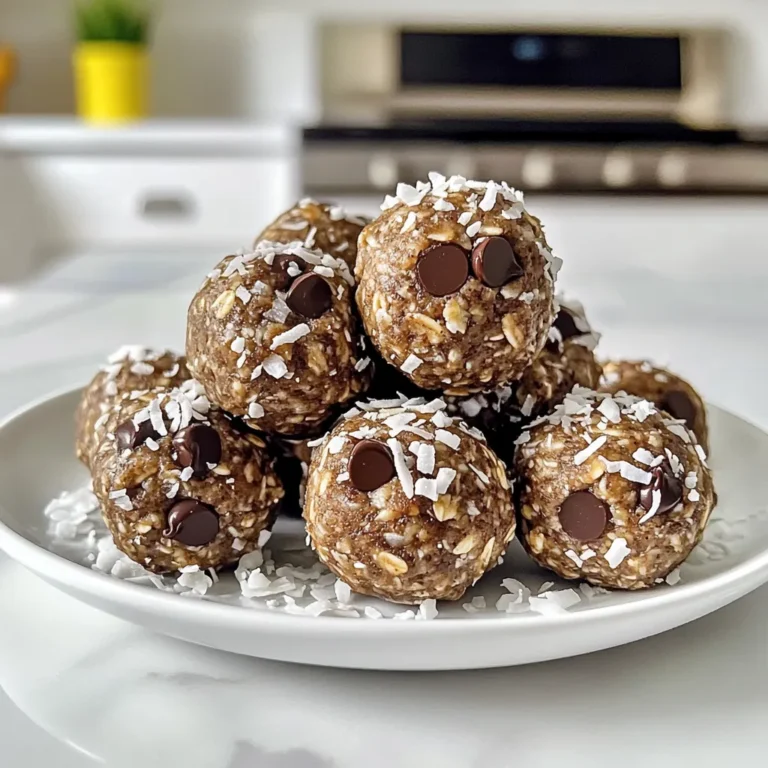
Chocolate Coconut Protein Balls Simple Energy Snack

- 2 ribeye steaks (about 1 inch thick) - 4 tablespoons unsalted butter - 4 cloves garlic, minced - 1 tablespoon fresh rosemary, chopped - 1 tablespoon fresh thyme, chopped - Salt and freshly ground black pepper, to taste - 1 tablespoon olive oil - Fresh parsley, for garnish To make this dish, you will need a few key tools: - A large skillet (cast iron works best) - A sharp knife for slicing - A cutting board - Measuring spoons - Tongs for flipping the steaks - A spoon for basting When choosing your ribeye steaks, here are some tips: - Look for steaks with good marbling. This fat adds flavor and keeps the meat juicy. - Choose steaks that are bright red in color. Avoid any that look brown or dull. - Ask your butcher for steaks that are at least 1 inch thick. Thicker steaks cook better in a skillet. - Freshness matters. Buy your steaks from a trusted source to ensure quality. {{ingredient_image_1}} Start by taking two ribeye steaks out of the fridge. Let them sit for about 30 minutes. This helps the meat cook evenly. Pat the steaks dry with paper towels. This step keeps the crust nice and crispy. Season both sides with salt and black pepper. Use enough to enhance the flavor. Grab a large skillet and place it on the stove. Turn the heat to medium-high. Add one tablespoon of olive oil to the skillet. Wait until the oil starts to shimmer. This shows it's hot enough for the steaks. Be careful when placing the steaks in the skillet. Place the seasoned steaks in the hot skillet. Let them cook for about 4 to 5 minutes. Avoid moving them around. This helps create a nice crust. After 4 to 5 minutes, flip the steaks. Cook for another 4 to 5 minutes for medium-rare. Adjust the time if you prefer a different doneness. Once the steaks reach your desired doneness, lower the heat to medium-low. Add 4 tablespoons of unsalted butter to the skillet. Then, add 4 cloves of minced garlic, along with chopped rosemary and thyme. As the butter melts, use a spoon to baste the steaks. This adds rich flavor and moisture for about 1 to 2 minutes. After basting, remove the steaks from the skillet. Place them on a cutting board. Let them rest for 5 minutes. This step allows the juices to settle back into the meat, making each bite juicy and tender. To get a great crust on your ribeye steak, start with dry meat. Pat the steaks with paper towels before seasoning. This helps the surface sear well. Use a hot skillet with olive oil to create that nice golden color. Don't move the steaks too soon; let them sit for about 4-5 minutes on each side. Cooking times vary with your preferred doneness. For medium-rare, cook the steak about 4-5 minutes per side. If you like it medium, add a minute or two. Use a meat thermometer to check the doneness. Aim for 130°F for medium-rare and 140°F for medium. Basting adds rich flavor to your steaks. After cooking, lower the heat and add butter, garlic, and herbs to the pan. Use a spoon to scoop up the melted butter and pour it over the steaks. Do this for about 1-2 minutes. This step enhances taste and keeps the meat juicy. Pro Tips Rest the Steaks: Allowing the steaks to rest after cooking is crucial for juicy meat. This helps the juices redistribute throughout the steak, ensuring each bite is flavorful. Use a Meat Thermometer: For perfect doneness, consider using a meat thermometer. Aim for 130°F (54°C) for medium-rare, and adjust according to your preference. Searing Technique: To achieve a great crust, ensure your skillet is hot enough before adding the steaks. Avoid moving them around to allow a proper sear. Herb Variations: Feel free to experiment with different herbs like sage or oregano for a unique flavor profile in your garlic herb butter. {{image_2}} You can switch up the herbs in your garlic herb butter steak. Try using fresh basil for a sweet taste. Oregano adds a nice kick, too. Chives bring a mild onion flavor that works great. Just remember to chop them finely. This way, you mix things up while keeping the flavor bold. While ribeye is delicious, you can use other cuts as well. Sirloin is lean and still tasty. New York strip is also a great choice; it has a good balance of fat. Flank steak is a fun option for grilling, and it can soak up flavors well. Each cut gives a different bite and taste, so feel free to explore! Want to add more to your dish? Toss in some veggies while cooking. Asparagus or bell peppers can add crunch and color. You can also add mushrooms for earthiness. Want a sauce? A splash of red wine or balsamic vinegar can elevate the dish. These extras bring new flavors and textures that make each bite exciting! To store leftover steaks, let them cool first. Wrap each steak tightly in plastic wrap. This keeps air out and keeps the meat fresh. You can also use an airtight container if you prefer. Store the wrapped steaks in the fridge. They will stay good for about 3 to 4 days. If you want to keep them longer, freezing is a good option. When reheating your steaks, do it gently. You want to keep them juicy and tasty. Place the steak on a skillet over low heat. Add a splash of broth or water to help with moisture. Cover the skillet with a lid to trap steam. Heat for about 5 minutes on each side. This method warms the steak without drying it out. You can also use a microwave, but do it in short bursts. Heat for 30 seconds at a time, checking after each burst. If you want to freeze your steaks, wrap them well in plastic wrap first. Then, place them in a freezer bag. Make sure to squeeze out as much air as possible. This prevents freezer burn. Your steaks can last up to 6 months in the freezer. When you are ready to eat them, thaw the steaks in the fridge overnight. Never thaw at room temperature, as it can cause bacteria to grow. After thawing, follow the reheating tips to enjoy your flavorful meal! To season steak well, use salt and black pepper. I like to coat both sides. This simple mix brings out the meat's flavor. You can also add garlic powder or onion powder for extra taste. Remember to season the steak at least 30 minutes before cooking. This helps the salt soak in. Let your steak rest for about 5 minutes after cooking. This step is key for juicy meat. Resting allows the juices to spread evenly. If you cut right away, those tasty juices run out. So, be patient and enjoy the wait. Yes! You can use a stainless steel or non-stick skillet. Both work well for cooking steak. Just make sure your skillet can handle high heat. Cast iron gives a great sear, but other skillets can also do the job. You might miss some of that flavor if you don't use cast iron. Many side dishes go well with garlic herb butter steak. Here are a few ideas: - Roasted vegetables like carrots and broccoli - Creamy mashed potatoes - Garlic bread for a tasty touch - A fresh green salad with vinaigrette These sides complement the rich flavors of the steak well. This post covered the key steps for cooking the perfect steak. We explored the best ingredients, tools, and tips for choosing high-quality steaks. You learned how to prepare and cook steaks to your liking, and I shared ways to add flavor through variations. Don't forget to store leftovers properly for later enjoyment. Now you have all the tools to impress at your next meal. Cooking steak well is rewarding, and you can enjoy the delicious results anytime.

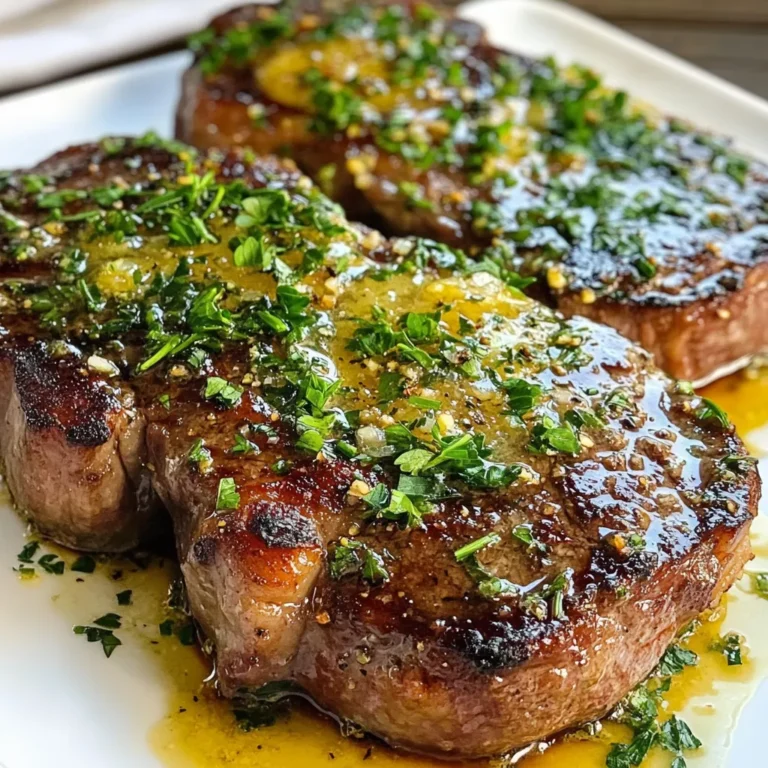
Garlic Herb Butter Steak Skillet Sizzles with Flavor

- 2 boneless, skinless chicken breasts, sliced thin - 2 packs of instant ramen noodles (discard the seasoning packets) - 1 cup broccoli florets - 1 bell pepper, sliced (any color) - 1 carrot, julienned - 4 green onions, chopped - 2 cloves garlic, minced - 1 tablespoon ginger, grated - 1/4 cup teriyaki sauce - 2 tablespoons sesame oil - 1 tablespoon vegetable oil - Salt and pepper to taste - 1 teaspoon sesame seeds (for garnish) These ingredients come together to create a bright and tasty meal. The chicken gives protein, while the veggies add crunch and color. The teriyaki sauce adds a sweet and savory kick. Using instant ramen makes this dish quick and easy. You can swap in different veggies or proteins based on what you have. Enjoy mixing and matching! {{ingredient_image_1}} Start by boiling water in a medium pot. The water should be at a rolling boil. Add the instant ramen noodles and cook for about 3-4 minutes. You want them soft but still firm. Drain the noodles and set them aside. This step makes sure your noodles don’t get mushy later. Next, heat a large skillet or wok over medium-high heat. Add vegetable oil to the skillet. Once hot, add the thinly sliced chicken. Season the chicken with salt and pepper. Stir-fry for 5-6 minutes until it’s fully cooked. You want the chicken to be golden and no longer pink inside. After the chicken cooks, add minced garlic and grated ginger to the skillet. Stir-fry for a minute until you smell the nice aroma. Then, toss in the broccoli florets, sliced bell pepper, and julienned carrot. Stir-fry these veggies for about 4-5 minutes. They should be tender but still crisp. Now, it’s time to bring everything together. Add the cooked ramen noodles to the skillet. Pour in the teriyaki sauce and sesame oil. Gently toss everything to coat the noodles and chicken in the sauce. Cook for another 2-3 minutes to heat through. This step makes sure every bite is full of flavor. How to avoid overcooking chicken To keep chicken juicy, cut it thin. This helps it cook fast and evenly. Start with hot oil in your skillet. Cook the chicken for 5 to 6 minutes. Stir it often. Look for no pink inside to know it’s done. Maximizing flavor with aromatics Aromatics like garlic and ginger add depth. Add them right after the chicken cooks. Stir-fry them for one minute until fragrant. This step fills your kitchen with a great smell and enhances the dish's flavor. Recommended sides or pairings This teriyaki chicken ramen stir fry is great on its own. You can also serve it with a light salad. A side of steamed edamame adds a nice touch too. Both pair well with the rich teriyaki sauce. Best practices for presentation For a beautiful plate, use a wide bowl. Add the stir fry in the center. Sprinkle chopped green onions and sesame seeds on top. This makes your dish look colorful and appetizing. Essential cookware A large skillet or wok is key for stir-frying. It gives you enough room to mix all the ingredients. A medium pot is also needed for the ramen noodles. Recommended tools for best results Use a good spatula for stirring. A sharp knife helps chop veggies and chicken. Measuring spoons can help you get the right amount of sauce. These tools make cooking easier and more fun. Pro Tips Prep Ingredients Ahead: Having all your ingredients prepped before you start cooking will make the stir-fry process smoother and quicker. High Heat is Key: Stir-frying works best on high heat to ensure the chicken cooks quickly and the vegetables retain their crunch. Customize Your Veggies: Feel free to swap in your favorite vegetables such as snap peas or zucchini for a personal twist on this dish. Leftovers are Gold: This stir-fry keeps well in the fridge and can be reheated for a quick lunch or dinner throughout the week. {{image_2}} You can switch proteins in this dish. Tofu works well for a plant-based option. It absorbs flavors nicely. Beef strips are another choice if you want something heartier. Feel free to add more veggies. Snow peas or mushrooms can bring new tastes. You can also include baby corn for a sweet crunch. If you need a gluten-free meal, choose gluten-free ramen. Many brands offer tasty options that fit your needs. You might need to adapt the teriyaki sauce too. Look for gluten-free soy sauce or make your own. Combine soy sauce, honey, and a splash of rice vinegar. It’s easy and delicious! For heat lovers, add chili sauce or red pepper flakes. Start with a small amount and taste as you go. Adjust the teriyaki sauce by mixing in chili paste. This will give your dish a nice kick. Spice up your ramen for a fun twist! To store leftovers, first let the dish cool completely. Place it in an airtight container. This keeps the flavors fresh and prevents spills. You can store it in the fridge for up to three days. If you want to enjoy it later, make sure to check for any signs of spoilage before eating. For longer storage, you can freeze Teriyaki Chicken Ramen Stir Fry. Use a freezer-safe container and leave some space for the food to expand. It can last in the freezer for about two months. When you're ready to eat, thaw the dish in the fridge overnight. To reheat, warm it on the stove over low heat. Add a splash of water if it seems dry. Preparing this dish in advance can save you time during the week. You can slice the chicken and chop the veggies ahead of time. Store them separately in the fridge. For portion control, divide the stir fry into meal-sized containers. This way, you can grab a quick and tasty meal anytime. Yes, you can use fresh ramen. Fresh ramen cooks faster than instant noodles. You will need about 2-3 minutes to boil fresh ramen. The texture will also be softer and chewier, which can enhance the dish's overall appeal. Just remember to adjust the cooking time to avoid overcooking. To boost nutrition, add more veggies. Try adding spinach, snow peas, or mushrooms. You can also use whole grain ramen for more fiber. For protein, swap chicken for tofu or add edamame. This adds vitamins and protein without extra calories. For a vegetarian version, replace chicken with tofu or tempeh. Use the same cooking method for these proteins. You can also add extra vegetables for more flavor and nutrients. Use vegetable-based teriyaki sauce to keep it plant-based. This way, you can enjoy the same great taste without meat. This blog post covered tasty ways to make teriyaki chicken ramen. You learned about the key ingredients, like chicken, noodles, and fresh veggies. I shared step-by-step instructions to help you cook it perfectly. You also got tips for stir-frying and serving, plus variations to fit your taste. Remember, cooking should be fun and flexible. Experiment with flavors and make it your own. Now, enjoy your delicious meal and make it again soon!

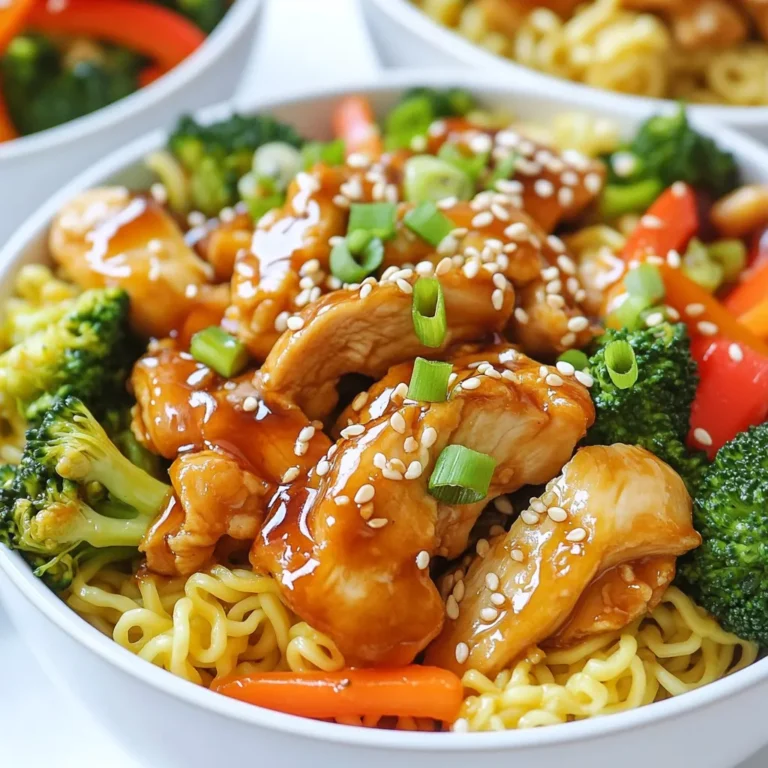
Teriyaki Chicken Ramen Stir Fry Flavorful Meal Idea

- Chicken and seasoning essentials - 4 boneless, skinless chicken breasts - Salt and pepper to taste - 1 cup all-purpose flour - Cooking fats and flavor boosters - 1/4 cup olive oil - 1/4 cup unsalted butter - 2 cloves garlic, minced - Additional key ingredients - 1 lemon, juiced (about 1/4 cup) - 1 cup chicken broth - 2 tablespoons capers, rinsed and drained - Fresh parsley, chopped (for garnish) For this dish, I love using fresh ingredients. The chicken breasts give a nice base, while the salt and pepper bring out their flavor. Dredging the chicken in flour helps create a delicious crust when you fry it. The olive oil and butter blend is key for cooking. They add richness and depth to the dish. Don’t skip the garlic; it adds a lovely aroma. The lemon juice gives the sauce a bright, zesty taste. Capers are the star in this recipe. They provide a tangy punch that makes each bite exciting. Finally, fresh parsley is perfect for garnish. It adds a pop of color and freshness to your plate. Gather these ingredients, and you'll be ready to create a tasty chicken piccata with capers that everyone will love! {{ingredient_image_1}} Start by placing the chicken breasts between two pieces of plastic wrap. Use a flat object to gently pound them until they are about 1/2 inch thick. This helps the chicken cook evenly. After pounding, season both sides with salt and pepper. Next, take 1 cup of all-purpose flour and spread it out on a plate. Dredge each chicken breast in the flour, shaking off any extra flour. This step gives the chicken a nice crust when cooked. In a large skillet, heat 1/4 cup of olive oil and 2 tablespoons of unsalted butter over medium heat. Wait until the oil is hot, but not smoking. Carefully place the coated chicken breasts in the skillet. Cook the chicken for about 4 to 5 minutes on each side. You want them to turn golden brown and be fully cooked. Once done, transfer the chicken to a plate and set aside. In the same skillet, add the remaining 2 tablespoons of butter and 2 minced garlic cloves. Sauté the garlic for about 30 seconds until it smells fragrant. Now, pour in the juice of 1 lemon and 1 cup of chicken broth. Use a wooden spoon to scrape up any browned bits stuck to the pan. These bits add great flavor to your sauce. Let the sauce simmer for about 3 to 5 minutes. This helps it reduce and thicken slightly. Stir in 2 tablespoons of rinsed and drained capers. These little flavor bombs add a salty, tangy kick. Return the cooked chicken breasts to the pan. Spoon the sauce over the chicken and let it warm up for 1 to 2 minutes. Remove the skillet from the heat. Garnish with fresh chopped parsley before serving. This adds a pop of color and freshness to your dish. Serve the chicken piccata on a nice platter with extra sauce drizzled on top. Enjoy! To get perfect chicken texture, pound the chicken breasts gently. Aim for about 1/2 inch thick. This helps them cook evenly. Season both sides with salt and pepper for flavor. For the right sauce consistency, simmer the sauce after adding lemon juice and chicken broth. Scrape the browned bits from the pan. This adds depth and flavor. Allow the sauce to reduce for about 3-5 minutes. It should coat the back of a spoon. To boost flavor, consider adding fresh herbs like thyme or basil. They pair well with the lemon and capers. You could also sprinkle in red pepper flakes for heat. If you want extra zing, swap lemon juice for lime juice. You can also use white wine in place of some chicken broth. Both will add a unique twist to your dish. Pro Tips Use Fresh Ingredients: Always opt for fresh lemons and high-quality capers for the best flavor in your piccata sauce. Don't Overcrowd the Pan: Cook the chicken breasts in batches to ensure they brown nicely and cook evenly without steaming. Adjust the Sauce to Your Taste: Feel free to tweak the amount of lemon juice and capers based on your preference for tanginess and saltiness. Rest the Chicken: Let the cooked chicken rest for a few minutes before serving to keep it juicy and tender. {{image_2}} If you need gluten-free options, you can use almond flour instead of all-purpose flour. It gives a nice flavor without the gluten. You can also use cornstarch. Just make sure to coat the chicken well. For dairy-free options, swap the unsalted butter with more olive oil or use a dairy-free butter. This will keep your dish creamy without the dairy. For side dishes, lemon butter pasta works great with chicken piccata. A fresh green salad adds a nice crunch. You could also serve it with steamed veggies or garlic bread to soak up the sauce. When it comes to wine pairing, a crisp white wine like Pinot Grigio is a perfect match. The wine's bright flavor complements the lemon and capers well. Another good choice is Chardonnay, which adds richness to the meal. To store your chicken piccata, let it cool first. Place leftovers in an airtight container. This keeps it fresh for up to three days in the fridge. You can also cover the dish with plastic wrap. When reheating, use the stove or microwave. Heat it on low to avoid drying out the chicken. Add a splash of broth for moisture. You can freeze chicken piccata for later. Wrap it tightly in plastic wrap, then place it in a freezer bag. This helps prevent freezer burn. Label the bag with the date. It stays good for about three months. When you are ready to eat it, thaw it overnight in the fridge. Reheat gently in a pan or microwave. Add a little broth to keep the sauce flavorful. What is chicken piccata? Chicken piccata is a classic Italian dish. It features chicken breasts cooked in a lemony sauce. The sauce includes capers, which add a briny flavor. The dish is simple yet very tasty. Can I customize the recipe? Yes, you can customize this recipe! You might add herbs like thyme or basil. Try different types of chicken, or swap in other vegetables. Just keep the core flavors of lemon and capers. How do you know when the chicken is cooked? You can tell chicken is cooked when it reaches 165°F (75°C). The meat should be white and no longer pink. If you cut into it, the juices should run clear. What can I use instead of capers? If you don't have capers, you can try olives or pickles. Both give a nice salty flavor. You might also use a splash of vinegar for a tangy taste. Can I use chicken thighs instead of breasts? Absolutely! Chicken thighs work well in this recipe. They stay juicy and flavorful. Just cook them until they reach the same safe temperature. What other dishes can I make with capers? Capers are great in many dishes! You can use them in pasta, salads, or even on pizza. They also add flavor to sauces for fish or chicken. This blog post has covered how to make a tasty chicken piccata. We explored ingredients, step-by-step cooking instructions, and helpful tips. I shared ways to customize the dish and how to store leftovers. The goal is to make a flavorful meal that you can enjoy and share. Remember, cooking is all about creativity. Try new flavors and make this dish your own. Enjoy your cooking adventure!

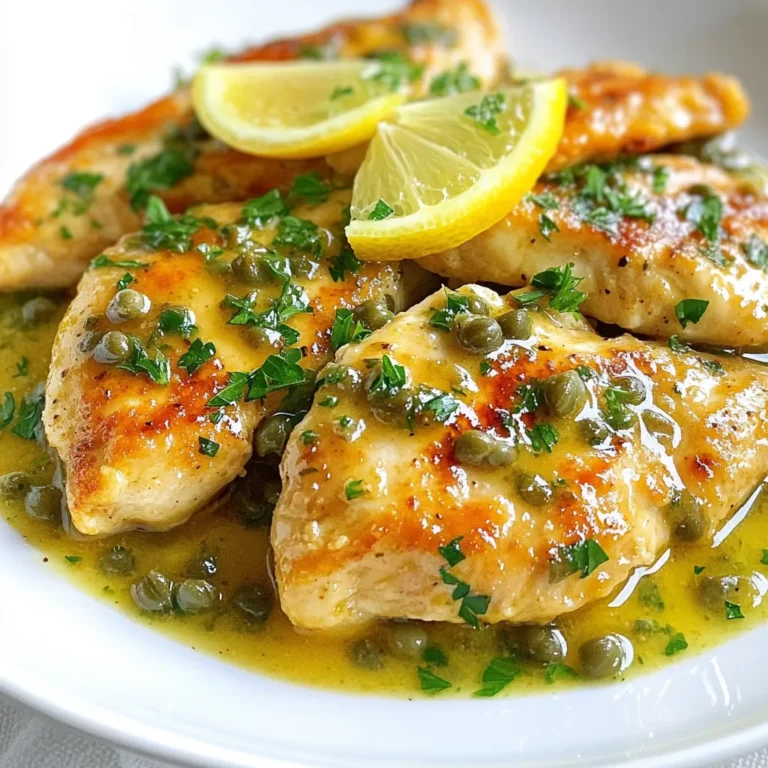
Chicken Piccata with Capers Simple and Flavorful Meal

- 1 cup quinoa, rinsed - 2 cups water or vegetable broth - 1 cup cherry tomatoes, halved - 1 cucumber, diced - 1 bell pepper (red or yellow), diced - 1/4 red onion, finely chopped - 1/2 cup fresh basil leaves, chopped - 2 tablespoons olive oil - 3 tablespoons lemon juice - Salt and pepper to taste - Zest of 1 lemon To make a tasty Lemon Basil Quinoa Salad, you need fresh and bright ingredients. Quinoa serves as the base. It brings a nutty flavor and fluffy texture. Rinse it well to remove any bitterness. Cook it in water or vegetable broth for added flavor. Next, gather your fresh vegetables. Cherry tomatoes add sweetness, while cucumber gives a nice crunch. Bell peppers bring color and sweetness. Red onion adds a sharp bite. The mix of these vegetables makes the salad vibrant and appealing. Fresh basil and lemon are vital. They add a bright and zesty touch. The olive oil and lemon juice blend together to form a simple dressing. Salt and pepper enhance all the flavors. Don't forget the lemon zest for that extra punch! - Feta cheese - Avocado - Nuts or seeds for added crunch You can customize your salad with optional add-ins. Feta cheese adds creaminess and a salty taste. Avocado offers richness and healthy fats. Nuts or seeds provide a delightful crunch. These add-ins bring new textures and flavors to the dish. - Approximately 200 calories per serving - Protein: 6g, Fat: 8g, Carbs: 30g This salad is not only tasty but also nutritious. Each serving has about 200 calories. It contains protein for muscle health and healthy fats for energy. The carbohydrates come from quinoa and veggies, giving you a steady source of energy. Key ingredients like quinoa and vegetables offer many health benefits. Quinoa is a complete protein, meaning it has all the essential amino acids. Fresh vegetables provide vitamins and minerals to support your health. Basil is known for its anti-inflammatory properties, making this salad a smart choice! {{ingredient_image_1}} First, rinse the quinoa under cold water. This helps remove any bitter taste. Next, add the rinsed quinoa to a medium saucepan. Pour in two cups of water or vegetable broth. Bring it to a boil over medium-high heat. Once it boils, reduce the heat to low. Cover the pan and let it simmer for about 15 minutes. The quinoa should absorb all the water. After cooking, let it sit covered for five minutes. This step helps the quinoa become fluffy. Use a fork to fluff it gently before cooling. To get perfect quinoa texture, remember these tips: - Rinse well to remove bitterness. - Use a 1:2 ratio of quinoa to water. - Let it rest after cooking for fluffiness. While the quinoa cooks, it’s time to chop the veggies. Start with the cherry tomatoes. Slice them in half. Next, dice the cucumber and bell pepper into small pieces. For the red onion, chop finely. Proper chopping makes the salad look nice and helps flavors blend well. Fresh ingredients are key to a great taste. Look for bright colors and firm textures. Once your quinoa has cooled, it’s time to mix everything. In a large bowl, combine the chopped veggies with the cooled quinoa. In a small bowl, whisk together olive oil, lemon juice, lemon zest, salt, and pepper. Pour this dressing over the quinoa and veggies. Toss gently to combine. Add the chopped basil last. This keeps its bright flavor. Mixing it in too early can wilt the leaves. Serve right away for the best taste and freshness. Enjoy your Lemon Basil Quinoa Salad! To make your Lemon Basil Quinoa Salad stand out, try adding different herbs or spices. Fresh dill or parsley can add a new twist. You might enjoy a pinch of garlic powder or a dash of cayenne for heat. Experiment and find what you love! You can also switch up your dressing. If you want a creamier feel, try a yogurt-based dressing. A balsamic vinaigrette adds a sweet touch. Each dressing brings a unique flavor to the salad, so feel free to explore. Prepping ingredients in advance can save you time. You can cook the quinoa a day before and store it in the fridge. Chop the vegetables the night before too. Just keep them in a sealed container. This way, they stay fresh and crunchy. If you prepare the salad, aim to eat it within two days. The flavors meld well when made ahead. Just add the basil right before serving to keep it fresh and bright. This salad pairs perfectly with grilled chicken or fish. The bright flavors complement the protein well. Serve it alongside a crusty bread for a complete meal. For a stunning presentation, try serving in individual cups. This adds a touch of elegance to your table. Garnish each cup with extra basil leaves and a lemon wedge. It looks beautiful and invites your guests to dig in! Pro Tips Use Fresh Ingredients: For the best flavor, always opt for fresh vegetables and herbs. They elevate the taste of your salad significantly. Chill Before Serving: Allow the salad to chill in the refrigerator for at least 30 minutes before serving. This helps the flavors meld together beautifully. Customize Your Veggies: Feel free to add or substitute other vegetables like avocado, spinach, or radishes to suit your taste and preference. Make it a Meal: To turn this salad into a complete meal, add grilled chicken, chickpeas, or feta cheese for added protein and richness. {{image_2}} You can make this salad even better with some healthy additions. - Incorporating More Greens: Adding spinach or kale boosts nutrients. These greens add fiber and vitamins. They also give a nice crunch and color. - Adding Protein Options: Want to make it heartier? Try adding chickpeas or grilled chicken. Chickpeas are great for a vegan option. They add protein and keep you full. Grilled chicken gives a nice flavor and texture. Change up the salad with seasonal vegetables. - Using Seasonal Vegetables: In summer, add fresh corn or zucchini. These veggies add sweetness and crunch. In winter, use roasted squash or beets. They add warmth and a rich flavor. - Adjusting for Summer versus Winter Salads: For summer, keep it light and fresh. For winter, consider warm ingredients. This keeps the salad appealing all year. Make this salad fit any diet easily. - Gluten-free Options: Quinoa is naturally gluten-free. This makes it perfect for those with gluten issues. - Vegan and Vegetarian-friendly Enhancements: Use vegetable broth for cooking quinoa. Swap the olive oil for a vegan dressing. This keeps it tasty and friendly for all diets. Feel free to mix and match these ideas to suit your taste and needs! Store your Lemon Basil Quinoa Salad in an airtight container. This helps keep the salad fresh. Keep the dressing separate until you serve. This way, the quinoa and veggies stay crisp. In the fridge, the salad lasts for about three days. After that, check for signs of spoilage. Look for any off smells, changes in color, or slimy textures. If you find these signs, it is best to toss it. You can freeze quinoa, but it is not ideal for the salad. Freezing changes the texture of fresh veggies. If you want to freeze quinoa, cook it, cool it, and store it in a freezer bag. For best taste, use within three months. When ready to use, thaw it overnight in the fridge. To make this salad vegan, simply swap out any non-vegan items. If you want to add cheese, skip the feta or use a vegan cheese. The rest of the ingredients are already plant-based. For added protein, consider tossing in chickpeas or black beans. These options will keep it hearty and filling. Yes, you can use other grains! Rice or farro are great alternatives. They offer different textures and flavors. Brown rice gives a nutty taste, while farro adds a chewy bite. Just make sure to cook them according to their package instructions. This way, they will fit perfectly with your fresh veggies. I recommend serving this salad cold or at room temperature. It tastes best when the flavors meld together. You can serve it in a large bowl for sharing or in cups for individual servings. Garnish with extra basil leaves and a lemon wedge to make it look pretty. This adds a nice touch to your table! In this blog post, we explored how to make a Lemon Basil Quinoa Salad. We discussed the main ingredients like quinoa, fresh veggies, and olive oil. You learned about optional add-ins, nutritional benefits, and how to prepare each element. We also covered tips for dressings and presentation. Finally, we touched on serving suggestions, variations, and storage tips. This salad is not just healthy; it is also simple and versatile. Experiment with fresh ingredients to find your favorite mix! Enjoy making this dish and share it with friends!

Lemon Basil Quinoa Salad Fresh and Flavorful Delight

To make delicious Teriyaki Chicken Lettuce Cups, you'll need: - 1 lb boneless, skinless chicken thighs, diced - 1 tablespoon olive oil - 1/4 cup teriyaki sauce (low-sodium if preferred) - 1 tablespoon fresh ginger, minced - 2 cloves garlic, minced - 1 bell pepper (any color), finely diced - 1 cup shredded carrots - 2 green onions, sliced - 1/2 cup water chestnuts, diced - 1 head of butter lettuce or romaine, leaves separated - Sesame seeds for garnish (optional) If you can’t find chicken thighs, use chicken breast. It works well too. For a vegetarian option, try tofu or tempeh. You can swap the low-sodium teriyaki sauce with regular sauce if salt isn’t a concern. For extra crunch, add chopped nuts or seeds. When picking chicken, look for bright pink meat without any brown spots. The chicken should feel firm and moist. For fresh produce, pick vegetables that are firm and vibrant. Check lettuce leaves for crispness and avoid any brown edges. Fresh ginger should be smooth and firm, not shriveled. Always wash your vegetables before use to remove dirt and pesticides. {{ingredient_image_1}} 1. Heat olive oil: In a large skillet, heat 1 tablespoon of olive oil over medium heat. 2. Cook chicken: Add 1 pound of diced chicken thighs. Cook for 5-7 minutes. Stir occasionally. The chicken should turn golden brown and be cooked through. 3. Add aromatics: Mix in 1 tablespoon of minced ginger and 2 cloves of minced garlic. Sauté for about 1 minute. You want to smell the garlic and ginger. 4. Add teriyaki sauce: Pour in 1/4 cup of teriyaki sauce. Stir well to coat the chicken. Let it simmer for 2-3 minutes. The sauce should thicken a bit. 5. Mix in veggies: Stir in 1 diced bell pepper, 1 cup of shredded carrots, and 1/2 cup of diced water chestnuts. Cook for 3-4 minutes. The veggies should be tender but still crisp. 6. Finish with green onions: Remove the skillet from heat. Mix in 2 sliced green onions, saving some for garnish. 7. Assemble cups: Spoon the chicken mixture into the center of each lettuce leaf. Use a head of butter lettuce or romaine for the cups. 8. Garnish: Top with sesame seeds and reserved green onions before serving. - Heat oil: 1 minute - Cook chicken: 5-7 minutes - Add ginger and garlic: 1 minute - Add teriyaki sauce: 2-3 minutes - Mix in veggies: 3-4 minutes - Combine with green onions: 1 minute - Total cooking time: 15-17 minutes - Chicken: Look for a golden brown color with no pink inside. - Ginger and garlic: Should smell fragrant, not burnt. - Sauce: Should be slightly thickened, not runny. - Vegetables: Should be bright and tender but still have a little crunch. - Lettuce: Leaves should be fresh and crisp for the best cups. To make your teriyaki chicken even tastier, use fresh ingredients. Fresh ginger and garlic bring bright flavor. You can also add a splash of lime juice for zing. Consider mixing in chopped cilantro for a fresh twist. If you like spice, add a bit of sriracha to the sauce. This will give your dish a nice kick without being too hot. One common mistake is overcooking the chicken. Cook it just until it's golden and no longer pink. If you add the veggies too soon, they can get mushy. Wait until the chicken is almost done before mixing them in. Another mistake is using too much sauce. You want to coat the chicken without making it soggy. Lastly, don't forget to season your filling with salt or pepper to taste. To make your dish look great, use nice lettuce leaves as cups. Choose larger leaves for better holding. Spoon the chicken mixture right into the center. Top with green onions and sesame seeds for color. Arrange the cups on a nice platter. You can add lime wedges around the platter for a pop of color and freshness. A well-presented dish makes everything taste better! Pro Tips Marinate for More Flavor: For an even deeper flavor, marinate the diced chicken thighs in teriyaki sauce for at least 30 minutes before cooking. Vegetable Variations: Feel free to mix in other vegetables like snap peas or mushrooms for added texture and flavor. Serving Suggestions: These teriyaki chicken cups pair well with steamed rice or quinoa for a complete meal. Leftover Storage: Store any leftover filling in an airtight container in the refrigerator for up to 3 days. Reheat before serving in lettuce cups. {{image_2}} You can swap chicken for other proteins. Try diced tofu for a vegetarian option. Pork works well too. Use ground turkey or beef for a different taste. Each option gives a new twist to the dish. Choose what you like best! Enhance your lettuce cups with fun toppings. Add chopped peanuts for a crunch. Sliced red chili peppers can give heat. Try avocado slices for creaminess. You can also sprinkle fresh herbs like cilantro or mint on top. These add freshness and color to your meal. To make this dish gluten-free, use tamari instead of teriyaki sauce. For vegans, replace chicken with mushrooms or tempeh. You can use a mix of veggies to keep it hearty. Always check labels to ensure your ingredients fit your diet. Adjusting the recipe lets everyone enjoy these tasty cups! To keep your Teriyaki Chicken Lettuce Cups fresh, store leftovers in an airtight container. Make sure to cool the chicken mixture to room temperature before sealing it. This helps prevent condensation, which can make it soggy. Keep the chicken and lettuce leaves separate. This way, the lettuce stays crisp. Enjoy your leftovers within three to four days for the best taste. When you’re ready to eat your leftovers, reheat the chicken mixture on the stove. Use medium heat in a skillet, stirring gently. Add a splash of water or teriyaki sauce if it seems dry. Heat until warm, about 5 minutes. Avoid using the microwave as it can make your chicken tough and the lettuce soggy. Serve the mixture in fresh lettuce cups for a great crunch. You can freeze the chicken mixture for meal prep. Place it in a freezer-safe bag or container. Remove as much air as possible to prevent freezer burn. It can last for up to three months. When ready to eat, thaw it in the fridge overnight. Reheat it as mentioned above. Just remember to use fresh lettuce when serving, as frozen lettuce does not hold up well. You can serve Teriyaki Chicken Lettuce Cups with a side of steamed rice. Jasmine or brown rice works well. You could also add a light salad. A simple cucumber salad can balance the flavors. Serve with dipping sauces for extra taste. Soy sauce or extra teriyaki sauce are great choices. Yes, you can make the filling ahead of time. Cook the chicken and veggies, then cool them down. Store them in an airtight container in the fridge. This keeps well for up to three days. When ready to serve, just warm it up. Spoon it into the lettuce cups and enjoy! Making homemade teriyaki sauce is easy and fun! Here’s a simple recipe: - 1/4 cup soy sauce - 1 tablespoon honey or brown sugar - 1 tablespoon rice vinegar - 1 tablespoon sesame oil - 1 teaspoon garlic, minced - 1 teaspoon fresh ginger, minced Mix all ingredients in a bowl. Adjust sweetness or saltiness to your taste. Cook it in a saucepan over medium heat until it thickens. Let it cool before using. This sauce adds great flavor to your dishes! Teriyaki Chicken Lettuce Cups are easy and fun to make. We covered key ingredients, cooking steps, and tips to boost flavor. I shared ways to customize your cups with different proteins and toppings. Plus, I provided storage methods to keep your meal fresh. Now, you can enjoy this tasty dish any night of the week. Keep experimenting and have fun in the kitchen!

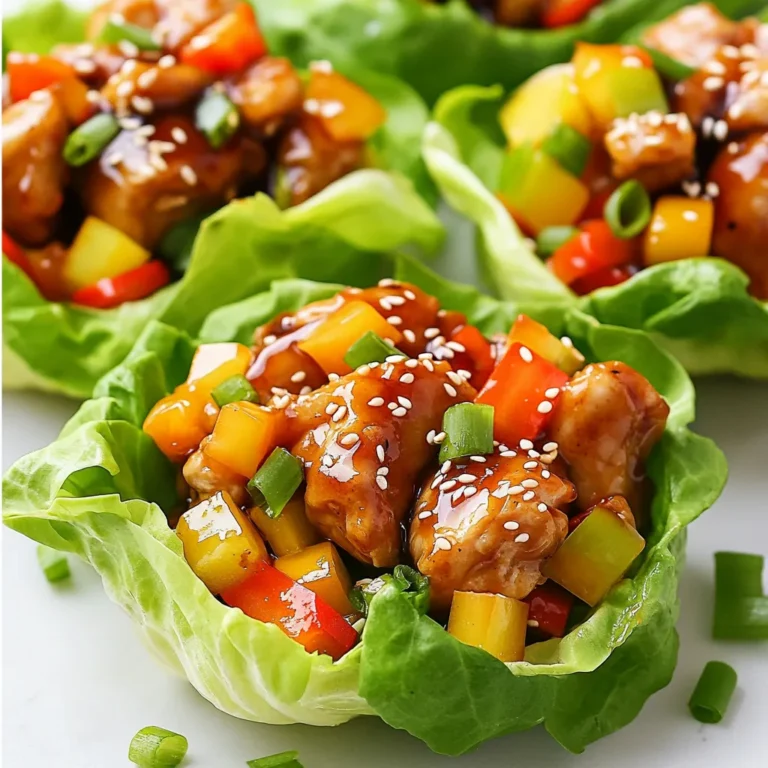
Teriyaki Chicken Lettuce Cups Flavorful and Fresh Dish

- 1 lb large shrimp, deveined and peeled - 2 tablespoons olive oil - 3 cloves garlic, minced - 1 cup cherry tomatoes, halved - 2 cups fresh spinach - 1 cup heavy cream - ½ cup grated Parmesan cheese For this recipe, fresh ingredients shine. Start with large shrimp. They cook quickly and taste great. The olive oil adds richness. Garlic brings a lovely aroma that fills your kitchen. Cherry tomatoes add a sweet burst. Fresh spinach gives color and nutrients. Heavy cream makes the dish creamy and dreamy. Finally, Parmesan cheese adds depth to the sauce. - 1 teaspoon Italian seasoning - Salt and pepper to taste - Fresh basil leaves for garnish Seasoning is key for flavor. Italian seasoning ties all the elements together. Use salt and pepper to enhance the taste. Fresh basil leaves add a nice touch. They make the dish look good and taste fresh. Each ingredient plays a role in making this creamy Tuscan shrimp delightful and simple. {{ingredient_image_1}} 1. First, get a large skillet. Heat 2 tablespoons of olive oil over medium heat. 2. Add 3 cloves of minced garlic to the skillet. Sauté for about 1 minute. It should smell great. 3. Now, add 1 pound of large shrimp, deveined and peeled. Season with salt, pepper, and 1 teaspoon of Italian seasoning. Cook the shrimp for 2 to 3 minutes. They will turn pink and opaque. Remove the shrimp and set them aside. 1. In the same skillet, add 1 cup of halved cherry tomatoes. Cook for about 2 minutes until they soften. 2. Then, stir in 2 cups of fresh spinach. Cook it until it wilts down. 3. Lower the heat and pour in 1 cup of heavy cream. Stir to combine and let it simmer for a minute. 1. Add ½ cup of grated Parmesan cheese to the skillet. Stir until it melts and the sauce becomes creamy. 2. Return the cooked shrimp to the skillet. Toss them in the creamy sauce to coat well. 3. Taste and adjust the seasoning with more salt and pepper if needed. - Best practices for perfectly cooked shrimp: Start with fresh, deveined shrimp. Cook them in a hot skillet for 2-3 minutes. They should turn pink and opaque. Overcooking makes them tough. So, keep an eye on them! - How to prevent the sauce from curdling: Use low heat when adding the cream. Stir it gently. If the heat is too high, the cream can separate. Adding the cheese slowly helps create a smooth sauce too. - Serving suggestions for an appealing dish: Serve the creamy shrimp over a bed of pasta or rice. This adds color and makes a hearty meal. You can also pair it with crusty bread to soak up the sauce. - Garnishing techniques with fresh basil: Use whole basil leaves for a fresh look. You can also chop the basil and sprinkle it on top. This adds bright color and a nice aroma to your dish. Pro Tips Fresh Shrimp is Best: Always choose fresh or properly thawed shrimp for the best texture and flavor in your dish. Customize the Creaminess: Adjust the amount of heavy cream according to your preference for a lighter or richer sauce. Perfectly Cooked Shrimp: Be careful not to overcook the shrimp; they should only be cooked until they turn pink and opaque for optimal tenderness. Herb Variations: Feel free to experiment with different herbs like thyme or oregano for added flavor dimensions in your creamy sauce. {{image_2}} You can make this creamy Tuscan shrimp even better by swapping ingredients. First, try using different types of shrimp. You can use small shrimp or even scallops. Each option brings a unique taste. You can also add extra veggies to boost flavor. Consider bell peppers, zucchini, or mushrooms. These add color and nutrients. Just sauté them with the garlic for great results. If you need a gluten-free option, this dish works well without changes. Just check your seasoning for gluten. You can also make it dairy-free. Replace heavy cream with coconut cream or a nut-based cream. This keeps it rich while being dairy-free. For a vegan twist, swap shrimp with tofu or chickpeas. Use the same cooking steps. This way, you keep the creamy sauce and fresh veggies for a tasty plant-based meal. To store leftovers of creamy Tuscan shrimp, first cool them to room temperature. Place the shrimp in an airtight container. This keeps the shrimp safe and fresh. Try to use the leftovers within three days for the best taste. For containers, I recommend glass or BPA-free plastic. These materials help keep the flavor intact. Make sure the container seals tightly to avoid leaks or spills. The best way to reheat creamy Tuscan shrimp is on the stove. Pour the leftovers into a skillet over low heat. Stir gently until warmed through. This method helps to keep the sauce smooth. If you're in a hurry, you can use the microwave. Place the shrimp in a microwave-safe bowl. Cover it with a damp paper towel to keep moisture in. Heat in short bursts, stirring between each, to avoid overcooking. To maintain flavor and texture, avoid high heat. Shrimp can become tough if cooked too long. A little patience goes a long way in keeping your dish delicious. Creamy Tuscan shrimp lasts about 3 days in the fridge. To keep it fresh, store it in an airtight container. This helps prevent any strong odors from other foods. Reheat it gently to maintain the creamy texture. Yes, you can use half-and-half or whole milk instead of heavy cream. This will make the dish lighter. However, the sauce may not be as thick or rich. If you want more creaminess, add a little cornstarch to thicken it. To peel shrimp, hold the body and twist off the shell. For deveining, use a small knife to cut along the back. This exposes the dark vein. Gently pull it out with your fingers or the knife. Rinse the shrimp under cold water before cooking. This keeps them clean and ready for your dish. This blog post explored how to make creamy Tuscan shrimp. We covered the main ingredients, like shrimp, garlic, and spinach. You learned the step-by-step process to prepare this dish and important tips for cooking and presentation. Variations gave options for different diets. Proper storage and reheating tips help to enjoy leftovers. In closing, this dish brings vibrant flavors and easy cooking. You can impress anyone with this recipe. Enjoy experimenting with your own twists!

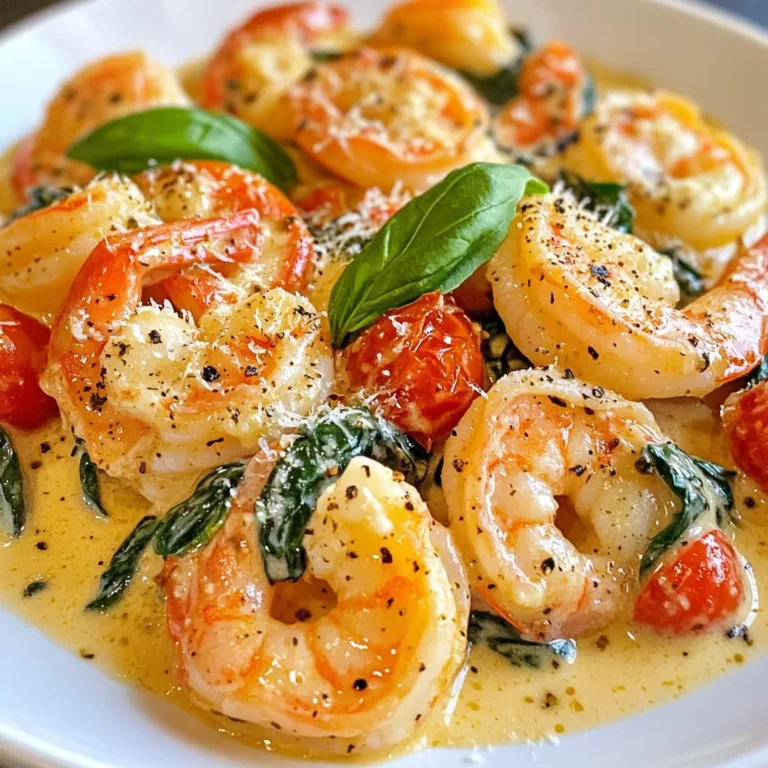
Creamy Tuscan Shrimp Delightful and Simple Recipe

- 2 boneless, skinless chicken breasts, diced - 1 cup long-grain rice - 2 cups chicken broth - 1 bell pepper, chopped - 1 small onion, diced - 3 cloves garlic, minced - 1 tablespoon Cajun seasoning - 1 teaspoon smoked paprika - 1 cup diced tomatoes - 1 cup frozen peas - 2 tablespoons olive oil - Salt and pepper to taste - Chopped fresh parsley for garnish Alternatives for chicken: You can use turkey or tofu if you want a change. Both can add great flavors. Choices for rice: Long-grain rice is best, but jasmine or basmati work well too. Each type brings its own taste and texture. Variations in seasoning: If you want less heat, try using mild Cajun seasoning or Italian herbs. You can also mix in some lemon zest for a fresh twist. {{ingredient_image_1}} Start by preparing the chicken and vegetables. You will need two boneless, skinless chicken breasts. Dice the chicken into small pieces for even cooking. Chop one bell pepper and dice one small onion. Mince three cloves of garlic. These fresh ingredients make your dish flavorful and colorful. Next, let’s cover some essential cooking tips. Use a sharp knife for cutting. This makes your prep faster and safer. Always wash your vegetables under cold water. Clean hands and surfaces help prevent germs. Now, let’s move on to sautéing the chicken and vegetables. In a large skillet, heat two tablespoons of olive oil over medium heat. Add the diced chicken to the skillet. Season the chicken with salt, pepper, and one tablespoon of Cajun seasoning. Cook for about 5-7 minutes until the chicken turns golden brown. Once cooked, remove the chicken from the skillet and set it aside. In the same skillet, add the chopped onion, bell pepper, and minced garlic. Cook for 3-4 minutes until the vegetables soften and smell great. Next, it's time to cook the rice and integrate flavors. Add one cup of long-grain rice to the skillet. Stir well to coat the rice with the oil and veggies. Toast the rice for about 2 minutes, stirring continuously. This step adds a nice nutty flavor. Pour in two cups of chicken broth and add one cup of diced tomatoes. Bring this mixture to a simmer. Once it’s boiling, reduce the heat to low. Cover the skillet and let it cook for 15-20 minutes. The rice will absorb the liquid and become tender. In the last few minutes of cooking, stir in one cup of frozen peas and the cooked chicken. Cover again and let it warm through for about 5 minutes. Taste your dish to see if it needs more salt or pepper before serving. This simple process creates a tasty Cajun chicken and rice skillet. Enjoy every bite! - Achieving the right texture for the chicken: Start with diced chicken breasts. Cook them over medium heat. This gives them a nice golden color. Stir often to ensure even cooking. The chicken should be juicy and tender when done. - Importance of resting the chicken after cooking: After cooking, let the chicken rest for a few minutes. This helps the juices settle back in. When you slice it, the chicken will stay moist and flavorful. - How to adjust spiciness levels: If you like it spicy, add more Cajun seasoning. You can also mix in some cayenne pepper. For less heat, use less seasoning or add a dollop of sour cream when serving. - Suggestions for homemade Cajun seasoning: You can make your own Cajun seasoning. Combine garlic powder, onion powder, paprika, thyme, oregano, and black pepper. This mix can give you a fresh taste. Store it in a jar for later use. Pro Tips Use Fresh Ingredients: Fresh vegetables and herbs can enhance the flavor significantly, making your dish more vibrant and delicious. Adjust Spice Levels: Feel free to adjust the amount of Cajun seasoning according to your spice tolerance. Start with less and add more if needed. Let it Rest: After cooking, let the skillet sit covered for a few minutes before serving. This helps the flavors meld together. Serve with Sides: Pair this dish with a simple side salad or some crusty bread to balance the spiciness and add texture. {{image_2}} You can switch up the proteins in this dish. Shrimp works great and adds a nice touch. You can also use sausage for a heartier flavor. Each option gives a different taste and texture. Feel free to swap the veggies too. If you like spice, try adding jalapeños or cayenne. Zucchini or spinach can also work well. Use what you enjoy or have on hand. This meal is flexible and fun to customize. If you want to save time, try the Instant Pot method. Just sauté the chicken and veggies, then add the other ingredients. Cook for about 10 minutes under high pressure. You will have a tasty meal in no time. An oven-baked version is also simple. After sautéing, transfer everything to a baking dish. Cover with foil and bake at 375°F for 30 minutes. This method gives the rice a nice, creamy texture. Each cooking style offers a unique twist to Cajun chicken and rice. To keep your Cajun Chicken and Rice Skillet fresh, place leftovers in an airtight container. This method protects against moisture and odors. You can store it in the fridge for up to three days. If you want to enjoy it later, make sure to check for any signs of spoilage before reheating. If you want to freeze this dish, let it cool completely. Then, transfer it to a freezer-safe container. Be sure to leave some space at the top. This allows the dish to expand as it freezes. You can freeze it for up to three months. When you’re ready to eat, thaw it in the fridge overnight. To reheat, place it in a skillet over medium heat. Add a splash of chicken broth to keep it moist. Stir it well until heated through for the best taste. Can I use brown rice instead of white? Yes, you can use brown rice. However, it will take longer to cook. Adjust the liquid and timing. Brown rice typically needs more water and about 10-15 more minutes. What can I serve alongside this dish? I like to serve a simple salad or some crusty bread. A green salad adds freshness. Bread helps soak up the tasty sauce. How can I make this recipe gluten-free? To make this dish gluten-free, use gluten-free chicken broth. Check the Cajun seasoning for any gluten ingredients. Most brands are gluten-free, but it’s good to check. What to do if the rice is too dry or too wet? If the rice is too dry, add a bit of broth or water. Stir gently and heat on low. If it’s too wet, cook uncovered on low heat. This helps the excess liquid evaporate. How to store leftovers without losing flavor? Store leftovers in an airtight container. Keep them in the fridge for up to 4 days. Reheat gently on the stove or in the microwave. Add a splash of broth to keep it moist. In this article, we explored how to make Cajun Chicken and Rice. We covered the key ingredients, easy steps to prepare, and advice for perfect cooking. You can customize this dish with various proteins and flavors. Remember, proper storage keeps your meal fresh. Enjoy experimenting with this recipe to find your favorite version. Cooking can be fun, so get creative in the kitchen! Your next flavorful dish awaits.

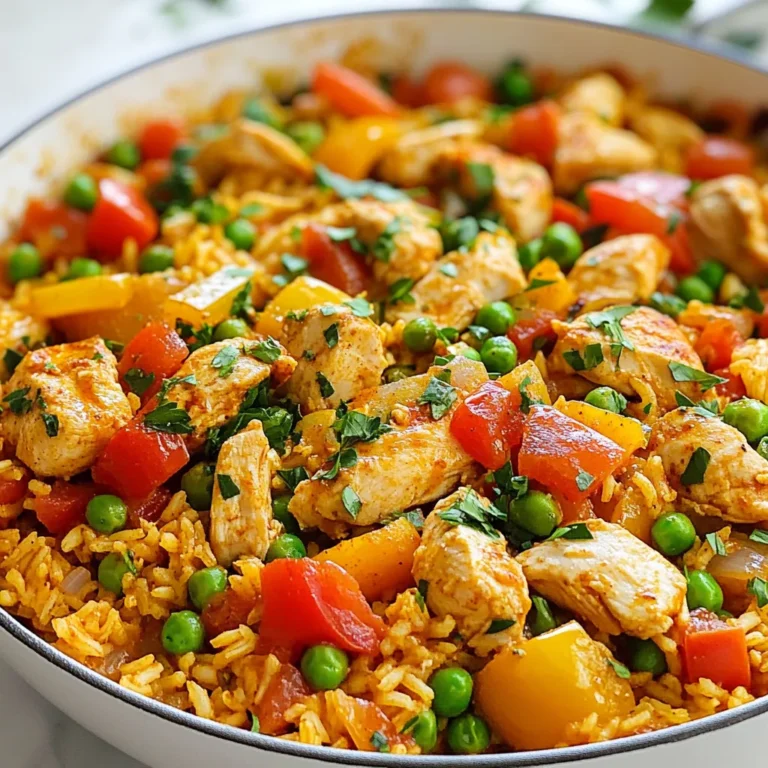
Cajun Chicken and Rice Skillet Tasty Weeknight Meal

You need 1 pound of fresh salmon fillet. Make sure the skin is removed. Fresh salmon gives the best flavor and texture. It should be bright pink and smell like the sea. Flake the salmon into small pieces before mixing it with other ingredients. For the base, use 1/2 cup of breadcrumbs. I like to use panko breadcrumbs for a crunchier texture. Add 1/4 cup of finely chopped red onion for a sweet bite. Also, season the mixture with salt and pepper to taste. These ingredients will help bind the cakes and add flavor. Fresh herbs make these salmon cakes shine. Use 2 tablespoons of chopped fresh dill. Dill adds a bright, fresh taste that pairs well with salmon. Next, add the zest of 1 lemon and 2 tablespoons of lemon juice. The lemon gives a nice tang and balances the richness of the fish. {{ingredient_image_1}} Start with a fresh salmon fillet. Place it in a large bowl. Use a fork to flake the salmon into small pieces. Look for and remove any bones. This step ensures you have tender salmon for your cakes. Next, add the following to the bowl: - 1/2 cup breadcrumbs (preferably panko) - 1/4 cup finely chopped red onion - 2 tablespoons fresh dill, chopped - 2 tablespoons lemon juice - Zest of 1 lemon Stir these ingredients together until they mix well with the salmon. Now, it’s time to shape your salmon mixture. With clean hands, form the mixture into patties. Each patty should be about 2 inches in diameter. You will make about 6 to 8 cakes, depending on how big you want them. Heat 2 tablespoons of olive oil in a skillet over medium heat. Once the oil is hot, place the salmon cakes in the skillet. Gently flatten them with a spatula. Cook for 4 to 5 minutes on each side. You want them to be golden brown and crispy. When the salmon cakes are done, remove them from the skillet. Place them on a paper towel-lined plate to soak up extra oil. Serve your cakes hot with tartar sauce or lemon aioli on the side for a tasty dip. Enjoy! The prep time for these lemon dill salmon cakes is just 15 minutes. You need this time to gather your ingredients and mix them together. Cooking the salmon cakes takes about 25 minutes. You’ll fry them for 4-5 minutes on each side until they are golden brown. This recipe makes 4 servings. You can easily double it if you have more guests to feed or want leftovers. Enjoy these tasty cakes as a meal or a snack! Pro Tips Use Fresh Salmon: Fresh salmon fillets yield the best flavor and texture for your cakes. Frozen salmon can be used in a pinch, but be sure to thaw and drain it well. Adjusting Consistency: If the mixture feels too dry, a splash more lemon juice or a touch of mayonnaise can help bind it without making it too wet. Chill Before Cooking: For firmer salmon cakes, refrigerate the formed patties for about 30 minutes before frying. This helps them hold their shape better while cooking. Experiment with Herbs: Feel free to mix in other fresh herbs like parsley or chives for added flavor. This can give your salmon cakes a unique twist. {{image_2}} To make your salmon cakes perfect, focus on the mixture's consistency. You want it to hold together well. If the mix feels too dry, add more lemon juice. If it’s too wet, sprinkle in more breadcrumbs. This balance keeps the cakes from falling apart while cooking. Always test a small patty first. Cook it for 4-5 minutes to check the texture. Adjust your mix as needed before cooking the rest. To boost the flavor, try these simple tips. First, use fresh herbs like dill for a bright taste. You can also mix in a pinch of garlic powder or smoked paprika. These add depth without overpowering the salmon. For a tangy kick, serve with lemon aioli or tartar sauce. This extra layer of flavor makes each bite special. A good skillet makes all the difference. Use a non-stick skillet for easy cooking and flipping. Heat the olive oil over medium heat, ensuring it’s hot before adding the cakes. This helps them crisp up nicely. If you want a healthier option, bake the cakes on a parchment-lined tray at 400°F for about 15-20 minutes. You’ll still get a delicious result without frying. You can switch out the fresh salmon for canned salmon if you want. Canned salmon is easy to find and saves time. Just make sure to drain it well. Instead of breadcrumbs, you can use crushed crackers or even oats. This change adds a unique texture. If you lack fresh dill, dried dill works too. Use one-third the amount since dried herbs are stronger. Lemon juice can be swapped with lime juice for a different twist. Serve your salmon cakes with tartar sauce or lemon aioli for extra flavor. A fresh salad on the side brings color and crunch. You can also add a dollop of Greek yogurt for creaminess. For a heartier meal, serve them on a bun like a salmon burger. Add some greens or pickles for a tasty sandwich. These cakes work great as an appetizer at parties too! For gluten-free options, use gluten-free breadcrumbs. Many brands offer tasty alternatives. If you're avoiding eggs, try using a flaxseed mixture. Combine one tablespoon of ground flaxseed with three tablespoons of water. Let it sit until it thickens, then add it to your mixture. For a low-carb option, skip the breadcrumbs entirely and use grated zucchini. This keeps the cakes moist and flavorful while cutting carbs. Yes, you can use canned salmon. Just drain it well and flake it. Canned salmon makes this recipe easy. It saves time and still tastes great. You may want to reduce the salt, as canned salmon can be salty. To store leftover salmon cakes, place them in an airtight container. Keep them in the fridge for up to three days. You can also wrap them tightly in plastic wrap. This keeps them fresh and prevents drying out. Lemon dill salmon cakes pair well with many sides. Try a fresh salad or roasted veggies. You can also serve them with rice or quinoa. Tartar sauce or lemon aioli adds a tasty touch. To reheat salmon cakes, use a skillet over medium heat. Cook them for about 3-4 minutes on each side. This keeps them crispy. You can also use an oven at 350°F for 10-15 minutes. Make sure they are hot inside before serving. This blog post shows you how to make tasty lemon dill salmon cakes. We covered the main ingredients and simple steps to prepare, cook, and serve them. I shared tips to enhance flavor and perfect texture, plus variations for different diets. In summary, making these cakes is fun and easy. You can impress your friends with great tastes and healthy choices. Don't hesitate to get creative with them! Enjoy delicious salmon cakes tonight.

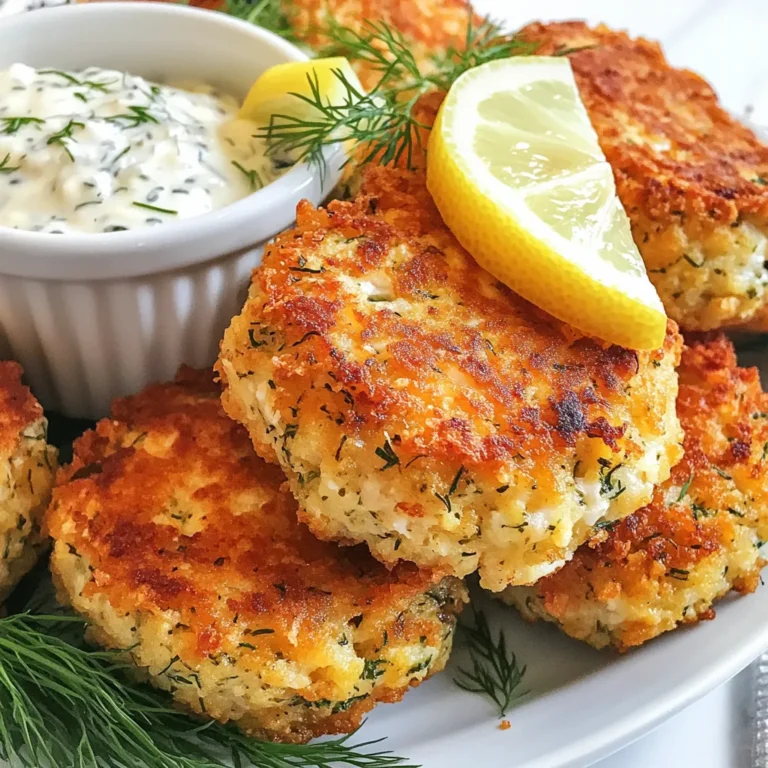
Lemon Dill Salmon Cakes Simple and Tasty Recipe

- 1 lb boneless, skinless chicken thighs - 2 tablespoons chipotle sauce (or adobo sauce from canned chipotles) - 1 cup brown rice or quinoa To make your Chipotle Chicken Burrito Bowl shine, start with chicken thighs. They are juicy and full of flavor. Marinate them in chipotle sauce. This sauce gives a nice kick. You can also use adobo sauce from canned chipotles if you prefer. Cook your choice of brown rice or quinoa as a base. Both grains add a hearty touch. - 1 can black beans, rinsed and drained - 1 cup corn, fresh or frozen - 1 cup cherry tomatoes, halved - 1 avocado, diced Next, let's talk about vegetables and toppings. Black beans offer protein and fiber. Corn adds sweetness and crunch. Cherry tomatoes bring a burst of freshness. Diced avocado gives creaminess to balance the spice. Feel free to mix and match these toppings based on your taste. - 1 tablespoon olive oil - 1 teaspoon ground cumin - 1 teaspoon garlic powder - 1 teaspoon onion powder - 1/2 cup fresh cilantro, chopped - Juice of 1 lime Seasoning is key to great flavor. Use olive oil to help marinate the chicken. Ground cumin adds a warm, earthy taste. Garlic and onion powders boost the overall flavor. Don't forget fresh cilantro for a pop of freshness. Squeeze lime juice over the bowl for a zesty finish. This combo brings your burrito bowl to life! {{ingredient_image_1}} To start, you need to marinate the chicken. In a bowl, mix these ingredients: - 1 lb boneless, skinless chicken thighs - 2 tablespoons chipotle sauce - 1 tablespoon olive oil - 1 teaspoon ground cumin - 1 teaspoon garlic powder - 1 teaspoon onion powder - Salt and pepper to taste Toss the chicken in the marinade until well coated. Let it marinate for at least 30 minutes. For more flavor, you can marinate it overnight in the fridge. While the chicken marinates, it’s time to cook the rice or quinoa. Follow the package instructions for either brown rice or quinoa. This usually takes about 15-20 minutes. Once cooked, set it aside. If you want to try something different, you can use other grains like farro or barley. Now, it’s time to cook the chicken. You can use a grill or a skillet. Heat your grill or skillet over medium-high heat. Add the marinated chicken thighs and cook for about 6-7 minutes per side. Make sure the chicken is fully cooked. Check that it is no longer pink in the center. After cooking, let the chicken rest for a few minutes. Then, slice it into strips to add to your bowl. To get the best taste, marination is key. Marinate your chicken for at least 30 minutes. If you have time, let it sit overnight. This helps the flavors sink in. You can also adjust the seasoning. If you want more heat, add extra chipotle sauce. For a milder taste, reduce the sauce. When cooking, I recommend grilling or pan-searing the chicken. Heat your grill or skillet to medium-high heat. Cook the chicken for 6-7 minutes on each side. Check for doneness by slicing into the thickest part; it should be no longer pink. After cooking, let the chicken rest for a few minutes. This keeps it juicy and tender. Layering is important in your burrito bowl. Start with a base of rice or quinoa. Then add black beans, corn, and tomatoes. Top it off with sliced chicken and diced avocado. For a pop of color, sprinkle fresh cilantro on top. You can also drizzle lime juice for extra flavor. Consider adding sour cream or cheese for creaminess. Pro Tips Marinate Longer for More Flavor: Allow the chicken to marinate overnight for an even more intense flavor that seeps into the meat. Cook Rice/Quinoa with Broth: For added flavor, cook your rice or quinoa in chicken or vegetable broth instead of water. Rest the Chicken: Let the cooked chicken rest for a few minutes before slicing to retain its juices and tenderness. Customize Your Toppings: Feel free to add or swap out toppings like jalapeños, bell peppers, or different types of cheese for a personal touch. {{image_2}} You can make this dish vegetarian or vegan by swapping chicken for jackfruit or tofu. Use chipotle sauce made from dried peppers. For a gluten-free option, stick to corn or rice instead of wheat products. Check your sauces and toppings for gluten-free labels. Feel free to change up the sauces and spices. Try salsa verde for a fresh twist. If you love heat, add jalapeños or a splash of hot sauce. You can also mix in smoked paprika for a rich flavor. Adjust the spices to your taste. If you want alternatives for black beans, try pinto beans or chickpeas. For corn, you can use roasted bell peppers or peas. Other toppings like shredded lettuce, diced red onion, or sliced olives also work well. Get creative with what you have! To keep your Chipotle Chicken Burrito Bowls fresh, refrigeration is key. Store leftovers in an airtight container. This keeps moisture in and prevents odors from mixing. Let the dish cool down to room temperature first. This helps avoid condensation inside the container. Use glass or BPA-free plastic for the best results. If you want to save your burrito bowls for later, freezing is a great option. Divide the contents into single servings. Use freezer-safe bags or containers to prevent freezer burn. When you’re ready to eat, thaw in the fridge overnight. For quick reheating, microwave the bowls for about 2-3 minutes, stirring halfway through. Ensure everything is heated to at least 165°F for safety. In the fridge, Chipotle Chicken Burrito Bowls last about 3 to 4 days. Always check for signs of spoilage before eating. If you notice an off smell, change in color, or mold, throw it away. These signs mean it’s no longer safe to eat. Always prioritize food safety for a delicious meal every time! To make Chipotle Chicken Burrito Bowls, follow these steps: 1. Marinate the chicken: Mix chicken thighs with chipotle sauce, olive oil, cumin, garlic powder, onion powder, salt, and pepper. Marinate for at least 30 minutes. 2. Cook the rice or quinoa: Follow package instructions for cooking. 3. Cook the chicken: Grill or pan-sear chicken for 6-7 minutes on each side until no longer pink. 4. Assemble the bowls: Start with a base of rice or quinoa. Add black beans, corn, cherry tomatoes, avocado, and sliced chicken. 5. Finish: Top with cilantro, lime juice, and optional sour cream or cheese. Key ingredients to focus on include chicken thighs, chipotle sauce, and brown rice or quinoa. Yes, you can substitute chicken. Other proteins that pair well include: - Turkey - Shrimp - Tofu - Beef These options will bring great flavor to your burrito bowls. Each serving has about 500 calories. Here’s the breakdown of macronutrients: - Protein: 30 grams - Carbohydrates: 60 grams - Fat: 15 grams This meal is balanced and nutritious, making it a great choice for any time of day. You learned how to make delicious Chipotle Chicken Burrito Bowls in this guide. We covered the key ingredients like chicken thighs, chipotle sauce, and various toppings. I shared step-by-step instructions to marinate and cook your chicken perfectly. Tips for flavor and presentation help elevate your meal. Feel free to customize the recipe for any diet. Store leftovers properly for the best taste. Enjoy creating your bowls and making them your own!

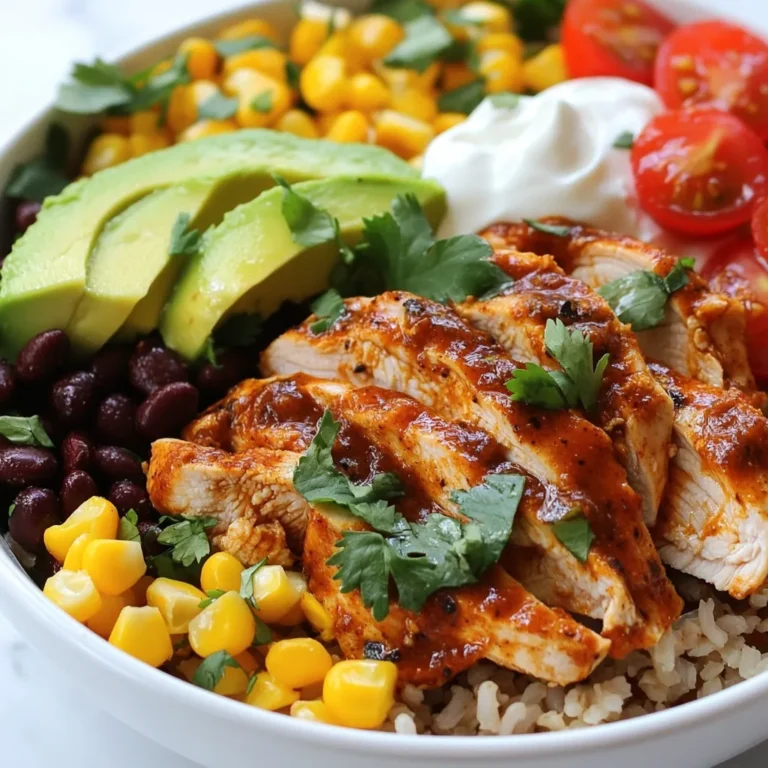
Chipotle Chicken Burrito Bowls Flavorful and Easy Recipe

PREV 1 … 55 56 57 NEXT
flavor nest kitchen

explore

DessertsDinnerAppetizersDrinks

Our Policies

  • Cookie Policy
  • Copyright Policy
  • Disclaimer
  • GDPR Policy
  • Terms Of Use
Back to Top
  • About
  • Contact Us
  • Privacy Policy
© 2025 flavor nest kitchen