FREE DINNER EBOOK! Get your copy!
  • Cookie Policy
  • GDPR Policy
  • Disclaimer
  • Terms Of Use
  • Visit my other site: Fun Cookie Recipes
flavor nest kitchen
  • Home
  • Dinner
  • Desserts
  • Drinks
  • Appetizers
  • Contact
  • About
  • Privacy Policy
  • Home
  • Dinner
  • Desserts
  • Drinks
  • Appetizers
  • Contact
  • About
  • Privacy Policy
  • Cookie Policy
  • GDPR Policy
  • Disclaimer
  • Terms Of Use
Visit my other site: Fun Cookie Recipes

HOME / CATEGORIES /

Latest

To make No-Bake White Chocolate Cranberry Energy Bites, gather these simple items: - 1 cup rolled oats - 1/2 cup almond butter (or peanut butter) - 1/2 cup honey (or maple syrup) - 1/2 cup white chocolate chips - 1/3 cup dried cranberries, chopped - 1/4 cup flaxseeds - 1 teaspoon vanilla extract - 1/4 teaspoon sea salt If you don't have something on hand, here are some easy swaps: - Use peanut butter instead of almond butter. - Maple syrup can replace honey for a vegan option. - Dark chocolate chips work well if you want a richer flavor. - Chopped nuts can replace flaxseeds for added crunch. - Use any dried fruit you like instead of cranberries. These energy bites are not only tasty but also healthy. Here’s what you get per bite: - Calories: About 100 - Protein: 3 grams - Fat: 4 grams - Carbohydrates: 14 grams - Fiber: 2 grams - Sugar: 5 grams These bites are great for a quick snack or a post-workout boost. Enjoy the blend of flavors while knowing you’re fueling your body right! To make these no-bake white chocolate cranberry energy bites, start by gathering your ingredients. You will need rolled oats, almond butter, honey, white chocolate chips, dried cranberries, flaxseeds, vanilla extract, and sea salt. In a large mixing bowl, combine the rolled oats, almond butter, and honey. Mix until everything is smooth and well-blended. Next, add the white chocolate chips, chopped dried cranberries, flaxseeds, vanilla extract, and sea salt to the bowl. Stir everything together until the mixture is evenly combined. When mixing, make sure to break apart any clumps of almond butter. This helps create a smooth texture. Use a sturdy spoon or spatula to mix. If you find it hard to combine, dampen your hands and mix by hand. This can help you ensure all ingredients blend well. Keep in mind that the mixture should feel sticky but not too wet. If it feels dry, add a little more honey or almond butter. This will help the bites hold together better. Now it’s time to shape your energy bites. Use your hands to roll the mixture into small balls, about 1 inch in size. Place each ball on a baking sheet lined with parchment paper. This keeps them from sticking. Once you shape all the bites, place the baking sheet in the refrigerator. Chill the energy bites for at least 30 minutes. This helps them firm up nicely. After they are set, transfer the bites to an airtight container. Store them in the fridge for a quick snack anytime! To make the best energy bites, start with fresh ingredients. Use creamy almond or peanut butter for a smooth texture. Honey adds sweetness and helps bind the mix. Mix the oats, nut butter, and honey first. This ensures a good base. Then, fold in the white chocolate chips and dried cranberries gently. This keeps the chips from breaking. Roll the mix into 1-inch balls. If the mix is too sticky, wet your hands slightly. Chill the bites for at least 30 minutes to firm them up. One common mistake is not measuring ingredients correctly. This can lead to a dry or too gooey mixture. If you skip the flaxseeds, your bites may lack the right crunch. Another mistake is not chilling the bites long enough. They need time to set in the fridge. Avoid using too many add-ins. This can make the mixture hard to shape. Lastly, don’t forget the sea salt. It enhances the flavors and balances the sweetness. These energy bites are great for quick snacks or breakfast. Serve them alongside yogurt or fresh fruit for a balanced meal. You can pack them for school lunches or hikes. They also make a perfect post-workout snack. For a fun twist, try drizzling melted white chocolate on top before serving. This adds extra sweetness and a nice presentation. Enjoy these bites any time you need a quick energy boost! {{image_2}} You can play with flavors to make these bites your own. Try adding a pinch of cinnamon for warmth. You can also use dark chocolate chips instead of white. This gives a richer taste. Want a tropical twist? Add dried pineapple or shredded coconut. For a nutty flavor, mix in some chopped walnuts or pecans. Each option changes the taste and keeps it exciting. Need to adjust for allergies or diets? You can swap almond butter for sunbutter if you're nut-free. Maple syrup works great if you want a vegan option instead of honey. Use gluten-free oats to make these bites gluten-free. It’s easy to make these energy bites fit your needs. Just keep the main texture and taste in mind. Boost the nutrition by adding ingredients. Chia seeds are a great choice for fiber. You can also mix in protein powder for an extra kick. If you want more vitamins, add in some dried fruit like apricots or raisins. These additions make your bites even healthier and keep you full longer. To keep your no-bake white chocolate cranberry energy bites fresh, use an airtight container. Place the bites in the container and store them in the fridge. This method keeps them tasty and firm. I recommend layering parchment paper between layers if you stack them. This helps prevent sticking. If you want to keep your energy bites longer, freezing is a great option. First, place the bites in a single layer on a baking sheet. Freeze them for about an hour until they are hard. Then, transfer them to a freezer bag or container. Make sure to remove as much air as possible. When you're ready to enjoy them, simply thaw the bites in the fridge for a few hours. They taste just as good! These energy bites can last up to a week in the fridge. If frozen, they can stay fresh for about three months. Check for any changes in smell or texture before eating. To keep them at their best, store them in a cool place. Always keep them sealed tight to lock in their flavor. No-bake energy bites last about one week in the fridge. They stay fresh if you store them in an airtight container. If you want them to last longer, you can freeze them. In the freezer, they can last up to three months. Just let them thaw before eating. Yes, you can use different nut butters! Almond butter, peanut butter, or even sunflower seed butter all work well. Each nut butter adds its own flavor. Just make sure the nut butter is smooth for the best texture. These energy bites are gluten-free if you use certified gluten-free oats. Most rolled oats contain gluten, so check the label. The other ingredients are naturally gluten-free, so you can enjoy them worry-free. Absolutely! You can skip the white chocolate or replace it with dark chocolate chips. You can even add extra dried fruits or nuts for a different taste. Just remember that this will change the flavor, but they will still be delicious! In this article, we explored how to make tasty energy bites. We looked at key ingredients, useful substitutions, and what makes them nutritious. I shared step-by-step instructions, tips for mixing, and how to shape and chill the bites. You learned ways to avoid common mistakes and how to serve them well. We also discussed fun flavor variations and storage tips to keep them fresh. Now, you have all you need to create your own healthy snacks. Enjoy making energy bites that fit your taste and dietary needs!

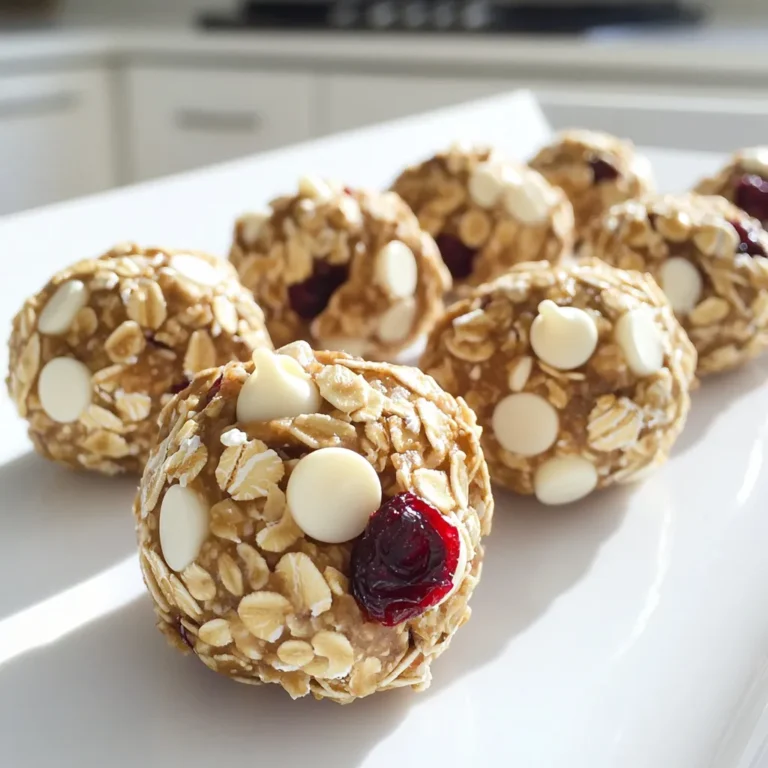
No-Bake White Chocolate Cranberry Energy Bites Recipe

To make Creamy Sun-Dried Tomato Chicken, gather the following ingredients: - 4 boneless, skinless chicken breasts - 1 cup sun-dried tomatoes in oil, drained and chopped - 1 cup heavy cream - 1 cup chicken broth - 2 cloves garlic, minced - 1 medium onion, finely chopped - 1 teaspoon Italian seasoning - 1 tablespoon olive oil - Salt and pepper to taste - Fresh basil leaves, for garnish - Grated Parmesan cheese, for serving These ingredients come together to create a rich and flavorful dish. The chicken breasts are the star, providing a hearty base. Sun-dried tomatoes add a sweet depth, while heavy cream gives a luscious texture. Chicken broth enhances the savory notes, and garlic and onion bring aromatic warmth. Italian seasoning ties all the flavors together. For garnish, fresh basil leaves add a burst of color and taste. Grated Parmesan cheese makes the dish feel special, elevating it to gourmet status. Make sure to have these items on hand for a quick weeknight meal that impresses. {{ingredient_image_1}} 1. Cooking the chicken Heat olive oil in a large skillet over medium heat. Season the chicken breasts with salt and pepper. Add the chicken to the skillet. Cook for about 5-7 minutes on each side until they turn golden brown. Make sure they are fully cooked. Remove the chicken from the skillet and set it aside. 2. Sautéing onion and garlic In the same skillet, add the finely chopped onion and minced garlic. Sauté them until the onion looks translucent, which takes about 3-4 minutes. This step builds flavor and aroma. 3. Creating the creamy sun-dried tomato sauce Stir in the chopped sun-dried tomatoes and Italian seasoning. Let them cook for 1-2 minutes to release their flavors. Next, pour in the chicken broth and bring it to a gentle simmer. Allow it to reduce slightly for about 3-5 minutes. 4. Combining chicken and sauce for flavor infusion Lower the heat and slowly stir in the heavy cream. Mix it well to create a creamy sauce. Let it simmer on low for an additional 2-3 minutes. Return the cooked chicken breasts to the skillet. Spoon the creamy sauce over the chicken. Let it cook together for an additional 5 minutes to soak in all the rich flavors. Now, you have a delicious creamy sun-dried tomato chicken ready to serve! - Ensuring chicken is fully cooked Cook the chicken until it reaches 165°F. Use a meat thermometer for safety. This keeps the chicken juicy and safe to eat. - Adjusting sauce consistency If the sauce is too thick, add more chicken broth. For a thicker sauce, let it simmer longer. This helps create the perfect creamy texture. - Using fresh vs. dried herbs Fresh herbs give a bright flavor, while dried herbs are more intense. Use one tablespoon of fresh herbs or one teaspoon of dried. Adjust based on your taste. - Flavor enhancing strategies Add a splash of lemon juice for brightness. A pinch of red pepper flakes can add a nice kick. These small tweaks make a big difference in flavor. Pro Tips Enhance the Flavor: Consider marinating the chicken breasts in a mixture of olive oil, garlic, and Italian seasoning for at least 30 minutes before cooking to deepen the flavors. Use Fresh Ingredients: For an even richer taste, opt for fresh sun-dried tomatoes instead of the jarred variety. They can elevate the dish significantly. Adjust Consistency: If the sauce is too thick, thin it out with additional chicken broth or a splash of white wine to achieve your desired consistency. Garnish Wisely: Adding a squeeze of fresh lemon juice right before serving can brighten up the dish and complement the creamy sauce beautifully. {{image_2}} You can easily change this creamy sun-dried tomato chicken to suit your taste. Here are some fun ideas: - Swapping out chicken for turkey or shrimp: Use turkey breast for a leaner option. Shrimp adds a seafood twist that pairs well with the creamy sauce. Just cook the shrimp until they turn pink, and they will soak in those great flavors. - Making it lighter with low-fat alternatives: Substitute heavy cream with low-fat milk or a non-dairy cream. This will cut calories but keep the dish creamy. You can also use chicken breast tenderloins, which are lighter than traditional cuts. - Adding vegetables to the dish: Toss in some spinach or bell peppers. They add color and nutrients. Cook the veggies after the onion and garlic for extra flavor. You can also use sun-dried tomatoes packed in oil for a richer taste and smoother texture. These modifications let you enjoy this dish in new ways while keeping it simple and delicious! To keep your creamy sun-dried tomato chicken fresh, follow these simple tips: - Refrigeration Guidelines: Store any leftovers in an airtight container. This dish stays good for up to 3 days in the fridge. Make sure it cools down before sealing. - Freezing Options: You can freeze this chicken dish for up to 2 months. Use a freezer-safe container. If you freeze it, the sauce may separate when thawed. Just stir it well before reheating. - Reheating Instructions for Best Results: To reheat, thaw overnight in the fridge if frozen. Heat in a skillet over low heat, adding a splash of chicken broth or cream to revive the sauce. Stir gently until warm. You can also use a microwave, but do so in short bursts to avoid overcooking. These steps help you enjoy your creamy sun-dried tomato chicken even after a busy week! Yes, you can use fresh tomatoes. However, sun-dried tomatoes give a rich flavor. If you choose fresh, cook them longer to soften and blend into the sauce. You may need to adjust the seasoning since fresh tomatoes have more water. To make this dish dairy-free, swap the heavy cream for coconut milk or a dairy-free cream. Use a dairy-free cheese for serving. This keeps the dish creamy while making it suitable for those avoiding dairy. This dish pairs well with various sides. Here are some great options: - Pasta: Serve over fettuccine or penne. - Rice: Fluffy white or brown rice works well. - Vegetables: Roasted or steamed broccoli adds color and nutrition. - Garlic bread: Perfect for soaking up that creamy sauce. Yes, you can make this ahead of time. Cook the chicken and sauce, then store them in the fridge. When ready to eat, reheat gently on the stove. This dish tastes even better after the flavors meld together. This blog covered all the key steps to make Creamy Sun-Dried Tomato Chicken. We explored the ingredients, preparation methods, and helpful cooking tips. You also learned about possible variations and smart storage tips. Now you have the tools to create a delicious meal. Enjoy the process and feel free to experiment. Great food brings joy, so have fun with this recipe!

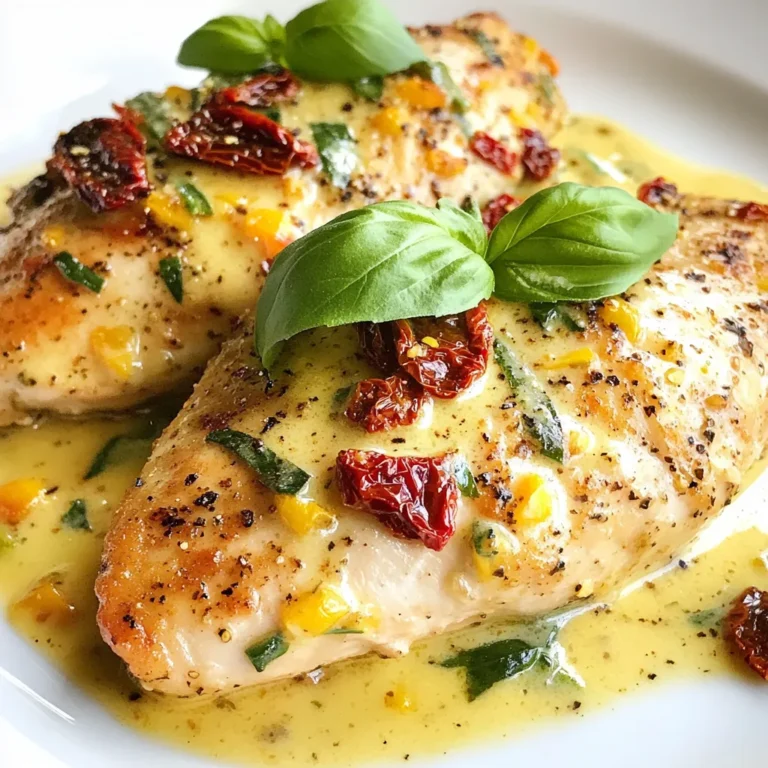
Creamy Sun-Dried Tomato Chicken Easy Weeknight Meal

- 1 lb large shrimp, peeled and deveined - 2 cups broccoli florets - 1/4 cup honey - 3 tablespoons soy sauce For this dish, large shrimp are the star. They soak up the sweet and salty flavors well. Fresh broccoli florets add crunch and color. Honey and soy sauce create a tasty glaze that brings everything together. - 2 tablespoons olive oil - 4 cloves garlic, minced - 1 teaspoon ginger, grated - 1 teaspoon sesame oil - 1 tablespoon sesame seeds (for garnish) - Sliced green onions (for garnish) Olive oil adds richness to the dish. Garlic and ginger bring a lovely aroma. Sesame oil gives a nutty flavor. For garnish, sesame seeds and green onions add a pop of color and crunch. - Salt and pepper to taste For a simple yet effective flavor boost, salt and pepper are key. You can also play with other flavors. Try adding chili flakes for heat or lemon juice for brightness. These small changes can make a big impact on taste. First, preheat your oven to 400°F (200°C). This heat will cook the shrimp and broccoli perfectly. Next, line a large baking sheet with parchment paper. This helps with easy cleanup later. Now, let’s make the marinade. In a bowl, whisk together these ingredients: - 1/4 cup honey - 3 tablespoons soy sauce - 2 tablespoons olive oil - 4 cloves garlic, minced - 1 teaspoon ginger, grated - 1 teaspoon sesame oil - Salt and pepper to taste This mix brings a sweet and savory flavor to the dish. Add 1 pound of large, peeled, and deveined shrimp to the marinade. Make sure each piece is well-coated. This step is key for flavor. Let the shrimp marinate for about 15 minutes. It’s just enough time for the flavors to soak in. While the shrimp marinates, prepare 2 cups of broccoli florets. Place them on the prepared baking sheet. Drizzle with olive oil, salt, and pepper, then toss to coat. After marinating, arrange the shrimp on the same baking sheet with the broccoli. Spread them out in a single layer. This helps them cook evenly. Now, bake in the preheated oven for 10-12 minutes. Watch for the shrimp to turn pink and opaque. The broccoli should be tender yet crisp. Once done, remove from the oven. Garnish with sesame seeds and sliced green onions for added flavor and style. Enjoy your meal right away, either on the baking sheet or a platter! To ensure even cooking for shrimp and broccoli, spread them out on the baking sheet. If they touch, they may steam instead of roast. This can lead to uneven cooking. For marinating times, if you're busy, even 5 minutes makes a difference. If you have more time, let the shrimp marinate for up to 30 minutes. This way, you get more flavor. For creative plating, try serving the shrimp and broccoli on a large platter. You can arrange them in a circle with a sprinkle of sesame seeds in the center. This looks nice and makes it easy for everyone to serve themselves. You can pair this dish with rice or quinoa. These sides soak up the honey garlic sauce well. You can also serve it with a light salad to balance the meal. If you want to change things up, consider using bell peppers or snap peas instead of broccoli. They add color and crunch. For garnish, try adding chopped cilantro or a squeeze of lime. This adds freshness and makes the dish pop visually. Don't shy away from experimenting; it’s all about making it your own! {{image_2}} You can switch up the veggies in this dish. Try using bell peppers or snap peas for a twist. They add a nice crunch and bright color. If you prefer another protein, tofu or chicken works well too. Just marinate them like the shrimp. Each option gives a fresh take on the classic recipe. Want to spice things up? Add sriracha or red pepper flakes to the marinade. This gives your dish a nice kick. If you like it sweeter, maple syrup is a great substitute for honey. It brings a different flavor that pairs well with garlic. Feel free to get creative with flavors! If you need a gluten-free option, use tamari instead of soy sauce. It gives the same great taste without the gluten. For those who want a vegan version, swap the shrimp for chickpeas or more veggies. This way, everyone can enjoy this tasty dish! To keep your honey garlic shrimp and broccoli fresh, use airtight containers. Glass or plastic containers work well. Make sure to cool the dish before sealing it. Store the leftovers in the fridge for up to three days. If you want to save them longer, freeze the shrimp and broccoli in freezer-safe bags. Press out as much air as you can before sealing. This helps prevent freezer burn. When reheating, I suggest using an oven or a stovetop. For the oven, preheat it to 350°F (175°C). Spread the shrimp and broccoli on a baking sheet. Heat for about 10 minutes. This method keeps the texture intact. On the stovetop, use a skillet over medium heat. Stir the shrimp and broccoli for about five minutes. Make sure they are heated through but not overcooked. In the fridge, your leftovers will last about three days. In the freezer, they can stay good for up to three months. Check for any off smells or changes in color. If the shrimp looks dull or the broccoli is slimy, it’s best to throw it out. Always trust your senses when it comes to food safety. How do I know when shrimp is fully cooked? You can tell shrimp is cooked when it turns pink and opaque. The flesh should also feel firm to the touch. This usually takes about 10 to 12 minutes when baking. If you are unsure, cut one shrimp in half. It should be white and not translucent. Can this recipe be made ahead of time? Yes! You can prepare the marinade a day in advance. Just store it in the fridge. You can also marinate the shrimp for up to one hour before baking. This helps the flavors blend well. However, I recommend cooking it fresh for the best taste and texture. Can I use frozen shrimp or broccoli? Absolutely! You can use frozen shrimp or broccoli. Just make sure to thaw them well before cooking. Drain any excess moisture to avoid sogginess. This way, you still get that nice crispness in your dish. How can I make this dish spicy? To add some heat, mix sriracha into the marinade. You can start with one teaspoon and adjust to your taste. Another option is to sprinkle red pepper flakes on the shrimp and broccoli before baking. This will give it a nice kick! Caloric content per serving Each serving of this dish has about 250 calories. This is a great option for a quick meal that is satisfying and healthy. Key nutrient breakdown of the dish - Protein: Shrimp is high in protein, giving you about 25 grams per serving. - Fiber: Broccoli adds fiber, which is great for digestion. - Vitamins: This dish is rich in vitamins C and K, thanks to the broccoli. - Healthy fats: Olive oil provides healthy fats for your diet. This dish is not only tasty but also packed with nutrients! This blog post guides you through a tasty shrimp and broccoli dish. You learned the key ingredients, the step-by-step cooking process, and tips for serving. We explored variations for different diets and how to store leftovers correctly. Cooking should be fun and easy. With this recipe, you can impress your friends and family. Don't hesitate to swap ingredients to make it your own. Enjoy your cooking adventure, and savor every bite!

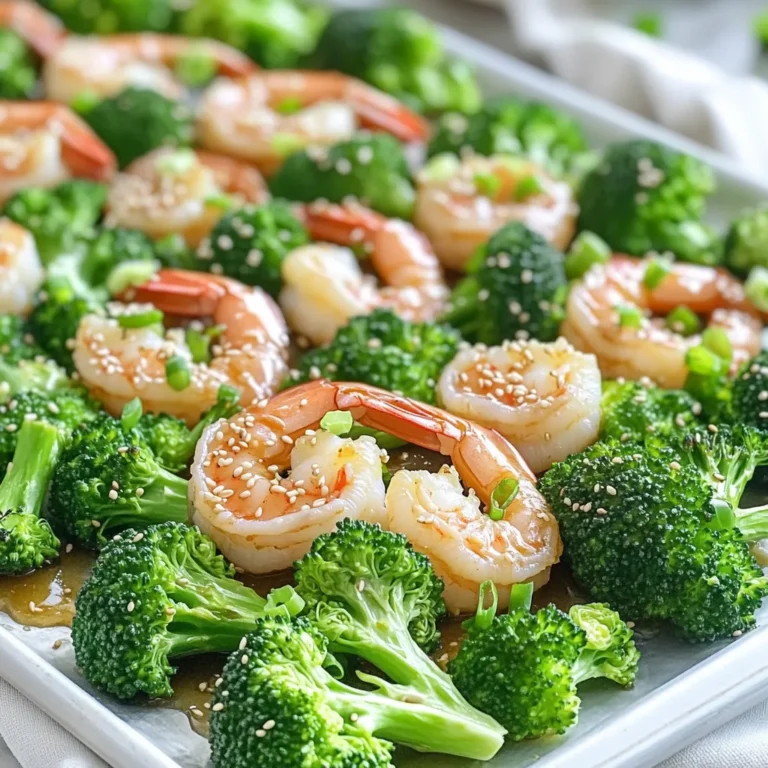
Sheet Pan Honey Garlic Shrimp and Broccoli Delight

- 2 cups all-purpose flour - 1 cup granulated sugar - 1/2 cup brown sugar, packed - 1 tablespoon baking powder - 1/2 teaspoon baking soda - 1/2 teaspoon salt - 1 cup whole milk - 1/2 cup unsalted butter, melted - 2 large eggs - 1 teaspoon vanilla extract - 1 cup semi-sweet chocolate chunks - 1/2 cup walnuts, chopped (optional) For my chocolate chunk muffins, I focus on using fresh and high-quality ingredients. The dry ingredients form the base and give structure. Flour, sugar, and leavening agents work together to create a fluffy texture. The wet ingredients add moisture and richness. Milk and melted butter give the muffins a tender crumb. Eggs help with binding, and vanilla adds a delightful flavor. Mix-ins are where the magic happens! Semi-sweet chocolate chunks melt beautifully and create gooey pockets in each muffin. If you like nuts, walnuts add a nice crunch and nutty flavor. You can skip them if you prefer a pure chocolate experience. Gather your ingredients and measure them carefully. Using the right amounts will help you achieve the best results. Remember, fresh ingredients make a big difference in taste. So, let’s get ready for some baking fun! - Preheat your oven to 375°F (190°C) and prepare the muffin tray. Line it with paper liners or grease it with non-stick spray. This helps the muffins come out easily. - In a large mixing bowl, combine 2 cups of all-purpose flour, 1 cup of granulated sugar, 1/2 cup of packed brown sugar, 1 tablespoon of baking powder, 1/2 teaspoon of baking soda, and 1/2 teaspoon of salt. Whisk these dry ingredients together until they mix well. - In another bowl, whisk together 1 cup of whole milk, 1/2 cup of melted unsalted butter, 2 large eggs, and 1 teaspoon of vanilla extract. Mix until smooth and creamy. - Now, pour the wet ingredients into the dry ingredients. Gently fold them together with a spatula. Remember, don’t over-mix; a few lumps are okay. - Add in 1 cup of semi-sweet chocolate chunks and, if you like, 1/2 cup of chopped walnuts. Fold them into the batter evenly. - Divide the batter into the muffin cups, filling each about 3/4 full. For a special touch, sprinkle a few extra chocolate chunks on top of each muffin. - Bake your muffins in the preheated oven for 18 to 20 minutes. Check if they are done by inserting a toothpick in the center. If it comes out clean, they are ready! - After baking, remove the muffins from the oven and let them cool in the pan for about 5 minutes. Then, transfer them to a wire rack to cool completely. To get the best muffin, avoid over-mixing the batter. When you mix too much, muffins can turn out dense. Gently fold the wet and dry ingredients together until just combined. A few lumps are okay. Also, let your ingredients come to room temperature before mixing. This helps the batter blend better and rise nicely. You can add fun toppings to your muffins. Try sprinkling extra chocolate chunks or nuts on top before baking. This gives your muffins a nice look and extra crunch. For serving, dust the muffins with powdered sugar. It adds a sweet touch and makes them look fancy. Pair them with a cold glass of milk for a perfect treat. Use a good muffin tray and liners for easy baking. I recommend using a non-stick muffin tray or paper liners to avoid sticking. For mixing, a large mixing bowl works best. A sturdy spatula is great for folding the batter. Make sure you have measuring cups and spoons handy for accuracy. {{image_2}} You can change the flavor of your muffins easily. If you want a classic twist, try chocolate chip muffins. Just swap out the chocolate chunks for chocolate chips. This small change creates a different texture and taste. For a nut-free version, simply leave out the walnuts. Your muffins will still be rich and tasty. Need a gluten-free option? Use gluten-free flour instead of all-purpose flour. Many brands work well. You will get soft, fluffy muffins. If you want a vegan version, replace the eggs with flax eggs and the milk with almond milk. The muffins will still taste great and be plant-based. Add fruits like blueberries or raspberries for a fresh touch. These fruits make your muffins juicy and colorful. You can also sprinkle in spices like cinnamon or nutmeg for seasonal flavors. These spices add warmth and comfort to your muffins, making them perfect for fall or winter. Store your chocolate chunk muffins in an airtight container. This keeps them fresh and moist. You can place parchment paper between layers to avoid sticking. The best temperature for storage is room temperature. Your muffins will stay good for about three days this way. Freezing muffins is easy and keeps them tasty. First, let your muffins cool completely. Wrap each muffin in plastic wrap or foil. Then, place them in a freezer-safe bag. Remove as much air as you can before sealing. To thaw, simply take one out and leave it at room temperature for about an hour. For a warm treat, you can reheat them in the oven at 350°F for about 5-10 minutes. At room temperature, muffins last about three days. If you freeze them, they can last up to three months. Check for signs of spoilage like mold or an off smell. If the muffins feel dry or hard, they may no longer be good. Enjoy them fresh for the best taste! To make muffins fluffy, you need to focus on mixing. First, do not over-mix the batter. Mix just until you see no dry flour. A few lumps are okay. Second, use fresh baking powder to help the muffins rise. Also, make sure your wet ingredients are at room temperature. This helps them blend well with the dry ingredients. Yes, you can use different types of chocolate! Feel free to swap semi-sweet chocolate for dark or milk chocolate. You could even use white chocolate for a fun twist. Each type adds a unique flavor. Just make sure to chop the chocolate into chunks for even distribution. If you need an egg substitute, try using applesauce. Use 1/4 cup of unsweetened applesauce for each egg. Another option is to use mashed banana, which will add a slight banana flavor. You could also use flaxseed meal. Mix 1 tablespoon of flaxseed with 2.5 tablespoons of water. Let it sit until it thickens. Absolutely! You can make mini chocolate chunk muffins by using a mini muffin tin. Just fill each mini cup about halfway with batter. Bake for about 10-12 minutes. Keep an eye on them since they bake faster than regular-sized muffins. To check if the muffins are done, insert a toothpick into the center of one muffin. If it comes out clean or with a few crumbs, they are ready. If the toothpick has wet batter on it, bake for a few more minutes. Remember to let them cool for a bit before serving. In this post, we explored how to make delicious chocolate chunk muffins. We covered ingredients, step-by-step instructions, and tips for perfect texture. Don't forget your mix-ins and variations to make them unique! Baking muffins at home is fun and rewarding. With these simple steps, you can impress anyone with your baking skills. Enjoy your tasty creations, and feel free to experiment! Happy baking!

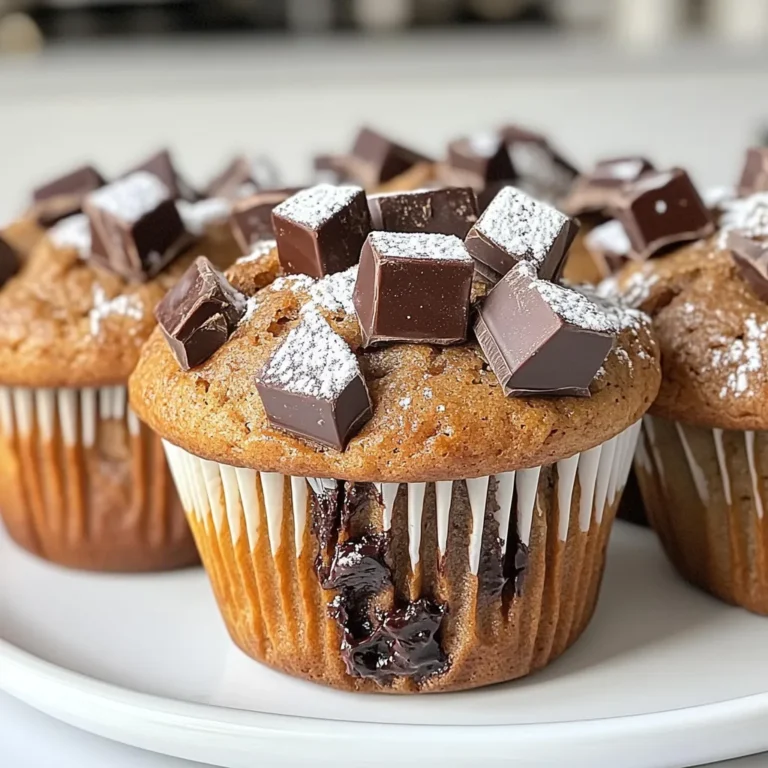
Chocolate Chunk Muffins Bakery Style Easy Recipe

- 250g mascarpone cheese - 200ml heavy cream - 100g powdered sugar - 1 teaspoon vanilla extract - 200g Lotus Biscoff cookies - 150ml strong brewed coffee, cooled - 2 tablespoons coffee liqueur substitute (like chocolate syrup or more coffee) - Cocoa powder for dusting - Crushed Lotus Biscoff cookies for garnish Mascarpone cheese forms the creamy base. It has a rich, smooth texture. Heavy cream adds volume and lightness. When whipped, it gives the tiramisu its airy feel. Powdered sugar sweetens the mix without grit. Lotus Biscoff cookies bring a unique taste. Their caramel notes pair well with coffee. Strong brewed coffee offers depth. It enhances the flavors and adds a delightful kick. The coffee liqueur substitute can add extra sweetness if you prefer. Choose high-quality mascarpone for the best taste. Fresh heavy cream whips better, so check the date. For coffee, use a strong brew, like espresso, for a bold flavor. If you like less coffee taste, use chocolate syrup instead of liqueur. This dessert can be made ahead. It improves in flavor the longer it chills. When serving, the dusting of cocoa and crushed cookies adds a nice finish. Enjoy this treat with family or friends! Start by getting a mixing bowl. Add 250g of mascarpone cheese, 100g of powdered sugar, and 1 teaspoon of vanilla extract. Whisk these ingredients together until they are smooth and creamy. This step is key for a rich flavor. In a separate bowl, whip 200ml of heavy cream until it forms stiff peaks. This makes your dessert light and airy. Now, gently fold the whipped cream into the mascarpone mixture. Be careful not to stir too hard, as we want to keep that fluffiness. Set this mixture aside for later. Next, take 200g of Lotus Biscoff cookies. Dip each cookie quickly into 150ml of cooled strong brewed coffee. If you like, add 2 tablespoons of a coffee liqueur substitute, like chocolate syrup. Lay the dipped cookies in a single layer in a rectangular dish. This makes the base of your tiramisu. Spread half of the mascarpone mixture over the cookies. Smooth it out evenly for a nice finish. Repeat the process by dipping more cookies and layering them on top of the mascarpone. Once done, top this layer with the rest of the mascarpone mixture, smoothing it again for that perfect look. Now, cover the dish with plastic wrap. Place it in the fridge for at least 4 hours. For the best taste, let it chill overnight. This helps the flavors meld together. Before you serve, dust the top with cocoa powder. You can also sprinkle crushed Lotus Biscoff cookies on top for extra crunch and flavor. Enjoy this delightful dessert with friends and family! To get great whipped cream, start with cold heavy cream. Use a chilled bowl and whisk. Whip until you see stiff peaks. This means the cream holds its shape. Don’t over-whip. If you do, it can turn into butter. Gently fold the whipped cream into the mascarpone mix. This keeps the air in the cream, making it light. Layering is key to a great no bake Lotus Biscoff tiramisu. First, dip the cookies in coffee quickly. Don’t let them soak too long or they will be mushy. Lay the cookies flat in a single layer. Spread half of the mascarpone mix over the cookies. Repeat the dipping and layering. This creates a nice balance of flavors and textures. One common mistake is not letting the tiramisu chill long enough. It needs at least four hours in the fridge. If you skip this, the layers won't set properly. Another mistake is over-mixing the mascarpone and whipped cream. Be gentle when folding. Lastly, don’t forget to dust cocoa powder before serving. It adds a nice finish and flavor. {{image_2}} You can make this dessert even better by adding different flavors. For a chocolate twist, mix in cocoa powder or chocolate syrup into the mascarpone. You can also layer in chocolate cookies for extra crunch. If you prefer vanilla, just increase the vanilla extract in the mascarpone mixture. It makes the dessert taste richer and more fragrant. If you need a lactose-free version, swap out the mascarpone cheese for a lactose-free cream cheese. Use coconut cream instead of heavy cream for a dairy-free option. For gluten-free needs, choose gluten-free cookies. There are many brands that offer gluten-free Lotus-style cookies. These swaps let everyone enjoy this treat! Serve your No Bake Lotus Biscoff Tiramisu in individual cups for a fun twist. You can also layer it in a jar for a cute dessert to take on-the-go. For a crunchy topping, sprinkle crushed cookies or nuts on top. You can even add fresh fruits like strawberries or raspberries for a pop of color and flavor. To keep your No Bake Lotus Biscoff Tiramisu fresh, use an airtight container. This will help it stay moist and tasty. If you keep it in the original dish, cover it tightly with plastic wrap. This keeps air out and prevents drying. Always store it in the fridge until you are ready to serve. You can freeze this dessert, but it might change the texture. To freeze, slice it into portions. Wrap each piece in plastic wrap and then place them in a freezer bag. This way, you can enjoy a piece later. When you want to eat it, let it thaw in the fridge overnight. The No Bake Lotus Biscoff Tiramisu lasts about 3 to 4 days in the fridge. The flavors deepen as it sits. For the best taste, eat it within the first two days. After that, check for any signs of spoilage. If it smells off, it's best to throw it away. Yes, you can. If you want to try other cookies, go for a chocolate wafer or ladyfingers. Both options work well. They will give a different flavor but still taste great. Just remember to dip them in coffee too. This adds moisture and flavor. You should chill it for at least 4 hours. However, overnight is best for rich flavor. The longer it sits, the better the layers mix. This waiting time helps the cookies soften just right. You want a creamy texture that melts in your mouth. If you need a substitute for heavy cream, use whipped coconut cream. It gives a nice texture and flavor. You can also try using milk with a bit of butter. Mix ¾ cup of milk with ¼ cup melted butter. This mix can help create a similar result. This blog detailed the key ingredients and steps to make delicious No Bake Lotus Biscoff Tiramisu. We explored tips for perfect whipped cream and common mistakes to avoid. You learned about tasty flavor options and dietary substitutes. Proper storage methods were also discussed to keep your dessert fresh. Making this dessert is fun and rewarding. Enjoy your tasty creation and impress your family and friends!

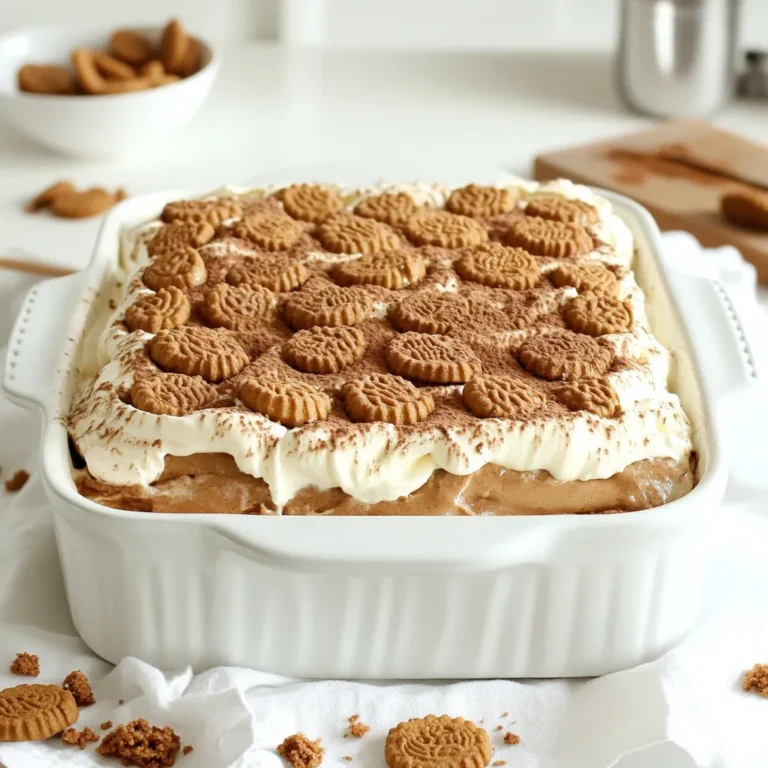
No Bake Lotus Biscoff Tiramisu Delightful Dessert Recipe

- 1 cup orzo pasta - 2 tablespoons olive oil - 4 cloves garlic, minced - 3 cups fresh spinach, chopped - 4 cups vegetable broth - 1 cup heavy cream - 1 cup grated Parmesan cheese - Salt and pepper to taste - 1/2 teaspoon red pepper flakes (optional) - Fresh parsley, chopped for garnish When choosing your ingredients, freshness matters. Fresh spinach will give your dish a bright taste. Use high-quality olive oil for better flavor. Grated Parmesan cheese melts well and adds a rich taste. Opt for low-sodium vegetable broth if you want to control salt levels. You can swap out the orzo for gluten-free pasta if needed. For a lighter version, use half and half instead of heavy cream. If you want a dairy-free option, try nutritional yeast for a cheesy flavor. Fresh spinach can be replaced with kale or arugula for a different twist. This dish cooks in one pot, making it easy and quick. You heat olive oil, sauté garlic, and add orzo. Next, you pour in broth, let it simmer, and finish with cream and cheese. It’s creamy, cheesy, and full of flavor. 1. Heat the olive oil: Start by pouring 2 tablespoons of olive oil into a large pot over medium heat. 2. Sauté garlic: Add 4 minced garlic cloves. Cook for about 1-2 minutes. You want it fragrant but not browned. 3. Add orzo: Stir in 1 cup of orzo pasta. Cook for an extra minute to let it toast slightly. 4. Add broth: Pour in 4 cups of vegetable broth. Bring it to a boil. 5. Simmer the orzo: Reduce the heat to medium-low. Let it simmer for 7-10 minutes, stirring now and then. The orzo should be tender and most of the liquid absorbed. 6. Add spinach: Mix in 3 cups of chopped spinach. Cook for 2-3 minutes until the spinach wilts. 7. Finish with cream and cheese: Stir in 1 cup of heavy cream and 1 cup of grated Parmesan cheese. Mix until creamy. 8. Season: Add salt, pepper, and 1/2 teaspoon of red pepper flakes (if you like heat). Adjust to your taste. 9. Let it sit: Reduce the heat to low. Let it simmer for another 2-3 minutes. This helps all the flavors blend. - When you sauté garlic, watch it closely. It can burn quickly, which will make it bitter. - Toasting the orzo adds a nice nutty flavor. Don’t skip this step! - Stirring the orzo while it simmers helps prevent sticking. Keep an eye on it! - For extra creaminess, add more cream or cheese at the end. Taste as you go. - Letting the dish sit before serving helps thicken it. It’s worth the wait! To boost flavor, always use fresh garlic. Fresh garlic adds a strong and rich taste. You can also add herbs like thyme or basil. This gives the dish a nice aroma. If you enjoy a bit of heat, red pepper flakes work wonders. They add a gentle kick. Fresh lemon juice at the end brightens up the entire dish. It cuts through the creaminess and adds zest. When cooking orzo, keep stirring. This prevents it from sticking to the pot. Toasting the orzo for a minute adds a nice nutty flavor. Use low-sodium vegetable broth. This gives you control over salt levels. For an extra creamy texture, let the dish sit before serving. This helps the flavors meld together. If you want a thicker sauce, simmer it a little longer. A common mistake is overcooking the orzo. It should be just tender, not mushy. Always taste before adding more salt or pepper. You can always add more, but you can’t take it away. Don’t skip the resting time after cooking. It allows the sauce to thicken and the flavors to deepen. Lastly, don’t be shy with the cheese. A generous amount of Parmesan makes a huge difference! {{image_2}} You can switch up the ingredients in this dish. Instead of orzo, try using quinoa or rice. These grains will still soak up the flavors well. For a twist, substitute vegetable broth with chicken broth. This change adds a deeper flavor to the dish. You can also replace heavy cream with Greek yogurt. This swap keeps it creamy while cutting some fat. To make this recipe vegan, replace heavy cream with coconut cream or cashew cream. These options maintain creaminess without dairy. Use nutritional yeast instead of Parmesan cheese for a cheesy taste. For the broth, always choose vegetable broth to keep it vegan. This ensures all your ingredients align with your dietary choice. Want to add more flavor? Toss in some sun-dried tomatoes or olives. These will bring a savory kick. For spice lovers, increase the red pepper flakes. Fresh herbs like basil or thyme can also brighten the dish. Experiment with lemon zest for a fresh twist. Each of these ideas can take your One Pot Garlic Parmesan Orzo to new heights! To store your leftover orzo, first let it cool. Place it in an airtight container. This keeps it fresh for later meals. You can store it in the fridge for about three to four days. If you want to enjoy it later, freezing is a great option. When you’re ready to enjoy your orzo again, heat it on the stove or in the microwave. For the stovetop, add a splash of vegetable broth or cream to help it rehydrate. Stir often until warm. If using the microwave, heat in short bursts. Stir between each burst until it’s hot all the way through. To freeze the orzo, place it in a freezer-safe container. Make sure to leave some space for expansion. It can stay in the freezer for up to three months. When you want to eat it, move it to the fridge overnight. Reheat it as mentioned before. This way, you keep the creamy texture and flavors intact. To make this recipe gluten-free, you can swap the orzo pasta for gluten-free orzo. Many brands offer pasta made from rice or corn that works well. Just check the cooking time, as gluten-free pasta may need slight adjustments. This way, you get the same creamy texture without the gluten. Yes, you can use frozen spinach. It’s a great time-saver! Just thaw and drain it before adding it to the pot. Frozen spinach is already cooked, so add it in the last few minutes of cooking. This gives it enough time to warm up and blend with the orzo. One Pot Garlic Parmesan Orzo pairs well with many dishes. A simple side salad adds freshness. Grilled chicken or shrimp can add protein and flavor. You can also serve it with crusty bread to soak up the creamy sauce. Enjoy it with a glass of white wine for an extra treat! This article covered the main ingredients and how to prepare your dish. I shared step-by-step instructions for perfect results. We discussed tips for enhancing flavors and avoiding common mistakes. I also suggested substitutions for various diets and how to store leftovers. Cooking is all about experimenting and finding what works for you. Use these guidelines to create a meal you love. Enjoy your cooking journey!

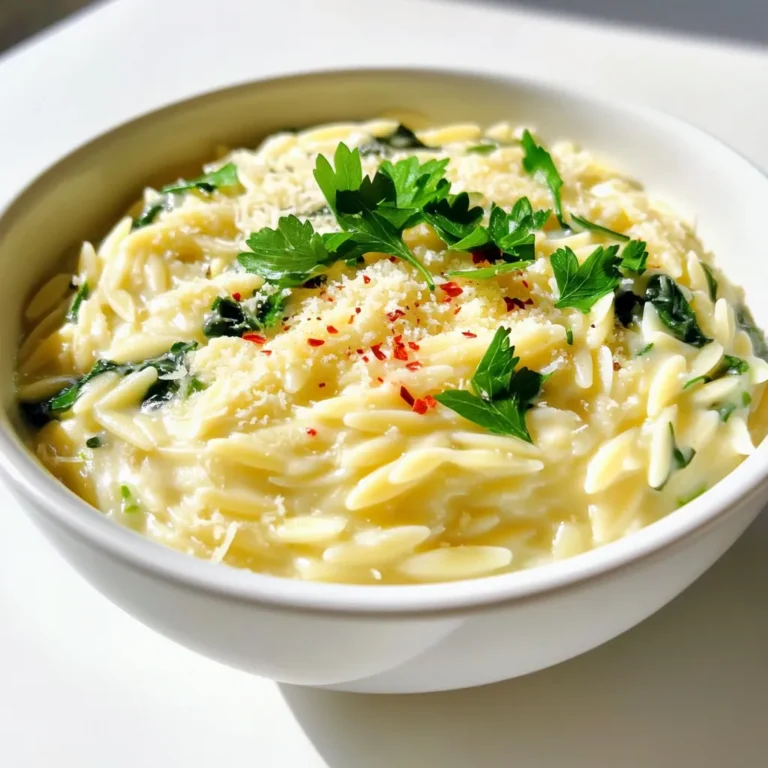
Delicious One Pot Garlic Parmesan Orzo with Spinach

- 1 lb skinless salmon fillet, cut into 1-inch cubes - 1/4 cup teriyaki sauce (store-bought or homemade) - 1 tablespoon sesame oil - 1 tablespoon honey - 1 teaspoon freshly grated ginger - 1 clove garlic, minced - 2 green onions, chopped (for garnish) - 1 tablespoon sesame seeds (for garnish) Gathering the right ingredients is key to making great Air Fryer Teriyaki Salmon Bites. First, I use fresh, skinless salmon fillets. I cut them into 1-inch cubes for even cooking. The teriyaki sauce brings sweet and savory notes. You can buy it or make your own at home. Next, I add sesame oil for a nutty flavor. Honey adds a touch of sweetness. Freshly grated ginger and minced garlic provide depth. They enhance the overall taste. For garnish, I use green onions and sesame seeds. These add color and crunch. Having these ingredients ready makes the cooking process smooth. You’ll love how simple and tasty this dish is! First, you need to make the marinade. In a medium bowl, whisk together the teriyaki sauce, sesame oil, honey, grated ginger, and minced garlic. This mix gives the salmon a rich flavor. Next, take your salmon cubes and add them to the bowl. Make sure each piece is well coated with the marinade. Let the salmon marinate for 15 to 20 minutes. This step is key to infusing all those tasty flavors into the fish. Now, it's time to cook! Preheat your air fryer to 400°F (200°C). This usually takes about 3 to 5 minutes. Once preheated, place the marinated salmon bites in a single layer in the air fryer basket. Make sure not to overcrowd them; this helps them cook evenly. Cook the salmon bites for 8 to 10 minutes. Don't forget to shake the basket halfway through to ensure they cook evenly. The salmon should be fully cooked with a slightly crispy outside. After cooking, carefully remove the salmon bites from the air fryer. Place them on a serving platter. Garnish with chopped green onions and sprinkle sesame seeds on top. This adds a nice crunch and looks great! For presentation, you can drizzle some extra teriyaki sauce over the salmon. Serve with toothpicks for easy eating. You can also add some steamed rice or veggies on the side to make it a full meal. Enjoy your tasty bites! Marinating is key for great flavor in salmon bites. It helps the fish soak up tasty teriyaki sauce, sesame oil, and spices. I recommend marinating for at least 15-20 minutes. This time is perfect for the flavors to really blend into the salmon. If you have more time, you can marinate it longer for an even deeper taste. Cooking times may vary between air fryer models. Start with 8-10 minutes at 400°F (200°C). If your air fryer runs hot, check at 7 minutes. The salmon should flake easily with a fork when done. Look for a golden, slightly crispy outside. That means your salmon bites are ready to eat! Serve your teriyaki salmon bites on a nice platter. Pair them with steamed rice or fresh veggies for a full meal. You can also drizzle extra teriyaki sauce on top. For drinks, try a light beer or green tea for a refreshing match. These flavors work well together and make your meal even better! {{image_2}} You can change up the flavor by using different sauces. Try a sweet teriyaki sauce with pineapple. A spicy sauce can add heat. Look for chili garlic sauce or sriracha for a kick. If you want something sweet, add a touch of maple syrup or brown sugar to the marinade. This can make the salmon bites sticky and delicious. Adding vegetables to the air fryer makes this meal more balanced. Vegetables like bell peppers, broccoli, or snap peas work well. Simply cut them into small pieces and toss them in the same marinade. Cook them alongside the salmon for a colorful, tasty dish. This way, you get a complete meal in one go. If you want to swap salmon for other proteins, you have options. Chicken or shrimp can work well with this recipe. Cut them into bite-sized pieces and follow the same marinating steps. For a vegetarian choice, try tofu. Press it to remove the water, then cube it and marinate. This adds great flavor and makes a filling meal. To store leftover salmon bites, place them in an airtight container. This helps to keep them fresh. You can store them in the fridge for up to three days. Make sure they cool down before sealing to avoid steam buildup. If you want to freeze salmon bites, first let them cool completely. Place them in a freezer-safe bag or container. Lay them flat for easier stacking. They can last up to three months in the freezer. When ready to eat, thaw them in the fridge overnight. This helps maintain their flavor and texture. To reheat salmon bites, preheat your air fryer to 350°F (175°C). Place the salmon bites in the fryer for about 5 minutes. This method helps keep them crispy. Avoid reheating in the microwave, as it can make them soggy. Always check for doneness to prevent overcooking. You should marinate the salmon for at least 15-20 minutes. This time allows the salmon to soak up the flavors from the teriyaki sauce and other ingredients. If you have more time, marinating for up to an hour can deepen the taste even more. Just remember, the key is to ensure the salmon is well-coated in the marinade. Yes, you can use frozen salmon for this recipe. Just make sure to thaw it first. You can do this by leaving it in the fridge overnight or using a microwave on the defrost setting. After thawing, pat the salmon dry before cutting it into cubes. This helps the marinade stick better and enhances the flavor. Several side dishes pair wonderfully with teriyaki salmon bites. Here are a few of my favorites: - Steamed rice: A classic choice that soaks up the teriyaki sauce. - Stir-fried vegetables: Broccoli, bell peppers, or snap peas add color and crunch. - Cucumber salad: A refreshing option to balance the rich flavors of the salmon. - Quinoa: A healthy grain that complements the dish well. - Edamame: A fun and healthy snack that adds protein to your meal. These sides make your meal complete and enhance the overall dining experience! In this post, we explored a tasty air fryer teriyaki salmon recipe. We covered essential ingredients, marinating tips, and step-by-step cooking instructions. I shared ways to enhance flavors and serve your dish beautifully. Remember to store leftovers properly for the best taste later. Experiment with sauces and vegetables to make it your own. This dish showcases salmon's versatility and makes meals delicious and simple. Enjoy creating a healthy meal that everyone will love.

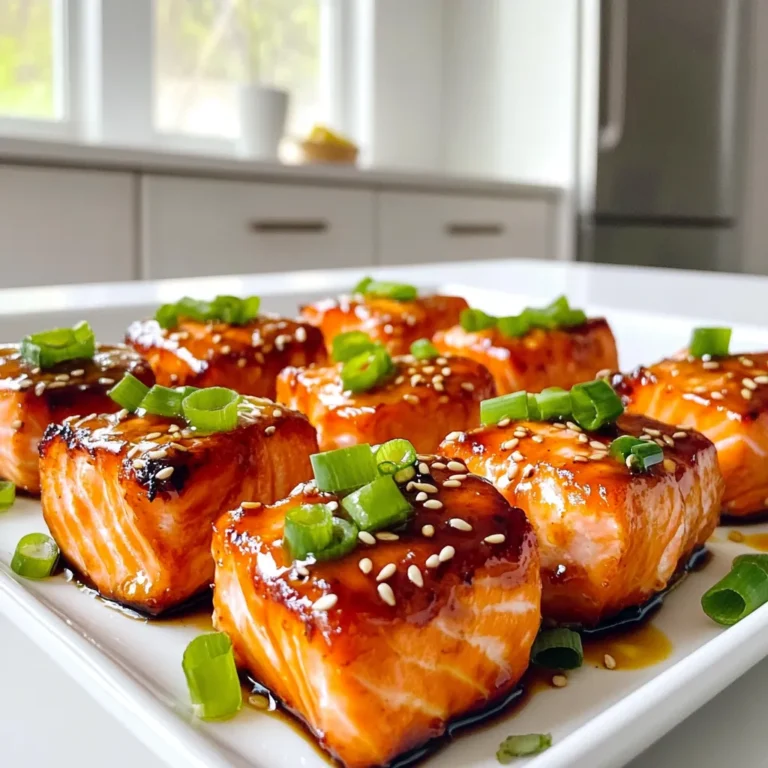
Air Fryer Teriyaki Salmon Bites Tasty and Easy Recipe

- 1 cup raw pistachios, shelled - 1 cup dried cranberries - 1 cup rolled oats - 1/2 cup almond butter (or any nut butter of choice) - 1/4 cup honey or maple syrup - 1 tsp vanilla extract - 1/2 tsp cinnamon - 1/4 cup unsweetened shredded coconut (for coating) When making No-Bake Pistachio Cranberry Bliss Bites, each ingredient plays a key role. The pistachios give a nice crunch and a rich flavor. Dried cranberries add sweetness and chewy texture. Rolled oats provide a base and help bind everything together. Almond butter, or your choice of nut butter, adds creaminess and healthy fats. Honey or maple syrup sweetens the mix and brings all the flavors together. Vanilla extract offers a warm aroma, while cinnamon enhances the taste. Lastly, shredded coconut adds a delightful coating. - Alternatives for nut butter: You can use peanut butter, sunflower seed butter, or cashew butter. - Options for sweeteners: Agave syrup or brown rice syrup work well if you want a different taste. - Non-dried fruit mix-ins: Try using raisins, chopped dates, or even small pieces of apricot for a fun twist. These substitutions make the recipe flexible and cater to different taste preferences. Feel free to mix and match based on what you have at home! First, chop the raw pistachios. Use a food processor and pulse them. Aim for a fine chop, but keep some pieces chunky. This adds nice texture. Next, measure the other ingredients carefully. You’ll need dried cranberries, rolled oats, almond butter, honey, vanilla extract, and cinnamon. Now, combine the chopped pistachios, cranberries, oats, and nut butter in the food processor. Add honey or maple syrup, vanilla, and cinnamon. Pulse until the mixture is sticky and well blended. Make sure it’s not too smooth; you want some texture. If you need a smoother mix, add a touch more nut butter. To roll the bites, lightly grease your hands with almond butter or coconut oil. Take about a tablespoon of the mixture. Roll it into a small ball. Keep your bites uniform in size for even cooking. Repeat this step until you use all the mixture. Next, spread shredded coconut on a shallow dish. Roll each bliss bite in the coconut until fully coated. This gives a nice look and flavor. Finally, place the coated bites on a parchment-lined baking sheet. Refrigerate them for at least 30 minutes. This helps the bites set well. Enjoy your delicious no-bake treats! Fresh ingredients make a big difference. Always choose high-quality pistachios and cranberries. They add rich taste and nutrients. If you want a twist, add spices like nutmeg or cardamom. These will give your bliss bites a unique kick. For gatherings, present the bliss bites on a colorful plate. You can also use a glass jar for a fun display. Sprinkle crushed pistachios on top for added flair. Pair these bites with herbal tea or sparkling water. The flavors blend well and create a delightful treat. Pistachios and cranberries are superfoods. Pistachios are full of protein, fiber, and healthy fats. Cranberries bring antioxidants and vitamins. Oats provide fiber and keep you full longer. Nut butter adds healthy fats and helps bind the bites together. These ingredients make your snacks both tasty and nutritious. {{image_2}} You can easily add a chocolate layer to your bliss bites. Just melt some dark or milk chocolate. Once melted, dip each bite halfway in the chocolate. Place them on parchment paper to cool. The chocolate adds a rich, sweet touch that pairs well with the pistachios and cranberries. You can also sprinkle sea salt on top for a nice contrast. If you have nut allergies, you can still enjoy these treats. Use sunflower seed butter instead of almond butter. For the pistachios, try pumpkin seeds or sunflower seeds. They give a nice crunch without nuts. The flavor stays rich and tasty with these swaps, so you won't miss the nuts. Want to mix it up? You can add other dried fruits like apricots or raisins. They will add a new twist to the bites. For spices, try ginger or nutmeg. These flavors can brighten the bites even more. Feel free to be creative with what you have at home! To keep your bliss bites fresh, use an airtight container. A glass jar works well. You can also use plastic containers, but glass keeps the bites fresher. Store them in the fridge. This helps maintain their taste and texture. Avoid storing them in warm areas. Heat can make them sticky and spoil faster. How long do bliss bites last? If stored properly, they can last up to one week in the fridge. You can freeze them for longer storage. Frozen bliss bites can last for about three months. Signs of spoilage include a change in smell or texture. If they feel sticky or look dull, it’s best to toss them. Preparing in advance is easy with these bliss bites. Make a big batch and store them. This way, you have a healthy snack ready. You can also freeze them after forming the bites. Place them on a baking sheet to freeze individually. Once frozen, transfer them to a container. This makes snacking quick and easy. Yes, you can use other dried fruits. Try chopped apricots, raisins, or figs. Each fruit adds its own taste and texture. Just make sure they are chopped small enough to blend well. To make these bites vegan, replace honey with maple syrup. This keeps the sweetness and makes it plant-based. Ensure your nut butter has no animal products as well. If the mixture feels dry, add a bit more nut butter or sweetener. This helps bind the ingredients better. You can also add a splash of water or plant milk if needed. Absolutely! Adding protein powder can boost the nutritional value. Start with one to two tablespoons. Blend it in with the other ingredients for a healthy snack. Serve the bliss bites on a nice plate or in a jar. You can add a sprinkle of crushed pistachios on top for color. They also look great next to fresh fruits or a dip. These bliss bites are easy to make and taste great. You only need a few key ingredients, like pistachios, oats, and nut butter. I shared step-by-step instructions to help you in the kitchen. Remember to use fresh ingredients for the best flavor. You can also mix and match flavors to suit your taste. With proper storage, these treats can last a while. Enjoy making and serving them at your next gathering. They are fun, healthy, and sure to please everyone!

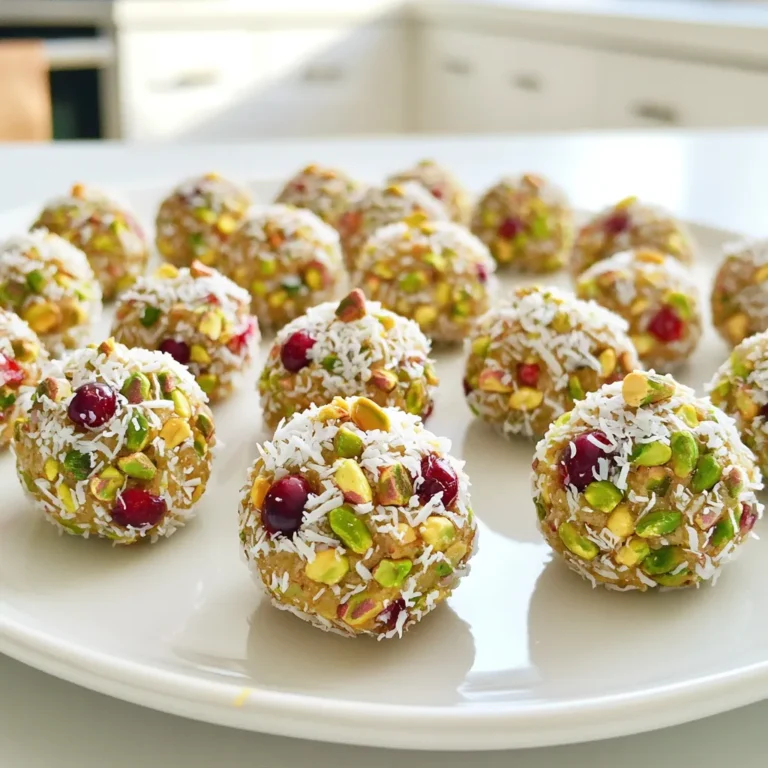
No-Bake Pistachio Cranberry Bliss Bites Delight

- 2 cups plain Greek yogurt - 3 tablespoons honey or maple syrup - 1 teaspoon vanilla extract - 1/4 cup cocoa powder - 1/2 cup mini marshmallows - 1/4 cup chocolate chips (dark or milk chocolate) - Pinch of sea salt - 1/2 cup crushed graham crackers - Reserved mini marshmallows and chocolate chips for garnish This High-Protein S’mores Greek Yogurt Dip is simple and fun. I love using plain Greek yogurt as my base. It packs a protein punch and makes this dip creamy. Honey or maple syrup adds just the right sweetness. You can choose either sweetener based on your taste. For flavor, I always add vanilla extract. It gives the dip a warm, inviting aroma. Cocoa powder brings that rich chocolate taste we all love. This dip is a great way to enjoy s’mores without the campfire. Next, we have the mix-ins. Mini marshmallows create that classic s’mores feel. I like to use both dark and milk chocolate chips. The mix of both gives a nice balance. A pinch of sea salt enhances all these flavors perfectly. Lastly, the toppings make it look great. Crushed graham crackers add crunch and texture. I save some mini marshmallows and chocolate chips for garnish. It makes the dip extra special and inviting. Gather these ingredients, and you’re ready to whip up a delicious treat. Enjoy the process; it’s just as fun as eating the dip! First, grab a large mixing bowl. Combine 2 cups of plain Greek yogurt, 3 tablespoons of honey or maple syrup, 1 teaspoon of vanilla extract, 1/4 cup of cocoa powder, and a pinch of sea salt. Whisk these ingredients together until the mix is smooth and creamy. This step is key to a great texture. Next, gently fold in 1/2 cup of mini marshmallows and 1/4 cup of chocolate chips. Be careful and take your time. You want to keep the marshmallows whole. Set aside a small handful of each for later. Now it's time for the fun part! Transfer the yogurt mixture into a serving bowl. Sprinkle 1/2 cup of crushed graham crackers evenly on top. This adds a nice crunch. Finally, garnish with the reserved mini marshmallows and chocolate chips for extra flair. Serve immediately with fresh fruit, graham crackers, or pretzels for dipping. Enjoy your tasty treat! You can switch up sweeteners in this dip. Use agave syrup or stevia if you want. These options cut sugar but keep the sweet taste. Also, try flavored Greek yogurt. It adds extra taste and can change the flavor profile entirely. This dip pairs well with fresh fruits, graham crackers, or pretzels. Think strawberries, apple slices, or banana chunks for dipping. It’s perfect for parties or as a healthy snack. Kids love it, and it keeps adults happy too! Make your dip stand out with fun serving bowls or jars. You can also layer it in clear cups for a beautiful view. Adding colorful fruit spots on top boosts visual appeal. A sprinkle of graham crackers adds a nice crunch, too! {{image_2}} You can change the flavor of your dip easily. For a peanut butter s’mores dip, add 1/4 cup of creamy peanut butter to the yogurt mix. This twist gives it a nutty taste and makes it even more filling. Another fun option is the mint chocolate variation. Simply add a few drops of mint extract and a bit of green food coloring. This change makes it fresh and exciting! If you want a vegan or dairy-free version, swap the Greek yogurt for coconut yogurt. Use maple syrup instead of honey for sweetness. This keeps the dip creamy and delicious without dairy. For gluten-free options, choose gluten-free graham crackers. This way, anyone can enjoy the dip without worry. You can serve this dip in different styles to make it fun. Try layered parfaits by adding layers of the dip, fruit, and graham crackers in a glass. This looks pretty and tastes amazing! Another idea is to serve it as a sandwich spread. Use it between two slices of bread for a tasty twist on dessert. To store leftovers, place the dip in an airtight container. This keeps it fresh. You can enjoy it for up to three days in the fridge. Just remember to check for any changes in smell or texture before eating. Can you freeze the dip? Yes, you can freeze this dip for up to one month. However, the texture may change. To thaw, move the dip to the fridge for a few hours or overnight. Stir well before serving to bring it back to life. For best practices with leftovers, simply enjoy it cold. If you prefer it warm, heat it gently in the microwave. Use short bursts, so it doesn’t overheat. Stir after each burst to ensure even warmth. This High-Protein S’mores Greek Yogurt Dip packs a punch with protein. Each serving offers about 15 grams of protein. This comes mainly from the Greek yogurt. Greek yogurt is a great source of protein and helps keep you full. It also adds creaminess to the dip. With the combination of yogurt and other ingredients, you enjoy a tasty treat that fuels your day. Yes, you can make this dip ahead of time! Prepare it up to two days in advance. Store it in an airtight container in the fridge. To keep it fresh, cover it well. Before serving, give it a stir. You might want to add a few more toppings for a fresh look. This dip is perfect for meal prep, and it saves time on busy days. You have many options for dippers! Here are some of my favorites: - Fresh fruit (like strawberries, bananas, or apples) - Graham crackers - Pretzels - Animal crackers - Rice cakes These dippers add flavor and crunch. You can mix and match to find your perfect pairing. Enjoy the fun of dipping! This blog post explored a rich and tasty Greek yogurt dip. We covered the main ingredients, mix-ins, and toppings to create a delightful treat. I shared steps to prepare, assemble, and serve, along with useful tips for substitutions and variations. This dip is perfect for sharing at parties or enjoying as a healthy snack. Get creative with flavors and presentation. With simple storage and reheating advice, you can enjoy this dip any time. Try it today and enjoy its creamy goodness!

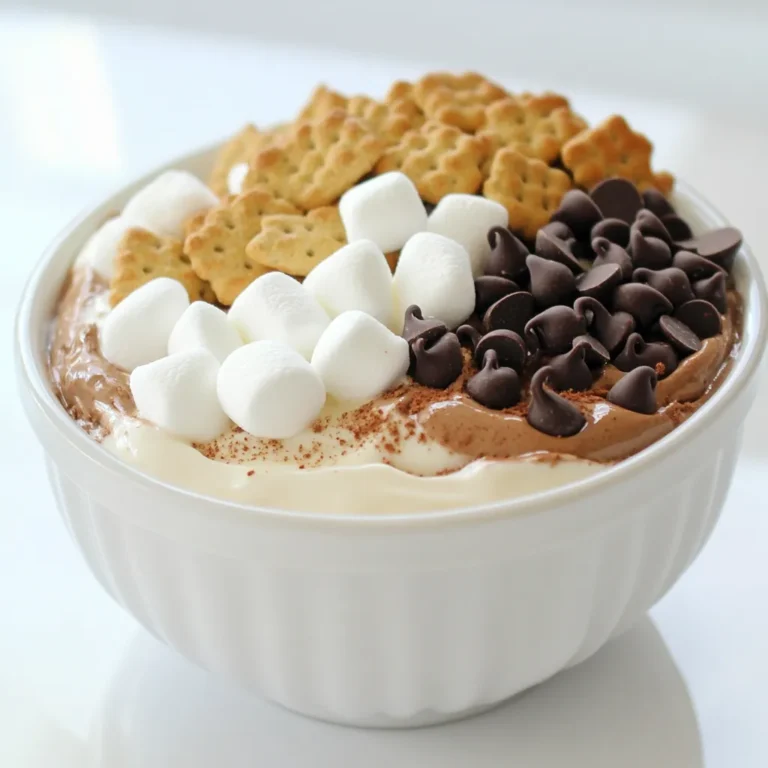
High-Protein S’mores Greek Yogurt Dip Delight

To make Minute Creamy Tomato Feta Pasta, you will need: - 8 ounces pasta of choice (penne or fusilli work well) - 1 cup cherry tomatoes, halved - 1 block (8 ounces) feta cheese - 3 cloves garlic, minced - 1/4 cup olive oil - 1 teaspoon dried oregano - 1/2 teaspoon red pepper flakes (optional) - Salt and pepper to taste - Fresh basil leaves for garnish - Grated Parmesan cheese for serving (optional) These ingredients come together to create a rich and creamy sauce that will impress anyone at your dinner table. Feel free to add your own twist! Here are some optional ingredients: - Spinach or kale for added greens - Sun-dried tomatoes for a bolder flavor - Lemon juice or zest for brightness - Different herbs like thyme or parsley - Crushed nuts for crunch These additions can enhance the flavor and nutrition of your dish. Though penne and fusilli are great choices, you can use other pasta types: - Spaghetti for a classic style - Farfalle for a fun shape - Gluten-free pasta for dietary needs Choosing the right pasta can change the texture and feel of your dish. First, bring a large pot of water to a boil. Make sure you add salt to the water. This will help flavor the pasta. Once boiling, add 8 ounces of your favorite pasta, like penne or fusilli. Cook according to the package instructions until it is al dente. This usually takes about 8 to 10 minutes. Remember to reserve 1 cup of pasta water before draining the pasta. Set the drained pasta aside for later. Grab a large baking dish and add 1 cup of halved cherry tomatoes. Then, place an 8-ounce block of feta cheese in the center. Next, mix in 3 cloves of minced garlic for flavor. Drizzle in 1/4 cup of olive oil, then sprinkle 1 teaspoon of dried oregano. If you like some heat, add 1/2 teaspoon of red pepper flakes. Season with salt and pepper to taste. Toss everything well so the tomatoes and feta are coated nicely. Now it’s time to bake. Preheat your oven to 400°F (200°C). Place the baking dish in the oven and let it bake for about 25 minutes. You want the tomatoes to blister and the feta to melt and turn slightly golden. This step is key for great flavor. Once the baking is done, take the dish out of the oven. Use a fork or spoon to mash the feta cheese and tomatoes together. This will create a creamy sauce. Next, add the cooked pasta to the dish. Gradually mix in the reserved pasta water, a little at a time. This will help you reach your desired sauce consistency. Finally, plate your creamy pasta and garnish with fresh basil leaves. If you like, sprinkle some grated Parmesan cheese on top for extra flavor. Enjoy your meal! To make the sauce smooth, start by mashing the feta well. This helps mix it evenly with the tomatoes. Use a fork to break it down as much as you can. Add pasta water slowly while mixing. This will help the sauce become creamy and cling to the pasta. Remember, you can always add more water for the right texture. Preheat your oven to 400°F (200°C) before baking. This ensures even cooking. Place the tomatoes and feta in a baking dish. Make sure the tomatoes are cut in half. This allows their juices to blend with the feta. Bake them for about 25 minutes until the tomatoes are blistered and the feta is golden. Keep an eye on them to avoid burning. If you want to switch things up, here are some ideas: - Cheese: Try goat cheese or ricotta for a different flavor. - Pasta: Use whole wheat or gluten-free pasta if preferred. - Herbs: Fresh basil or parsley can replace dried oregano for a fresh taste. - Veggies: Add spinach or zucchini for extra nutrition. These substitutions can change the dish while keeping it delicious. {{image_2}} You can make this dish vegetarian by skipping meat and focusing on fresh veggies. Try adding spinach, zucchini, or bell peppers for extra flavor and color. These veggies blend well with the creamy sauce. Toss them in when mixing the pasta. You can also use vegetable broth instead of water for cooking. This adds a nice depth of flavor. If you want to add protein, cooked chicken or shrimp works great. For chicken, grill or sauté it before adding. Cut it into bite-sized pieces and mix it with the pasta. For shrimp, simply sauté them until they turn pink. Then, toss them in with the creamy sauce. Both options make this dish heartier and more filling. To spice things up, add more red pepper flakes or some diced jalapeños. You can also stir in a bit of sriracha for a kick. If you love bold flavors, consider adding smoked paprika or crushed black pepper. These spices enhance the dish and make it more exciting. Experiment with the heat level to find what you enjoy most. To keep your creamy tomato feta pasta fresh, let it cool first. Then, place it in an airtight container. Make sure to store it in the fridge. It will last up to three days. If you notice any signs of spoilage, it’s best to toss it. When you're ready to enjoy leftovers, reheat gently. Place the pasta in a pan over low heat. Add a splash of water or olive oil. Stir often to keep it creamy. You can also microwave it in short bursts. Cover it to prevent drying out. If you want to save this dish for later, freezing is a great option. Portion the pasta into freezer bags. Remove as much air as possible before sealing. This helps prevent freezer burn. It can last up to three months in the freezer. When ready to eat, thaw overnight in the fridge. Reheat slowly, adding a bit of water if needed. It takes about 35 minutes total. You need 10 minutes to prep. Cooking the pasta and baking the feta takes around 25 minutes. This means you can enjoy a tasty meal in no time. Yes, you can! Cream cheese or goat cheese works great. Each type adds its own flavor. Try different cheeses to find your favorite mix. Just keep the amounts the same for best results. This dish matches well with garlic bread or a fresh salad. You can also serve it with grilled chicken or shrimp for protein. Pairing it with a light white wine enhances the flavors, too. Absolutely! Minute Creamy Tomato Feta Pasta is perfect for meal prep. You can store leftovers in the fridge for up to three days. Just reheat in the microwave or on the stove. Add a splash of water to keep it creamy. This blog post covered how to make a creamy tomato feta pasta dish. We discussed key ingredients and options for customization. You learned step-by-step instructions, plus helpful tips for a perfect bake. We also explored delicious variations and smart storage techniques. This dish is easy to prepare and fun to make. With some practice, you can impress friends and family with your cooking skills. Enjoy your creamy tomato feta pasta!

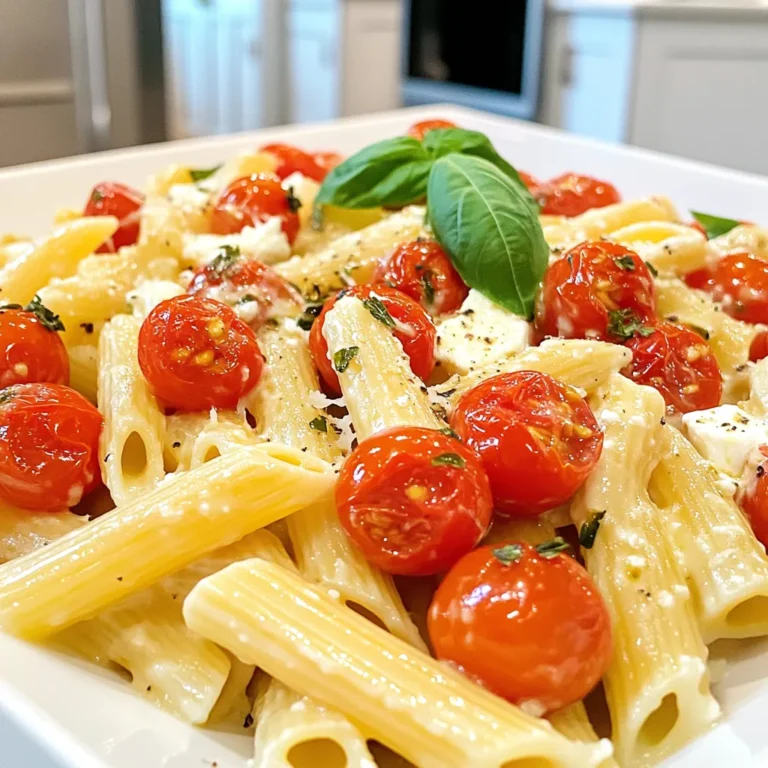
Minute Creamy Tomato Feta Pasta Quick and Easy Meal

PREV 1 … 6 7 8 … 57 NEXT
flavor nest kitchen

explore

DessertsDinnerAppetizersDrinks

Our Policies

  • Cookie Policy
  • Copyright Policy
  • Disclaimer
  • GDPR Policy
  • Terms Of Use
Back to Top
  • About
  • Contact Us
  • Privacy Policy
© 2025 flavor nest kitchen