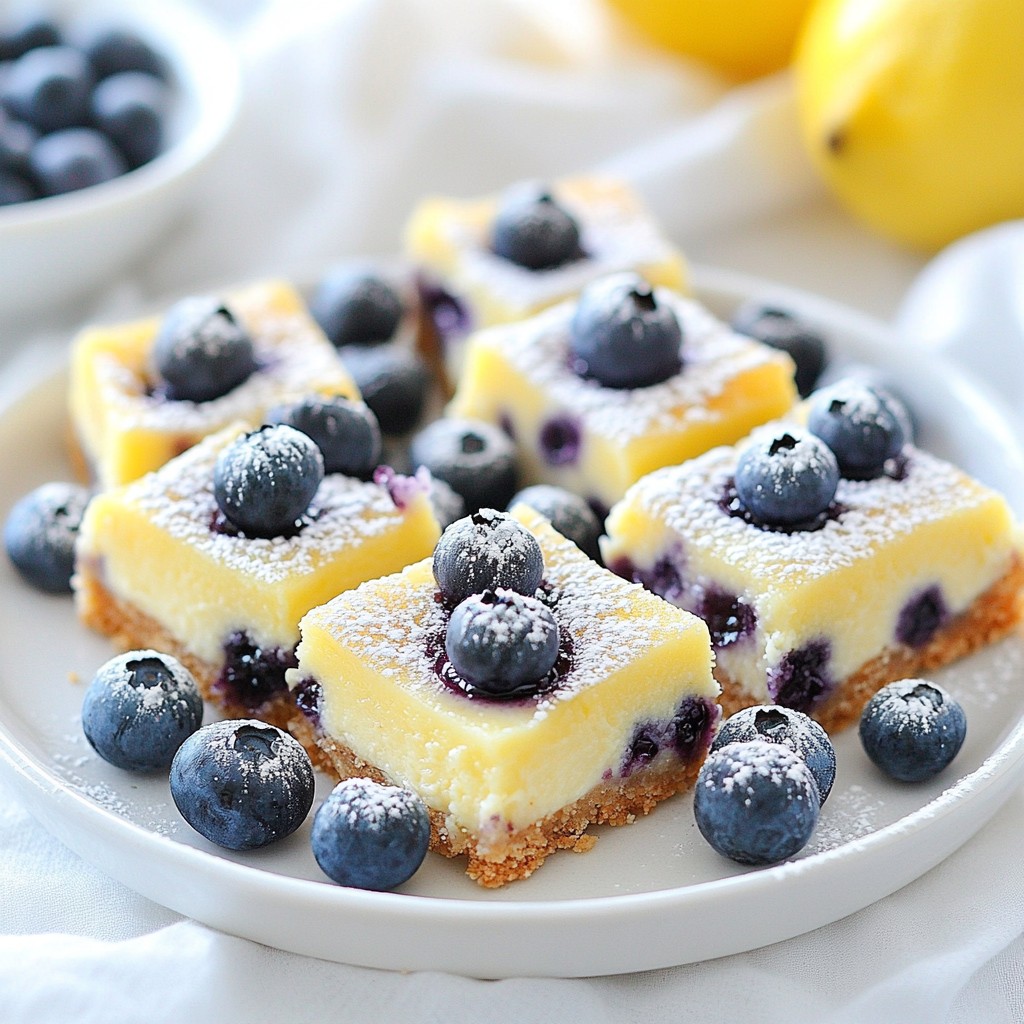
If you love sweet and tangy treats, you'll adore these Blueberry Lemon Cheesecake Bars! I’ll guide you through a simple recipe that packs a burst of fresh flavor and creamy goodness. With easy steps, ingredient swaps, and handy tips, you’ll master a dessert perfect for any occasion. Let’s dive into the world of cheesecake goodness and brighten your dessert game today!
Why I Love This Recipe
- Refreshing Flavor: The combination of tart lemon and sweet blueberries creates a delightful balance that is perfect for any occasion.
- Easy to Make: With simple ingredients and straightforward steps, this recipe is accessible for both novice and experienced bakers.
- Perfect for Sharing: These cheesecake bars can be easily cut into portions, making them ideal for gatherings and parties.
- Make Ahead Option: Prep them in advance and let them chill overnight, so you can enjoy a stress-free dessert the next day!
Ingredients
Complete List of Ingredients
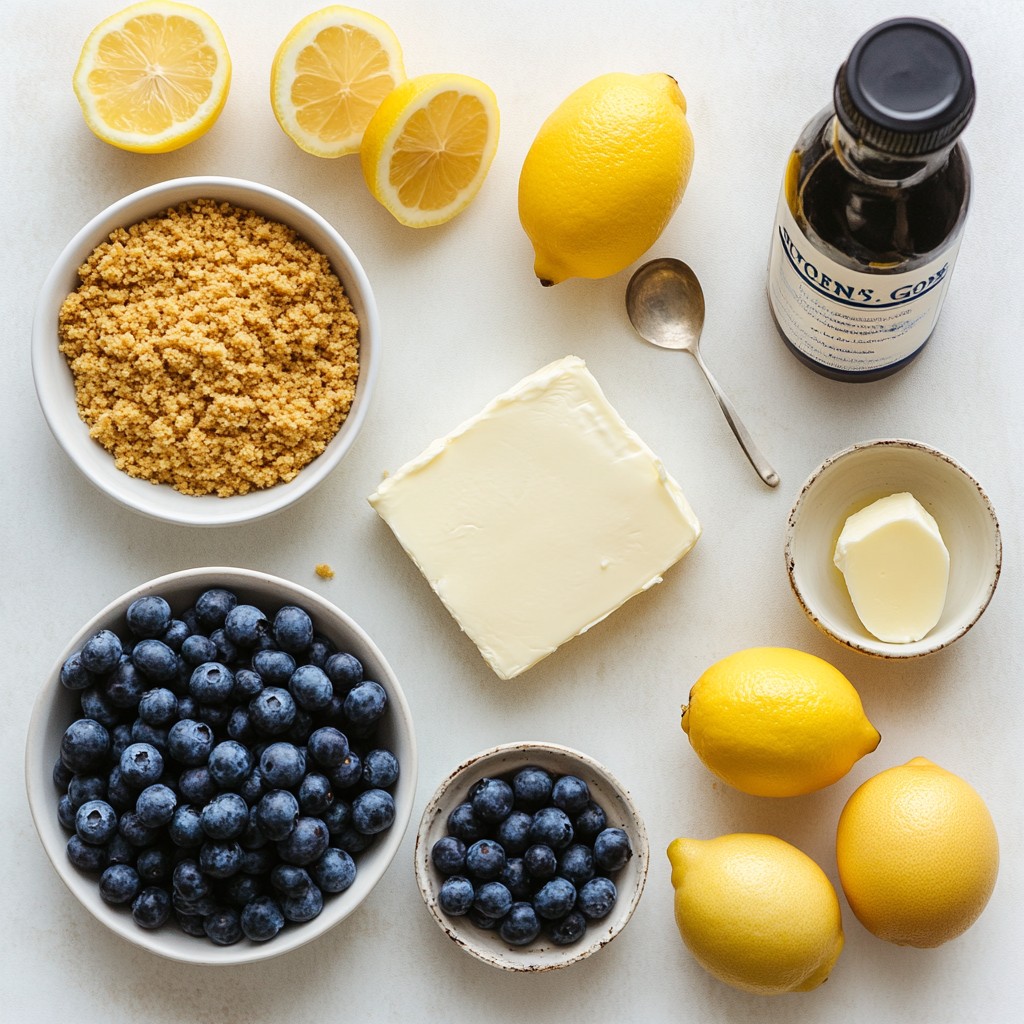
To make Blueberry Lemon Cheesecake Bars, gather these items:
- 1 ½ cups graham cracker crumbs
- ½ cup unsalted butter, melted
- 2 tablespoons sugar
- 16 oz cream cheese, softened
- ¾ cup sugar
- 2 large eggs
- Zest and juice of 1 lemon
- 1 teaspoon vanilla extract
- 1 ½ cups fresh blueberries (plus extra for topping)
- 2 tablespoons cornstarch
Ingredient Substitutions
You can change some ingredients to suit your taste or needs. Here are some ideas:
- Use digestive biscuits instead of graham crackers for a different crust flavor.
- Swap unsalted butter with coconut oil for a dairy-free option.
- Replace cream cheese with a vegan cream cheese for a plant-based treat.
- Use maple syrup or honey instead of sugar for a natural sweetener.
- If you need a gluten-free version, ensure you use gluten-free graham crackers.
Fresh vs. Frozen Blueberries
Fresh blueberries taste great in this recipe. They add vibrant flavor and texture. However, frozen blueberries work too. They can save you time and often come pre-washed. If using frozen, do not thaw them before adding to the batter. This prevents the color from bleeding into the cheesecake. Both options provide delicious results, so choose what works best for you!
Step-by-Step Instructions
Preparation of the Crust
To start, preheat your oven to 350°F (175°C). This step is key for a great crust. Next, grab a medium bowl and mix together 1 ½ cups of graham cracker crumbs, ½ cup of melted unsalted butter, and 2 tablespoons of sugar. Stir until the mixture looks like wet sand.
Now, press this mixture evenly into the bottom of a greased or lined 9x9 inch baking pan. Use your hands or a flat bottom to get it nice and tight. Bake the crust for 8-10 minutes until it sets and turns slightly golden. After baking, let it cool a bit before adding the cheesecake filling.
Making the Cheesecake Filling
In a large mixing bowl, beat 16 oz of softened cream cheese with ¾ cup of sugar. Mix until smooth and creamy, which takes about 2-3 minutes. Then, add 2 large eggs one at a time. Make sure to mix well after each egg.
Next, add the zest and juice of 1 lemon, plus 1 teaspoon of vanilla extract. Mix this until it’s all combined. Now for the fun part! Gently fold in 1 ½ cups of fresh blueberries and 2 tablespoons of cornstarch. Make sure each blueberry gets coated in the batter.
Baking and Cooling Process
Pour the cheesecake mixture over the cooled crust. Spread it evenly with a spatula. Bake in your preheated oven for 25-30 minutes. You want the center to be set but still a little jiggly.
Once done, take it out and let it cool to room temperature. Then, refrigerate your cheesecake bars for at least 4 hours, or better yet, overnight. This step helps them firm up nicely. When ready, cut them into bars and add extra blueberries on top for a lovely finish. Enjoy!
Tips & Tricks
Achieving the Perfect Texture
To get the best texture, you need to mix well. Start with softened cream cheese. This helps avoid lumps. Beat the cream cheese and sugar until smooth. Add eggs slowly, mixing well each time. This keeps your cheesecake light and creamy. Don't overmix once you add the blueberries. Fold them in gently to keep their shape.
Serving Suggestions and Garnishes
These cheesecake bars shine when served cold. Place them on a nice platter. Dust with powdered sugar for a sweet touch. Fresh mint leaves add color and flavor. You can also add more blueberries on top. This makes the bars look even more appealing. Serve with a dollop of whipped cream for extra delight.
Common Mistakes to Avoid
One common mistake is skipping the chilling time. If you cut the bars too soon, they may fall apart. Always chill for at least four hours. Another mistake is not greasing the pan. This can make it hard to remove the bars. Finally, avoid overbaking. The center should be slightly jiggly when you take it out. This helps keep it creamy and delicious.
Pro Tips
- Use Room Temperature Cream Cheese: This ensures a smoother batter and prevents lumps in your cheesecake mixture.
- Don’t Overmix: Overmixing can incorporate too much air, leading to cracks in the cheesecake as it bakes.
- Chill Overnight: For the best texture and flavor, refrigerate the cheesecake bars overnight before serving.
- Fresh Blueberries: Use fresh blueberries for the best flavor and texture; frozen blueberries can make the filling watery.
Variations
Different Fruit Options
You can swap blueberries for other fruits. Strawberries add a sweet twist. Raspberries bring a tart bite. You can even use peaches for a summer vibe. Just make sure to adjust the sugar based on the fruit's sweetness. Fresh fruit works best, but frozen can work too. Just thaw them first and drain excess water.
Gluten-Free Alternatives
If you need gluten-free bars, use gluten-free graham cracker crumbs. Many brands offer this option. You can also make a crust with ground almonds or oats. Just mix them with melted butter and sugar. This gives a nice crunch and flavor. Always check labels to ensure they are truly gluten-free.
Flavor Enhancements
Adding vanilla extract gives a warm flavor. A teaspoon adds depth without overpowering lemon. You can also mix in other citrus zest like lime or orange. This will brighten the taste and add a fun twist. For a richer flavor, try mixing in a bit of almond extract. Each change allows you to create your own unique bars!
Storage Info
Best Practices for Refrigeration
To keep your blueberry lemon cheesecake bars fresh, store them in the fridge. Place the bars in an airtight container. This protects them from drying out and absorbing other smells. They will last about five days in the fridge. Make sure to cover them well. This keeps the flavors bright and delicious.
Freezing Instructions
If you want to save some for later, freezing works great. First, cut the cheesecake into bars. Wrap each bar in plastic wrap tightly. Then place the wrapped bars in a freezer-safe bag. They can last up to three months in the freezer. When you are ready to eat, just remove the bars from the freezer and let them thaw overnight in the fridge.
How to Reheat for Serving
You don’t need to reheat these cheesecake bars. They taste best cold. If you prefer them slightly warm, you can let them sit at room temperature for about 15 minutes before serving. This way, the flavors can come out nicely. Just remember, avoid using the microwave. It can change the texture and make them soggy. Enjoy your cheesecake bars chilled for the best taste!
FAQs
Can I use low-fat cream cheese?
Yes, you can use low-fat cream cheese. It will still work well in this recipe. Just keep in mind, the texture may be a bit different. Low-fat cream cheese can make the bars less creamy. You might want to add a bit more sugar for sweetness.
How long do these cheesecake bars last in the fridge?
These cheesecake bars last up to five days in the fridge. Make sure you store them in an airtight container. This helps keep them fresh and safe to eat. If they are properly stored, they will taste great for days.
Is it necessary to refrigerate before serving?
Yes, refrigerating is very important. After baking, let the bars cool to room temperature first. Then, chill them for at least four hours. Chilling helps the bars set nicely. It also makes them easier to cut and serve. Enjoy them cold for the best flavor!
In this blog post, we explored the key ingredients for cheesecake bars, from crust to filling. I shared step-by-step instructions to ensure your bars turn out great. You learned tips for texture, serving ideas, and common mistakes to avoid. We also covered fun variations and storage advice.
Cheesecake bars are simple yet delicious. With these insights, you can make the perfect treat. Enjoy experimenting and impressing everyone with your baking skills!