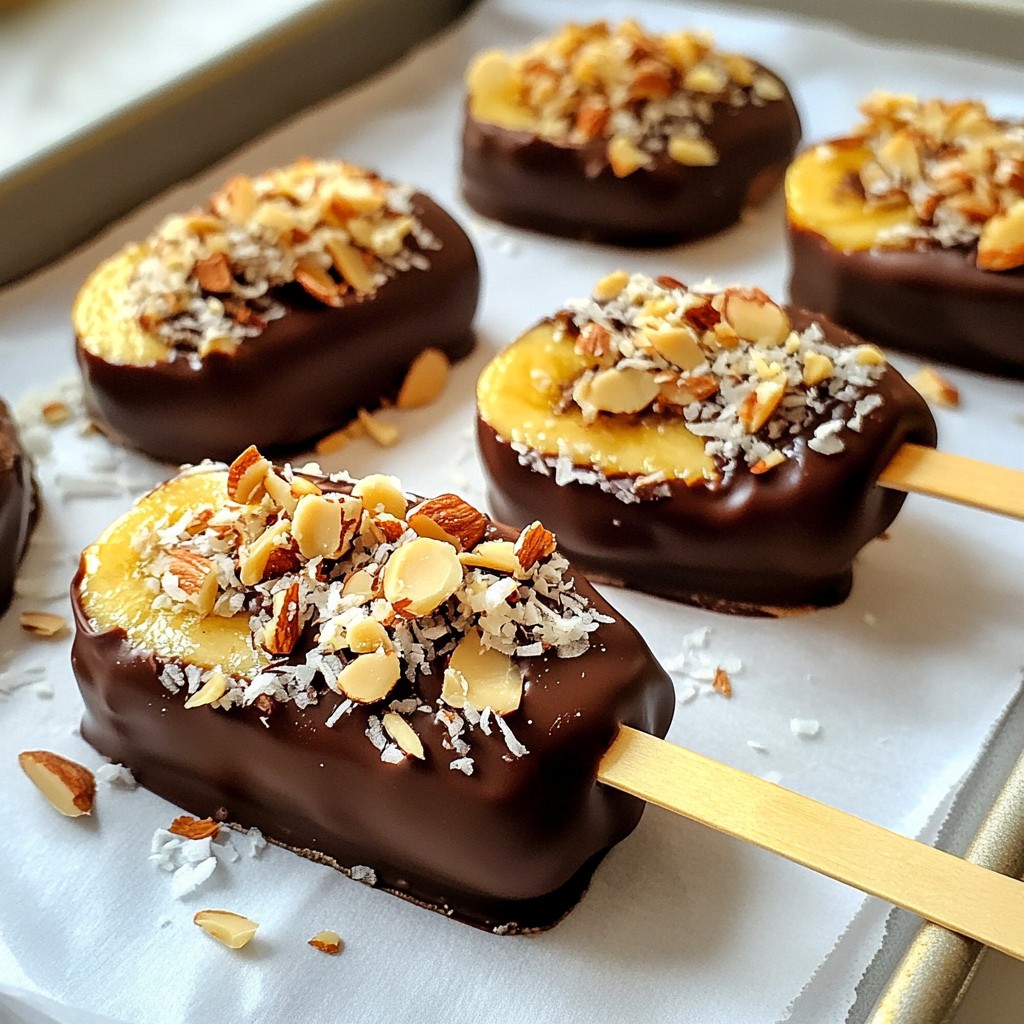
Are you ready to beat the heat with a cool treat? Chocolate covered banana pops are easy to make and so much fun! I’ll show you how to turn simple bananas into a frozen delight everyone will love. With just a few ingredients and simple steps, you can create a tasty snack that’s perfect for kids and adults alike. Let’s dive in and discover how to make these delicious treats!
Why I Love This Recipe
- Quick and Easy: This recipe takes only 15 minutes of prep time, making it a perfect last-minute treat.
- Healthy Indulgence: Using bananas and dark chocolate, this dessert is a healthier alternative to traditional sweets.
- Customizable: You can easily switch up the toppings to include your favorite nuts or other delicious add-ins.
- Kid-Friendly Fun: Making chocolate-covered banana pops is a fun activity for kids, encouraging them to participate in the kitchen.
Ingredients
List of Ingredients
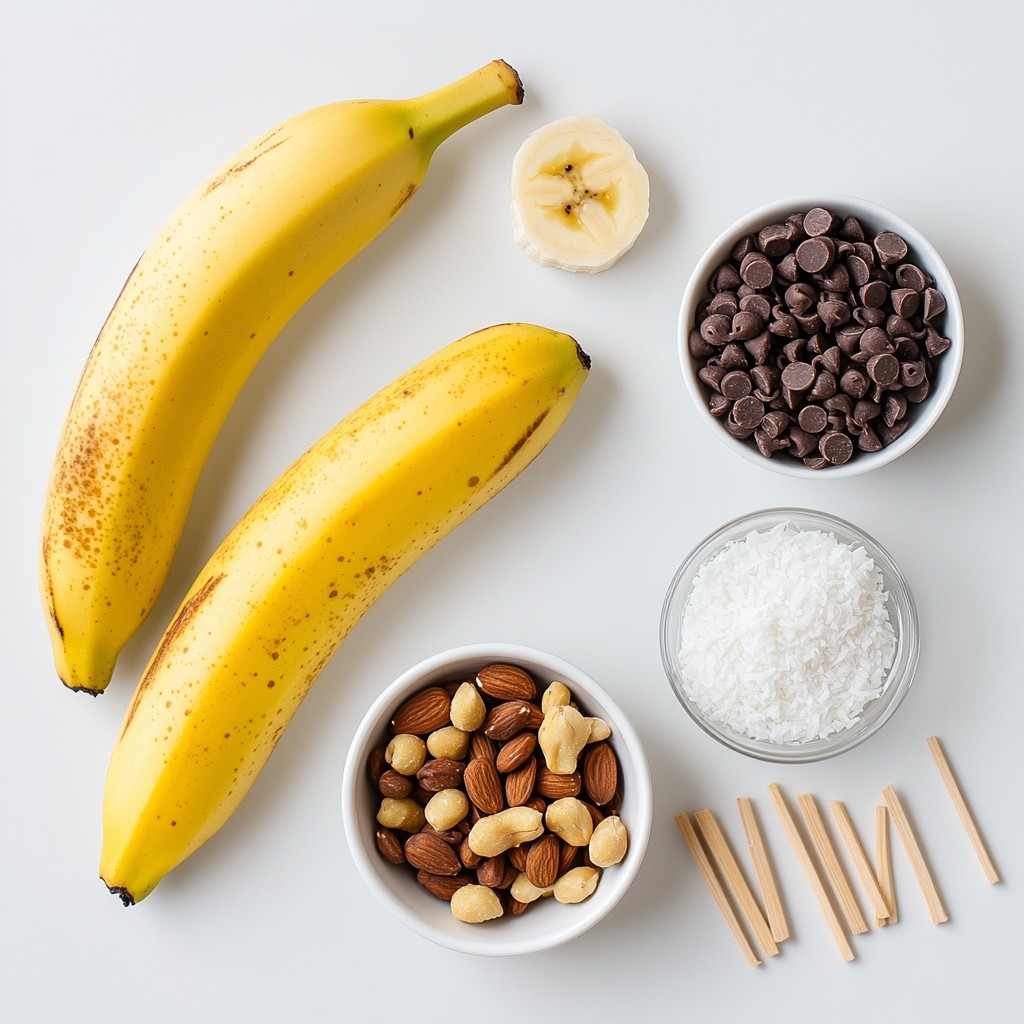
- 2 ripe bananas
- 1 cup dark chocolate chips
- 1 tablespoon coconut oil
- 1/4 cup crushed nuts (almonds or peanuts)
- 1/4 cup desiccated coconut (optional)
- Popsicle sticks
Measurement Guide
When making chocolate covered banana pops, precise measurements matter. Use ripe bananas for the best taste. You need 2 bananas. The chocolate is key, so grab 1 cup of dark chocolate chips. The coconut oil helps the chocolate melt well, so use 1 tablespoon. For toppings, 1/4 cup of crushed nuts adds crunch. If you like, add 1/4 cup of desiccated coconut for a tropical twist. Lastly, get enough popsicle sticks for each banana half.
Best Types of Chocolate to Use
Dark chocolate is my top choice. It has a rich flavor that pairs well with bananas. You can also use milk chocolate if you prefer something sweeter. White chocolate is another fun option for a creamy taste. Each type of chocolate gives a unique twist. Pick what you love most, but remember, the quality of chocolate can change the taste of your pops. Always choose good quality chocolate for the best results.
Step-by-Step Instructions
Preparing the Bananas
First, peel the bananas. You want ripe bananas for the best taste. Cut each banana in half. Then, take a popsicle stick and insert it into the cut end of each half. This step creates a handle for your tasty pops. Make sure the stick goes in deep enough to hold well while you dip.
Melting the Chocolate
Now, let’s melt the chocolate. Grab a microwave-safe bowl and add 1 cup of dark chocolate chips. Add 1 tablespoon of coconut oil to make it smooth. Heat this mixture in the microwave. Start with 30 seconds. Stir the chocolate, then heat for another 30 seconds. Keep stirring until it is fully melted and smooth. Watch closely so it doesn't burn!
Dipping and Coating the Pops
It’s time to dip the bananas! Take each banana pop and dip it into the melted chocolate. Make sure to cover it all the way. Let any extra chocolate drip off. While the chocolate is still wet, you can coat the pops. Roll them in crushed nuts or sprinkle desiccated coconut on top. This adds flavor and a nice crunch. Place the coated pops on a parchment-lined baking sheet. Put them in the freezer for at least 2 hours. This helps the chocolate set firm. Enjoy your delicious frozen treat!
Tips & Tricks
Best Practices for Melting Chocolate
To melt chocolate, use a microwave-safe bowl. Combine dark chocolate chips and coconut oil. Heat the bowl in the microwave for 30 seconds. Stir well after each time. This keeps the chocolate smooth and shiny. Do not heat for too long. If you do, the chocolate can burn. Use low heat if you melt on the stove.
Ensuring Even Coating
To coat your banana pops evenly, dip each one fully into the chocolate. Make sure the chocolate covers all sides. Hold the banana pop above the bowl to let excess chocolate drip off. This step helps avoid thick spots. If you want a thicker coat, dip the pop twice. Just let it chill between dips.
How to Avoid Messy Dips
To avoid mess, use a small, deep bowl for the chocolate. This will help you dip without splashing. Hold the banana pop by the stick. Keep your hands away from the chocolate. If any chocolate drips down the stick, wipe it off with a paper towel. This makes serving easier and cleaner.
Pro Tips
- Choose Ripe Bananas: For the best flavor and texture, select bananas that are ripe but not overly soft. They should have a few brown spots for optimal sweetness.
- Use Quality Chocolate: The taste of your chocolate-covered pops will depend significantly on the quality of chocolate you use. Opt for high-quality dark chocolate for a richer flavor.
- Experiment with Toppings: Feel free to get creative with your toppings! Try different nuts, sprinkles, or even a drizzle of white chocolate for a fun twist.
- Keep Them Frozen: For the best experience, serve these pops straight from the freezer. They are best enjoyed when they are still cold and the chocolate is firm.
Variations
Flavor Variations
You can add a lot of flavor to your banana pops. Nut butters, like almond or peanut butter, work great. Just spread a thin layer on the banana before dipping it in chocolate. You can also use flavored chocolate. Try adding mint or orange extract to the melted chocolate. This adds a fun twist to your treat.
Healthier Alternatives
If you want a healthier option, use dark chocolate. Dark chocolate has less sugar and more antioxidants. You can also roll your pops in desiccated coconut instead of nuts. This gives a tropical taste and is low in carbs. Both options help keep your treats tasty and nutritious.
Seasonal Toppings
Toppings can change with the seasons. In summer, add colorful sprinkles for a fun look. In winter, crushed candy canes add a festive touch. You can also use crushed nuts or seeds for a crunchy bite. Each topping gives a new twist to your banana pops, making them fun for any occasion.
Storage Info
How to Store Chocolate Covered Banana Pops
To keep your chocolate covered banana pops fresh, store them in an airtight container. This prevents moisture from getting in and keeps the chocolate nice and crisp. You can stack them in the container, but place parchment paper between layers to avoid sticking. Store them in the freezer for the best taste and texture.
Freezing Tips for Long-Term Storage
When freezing, make sure the pops are fully set. After freezing, wrap each pop in plastic wrap for extra protection. This will help keep them safe from freezer burn. Store the wrapped pops in a labeled freezer bag. They can last up to two months in the freezer, but I bet they won't last that long!
Reheating or Serving Suggestions
These pops are best served straight from the freezer. They are a cool treat on a hot day. If you want to serve them at a party, remove them from the freezer just before guests arrive. You can also drizzle some warm chocolate over them for extra flair. Enjoy your delicious chocolate covered banana pops!
FAQs
Can I use milk chocolate instead of dark chocolate?
Yes, you can use milk chocolate. It makes the pops sweeter. Just melt it the same way as dark chocolate. If you love milk chocolate, go for it!
How long do chocolate covered banana pops last?
Chocolate covered banana pops can last about one month in the freezer. Keep them in a sealed bag or container. This helps keep them fresh and tasty.
What other fruits can I use for this recipe?
You can use strawberries, apples, or pineapple. These fruits work well with chocolate. Just cut them into bite-sized pieces. You can also use other fruits you like!
In this post, we explored the best ingredients and step-by-step methods for making chocolate-covered banana pops. We covered tips for doing it right, fun variations, and how to store them well. These pops are tasty, easy, and fun for everyone. Experiment with flavors and toppings to find your favorites. Enjoy creating and sharing this treat with friends and family. Happy dipping!