Craving a sweet treat that's easy to make? Dive into this Chocolate Mint Fudge recipe! You won't need an oven for this one, making it a perfect no-bake delight. With just a few simple ingredients and a bit of patience, you’ll create a rich, minty fudge that’s sure to impress. Let me guide you step-by-step through this indulgent treat that everyone will love!
Why I Love This Recipe
- Decadent Flavor: This fudge combines the rich taste of chocolate with the refreshing essence of mint, creating a perfect balance that's hard to resist.
- Easy to Make: With just a few ingredients and simple steps, this recipe is perfect for both novice and experienced bakers looking for a quick treat.
- Customizable: You can easily adjust this recipe by adding your favorite nuts or using different types of chocolate to suit your taste.
- Perfect for Gifting: Cut into squares and wrapped beautifully, this fudge makes a delightful homemade gift for friends and family during holidays or special occasions.
Ingredients
List of Ingredients
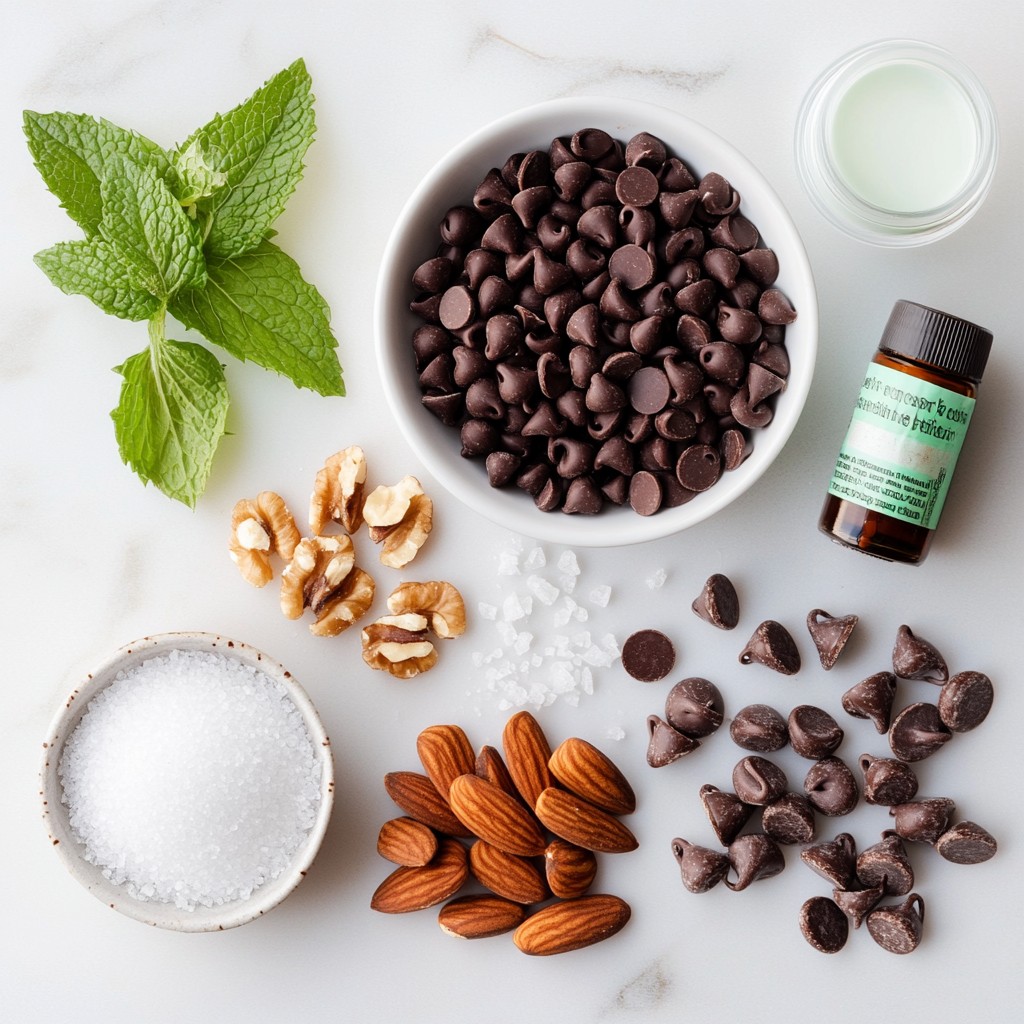
- 2 cups semisweet chocolate chips
- 1 can (14 oz) sweetened condensed milk
- 1 teaspoon peppermint extract
- 1/4 teaspoon sea salt
- 1 cup powdered sugar
- 1/2 cup crushed mint chocolate candies
- 1/2 cup walnuts or pecans, chopped (optional)
- Green food coloring (optional)
When I make Chocolate Mint Fudge, I choose ingredients that create a rich, creamy treat. The semisweet chocolate chips are my base. They melt well and give a deep chocolate flavor. Sweetened condensed milk adds sweetness and creaminess. It makes the fudge smooth and easy to work with.
I like to add peppermint extract for that fresh mint taste. The sea salt balances the sweetness. It makes every bite more delicious. I use powdered sugar to give the fudge its final texture. It helps to thicken the mixture.
For extra flavor, I fold in crushed mint chocolate candies. They add a fun crunch. If you like nuts, walnuts or pecans work great. They give a nice texture. Lastly, I sometimes use green food coloring. It makes the fudge look festive and fun for any occasion.
With these ingredients, you can create a delightful treat that everyone will love.
Step-by-Step Instructions
Preparing the Baking Pan
To start, you need to get your baking pan ready. Use an 8x8 inch square pan. Line it with parchment paper. Make sure to leave some paper hanging over the edges. This helps when you want to lift the fudge out later. The parchment makes removal easy and keeps your fudge intact.
Melting the Chocolate Mixture
Next, let’s melt the chocolate. In a medium saucepan, combine 2 cups of semisweet chocolate chips with 1 can of sweetened condensed milk. Place the pan over low heat. Stir constantly until the mixture is smooth. Low heat is key here. It prevents the chocolate from burning.
Adding Flavor and Color
Once melted, remove the pan from the heat. Stir in 1 teaspoon of peppermint extract and 1/4 teaspoon of sea salt. This adds a fresh minty flavor. If you want your fudge to be green, add a few drops of green food coloring. Mix well until the color is even throughout.
Final Mixing
Now it’s time to combine it all. Gradually add in 1 cup of powdered sugar. Stir until the mixture is smooth and well combined. After that, fold in 1/2 cup of crushed mint chocolate candies. You can also add 1/2 cup of chopped walnuts or pecans if you like nuts. Mix until everything is evenly distributed.
Pouring and Refrigerating
Pour the fudge mixture into the prepared baking pan. Use a spatula to spread it evenly into the corners. Then, cover the pan and refrigerate it. Let it set for at least 2 hours. This allows the fudge to become firm and ready to cut.
Serving Precautions
When the fudge is set, lift it out of the pan using the overhanging parchment paper. Place it on a cutting board. Use a sharp knife to cut it into small squares. Make sure to wipe the knife between cuts for clean edges. Enjoy your delicious chocolate mint fudge!
Tips & Tricks
Achieving the Best Texture
To get the best texture in your fudge, mixing is key. Start by stirring the chocolate and sweetened condensed milk until they blend smoothly. This step helps avoid lumps and ensures a creamy finish.
Once mixed well, let the fudge set in the fridge for at least two hours. This waiting time is crucial. If you cut it too soon, the fudge will crumble instead of holding its shape.
Presentation Ideas
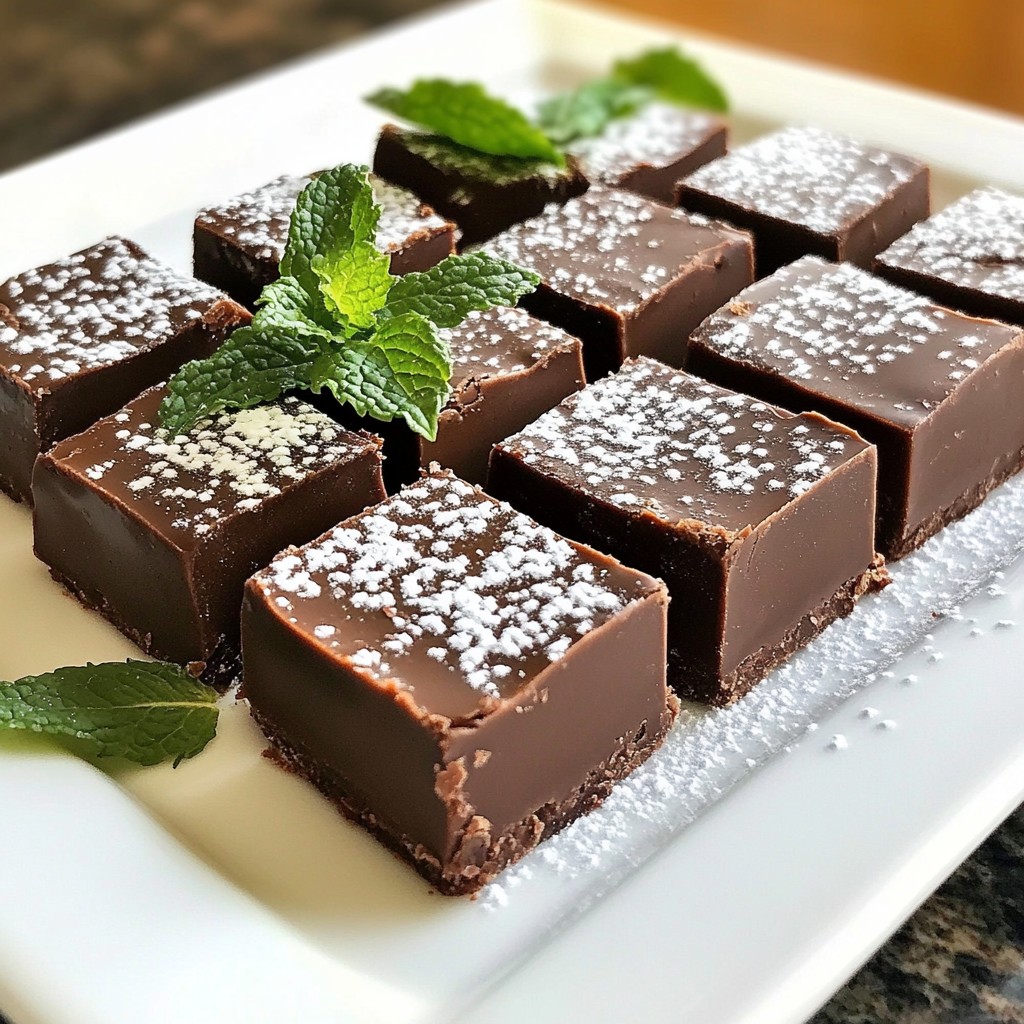
When it comes to presentation, a decorative platter makes your fudge stand out. Place the fudge squares neatly, and consider garnishing with fresh mint leaves. This adds color and a fresh touch. Dusting with powdered sugar offers a snowy finish, making your treat look even more inviting.
Common Mistakes to Avoid
One common mistake is overheating the chocolate mixture. Always melt your chocolate on low heat. If you rush, it can burn, ruining your fudge.
Another mistake is not letting the fudge set long enough. If you cut it too early, you’ll end up with a gooey mess. Remember, patience is key for perfect fudge!
Pro Tips
- Use High-Quality Chocolate: For the best flavor, opt for high-quality semisweet chocolate chips. This will enhance the overall taste of your fudge.
- Cool the Fudge Gradually: Allow the fudge to cool slightly before refrigerating. This helps prevent the fudge from becoming too firm and ensures a smoother texture.
- Customize Your Mix-Ins: Feel free to experiment with different mix-ins like crushed Oreos or different types of nuts to add your personal touch!
- Store Properly: Keep the fudge in an airtight container in the refrigerator to maintain freshness; it can last for up to two weeks.
Variations
Nut-Free Options
You can easily make this fudge nut-free. Simply omit the walnuts or pecans. If you want to add some crunch, try using crispy rice cereal or sunflower seeds. These alternatives keep the texture fun without nuts.
Flavor Combinations
Get creative with flavors! You can swap peppermint extract for vanilla or almond extract. Each will give a unique taste. Also, consider using different types of chocolate. White chocolate adds a sweet twist. Mixing semisweet with dark chocolate can give a rich, bold flavor.
Dietary Considerations
If you need gluten-free options, this recipe is naturally gluten-free. Just check the labels on your ingredients. For vegan alternatives, replace sweetened condensed milk with coconut milk or a vegan version. Use dairy-free chocolate chips to keep it plant-based and tasty.
Storage Info
Proper Storage Methods
To keep your chocolate mint fudge fresh, use an airtight container. This will stop moisture from ruining the fudge. If you stack the fudge, layer it with parchment paper. This way, the pieces won’t stick together.
Shelf Life
Chocolate mint fudge stays fresh for about two weeks at room temperature. If you keep it in the fridge, it can last up to four weeks. Look for signs of spoilage, like a dull surface or an off smell. If you notice these signs, it’s best to throw it away.
Freezing Instructions
You can freeze chocolate mint fudge for up to three months. Wrap each piece tightly in plastic wrap. Then, put them in an airtight container or a freezer bag. When you're ready to enjoy it, thaw the fudge in the fridge overnight. This keeps it from getting too soft.
FAQs
How long does it take to make Chocolate Mint Fudge?
Making Chocolate Mint Fudge takes about 10 minutes to prep. After that, you must chill it for at least 2 hours. So, the total time is around 2 hours and 10 minutes. This quick recipe is perfect for busy days or last-minute treats.
Can I use milk chocolate instead of semisweet?
Yes, you can use milk chocolate instead of semisweet. It will make the fudge sweeter and creamier. However, the mint flavor may not stand out as much. Semisweet chocolate gives a nice balance to the mint. Choose what you like best!
What if I don’t have peppermint extract?
If you don’t have peppermint extract, you can try using mint leaves or spearmint extract. You can also use vanilla extract for a different taste. This will change the flavor but still keep it yummy. Get creative and find what suits you!
Can I make this recipe with kids?
Absolutely! This recipe is perfect for kids. They can help melt the chocolate and mix in the ingredients. Just make sure to supervise them when melting the chocolate. You can also use fun molds instead of a pan. This makes for a fun and tasty activity.
Where can I buy pre-made Chocolate Mint Fudge?
You can find pre-made Chocolate Mint Fudge at many stores. Look in the candy aisle or the bakery section. Stores like Walmart, Target, or local sweet shops often carry it. Online, check out sites like Amazon or specialty candy shops for delivery.
Making chocolate mint fudge is fun and simple. You learned about the key ingredients, like chocolate chips and peppermint extract. Following the steps makes it easy to create a tasty treat.
Remember to mix well and let it chill properly for great texture. You can explore different flavors and make it fit your needs. With these tips, your fudge will impress everyone. Now, grab your ingredients and enjoy making this delicious dessert!