Chocolate Peanut Butter Nice Cream Delightful Dessert

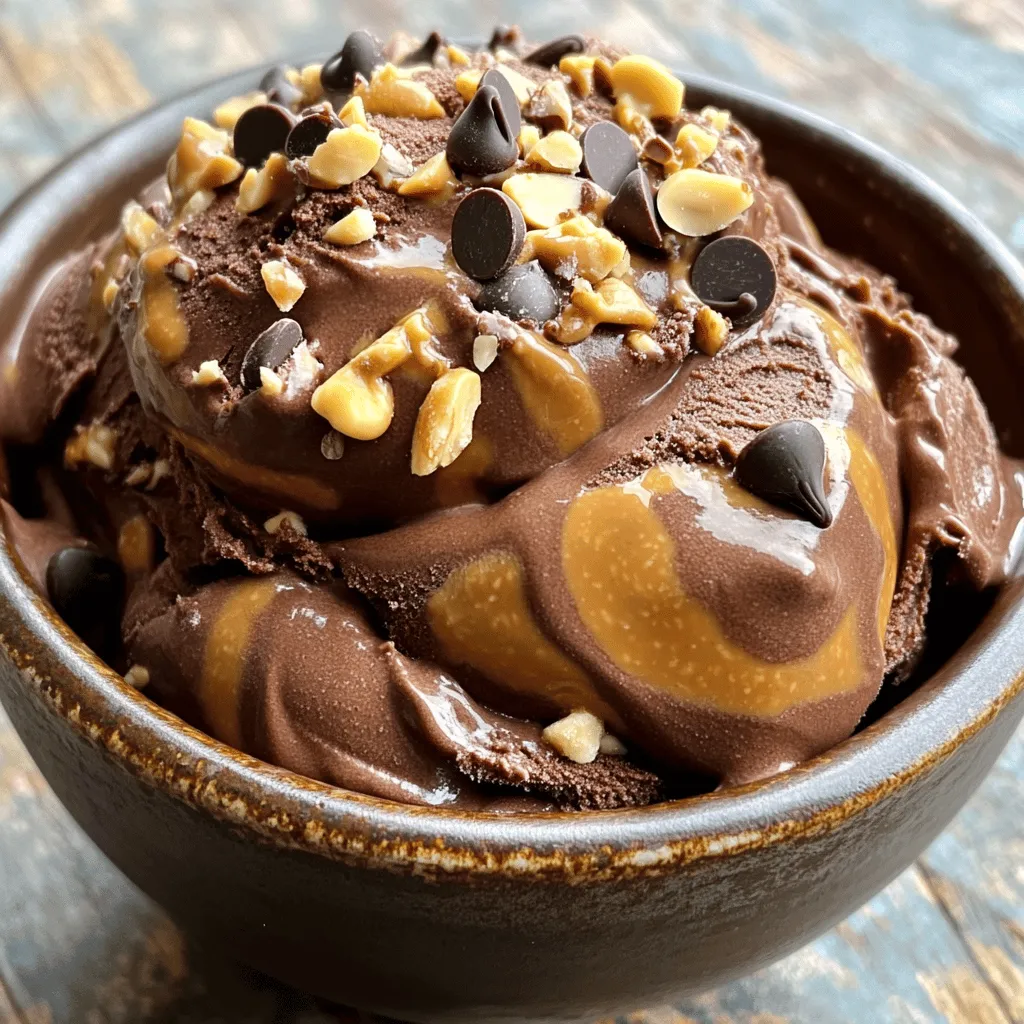
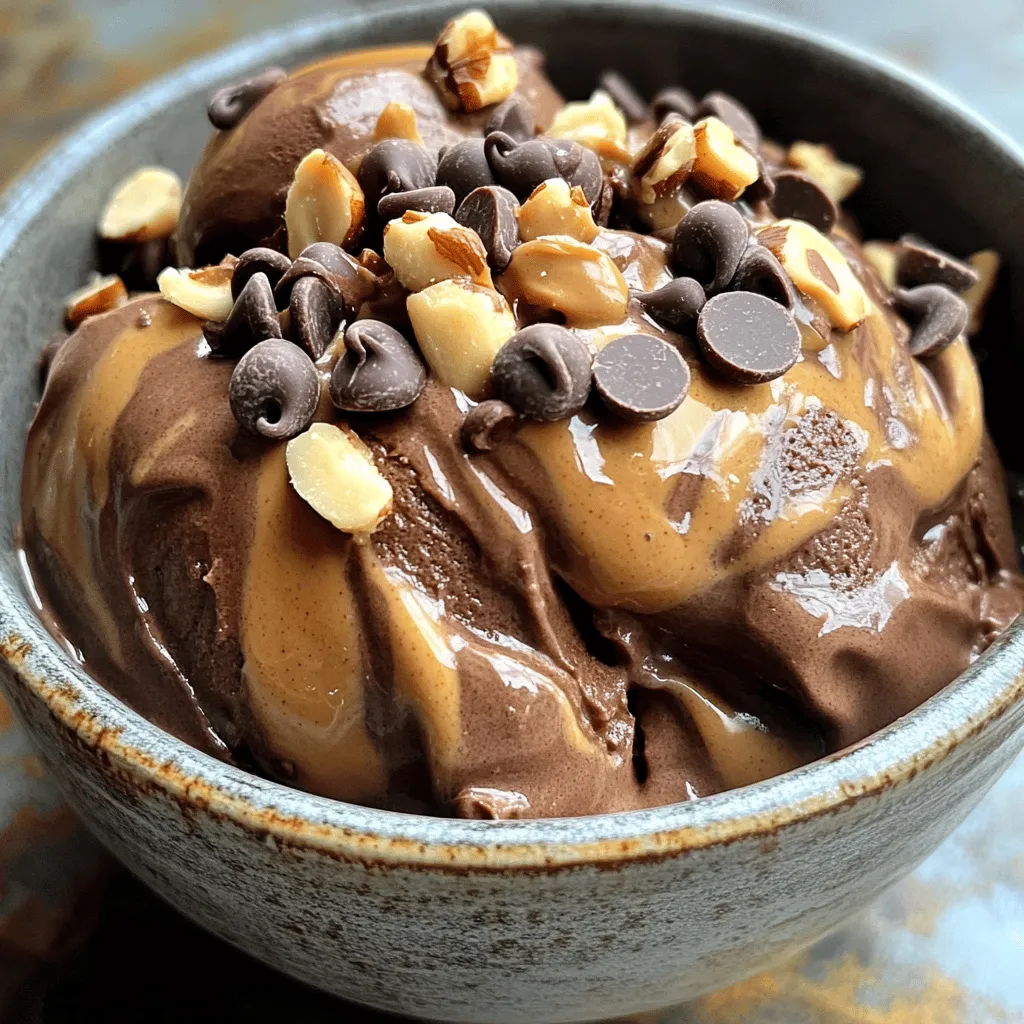
Craving something cool and sweet? Let me introduce you to Chocolate Peanut Butter Nice Cream! This delicious dessert combines rich chocolate and creamy peanut butter, perfect for satisfying your sweet tooth. Plus, it’s easy to make with just a few simple ingredients. Whether you’re enjoying a warm day or looking for a guilt-free treat, this nice cream is a winner. Let’s dive into this delightful recipe and make your taste buds happy!

- 4 ripe bananas, sliced and frozen - 3 tablespoons unsweetened cocoa powder - 2 tablespoons natural peanut butter - 1 tablespoon maple syrup (optional, for sweetness) - 1 teaspoon vanilla extract - A pinch of salt - Chopped nuts - Chocolate chips You can switch bananas with avocados for a creamier base. Use almond butter if you want a nut-free option. If you don’t like cocoa powder, try carob powder instead. For sweetness, honey or agave syrup works well. Start with ripe bananas. Peel and slice them into small pieces. Lay the banana slices on a tray and freeze them for at least two hours. You want them nice and firm. This makes the nice cream creamy. If you forgot to freeze them, no worries! Just slice and let them sit for five minutes. Grab your food processor. Add the frozen banana slices. Let them soften for about five minutes. This helps the blades blend smoothly. Next, add the cocoa powder, peanut butter, maple syrup, vanilla extract, and a pinch of salt. Blend everything on high speed. Stop to scrape the sides if needed. Blend until smooth and creamy. Taste it! If you want it sweeter, add more maple syrup. Once it's creamy, transfer the nice cream to an airtight container. Freeze it for one to two hours. This step makes it thicker. When you're ready to serve, scoop it into bowls. Top with chopped nuts or chocolate chips if you like. Enjoy your tasty Chocolate Peanut Butter Nice Cream! To get that perfect creamy texture, start with ripe bananas. Ripe bananas are sweeter and blend better. Slice them and freeze them for at least 2 hours. Before blending, let them sit for 5 minutes. This softens them slightly, making blending easier. Blend on high speed until smooth. If it feels thick, add a splash of almond milk or a little more peanut butter. This helps smooth it out. Taste is key when it comes to sweetness. If you find it too bitter, add maple syrup. Start with one tablespoon, and blend again. You can always add more, but you cannot take it out. Remember, the bananas add natural sweetness too. So, adjust based on your taste and enjoy the balance of chocolate and peanut butter. When serving, use a big scoop. Place it in a bowl or a cone for fun. Top it with chopped nuts or chocolate chips for crunch. You can also add a drizzle of extra peanut butter or chocolate sauce. This makes it look fancy! Want to be bold? Try adding fresh fruit on top, like sliced strawberries or bananas. It adds color and flavor. {{image_2}} If you want a nut-free nice cream, swap peanut butter with sunflower seed butter. This keeps the creamy texture and adds a new flavor. You can also try tahini, which is made from sesame seeds. It gives a nice, rich taste without nuts. Both options work well in this recipe. You can add extra flavors to your nice cream. For a hint of vanilla, just mix in one teaspoon of vanilla extract. If you love sweet notes, drizzle some caramel sauce into the mix. You can even add a touch of cinnamon for warmth. These add-ins make the nice cream even more delightful. Fruits pair well with chocolate and peanut butter. Try adding frozen strawberries or raspberries for a fruity twist. Just blend them in with the other ingredients. You can also mix in some chopped ripe mango for a tropical vibe. These fruit combinations keep it fun and fresh. To keep your Chocolate Peanut Butter Nice Cream fresh, use an airtight container. This helps avoid ice crystals and keeps the texture smooth. Make sure to seal the lid tightly. If you have some leftovers, scoop out the nice cream before re-freezing. Avoid leaving it in the original mixing bowl. Your nice cream can last in the freezer for about one month. After that, the taste and texture may change. For best results, try to eat it within two weeks. This way, you enjoy the flavor at its peak. If you see any ice crystals forming, it's a sign that it's time to eat it. If you have melted your nice cream, you can refreeze it. Just make sure to blend it again before serving. This helps restore its creamy texture. Don't refreeze it too many times, as this can make it icy and hard. Enjoy it fresh for the best taste and texture! You can use fresh bananas, but frozen ones work best. Frozen bananas give the nice cream a smooth and creamy texture. If you use fresh bananas, the nice cream might be too soft. To make fresh bananas colder, slice them and freeze them for about two hours before using. This recipe is already vegan! The ingredients include bananas, cocoa powder, and peanut butter. Just make sure to choose a brand of peanut butter that does not contain any added dairy or other non-vegan ingredients. The maple syrup is also a plant-based sweetener, keeping everything vegan-friendly. I love serving this nice cream in bowls. You can scoop it out and let it sit for a few minutes to soften. This makes it easier to eat. Top it with chopped nuts or chocolate chips for extra flavor and crunch. You can also serve it with fresh fruit for a fun twist! You learned how to make nice cream with simple steps. We covered the right ingredients, from bananas to toppings. I shared tips for a creamy texture and sweetness balance. You can store it easily and keep it fresh. Don’t forget the variations for fun flavors. Now, you can enjoy a tasty treat that's healthy and easy to make. Dive in and get creative with your nice cream!

Ingredients

List of Ingredients with Measurements

– 4 ripe bananas, sliced and frozen

– 3 tablespoons unsweetened cocoa powder

– 2 tablespoons natural peanut butter

– 1 tablespoon maple syrup (optional, for sweetness)

– 1 teaspoon vanilla extract

– A pinch of salt

Optional Toppings

– Chopped nuts

– Chocolate chips

Ingredient Substitutions

You can switch bananas with avocados for a creamier base. Use almond butter if you want a nut-free option. If you don’t like cocoa powder, try carob powder instead. For sweetness, honey or agave syrup works well.

Step-by-Step Instructions

Preparation of Frozen Bananas

Start with ripe bananas. Peel and slice them into small pieces. Lay the banana slices on a tray and freeze them for at least two hours. You want them nice and firm. This makes the nice cream creamy. If you forgot to freeze them, no worries! Just slice and let them sit for five minutes.

Blending the Nice Cream Ingredients

Grab your food processor. Add the frozen banana slices. Let them soften for about five minutes. This helps the blades blend smoothly. Next, add the cocoa powder, peanut butter, maple syrup, vanilla extract, and a pinch of salt. Blend everything on high speed. Stop to scrape the sides if needed. Blend until smooth and creamy. Taste it! If you want it sweeter, add more maple syrup.

Freezing and Serving Tips

Once it’s creamy, transfer the nice cream to an airtight container. Freeze it for one to two hours. This step makes it thicker. When you’re ready to serve, scoop it into bowls. Top with chopped nuts or chocolate chips if you like. Enjoy your tasty Chocolate Peanut Butter Nice Cream!

Tips & Tricks

Perfecting the Creamy Texture

To get that perfect creamy texture, start with ripe bananas. Ripe bananas are sweeter and blend better. Slice them and freeze them for at least 2 hours. Before blending, let them sit for 5 minutes. This softens them slightly, making blending easier. Blend on high speed until smooth. If it feels thick, add a splash of almond milk or a little more peanut butter. This helps smooth it out.

Sweetness Adjustments

Taste is key when it comes to sweetness. If you find it too bitter, add maple syrup. Start with one tablespoon, and blend again. You can always add more, but you cannot take it out. Remember, the bananas add natural sweetness too. So, adjust based on your taste and enjoy the balance of chocolate and peanut butter.

Serving Suggestions

When serving, use a big scoop. Place it in a bowl or a cone for fun. Top it with chopped nuts or chocolate chips for crunch. You can also add a drizzle of extra peanut butter or chocolate sauce. This makes it look fancy! Want to be bold? Try adding fresh fruit on top, like sliced strawberries or bananas. It adds color and flavor.

Variations

Nut-Free Alternatives

If you want a nut-free nice cream, swap peanut butter with sunflower seed butter. This keeps the creamy texture and adds a new flavor. You can also try tahini, which is made from sesame seeds. It gives a nice, rich taste without nuts. Both options work well in this recipe.

Flavor Add-Ins

You can add extra flavors to your nice cream. For a hint of vanilla, just mix in one teaspoon of vanilla extract. If you love sweet notes, drizzle some caramel sauce into the mix. You can even add a touch of cinnamon for warmth. These add-ins make the nice cream even more delightful.

Fruit Combinations

Fruits pair well with chocolate and peanut butter. Try adding frozen strawberries or raspberries for a fruity twist. Just blend them in with the other ingredients. You can also mix in some chopped ripe mango for a tropical vibe. These fruit combinations keep it fun and fresh.

Storage Info

Best Ways to Store Nice Cream

To keep your Chocolate Peanut Butter Nice Cream fresh, use an airtight container. This helps avoid ice crystals and keeps the texture smooth. Make sure to seal the lid tightly. If you have some leftovers, scoop out the nice cream before re-freezing. Avoid leaving it in the original mixing bowl.

Shelf Life in the Freezer

Your nice cream can last in the freezer for about one month. After that, the taste and texture may change. For best results, try to eat it within two weeks. This way, you enjoy the flavor at its peak. If you see any ice crystals forming, it’s a sign that it’s time to eat it.

Re-Freezing Guidelines

If you have melted your nice cream, you can refreeze it. Just make sure to blend it again before serving. This helps restore its creamy texture. Don’t refreeze it too many times, as this can make it icy and hard. Enjoy it fresh for the best taste and texture!

FAQs

Can I use fresh bananas instead of frozen?

You can use fresh bananas, but frozen ones work best. Frozen bananas give the nice cream a smooth and creamy texture. If you use fresh bananas, the nice cream might be too soft. To make fresh bananas colder, slice them and freeze them for about two hours before using.

How can I make this recipe vegan?

This recipe is already vegan! The ingredients include bananas, cocoa powder, and peanut butter. Just make sure to choose a brand of peanut butter that does not contain any added dairy or other non-vegan ingredients. The maple syrup is also a plant-based sweetener, keeping everything vegan-friendly.

What is the best way to serve Chocolate Peanut Butter Nice Cream?

I love serving this nice cream in bowls. You can scoop it out and let it sit for a few minutes to soften. This makes it easier to eat. Top it with chopped nuts or chocolate chips for extra flavor and crunch. You can also serve it with fresh fruit for a fun twist!

You learned how to make nice cream with simple steps. We covered the right ingredients, from bananas to toppings. I shared tips for a creamy texture and sweetness balance. You can store it easily and keep it fresh. Don’t forget the variations for fun flavors.

Now, you can enjoy a tasty treat that’s healthy and easy to make. Dive in and get creative with your nice cream!

- 4 ripe bananas, sliced and frozen - 3 tablespoons unsweetened cocoa powder - 2 tablespoons natural peanut butter - 1 tablespoon maple syrup (optional, for sweetness) - 1 teaspoon vanilla extract - A pinch of salt - Chopped nuts - Chocolate chips You can switch bananas with avocados for a creamier base. Use almond butter if you want a nut-free option. If you don’t like cocoa powder, try carob powder instead. For sweetness, honey or agave syrup works well. Start with ripe bananas. Peel and slice them into small pieces. Lay the banana slices on a tray and freeze them for at least two hours. You want them nice and firm. This makes the nice cream creamy. If you forgot to freeze them, no worries! Just slice and let them sit for five minutes. Grab your food processor. Add the frozen banana slices. Let them soften for about five minutes. This helps the blades blend smoothly. Next, add the cocoa powder, peanut butter, maple syrup, vanilla extract, and a pinch of salt. Blend everything on high speed. Stop to scrape the sides if needed. Blend until smooth and creamy. Taste it! If you want it sweeter, add more maple syrup. Once it's creamy, transfer the nice cream to an airtight container. Freeze it for one to two hours. This step makes it thicker. When you're ready to serve, scoop it into bowls. Top with chopped nuts or chocolate chips if you like. Enjoy your tasty Chocolate Peanut Butter Nice Cream! To get that perfect creamy texture, start with ripe bananas. Ripe bananas are sweeter and blend better. Slice them and freeze them for at least 2 hours. Before blending, let them sit for 5 minutes. This softens them slightly, making blending easier. Blend on high speed until smooth. If it feels thick, add a splash of almond milk or a little more peanut butter. This helps smooth it out. Taste is key when it comes to sweetness. If you find it too bitter, add maple syrup. Start with one tablespoon, and blend again. You can always add more, but you cannot take it out. Remember, the bananas add natural sweetness too. So, adjust based on your taste and enjoy the balance of chocolate and peanut butter. When serving, use a big scoop. Place it in a bowl or a cone for fun. Top it with chopped nuts or chocolate chips for crunch. You can also add a drizzle of extra peanut butter or chocolate sauce. This makes it look fancy! Want to be bold? Try adding fresh fruit on top, like sliced strawberries or bananas. It adds color and flavor. {{image_2}} If you want a nut-free nice cream, swap peanut butter with sunflower seed butter. This keeps the creamy texture and adds a new flavor. You can also try tahini, which is made from sesame seeds. It gives a nice, rich taste without nuts. Both options work well in this recipe. You can add extra flavors to your nice cream. For a hint of vanilla, just mix in one teaspoon of vanilla extract. If you love sweet notes, drizzle some caramel sauce into the mix. You can even add a touch of cinnamon for warmth. These add-ins make the nice cream even more delightful. Fruits pair well with chocolate and peanut butter. Try adding frozen strawberries or raspberries for a fruity twist. Just blend them in with the other ingredients. You can also mix in some chopped ripe mango for a tropical vibe. These fruit combinations keep it fun and fresh. To keep your Chocolate Peanut Butter Nice Cream fresh, use an airtight container. This helps avoid ice crystals and keeps the texture smooth. Make sure to seal the lid tightly. If you have some leftovers, scoop out the nice cream before re-freezing. Avoid leaving it in the original mixing bowl. Your nice cream can last in the freezer for about one month. After that, the taste and texture may change. For best results, try to eat it within two weeks. This way, you enjoy the flavor at its peak. If you see any ice crystals forming, it's a sign that it's time to eat it. If you have melted your nice cream, you can refreeze it. Just make sure to blend it again before serving. This helps restore its creamy texture. Don't refreeze it too many times, as this can make it icy and hard. Enjoy it fresh for the best taste and texture! You can use fresh bananas, but frozen ones work best. Frozen bananas give the nice cream a smooth and creamy texture. If you use fresh bananas, the nice cream might be too soft. To make fresh bananas colder, slice them and freeze them for about two hours before using. This recipe is already vegan! The ingredients include bananas, cocoa powder, and peanut butter. Just make sure to choose a brand of peanut butter that does not contain any added dairy or other non-vegan ingredients. The maple syrup is also a plant-based sweetener, keeping everything vegan-friendly. I love serving this nice cream in bowls. You can scoop it out and let it sit for a few minutes to soften. This makes it easier to eat. Top it with chopped nuts or chocolate chips for extra flavor and crunch. You can also serve it with fresh fruit for a fun twist! You learned how to make nice cream with simple steps. We covered the right ingredients, from bananas to toppings. I shared tips for a creamy texture and sweetness balance. You can store it easily and keep it fresh. Don’t forget the variations for fun flavors. Now, you can enjoy a tasty treat that's healthy and easy to make. Dive in and get creative with your nice cream!

Chocolate Peanut Butter Nice Cream

Indulge in a deliciously creamy Chocolate Peanut Butter Nice Cream that's guilt-free and easy to make! With just a few simple ingredients like ripe bananas, cocoa powder, and peanut butter, you'll create a delightful frozen treat perfect for any day. This recipe is not only a healthier option but also a fantastic way to satisfy your sweet cravings. Click through to explore the full recipe and enjoy this delectable dessert!

Ingredients
  

4 ripe bananas, sliced and frozen

3 tablespoons unsweetened cocoa powder

2 tablespoons natural peanut butter

1 tablespoon maple syrup (optional, for sweetness)

1 teaspoon vanilla extract

A pinch of salt

Chopped nuts or chocolate chips for topping (optional)

Instructions
 

Begin by placing the frozen banana slices in a food processor. Let them sit for about 5 minutes to soften slightly, making them easier to process.

    Add the unsweetened cocoa powder, peanut butter, maple syrup (if using), vanilla extract, and a pinch of salt to the processor.

      Blend the mixture on high speed until it becomes smooth and creamy. You may need to stop and scrape down the sides to ensure everything is well blended.

        Once you achieve a creamy texture, taste the nice cream and adjust sweetness if desired by adding more maple syrup.

          Transfer the nice cream into an airtight container and freeze for about 1-2 hours to firm up slightly if you prefer a thicker texture.

            Serve scoops of your Chocolate Peanut Butter Nice Cream in bowls, and top with chopped nuts or chocolate chips if you like.

              Prep Time: 10 mins | Total Time: 2 hours 10 mins | Servings: 4