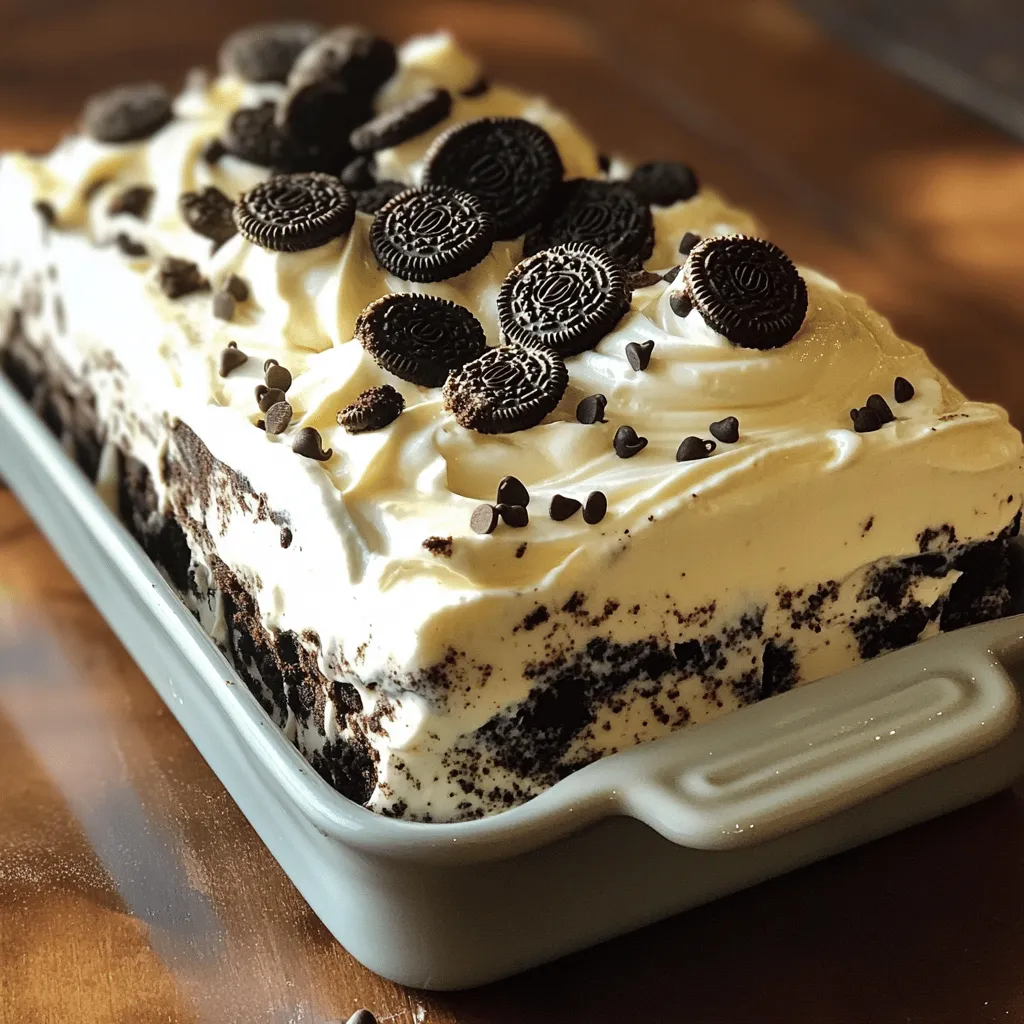
Do you want a dessert that’s super easy and delicious? Look no further than my Cookies and Cream Icebox Cake! With just a few main ingredients like Oreos and cream, this treat is a breeze to prepare. It’s perfect for gatherings or a cozy night in. Let’s dive into how to layer this delightful dessert that everyone will love, plus some tips to make it even better!
Ingredients
List of Main Ingredients
– 24 Oreo cookies, crushed
– 2 cups heavy whipping cream
– 1 cup powdered sugar
– 1 teaspoon vanilla extract
– 1/2 cup cream cheese, softened
– 1/2 cup chocolate chips (optional)
For this Cookies and Cream Icebox Cake, you will need a few simple ingredients. First, grab 24 Oreo cookies. These will give the cake its rich chocolate flavor. Next, you will need 2 cups of heavy whipping cream. This is key for a light and fluffy texture. You will also need 1 cup of powdered sugar to sweeten the cream. A teaspoon of vanilla extract adds a lovely aroma and flavor.
Don’t forget the cream cheese! You need 1/2 cup, softened to mix easily. If you love chocolate, add 1/2 cup of chocolate chips on top for extra crunch. Finally, keep some extra Oreo cookies for garnish.
Equipment Needed
– Mixing bowls
– Electric mixer
– Rectangular baking dish
– Plastic wrap
To make this cake, you will need a few tools. Start with mixing bowls to combine your ingredients. An electric mixer is essential for whipping the cream, as it makes the job easier and faster. A rectangular baking dish, about 9×13 inches, is perfect for layering your cake. Lastly, plastic wrap will help cover the dish while it chills in the fridge.
Step-by-Step Instructions
Preparation of the Cream Mixture
First, grab a large bowl. Combine 2 cups of heavy whipping cream, 1 cup of powdered sugar, and 1 teaspoon of vanilla extract. Now, use an electric mixer on medium-high speed. Whip this mixture until soft peaks form. This means it should be thick but still smooth. In another bowl, beat 1/2 cup of softened cream cheese until it is creamy and smooth. Slowly add the whipped cream mixture to the cream cheese. Gently fold them together until they mix well.
Assembly of the Cake
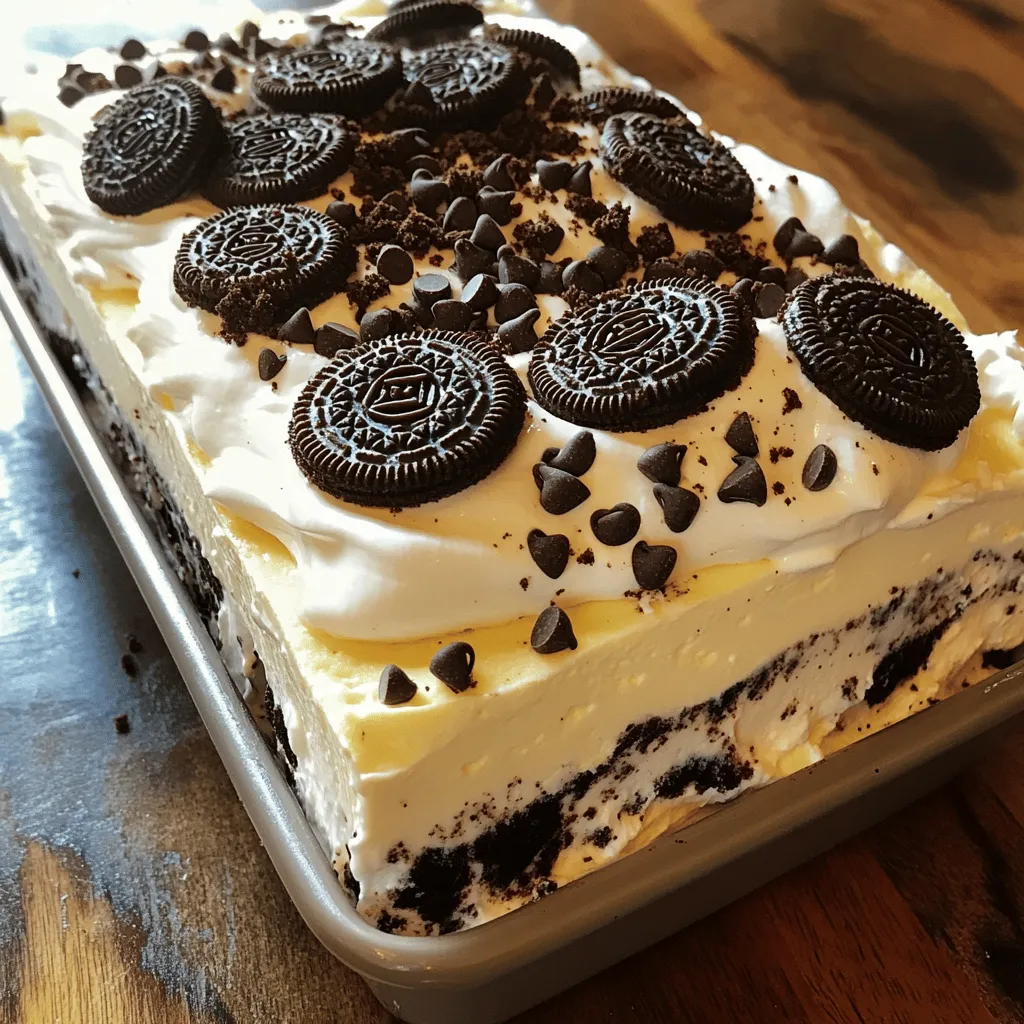
Now, let’s build our cake! Take a rectangular baking dish, about 9×13 inches. Spread a layer of the cream cheese mixture evenly at the bottom. Next, dip each Oreo cookie in milk for 1 to 2 seconds. Make sure not to soak them. Place the dipped Oreos on top of the cream cheese layer. Repeat this process to create even layers. After the Oreos, spread more cream cheese mixture on top. Keep layering until you finish all your ingredients. End with a layer of cream mixture on top. If you want, sprinkle chocolate chips for extra texture.
Setting the Cake
Once your cake is layered, cover the dish with plastic wrap. Place it in the fridge to chill. I recommend letting it sit for at least 4 hours, or even overnight for the best texture. The longer it chills, the better the flavors meld. When you’re ready to serve, garnish the top with crushed Oreos for a delightful crunch. Enjoy your Cookies and Cream Icebox Cake!
Tips & Tricks
Achieving the Perfect Texture
To whip cream well, start with cold tools. Chill your mixing bowl and beaters for best results. Pour the heavy cream into the bowl. Then, add powdered sugar and vanilla extract. Mix on medium-high speed. Stop when soft peaks form. This means the cream should hold its shape but still be smooth.
When you fold the whipped cream into the cream cheese, be gentle. Use a spatula to scoop from the bottom. Lift the mixture over the top. This helps keep the air in the cream. Don’t stir too hard. You want a light and fluffy texture.
Substitutions for Dietary Needs
If you need a dairy-free version, try coconut cream. Chill a can of coconut milk overnight. Scoop out the solid part and whip it like regular cream. For gluten-free options, use gluten-free cookies. Many brands now make tasty gluten-free Oreos. This way, everyone can enjoy your cake.
Enhancements for Flavor
To make your cake even better, think about toppings. Add crushed Oreos or sprinkles on top. You can also layer in some chocolate chips for extra crunch. If you want a twist, try different cookies. Mint Oreos add a fresh taste. Or use peanut butter cookies for a nutty flavor. Be creative and have fun!
Variations
Flavor Variations
You can change the flavor of your Cookies and Cream Icebox Cake easily. Try a mint version for a fresh twist. Use mint Oreo cookies instead of regular ones. This adds a cool taste that pairs well with the cream. Simply mix crushed mint Oreos into the cream layer for even more flavor.
Another great option is the peanut butter version. Swap some cream cheese for peanut butter. It gives a rich and nutty flavor. You can also mix crushed peanut butter cookies in the layers. This adds a crunchy texture that everyone will love.
Layering Ideas
Layering is key to a great icebox cake. You can use different cookies for variety. Try vanilla wafers or chocolate wafers instead of Oreos. Each cookie brings a unique taste that changes the cake.
Explore different creams or fillings too. Instead of just whipped cream, mix in flavored yogurt or pudding. This adds a fun twist to each bite. Adding fruit like sliced strawberries or bananas will brighten each layer.
Presentation Styles
Make your cake even more fun with creative presentations. Serve it in individual glasses for a personal touch. Layer the cake mixture and cookies in the glass. This makes a pretty and tasty treat for parties.
Garnishing is also important. Use whole or crushed Oreo cookies on top for a nice look. You can also drizzle chocolate or caramel sauce over the top. This not only looks great but adds extra flavor too.
Storage Info
Best Practices for Storing
To keep your Cookies and Cream Icebox Cake fresh, use an airtight container. This will prevent the cake from drying out or absorbing other smells from the fridge. If you don’t have a container, cover the dish tightly with plastic wrap. Store it in the refrigerator for best results.
Freezing Instructions
If you want to save some cake for later, you can freeze it. Wrap the cake well in plastic wrap, then place it in a freezer-safe container. This helps protect it from freezer burn. When you are ready to enjoy it, take it out and place it in the fridge for about 6 hours to thaw. You can also leave it on the counter for about 1-2 hours until it softens.
Shelf Life
In the fridge, your Cookies and Cream Icebox Cake will stay fresh for about 5 days. After that, it may lose its taste and texture. Look for signs of spoilage, such as changes in color or an off smell. If you see mold, it’s best to toss it out. Keeping an eye on these details will help ensure you enjoy every last bite!
FAQs
How long does the Cookies and Cream Icebox Cake need to chill?
The Cookies and Cream Icebox Cake needs to chill for at least 4 hours. For the best flavor and texture, I recommend letting it set overnight. This allows the cream to firm up and the flavors to blend. When you cut into it after this time, you’ll find a smooth, creamy delight.
Can I use other types of cookies in this recipe?
Yes, you can use other cookies if you like. Some great options are chocolate wafer cookies or even mint-flavored cookies. Just remember to adjust the soaking time in milk to keep the layers intact. Get creative and mix flavors to find your favorite!
Is it okay to make this dessert in advance?
Absolutely! Making this dessert ahead of time is a smart idea. It saves you time on the day you want to serve it. Plus, the longer it sits, the better the flavors meld together. Just cover it well and store it in the fridge until you’re ready to share.
You have all the tools to make a delightful Cookies and Cream Icebox Cake. We covered the main ingredients, step-by-step instructions, and added tips for better texture and flavor. Whether you choose classic Oreos or switch things up, this dessert is easy and fun. With the right storage, you can enjoy it longer. Don’t hesitate to try different flavors and layers. This cake is a crowd-pleaser that you can customize for anyone. Happy baking!