If you're craving a simple yet delicious meal, look no further! This Garlic Parmesan Chicken Tenders recipe is easy to make and packed with flavor. You'll learn how to prepare crispy tenders with just a few basic ingredients. Whether you’re frying or baking, I’ll guide you every step of the way. Get ready to impress your family with a dish that brings comfort and joy to any table!
Why I Love This Recipe
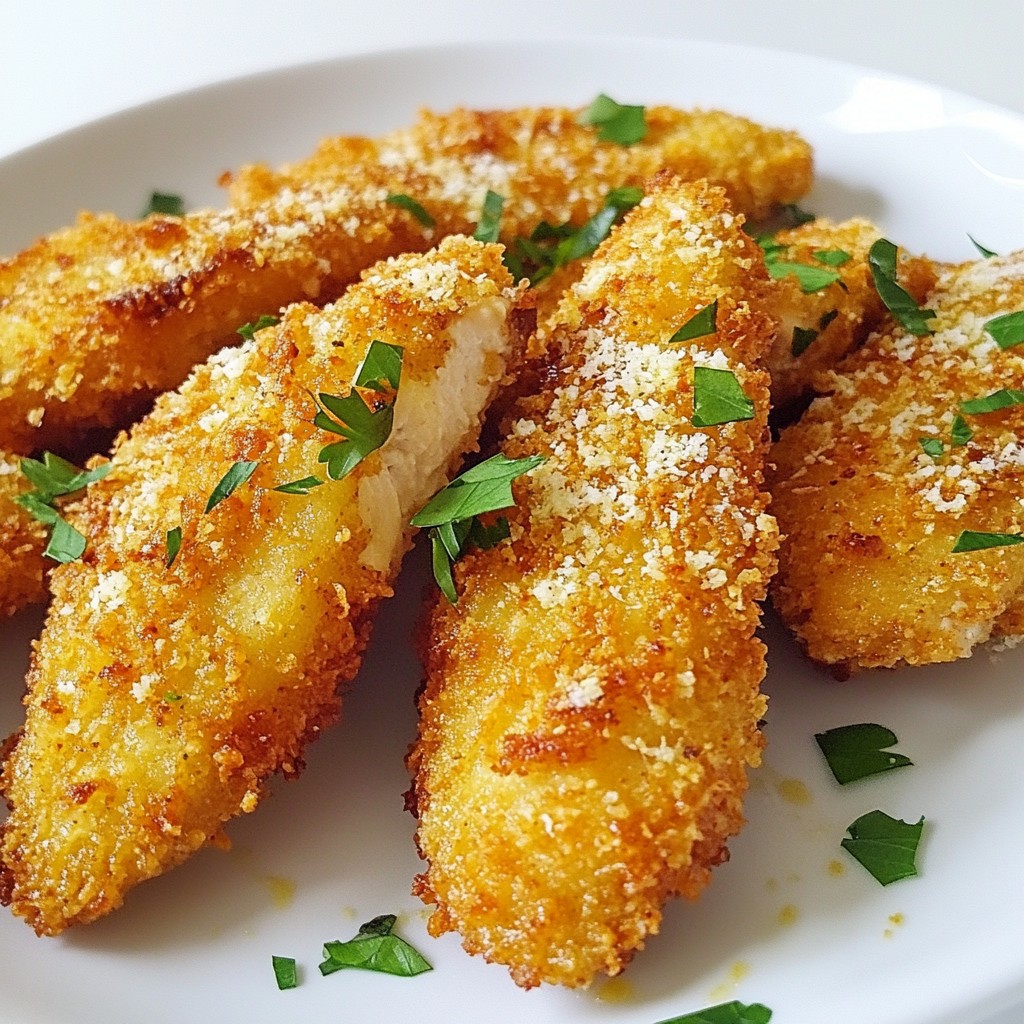
- Crispy Texture: The use of panko breadcrumbs gives these chicken tenders an unbeatable crunch that elevates the dish.
- Flavorful Coating: The combination of Parmesan cheese and garlic creates a savory crust that is simply irresistible.
- Versatility: Whether you choose to fry or bake, these tenders turn out deliciously, making them perfect for any occasion.
- Quick and Easy: This recipe is simple to follow and can be ready in just 30 minutes, making it ideal for busy weeknights.
Ingredients
Main Ingredients
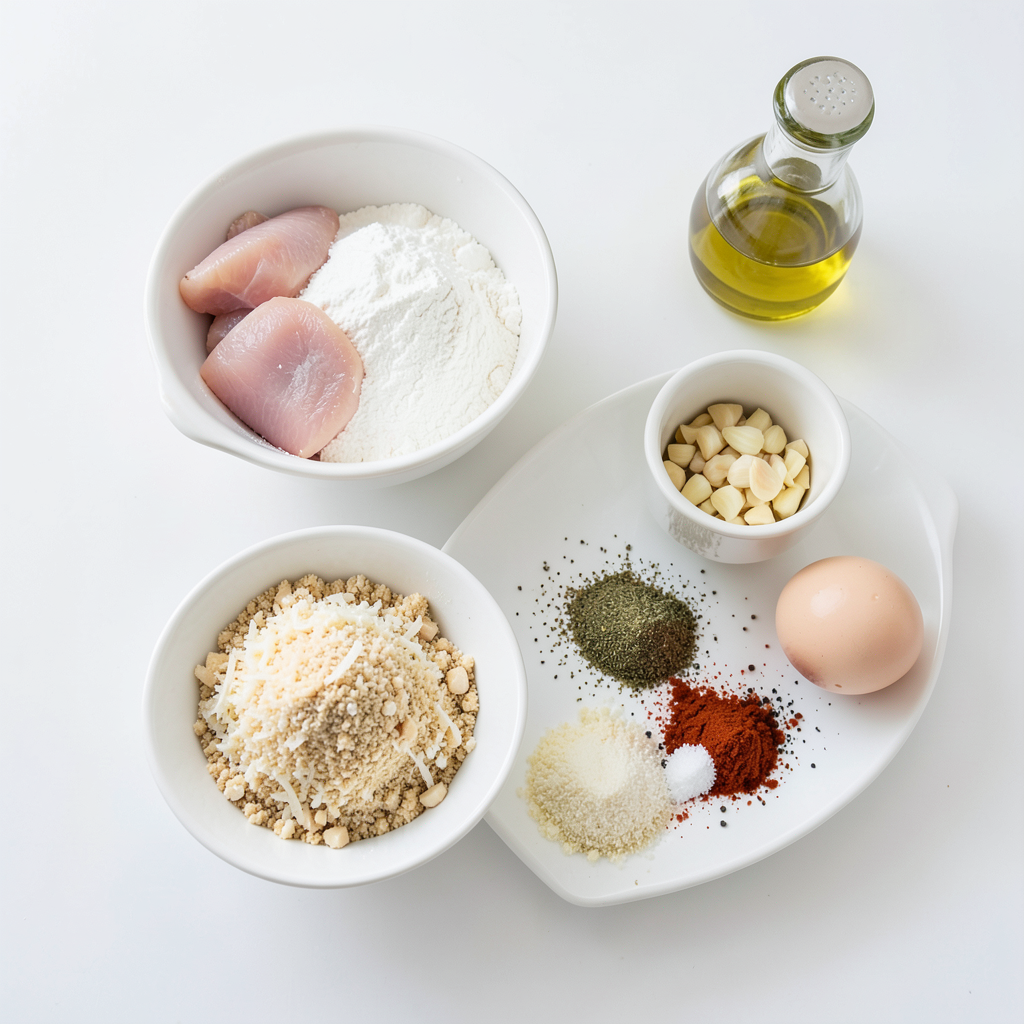
For Garlic Parmesan Chicken Tenders, you will need:
- 1 pound chicken tenders
- 1 cup all-purpose flour
- 2 large eggs
- 1 cup breadcrumbs (preferably panko for extra crunch)
- 1 cup grated Parmesan cheese
These main ingredients form the base of the dish. The chicken provides protein, while the flour and breadcrumbs help create a crispy coating. Using panko gives you that extra crunch.
Seasoning and Coating
The flavor comes from:
- 4 cloves garlic, minced
- 2 teaspoons garlic powder
- 1 teaspoon onion powder
- 1 teaspoon dried oregano
- 1 teaspoon paprika
- Salt and pepper to taste
These seasonings elevate the dish. The garlic adds depth, while the herbs bring freshness. Adjust the salt and pepper based on your taste preference.
Cooking Oil Option
For frying, use:
- Olive oil for frying
Olive oil works well for frying. It has a nice flavor and helps get that golden brown color. You can also bake the tenders if you prefer a healthier option. Just remember to spray with oil for crispiness.
Step-by-Step Instructions
Preparation Steps
First, gather your ingredients. You need chicken tenders, flour, eggs, breadcrumbs, and cheese. Don’t forget the garlic and spices. They add great flavor. Start by preheating your oven to 400°F (200°C) if you plan to bake. If you want to fry, heat olive oil in a skillet over medium-high heat.
Next, pat the chicken tenders dry. Dry chicken helps the coating stick better. Season them with salt and pepper for taste.
Dredging Technique
Now, it's time to set up your dredging station. Use three shallow bowls. In the first bowl, add flour. In the second bowl, whisk the eggs well. In the third bowl, mix breadcrumbs, Parmesan, minced garlic, and spices. This mix gives the tenders a nice crunch and flavor.
Take a chicken tender and coat it in flour. Shake off any extra flour. Next, dip it into the eggs. Let the excess drip off. Finally, coat the chicken in the breadcrumb mix. Press it gently so the crumbs stick well.
Frying vs. Baking Method
You can choose to fry or bake the chicken tenders. For frying, make sure the oil is hot. Add the coated tenders in batches. Cook them for about 4-5 minutes on each side. Look for a golden brown color. Make sure the internal temperature reaches 165°F (75°C).
If you prefer baking, place the coated tenders on a greased baking sheet. Lightly spray them with olive oil. Bake for 15-20 minutes. Flip them halfway to ensure even cooking. Enjoy your crispy Garlic Parmesan Chicken Tenders!
Tips & Tricks
Achieving Maximum Crispiness
To get your chicken tenders super crispy, use panko breadcrumbs. They add great crunch. Make sure your oil is hot before frying. If the oil is too cool, the tenders will soak it up and turn soggy. A good test is to drop a piece of bread in the oil. If it sizzles, you are ready to fry!
Flavor Enhancements
Garlic and Parmesan shine in this dish, but you can add more flavor. Try mixing in herbs like thyme or rosemary. A pinch of cayenne pepper gives it a nice kick. You can also add lemon zest to brighten the taste. For even more garlic flavor, sprinkle extra minced garlic on top right before serving.
Preventing Sticking
Coating your chicken well helps prevent sticking. Press the breadcrumbs firmly onto the chicken. If frying, do not overcrowd the pan. Leave space between each piece. If baking, make sure to grease your baking sheet and spray the tops lightly with oil. This helps them crisp up and not stick.
Pro Tips
- Use Panko Breadcrumbs: For an extra crispy texture, opt for panko breadcrumbs instead of regular breadcrumbs. They create a lighter, crunchier coating.
- Let the Chicken Rest: After frying or baking, allow the chicken tenders to rest for a few minutes. This helps retain the juices and enhances flavor.
- Seasoning Variations: Feel free to experiment with different herbs and spices like Italian seasoning or cayenne pepper for a kick. Adjust to your taste preference!
- Batch Cooking: Prepare a larger batch and freeze the uncooked coated tenders. They can be cooked directly from frozen for a quick meal later!
Variations
Different Coating Options
You can change the coating for your chicken tenders. Try using crushed cornflakes for a different crunch. You can also swap out the breadcrumbs for crushed tortilla chips. They add a fun twist. For a gluten-free option, use almond flour or gluten-free breadcrumbs. Each option gives a unique taste and texture.
Adding Spice
If you want some heat, add cayenne pepper to the breadcrumb mix. A teaspoon will give a nice kick. For more flavor, mix in some smoked paprika. This adds depth and a hint of smokiness. You can also try adding chili powder or crushed red pepper flakes. Adjust the amount to fit your taste.
Side Dish Pairings
Garlic Parmesan chicken tenders pair well with many sides. Serve them with a fresh salad for a light meal. Crispy fries or sweet potato fries make a great match too. You can also try serving them with creamy coleslaw. If you want something healthy, roasted veggies are a perfect choice. Each side enhances the dish and makes it more filling.
Storage Info
Refrigerating Leftovers
After your meal, let the chicken tenders cool down. Place them in a shallow container. Cover the container with a tight lid. Store them in the fridge for up to three days. This keeps them fresh and tasty. When ready to eat, check for any off smells or changes in color. Always trust your nose!
Freezing Instructions
For longer storage, freeze the chicken tenders. First, let them cool completely. Then, arrange them in a single layer on a baking sheet. Freeze them for about one hour. Once firm, transfer them to a freezer bag. Squeeze out as much air as possible. Label the bag with the date. Frozen tenders can last up to three months.
Reheating Tips
To reheat, you can bake or pan-fry the tenders. For baking, preheat your oven to 375°F (190°C). Place the tenders on a baking sheet. Bake for about 10-15 minutes until hot. If you prefer frying, heat a small amount of oil in a pan. Fry the tenders for 2-3 minutes on each side. This keeps them crispy and warm. Always check that the internal temperature reaches 165°F (75°C) before eating.
FAQs
Can I use chicken breasts instead of tenders?
Yes, you can use chicken breasts. Cut them into strips about the same size as the tenders. This way, they cook evenly. The cooking time may change. Check the internal temperature to reach 165°F (75°C).
How can I make this recipe gluten-free?
To make this recipe gluten-free, swap all-purpose flour for a gluten-free flour blend. Choose gluten-free breadcrumbs instead of regular ones. These changes keep the taste and texture nice. You can still enjoy the crispy coating without gluten.
What sauces pair well with Garlic Parmesan Chicken Tenders?
Many sauces taste great with these chicken tenders. Here are a few options:
- Ranch dressing: Creamy and tangy, a classic choice.
- Honey mustard: Sweet and a bit zesty.
- Buffalo sauce: For those who like heat and spice.
- Marinara sauce: A nice dip for a twist.
Feel free to try different sauces based on your taste!
You learned about the main ingredients and how to prepare Garlic Parmesan Chicken Tenders. We covered cooking methods, tips for crispiness, and flavor enhancements. I shared ways to store leftovers and reheating tips. Now, you have a clearer idea of how to make this dish your own.
Feel free to try different coatings or add spice to suit your taste. Enjoy making this meal and sharing it with others!