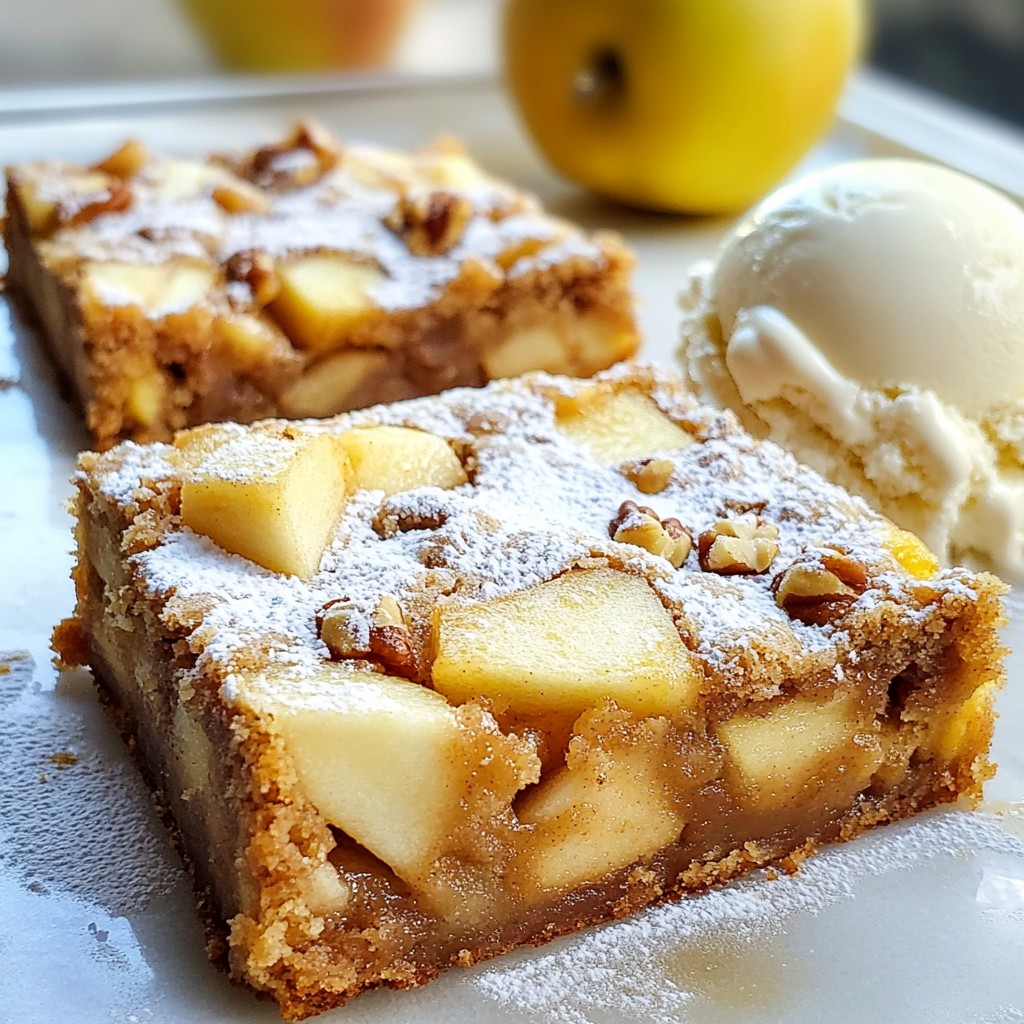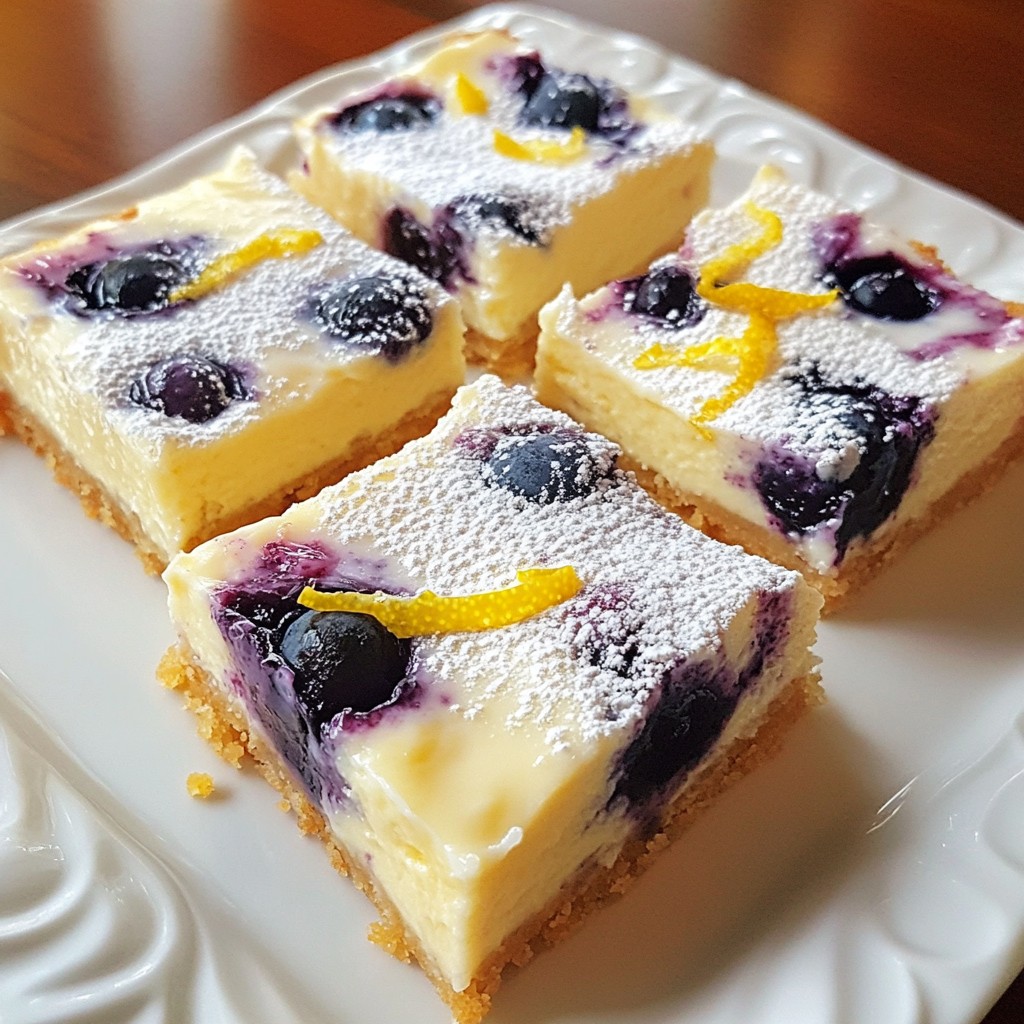
Are you ready to indulge in a sweet treat that bursts with flavor? These Lemon Blueberry Cheesecake Bars are the perfect blend of tangy lemon and sweet blueberries, layered on a crunchy graham cracker crust. In this post, I'll guide you through every step, from gathering your ingredients to serving these delightful bars at your next gathering. Get your taste buds ready for a delicious dessert adventure!
Why I Love This Recipe
- Refreshing Flavor: The combination of lemon and blueberry creates a delightful balance of tartness and sweetness that is perfect for any occasion.
- Easy to Make: With simple ingredients and straightforward steps, these cheesecake bars are a breeze to whip up, making them great for both beginners and seasoned bakers.
- Perfectly Portionable: Cutting the cheesecake into bars makes it easy to serve and share, ideal for parties, picnics, or just a sweet treat at home.
- Charming Presentation: The vibrant colors of the blueberries against the creamy lemon cheesecake make these bars visually appealing, perfect for impressing guests.
Ingredients
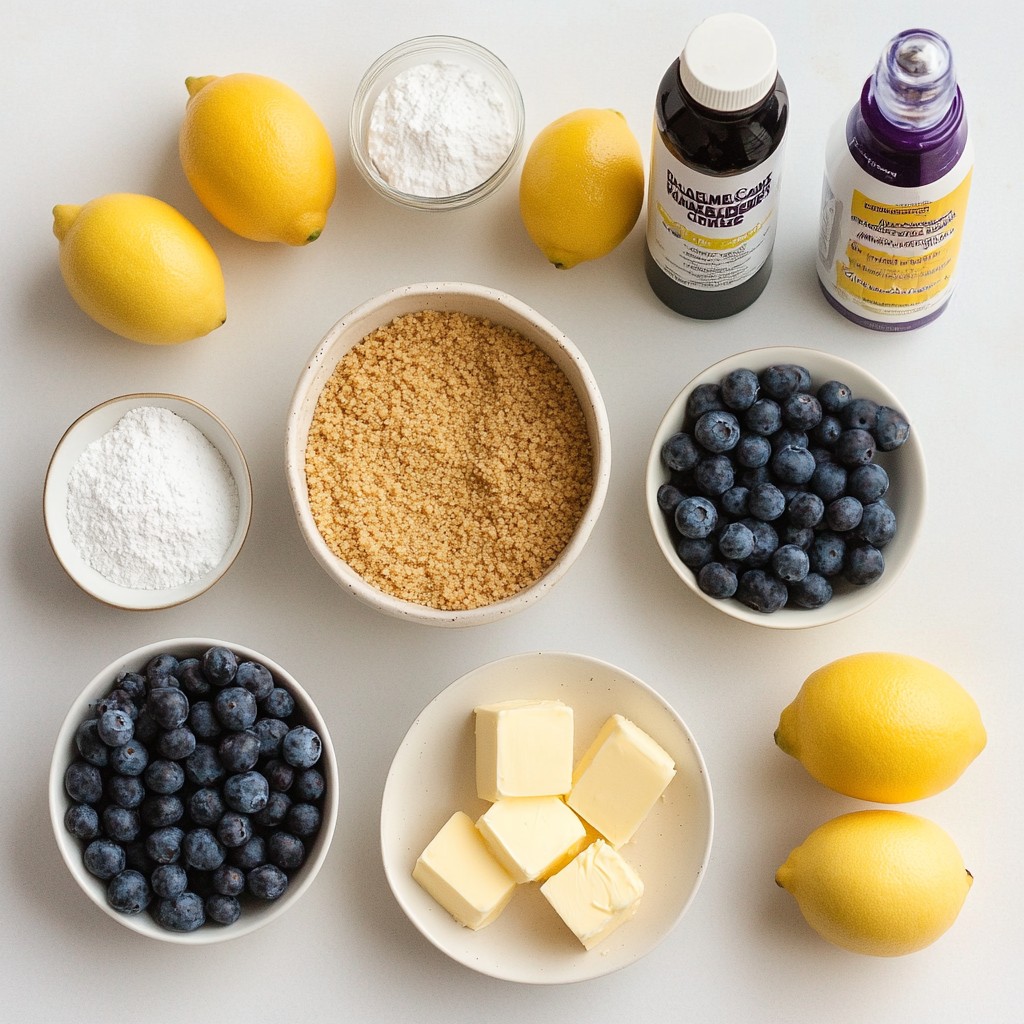
To make the Lemon Blueberry Cheesecake Bars, you need a few key ingredients. Each one plays a big role in making these bars tasty and creamy. Here’s the full list:
- 1 ½ cups graham cracker crumbs
- ½ cup unsalted butter, melted
- ¼ cup granulated sugar
- 16 oz cream cheese, softened
- ½ cup granulated sugar
- 2 large eggs
- Zest of 1 lemon
- ¼ cup fresh lemon juice
- 1 tsp vanilla extract
- 1 cup fresh blueberries
- Optional: powdered sugar, for dusting
What do these ingredients do?
- Graham cracker crumbs: They provide a crunchy base. They give a nice texture.
- Unsalted butter: This adds moisture and helps the crust hold together.
- Granulated sugar: It sweetens both the crust and the filling.
- Cream cheese: This is the main part of the cheesecake. It gives a rich, creamy taste.
- Eggs: They help set the cheesecake, giving it structure.
- Lemon zest & juice: These add a bright, fresh flavor. They make the bars zingy!
- Vanilla extract: This adds warmth to the taste.
- Fresh blueberries: They give color and bursts of sweetness in each bite.
- Optional powdered sugar: This adds a sweet touch on top when serving.
Gathering these ingredients will set you up for a delightful baking experience. Each one is important to make your Lemon Blueberry Cheesecake Bars shine!
Step-by-Step Instructions
Prepping the Oven and Baking Dish
First, set your oven to 325°F (160°C). This is the right temperature for baking. Next, take an 8x8 inch baking dish. Line it with parchment paper. Leave some paper hanging over the edges. This helps you lift the bars out later.
Creating the Graham Cracker Crust
In a mixing bowl, add 1 ½ cups of graham cracker crumbs. Pour in ½ cup of melted unsalted butter and ¼ cup of sugar. Stir this mix together until it feels like wet sand. Take this mixture and press it into the bottom of your baking dish. Make sure it forms an even layer. Bake this crust for 8-10 minutes. You want it golden and fragrant. After baking, let it cool slightly.
Mixing the Cheesecake Filling
Grab a large bowl for your filling. Beat 16 oz of softened cream cheese with ½ cup of sugar until it’s smooth and creamy. Then, add in 2 large eggs, zest of 1 lemon, ¼ cup of fresh lemon juice, and 1 tsp of vanilla extract. Mix well until it's all smooth. Now, gently fold in 1 cup of fresh blueberries without breaking them.
Baking the Lemon Blueberry Cheesecake Bars
Pour the cheesecake mixture over the cooled graham cracker crust. Spread it out evenly. Place it in the preheated oven. Bake for about 25-30 minutes. The edges should set, but the center can be a bit jiggly. This is normal. Once done, take it out of the oven to cool.
Cooling and Serving Suggestions
Let the bars cool to room temperature. After that, put them in the fridge for at least 3 hours. This chilling time is key for the best texture. When ready, lift the bars out using the parchment paper. Cut them into squares. For a nice touch, you can dust them lightly with powdered sugar before serving. Enjoy your delicious dessert!
Tips & Tricks
How to Get the Best Texture
To achieve a creamy texture, make sure your cream cheese is soft. Let it sit at room temperature for about 30 minutes before mixing. Beat it well with sugar until smooth. This helps blend in the ingredients evenly. Avoid over-mixing once you add eggs. Over-mixing can lead to cracks in your bars later.
Substitutions for Ingredients
You can swap graham cracker crumbs with crushed cookies like Oreos. Use coconut oil if you prefer a dairy-free option instead of butter. For a lighter texture, replace some cream cheese with sour cream. If you want less sugar, use a sugar substitute that measures cup for cup.
Avoiding Common Mistakes
Don’t skip the chilling time. This step is crucial for the bars to set properly. Be careful not to overbake them. The center should jiggle slightly when you take them out. If you see cracks forming, this means you mixed too much or baked too long.
Presentation Ideas
For a lovely touch, dust the top with powdered sugar. Serve the bars on a nice platter with fresh blueberries on top. You can also add a few lemon slices on the side for color. For fun, try serving them with whipped cream or a scoop of vanilla ice cream.
Pro Tips
- Chill for Best Results: Allow the cheesecake bars to chill for at least 3 hours before serving. This helps the flavors meld and the texture to set perfectly.
- Fresh Blueberries: Use fresh blueberries for the best flavor and texture. If using frozen, make sure to thaw and drain them to avoid excess moisture.
- Don’t Overmix: When folding in the blueberries, be gentle to avoid breaking them and creating a blue swirl in the filling.
- Perfect Portions: Use a sharp knife to cut the cheesecake bars, and wipe the blade with a damp cloth between cuts for clean edges.
Variations
Flavored Cheesecake Options
You can change the flavor of your cheesecake bars easily. Try adding different extracts. Almond or lemon extract can give a nice twist. You can also mix in some citrus zest. Lime or orange zest will give it a bright taste. Adding chocolate chips or nut butter can create a rich flavor, too. Each option offers a new way to enjoy these bars.
Different Fruit Combinations
Blueberries are tasty, but many fruits work well here. Raspberries, strawberries, or even peaches can bring fresh flavors. You can mash the fruit slightly before mixing it in. This method lets the fruit flavor spread through the cheesecake. You can also layer the fruit on top before baking for a fun look. Each fruit adds its unique touch to the dessert.
Gluten-Free Adjustments
If you need a gluten-free version, use gluten-free graham crackers. They work just as well for the crust. You can also use almond flour or oats as a base. Many gluten-free options give a nice texture. Check the labels to ensure all ingredients are gluten-free. This way, everyone can enjoy these delicious bars without worry.
No-Bake Option
Want a quicker version? You can make a no-bake cheesecake! Just skip the oven and chill the bars instead. Use the same crust and filling recipe. Press the crust into the dish and let it set in the fridge. This option is perfect for hot days when you don’t want to heat the kitchen. It’s easy and still very tasty!
Storage Info
How to Store Leftovers
After enjoying your bars, store any leftovers in an airtight container. Place them in your fridge. This keeps them fresh for days. If you have leftover bars, you can layer them with parchment paper. This prevents sticking and keeps them neat.
Freezing Instructions
You can freeze these cheesecake bars for later. First, let them cool completely. Cut the bars into squares. Wrap each square in plastic wrap. Then place them in a freezer-safe bag. You can enjoy them later. Just remember to thaw them in the fridge before serving.
Shelf Life
These lemon blueberry cheesecake bars last about 3-4 days in the fridge. If you freeze them, they can last up to 2 months. Just be sure to check for any signs of freezer burn. Enjoying them fresh is best, but freezing works well for later treats!
FAQs
Can I use frozen blueberries?
Yes, you can use frozen blueberries. They work well in this recipe. Just be aware that frozen blueberries may release more juice during baking. This can slightly change the texture but keeps the flavor great. If you use them, fold them in gently. This helps avoid breaking them up too much.
How do I know when the cheesecake bars are done?
To check if the cheesecake bars are done, look at the edges. They should be set and firm. The center will look slightly jiggly. This is perfect because it will firm up while cooling. A toothpick inserted in the center should come out mostly clean.
What is the best way to cut cheesecake bars?
To cut the cheesecake bars neatly, use a sharp knife. It helps to dip the knife in hot water first. Wipe it clean between cuts for smooth edges. This way, you will have beautiful slices that look great on a plate.
Can I make these cheesecake bars ahead of time?
Yes, you can make these cheesecake bars ahead of time. They taste even better after chilling for a few hours or overnight. Just store them in the fridge until you are ready to serve. This makes them a great dessert for parties or gatherings.
How to avoid cracks in the cheesecake bars?
To avoid cracks, make sure not to overmix the batter. Overmixing adds too much air, which can cause cracks. Also, bake the bars at a low temperature. This helps them cook evenly. Finally, let the bars cool slowly in the oven before moving them to the fridge.
Lemon blueberry cheesecake bars are a delightful treat. You've learned about the key ingredients like graham cracker crumbs and fresh blueberries. The step-by-step instructions show how easy it is to create and bake these bars, plus tips help avoid common pitfalls. Consider different variations to keep things fresh, and remember how to store leftovers for later.
Enjoy making these bars and impressing your friends. Homemade treats bring joy. Experiment to create your own unique flavors. Happy baking!