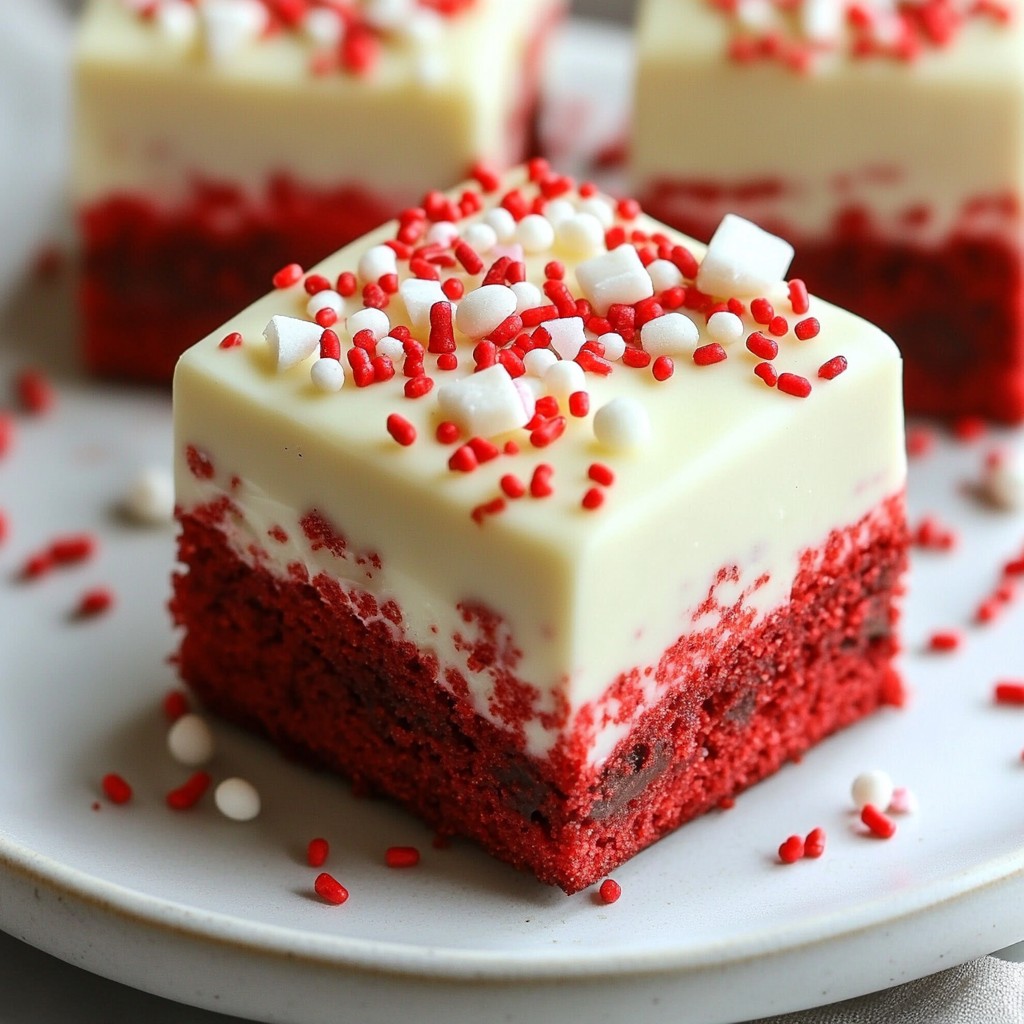
Are you ready to satisfy your sweet tooth with a treat that's easy and delicious? These Red Velvet Oreo Truffle Bars combine rich red velvet and creamy Oreos for the perfect dessert. Whether you're planning a party or a cozy evening at home, these bars will impress everyone. Join me in making this delightful dessert that’s sure to become a favorite! Let’s get started!
Why I Love This Recipe
- Decadent Flavor: The combination of rich red velvet and creamy Oreo filling creates a deliciously indulgent treat that’s hard to resist.
- Easy to Make: This recipe is straightforward and doesn’t require advanced baking skills, making it perfect for bakers of all levels.
- Perfect for Any Occasion: These truffle bars are great for celebrations, holidays, or just a sweet treat for yourself.
- Eye-Catching Presentation: The vibrant red and white colors along with sprinkles make these bars visually appealing and festive.
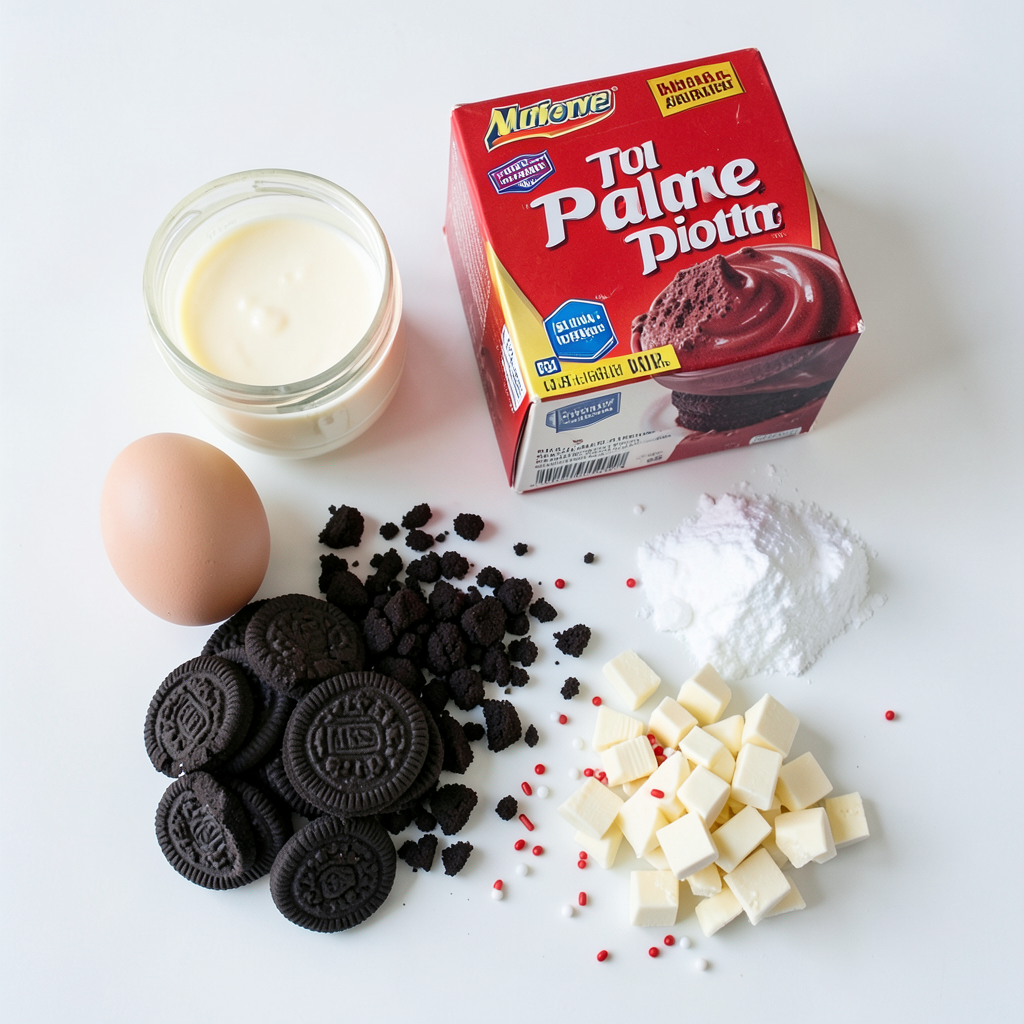
Ingredients
List of Ingredients
- Red Velvet Ingredients:
- 1 box of red velvet cake mix
- 1/2 cup unsalted butter, melted
- 1/4 cup water
- 1 large egg
- Cream Cheese Mixture:
- 8 oz cream cheese, softened
- 1 cup powdered sugar
- 1 tsp vanilla extract
- Topping Ingredients:
- 8 oz white chocolate, chopped (for coating)
- 1 1/2 cups crushed Oreo cookies (divided)
- Red and white sprinkles for decoration
Gather these ingredients before you start. The red velvet cake mix gives these bars their signature color and flavor. The butter, water, and egg make a moist cake base. For the cream cheese layer, soft cream cheese blends well with powdered sugar and vanilla.
You need crushed Oreo cookies to add a rich texture. The white chocolate coating adds sweetness and a beautiful finish. Lastly, the sprinkles give a fun pop of color. Make sure to have everything ready for a smooth cooking experience!
Step-by-Step Instructions
Preparing the Red Velvet Base
1. Preheat your oven to 350°F (175°C). Grease a 9x9-inch baking pan with butter or non-stick spray.
2. In a large bowl, mix the red velvet cake mix, melted butter, water, and egg. Stir until it is smooth and all ingredients blend well.
3. Now, fold in 1 cup of crushed Oreo cookies. This adds a fun crunch to the soft cake.
Baking the Bars
1. Pour the red velvet batter into the prepared pan. Spread it evenly with a spatula.
2. Bake for 25-30 minutes. To test doneness, insert a toothpick into the center. If it comes out clean, your cake is ready!
3. Let the bars cool completely in the pan on a wire rack. This step is key for easier layering later on.
Creating the Cream Cheese Layer
1. In a separate bowl, mix the softened cream cheese, powdered sugar, and vanilla extract. Stir until smooth and creamy.
2. Once the red velvet base has cooled, spread this cream cheese mixture evenly over the top. It adds a lovely tangy flavor.
Final Touches
1. Melt the white chocolate in a microwave-safe bowl. Heat it in 30-second intervals, stirring each time until smooth.
2. Cut the cooled bars into squares. Dip each square into the melted white chocolate. Make sure each piece is fully coated.
3. Place the dipped bars on a parchment-lined baking sheet. Sprinkle red and white sprinkles on top before the chocolate sets.
4. Refrigerate the truffle bars for 15-20 minutes. This helps the chocolate firm up nicely.
Tips & Tricks
Perfecting the Red Velvet Flavor
To make the best red velvet Oreo truffle bars, start with a high-quality red velvet cake mix. Brands like Duncan Hines or Betty Crocker work well. These mixes have the right balance of cocoa and flavor. Use a good cream cheese too, like Philadelphia, for the cream cheese layer. For the chocolate coating, Ghirardelli or Baker's white chocolate is top-notch. Quality ingredients make a big difference in taste.
Chocolate Coating Techniques
Melting chocolate can be tricky. Use a microwave-safe bowl and heat the chocolate in 30-second bursts. Stir after each interval until smooth. This keeps the chocolate from burning. When dipping, use a fork to lift each bar. This ensures an even coat. Let the excess drip off before placing them on parchment paper.
Presentation Suggestions
For serving, arrange the bars on a nice platter. This makes them look fancy. Garnish with extra crushed Oreos around the bars. A light dusting of powdered sugar adds a nice touch. For special occasions, use themed sprinkles that match the event. Creative plating makes your dessert stand out.
Pro Tips
- Chill the Cream Cheese: Ensure your cream cheese is at room temperature for easier mixing and a smoother texture.
- Check for Doneness: Use a toothpick to check the center of the cake; it should come out clean or with a few crumbs, not wet batter.
- Dip in Batches: If dipping in white chocolate, do it in small batches to keep the chocolate warm and fluid for better coating.
- Sprinkle While Wet: Add sprinkles immediately after dipping in chocolate to ensure they stick well before the chocolate hardens.
Variations
Flavor Variations
You can easily change the taste of these bars. Try adding mint or almond extract for a twist. Just a teaspoon can make a big difference. You can also swap the crushed Oreos with other cookies. Try chocolate or vanilla cookies for unique flavors. This makes the bars fun and different each time.
Dietary Modifications
For gluten-free options, use gluten-free cake mix and cookies. Many brands offer these choices now. If you want a dairy-free dessert, use dairy-free cream cheese. There are great brands that taste just like regular cream cheese. These swaps help everyone enjoy the treat.
Seasonal Twists
You can make these bars festive for any season. Use holiday-themed sprinkles for Christmas or Halloween. You could also add flavors like pumpkin spice in autumn. For summer, try adding fresh fruit or coconut flakes. Changing the decoration and flavors keeps it exciting!
Storage Info
Best Storage Practices
To keep your Red Velvet Oreo Truffle Bars fresh, use an airtight container. This helps avoid drying out. Line the container with parchment paper for added protection. If you stack the bars, separate layers with more parchment paper.
Refrigeration and Freezing
For the best taste, store the bars in the fridge. They will stay fresh for a week. If you want to keep them longer, you can freeze them. Wrap each bar in plastic wrap. Place them in a freezer-safe container. They can last for up to three months in the freezer.
Shelf Life
In the fridge, these truffle bars last about a week. Watch for signs of spoilage. If you see mold or an off smell, it’s best to throw them out. If they look dry or hard, they might not taste good anymore. Always check before enjoying!
FAQs
Can I use homemade red velvet cake instead?
Yes, you can use homemade red velvet cake. Just make sure it’s fully cooled before layering. The texture might change a bit, but it will still taste great.
What if I don't have crushed Oreos?
If you don’t have crushed Oreos, you can use any chocolate cookies. Try chocolate wafers or chocolate graham crackers. They will still add a nice crunch and flavor.
How do I make these bars less sweet?
To cut down on sweetness, reduce the powdered sugar in the cream cheese layer. You can also use less white chocolate for coating. Adding a pinch of salt can also balance the flavors nicely.
Can I omit the chocolate coating?
Yes, you can skip the chocolate coating. The bars will still be tasty without it. You can dust them with cocoa powder or leave them plain for a lighter version.
How to serve these bars at a party?
Serve these bars on a colorful platter. Cut them into small squares for easy eating. Add some fresh berries or extra sprinkles for a fun touch. These bars are sure to impress your guests!
You now have a simple guide to make delicious red velvet bars. We covered all the key steps, from mixing the perfect ingredients to adding sweet toppings. Remember to use quality ingredients for the best flavor. You can also get creative with variations to suit your taste. Enjoy sharing these tasty treats at your next gathering. With some practice, you’ll impress everyone with your baking skills. Keep these tips in mind for fresh and fun bars every time. Happy baking!