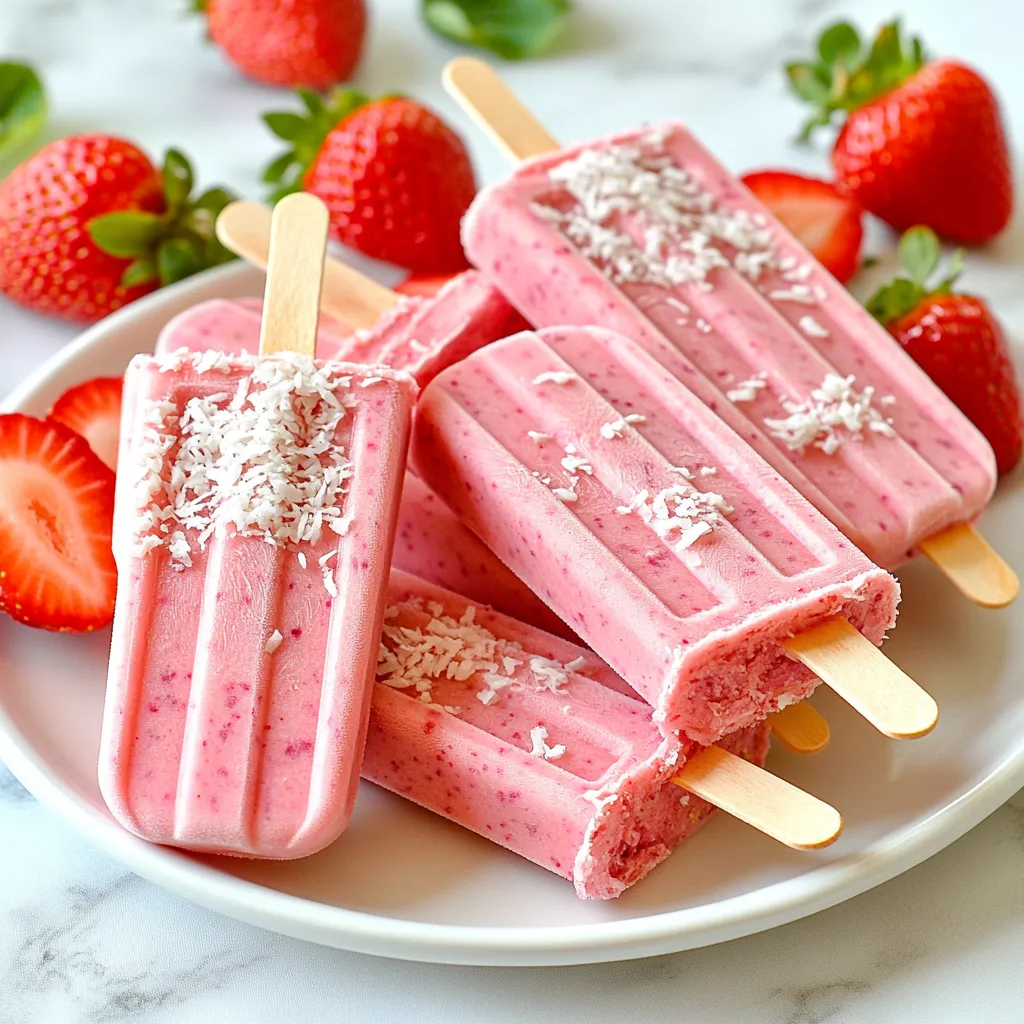
Craving a sweet treat that’s both cool and easy to make? These Strawberry Coconut Popsicles are your answer! With just a few simple ingredients, you can whip up a delicious and refreshing snack perfect for warm days. I’ll guide you through each step, from blending fresh strawberries to achieving the ideal texture. Get ready to beat the heat and impress your friends with this tasty, homemade delight!
Why I Love This Recipe
- Refreshing Summer Treat: These popsicles are the perfect way to cool down on a hot day, offering a delicious and refreshing flavor that everyone will love.
- Simple Ingredients: Made with just a handful of natural ingredients, this recipe is easy to whip up and ensures you know exactly what you’re eating.
- Customizable Sweetness: With the option to adjust the sweetness using honey or maple syrup, you can tailor these popsicles to your taste preference.
- Healthy Indulgence: These popsicles are not only delicious but also packed with nutrients from fresh strawberries and coconut, making them a guilt-free treat!
Ingredients
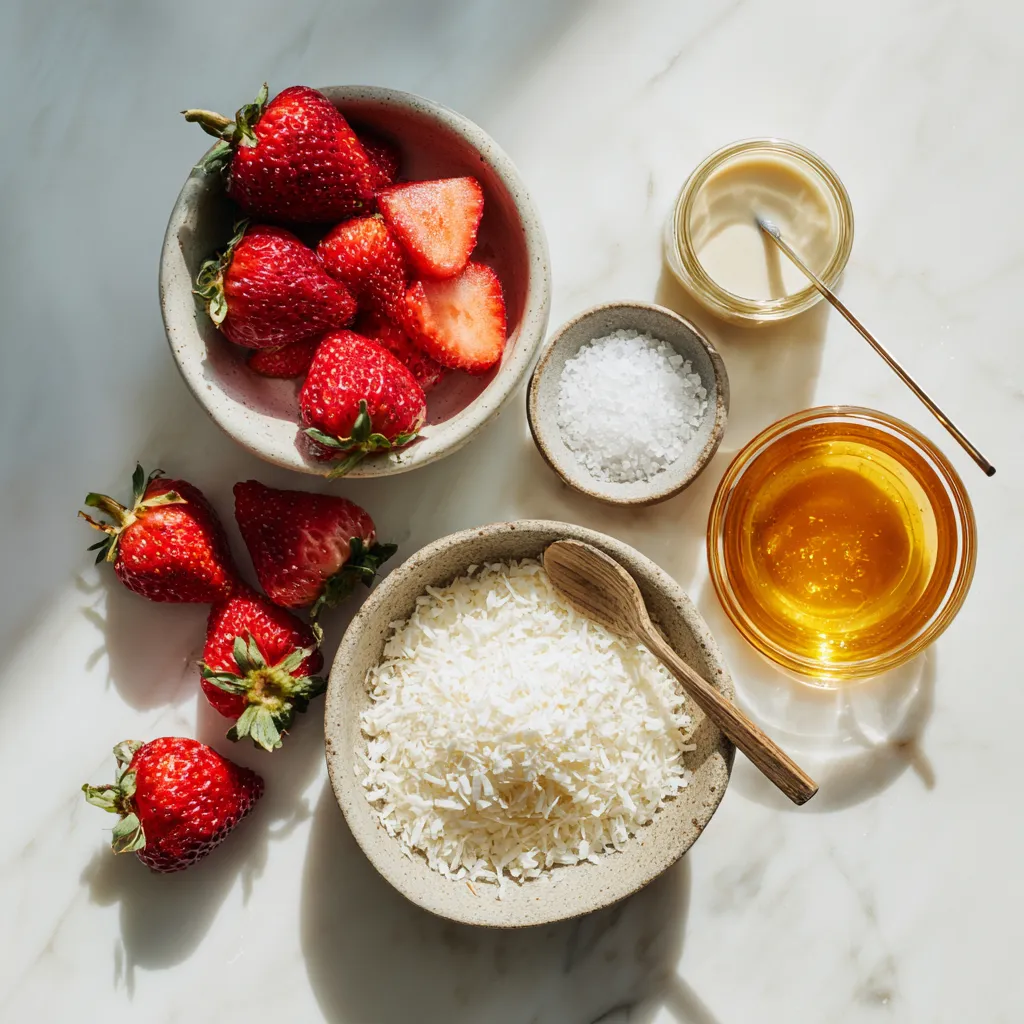
Fresh Strawberries
For these popsicles, use 2 cups of fresh strawberries. Make sure to hull and slice them first. Fresh berries give the best flavor and bright color. You can blend them until smooth or leave some chunks for texture.
Coconut Milk
Next, you need 1 cup of coconut milk. I recommend using full-fat coconut milk for a creamy taste. This will make your popsicles rich and smooth. If you want a lighter version, you can use low-fat coconut milk.
Sweeteners and Flavorings
You will need 2 tablespoons of honey or maple syrup. This adds a nice sweetness. Feel free to adjust based on your taste. You can also add 1 teaspoon of vanilla extract for extra flavor. Lastly, add a pinch of sea salt to balance all the flavors. For some fun texture, include 1/2 cup of shredded coconut. You can choose sweetened or unsweetened, depending on your preference.
Step-by-Step Instructions
Blending the Strawberries
Start by taking your fresh strawberries. Make sure they are hulled and sliced. Place them in your blender. Blend until smooth. If you like some bits of fruit, pulse the strawberries instead. This will give a nice texture to your popsicles.
Mixing the Ingredients
Next, grab a mixing bowl. Combine your blended strawberries with coconut milk. Add two tablespoons of honey or maple syrup. You can change this based on how sweet you want it. Don’t forget one teaspoon of vanilla extract. Toss in half a cup of shredded coconut and a pinch of sea salt. Mix everything well. Taste it! If it needs more sweetness, add more honey or maple syrup.
Freezing the Popsicles
Now, it’s time to pour the mixture into popsicle molds. Fill them about three-quarters full. This allows space for the pops to expand as they freeze. Carefully insert the popsicle sticks. Place the molds in the freezer for at least six hours. You want them completely solid. To remove the popsicles, run warm water over the molds. Do this for a few seconds. Then gently pull the popsicles out. Enjoy your tasty treat!
Tips & Tricks
Achieving the Perfect Texture
To get that creamy texture, use full-fat coconut milk. This makes the popsicles rich and smooth. If you want some strawberry chunks, blend the strawberries but don’t overdo it. Pulse them just a few times for a nice mix of smooth and chunky.
Adjusting Sweetness Levels
Taste your mixture before you freeze it. Start with two tablespoons of honey or maple syrup. If you like it sweeter, add more. Each sweetener can taste different, so adjust based on your preference. You can even add a pinch of sugar if needed.
Removing Popsicles from Molds
When it’s time to enjoy your popsicles, run warm water over the outside of the molds. This helps loosen them. Then, gently pull the popsicles out. If they stick, try twisting the mold a bit. This should help them slide right out. Enjoy your treat!
Pro Tips
- Choose Ripe Strawberries: Select strawberries that are bright red and slightly firm for the best flavor. Overripe or mushy strawberries may result in a less desirable texture and taste.
- Adjust Sweetness to Taste: Depending on the natural sweetness of your strawberries, you might want to adjust the amount of honey or maple syrup. Always taste the mixture before pouring it into molds.
- Experiment with Coconut Milk: For a creamier texture, use full-fat coconut milk. If you prefer a lighter popsicle, you can substitute with light coconut milk or even almond milk for a different flavor profile.
- Use Warm Water for Easy Release: When removing the popsicles from molds, running warm water over the outside for a few seconds helps them release easily without breaking.
Variations
Using Different Fruits
You can change the flavor by using other fruits. Try mango, pineapple, or blueberries. Each fruit brings its own taste. Mixing strawberries with bananas gives a creamy texture. You can blend any fruit you love. Just keep the same amount of fruit. This way, your popsicles stay balanced and tasty.
Alternative Sweeteners
If you want less sugar, use agave or stevia. You can also try coconut sugar for a caramel flavor. Honey works too, but remember to taste as you go. Each sweetener changes the flavor a bit. Adjust the amount based on your sweetness level. Find what makes your taste buds happy.
Adding Extra Ingredients (like chocolate or nuts)
Want to get creative? Add chocolate chips or nuts for crunch. Chopped almonds or hazelnuts add a nice bite. You can even swirl in some melted chocolate for a fun look. Just make sure to mix them in gently. This way, you get a surprise in every bite. Enjoy experimenting to make your popsicles unique!
Storage Info
Storing Popsicles Properly
To keep your strawberry coconut popsicles fresh, store them in an airtight container. This helps prevent freezer burn. You can also wrap each popsicle in plastic wrap for extra protection. Make sure to label your container with the date. That way, you’ll know when you made them.
Freezer Duration for Best Quality
For the best taste and texture, enjoy these popsicles within three months. After that, they may lose flavor and texture. If you freeze them longer, they can still be safe to eat, but they won’t taste as fresh.
Signs of Spoilage
Watch for signs of spoilage. If your popsicles have ice crystals or an off smell, it’s time to toss them. A change in color can also mean they are past their prime. Always trust your senses to decide if they are good to eat.
FAQs
Can I use frozen strawberries?
Yes, you can use frozen strawberries. They work well in this recipe. Just blend them straight from the freezer. You may need to adjust the mixing time since they are frozen. This can make your popsicles just as tasty. Frozen strawberries can also make your popsicles extra cold and refreshing.
How can I make these popsicles dairy-free?
To make these popsicles dairy-free, simply use coconut milk. Coconut milk is a great base. It gives a creamy texture without any dairy. Make sure you buy the full-fat version for the best results. This keeps the popsicles rich and smooth. You can also replace the honey with maple syrup for a vegan option.
What are the health benefits of these ingredients?
These popsicles have many health benefits. Fresh strawberries are high in vitamin C and antioxidants. They help boost your immune system and support heart health. Coconut milk provides healthy fats. These fats can help you feel full longer. Shredded coconut adds fiber to your diet. This can aid digestion and keep your tummy happy. Honey or maple syrup adds natural sweetness without added chemicals.
This blog covered key points on making tasty strawberry popsicles. We explored fresh strawberries, coconut milk, and sweeteners. The step-by-step guide showed how to blend, mix, and freeze your treats. Tips included perfect texture and adjusting sweetness. We also shared fun variations, storage tips, and answers to common questions.
Making popsicles is easy and fun. So, grab your ingredients and start creating! Enjoy your refreshing treat